

Page 1
Horizon NVR Raid Server 2U
Quick Installation Guide
A. Horizon NVR RAID Server 2U
Package Contents
1. NVR RAID Server 2U, preloaded with Horizon Software
2. Printed QIG Instructions
3. Printed Dell transfer tag document
4. Printed MS EULA
5. ReadyRails Sliding Rails
6. Power Cord
7. Internal Horizon Recovery Image USB Stick
Note:
This Quick Installation Guide covers all variations of the NVR RAID Server 2U supplied for the
Horizon system.
C. Horizon NVR RAID Server 2U
Hardware Connections
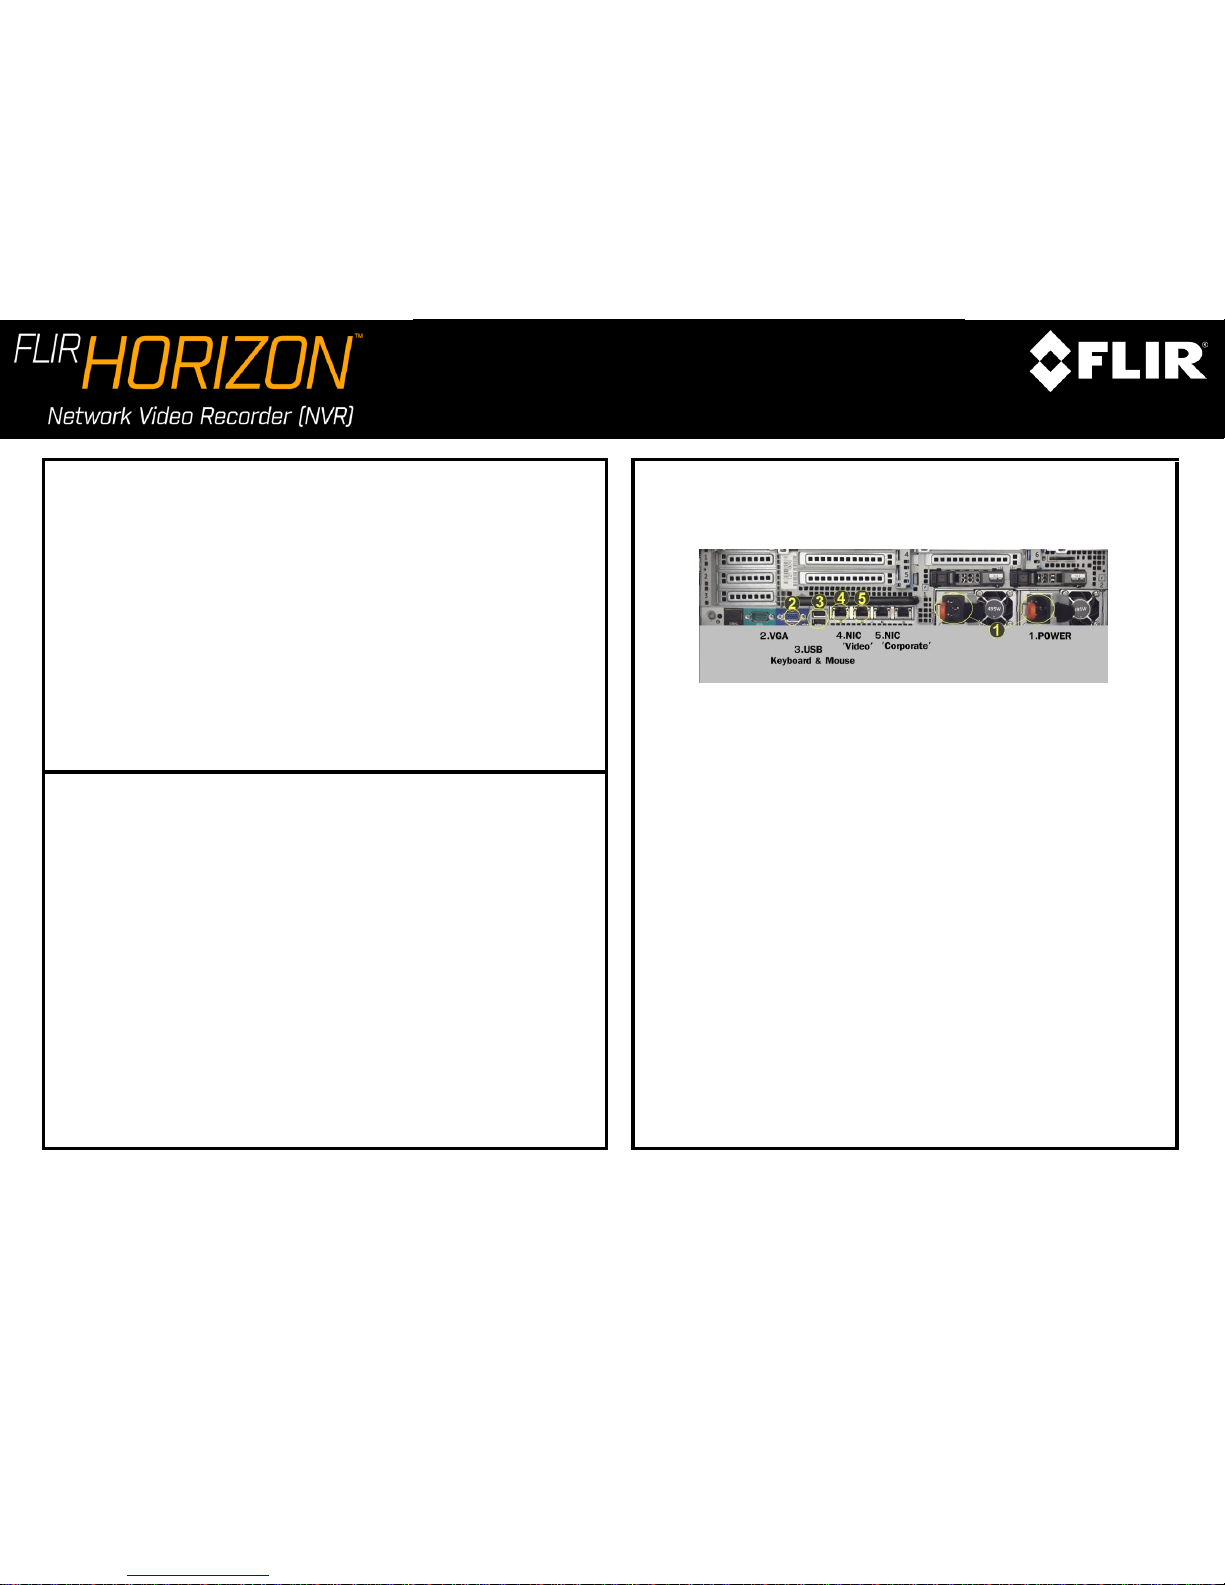
Figure 1 - NVR RAID Server 2U Hardware Connections
1. On the rear of the unit, connect the Power (1) and Monitor (2) cables to
the ports as shown. Connect the USB keyboard and mouse to 2
available USB ports (3).
2. Connect the Horizon server to the network:
- If your cameras are installed on a segregated (dedicated) network,
then connect the network cable to the “VIDEO” NIC (4).
Note: You may still use the “CORPORATE” NIC (5) to connect the Horizon server
to the corporate network, to allow remote viewing for clients whose
computers are connected to the corporate network.
- If your cameras are installed on the existing corporate network,
connect the network cable to the “CORPORATE” NIC (5).
B. Prerequisite Workflow
1. Setup your video network LAN and configure network infrastructure to
match your security plan (switches, routers, Ethernet cables and jacks).
2. Install power system infrastructure for the cameras - Power over
Ethernet (PoE), or properly-rated power supplies.
(Follow local electrical indoor and outdoor safety codes).
3. Install infrastructure wiring and hardware for ancillary devices, if they
interface with the system (relay outputs, alarm inputs, microphones, etc.).
4. Install optional infrastructure for analog cameras (BNC cabling to
encoders, etc.).
5. Mount the cameras and connect them to the network. Verify cameras are
suitable for the ambient conditions, or installed in protective housings as
needed – water, dust, heat, cold, and so on. Refer to the camera
specifications.
Page 2
Horizon NVR Raid Server 2U
Quick Installation Guide
E. Final Steps
Once the wizard has been completed, the Admin Center application is launched and the Login screen appears. Use the default username admin, leave the
password blank and enter the server IP address to login to the Horizon system. If you did not change the IP address, the default is 192.168.50.10 or enter
localhost.
Once logged in, the Horizon Home screen will appear displaying a dialog with system first launch information. By now the system storage is configured and all
cameras were discovered and attached to the system. To conclude the setup, we recommend you to carry out the following steps:
1. Name the cameras, changing their default name to ones which suit your site.
2. Add users if needed and assign them to one of the default user groups or alternatively create a custom user group if the default ones don’t suit your needs.
While not necessary, you can continue setting up advanced settings of the system.
We recommend that you print out the Sign-Off report for the customer to sign before leaving site. This report details how the system has been configured.
In order to install the client monitoring application on client workstations, please visit "http://<serverIP>/clientportal", then click download AdminCenter and
ControlCenter, then run the installation package.
Please Note: To ensure proper local Dell support is provided for this unit’s hardware, please perform Service Tag Transfer process.
Please go to www.dell.com/globaltransfer and follow the instructions online, or refer to the “Transfer Tag” document added to this package.
The “Transfer Tag” document can also be found at “C:\DVTEL Resources\Documents”.
D. Starting & Configuring the Horizon NVR RAID Server 2U
Your Horizon NVR RAID Server 2U is preconfigured by FLIR, and is almost ready for operation.
1. Turn on the monitor and start the computer.
2. Use the default username administrator and password dvtel to log on to Windows. The Horizon Initial Setup Wizard is displayed.
3. Follow the steps in the wizard. If necessary, refer to the embedded Help file for assistance.
 Loading...