

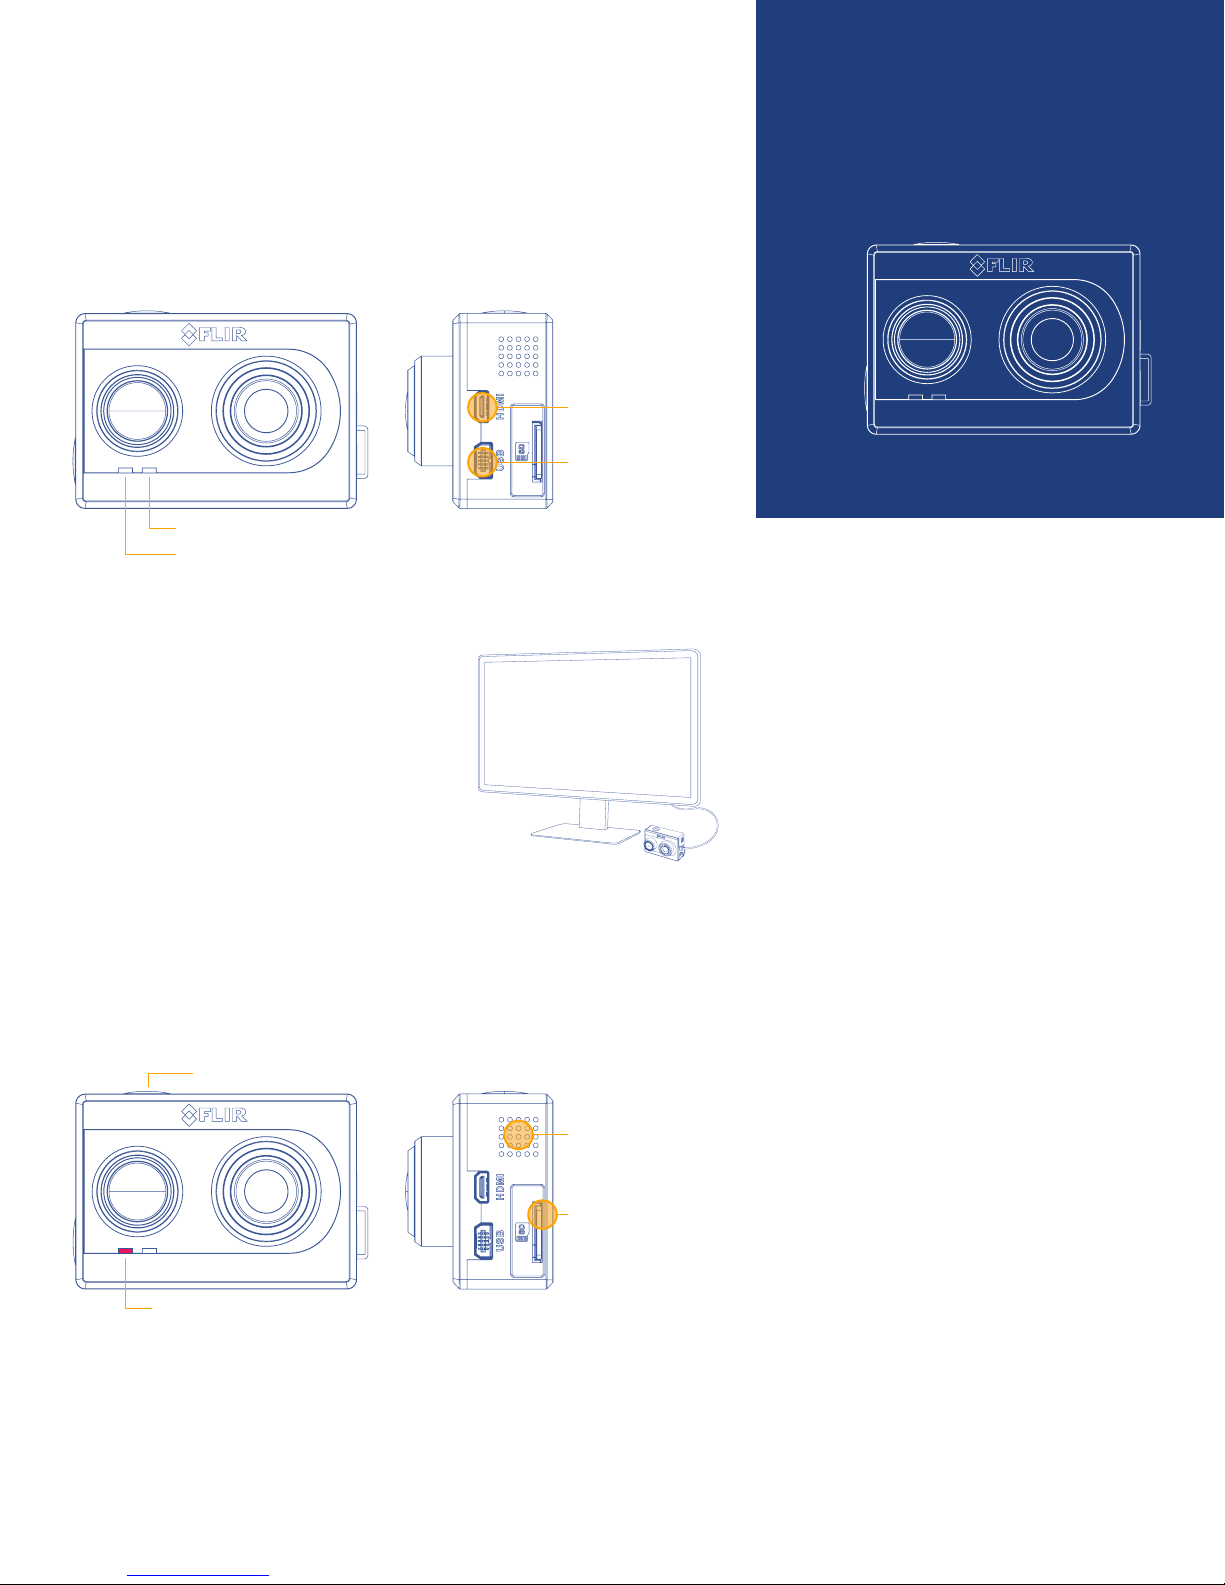
STEP 1: POWER TO THE CAMERA
Plug an external power source into the mini-USB port on side of unit. A
USB battery, UAS power cable, or wall charger that outputs 5V ~0.5A all
work well. The camera has reverse polarity protection and accepts 5-26
Volts. Use the included Bench cable for initial power, display testing, and
configuration.
On initial power-up, LED #2 will flash red for approximately 15 seconds then
it will change to solid Blue; at this point LED #1 will flash yellow for about 5
seconds, then change to solid Green indicating the camera is ready for use.
MICRO-HDMI
CONNECT OR
MINI-USB
CONNECT OR
LED #2 RED–BLUE
LED #1 YELLOW–GREEN
STEP 2: DISPLAY VIDEO
Duo can display either analog or digital
video. To display analog video to a monitor
or television, use the yellow RCA plug on the
supplied Bench Cable to connect Duo to the
monitor’s video input.
For digital video, power the camera as
described in Step 1 and connect Duo to an
HDMI display through the micro-HDMI camera
port. This will automatically disable the analog
video output and turn on the HDMI output.
FLIR
DUO
QUICK START GUIDE
P/N: 436-0100-01-00S
PLE ASE READ THE USER MANUAL FOR COMPLE TE
PRODUCT INFORMATION. HAVE QUESTIONS?
DO NOT RET URN THIS PRODUCT TO THE STORE.
CAL L OUR TOLL-FREE CONSUMER HELP LINE AT
866.667.7732 FOR ASSISTANCE WITH YOUR FLIR
DRONE PRODUCT.
STEP 3: RECORDING VIDEO
Press the Record button to start recording video to memory card. The LED
#1 will blink red to indicate active recording and the camera will beep. Press
the Record button again to stop recording video.
RECORD BUT TON
SPEAKE R
MICR O SD CA RD SL OT
LED # 1 BLINK S RED
STEP 4: RETRIEVE RECORDINGS
Connect the USB cable to a computer to view SD card as a mass storage
device and retrieve files as you normally would. Note that Duo cannot
record when connected to a computer. Duo will encode the date and
timestamps as part of file name after syncing its clock with the mobile app.
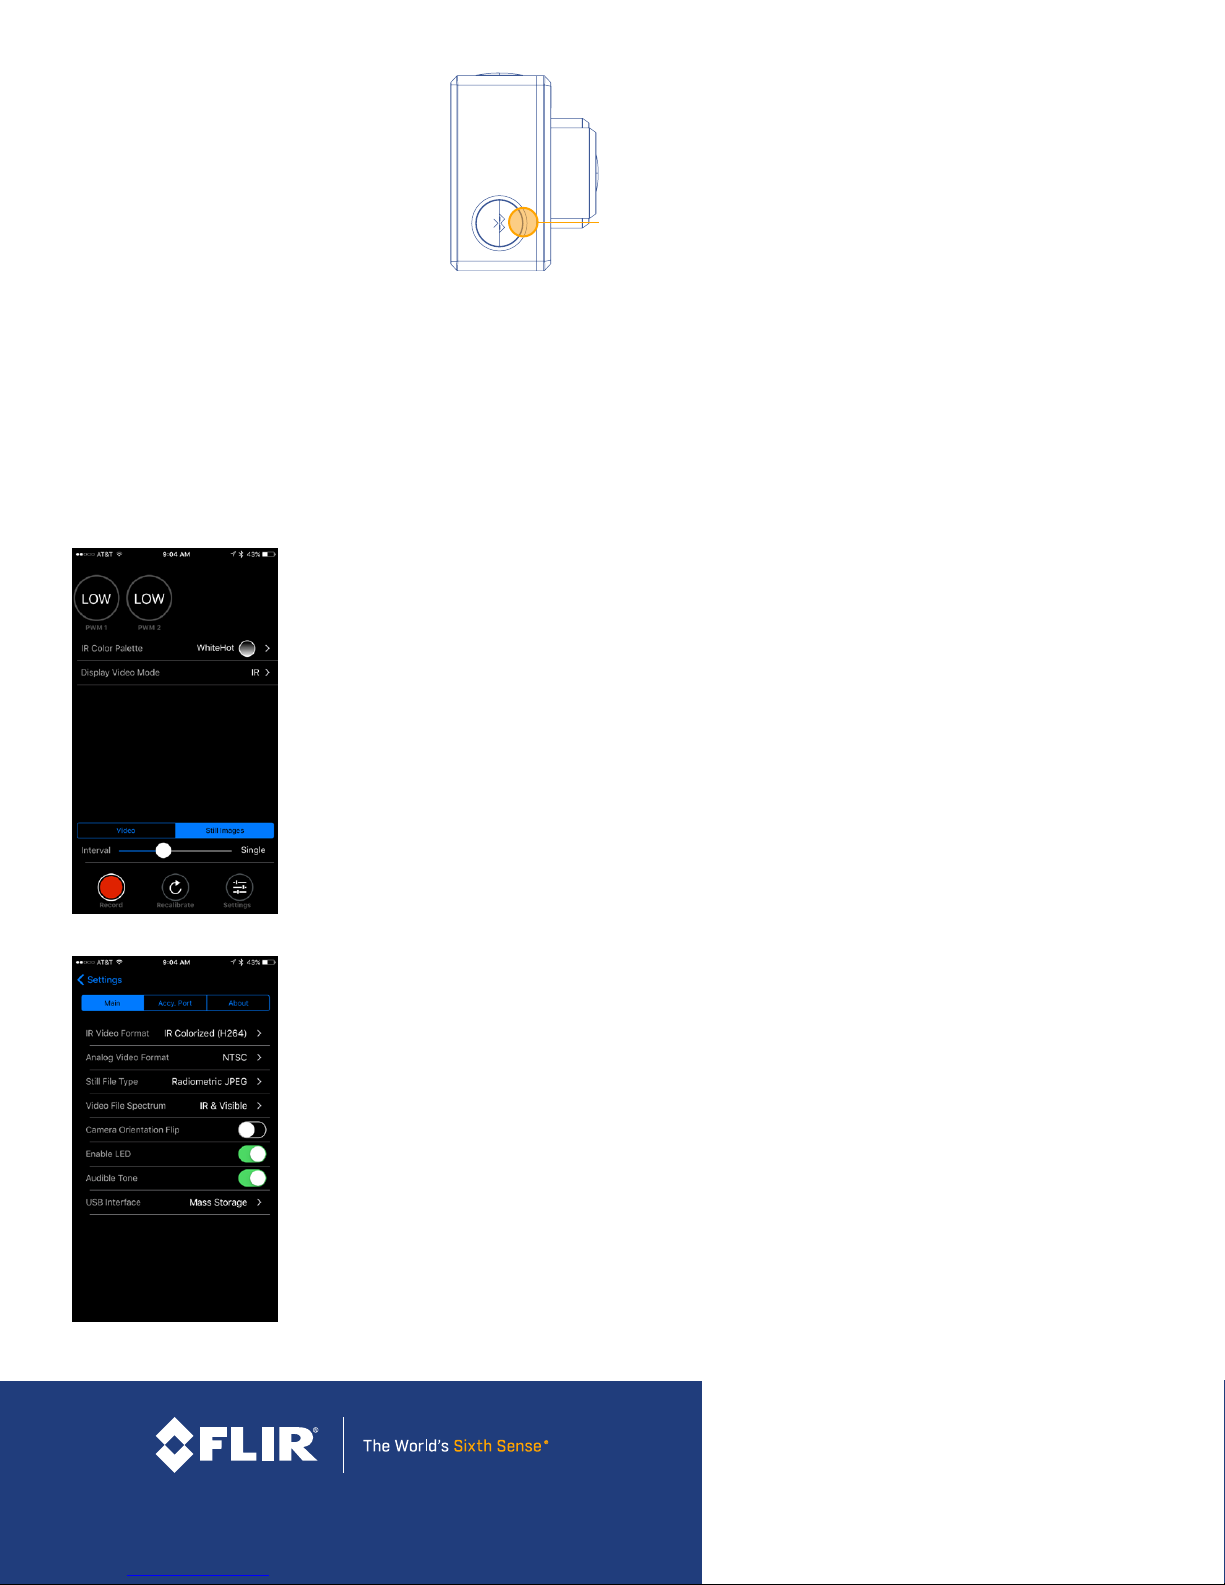
STEP 5: ACTIVATING BLUETOOTH
The camera Bluetooth is enabled on
start-up and automatically disables
after 2 minutes. To enable or disable it
manually, press the Bluetooth button
on the side of the camera.
BLUETOOTH
BUTT ON
STEP 6: CONNECTING TO CAMERA BLUETOOTH
Download the FLIR UAS mobile phone app from Google Android Play Store
or Apple iOS App Store. This connects to the camera over Bluetooth so
that you can change camera settings and start or stop recording remotely.
Launch the FLIR UAS app and it will automatically display a list of cameras
nearby, select your camera and wait for settings to sync.
Note that no images are transferred to the phone and all recordings are
saved on the SD card.
STEP 7: CONFIGURE DUO WITH THE APP
The FLIR UAS app lets you configure lots of
Duos functions and options, but here are a
few to get you started:
Select IR Color Palette to apply different
thermal colorization schemes to your infrared
images and video.
Select Display Video Mode to select whether
the streaming video is IR only, Visible only,
®
, or Picture-In-Picture mode.
MSX
Select Video or Still Images tabs to configure
Duo for recording either videos or still images.
STEP 8: ADVANCED SETTINGS
Press the Settings button on the app’s main
screen to view advanced recording features,
PWM and MAVLink setup, and camera
information.
Some of the advanced features you can
configure:
• IR Recording with IR Colorized and Raw
TIFF selection
• Analog video NTSC and PAL selection
• FLIR JPEG and IR TIFF Image selection
• Camera orientation if you need to mount
Duo upside down
• LED and speaker control
FREQUENTLY ASKED QUESTIONS
Why doesn’t my camera connect?
Verify Bluetooth is enabled or press the
Bluetooth button to manually enable
Bluetooth.
Is there an internal battery?
Duo does not have an internal battery, as
it is designed for lightweight integration
platforms that can provide power to the
camera, such as small Unmanned Aerial
Systems (sUAS) or drones. Evaluate your
sUAS for available power connections.
How do I mount on my airframe?
Duo has familiar action-camera dimensions
that allow easy integration onto existing
mounts; however, due to the many unique
mount configurations it is recommended
your system is reviewed for compatibility.
What are Radiometric JPEG images?
Radiometric JPEG images are compatible
with FLIR’s free FLIR Tools software. FLIR
Tools can be used to view infrared, visible,
and MSX blended images, as well as to
thermally tune images to bring out the
details you need.
What is MSX?
MSX stands for Multi-Spectral Dynamic
Imaging, which is FLIR’s patented real
time thermal image enhancement feature.
MSX embosses key visible light details
onto thermal images so that structural
edges, textures, numbers, labels, and other
identifiable features captured by the color
camera are highlighted. This adds extra
perspective to the thermal image for easy
orientation.
FLI R . C O M / DUO
FLIR SYSTEMS, INC.
16-032 1
 Loading...