

Flip Video Camera Quick Start Manual
Flip Video Camera
Quick Start Guide
http://www.theflip.com/
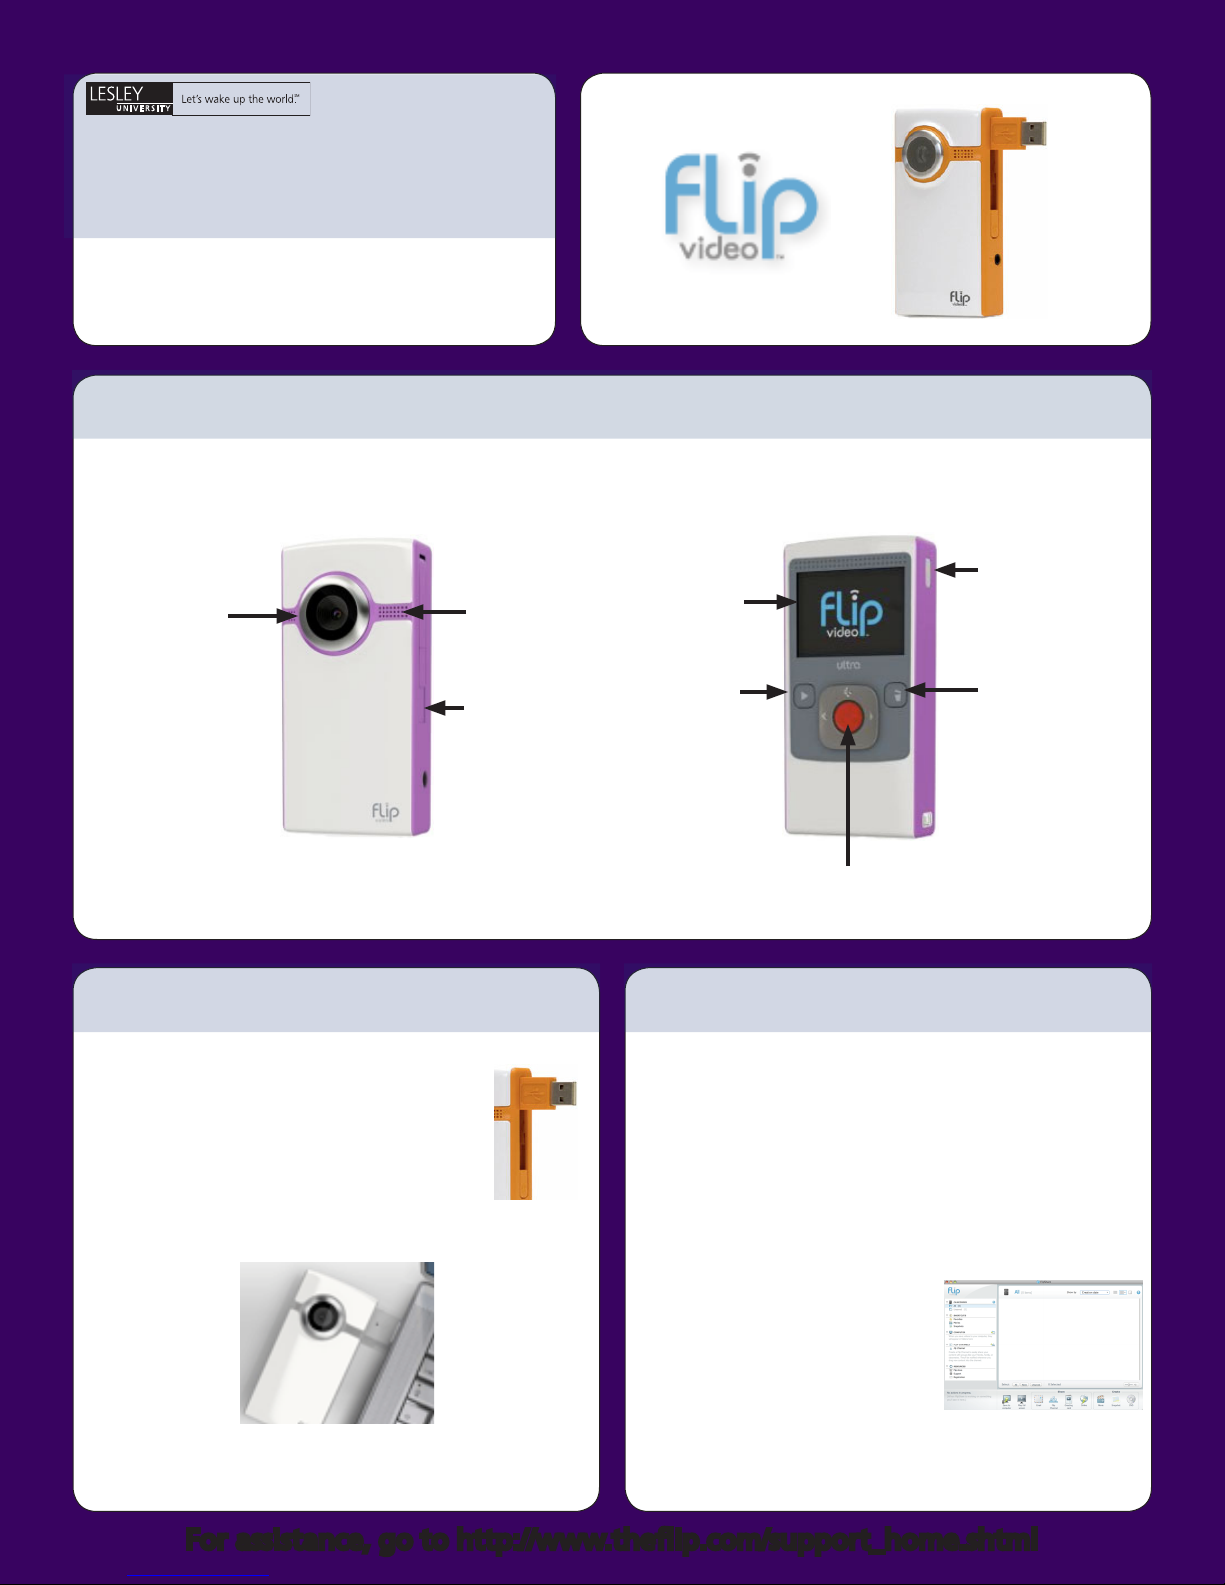
Front Back
Recording
lens.
Flip Camera Features
Video screen.Recording
microphone.
™
Slide down to
turn camera on
and off.
Slide down to
release USB
connector arm.
Connecting to a Computer
1. Make sure the Flip is off.
2. On the side of the Flip (left side when
viewed from the back, right side when
viewed from the front), slide the latch down
to release the USB connector arm.
3. Insert the connector into a USB port on your
computer.
Press to view
recordings.
Record and pause.
Press to delete
and confirm
video deletion.
Starting the Flip Video Program
1. Follow the instructions under “Connecting to a
Computer.”
2. To start the program:
Mac: Double click the FLIPVIDEO icon on your desktop,
and double click Start Flipshare.
PC: Click View your Flip Camcorder Videos using the
program on device in the pop-up dialog box, and click
OK.
Note: It is recommended you use a USB extension cable
if there is not enough space for your camera.
For assistance, go to http://www.theflip.com/support_home.shtml
3. The Flip Video Program will
appear with your recorded videos
previewed in the right screen.
Note: The program runs directly from your Flip camera,
it can only be used when the Flip is connected to your
computer.
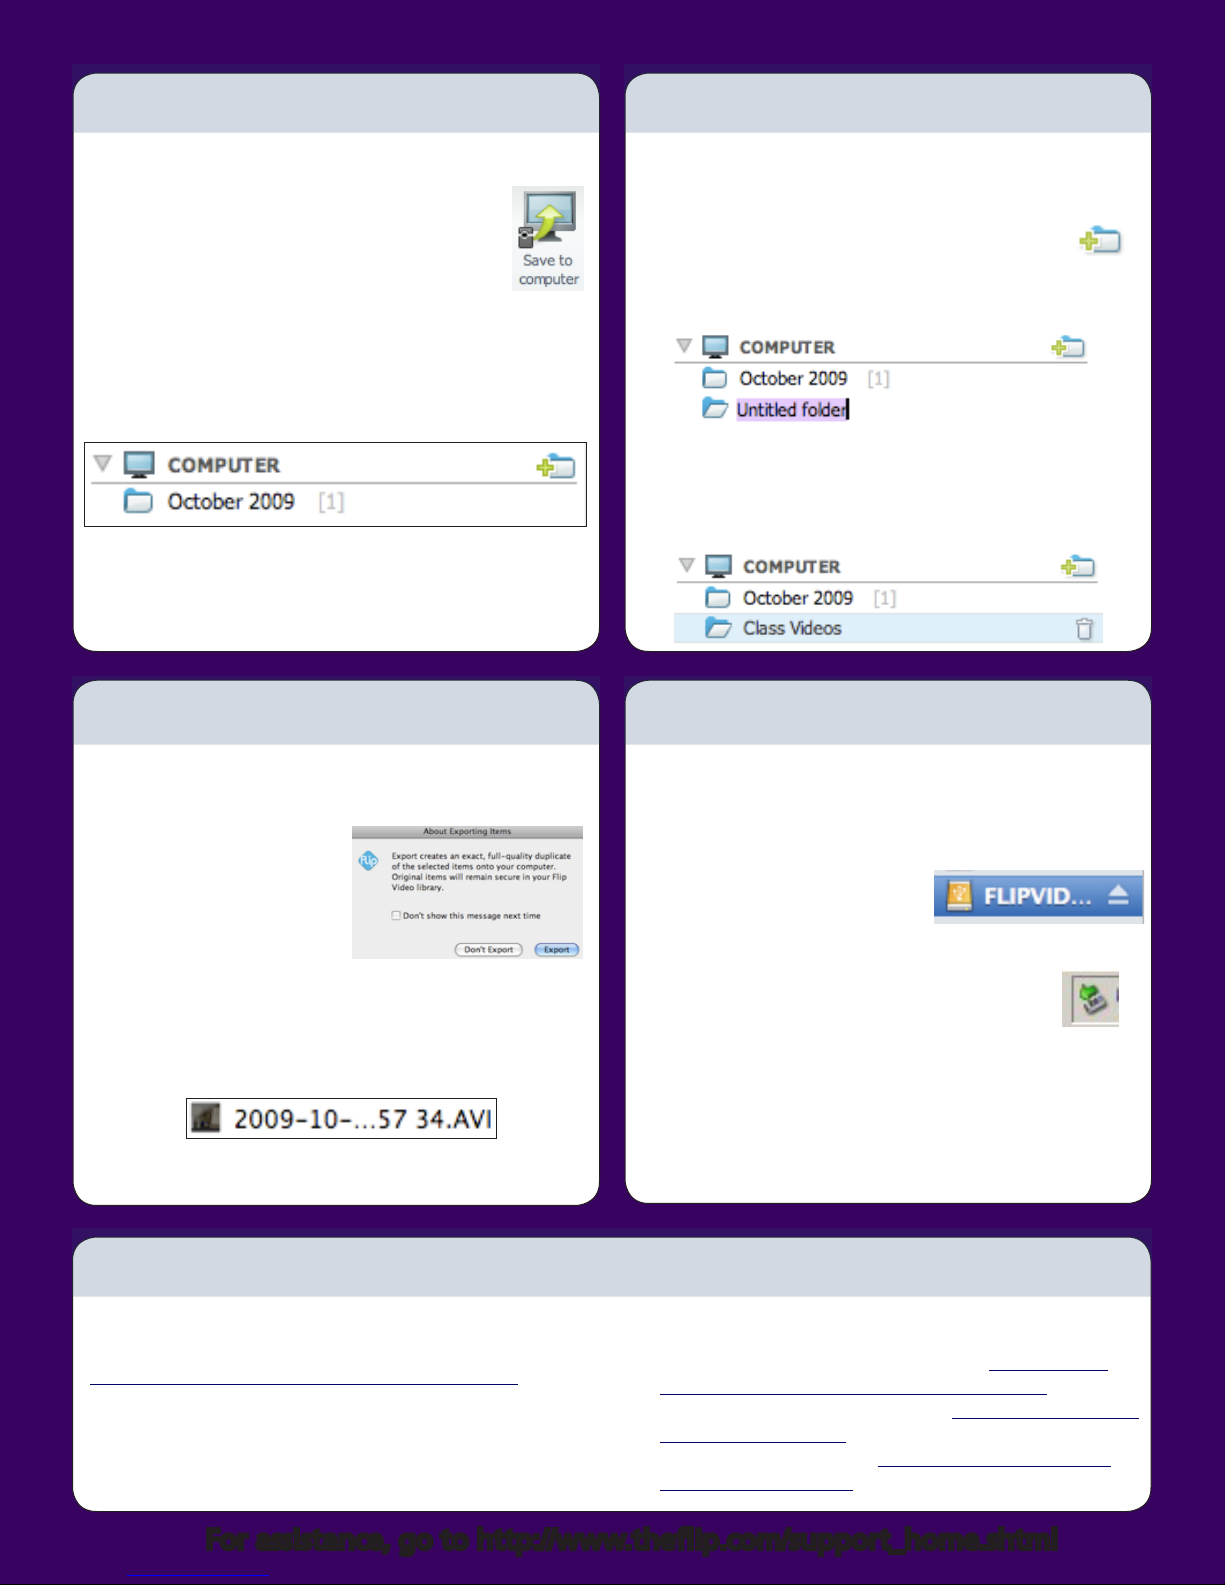
Transferring/Saving Videos
Organizing Your Flip Video Library
1. With the Flip connected and the Flip Video Program
running, click on the video you want to save.
2. Click the Save to Computer icon, or File >
Save to computer.
3. A dialog box will appear showing where the
video will be saved, and asking if you want to delete it
from the Flip. Select your options and click Yes.
4. The saved video will appear in the left window under
“Computer.”
Note: All videos will also be stored on your Flip video
camera until you delete them.
Sharing Your Videos
1. Make sure your Flip is connected to the computer and
the Flip Video Program is running.
2. In the left window area under “Computer,”
click the Add New File icon, or click File > Add
New Folder at the top of the screen.
3. An Untitled Folder will appear under “Computer.”
4. Double click this folder (Mac) or right click and select
“rename”(PC) to highlight the text, type in a new name
for the folder and hit enter on the keyboard.
The new folder name will appear under “Computer.”
Disconnecting the Flip
1. Make sure your Flip is connected to the computer and
the Flip Video Program is running.
2. Click on the video you
would like to share.
3. At the top of the screen,
click on File > Export to...,
and click Export.
4. In the finder window that appears, select the
Desktop on your computer, and click Choose.
5. A copy of your video will be saved on your Desktop as
a .AVI file.
You can then email your video or upload it to the web
on a site such as YouTube or TeacherTube.
Flip Video Information and Support
To learn more about how to use the Flip camera and its
additional features, visit the Flip Video Support page at
http://www.theflip.com/support_home.shtml, where
you can search through their online knowledgebase,
submit a question to their technical support group, and
get updates for your Flip camera software.
1. Quit the Flip Video Program by clicking on Flipshare
> Quit Flipshare at the top of the screen.
2. To safely eject the Flip video camera:
Mac: In the finder window, click
the eject button icon or drag the
FLIPVIDEO icon on your desktop
to the trash.
PC: Click the Safely Remove Hardware icon
at the bottom right of the Windows taskbar,
and in the pop-up box that appears click
Safely remove USB Mass Storage Device.
A pop-up window will appear confirming it is safe to
remove the device.
3. You can now remove the Flip video camera from your
computer.
Additional help and resources can be found at:
Information on• the Flipshare Program: http://www.
theflip.com/products_flip_flipshare.shtml.
Specifications for the Flip camera: • http://www.theflip.
com/products.shtml.
Flip Video Q & A section: • http://www.theflip.com/
support_video.shtml.
For assistance, go to http://www.theflip.com/support_home.shtml
 Loading...