

Page 1

Hawker
FB.11
DE
23-40
Page 2

Introduction
R
SUMMARY:
LR
/g
& NOTE:
L
R
Note:
1. This is not a toy! Operators should have some basic experience.
Beginners should operate only under the guidance of a professional
instructor
2. Before beginning assembly, please read through the instructions and
carefully follow them through the build.
3. Freewing and it's vendors will not be held responsible for any losses
due to improper assembly and operation
4. Model airplane operators must be at least 14 years of age.
5. This airplane is made of EPO foam material, covered with surface spray
paint. Don't use chemicals to clean as it may cause damage.
6. You should avoid flying in areas such as public places, areas with high
voltage power lines, nearby highways or airports or an other areas
where laws and regulations clearly prohibit flight.
7. Do not fly in bad weather conditions, including thunderstorms, snow, etc...
L
8.
9. Damaged or scrap batteries must be properly discharged before
10.
11. Do not try to catch the airplane when flying low or landing. Wait for
ipo batteries should be properly stored in a fire safe container and be
kept at a minimum of 2M distance away from flammable or explosive
materials
disposal or recycling to avoid spontaneous combustion and fire.
A
t the Flying Field, properly dispose of any waste you have created,
don't leave or burn your waste.. Ensure that your throttle is in the low
position and that your radio is turned on before connecting the
L
ipo battery.
the airplane and it's propeller to come to a complete stop.
Pliqh
Page 3

Index
1.Product Basic Information
2.Package List
3.Assembly
4.
Main Wing
5. Tail gear, rudder and elevator4
6. Elevator, Tail Wheel Pushrods5
7. Tail Hook, Main Landing Gear6
8. Servo Introduction, Battery Installation 7
9. Power System Installation
10. Motor Parameters, CG
11. Control Direction Test 10
13. Dual Rates, Optional Plastic Hinges 11
:
2
2
3
8
9
Page 4
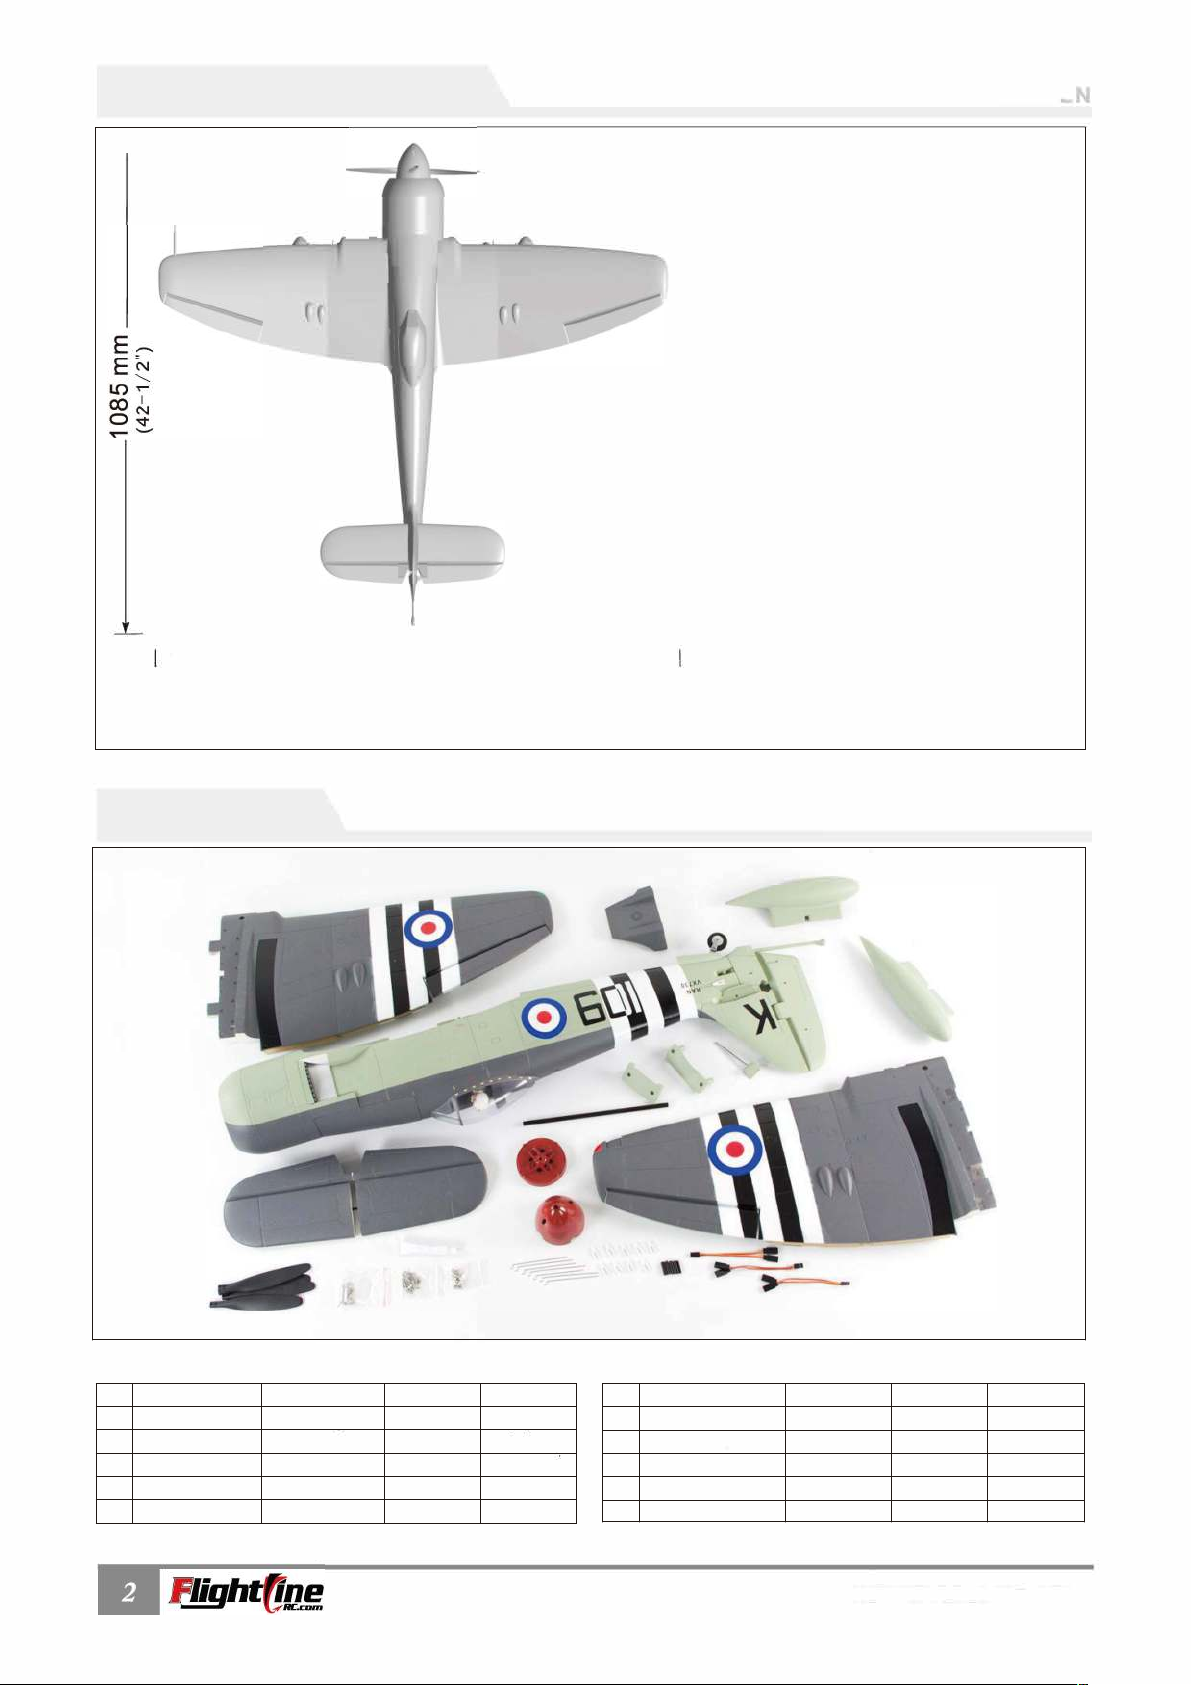
Product basic information
C
& Note:
(47-1/4")
2
High speed DIY spare-part
Package I ist
Different equipment include different spareparts. Please refer to the following contents to check your sparepart list.
1
10
Page 5
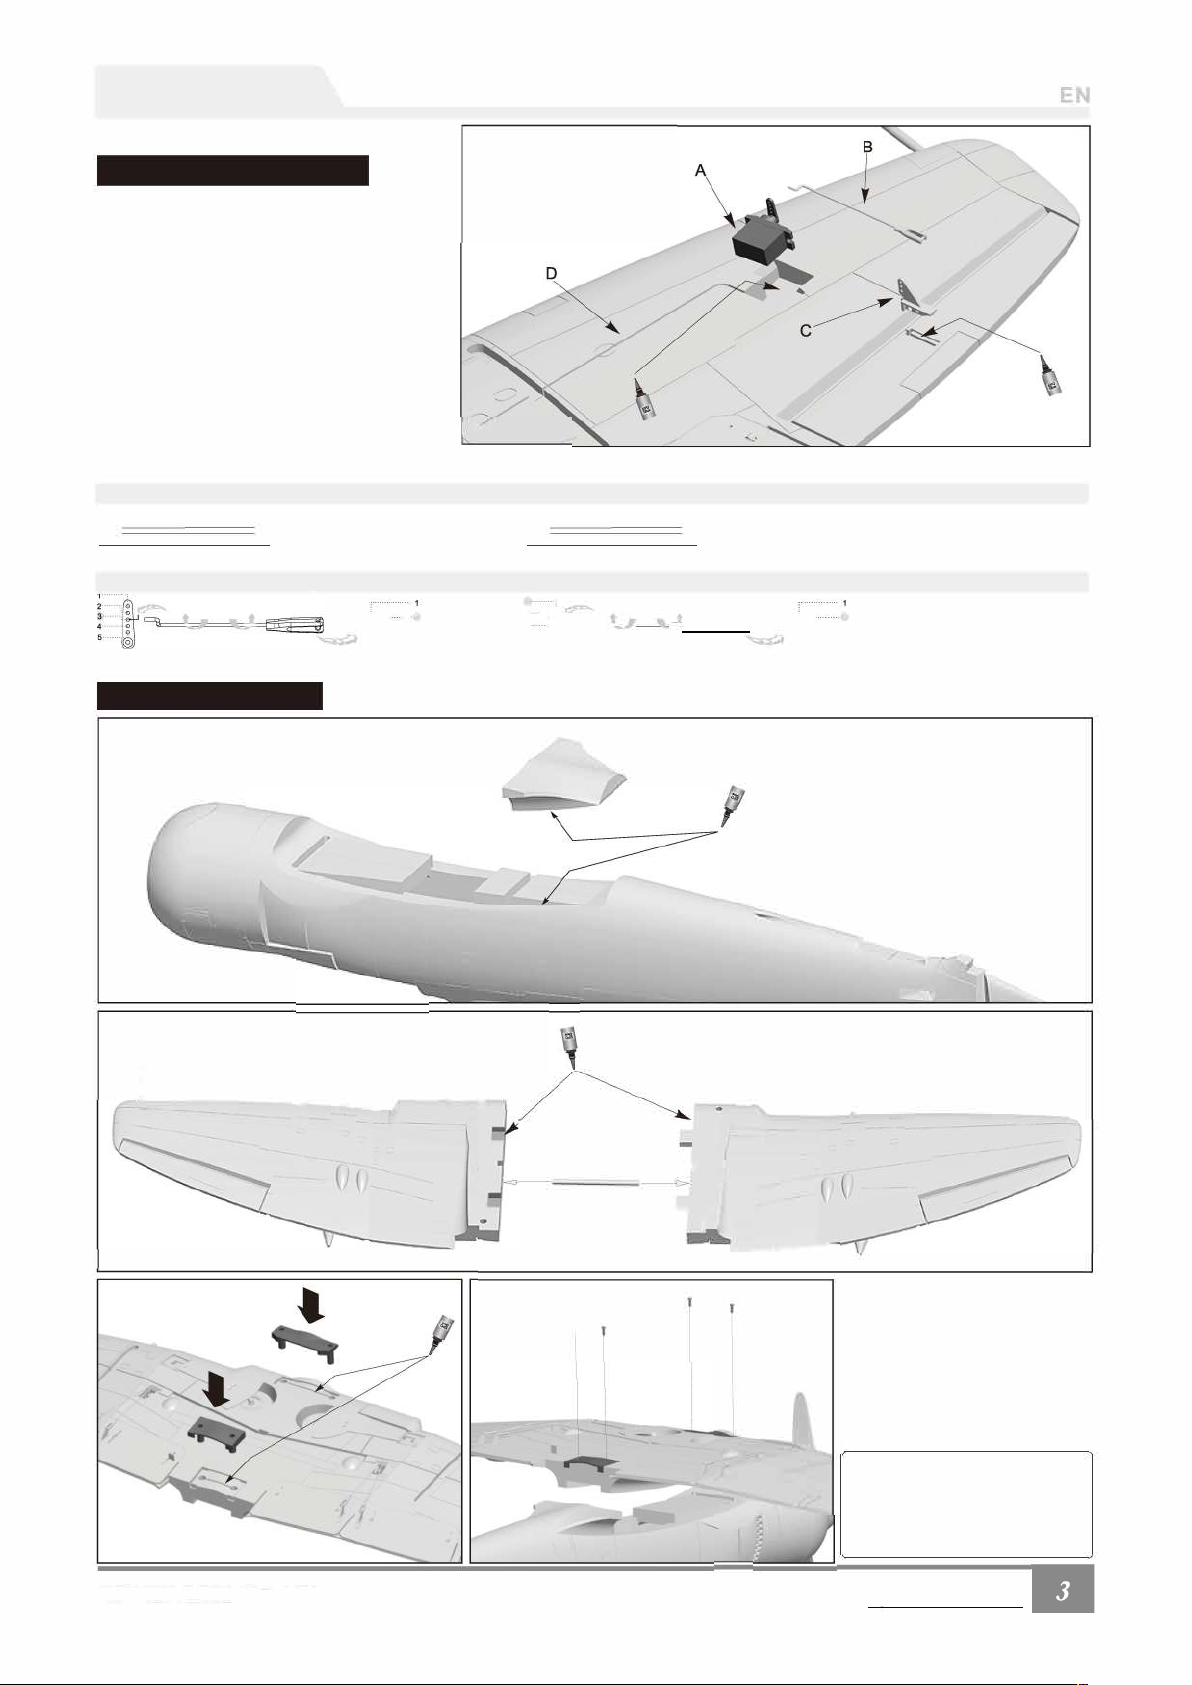
Assembly
•Main wing
Install main wing servos
F
I
4.
Aileron push rod size
Aileron push rod mounting hole
y
Main wing assembly
Flap push rod size
Flap push rod mounting hole
'
NOTE:S
Step 1
A
]
Step2 Fiberglass tube size :
_
·
.
I
�
.
Step 3
Step4
Note:
F
Pliqh
Page 6
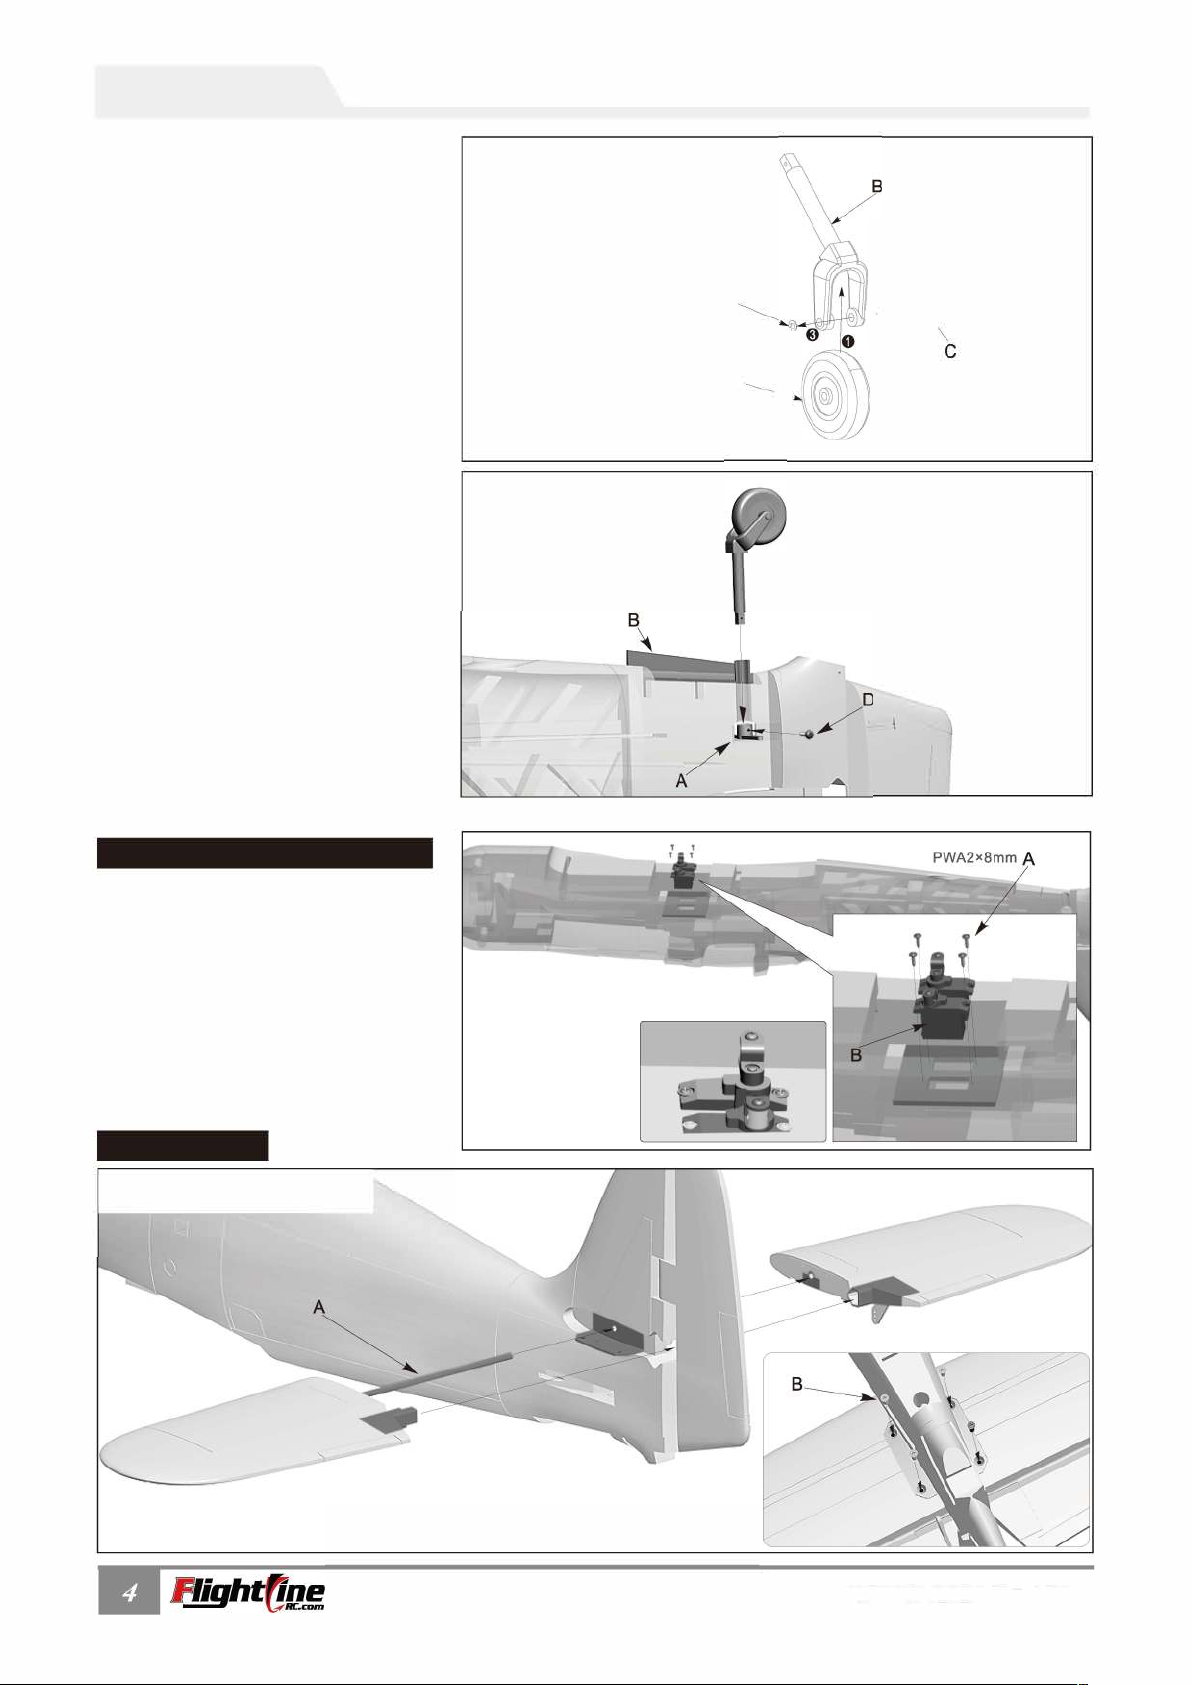
Assembly
mby
.
f
A- Rear
c�
D
A
@�
Installing Elevator/rudder Servos
S
Note:
y y
Iy
IIy
A
mb
y
I
Hzz
z
Page 7
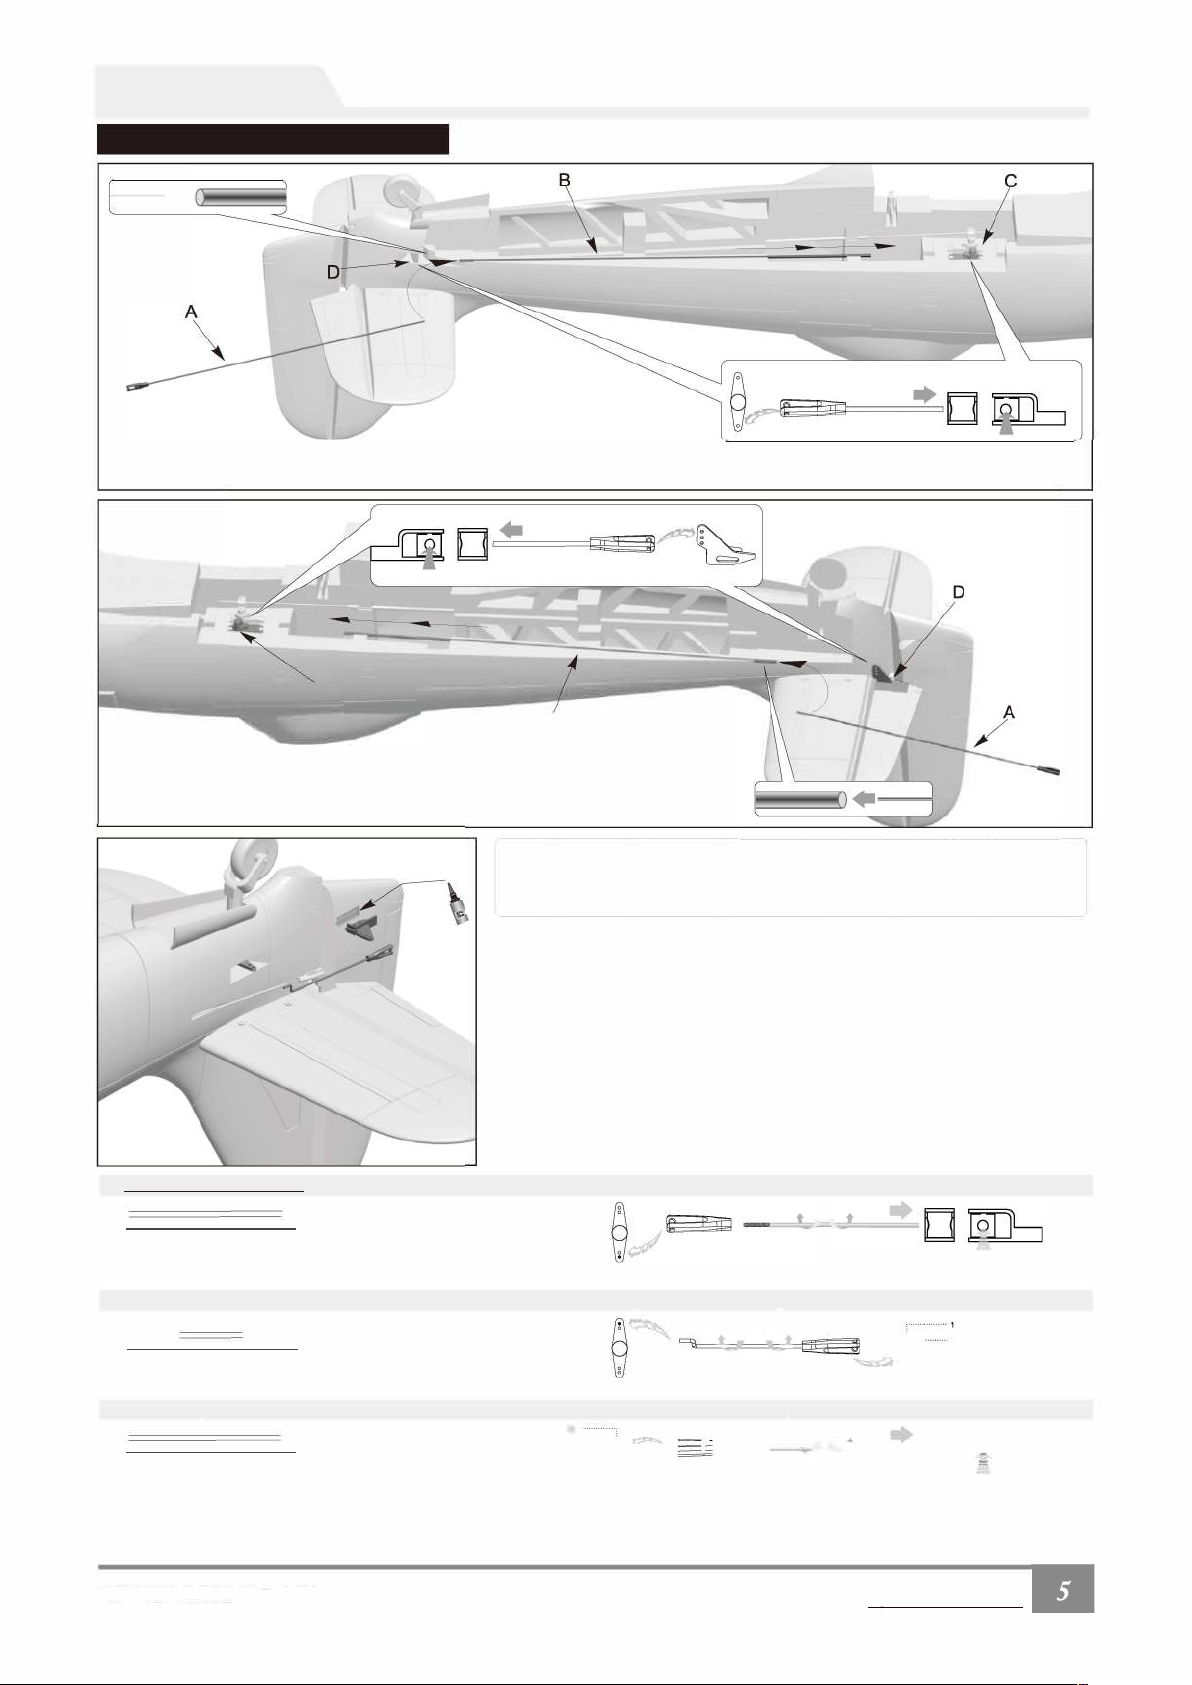
Assembly
Installing elevator/rudder pushrods
S
w
EN
C
B
S
w
& Note:
W
G
Steering push rod size
I
•1
Steering pushrod mounting hole
Rudder pushrod size
Elevator push rod size
Note: be sure to use the rubber retaining rings over each clevis to ensure they stay locked
Rudder pushrod mounting hole
Elevator push rod mounting hole
1··
I'@
A
.
Pliqh
Page 8
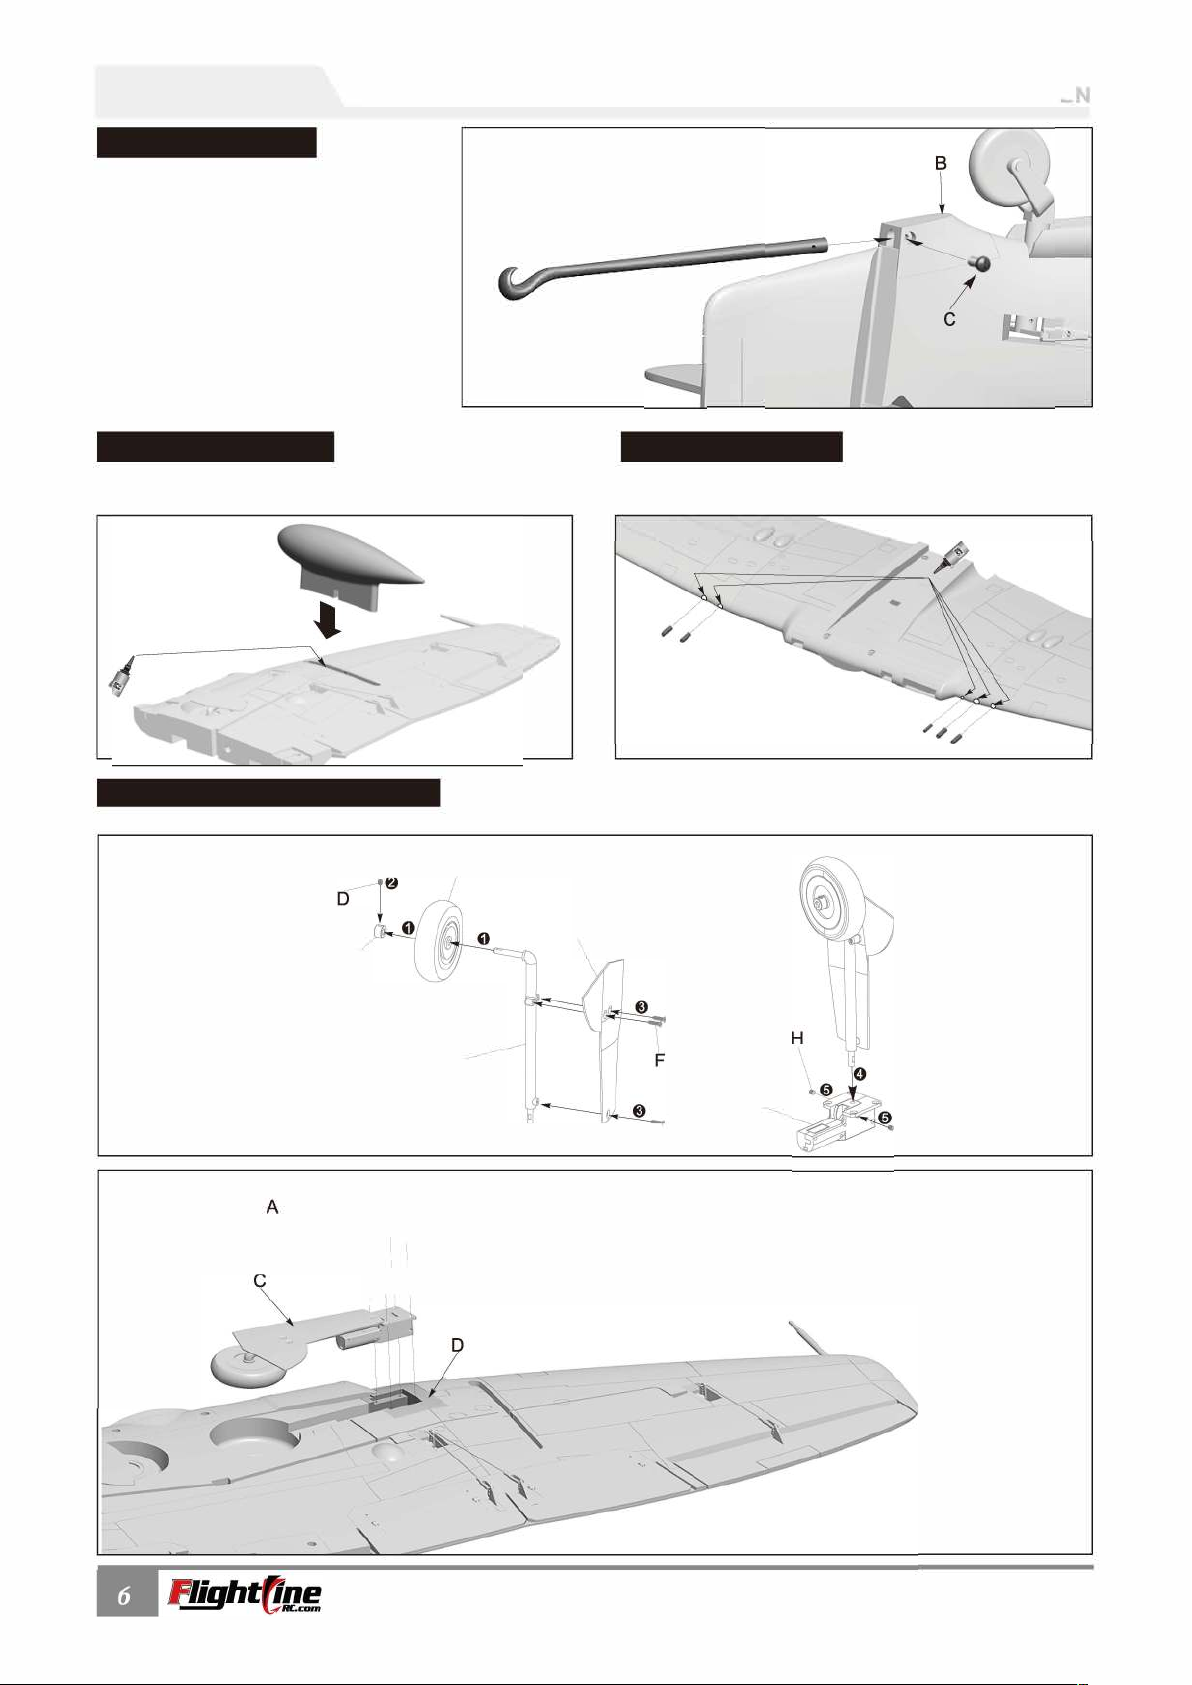
Assembly
Installing the tail hook
\
C
Installing the drop tanks
E
yv
M
ain Landing Gear Assembly
B
Install main wing guns
y
C
Accessories
v
G
' i
I
'
Page 9
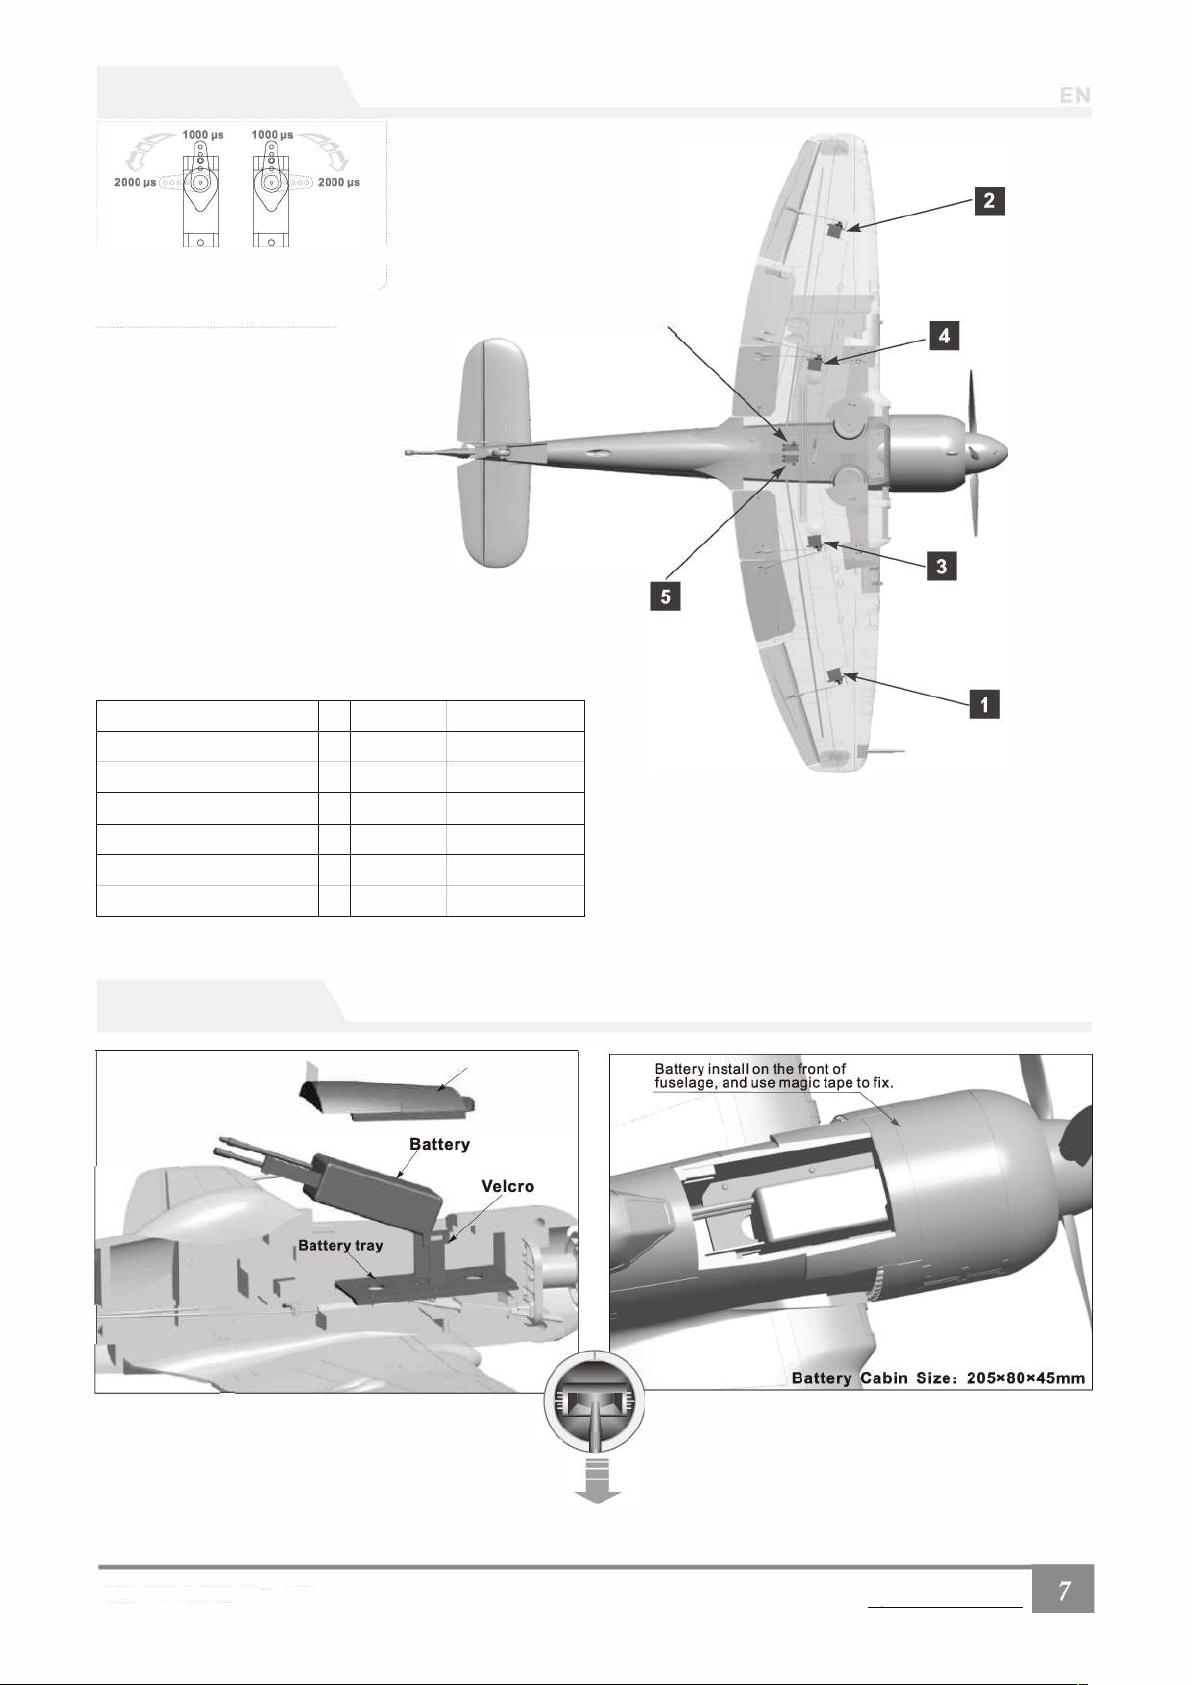
Servo introduction
A
ų
ų
No.
1
Servo connection
B
attery Installation
Us
I
,_
L
'!
ESC
!
Pliqh
Page 10
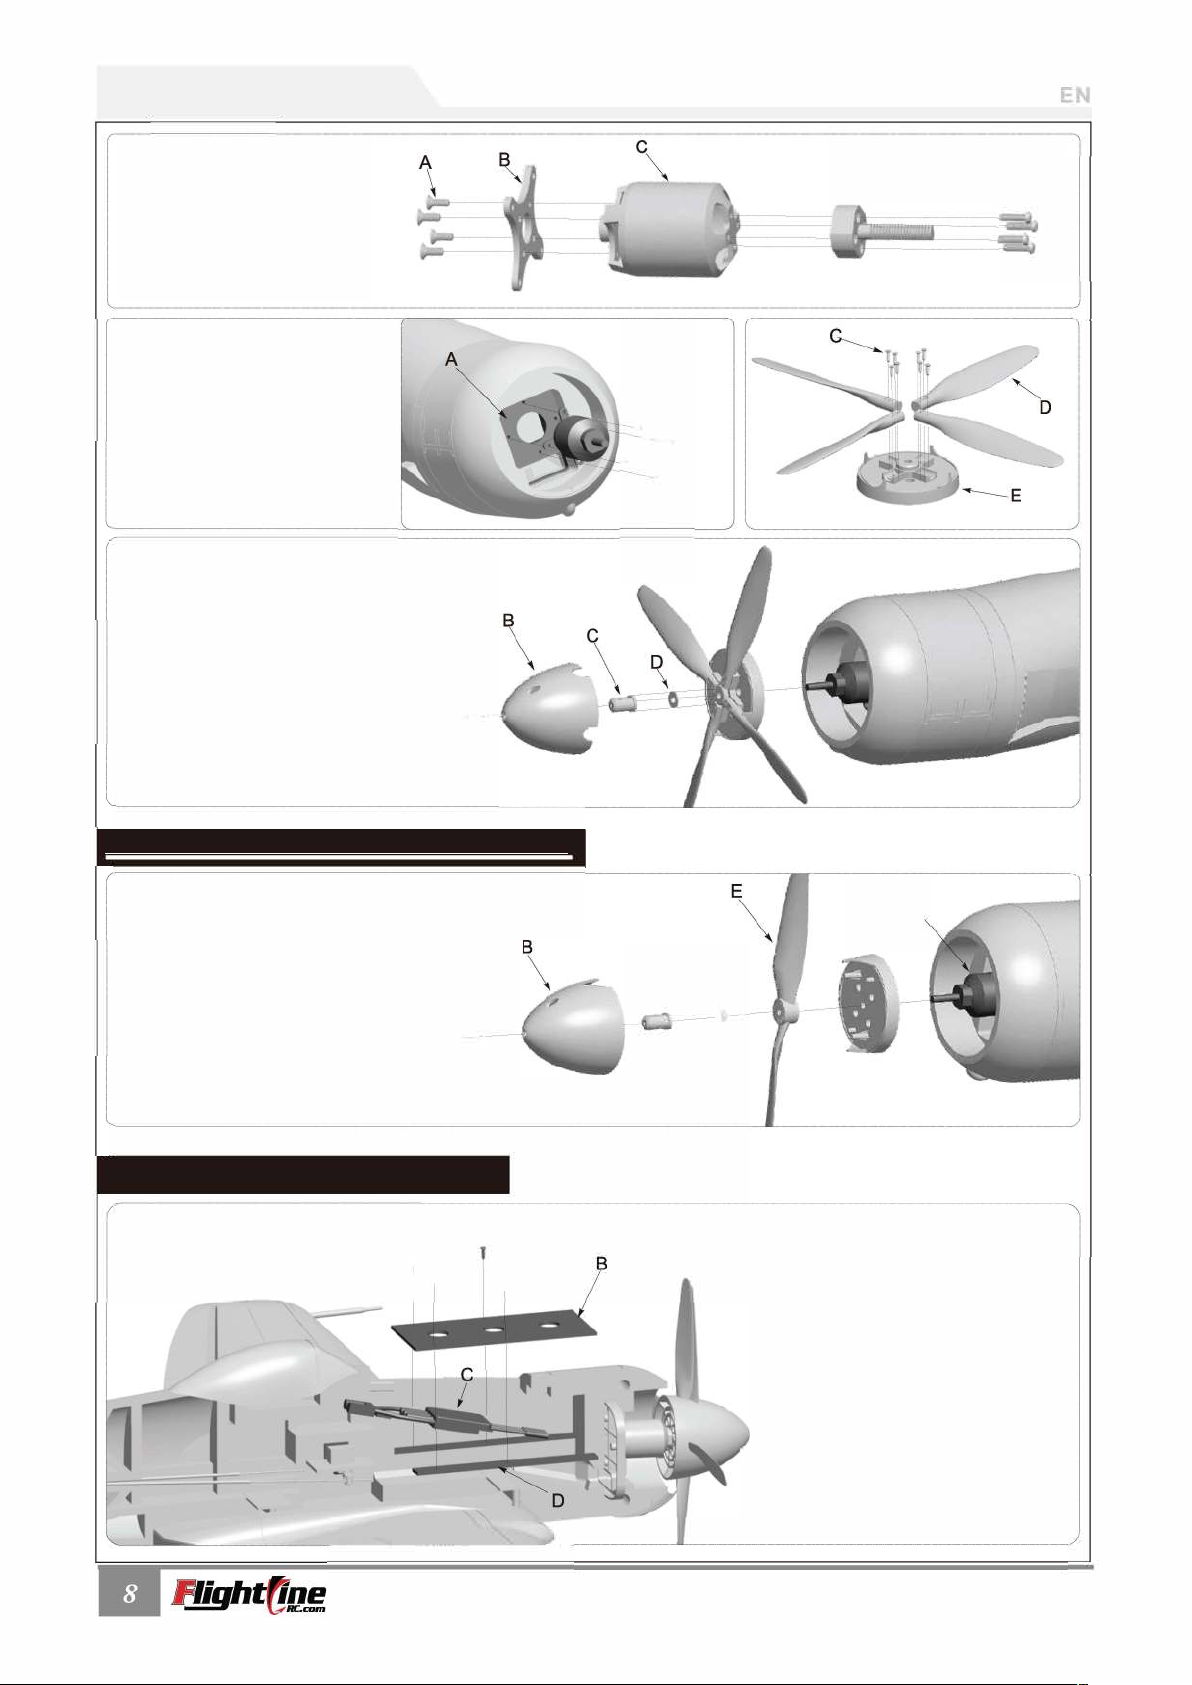
Installing the power system
X-fixed
•
/
.
\
E
Installing the optional 2-blade propeller high power system
Installing the ESC
A
�.
I '
r
D
F
G
.
·
O
Page 11
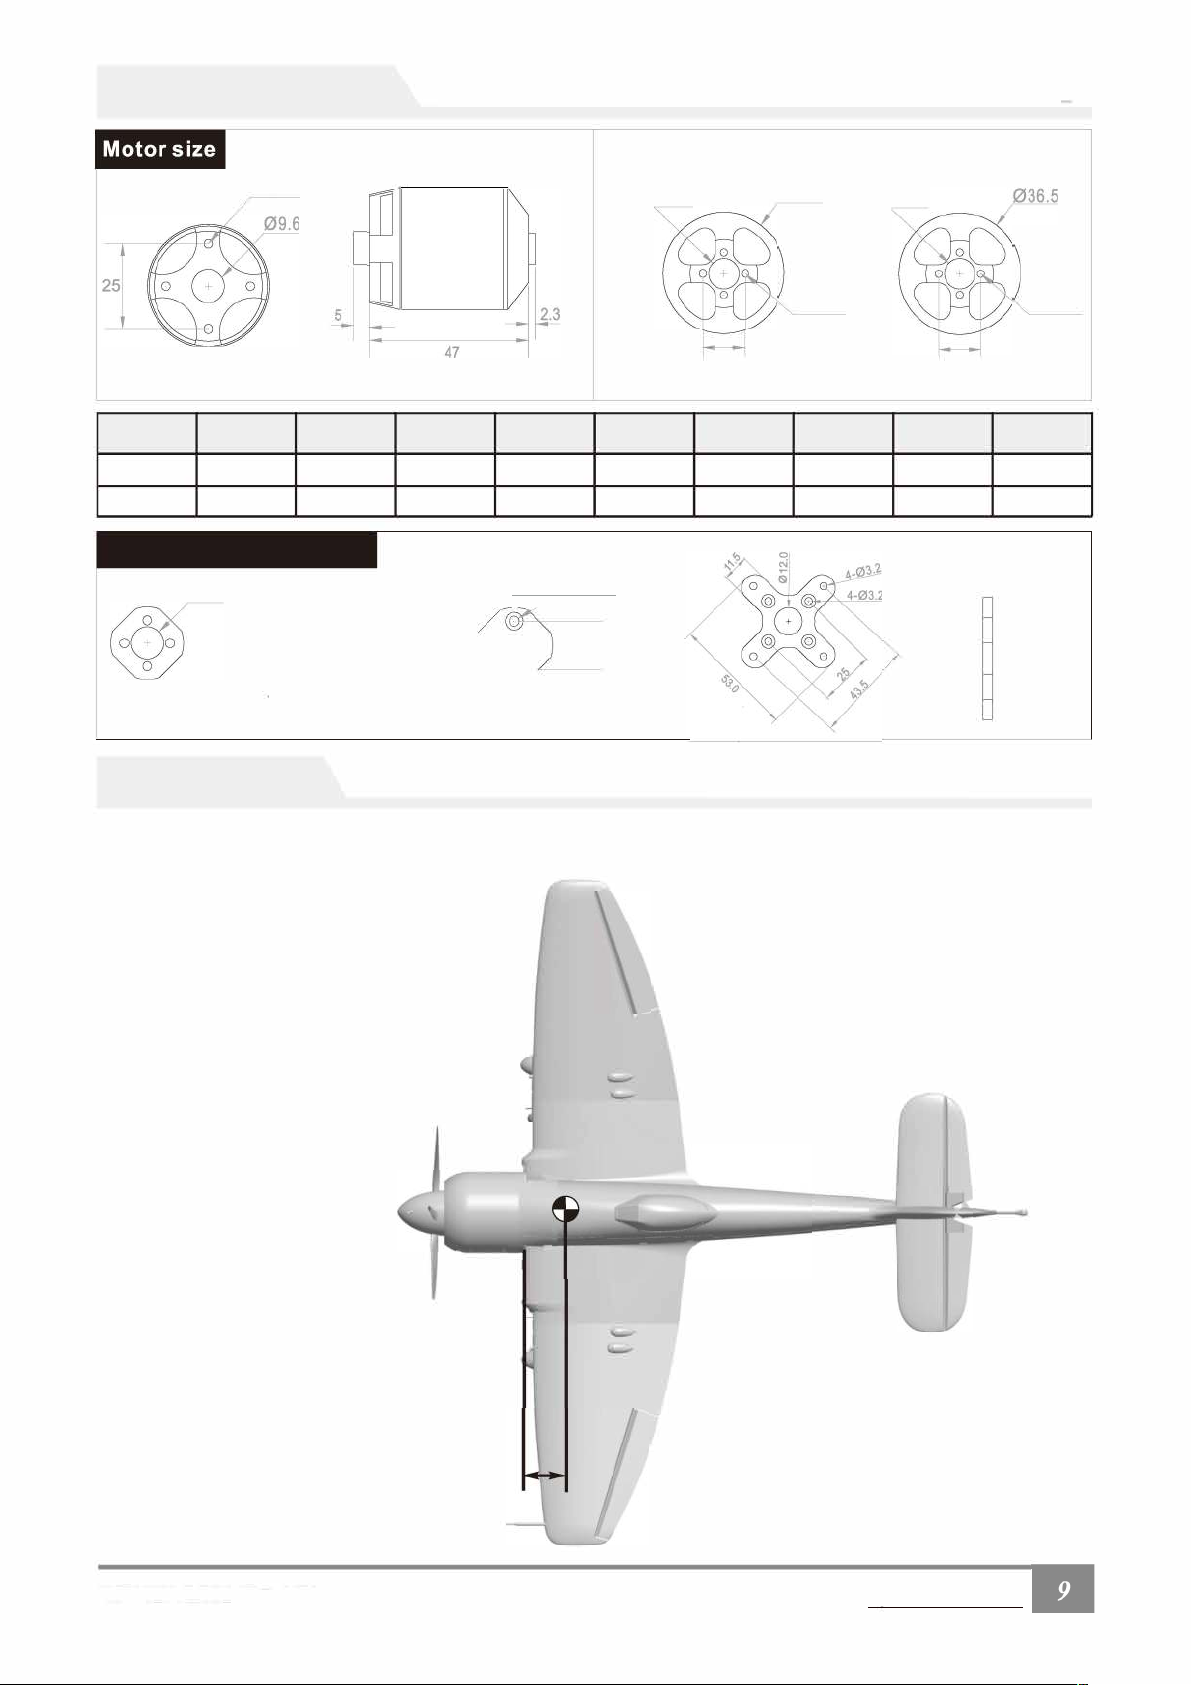
Parameter of Motor
N
M0137481
M0136484
580RPM/V
880RPM/V
09 .0
t
J •• �J
�1
,I�
3.0
Center of Gravity
80mm
(3-1/8")
Pliqh
Page 12
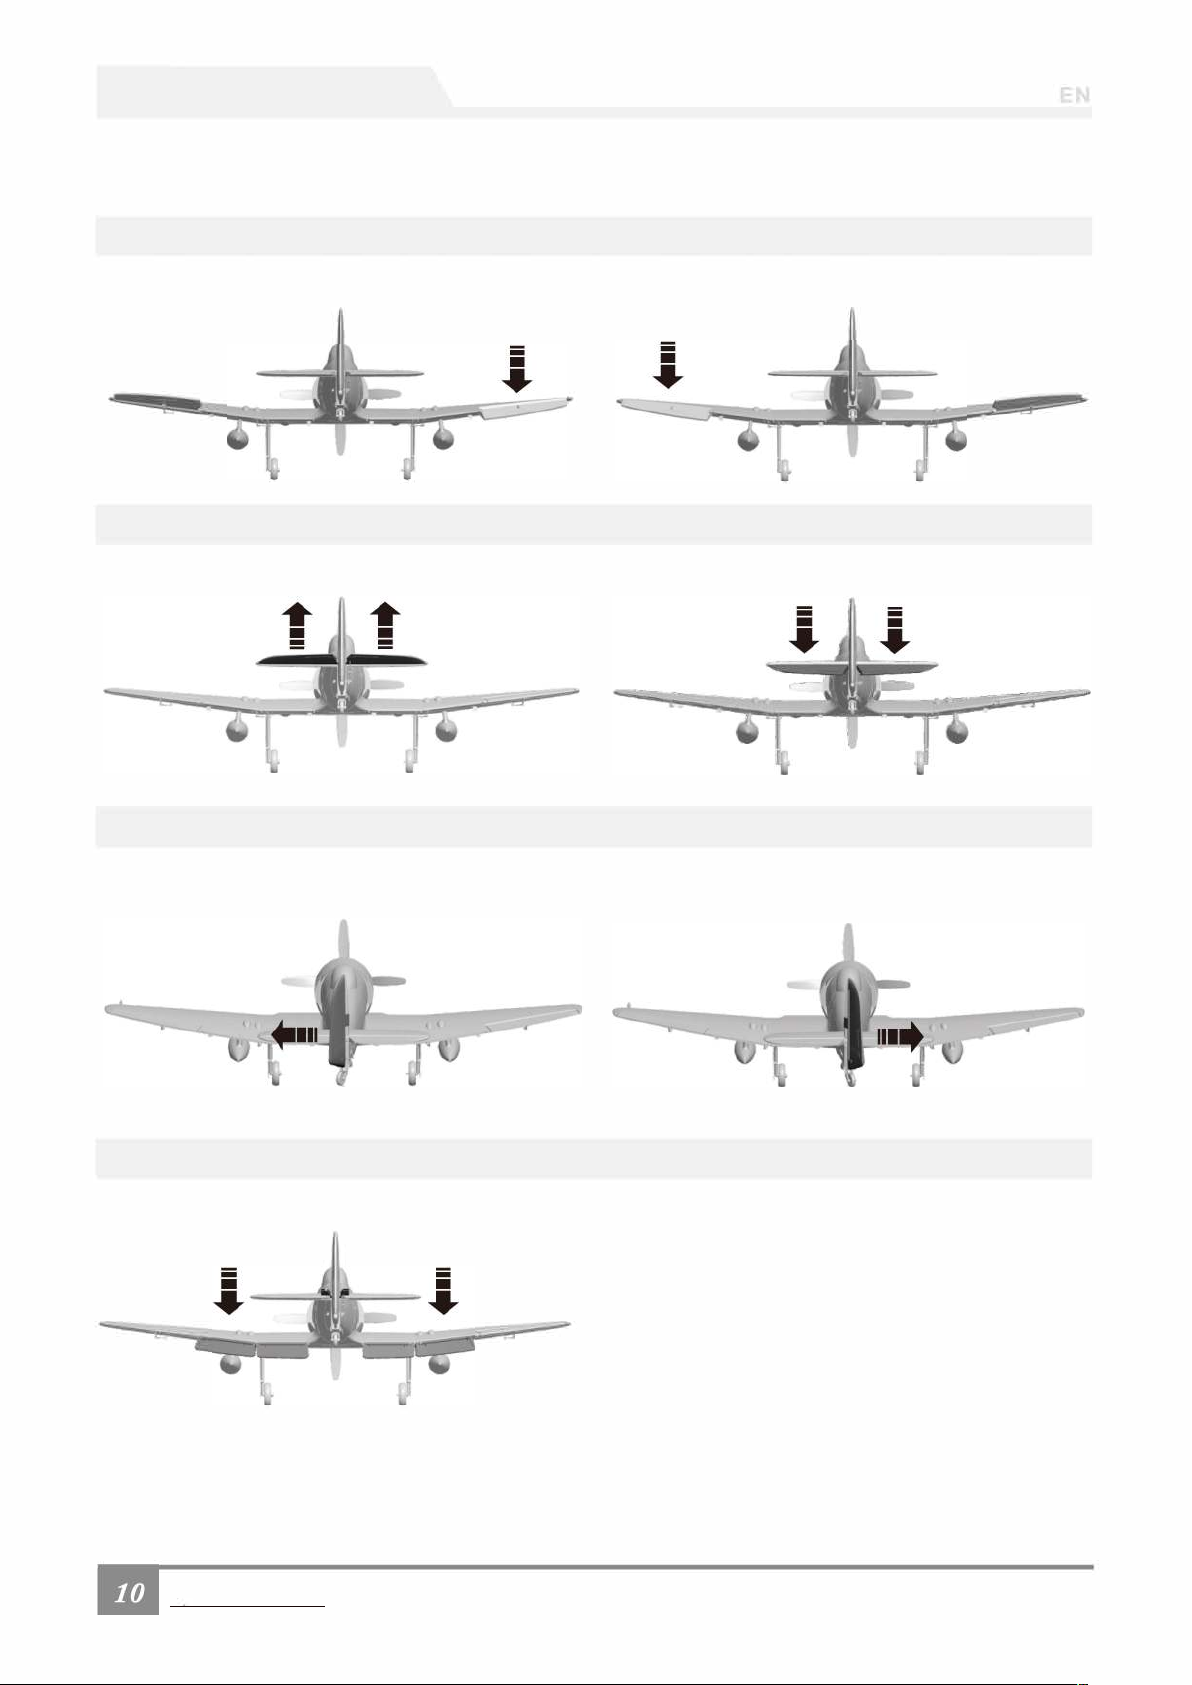
Control direction test
After the build is co
the ESC.
Aileron
Stick Left
Elevator
Up Elevator
U
se the radio to ensure proper control direction
•
•
m
plete but with the propeller removed, power up the radio and connect a fully charged battery to
Stick Right
•
•
Down Elevator
Rudder
Stick Left
Optional Flaps
Flaps down
Stick Right
Pliqht
Page 13
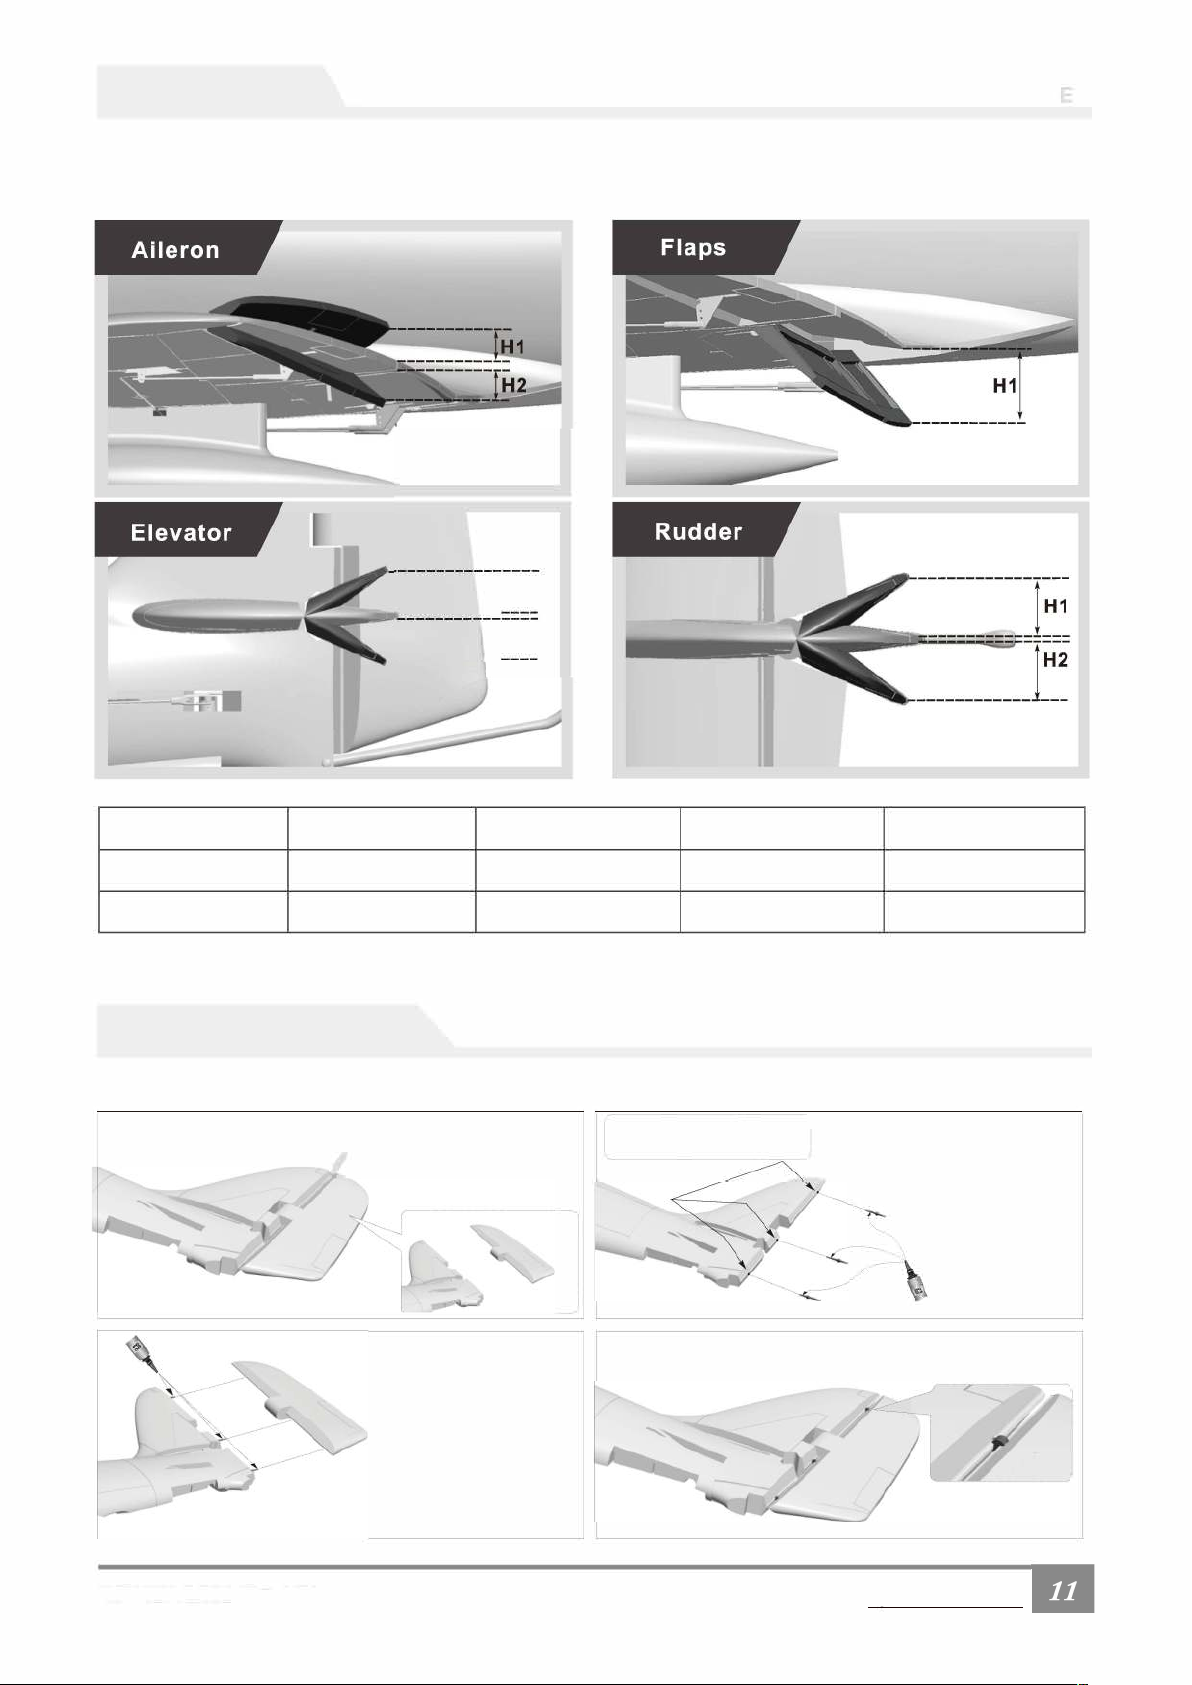
Dual Rates
According to our test results, the following rates proved to be a good starting point. Low rates are good for
initial flights or less experienced pilots. Ad
j
ust rates to suit you own style.
N
H 1
H2
Aileron
Low Rate
High Rate
Install
.The control surfaces of this airplane use a no-hinge connection design. Although proven reliable, these type of
hinges can be damaged due to errors, causing the control surface to become loose or separate. Included with
this kit is a set of plastic hinges if you wish to use them as an alternate or for repair.
ing
the optional Plastic Hinges
Step one
I
Elevator
v
b
z
Rudder
f
Step two
C
y
Flaps
(S
)
Step three
b
z
Pliqh
 Loading...