

Flick 1.1 User Manual

USER MANUAL
Flick 1.1
Multifunction Camera with OCR Reader
Software support: support@issist.com
Camera support: service@sightenhancement.com
www.Flickcamera.com
AND

2
TABLE OF CONTENTS
INTRODUCTION .......................................................................... 4
CONTENTS.................................................................................. 5
FLICK ASSEMBLY ......................................................................... 5
FLICK BATTERY CARE .................................................................. 6
SYSTEM REQUIREMENTS ............................................................ 7
FLICK CAMERA SET-UP ............................................................... 7
FLICK SOFTWARE INSTALL ............................................................. 7
FIRST TIME FLICK IS CONNECTED ................................................... 9
CALIBRATION ................................................................................ 9
TO SHUT DOWN FLICK ................................................................. 10
BASIC OPERATIONS .................................................................. 10
ZOOM IN AND OUT ...................................................................... 10
PAN AND SCROLL IMAGE ............................................................. 11
PAN IMAGE FOR READING ........................................................... 11
TEXT READING ............................................................................. 12
USING OCR TO READ ................................................................... 13
FLICK MENUS ........................................................................... 13
MENU NAVIGATION .................................................................... 14
MOVE UP/DOWN IN MENUS ....................................................... 14
ENTER/LEAVE SUBMENUS ........................................................... 14
SELECT MENU OPTION ................................................................ 14
USING MENUS .......................................................................... 15
MENU SYMBOLS .......................................................................... 15
MENU RADIO BUTTONS .............................................................. 15
HIGHLIGHTED OPTION ................................................................ 16
MENU BUTTONS.......................................................................... 16
MENU SLIDER .............................................................................. 16
BACK BUTTON ............................................................................. 17
MAIN MENU ............................................................................ 17
SHOW/HIDE MAIN MENU ........................................................... 17
COLOR ......................................................................................... 18

3
POINTER ...................................................................................... 19
SPEECH ........................................................................................ 20
READING ..................................................................................... 21
DISPLAY ....................................................................................... 23
HOTKEY LIST ................................................................................ 27
SUPPORT ..................................................................................... 28
CLOSE FLICK ................................................................................. 28
MINI MENU .............................................................................. 29
SHOW/HIDE MINI MENU ............................................................. 29
TOGGLE COLOR ........................................................................... 30
TOGGLE CAMERA POSITION ........................................................ 31
ROTATE VIDEO ............................................................................ 33
FREEZE FRAME ............................................................................ 34
SAVE PICTURES ............................................................................ 34
READER MENU ......................................................................... 34
SHOW/HIDE READER MENU [REAL IMAGE MODE] ...................... 34
REAL IMAGE MODE ..................................................................... 35
REFORMAT TEXT MODE .............................................................. 36
SAVE PAGE .................................................................................. 37
OPTIMAL READING HINTS ........................................................... 37
WARRANTY .............................................................................. 38

4
INTRODUCTION
Flick is the next-generation of multifunction distance and near
camera devices that allow the user to operate this fully motorized
camera from a touch screen, keyboard or with a mouse. The user
is immersed in the image at both distance or near viewing, on a
tablet, laptop or desktop and can control all functions from within
that view without the distraction of manual camera manipulation
Flick has many special features:
Portability: Weighs only 1.65kg (3.5 lbs)
Minimal assembly: Two components slot together using high
contrast parts. A USB cable connects to your computer.
Auto Focus camera: both distance and near viewing with
settings saved.
Excellent low light capabilities: Excels in dark environments
such as lecture halls.
Customization: The Color, Contrast, Brightness and many other
settings can be customized to fit your personal needs.
Compatibility: Compatible with Windows and Macintosh
(coming Summer 2012) operating systems.
Interactive OCR Capabilities: Can read and store a page of text.
Built-in Battery: operates approx. 8 hours on battery and will
not draw power from your tablet or PC.
iZoom: Shipped with iZoom magnifier and reader software to
use if required
2 year warranty
5
CONTENTS
Please unpack the product on arrival and confirm that all
components are present as described below:
Flick Camera Module
Flick Baseplate
Flick Charger 9v. 2A
County-specific Power Cable
USB Connect Cable
Flick User Manual with Calibration Page
Flick Software CD
Padded Carry Case
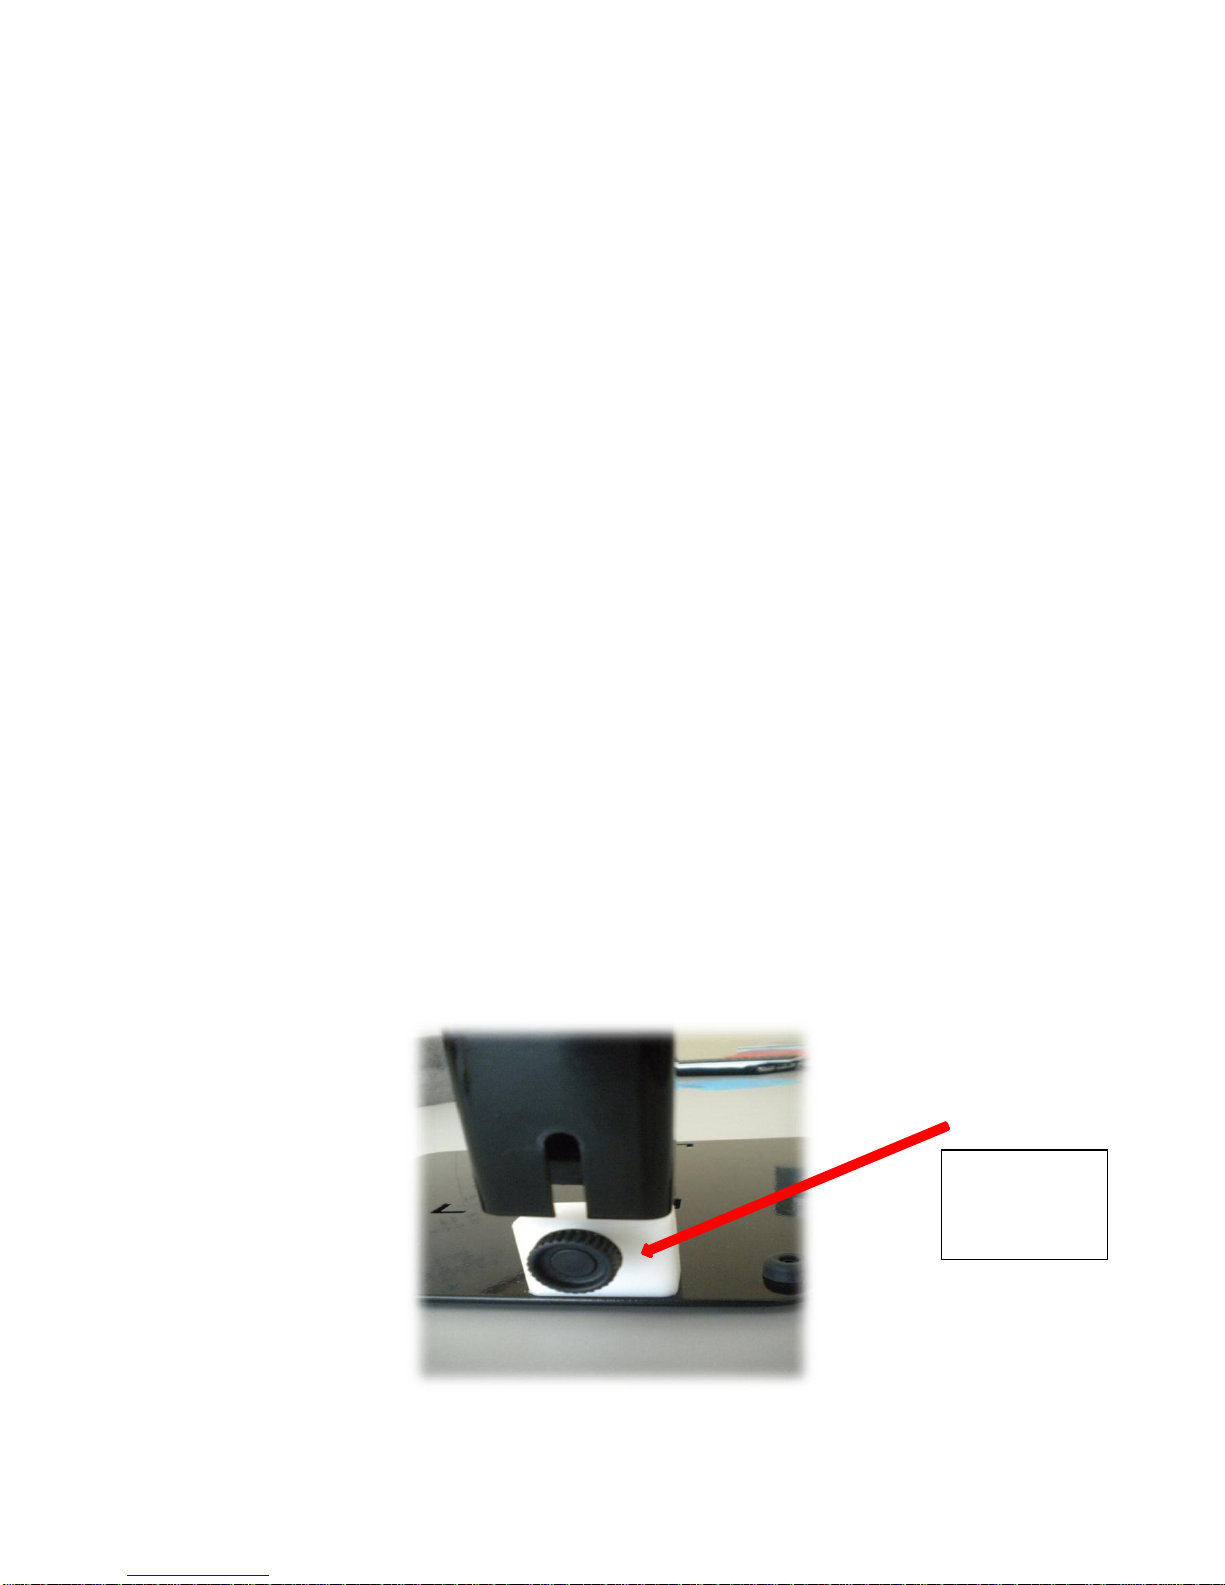
FLICK ASSEMBLY
Remove Flick camera and Baseplate from the carry case.
Mount the camera arm to the baseplate as shown in the
diagram.
Tighten the locking screw.
Locking
Screw
6
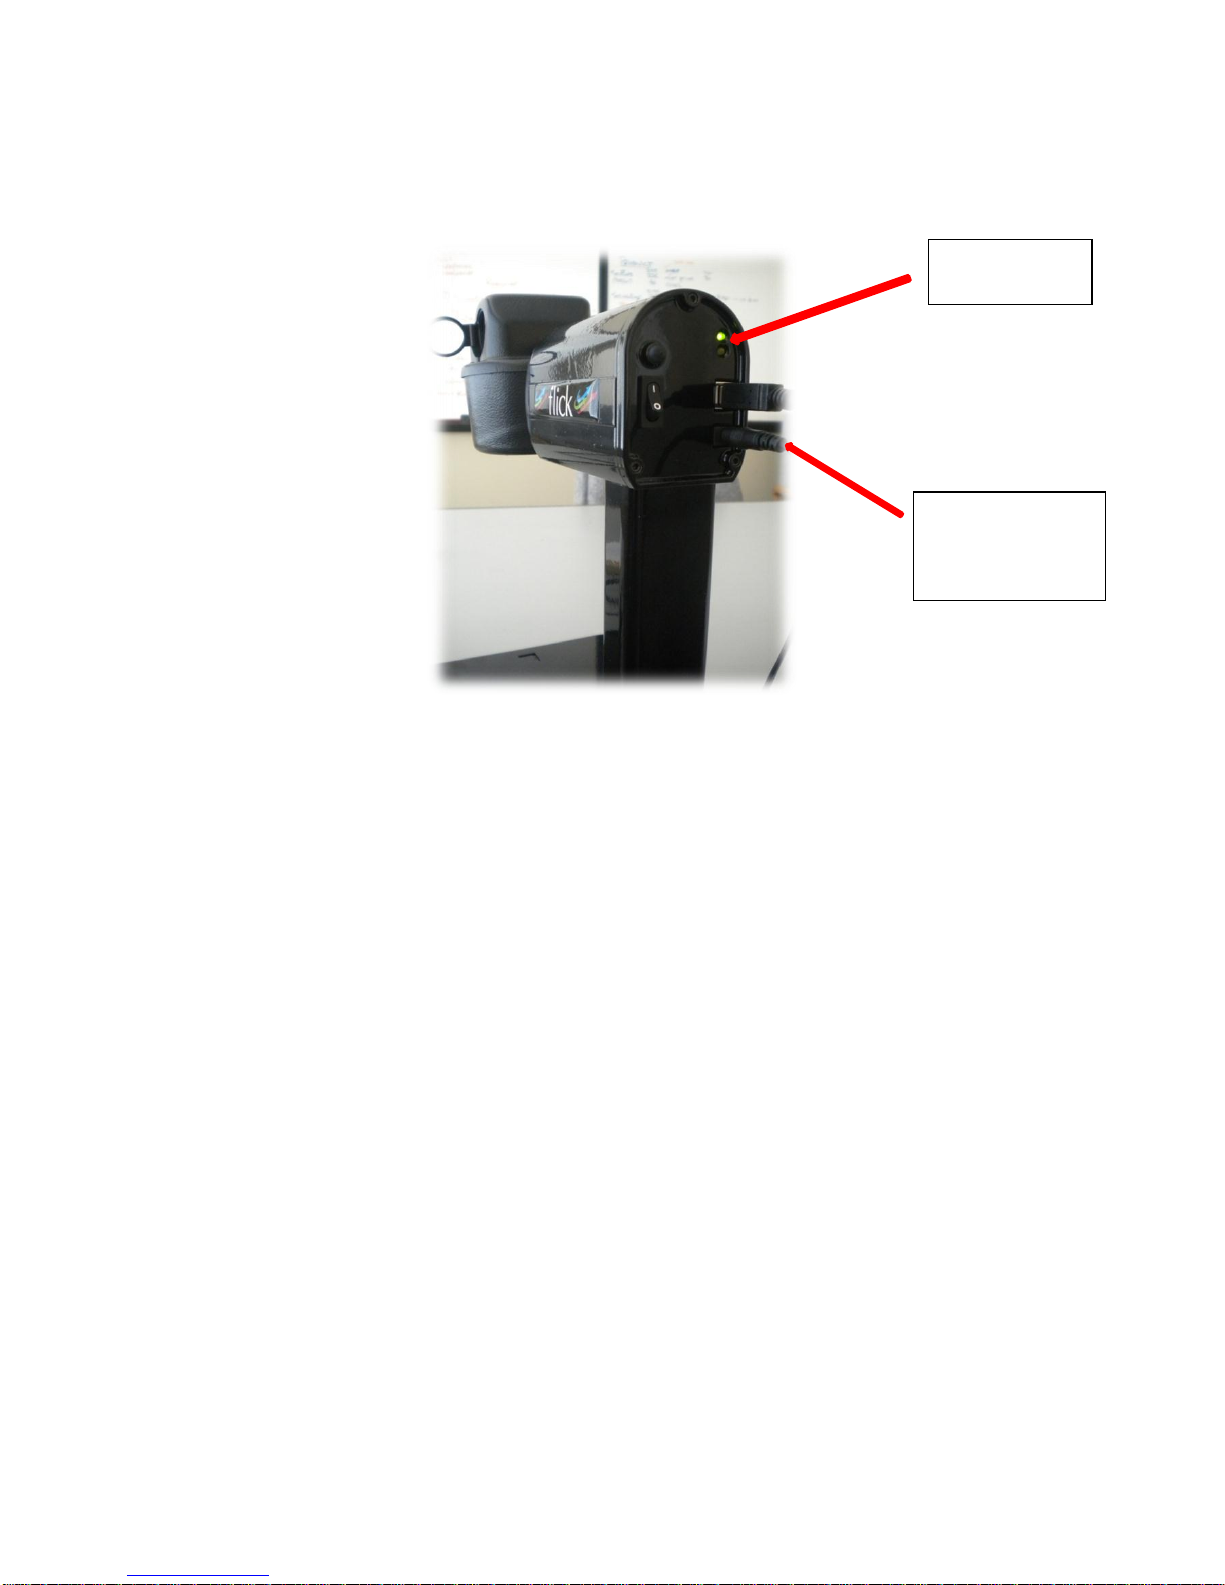
FLICK BATTERY CARE
Plug in Flick charger as shown – power connection
NOTE: Please ONLY use the Flick charger provided with your unit
Charge Flick before initial use
Orange LED is LIT during charging
Orange LED is OUT when battery is fully charged
Flick will operate approximately 8 hours before re-charging is
required
A full charge will require approx. 8 hours
Flick can be used while charging
Flick automatically regulates battery charging, so over-
charging is not an issue.
Important Reminder!
Your Flick camera is designed to move using motor drives when
the camera is ON. Only move the camera manually when the unit
is turned OFF.
Power
connection
LED lights
7
SYSTEM REQUIREMENTS
The system requirements for Flick are:
Minimum
Optimal
CPU
1.6 GHz Dual Core
2.4 GHz Dual Core
Memory
1 GB
2 GB
Disk Space
690 MB
Video Card
N/A
USB Port
USB 2.0 *REQUIRED
Operating System
Windows XP/Vista/7
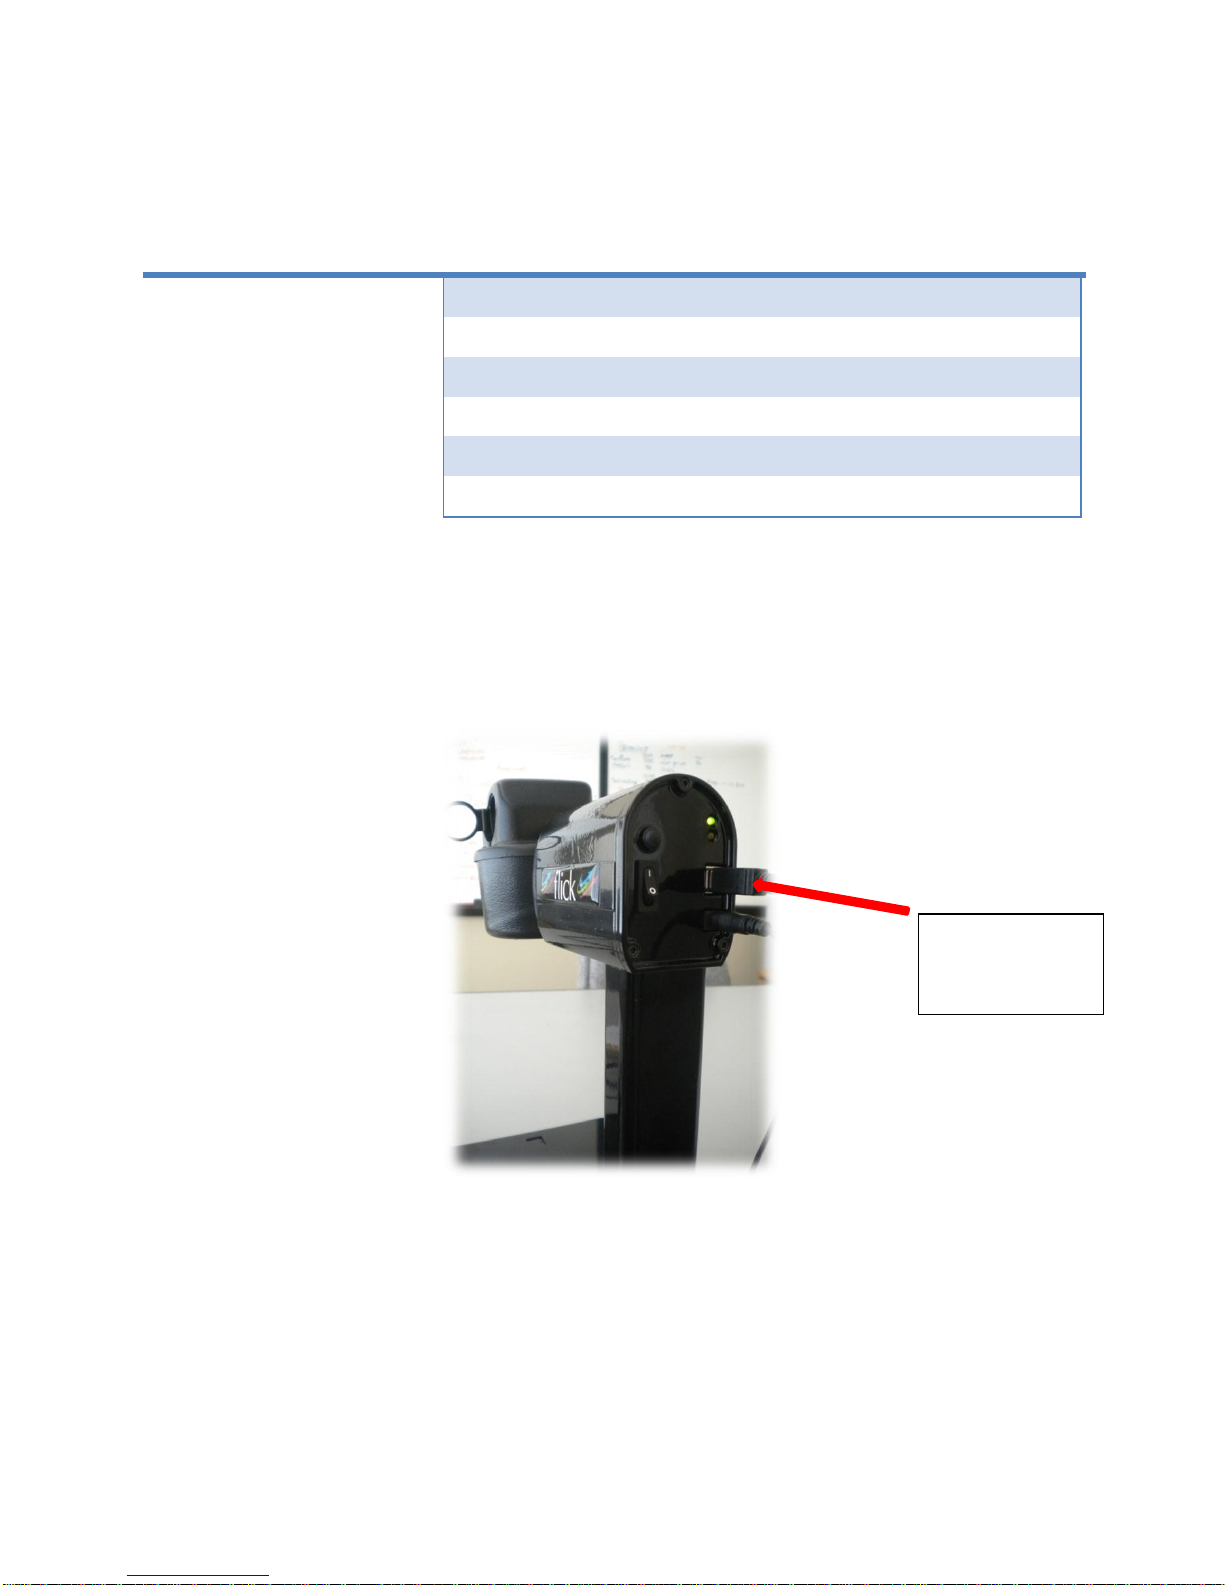
FLICK CAMERA SET-UP
Plug in USB cable and connect to laptop, tablet or desktop
computer
FLICK SOFTWARE INSTALL
Insert Flick software CD. The files will self-extract and commence
the installation. On completion of the install a Flick icon will be
placed on your desktop and in the START MENU. Here are the
steps to guide you through the installation process. If your
USB
connection

8
computer does not have a CD drive, you will need to copy files
from the CD to a flash drive for installation.
Warning message appears “Do you want to allow the
following program from an unknown publisher to make
changes to your computer”- Flick setup.exe. Select “YES”
Issist License Agreement dialog box appears. Select “I Agree”
Dialog box “Choose Components” appears with all items
highlighted by default. Select “Next”
Dialog box “choose Install Location” appears. Select default
or Browse for preferred location. Select “Install” and files will
unzip and begin installing. This step takes about 7 minutes
depending on the speed of your computer.
Dialog box “Microsoft .NET Framework 4 Maintenance”
appears. Default is “Repair”. Select “Next”.
Dialog box “Please wait while .Net Framework is being
installed“. This step may take up to 20 minutes if .Net
Framework has never been installed, but only a minute or
two if it is just being updated.
Dialog box “Repair is Complete”. Click “Finish”
Dialog box “You must restart your computer Now or Later”.
Select “Later”. This will allow you to exit from the install once
the installation is complete. Please wait a few minutes before
launching your Flick camera software to ensure time for
drivers to complete loading.
The installer will have placed a Flick icon on the desktop and
in the START MENU.
Turn Flick power switch ON – green LED light is now ON.
Please wait a few minutes to ensure that
Double click the Flick icon to start Flick.

9
FIRST TIME FLICK IS CONNECTED
When Flick is first connected to a new computer, you will be
prompted to enter the SOFTWARE Serial Number. This number
is printed on the back of your software CD case and on the
front of the Quick Start Manual. Once the serial number is
entered, the software will launch.
This step will only be required when you initially connect Flick
to your pc and when connecting to a different PC.
CALIBRATION
The Flick calibration is set at the factory and will not normally
need to be changed. However if a new version of the software is
installed the camera may need to be re-calibrated. The calibration
basically positions the camera to the center of the reading page to
obtain full page reading. The following process describes how to
reset the calibration if needed.
Open MAIN MENU (see MENU SECTION for details)
Select SUPPORT > CALIBRATION > CALIBRATION “ON”
Press BACK to image and note there is a red + in the centre of
the screen
Take the Flick Calibration sheet found with the User Manual
and align in the centre of the Flick baseplate
Move the black X using the keyboard arrows, mouse or
touchscreen so it aligns with the red + on the screen.
Press CTRL + SHIFT + F9 on the keyboard. Verify message
“Calibration Set” appears on the display.
Return to MAIN MENU
Select SUPPORT > CALIBRATION > CALIBRATION “OFF”
Press BACK to return to image.
Camera will now be able to sweep the entire page.

10
TO SHUT DOWN FLICK
Close Flick software: Select Menu > Close Flick > OK.
Flick will “park” the camera and close the lens. All other
applications will still be running.
Turn “OFF” the Flick camera
Unplug Flick camera USB cable from the computer and pack
in carry case
If the Camera is powered “OFF” for any reason with the Lens still
OPEN the lens can be closed as follows.
Gently rotate the camera to the down (reading) position
Switch the camera ON and let the lens close automatically.
Switch the camera OFF and pack the camera in carry case.
It is important that you do not attempt to close the lens manually
or force the motor drives to extreme camera positions. This can
cause damage to the camera mechanisms requiring return of the
camera for service. Any resulting damage is not covered by the
warranty.
BASIC OPERATIONS
ZOOM IN AND OUT
Flick provides magnification levels of approx. 40 x. Depending on
the display, text can be viewed at up to 80x.
Zoom In
Zoom Out
Mouse
Right-click + Scroll up
Right-click + Scroll
down
Touchscreen
2-Finger reverse pinch
2-Finger pinch
Keyboard
Press “+”
Press “-”

11
PAN AND SCROLL IMAGE
Pan and Scroll allows the user to scroll up/down/left/right to the
full extent of the range of motion of the camera. This can be
achieved by “pushing” the mouse to the extreme edge of the
display in the desired direction. The following keyboard and touch
commands can also be used.
Scroll Up/Down
Pan Left/Right
Jump Back
to Starting
Mouse
Mouse wheel
up/down
Mouse wheel
left/right
Tap Mouse
wheel left
Touchscreen
Finger drag
up/down
Finger drag
left/right
Not
available
Keyboard
Num key 8/2
Num key 4/6
Num key 5
PAN IMAGE FOR READING
For quick and easy reading, use Flick’s screen panning feature
described above using the numeric keypad. This allows the user
to move the camera along a line of text and quickly return to the
line start position to read the next line.
Panning Using Touch
Finger
Locator

12
Panning Using Mouse
Pan Up/Down
Pan Left/Right
Mouse
Left-click drag up/down
Left-click drag
left/right
Touchscreen
Finger drag up/down
Finger drag left/right
Keyboard
Arrow key up/down
Arrow key left/right
TEXT READING
Although Flick can be used for manually reading magnified text
images it can also be used for OCR text reading. The following
describes how to read text placed on the Flick table (Camera
Down. Note that Flick will not read text viewed in distance mode
(Camera UP).
Reading manually can be accomplished using pan and scroll
controls (see Table of Contents for page number). There is a fast
way to read using the numeric keypad by positioning the text at
the start of the line with the “4” key and using the “6” key to
Mouse
Pointer
 Loading...