

Flextone Dog Soldier FLX500 User Manual

User’s Manual Model # FLX500
HD GAME CALL
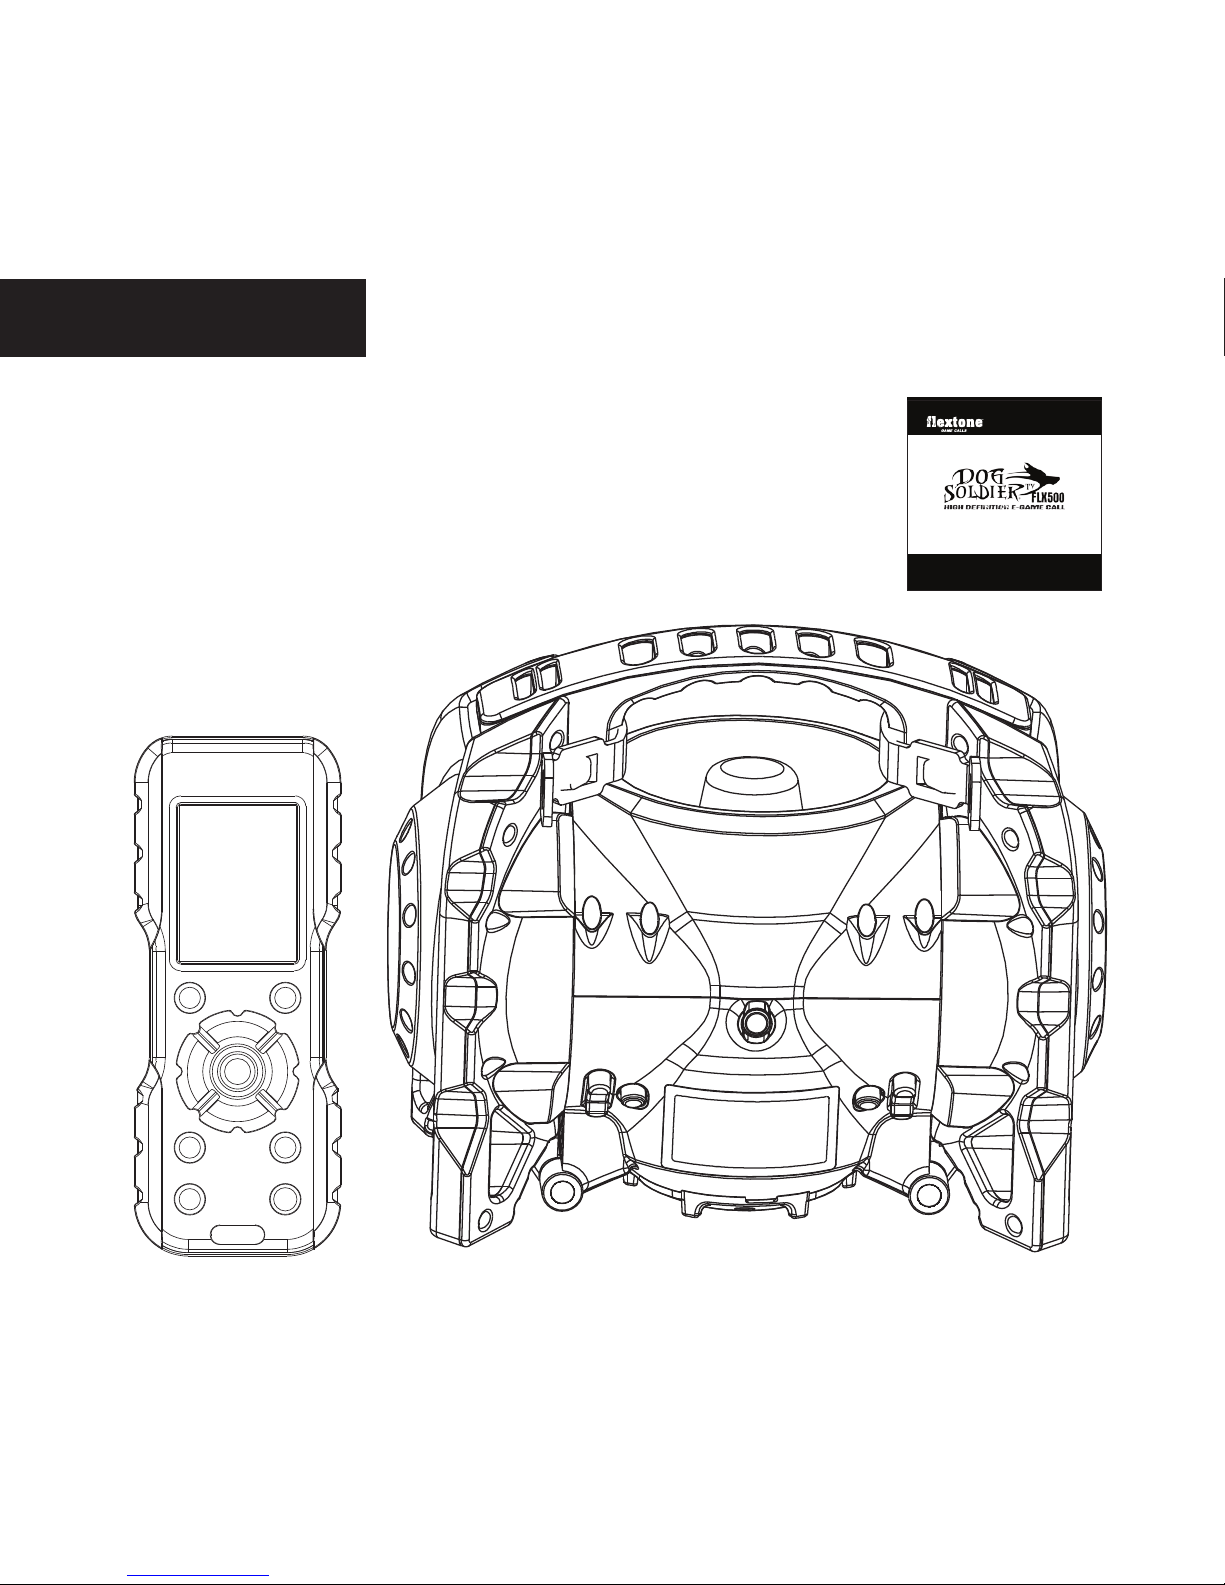
INCLUDED PARTS
1) Dog soldier FLX500 electronic game
call unit with remote – (2 pieces)
2) Product Information Guide – (1)
3) Shoulder Strap - (1)
PAGE 1
User’s Manual Model # FLX500
HD GAME CALL

INSTALLING BATTERIES IN UNIT
PAGE 2
3
To close put battery chamber back inside
cavity while aligning the arrows and rotate to
the right till you can’t turn it any further.
1
Turn the call on it’s side and rotate battery
door to the left. You will hear and feel a click.
2
Next, pull out the battery chamber, conrm
that the positive (+) and negative (-) terminals
are oriented correctly and insert ten (10) AA
batteries.

PAGE 3
3
To close, slide the cover up.
INSTALLING BATTERIES IN REMOTE
2
Next, conrm that the positive (+) and negative
(-) terminals are oriented correctly and insert
the batteries.
1
To install three (3) AA batteries for the
remote, slide the cover down to open.
TURNING SPEAKER UNIT ON
Press and hold the power button until LCD is
illuminated and then release. Unit is now on.
Note: The LCD will enter sleep mode in
approximately 1 minute of inactivity. The
Speaker unit will auto turn off after 30 minutes
of inactivity.
PAGE 4
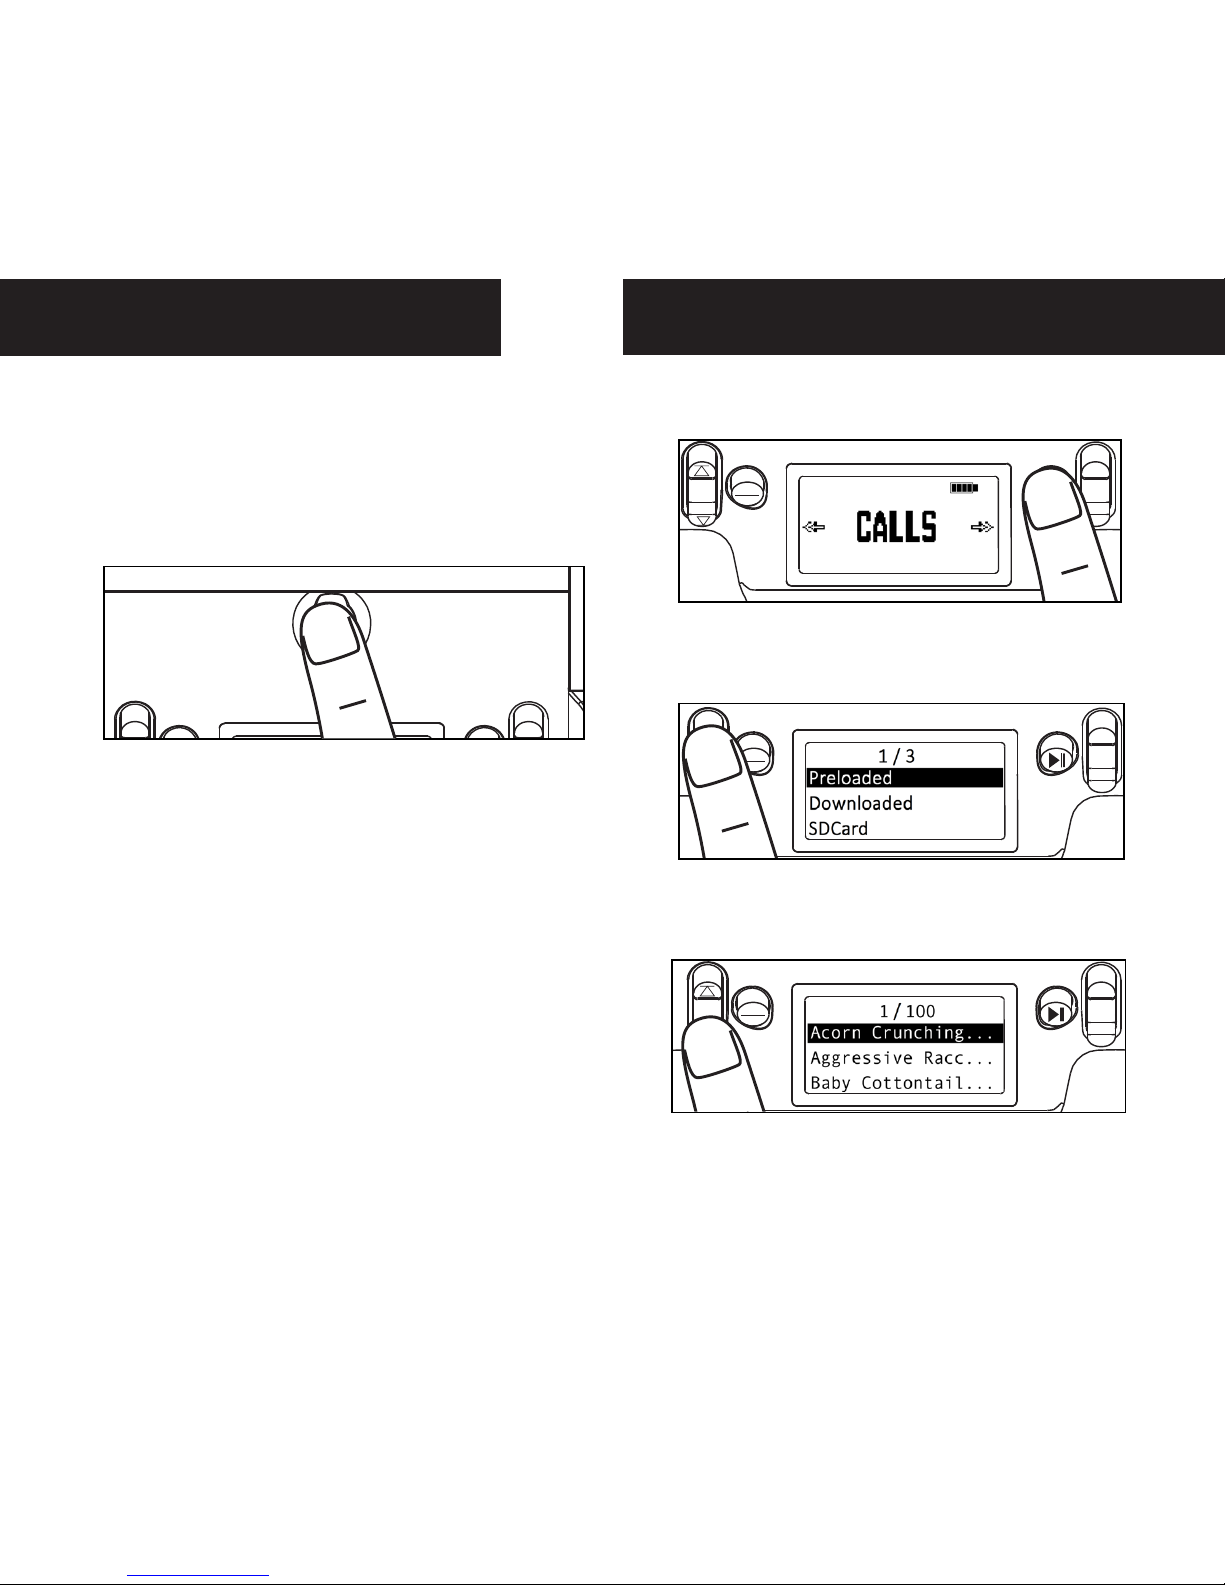
CHOOSING PRELOADED INDIVIDUAL
CALLS ON SPEAKER UNIT
1
First, press the play/enter button while CALLS
is on display.
2
Next, press either the up or down button to
choose Preloaded. Press the play/enter button
when the desired option is highlighted.
3
Scroll through calls by pressing the up or down
button. Press the play/enter button when the
desired option is highlighted.
MENU
BACK
VOL
+
-
MENU
BACK
VOL
+
-
MENU
BACK
VOL
+
-
This will activate the audible call. To maximize the
effectiveness of the Electronic Game Call, point
the call in the directions you want the sound to
go. Note: Call will loop repeatedly until call is
deactivated.
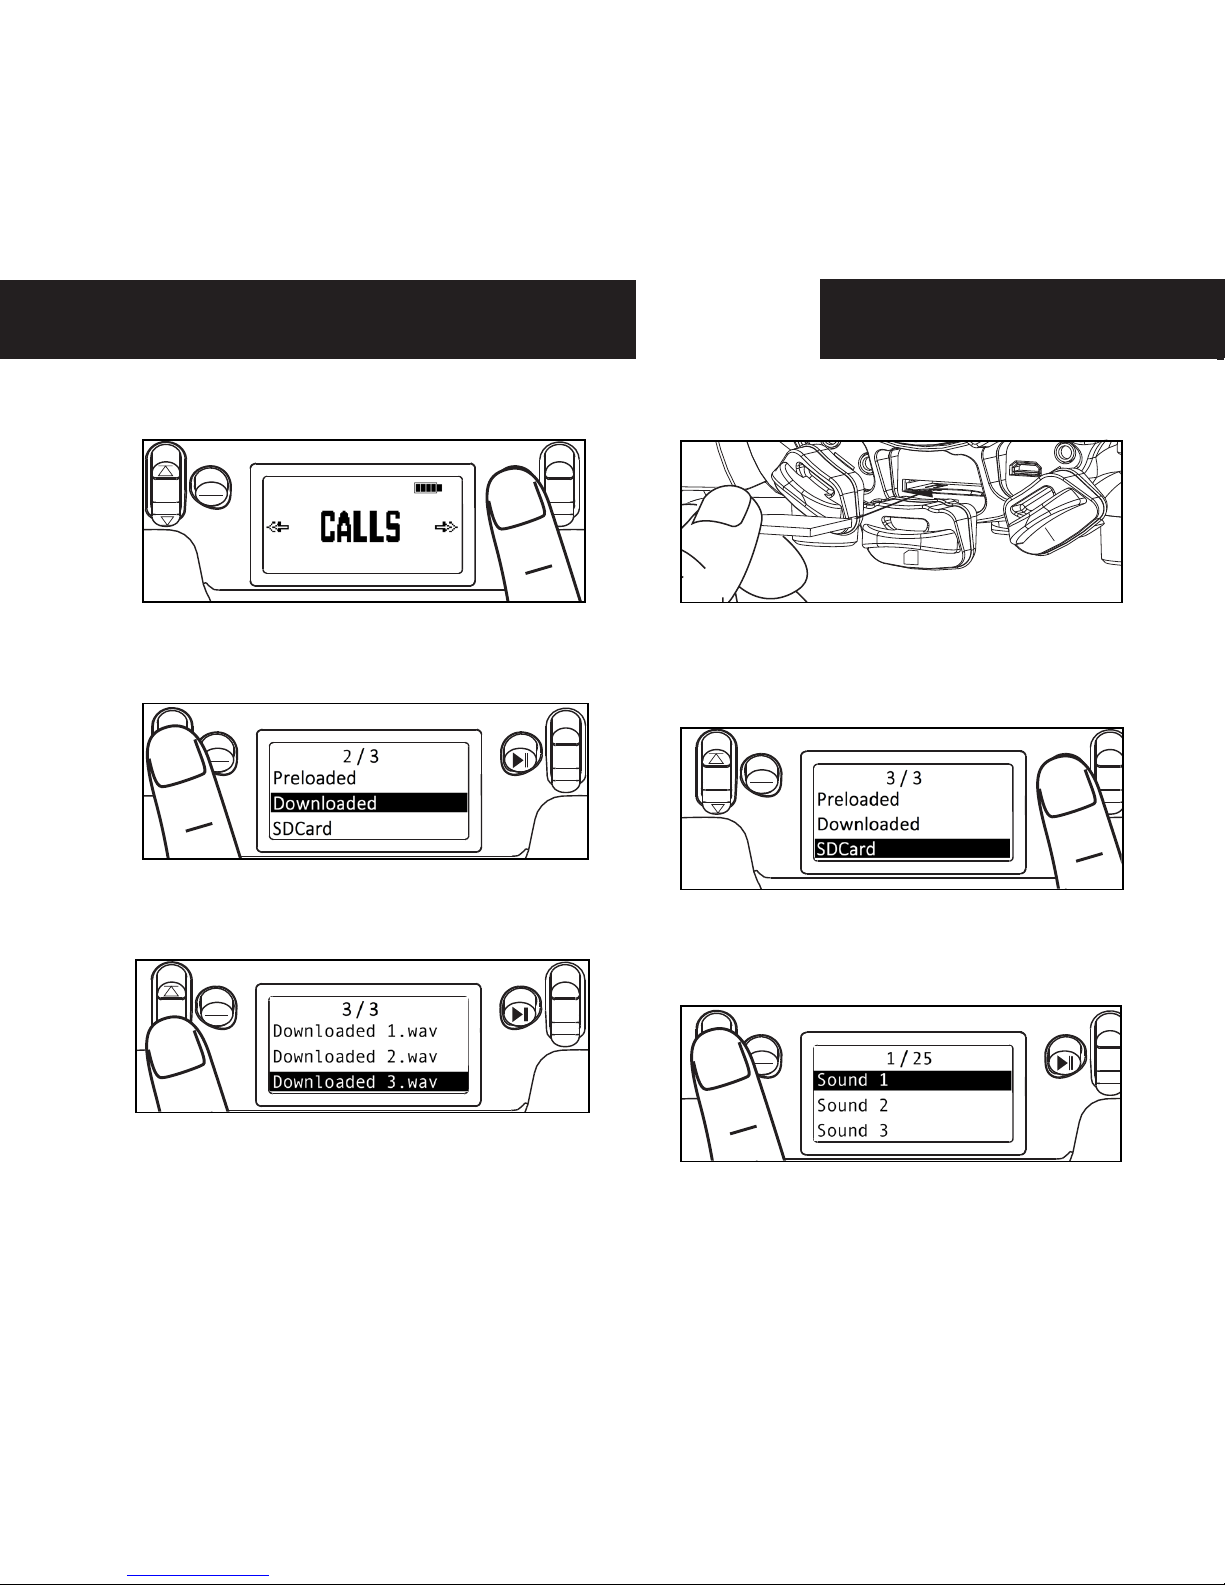
CHOOSING SD CARD
2
Next, press the play/enter button while SD
CARD is on display. NOTE: This option will only
show up if an SD card was inserted.
3
Scroll through calls by pressing the up or down
button. Press the play/enter button when the
desired option is highlighted.
MENU
BACK
MENU
BACK
This will activate the audible call. To maximize the
effectiveness of the Electronic Game Call, point
the call in the directions you want the sound to
go. Note: Call will loop repeatedly until call is
deactivated.
VOL
+
-
VOL
+
-
1
First, insert SD card.
SD
USB LINE-OUT
LINE-IN
CHOOSING DOWNLOADED INDIVIDUAL
CALLS ON SPEAKER UNIT
1
First, press the play/enter button while CALLS
is on display.
2
Next, press either the up or down button to
choose Downloaded. Press the play/enter
button when the desired option is highlighted.
3
Scroll through calls by pressing the up or down
button. Press the play/enter button when the
desired option is highlighted.
MENU
BACK
VOL
+
-
MENU
BACK
VOL
+
-
MENU
BACK
VOL
+
-
This will activate the audible call. To maximize the
effectiveness of the Electronic Game Call, point
the call in the directions you want the sound to
go. Note: Call will loop repeatedly until call is
deactivated.
PAGE 5
To adjust volume, press the volume + or -- buttons.
VOLUME CONTROL
MENU
BACK
VOL
+
-
PAGE 6
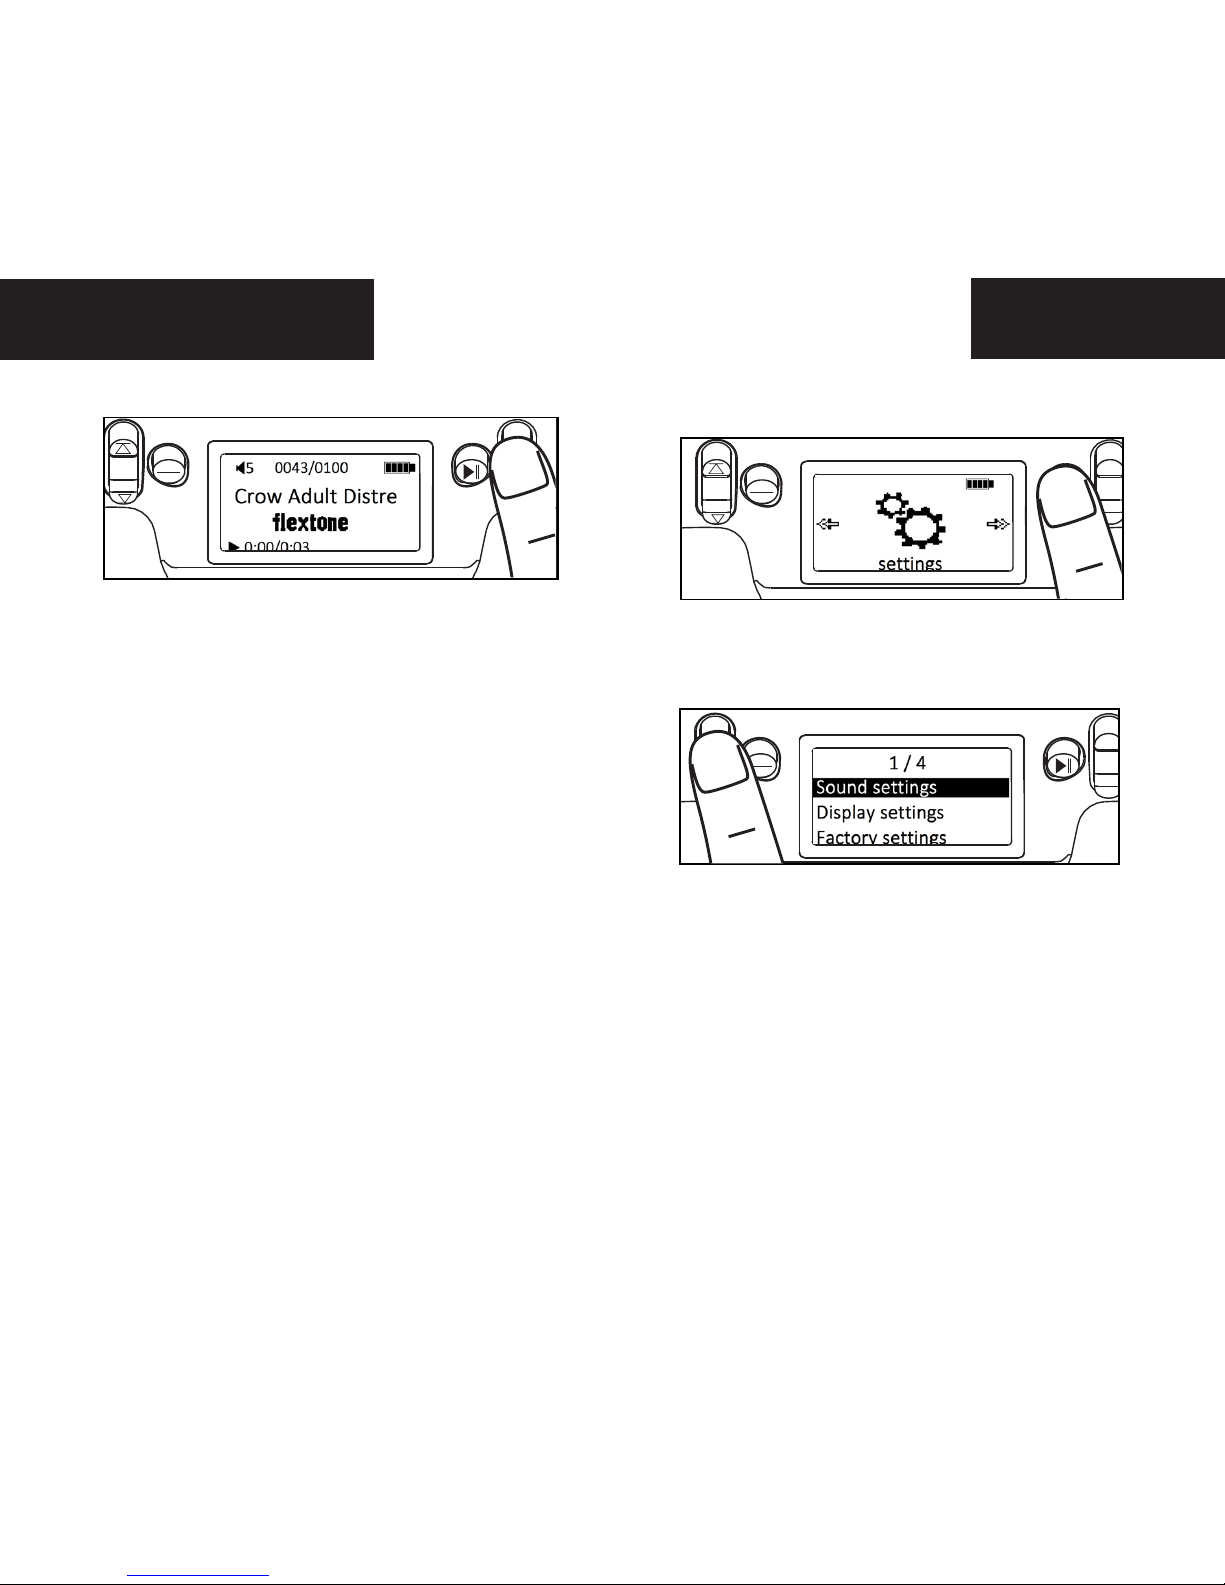
SETTINGS
1
First, press the play/enter button while
SETTING is on display.
MENU
BACK
VOL
+
-
2
Scroll through the options by pressing the up
or down button. Press the play/enter button
when the desired option is highlighted.
Sound Settings: You can switch to All, Side
Speakers or Center Speakers
Display Settings: Backlight timer can be adjusted
to 10 sec, 20 sec, 30 sec or Always On.
Factory Settings: Restore to factory settings.
About: Information about the unit.
MENU
BACK
VOL
+
-
 Loading...