


for$more$information$please$visit$www.flexston$.com$
Infrared Interactive Whiteboard
User Manual
model: BoardFlex 82 (A02-82V3)

$
$
visit$www.flexston.com$for$more$information$$$$$$$$$$$$$$$$$$1$
Contents
Accessories List.......................................................................................4
1 Introduction ·········································································· 5
1.1 Infrared technology principle ··················································· 5
1.2 Technical Specifications ························································· 6
1.3 Working Environment ···························································· 6
1.4 Minimum Computer System configuration: ······························· 7
1.5 System configuration recommended: ······································ 7
1.6 Software supported operation system ······································· 7
1.7 Hardware supported operation system ······································ 7
2 How to install BoardFlex Series interactive whiteboard? ············ 7
2.1 Mobile stand installation ························································· 7
2.2 Wall mounting installation ······················································· 9
3 How to use BoardFlex Series interactive whiteboard ················· 10
3.1 Toolbar ········································································· 10
3.2 Installtion for Software ······················································ 13
3.3 Calibration ····································································· 13
3.4 Start & Exit ···································································· 14
3.5 Introduction of the software tools ········································ 14
3.5.1 Drop-down Menus ······················································ 14
3.5.2 How to write on the board? ·········································· 17
3.5.3 How to erase on the board? ········································· 17
3.5.4 How to use the Resource in the software and computer? 188
3.5.5 How to use Hyperlink? ················································ 19
3.5.6 How to create a new file? ············································ 19
3.5.7 How to save file? ······················································· 20
3.5.8 How to open file? ······················································· 20
3.5.9 How to insert Text? ···················································· 21

$
$
visit$www.flexston.com$for$more$information$ $$$$$$$$$$$$$$$$$$$
2$
3.5.10 How to combine object? ·············································· 21
3.5.11 How to lock object? ···················································· 22
3.5.12 How to use Recorder? ················································ 22
3.5.13 How to make Screen Grab? ········································· 23
3.5.14 How to use Smart Pen? ·············································· 23
3.5.15 How to use Spotlight? ················································· 24
3.5.16 How to use Curtain? ··················································· 24
3.5.17 How to use Arrow? ····················································· 25
3.5.18 How to use Screen Postil? ··········································· 26
3.5.19 How to play the video files? ········································· 26
3.5.20 How to switch layer of pictures? ···································· 27
3.5.21 How to use Re-broadcast? ·········································· 28
3.5.22 Subjects-Math ··························································· 28
3.5.23 Application of the special tools ······································ 28
3.5.24 Measure tools ··························································· 29
4 FAQ ·················································································· 31
$
$
visit$www.flexston.com$for$more$information$ $$$$$$$$$$$$$$$$$$$
3$
Disclaimer
Please read this User manual carefully before using the product. We suggest that you keep this manual
carefully for future reference.
Copyright Notice
We maintain the right to revise its content without giving notification, please kindly understand. No copying or
spreading of its contents is allowed unless gives written permission formerly.
Shall any discrepancies caused by the descriptions of this user manual and the actual product or its
operation, the actual product and operation should be referred as the correct ones.
Notice
This user manual is applicable to BoardFlex Series Interactive Whiteboard
Some symbols are used in this manual to ensure the safe and correct use of this product. All the meanings
are explained as below:
Remarks:
This symbol means that there is further explanation of the software.
Attention:
This symbol indicates that there are ways to avoid incorrect operations of the product.
Warning:
This symbol indicates that if ignored or applied incorrectly, it would have the possibility of damaging the
product or results in abnormality!
Warning:
To avoid electric shock, please avoid installing the interactive whiteboard in places of heavy humidity or mist!
When using the product, please prevent it from fire source and electric shock as well as long time exposure
under the sunshine!
Warning:
Please do not stare straightly to the light beams from the projector!

$
$
visit$www.flexston.com$for$more$information$ $$$$$$$$$$$$$$$$$$$
4$
Important Attention:
Please connect the computer and the projector with the earth to avoid accidental damages. Please connect
the interactive whiteboard and computer through the USB cable or wireless module correctly to ensure
normal power supply.
Attention:
If the IWB mounted on the wall, it must be straight with the wall.
Do not use sharp or sturdy stuff to cut or carve the board surface or frame.
Accessories List:
Please open the packing carefully. Each package shall contains the following items if you have
selected our BoardFlex series.
USB cable (6M): 1 PC
Intelligent pen: 2 PCS
Pointer: 1 PC
Wall mount bracket: 4 PCS
Software CD: 1 PC
Expansion bolt: 8PCS
Small screw (optional): 4PCS
Shall any of the above mentioned parts is missing or damaged, please contact our local
distributor.
$
$
visit$www.flexston.com$for$more$information$ $$$$$$$$$$$$$$$$$$$
5$
Disclaimer
Please read this User manual carefully before using the product. We suggest that you keep this
manual carefully for future reference.
1 Introduction
Thank you for selecting our infrared interactive whiteboard and software!
1.1 Infrared technology principle
A plane scanning surface is formed by the infrared receiver and transmitters on x-axes and y-axes located
inside the frame. When an object enters the scanning surface and stops the scanning on that point, the
point’s coordinate(x, y) is found by sensing the blocked infrared beams from horizontal and vertical
directions.
$
$
visit$www.flexston.com$for$more$information$ $$$$$$$$$$$$$$$$$$$
6$
1.2 Technical Specifications
1.3 Working Environment
To avoid any abnormality and malfunction, please use the product as per the following working requirement.
Storage/Transporting temperature
-40℃ -- 70℃
Storage humidity
20% -- 93%(40℃)
Atmospheric pressure
86k Pa -- 106k Pa
Operating humidity
10% -- 90%
Operating Temperature:
-20℃ -- 60℃
Specification
Sensor Type
Infrared Technology
Positioning
Precision
≤0.1mm
Signal Interface
USB
Cursor Speed
12m/s / 180 dot/s
Length of USB
6m(10m/12m is
optional)
Response
Speed
≤8ms
Calibration
4 points
Sampling
Speed
180 dot/s
Power
Consumption
≤70mA
Resolution
32768 * 32768
Operation
System
Windows/Linux/Mac
Aspect Ratio
4:3 16:9 16:10
Visual Angle
170(Left and Right)
160(Up and Down)
Materials on
Surface
High wear-resisting
metal projection
board,partial models
use the aluminum
honeycomb board
HS
≤60

$
$
visit$www.flexston.com$for$more$information$ $$$$$$$$$$$$$$$$$$$
7$
1.4 Minimum Computer System configuration:
• PC with 1GHz x 86 processor
• 256M EMS memory or above
• Display card support 256 colors and above
• 10G applicable hard disk space
• Projection display resolution: 1280*800
• An available USB port
• Premium projector resolution: 1280*800
1.5 System configuration recommended:
• PC with 1GHz x86 processor
• 1G EMS memory or above
• Display card support 256 colors and above
• 10G applicable hard disk space
• Projection display resolution: 1280*800
• An available USB port
Premium projector resolution: 1280*800
1.6 Software supported operation system
• Windows 98, VISTA, 2000, XP, WINDOWS 7,WINDOWS 8
1.7 Hardware supported operation system
• Windows 98, VISTA, 2000, XP, WINDOWS7, WINDOWS 8 ,Linux, Mac
2 How to install BoardFlex Series interactive whiteboard?
2.1 Mobile stand installation
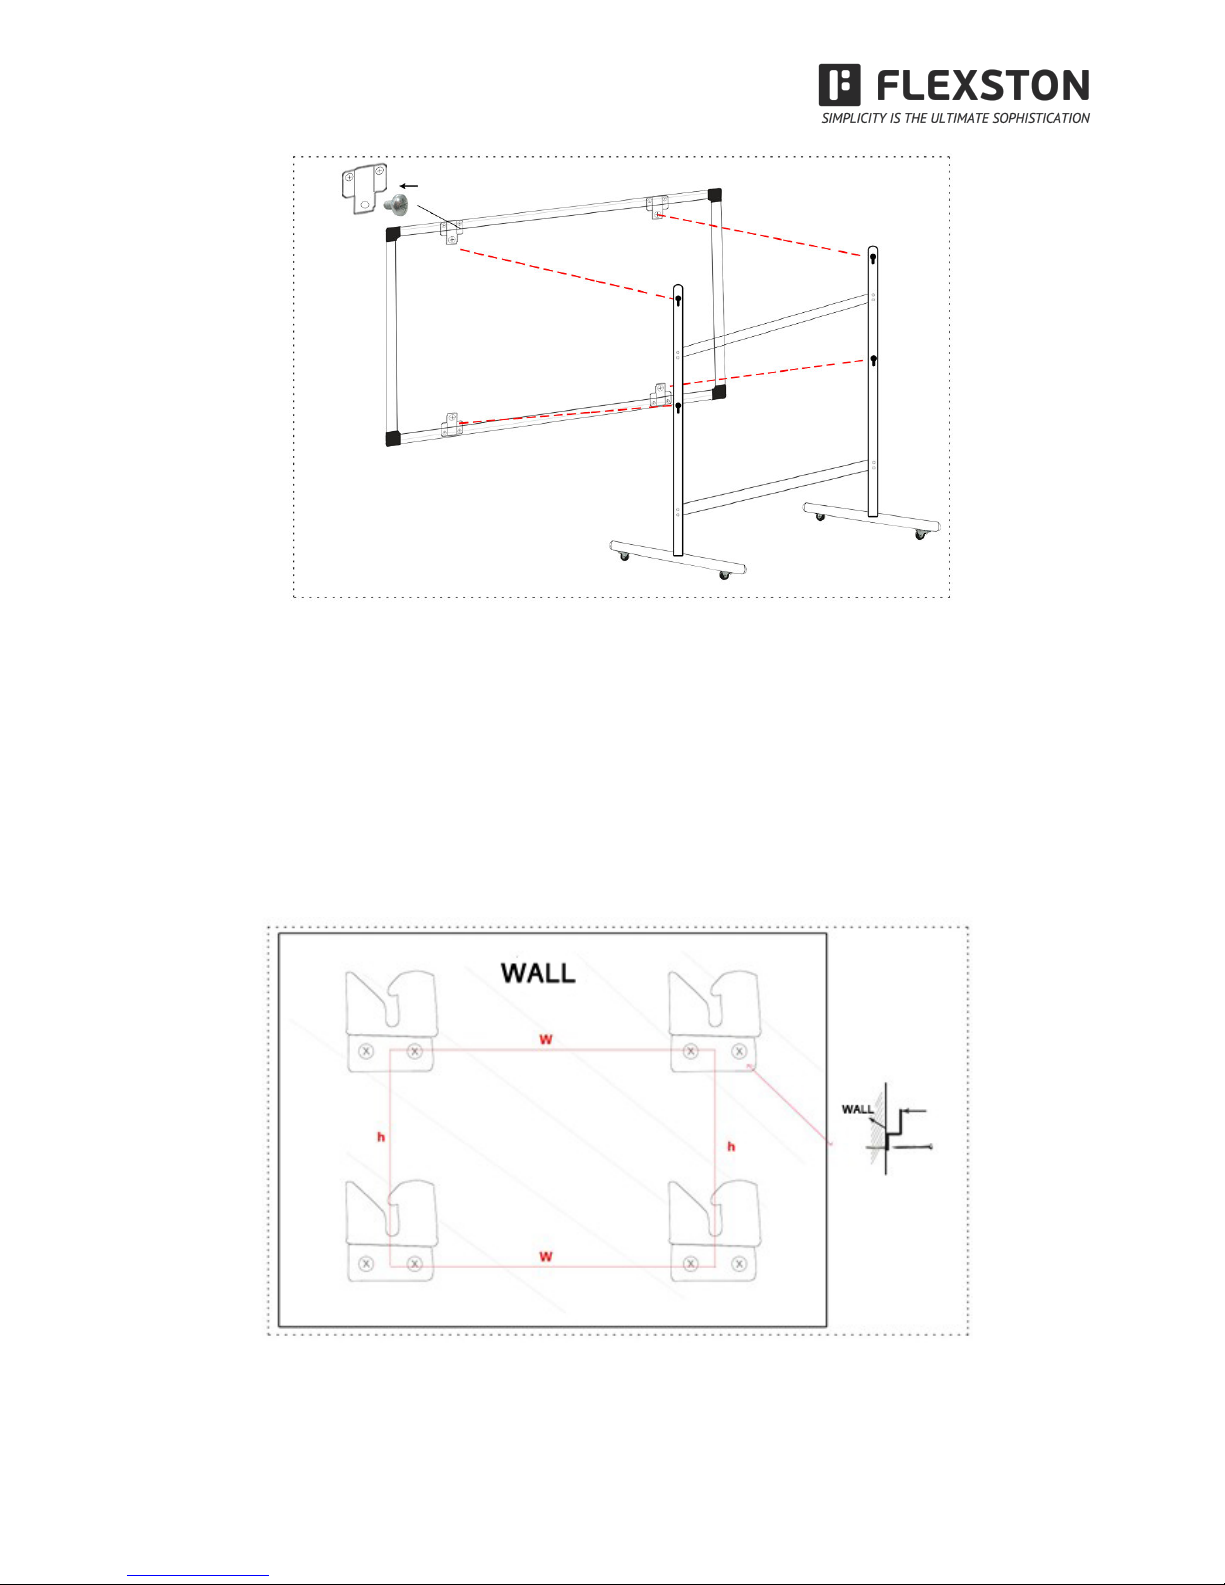
(1) Before installation,please prepare a wrench.Assembly four bracket as following picture ,fix the stands with
screws.
$
$
visit$www.flexston.com$for$more$information$ $$$$$$$$$$$$$$$$$$$
8$
(2) Fix all the wheels on the base of stands with the wrench. Plug the vertical poles c1 and c2
into the slots in the middle of bases. Fix them all with screws. The mobile stand is finished.
(3) Put the back of the whiteboard on the desk. Fix the bolts, but not too tight. Hang the
board to the four bolts position and fix the bolts tightly. The mobile installation is finished. Make
it stand on the ground.
$
$
visit$www.flexston.com$for$more$information$ $$$$$$$$$$$$$$$$$$$
9$
2.2 Wall mounting installation
(1) You may need tape measure, wrench and drill for installation.
! Choose the right place to install the board, which is convenient to connect the computer..
! Mark the drill positions on the wall according to the different models of products.
! Drill 8 fixing holes on the wall according to the mark.
! Fix the brackets on the wall with 8 setscrews.
(2) Hang the board on the four brackets. The wall mounting installation is finished.

$
$
visit$www.flexston.com$for$more$information$ $$$$$$$$$$$$$$$$$$$
10$
3 How to use BoardFlex Series interactive whiteboard
Attention:
To confirm whether the board is connected successfully, there are two connecting status of the “TouchDriver”
for your reference.
1. means the connection is failed.
2. means the connection is successful.
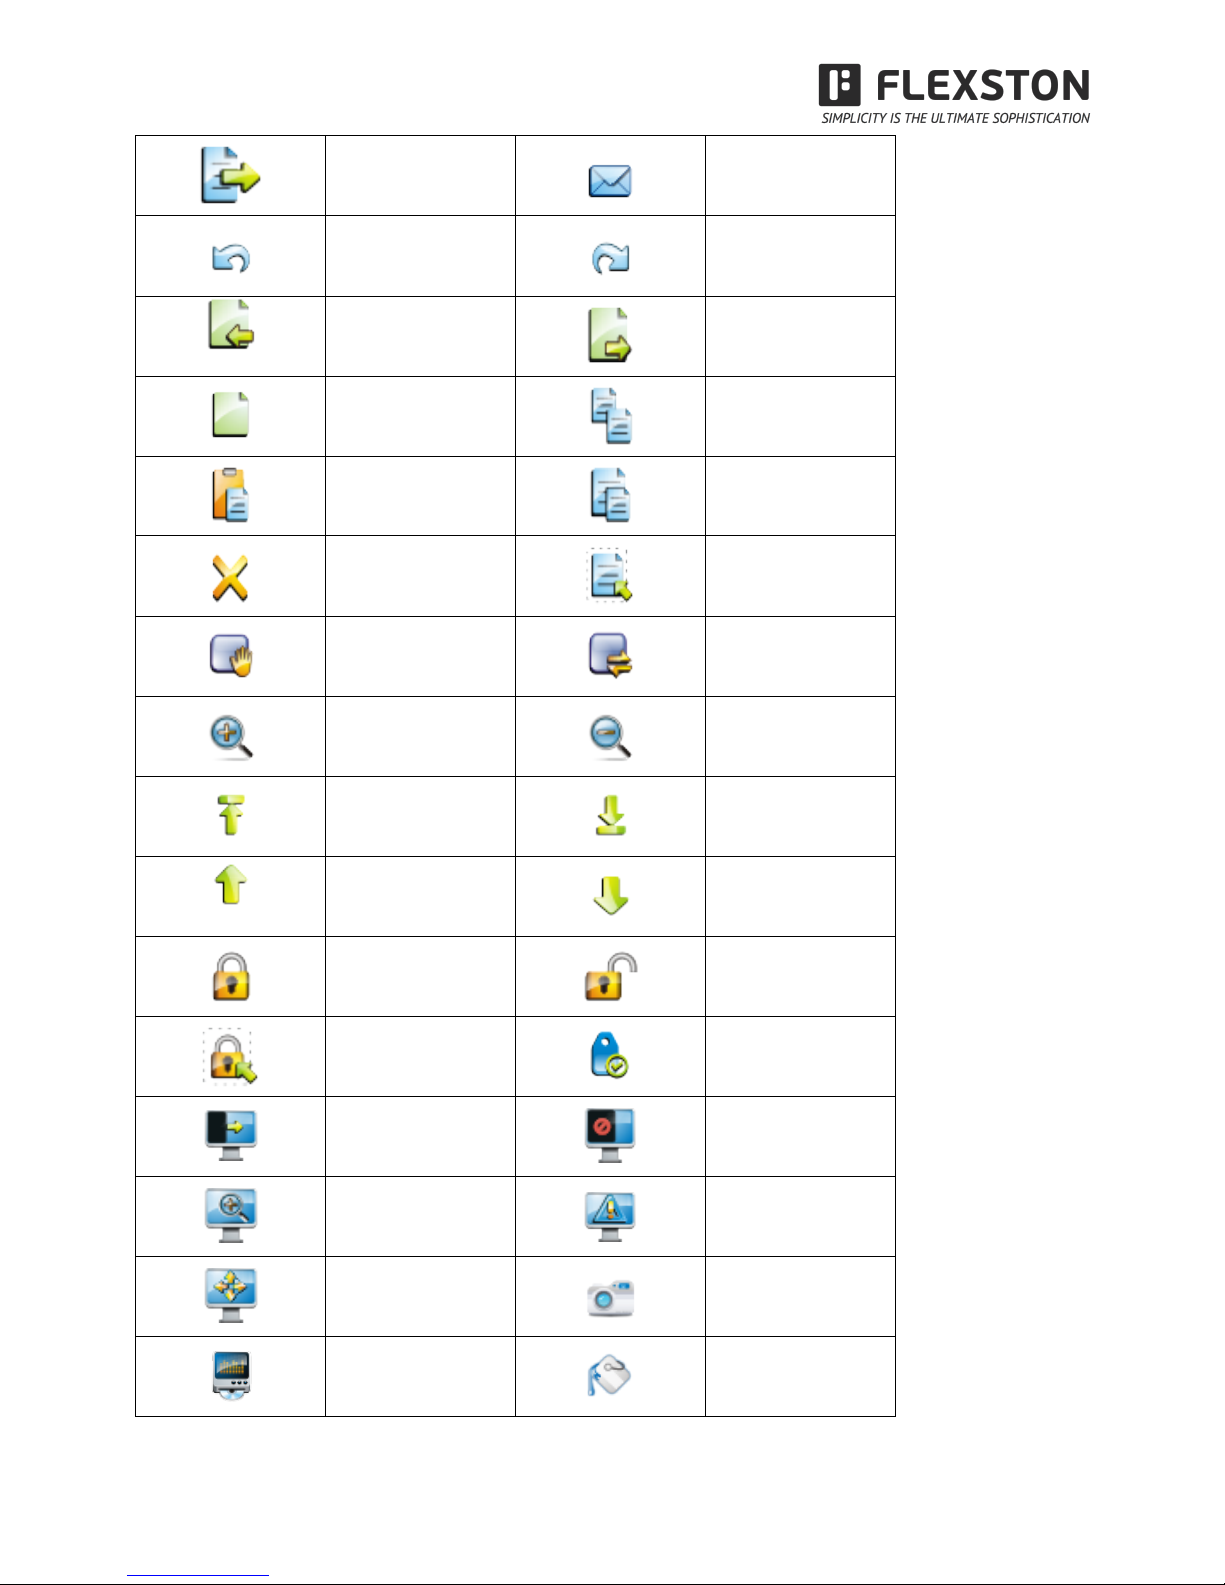
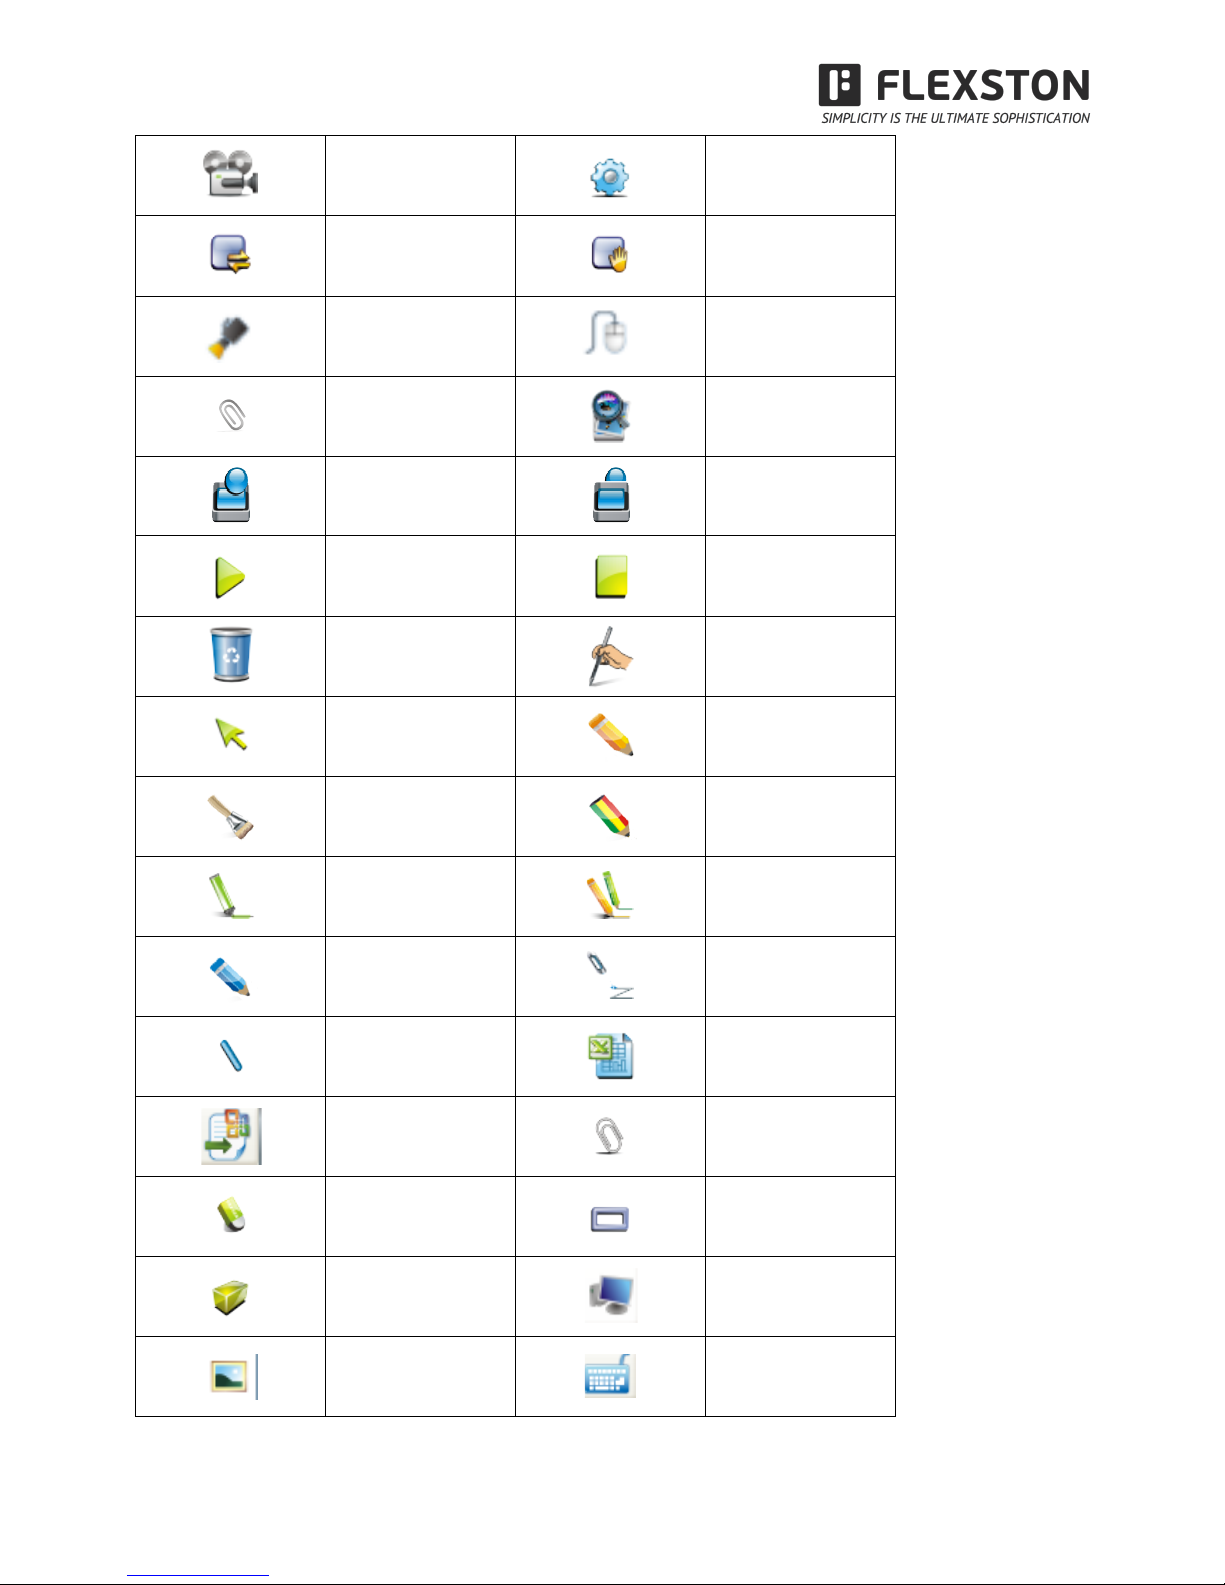
3.1 Toolbar
Button
Function
Button
Function
Creat document
Open document
Save
Save as
$
$
visit$www.flexston.com$for$more$information$ $$$$$$$$$$$$$$$$$$$
11$
Export
Send Email
Undo
Redo
Previous page
Next page
Select page
Copy
Paste
Clone
Delete
Select all
Screen Range
Reset
Zoom in
Zoom out
Layer go top
Layer go bottom
Layer go up
Layer go down
Lock
Unlock
Select
locked
object
Attributes
Screen curtain
Break page
Screen highlight
Screen cover
Screen arrow
Screen Grab
Media Player
Fill Color
$
$
visit$www.flexston.com$for$more$information$ $$$$$$$$$$$$$$$$$$$
12$
Recorder
System Setting
Reset
Roam
Spotlight
Screen
annotation
Attachment
Magnifier
Group
Ungroup
Rebroadcast
Pause
Dust bin
Hand writing
recognition
Select object
Hard pen
Spread pen
Texture pen
Fluorescence
pen
Multi-write pen
Smart pen
Laser pen
Line segment
Form
Office embed
Attachment
Eraser
Plane Figure
Solid Figure
Operate
computer file
Resource
Keyboard
$
$
visit$www.flexston.com$for$more$information$ $$$$$$$$$$$$$$$$$$$
13$
Dice
Calculator
Clock
30°Right angled
triangle
45°Right angled
triangle
Protractor
Vernier Caliper
Compass
Ruler
Cut
3.2 Installtion for Software
Insert CD into the CD-ROM drive, the system will automatically start the installation process, double-click
the icon , the software installation procedure, the system will remind installation steps.
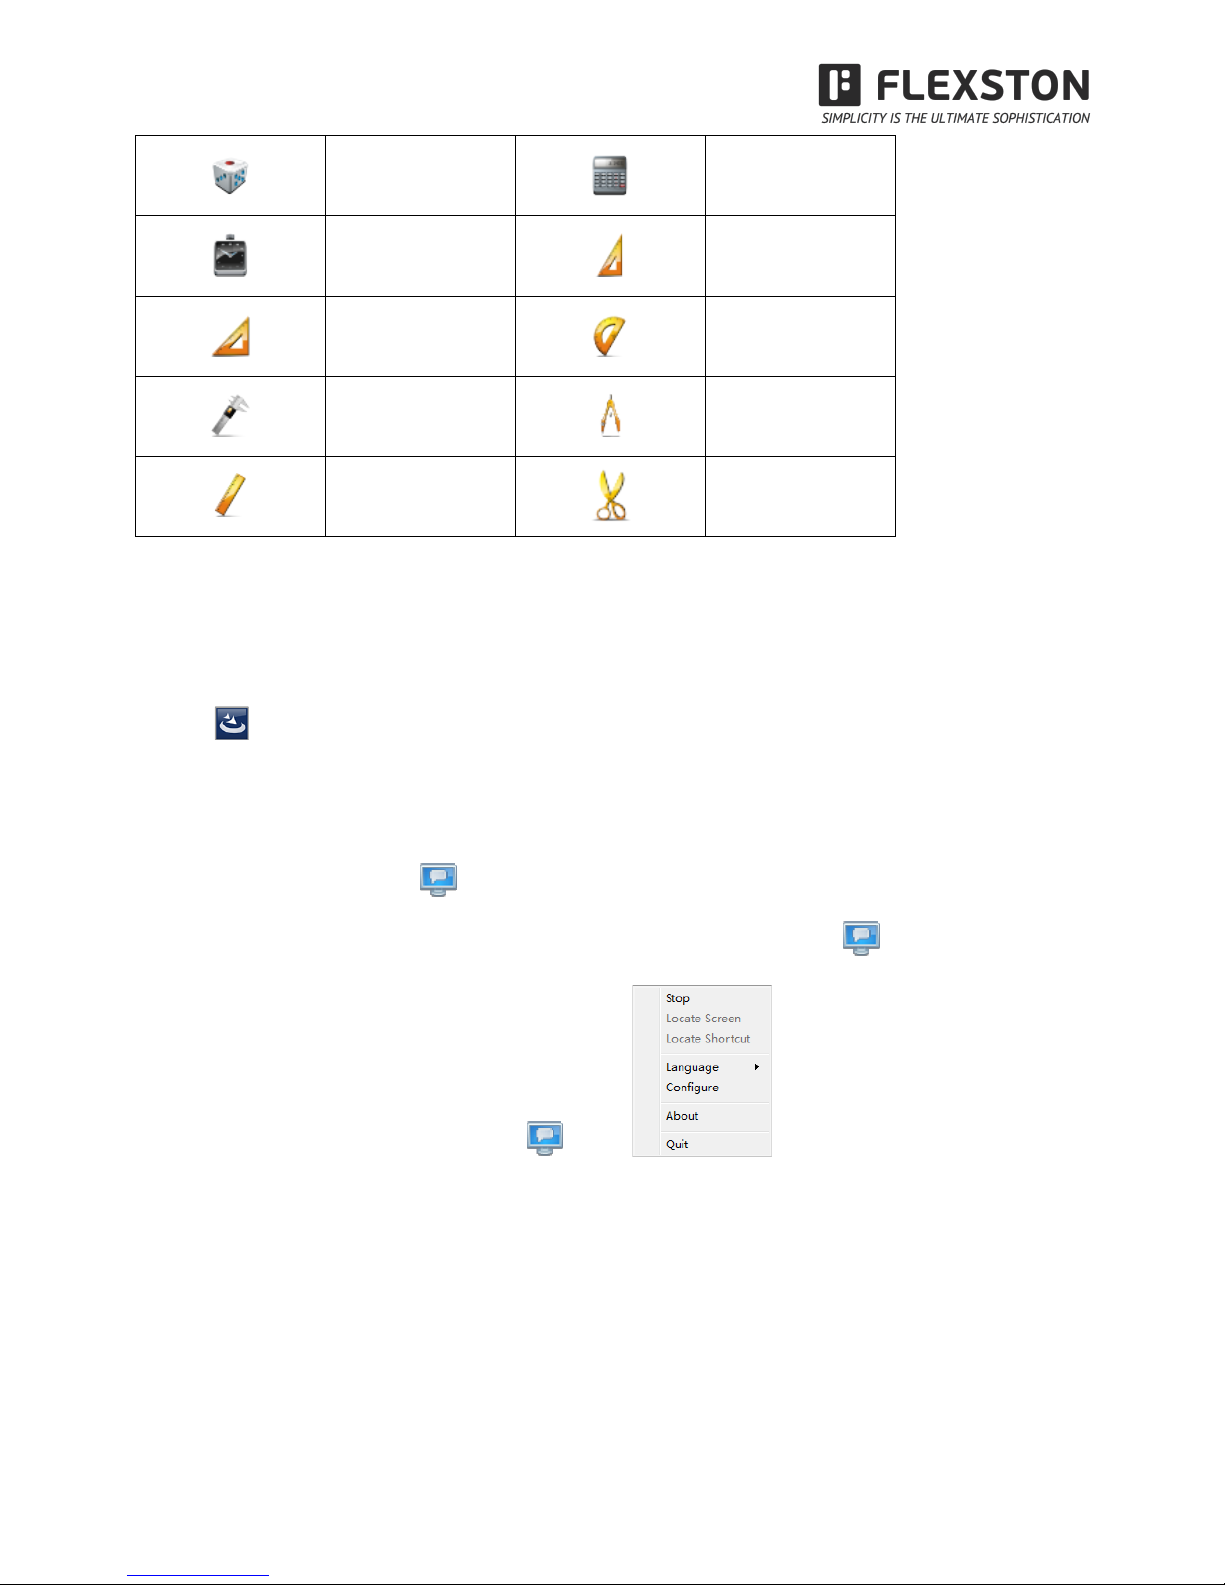
3.3 Calibration
After installation,the icon will display on the desk.First of all,double-click this icon to establish
connections between between interactive whiteboard and PC.Then The icon will appear in the lower
right corner of the whiteboard.Right-click ,pop-up ,click “Locate Screen”. Enter it, the
display will show:

$
$
visit$www.flexston.com$for$more$information$ $$$$$$$$$$$$$$$$$$$
14$
Use writing pen click the center of the cross intersection in turn,the location is completed.
3.4 Start & Exit
Start the software in two ways:
1.Double click or right-click the shortcut on the desktop .
2.Select the ”start” menu,choose ”program” item.Find the “Interactive Whiteboard” in the menu,click it,start
the software.
Exit
Click “File” in the menu,select”Exit”.
3.5 Introduction of the software tools
3.5.1 Drop-down Menus
There are lots of hidden submenus in the drop-down menu as showing below:
1. File
2. Edit

$
$
visit$www.flexston.com$for$more$information$ $$$$$$$$$$$$$$$$$$$
15$
3. View
4. Draw

$
$
visit$www.flexston.com$for$more$information$ $$$$$$$$$$$$$$$$$$$
16$
5.Tools

$
$
visit$www.flexston.com$for$more$information$ $$$$$$$$$$$$$$$$$$$
17$
6. Subject Tools
7. Help
3.5.2 How to write on the board?
Directly select the pen with setting line color and width in the main tool bar.
Or on the left side bar, select the icon for more setting.
3.5.3 How to erase on the board?
Object eraser: Click the eraser icon in the toolbar and select the object eraser function, then select the object,
the object will be erased.
Point eraser: This function is the same as that in the traditional blackboard. You can select the point eraser
icon to erase the content point by point.

$
$
visit$www.flexston.com$for$more$information$ $$$$$$$$$$$$$$$$$$$
18$
3.5.4 How to use the Resource in the software and computer?
Click the button or in the left side bar, you can insert various images and files from the resource
and computer, or you can save the outside resources into the gallery.
Drag the selected pictures to the whiteboard, and the picture will be shown in the board with four icons
around as below:
Click the icon , it will show you the following window to operate the computer.
If you want to insert the pictures or files, just drag the files and pictures in the left browser to the whiteboard;
Drag$ it$ to$ rotate$ the$
picture.$
$
Drag$ it$ to$zoom$ in/out$
the$picture.$
Click$ it$ to$ set$ the$
picture$ $

$
$
visit$www.flexston.com$for$more$information$ $$$$$$$$$$$$$$$$$$$
19$
3.5.5 How to use Hyperlink?
To set a hyperlink in your current page, pls click the icon at the left side bar.
Click “Add File” to add some files from the computer as backup;
Click “Add hyperlink” and set what to be linked to websites.
3.5.6 How to create a new file?
In the current page, if you are going to create a file, pls click “File” and then choose “New”. A dialog will popup
and ask if you want to save or don’t save the current contents. After choosing, a new file will be created.

$
$
visit$www.flexston.com$for$more$information$ $$$$$$$$$$$$$$$$$$$
20$
3.5.7 How to save file?
1. Click ”File-Save” or the icon in the main toolbar to select the submenu to save
contents in a special format INT which is available in our whiteboard software only
2. Click ”File-Export”, or the icon in the main toolbar to select the submenu to save
files in formats of various Images(png, jpg, bmp, gif, pbm, pgm, ppt, ppm, xbm, xpm, tiff); PPT; PDF; and
HTML. This function applies to the current page only.
3.5.8 How to open file?
Click ”File-Open” or the icon in the main toolbar to select the submenu , you can open the
documents of INT, PDF, WORD, EXCEL and PPT. Note that Excel should be in version 2007 or above.
Remarks: Images can not be opened with this function but to drag. Pls refer to 3.4.7 the way to open the
images.

$
$
visit$www.flexston.com$for$more$information$ $$$$$$$$$$$$$$$$$$$
21$
3.5.9 How to insert Text?
Pls find icon in the main toolbar, a dialog as below will popup. You could input the contents by
keyboards.
Or, you could click the dotted area and choose the icon , then input the contents by
handwriting.
3.5.10 How to combine object?
You could select multi objects at the same time and choose the icon in “Draw”, then all the

$
$
visit$www.flexston.com$for$more$information$ $$$$$$$$$$$$$$$$$$$
22$
objects would be combined in one group. To cancel this operation, pls choose the grouped object and click
the icon in “Draw”
3.5.11 How to lock object?
If you don’t want to move or change some contents in your lesson, you could lock it. Choose the icon in
“Edit”. To unlock it, pls click in “Edit”.
Remarks: There are two same icons at the sidebar. They are used to control the whole page.
3.5.12 How to use Recorder?
In “Tool”, pls select the icon , the screen recorder will popup.
Click to start

$
$
visit$www.flexston.com$for$more$information$ $$$$$$$$$$$$$$$$$$$
23$
3.5.13 How to make Screen Grab?
In “Tool”, choose the icon Screen Grab, A dialog as below will popup. Pls drag the mouse to the area
which you are going to capture.
To capture contents on the desktop and show them in the writing software, pls select“Export” and click
“screen”. Then drag the mouse in the writing software. Besides, you could choose “Rectangular” or “Custom”
shape to capture a special area instead of “screen” for the whole page.
To capture contents in the writing software, pls select “Grab current page” and “Export”, then click “screen”
and drag the mouse in the writing software. If you prefer to highlight part of the contents, you could choose
“Rectangular” or “Custom” instead of “Screen”.
To capture the contents and save them as file format, you could select “Save” or “Export and Save” instead of
“Export” only.
When you select “Export and Save”, you can save the captured contents and also export it to the writing
software by dragging the mouse.
3.5.14 How to use Smart Pen?
In “Draw” or the main tool bar, you could find the icon . That is smart pen. It could recognize the random
shape and change it to standard shape automatically.

$
$
visit$www.flexston.com$for$more$information$ $$$$$$$$$$$$$$$$$$$
24$
3.5.15 How to use Spotlight?
Find the icon Spot light in “Tool”, drag the mouse in the background area to highlight any contents at
any places.
Put the mouse in the highlight shape frame and drag it to zoom in or zoom out the showing area.
Hold your finger for few seconds on the board or right click in your computer or click the menu on the
bottom right to set the spotlight property.
Click the icon in the right bottom to exit.
3.5.16 How to use Curtain?
Select the icon in “Tool”, and drag in the writing software, a curtain will appear to cover your current
screen. To cover or reveal more contents, you could drag the four arrows at the four sides.
Drag the red frame to zoom
in/out the showing room
$
$
$
Drag the background area to
move the highlight frame
$
$
$
$

$
$
visit$www.flexston.com$for$more$information$ $$$$$$$$$$$$$$$$$$$
25$
Hold your finger for two seconds on the board or right click in the computer or click the menu on the bottom
right to set the curtain property.
3.5.17 How to use Arrow?
In “Tool”, find the icon . A red arrow would be shown in the screen. To change the direction, you could
drag the top.
Hold your finger for few seconds on the board or right click in the computer, a menu will popup to set the
property.
Drag the arrow to
reveal or cover the
contents.
$
$
$
$
Menu&
$

$
$
visit$www.flexston.com$for$more$information$ $$$$$$$$$$$$$$$$$$$
26$
3.5.18 How to use Screen Postil?
When you are going to make some remarks in Word, PowerPoint or Excel file, pls choose “Screen Postil”
function in “Tool” or click in the main tool bar. Select a hard pen in the icon , and a red cross
will appear on the top right. You can start inputting and after that, if you select office embed icon
in the main toolbar, your annotation would be saved in the file.
3.5.19 How to play the video files?
Click the icon in the left side bar, select the video file and drag it to the whiteboard. You would see a
player window as below. Just click the central icon to start playing. Pls see the illustrated pictures in
the following:
Red cross to show
you the annotation
is permitted

$
$
visit$www.flexston.com$for$more$information$ $$$$$$$$$$$$$$$$$$$
27$
Notice: The software support multi video playing at different progress. You can adjust it freely.
The size of the playing window can be changed by dragging the controlling point around the window. And
also you can double click the window to realize the full screen playing.
3.5.20 How to switch layer of pictures?
This software can not only move the picture in the plane position, but also can switch layers as required. Just
Select the TOP icon , BOTTOM icon , UP icon and DOWN icon in “Draw” to
realize it.
Click this button to
play the video.
Drag controlling point
here to change the
window size
Support multi video
playing at one time.

$
$
visit$www.flexston.com$for$more$information$ $$$$$$$$$$$$$$$$$$$
28$
3.5.21 How to use Re-broadcast?
Click index page in the left side bar, you will see the icons in the left bottom. It is
easy to realize the operations of REBROADCAST on the whiteboard:
PlayBack: Display the operating process backwards, from the beginning to the end.
Slow forward: Slow down the speed of display.
Fast Forward: Fast display.
Pause: Stop rebroadcasting and return to the interface of the last operation.
3.5.22 Subjects-Math
Function: Set square 30, set square 45, protractors, vernier caliper, ruler, compasses
3.5.23 Application of the special tools
3.5.23.1 Dice
Click the icon Dice in the menu “Tool” and it starts rolling, then double click it to stop rolling and select
your random number.
To start again, pls hold your finers on the board for few seconds or right click in the computer to select ”roll”,
or exit to end dice.
3.5.23.2 Calculator
Select calculator in “Tool”. Click it with your fingers or mouse to calculate.

$
$
visit$www.flexston.com$for$more$information$ $$$$$$$$$$$$$$$$$$$
29$
3.5.23.3 Magnifier
Click or in the expanded main toobar to zoom in\out the whole page. To enlarge partial contents,
click the icon magnifier in the menu”Tool”to activate the magnifier function. Then, the area around the
mouse would be enlarged in different multiples. The attributes can be set in the drop-down menu.
3.5.24 Measure tools
It belongs to the Subject-Math, and pls find them in the bottom side barof the software:
Enlarge partial content

$
$
visit$www.flexston.com$for$more$information$ $$$$$$$$$$$$$$$$$$$
30$
3.5.24.1 Protractor
The protractor can not only measures the angle, but also can be used to draw arc, angle and sector. To use
the drawing functions, pls click the icon and select it from the drop-down menu. Then drag the mouse around
the EDGE to realize different angle graphic.
3.5.24.2 Triangle
There are isosceles right triangle and 30 degree right triangle functions and can be used to draw line or
measure the distance. To drag it, just click any position in the tool. Put the mouse on the edge, you could
draw line.
3.5.24.3 Ruler
You could draw line or measure distance by ruler. Drag the mouse on the edge to get a line. Click any
position to move it.
Also you can change the measure unit in the setting by left click.
Drag mouse on the edge to
draw
Select the shape you want
to draw
Zoom in/out the tool
Rotate the tool
Zoom in/out the tool
Rotate the tool
Drag mouse on the
edge to draw
Drag mouse on the edge to
draw

$
$
visit$www.flexston.com$for$more$information$ $$$$$$$$$$$$$$$$$$$
31$
3.5.24.4 Compass
The compass could be used to draw arc or sector except circle. Pls click the top position of the compass,
then choose the different function in the submenu.
4 FAQ
A. Why my writing is unable to be displayed on the screen?
Please try another color which is different from the background.
Please remove any other object away from the screen when writing.
Please make sure that the software of Interactive Board is running.
B. Why the icon display in the task bar at the right bottom of the screen?
(1) The USB cable is in poor connection between the whiteboard and computer. Please make sure the
connection is not loose.
(2) The USB cable is not of the original packing. The USB cable adopted is made of superior quality materials
for Interactive Whiteboard application, which can not be substituted.
Rotate the tool
Zoom in/out the tool
Click the tool to set the
measure unit or quit.
Drag to move the
tool
Drag to draw Arc or Sector
Drag the leg to change the
angle
Click to select functions in
the setting

$
$
visit$www.flexston.com$for$more$information$ $$$$$$$$$$$$$$$$$$$
32$
Abnormal situation appears during installing the software. Please uninstall the software and restart the
computer, then install the software again.
(3) USB cable connection between the computer and whiteboard is improper. Please refer to the user manual
and correct the connection.
If the icon is not displayed in the taskbar at the right bottom of the screen,please re-start the
server.exe and InteractiveBoard.exe.
C. Is it necessary to do the position “locate” operation again after reinstalling the software of
interactive whiteboard?
No, it’s not necessary. The system has remembered your last parameter of position locating.
D. Is the content which is covered by window of “index page” lost?
No, the content still exists there, it’s just temporarily covered.
E. How to know the working state of Whiteboard?
When there is any touch on the board, if the light at the right bottom of the board will turn blue. It shows the
whiteboard is working correctly. If the light keeps still as red, it shows the whiteboard
may have problem in hardware.
F. Why sometimes no change happens after changing the background color?
It’s probably that the background color is covered by another big size picture. So we can’t see the color is
changed.
G. What kind of projector is required to equip with the whiteboard?
All the projectors will be ok if only they meet the following 3 points:
(1) It is front projector.
(2) It supports the resolution of computer.
(3) Luminous flux ≧ 500 lumens, specific requirement depends on the room size.
H. How to clean the Whiteboard surface?
Gently wipe the whiteboard surface by clean wet cloth.
Note: Do wring the wet cloth, make sure the water won’t soak into the frame
 Loading...