

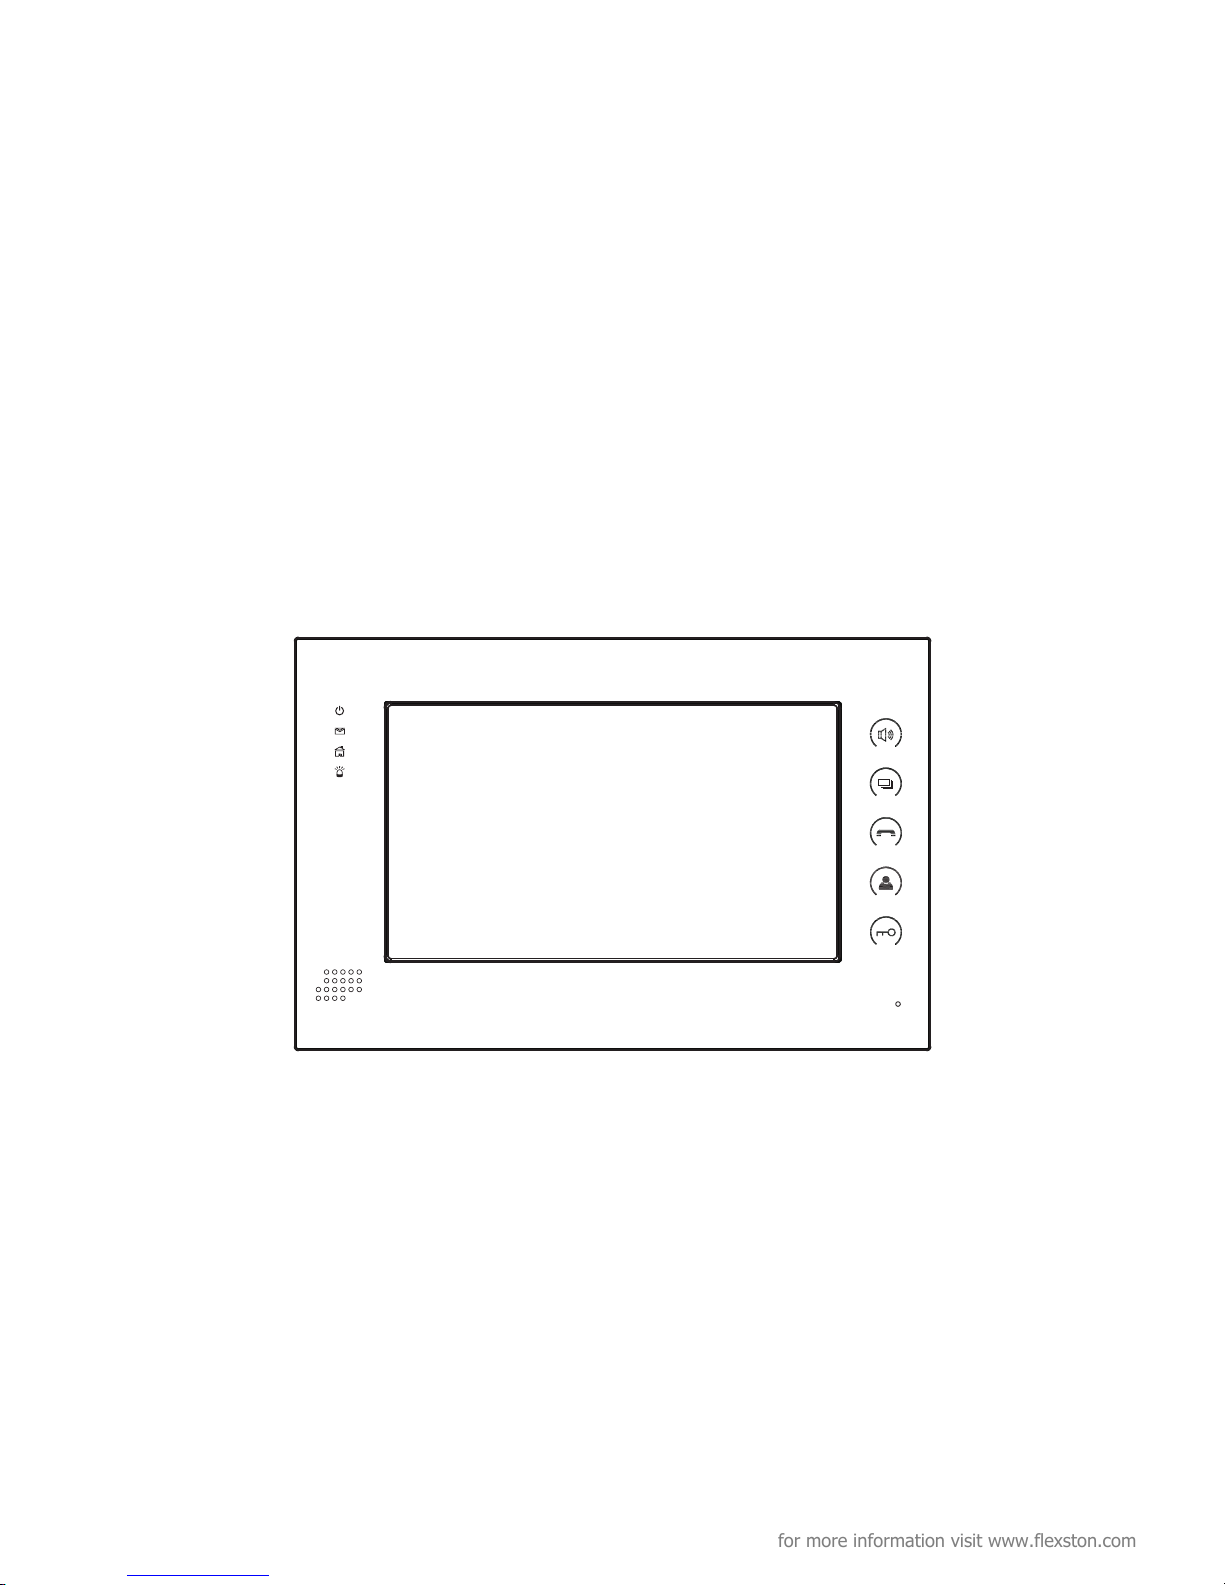
User Manual
DomoFlex Indoor Monitor
Models: 101IP/701IP/702IP/703IP
for more information visit www.flexston.com
Table of Contents
4
Product Features
Technical Specifications
Know Your Device
Operations
1. Home security
2. Communication
3. Home Control
4. Multi-media
5. System settings
9
13
17
19
for more information visit www.flexston.com

Product Features
1. 7’ or 10’ Touch screen.
2. Friendly interface, easy change to match with your decorative style.
3. Intercom with Outdoor panel, flat panel and Management Center.
4. Support 8 alarm stations, can be extended to 16 alarm stations
(Emergency, Smoke, Gas, IR, Magnetic contact for door or window).
5. Monitor Max. 8pcs IP cameras (ONVIF protocol).
6. Audio/video intercom between each indoor monitor.
7. Communicate with VOIP, PSTN or mobile phone.
8. Support Web Browser (appointed by system provider).
9. Connect max. 6pcs indoor monitors in one house.
10. Image/ video/ audio records from outdoor panel.
11. Message receiving from management center, max. 60 pcs.
12. Answering machine with video/audio message.
13. Multimedia playing such mp3, mp4 and photo frame with SD card.
14. Support Smart Home control module.
15. Easy installation, use international standard RJ 45.
16. Use TCP/IP protocol base on LAN network, no distance and apartment quantity
limitation, multi channel intercom.
17. Easy maintenance : automatic fault detection, software upgrade
with SD card.
-1-
Technical Specifications
Voltage: DC 12V
Rated power: 6W
Standby power consumption: 2.5W Display screen: 7'' / 10.2'' Resolution: 800*480 /
1024*600
Operating temperature: 0℃~+50℃Relative huminity: 20%~93%
Max SD card capacity: 32G
for more information visit www.flexston.com
-2-
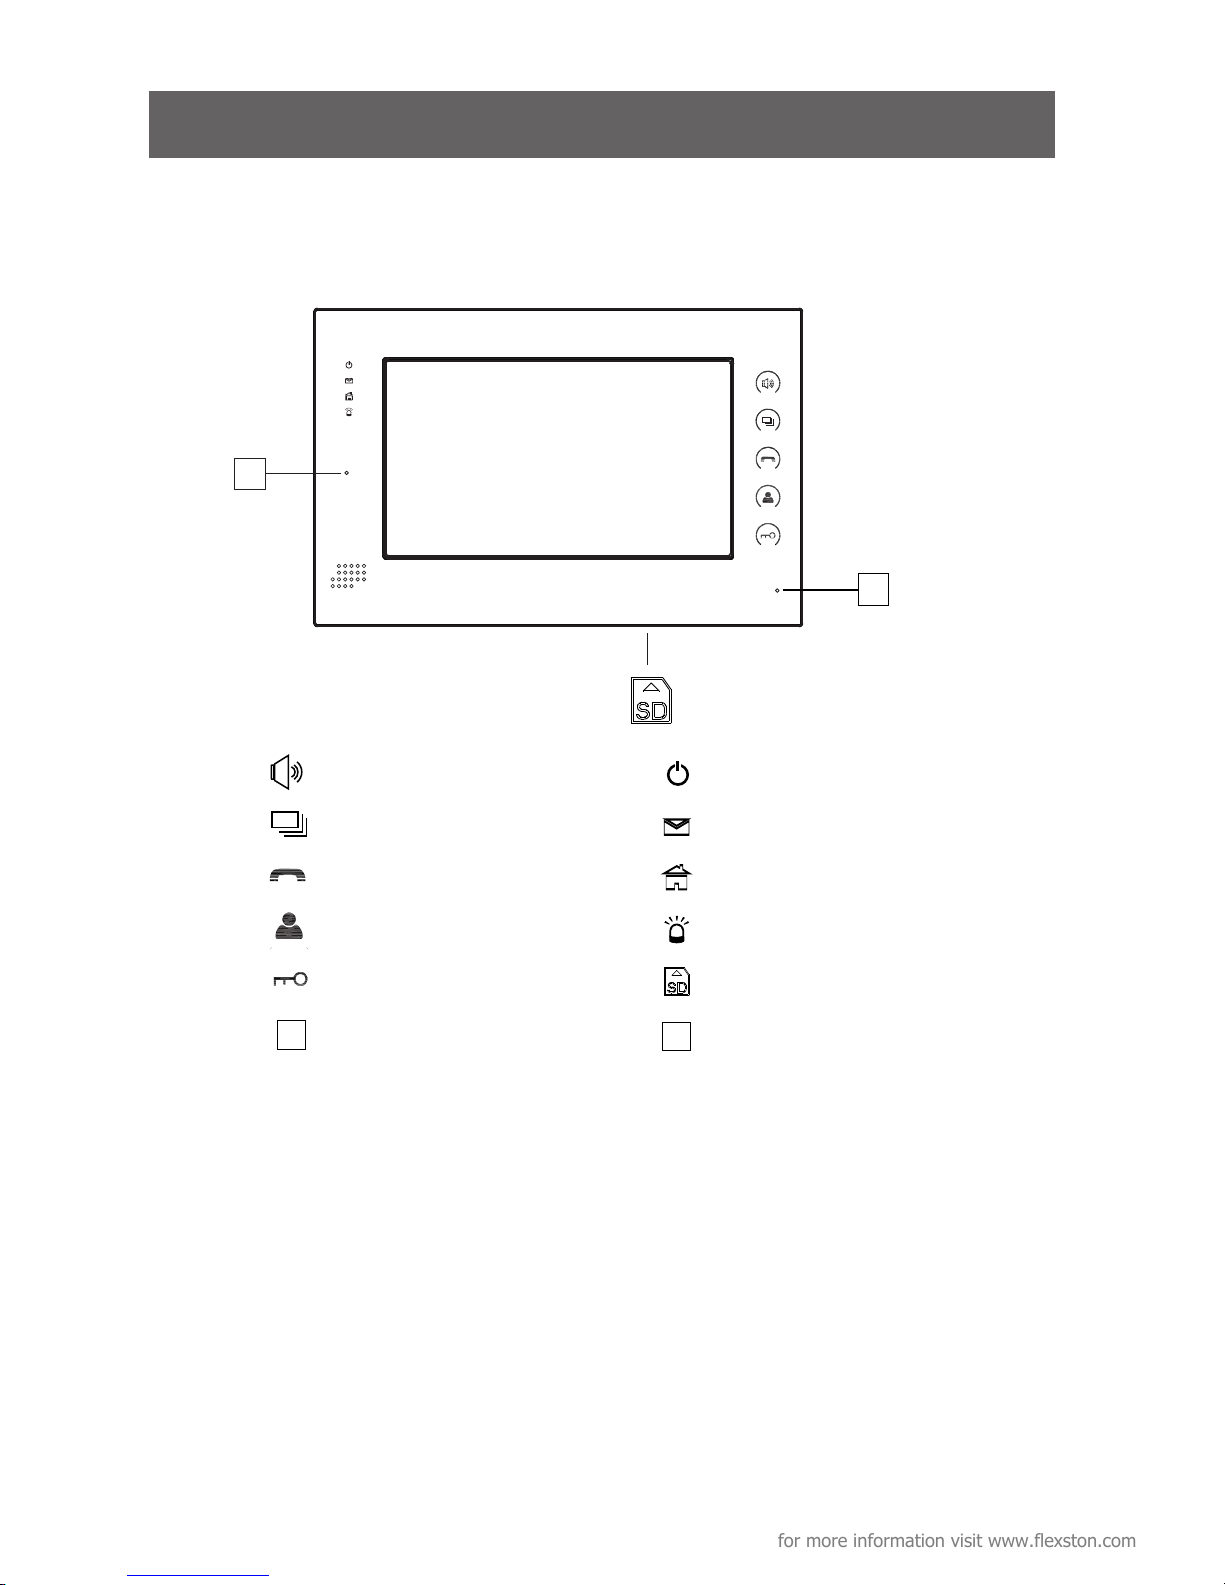
Hand-free
Photo frame
Calling management center
Monitoring
Unlocking
Microphone
Power indicator
Message indicator
Alarm setting indicator
Alarm indicator
SD card slot
Camera
Below picture as an example to describe the feature of each icon.
Know Your Device
*
*
for more information visit www.flexston.com
#
#

-3-
Main interface: Home Security, Communication, Home Control, Multi-media and
System Settings.
Status bar: Service Call & Info, SIP mark, Voice message, Alarm status, Mute mode,
Community message, and Network mark.
Status bar instruction:
1. Service Call &Info : to browse the appointed website.
2. SIP mark : when register SIP server successfully, the mark is lighted.
3. Voice message : click to listen the voice message.
4. Alarm status : it will flash and you’ll hear “DI-DI” tone when setting up, to
indicate your alarm sensors will be actived after 100 seconds .
5. Mute mode
: Click to set ON or OFF of mute mode.
6. Community message
: Click to read the community message.
7. Network mark : Connect with network properly or not.
Operations
for more information visit www.flexston.com

Each indoor monitor can be connected with max. 16 alarm zones. Click icon
on on the main interface, the system will enter the following interface.
Three security alarm models for option: At home, Outside and Sleep.
1.Home Security
-4-
1. 1 Alarm ON/OFF
1.1.1 To Alarm
Click “At home” “Outside”, or “Sleep” icon to active the alarm sensors, the
icon on the main interface will light with a “Di-Di” tone. After the set delay time,
the security alarm will operate and this icon will light up.
1.1.2 Stop Alarm
During the set alarm delay time, Click icon , the system will sound a tone,
thenthe alarm is stopped.
for more information visit www.flexston.com

-5-
1.1.3 Alarm OFF
If the system is in “Alarm ON” mode and you need to cancel it, you must input
the user password (the default password is 1234).
1.2 Setting
Click icon, then input the user password (the default password is 1234), the system
will enter the following interface:
Delay: refer to the delay time of alarm on. It can be set as following: 0s, 30s, 40s,
60s, 100s, 300s. For example, if you set it as 30s, it will be alarm on after 30 sec.
Remark: If the system is in “Alarm ON” mode, zone setting cannot be operated.
for more information visit www.flexston.com

1.2.1 Alarm Type
Click type input box, it will popup a dialog box as the following. In this
interface, you can set alarm Type as: 24H, Normal and Emergency. 24H and
Emergency type are always active. If you chose Emergency type alarm will sound only
at management center.
1.2.2 Delay Time
Click Delay setting box, it will popup the following dialog box: 0s, 5s, 10s, 15s,
20s, 25s, 40s and 60s. Choose the desired delay section. For example, you select the
delay time: 5S. Once the alarm sensor is triggered, 5 seconds later, the indoor monitor
will sound sirens.
-6-
for more information visit www.flexston.com

1.2.3 Sensor Type
Click sensor type input box, it will popup a dialog box such as the following
interface. Each sensor type can be set up as: Smoke, Gas, PIR, Door, Window,
Panic, Flood, Pull Cord and Bed Mat.
-7-
When alarm sensor is triggered, the indoor monitor will make a loud alarm
sound, the system will enter into the following interface, and send alarm message to
management center (if equiped):
You can see sensor number and type in red color showed at the top of
interface. For example: "2:Smoke 3: Smoke" to indicate that Zone 2 and Zone 3,
Smoke sensor are triggered.
To stop the alarm sound, input the password (the default password is 1234).
for more information visit www.flexston.com

Click icon, the system will enter into the following interface:
Click or
icon to
monitor. Click
icon to select the IP Camera to monitor; Click
icon to stop the monitoring.
-8-
1.3 Scene Mode
Click icon, input the user password with 4 digits(the default password is
1234), the system will enter into the following interface:
referes to Alarm ON, s refers to Alarm OFF. To set the sensor of alarm
stations, you can click the corresponding station with icon.
Remark: If the system is in “Alarm ON” mode, Scene Mode cannot be operated.
1.4 IP Camera
for more information visit www.flexston.com

-9-
Click icon in the main interface to enter communication teatures, it
includes: Monitoring, Calling, Records and Community message.
2.Communication
Click icon to switch into monitoring Main or Sub door panel. Click or
icon icon to select desired panel number. When select Main 1~9, it monitors
outdoor panel; when select Sub 1~9. it monitors the flat panel. Click icon to
monitor, click icon to stop monitoring, click icon to unlock the door.
2.1 Monitoring
Click
icon to enter the following interface:
Main1
for more information visit www.flexston.com

-10-
2.2 Calling
2.2.1 Calling Other Apartment Indoor Monitor
Input 1 to 4 digits + “Building”+1 to 2 digits + “Door”+1 to 4 digits room number,
then click icon. For example, you would like to call indoor monitor:
0001010807. You can input 1 and click “Building” icon, then input 1 and click
“Door” icon, and then input room No. 0807, finally click icon. Click icon
to
delete the wrong input.
2.2.2 Calling your sub Indoor Monitor
If it connects with sub indoor monitor, click icon to select the corresponding
device to make internal intercom.
2.2.3 VOIP phone
You can dial the phone number which registered in the SIP server, then the
system will get through the phone. ( Please refer to the installation instruction about
VOIP setting.)
2.2.4 Answer the call
When someone calls in, the system will enter into the following interface:
1-
1-705 Call in...
for more information visit www.flexston.com

-11-
2.3 Records
Click icon, system will enter into the following interface:
referes to outgoing call; refers to received calls; refers to missed calls. I
The max. quantity of records is 20.
Click icon to answer the call; click icon to hang up; click icon to
unlock the door. If one calls the monitor and no one answers, the system will snap the
visitor’s 1pc image automatically. During the communication with the visitor, click
icon to zoom in the visitor’s image, and click icon to snap more images of
the visitor.
During the call, Click icon, the system will record the video, click icon,
the system will record the audio.
2.2.5 Calling the management center
The system can connect max. 5 pcs management center. Click icon to call
the management center, when center 1 is busy, it will call the next
management center from 2~5.
Calling center...1
1 2010-01-01-08:02 1010226
2 2010-01-01-09:28 1010502
3 2010-01-01-09:40 1010601
4 2010-01-01-10:30 1010705
for more information visit www.flexston.com

-12-
Click icon, system will enter into the following interface:
icon, the system will display the visitor’s image, video and audio (if Click
recorded); click
icon to paus, click icon, the system will return
to the previous interface.
2.4 Community message
Click icon, the system will enter into the following interface:
1
2
2012-06-18 14:34
2012-06-18 14:24
referes to the unread message. When there are unread messages, the icon
in interface will light up, and when the message interface is entered, the icon will
light off.
Click icon to page up; click icon to page down; clic k icon to delete
the record.
for more information visit www.flexston.com

3.Home Control
Attention: Home control function should be connected with smart home
module to use, otherwise this function is invalid.
In the main interface, click
icon, the system will enter into the following interface:
3.1 Scene Mode
Click icon, the system will enter into the following interface:
Scene mode includes: Home, Out , Sleep, Party, and Dinner.
-13-
for more information visit www.flexston.com

3.2 Light
Click
icon to enter the following interface:
Set the light of corresponding room, such as Master, Sub, Living and Dining
(see the room setting for details), max 8 lights can be set in every room. Click the
corresponding light icon, then you can control the light turn ON/OFF.
3.3 Air-condition
Click icon to enter the following interface:
Set the air-condition switch of corresponding room. Click icon to turn air-
condition on/off; click icon to cool; click icon to heat; click icon to ventilate.
-14-
for more information visit www.flexston.com

-15-
3.4 Curtain
icon in the home control interfaceto enter into the following interface: Click
Click iconto open the curtain. Click icon to pause movement. Click icon to
close curtain.
3.5 Elevator
Click icon to enter into the following interface:
Click or to control the elevator to up and down. Click icon to
open the floor that the indoor monitor is located.
Remark: To support this interface, your system must connect with “Elevator
Control” module. Kindly check with your system provider.
for more information visit www.flexston.com

-16-
3.6 Room Settings
Click icon to enter into room settings interface.
3.6.1 Room
You can add, delete room data and change the room name. The room types
includes: Living, Dining, Master, Sub, Study, Kitchen,
There are max. 20 rooms you can set. After setting, click icon to save it.
3.6.2 Light
There are max. 8 routes light for each room. You can set the corresponding
room’s lamp. Choose the room type first, then you can set the name for each
light, the lamp includes: Lamp, Wall, Ceiling, Table, Floor, Pendant, Crystal and
Spot. Click or icon to see all lights. After setting, click icon to save it.
for more information visit www.flexston.com

-17-
4 Multi-media
Click icon to enter the following interface:
4.1 Voice message
Click icon to enter the following interface:
Click icon to record. The longest recording time is 30 seconds. Click icon to
stop recording and store it. If the recording time is reached to 30 seconds, the system will
end the record and save it automatically. Select any in record, click icon to play. Click
icon to delete the selected record. Click or icon to listen the previous or
next voice message.
for more information visit www.flexston.com

-18-
4.2 Music player
Click icon to select the file catalogue of SD card, then select the music
folder. Select a song, then click
icon to play it. Click icon or to select
song. Click icon to stop playing the music. The playing type can be set: Random
and Repeat. Click icon to random play the music; click icon to repeat play
the music. WAV, Mp3 .etc formats are supported.
4.3 Video player
Click icon to select the file catalogue of SD card, then select video folder.
The system will enter into the following interface:
Select one video, click icon to play in full screen; click the screen again to
quit the full screen mode. If it has incoming call during video playing, the video will be
paused. After the call, the video will resume playing from the point it stoped
automatically to keep on playing the video after the call.
AVI、MP4、MOV、WMV、RMVB、MPG.etc formats are supported for video.
for more information visit www.flexston.com

4.4 Photo frame
Click icon, then search SD card , select picture folder, then the system will
enter into the following interface, double-click the selected picture to browse in
full screen. JPG、PNG、BMP、GIF、TIF .etc formats are supported. Each picture
should be less than 1Mb.
If device is in stand-by mode for more than 2 minutes, the system will switch
screensaver mode on. If there is no image in SD card, the screensaver will display the
clock; if there are pictures in SD card, the screensaver will display these pictures, the
screensaver time is about 10 minutes.
5.System Settings
Click
icon to enter the following interface:
-19-
for more information visit www.flexston.com

-20-
5.1 Normal
Click icon to enter the normal setting interface. Normal setting includes:
Intercom, Date, Time and Wallpapers.
5.1.1 Intercom
The system supports video intercom between each indoor monitor, when the
camera is set as ON, it allows other indoor monitor to see you, when it is set OFF,
this feature is disabled.
Answering machine: set Video and Audio REC ON. When someone calls but no one
answers, device will auto answer and record video & audio; if only Video REC is set
ON, it will auto answer and record video only; if only Audio REC is set ON, it will auto
answer and record audio only. SD card must be inserted in order to allow Audio or
Video recording.
Monitor: you can set the default monitoring panel.
to save it. The
5.1.2 Date&Time
You can set Time zone, date and time. After setting, click
date and time on the main interface will be adjusted accordingly.
for more information visit www.flexston.com

Remark: Date and time will be reseted to factory default mode if there was
power outage, you will have to set it again. If the indoor monitor is connected to
internet, the date and time will be synchronized automatically.
5.1.3 Wallpapers
In this interface, you can choose the wallpaper you want. Four types of
wallpapers are available for you: Spring, Summer, Autumn and Winter. After
setting, click to to save it.
5.2.1 Sound
You can set System and In-call volume, set Ring and Touch sounds. After
setting, click to save it.
5.2 Others
Click
icon, the system will enter other settings.
-21-
for more information visit www.flexston.com

-22-
5.2.2 User PSW
You can set new user password. The default password is 1234. User password is
used for Home security. After setting, click to save it.
5.2.3 Adjustment
You can set Brightness and Contrast of your device. After setting, click
to save it.
for more information visit www.flexston.com

-23-
5.2.4 Language
You can choose the language you want. After setting, click
to save it.
5.2.5 System PSW
You can set new user password (Please check with your service provider).
for more information visit www.flexston.com

-24-
5.3 LAN
Click icon, input the password, the system will enter into the following
interface (please check with your service provider):
5.4 Room No.
Click icon, input the password, the system will enter into the following
interface (please check with your service provider):
for more information visit www.flexston.com

-25-
5.5 VOIP
Click icon, input the password, the system will enter into the following
interface (please check with your service provider):
5.6 Upgrade
Click icon, input the password, the system will enter into the following
interface (please check with your service provider):
for more information visit www.flexston.com

-26-
5.7 Version
Click icon to see the related version information of this device.
5.8 Adjust Screen
Warning: End users must not set this feature, please ask your service provider.
When you touch the screen and find the icons cannot react normally, please
make the screen calibration.
a. Slowly slide along the direction of arrows, horizontal or vertical on the LCD as
following
for more information visit www.flexston.com

-27-
b. If your indoor monitor has “ “ unlock button, press this button on the
indoor monitor for 5 seconds, the system will enter into the following interface.
Then click the center of cross intersection from
1
to 5 in turn. After adjustment,
the system will exit automatically.
1 2
4
3
5
for more information visit www.flexston.com
 Loading...