

FlexRadio FLEX-6400, FLEX-6600 Installation Manual
FLEX-6400 & FLEX-6600
Rack Mount and Handle
Installation Guide
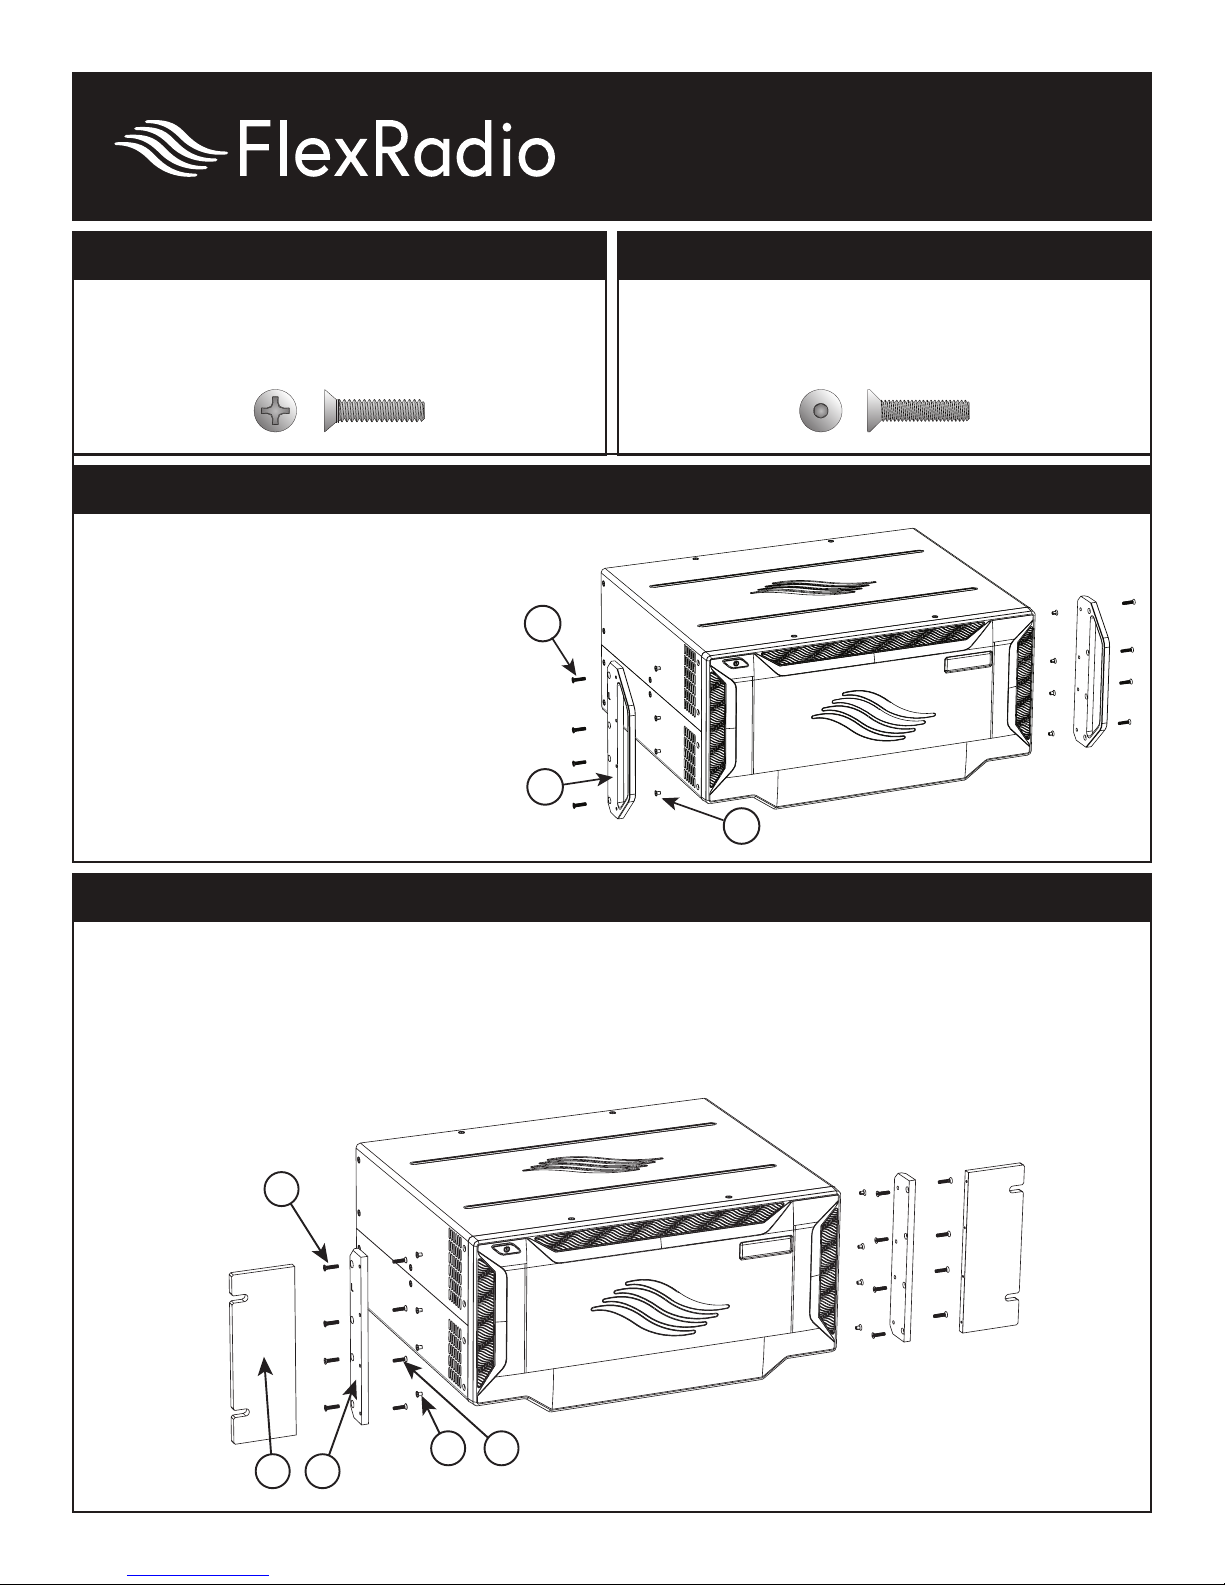
Philips Head Flat Screw (#1 Philips screwdriver)
Referred to as (item 3), this is a longer
replacement screw for fitting the rack mount ear
or handle to the chassis.
For Handles Only
Step 1- Remove cover screws on both
sides of the chassis (item 4).
There are 4 per side.
Step 2- Attach the handles (item 2)
to the chassis with the 4
supplied screws (item 3),
replacing the screws that
were removed in step 1.
Step 3- Repeat steps 2 and 3 for the
other handle.
3
2
M2.5 flat screw (1.5mm hex wrench *included)
Referred to as (item 5), this screw attaches the
rack mount ear or handle to the rack mount.
4
For Rack Mount Only
Step 1- Remove cover screws on both sides of the chassis (item 4). There are 4 per side.
Step 2- Attach rack mount ear (item 1 to chassis bracket (item 2) with the 4 supplied M2.5
screws (item 5).
Step 3- Attach chassis bracket (item 2) to the chassis with the 4 supplied screws (item 3),
replacing the screws that were removed in step 1.
Step 4- Repeat steps 2 and 3 for the
other bracket.
3
4
5
1
2
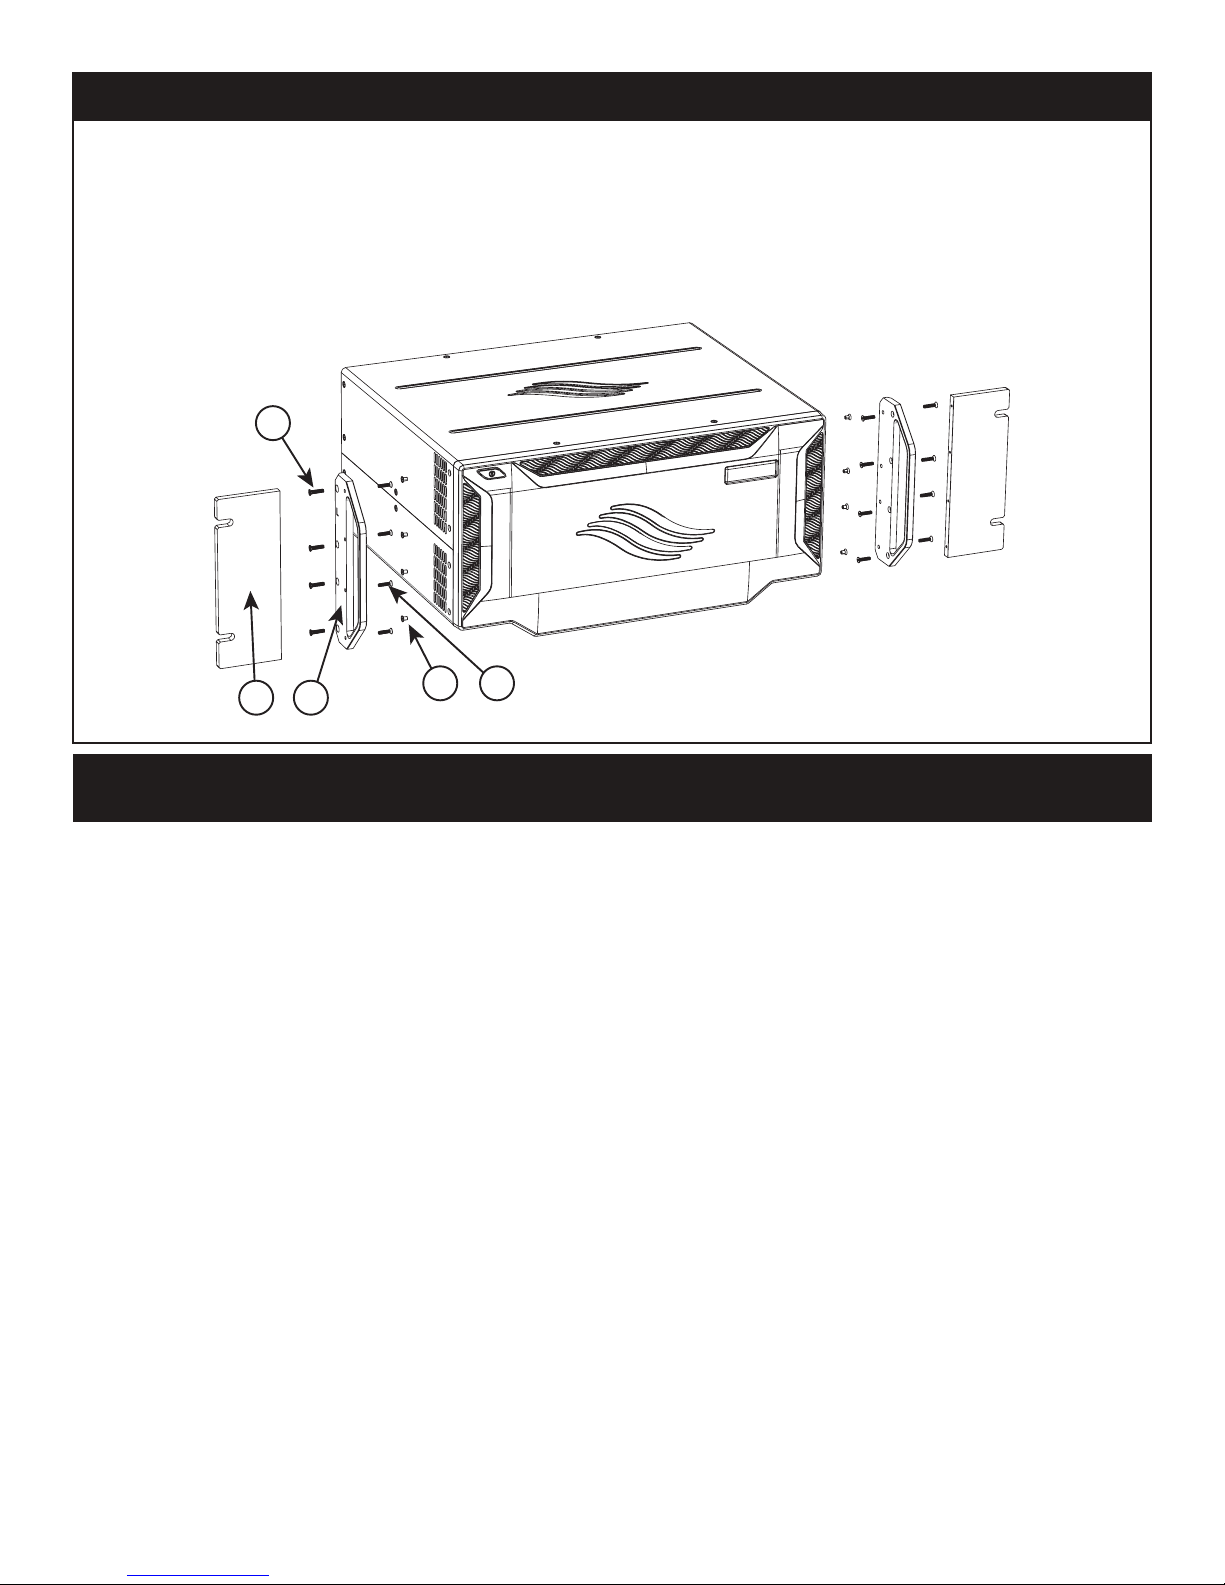
For Rack Mount With Handles
Step 1- Remove cover screws on both sides of the chassis (item 4). There are 4 per side.
Step 2- Attach rack mount ear (item 1) to chassis bracket handle (item 2) with the 4 supplied
M2.5 screws (item 5).
Step 3- Attach chassis bracket handle (item 2) to the chassis with the 4 supplied screws (item 3),
replacing the screws that were removed in step 1.
Step 4- Repeat steps 2 and 3 for the other bracket.
3
4
1
2
For any additional information on safety and operation please refer to the User Manual on the included CD
For technical support go to helpdesk.flexradio.com
5
 Loading...