


User Guide
SP405
Control Panel
94164E-02
2003-08
Keep this documentation for future reference

2
1 Introduction.............................................................................. 3
1.1 Connecting the SP405/existing control panel................................ 3
2 Initial Connection .....................................................................4
3 Technical Data.......................................................................... 5
4 Programming of Connection Times ........................................6
5 Permanent On or Off ................................................................ 7
6 Date and Time (summer/winter)............................................. 7
Our products are constantly developed and the information is therefore subject to change without prior notice.
We do not accept responsibilities for misprints or errors which may occur.
Contents
3
1 Introduction
The SP405 an interleaving 24-hour/week timer with
an automatic change between summer-/winter time
according to new european standard (dat 1). A sun or
a snow crystal is indicated in the display, indicating
summer or wintertime respectively. Functioning as
week-timer the days may freely be programmed in
blocks, meaning that days with the same connection
times is programmed in one block and thereby only
occupying one memory space. (Note: When using
Falcon units the DIP-switch on the controller board is set
according to installation guide.)
When used on the water models S4 W, L4 W and L7
W the link between the the connection terminals
28 and 30 on the unit controller board must be
removed.
Night-level temperature 3°C: Switch 3 is set to ON.
Fan speed reduced to low: Switch 4 is set to ON.)
The timer is preset by Flexit to the following times:
07:00 - 17:00 day 1 - 5.
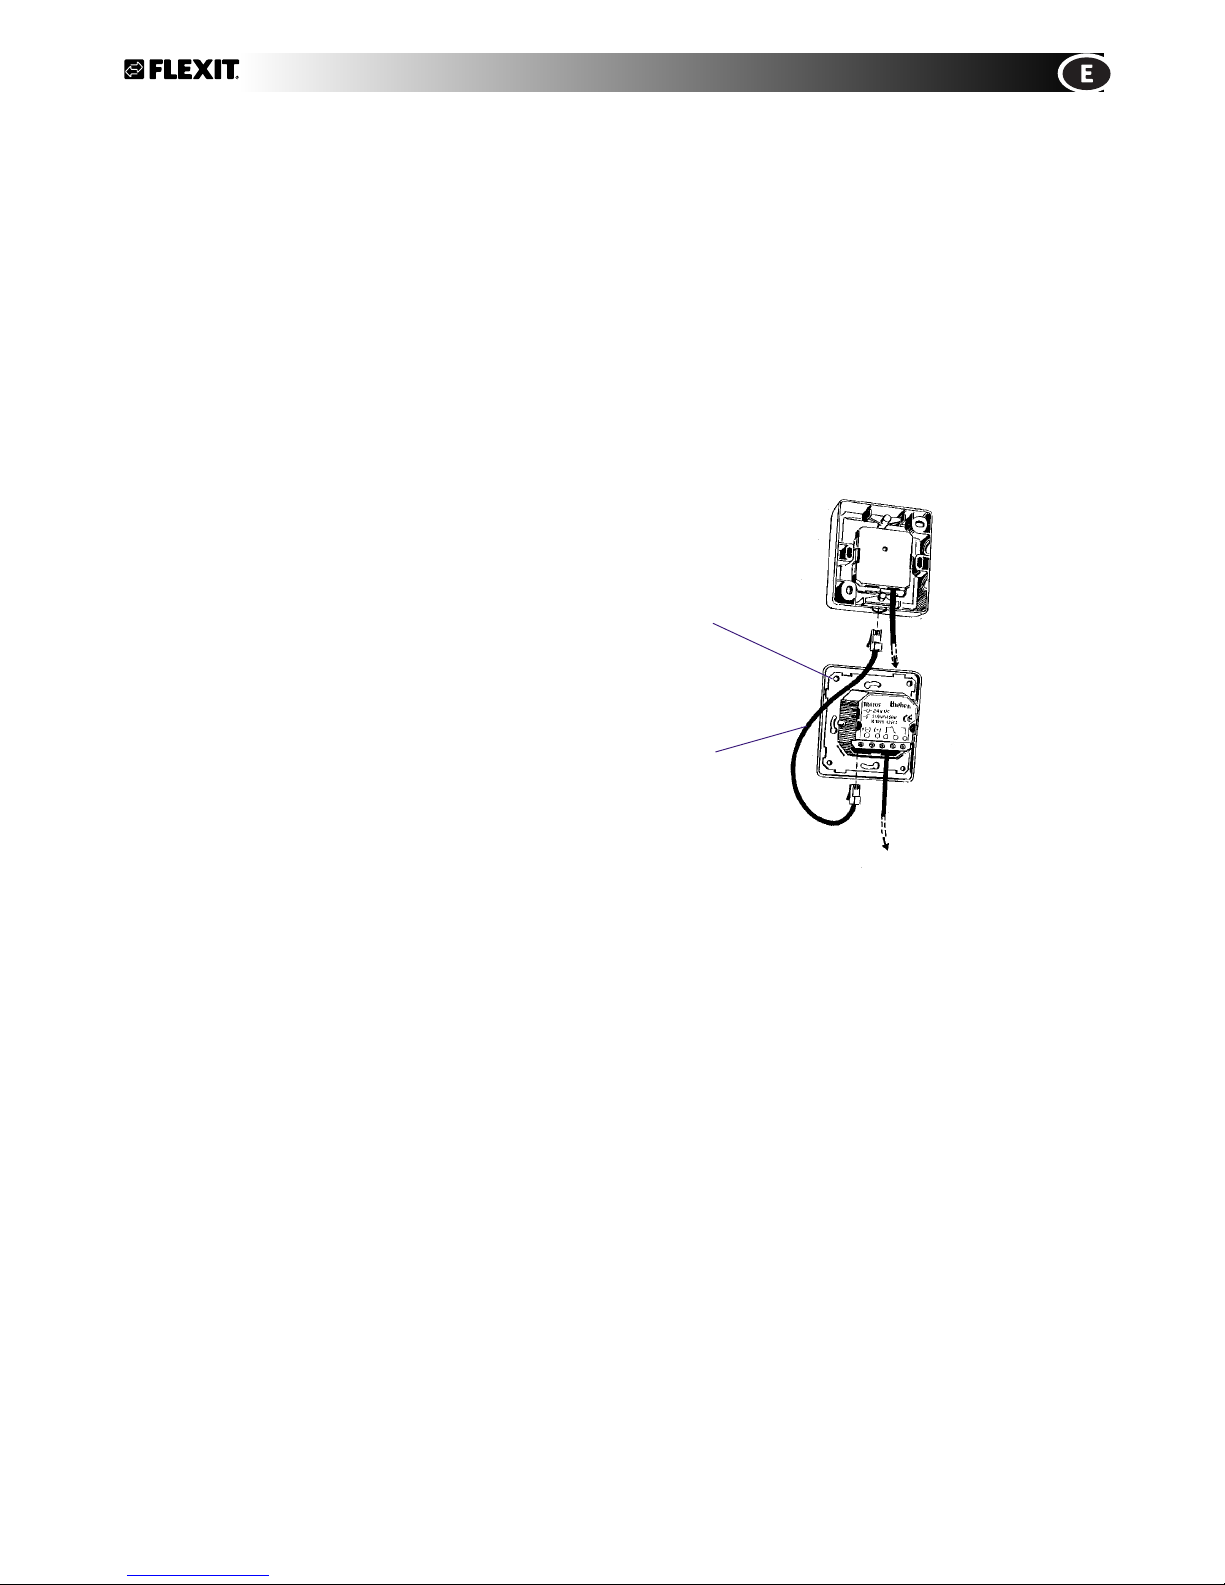
1.1 Connecting the SP405/existing control panel
To connect your existing control panel with the SP405,
follow the description below:
1. SP405 is mounted close to the control panel (check that
the cable goes all the way).
2. The cable with the telephone connection (4-poled) in
both ends is connected between the timer and the existing control panel. The SP405 has two equal terminals
which both may be used for this purpose.
2
1

4
2 Initial Connection
Choice of language / First start-up
For emergency use only! If the control panel is reset all the stored settings will be erased. The control panel remembers
the last language used and summer/winter time. Press the key RES with a pointed object for approximately 1 sec.
In order to change language, press all four keys simultaneously for 3 seconds.
Every model
Every model
Activating the panel, choosing a language:
Choose language with th or key .
The chosen language is stored with the
key.You may now start the programming.
Using the MENY-key you may enter the
programming and check programmes.
In the text display you may make a choice or
store your settings.
The decision YES confirms the
choice or programming.
The decision NO,the next selection
or change is performed with
the or key.
The control panel is delivered in "sleep mode“.
Activating without operational current:
Press the key MENU lightly.
Activating with operational current:
When the control p anel is allready programmed
with current time, day and automatic
summer/winter switch, the current time and
connection status is shown after selecting
the language.
When the control p anel is not programmed:
First select language and then set data and time.
Program,control, change or delete:
Allways read the text in the display first.
Menu choice: Select PROG with the MENU key.
Confirm with the key.
Select the menu you want with the key.
e.g.:New prog.,control, change or delete.
Confirm with the key.
Set or change with the or key.
Save with the key.
Controlling settings:
In the menu CHECK, press the key
repetedly .
ENGLISH
SVENSKA
SUOMI
DK/NOR
POLSKI
DEUTSCH

5
3 Technical Data
Density class II EN
60730-1 when mounted
according to instructions
IP 20 EN 60529
42 programming
slots
Lithium,
approx. 3 years
running time
Min. -10°
to
Max. +50°
Type 1 BSTU to
EN 60730-1, 2-7.
Use in standard
environment
Technical Data
PROGRAM
NEW PROG
CHECK
MODIFY
CLEAR
END
DAT/TIME
YEAR
MONTH
DAY
HOUR
MINUTE
SUM/WIN
MANUAL
OVERRIDE
PERM ON
PERM OFF
HOLIDAY
END

6
4 Programming of Connection Times
Connection times for ventilation systems.
Block programming of days:
The same settings for several different days
only occupies on memory space, e.g.
Monday - Friday 07.30 ON. You have 42
available memory spaces.
Block programming:
When asked Copy, respond with the key
for the current week program to be copied
to one or more weekdays.
Mixed programming of connection impulse
and cyclus times is not permitted.
When programming ON or OFF
connection times, e.g. 09.00, the
disconnection time (OFF) always
has priority.
Programming retrospect:
After programming the control panel
always makes a retrospect in the
program untill midnight and then sets
the corrrect programming status.
Save
Example: Connecting the lighting in a sports
centre Mon., Tue., Thu., Fri. from 07.00 to
12.00. Example of programming:
Chose PROG with the MENU key.
Save with the key.
Select new program with the or key.
Savewith the key.
Select ON or OFF with the or key.
Save with the key.
Set hours and minutes with the or key.
Save with the key.
It is only this weekday which is saved:
Select the next weekday with the or key.
Save with the key.
Choose with Save.
Save with the key.
Copying to other weekdays:
Select the next weekday with the or key.
Save with the key.
Save copies with the key.
Skip a weekday and move on by pressing the
key.
Finally choose the display Save with the key.
Save with the key.
MONDAY
COPY
PROGRAM
END
CLEAR
STORE
MODIFY
CHECK
NEW PROG
ADD TU
ADD WE
ADD TH
ADD FR
ADD SA
ADD SU

7
5 Permanent On or Off
Installation of random use or holiday program.
Read the display text before moving on.
Select from the MANUAL menu:
Override, Permanent or Holiday
using the or key
Confirm your choice with the key.
Reversing a function :
Select the function Clear.
Save with the key.
When the Holiday program is activated, the actual channel
blinks, in addition to showing Holiday on the menu display.
Using the Holiday program:
The Holiday program is set to not connect the
attached unit between programmed starting
and ending point (entered year, month, day).
The Holiday program always start and end
at midnight on the programmed day.
E.g. 25.3. Holiday
Programming: Start 25.3. End 25.3.
MANUAL
END
HOLIDAY
PERM OFF
PERM ON
OVERRIDE
6 Date and Time (summer/winter)
Setting and changing the summer/winter mode.
Read the text in the disply
first.
Select with the or key .
Save with the key.
Programmable summer/winter
time:
By entering month and week,
for instance;
Month 3 = Mars
Week 4 = week in month
Week 5 = last week
Automatic summer/winter adjustment:
The control panel is factory set for European
summer/winter adjustment..
If you want to turn off or change the automatic
settings, follow the instructions on the display.
Select with the or key.
Save with the key .
EUROPE
GB
USA/CAN
FREE
DATE/TIME
YEAR
MONTH
DAY
HOUR
MINUTE
SUM/WIN
WITH S/W
NO SU/WI

Flexit AS, Televeien 15, N-1870 Ørje www.flexit.no
 Loading...