

Page 1
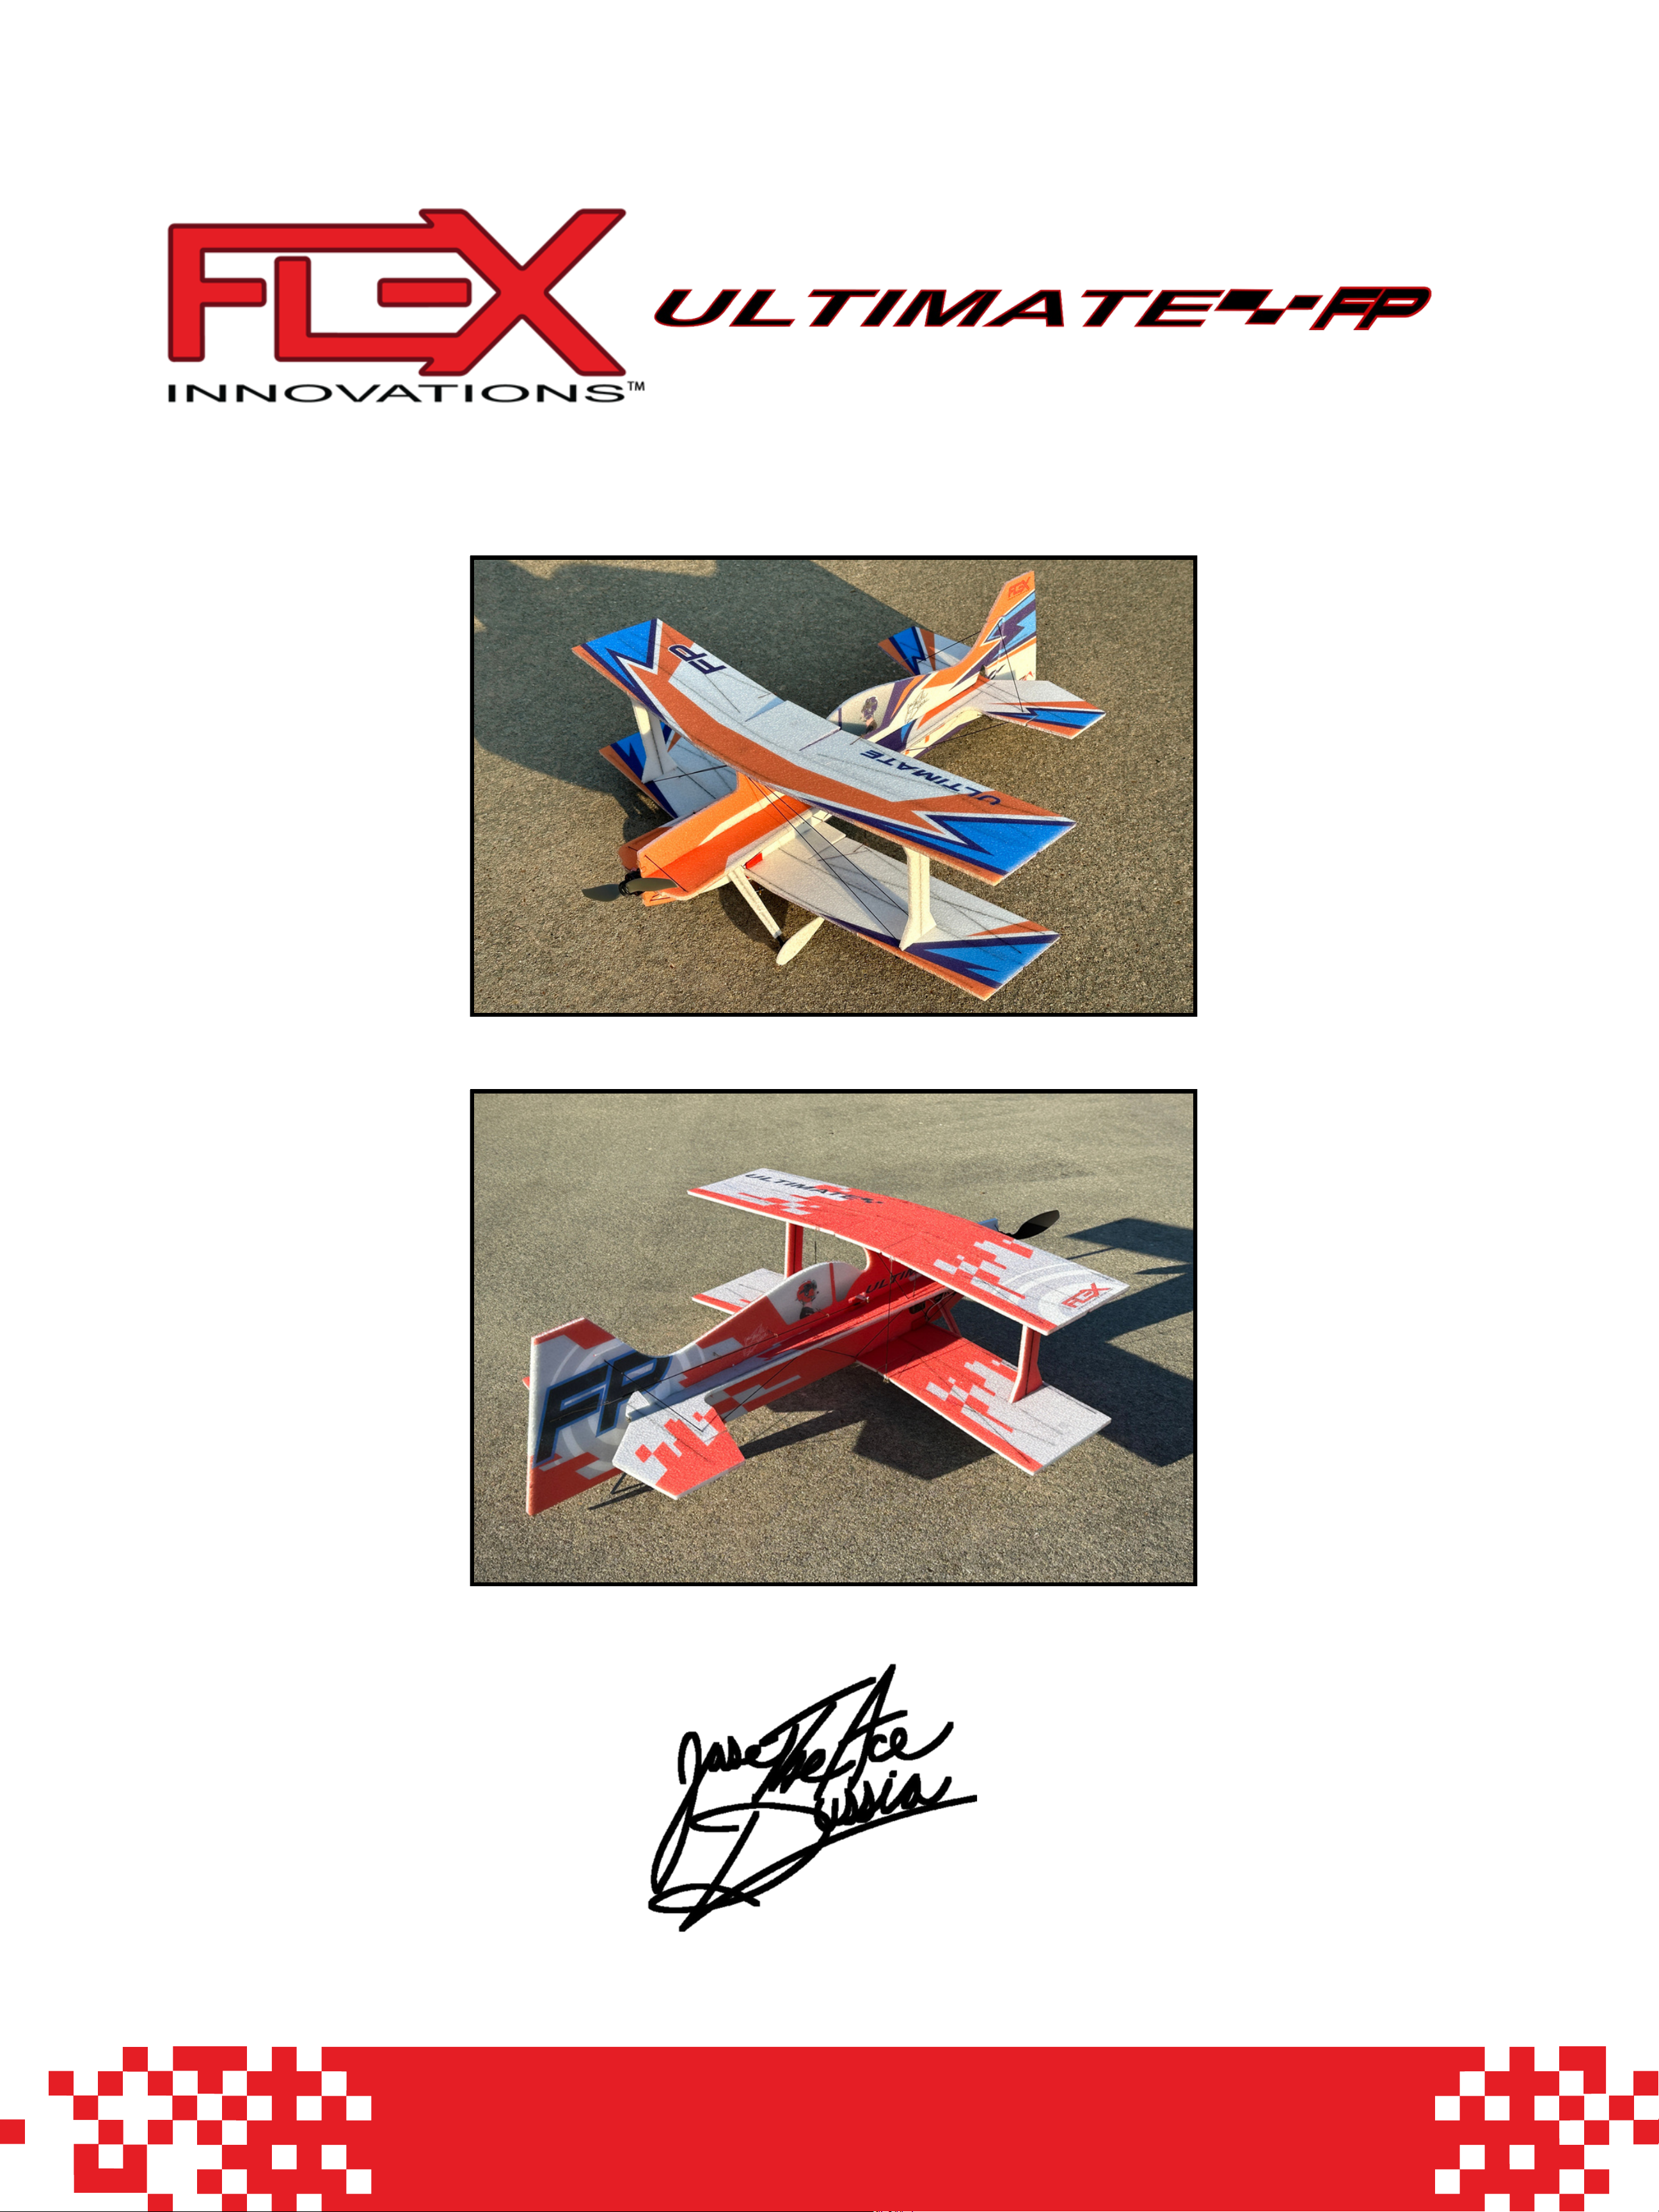
Assembly Manual
Page 2
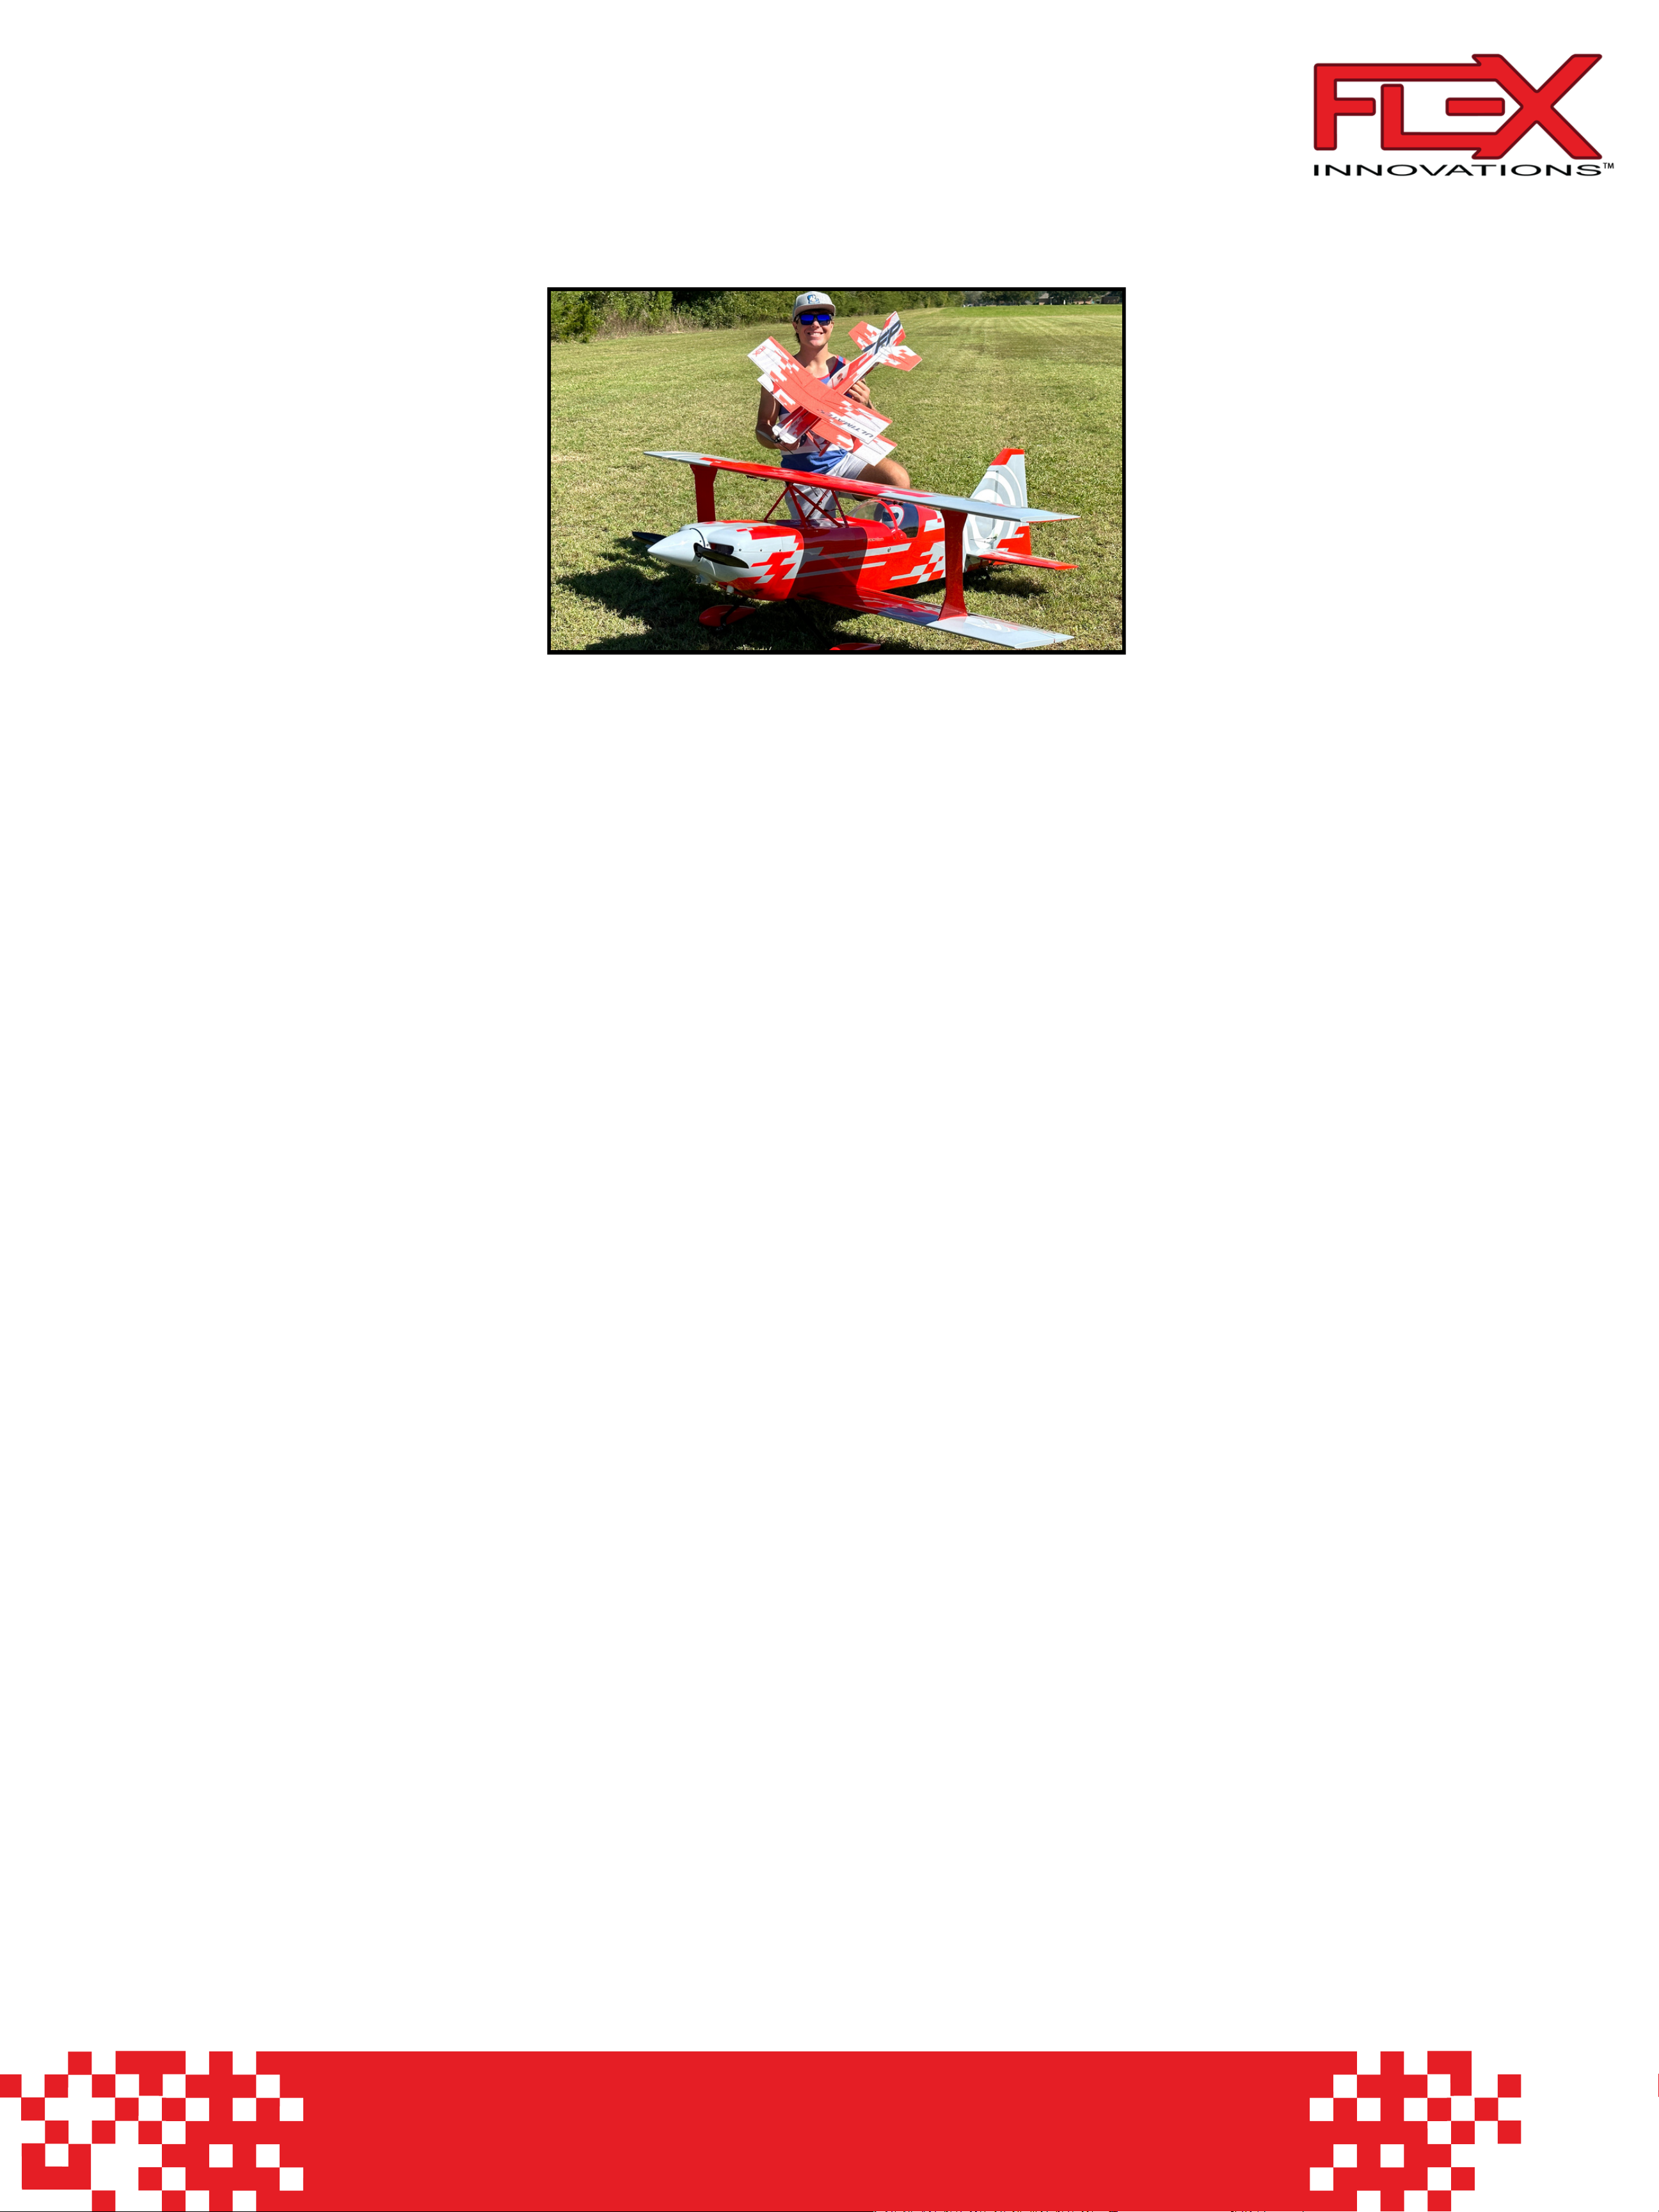
Flex Innovations is thrilled to introduce the Foam Profile (FP) line of aircraft. For years, profile foam
aircraft have attracted modelers of all types due to their combination of enjoyment and durability.
Now, Flex has committed to revolutionizing this type of aircraft by combining high level performance
and equipment with a simple PNP style assembly process. This line focuses on accessibility and
compatibility for pilots of all experiences and skill levels. From basic flight practice to high
performance aerobatic demand, the FP line will satisfy the needs of all. Additionally, the EPP/carbon
fiber construction allows for rigidity in flight and easy repairs. From indoors to outdoors, this line of
aircraft offers ease of assembly, transportation, maintenance, and much more!
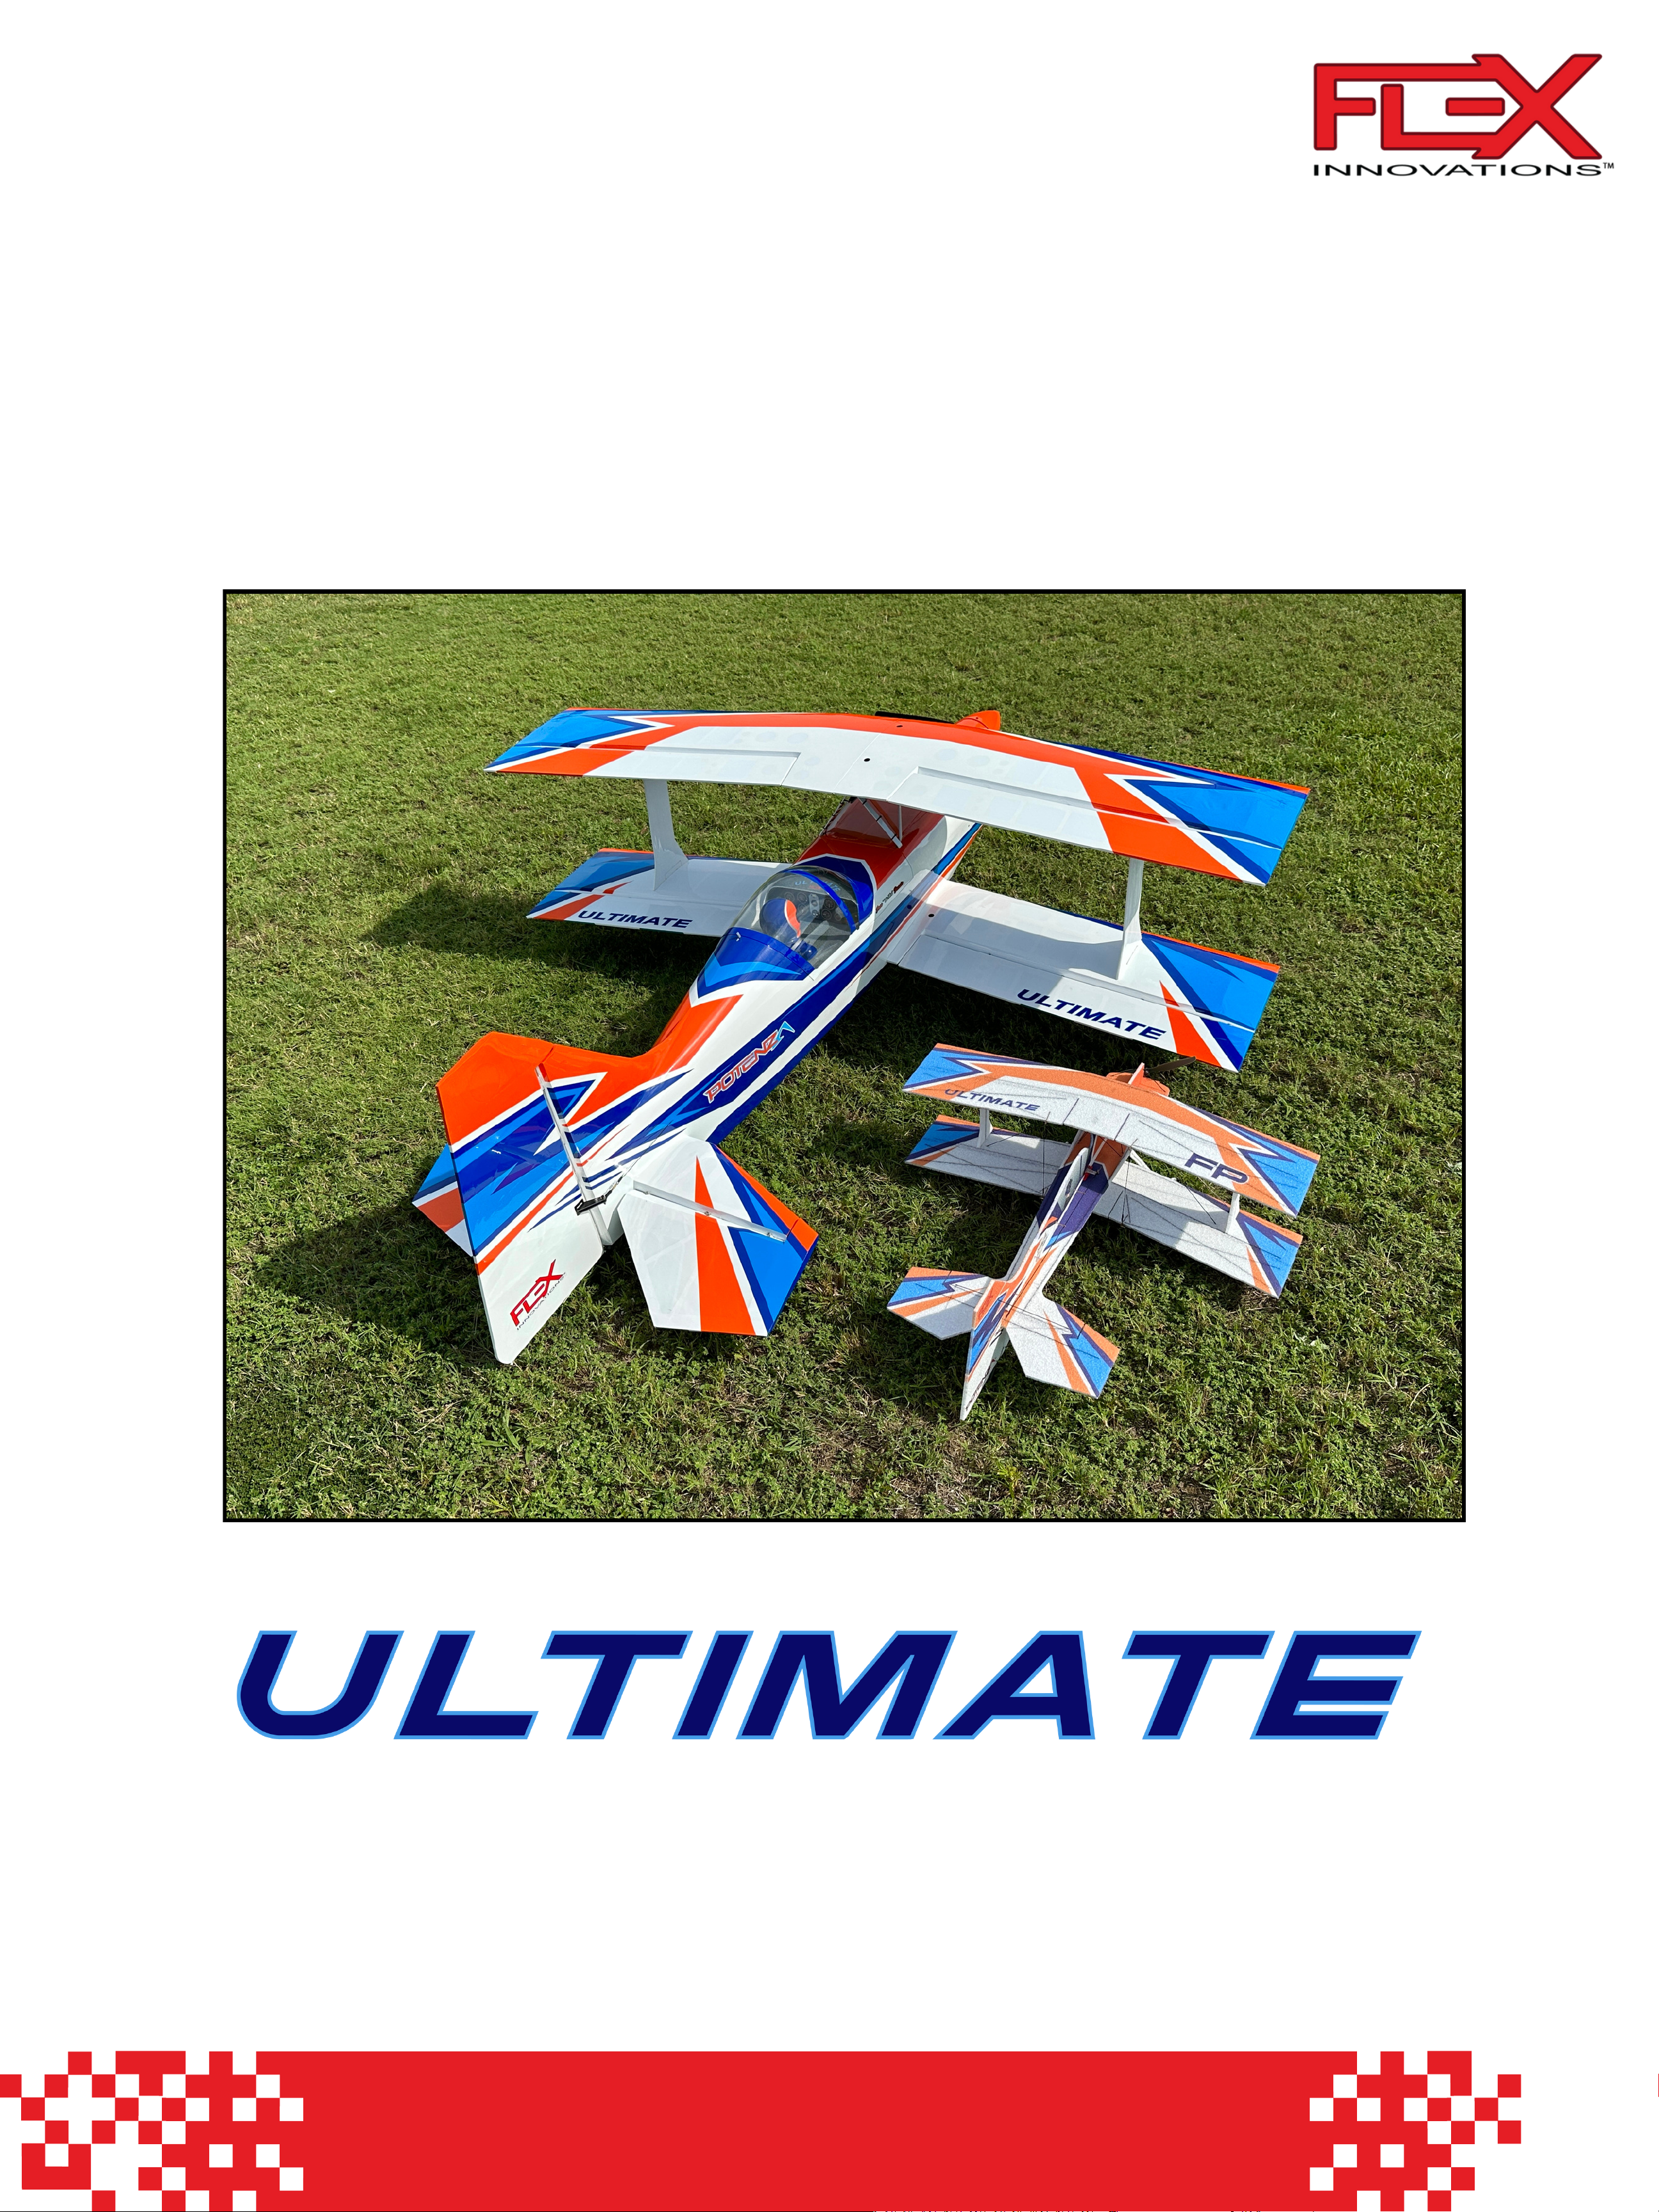
The Ultimate FP embodies the innovative spirit of Flex by not only providing a revolutionary foam
profile biplane from a flying characteristic and equipment standpoint, but also eliminating the build
hassle of previous biplane foam profiles! The Ultimate FP is a fantastic complement to the 70cc
Ultimate which has become extremely popular in a short period of time. From smooth precision to all-
out XA performance, this is a phenomenal addition to the Flex biplane lineup. One of the main focal
points of the Ultimate FP is its ability to be a low and slow 3D trainer. The predictability in post stall
flight is unmatched! Paired with high quality and high-performance equipment, the Ultimate FP is sure
to be a fun airplane for all styles!
SPECIFICATIONS/EQUIPMENT OPTIONS:
Wingspan- 28”
Weight- ~200-220g (about 7.8 oz)
Motor- T-Motor AM40 1850KV (FPZM2818)
ESC- T-Motor AT 20A ESC (TMAT20A3S)
Servos- Potenza DS17HV 180mm (FPZDS17HVB)
Prop- APC 9 x 4.1 SF 3D Propeller (LP09041SF)
Recommended Battery- Potenza 2S 600mAh 45C (FPZB6002S45) or 2s 600mAh 100C (FPZB6002S100)
Recommended RX- 4-6 channel (Spektrum AR620, Futaba R3104SB)
Aura (Optional)- FT AURA 5 LITE AFCS (FLT8050)
1
Ultimate FP Instructions
Introduction
Page 3
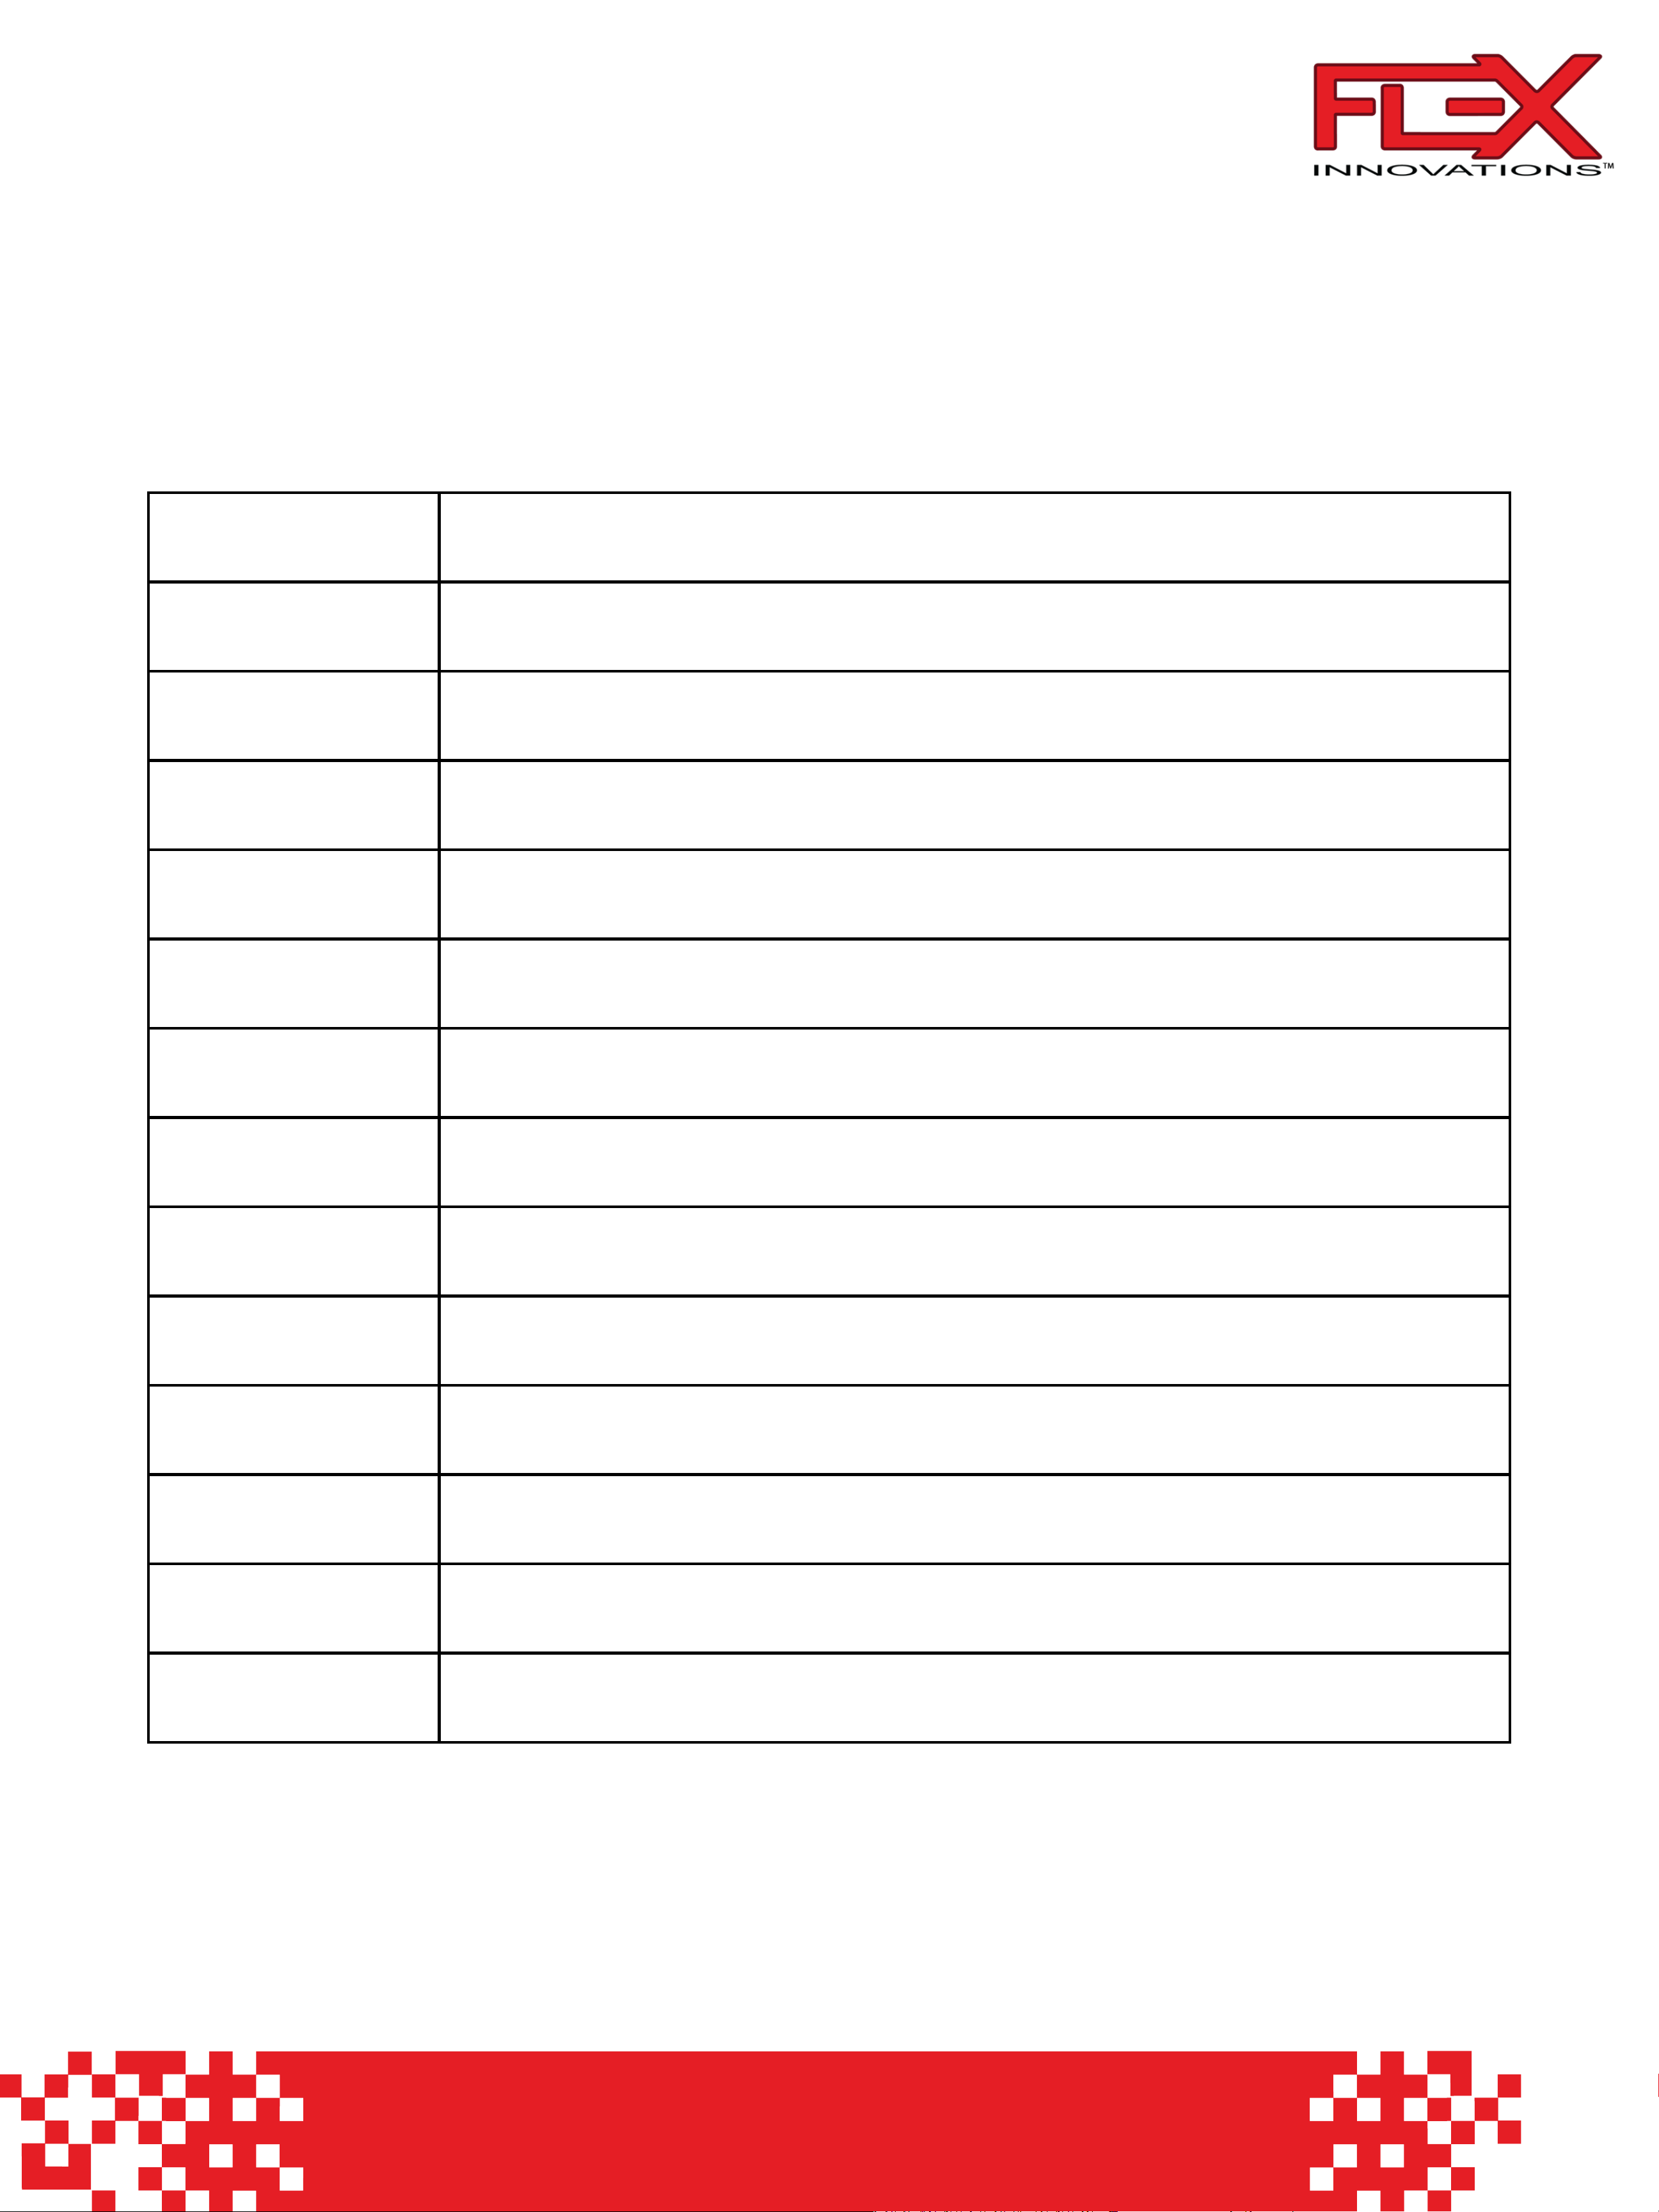
FPM5370A
Flex Ultimate FP Orange PNP
FPM5370B
Flex Flat Foamy Ultimate FP JD Red PNP
FPM537001
Flex Ultimate FP Plastic Parts Sheet
FPM537002A
Flex Ultimate FP Orange Foam Wheel Pant and Landing Gear Sheet
FPM537002B
Flex Ultimate FP Red Foam Wheel Pant and Landing Gear Sheet
FPZA1057
Flex FP Propeller Band Set
FPZA1058
Flex FP Landing Gear+Wheel+Wooden Collar Set
FPZA1059
Flex FP EZ Connector+Z-bend Set
FPZM2818
T-Motor AM40 1850KV Motor
HW20AESC
T-Motor AT-20A ESC
LP09041SF
APC 9x4.1SF 3D Propeller
FPZA1060
Flex FP Series Spare Carbon Fiber Set
FPZDS17HVB
Potenza DS17HV Servo (180mm wire)
FPMJQ2118
Jinqiang JQ-2118 Building Adhesive
2
Ultimate FP Instructions
Replacement Parts
Page 4

3
Ultimate FP Instructions
ATTENTION
Read the ENTIRE instruction manual to become familiar with the features and
assembly of the product before starting assembly. Failure to assemble or
operate the product correctly can result in damage to the product, personal
property and cause serious or fatal injury. All instructions, warranties and
other collateral documents are subject to change at the sole discretion of Flex
Innovations, LLC. For up-to-date product literature, please visit our website at
www.flexinnovations.com and navigate to the product page for this product.
WARNING
This is NOT a toy. This product is not intended for use by children under 14 years of age
without direct adult supervision.
IMPORTANT INFORMATION REGARDING WARRANTY
Please read our Warranty and Liability section before building this product. If you as
the purchaser or user are not prepared to accept the liability associated with the use of
this product, you are advised to return this product immediately in new and unused
condition, in the original packaging material, to the place of purchase.
Page 5

4
Ultimate FP Instructions
SAFETY WARNINGS AND PRECAUTIONS
Protect yourself and others by following these basic safety guidelines.
1. This manual contains instructions for safety, operation, and maintenance. It is essential to
read and follow all the instructions in the manual, prior to assembly, setup, or use, to operate
correctly and avoid damage or serious injury.
2. In some cases, the written instructions may differ slightly from the photos. In those
instances, the written instructions should be considered correct.
3. This model is not a toy, rather it is a sophisticated remote control hobby product and must
be operated with caution and common sense. This product requires some basic mechanical
ability. Failure to operate this product in a safe and responsible manner could result in injury,
or damage to the product, or other property.
4. This model must be assembled according to these instructions. Do not alter or modify the
model outside of these instructions provided by Flex Innovations, LLC, as doing so may
render it unsafe and/or unflyable. You must take time to build straight, true, and strong. It is
your responsibility to ensure the air worthiness of this product.
5. Use only compatible, appropriate components for the final assembly of this model. Ensure
that the radio system is in functional condition, that the engine is appropriately sized for the
model and that all other components are appropriate for use in this model as specified in this
instruction manual. All components must be installed correctly so that they operate correctly
both on the ground and in the air.
6. Inspect and check the operation of the model and all its components before every flight.
7. If you are not an experienced pilot, or have not flown a high-performance model before, it is
recommended that you seek assistance from an experienced pilot in your R/C club for your
first flights. If you're not a member of a club, the Academy of Model Aeronautics (AMA) has
information about clubs in your area whose membership includes experienced pilots.
8. Keep the propeller area clear from such items as loose clothing, jewelry, long hair, or tools,
as they can become entangled. Keep your hands and body parts away from the propeller as
injury can occur.
IMPORTANT BEFORE ASSEMBLY
Carefully unpack your aircraft and inspect the parts. Review the manual and gather the
required tools and supplies. Remove all parts from their plastic bags, inventory all items and
closely examine all the major airframe components for damage. If any items are missing or
you find damaged components, do not proceed. Please contact customer support.
Page 6

5
Ultimate FP Instructions
Tools/Supplies needed
Including but not limited to:
-Contact Foam Adhesive (FPMJQ2118) or Foam-Cure (BSI142)
-Medium CA (Foam safe not required)
-Hobby knife with fresh blades
-Phillips screwdriver
-CA Accelerator (BSI151)
-Parchment/Baking paper for a building surface (highly recommended)
Page 7
6
Ultimate FP Instructions
Bottom Wing Installation
1) Locate the bottom wing and main fuselage sections. Test fit the bottom wing into the
cutout in the fuselage. Once all is straight and well fitting, apply building adhesive to
glue in place.
*It is recommended to use parchment paper as a building surface. Additionally, when
gluing EPP parts together, we recommend a contact foam adhesive such as JINQIANG
JQ-2118 BUILDING ADHESIVE OR SIMILAR.
Page 8
7
Ultimate FP Instructions
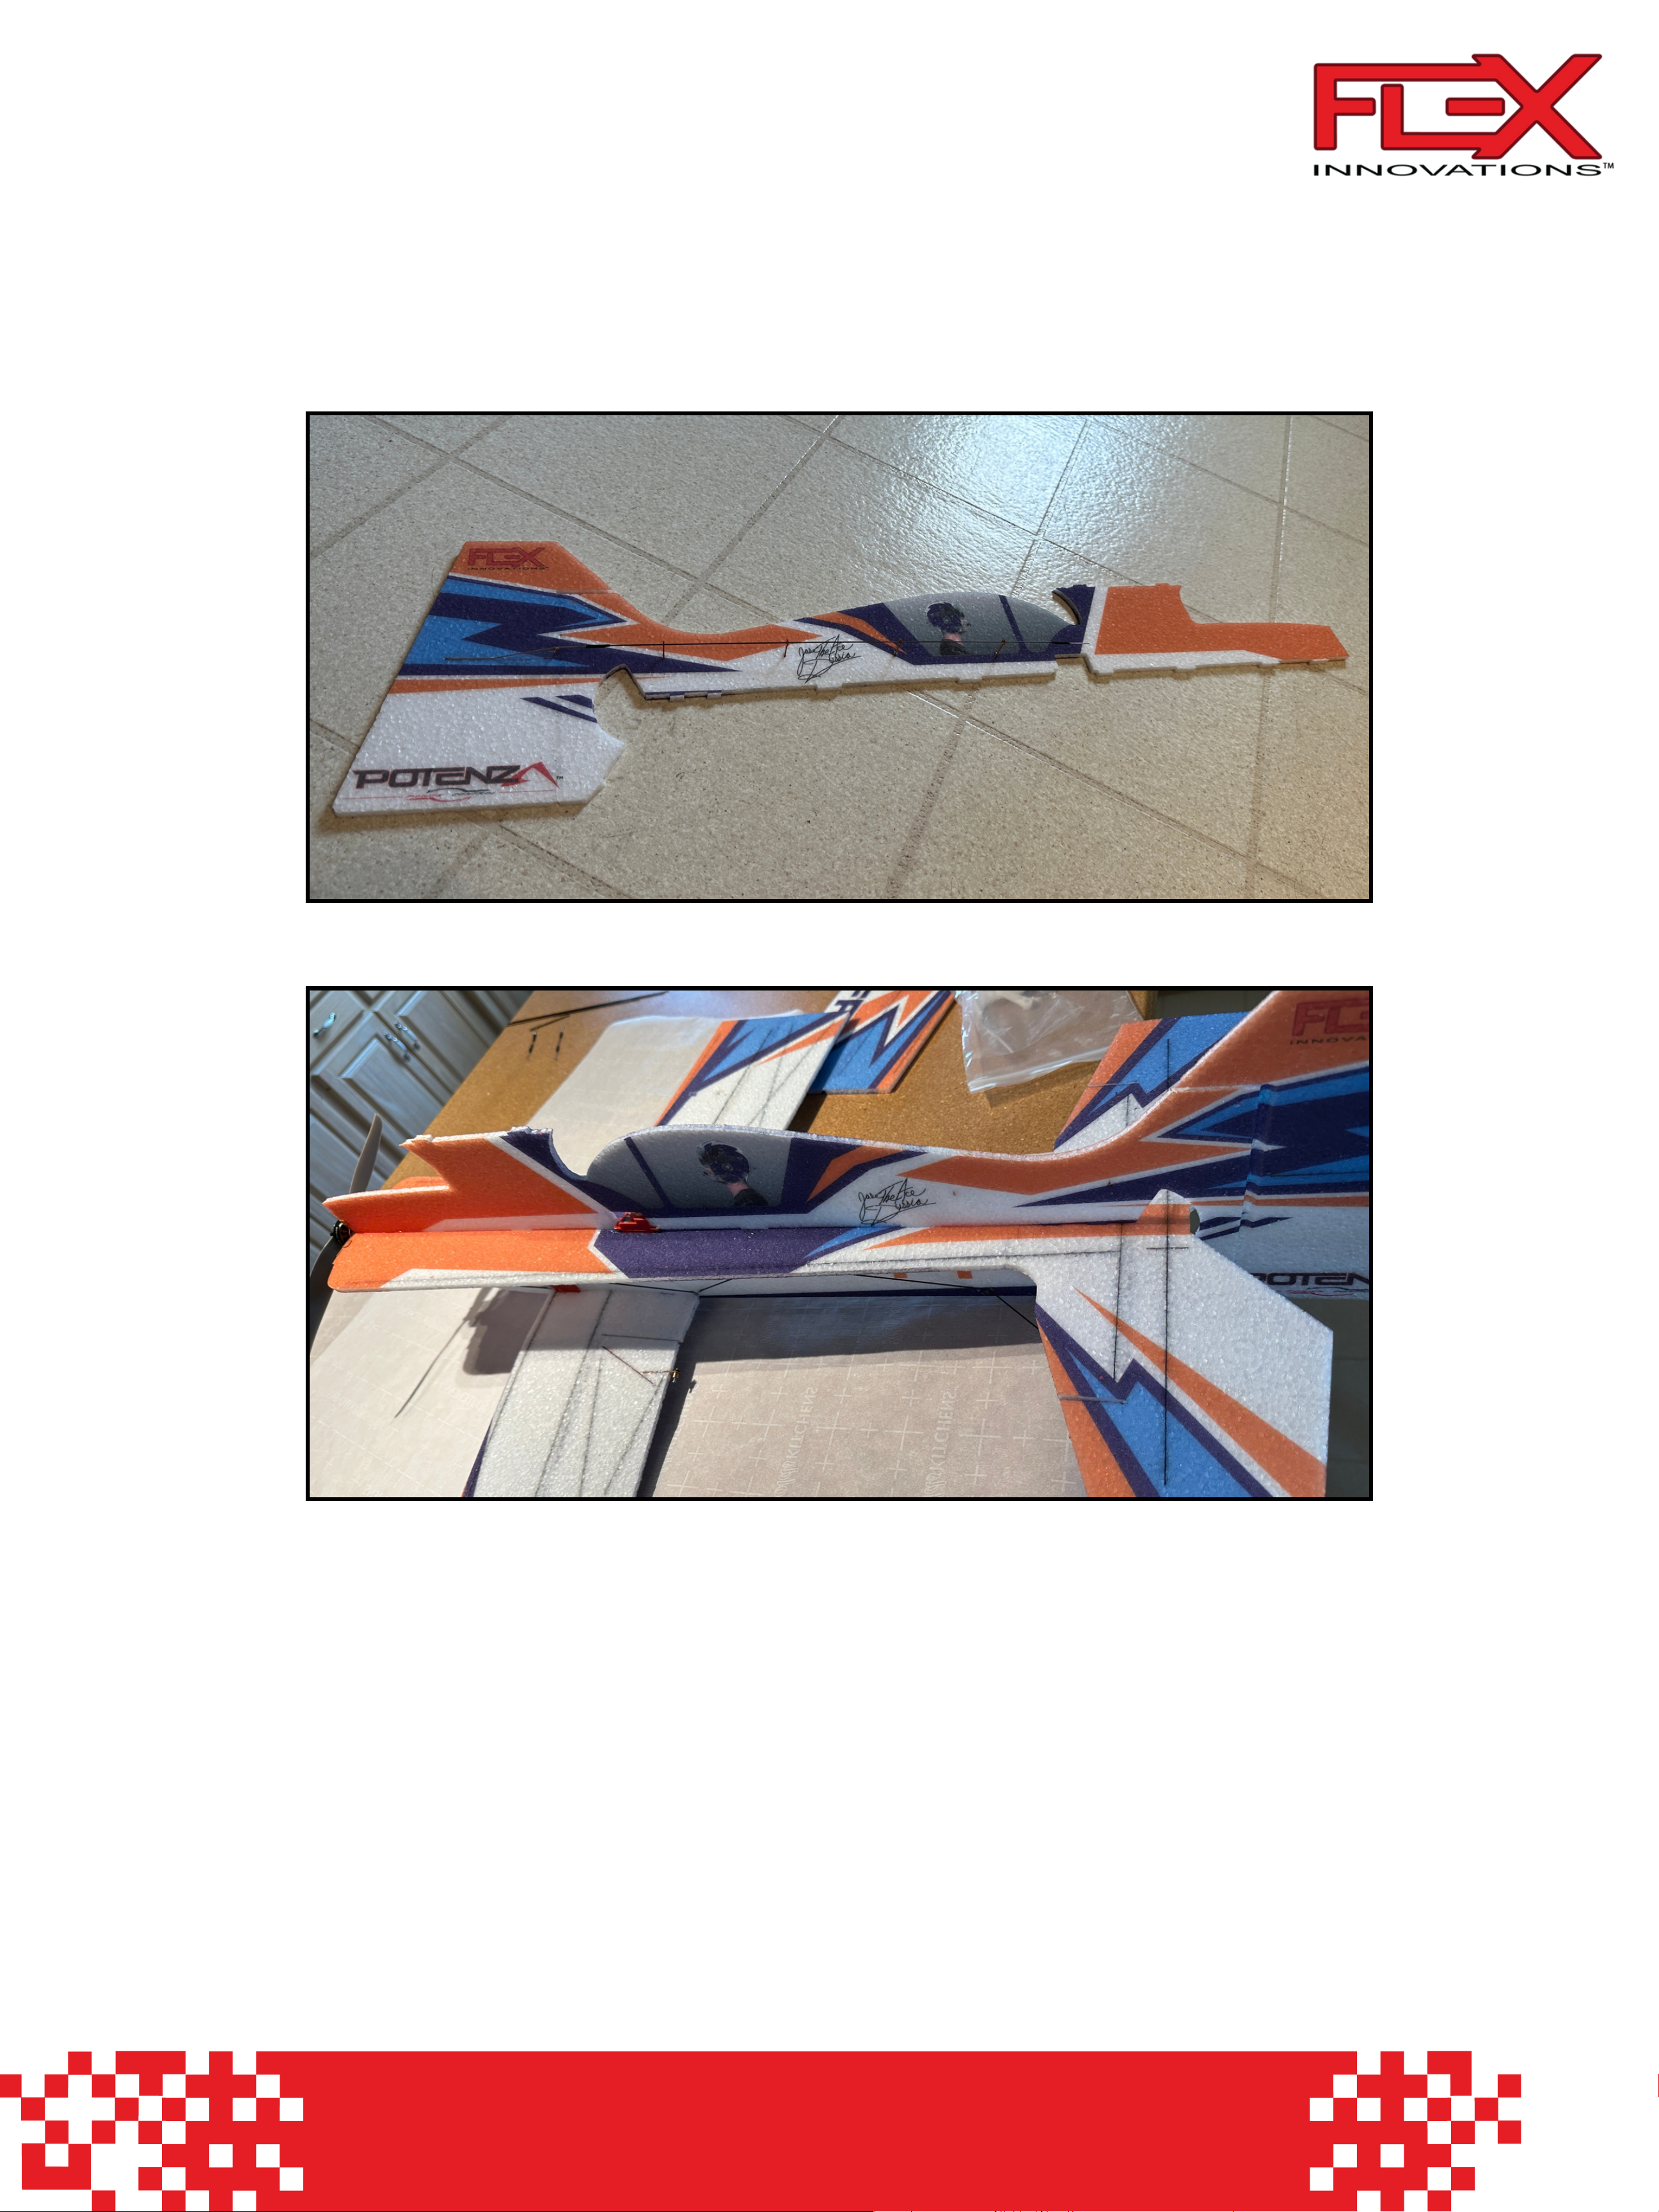
Top Fuselage Installation
1) Locate the top fuselage piece. Notice the slots along the fuselage
and how they correspond with the tabs of the top fuselage piece.
Test fit and once everything is confirmed to align, apply adhesive.
Make sure this sets at 90 degrees to the horizontal fuselage.
Page 9
8
Ultimate FP Instructions
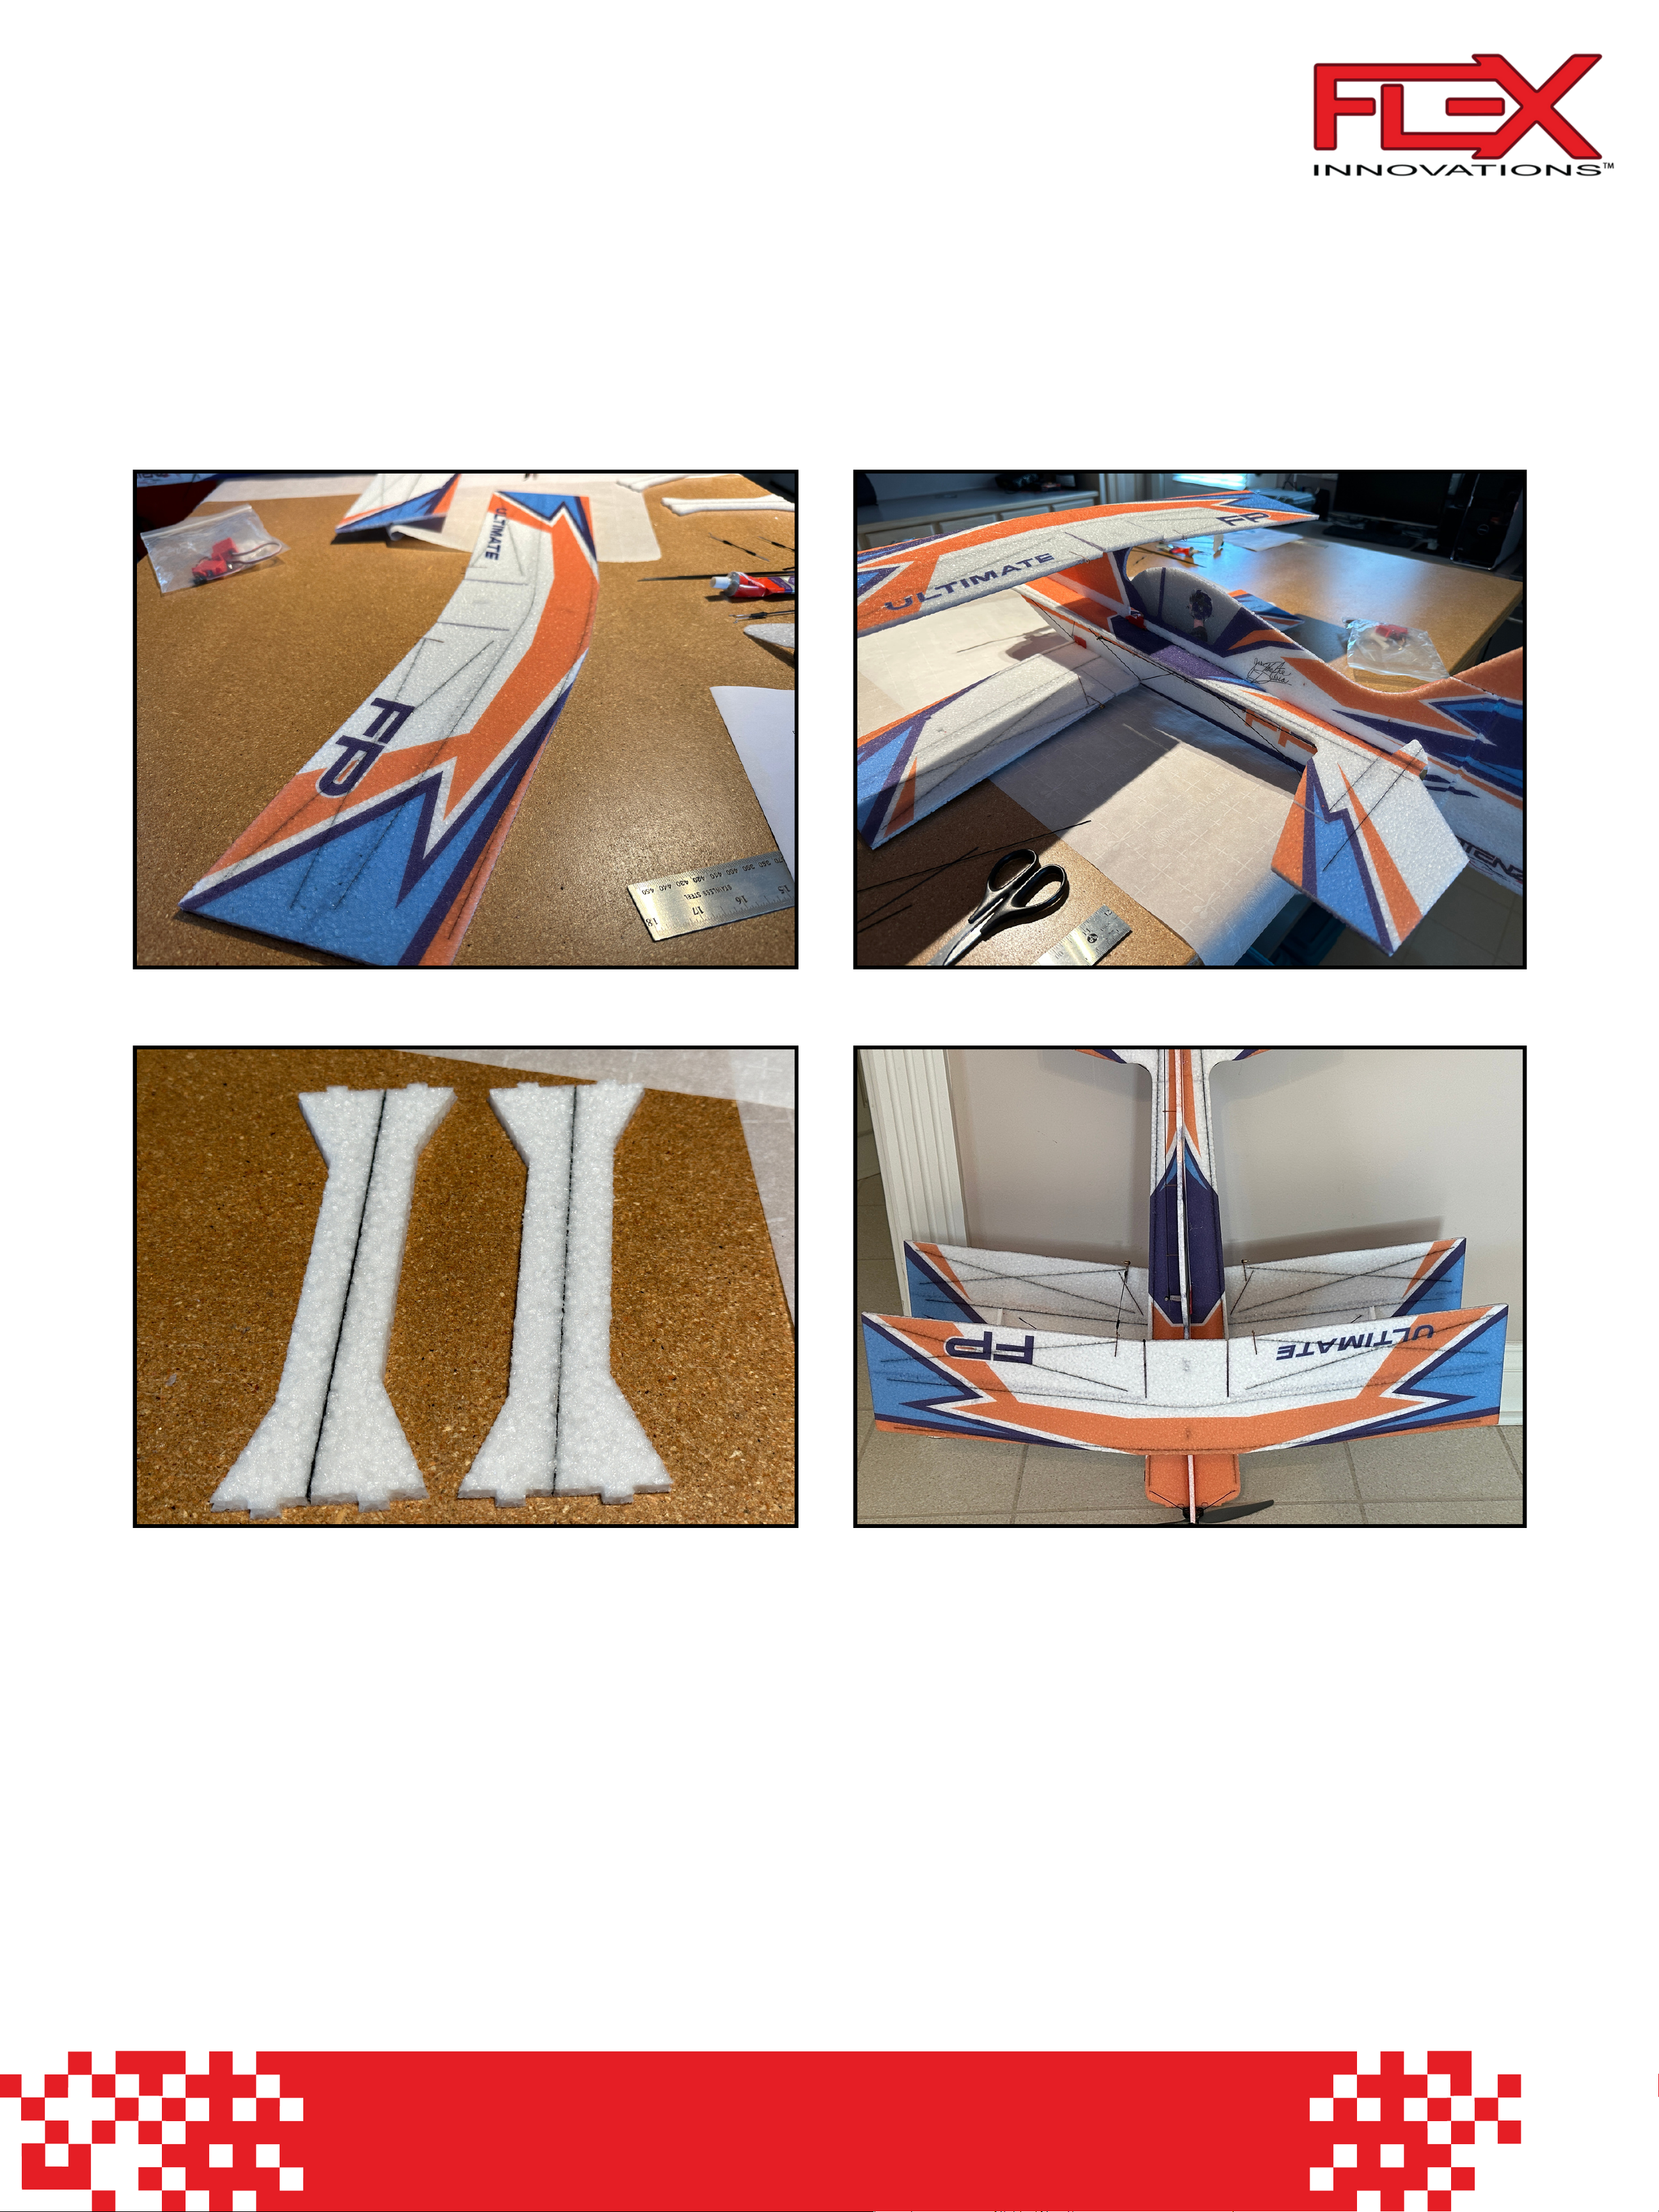
Top Wing Installation
1) Locate the top wing along with the interplane struts.
2) Attach the top wing based on the tabs and notches in the fuselage/cabane area.
3) Glue wing into place.
4) Test fit the interplane struts on each side. Once aligned, apply glue to the top and bottom of
the struts.
5) Make sure everything dries at 90 degrees and is straight.
Page 10
9
Ultimate FP Instructions
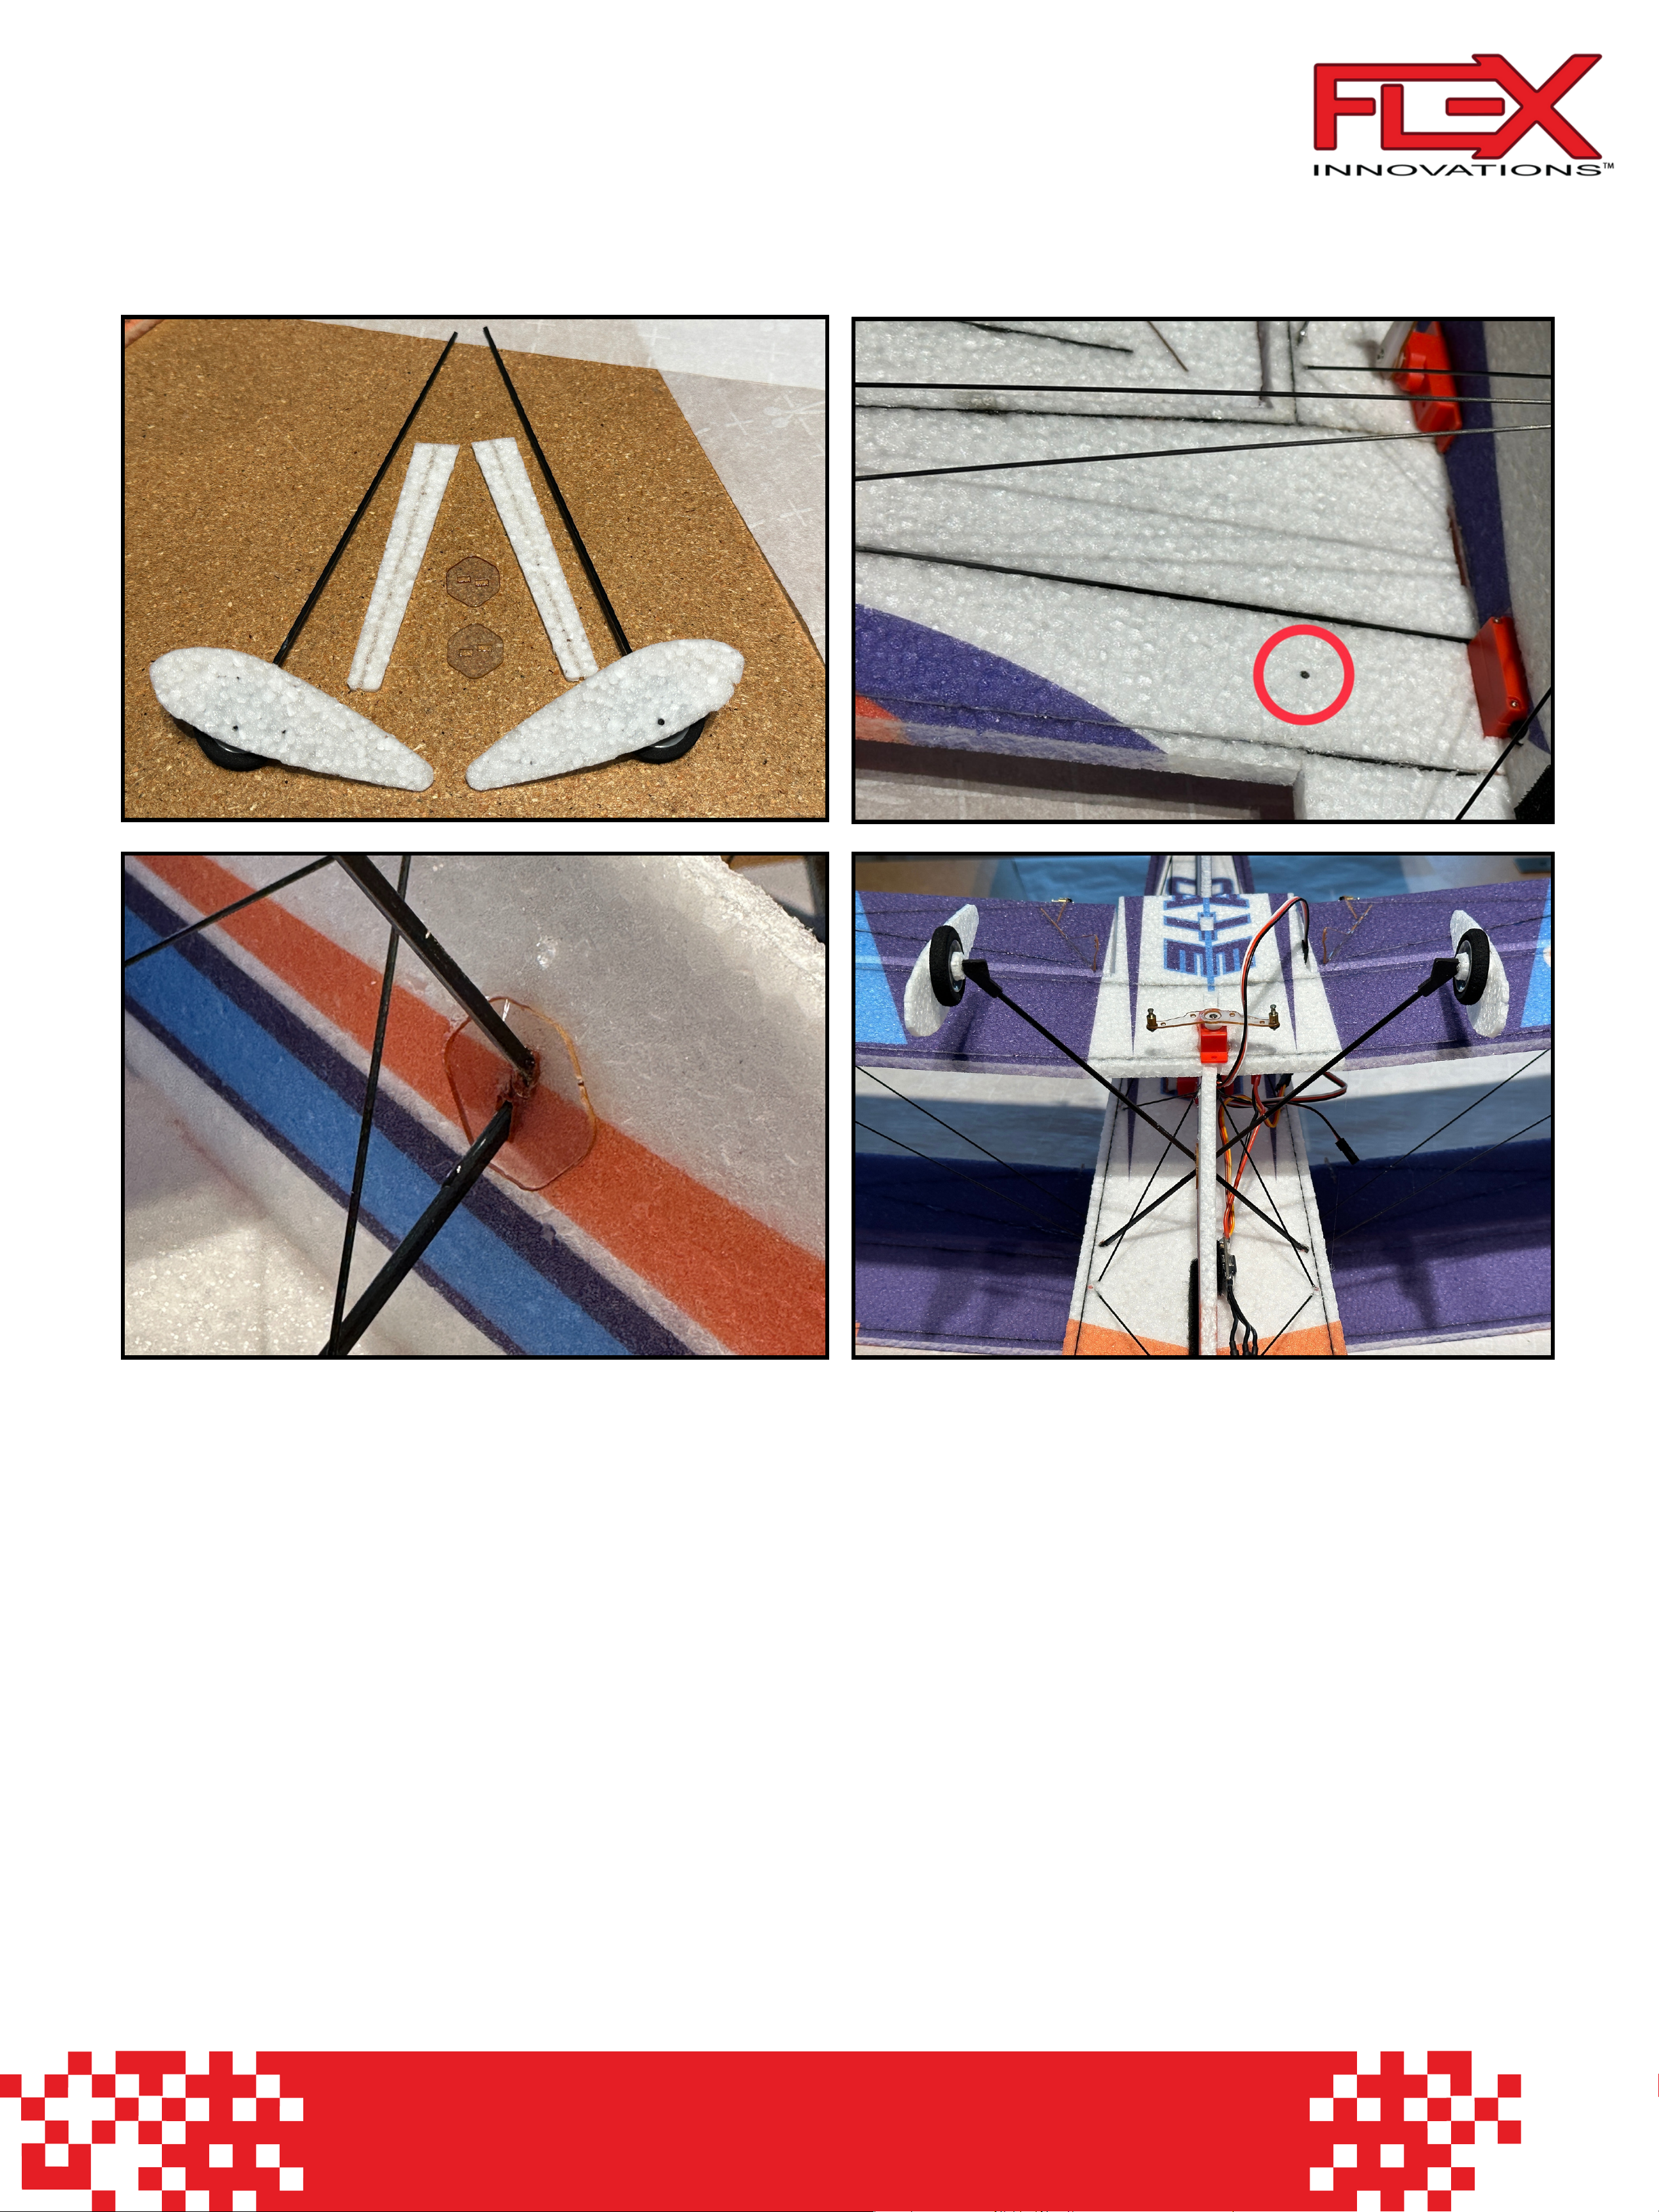
Landing Gear Installation
1) Locate the main landing gear along with the plastic landing gear supports.
2) Slide the landing gear through the plastic landing gear supports as shown:
3) Locate the two dots marked on the fuselage for location of the landing gear.
4) Take a hobby knife and cut a slit into the bottom fuselage at marked location to allow the
carbon fiber landing gear to pass through.
5) Once all fits, place building adhesive onto the ends of the landing gear.
6) Make sure the landing gear is equal height on each side while glue is setting.
7) Foam landing gear covers are optional. Apply contact adhesive to the center cutout of the
landing gear cover and apply it to the carbon fiber landing gear.
Page 11
10
Ultimate FP Instructions
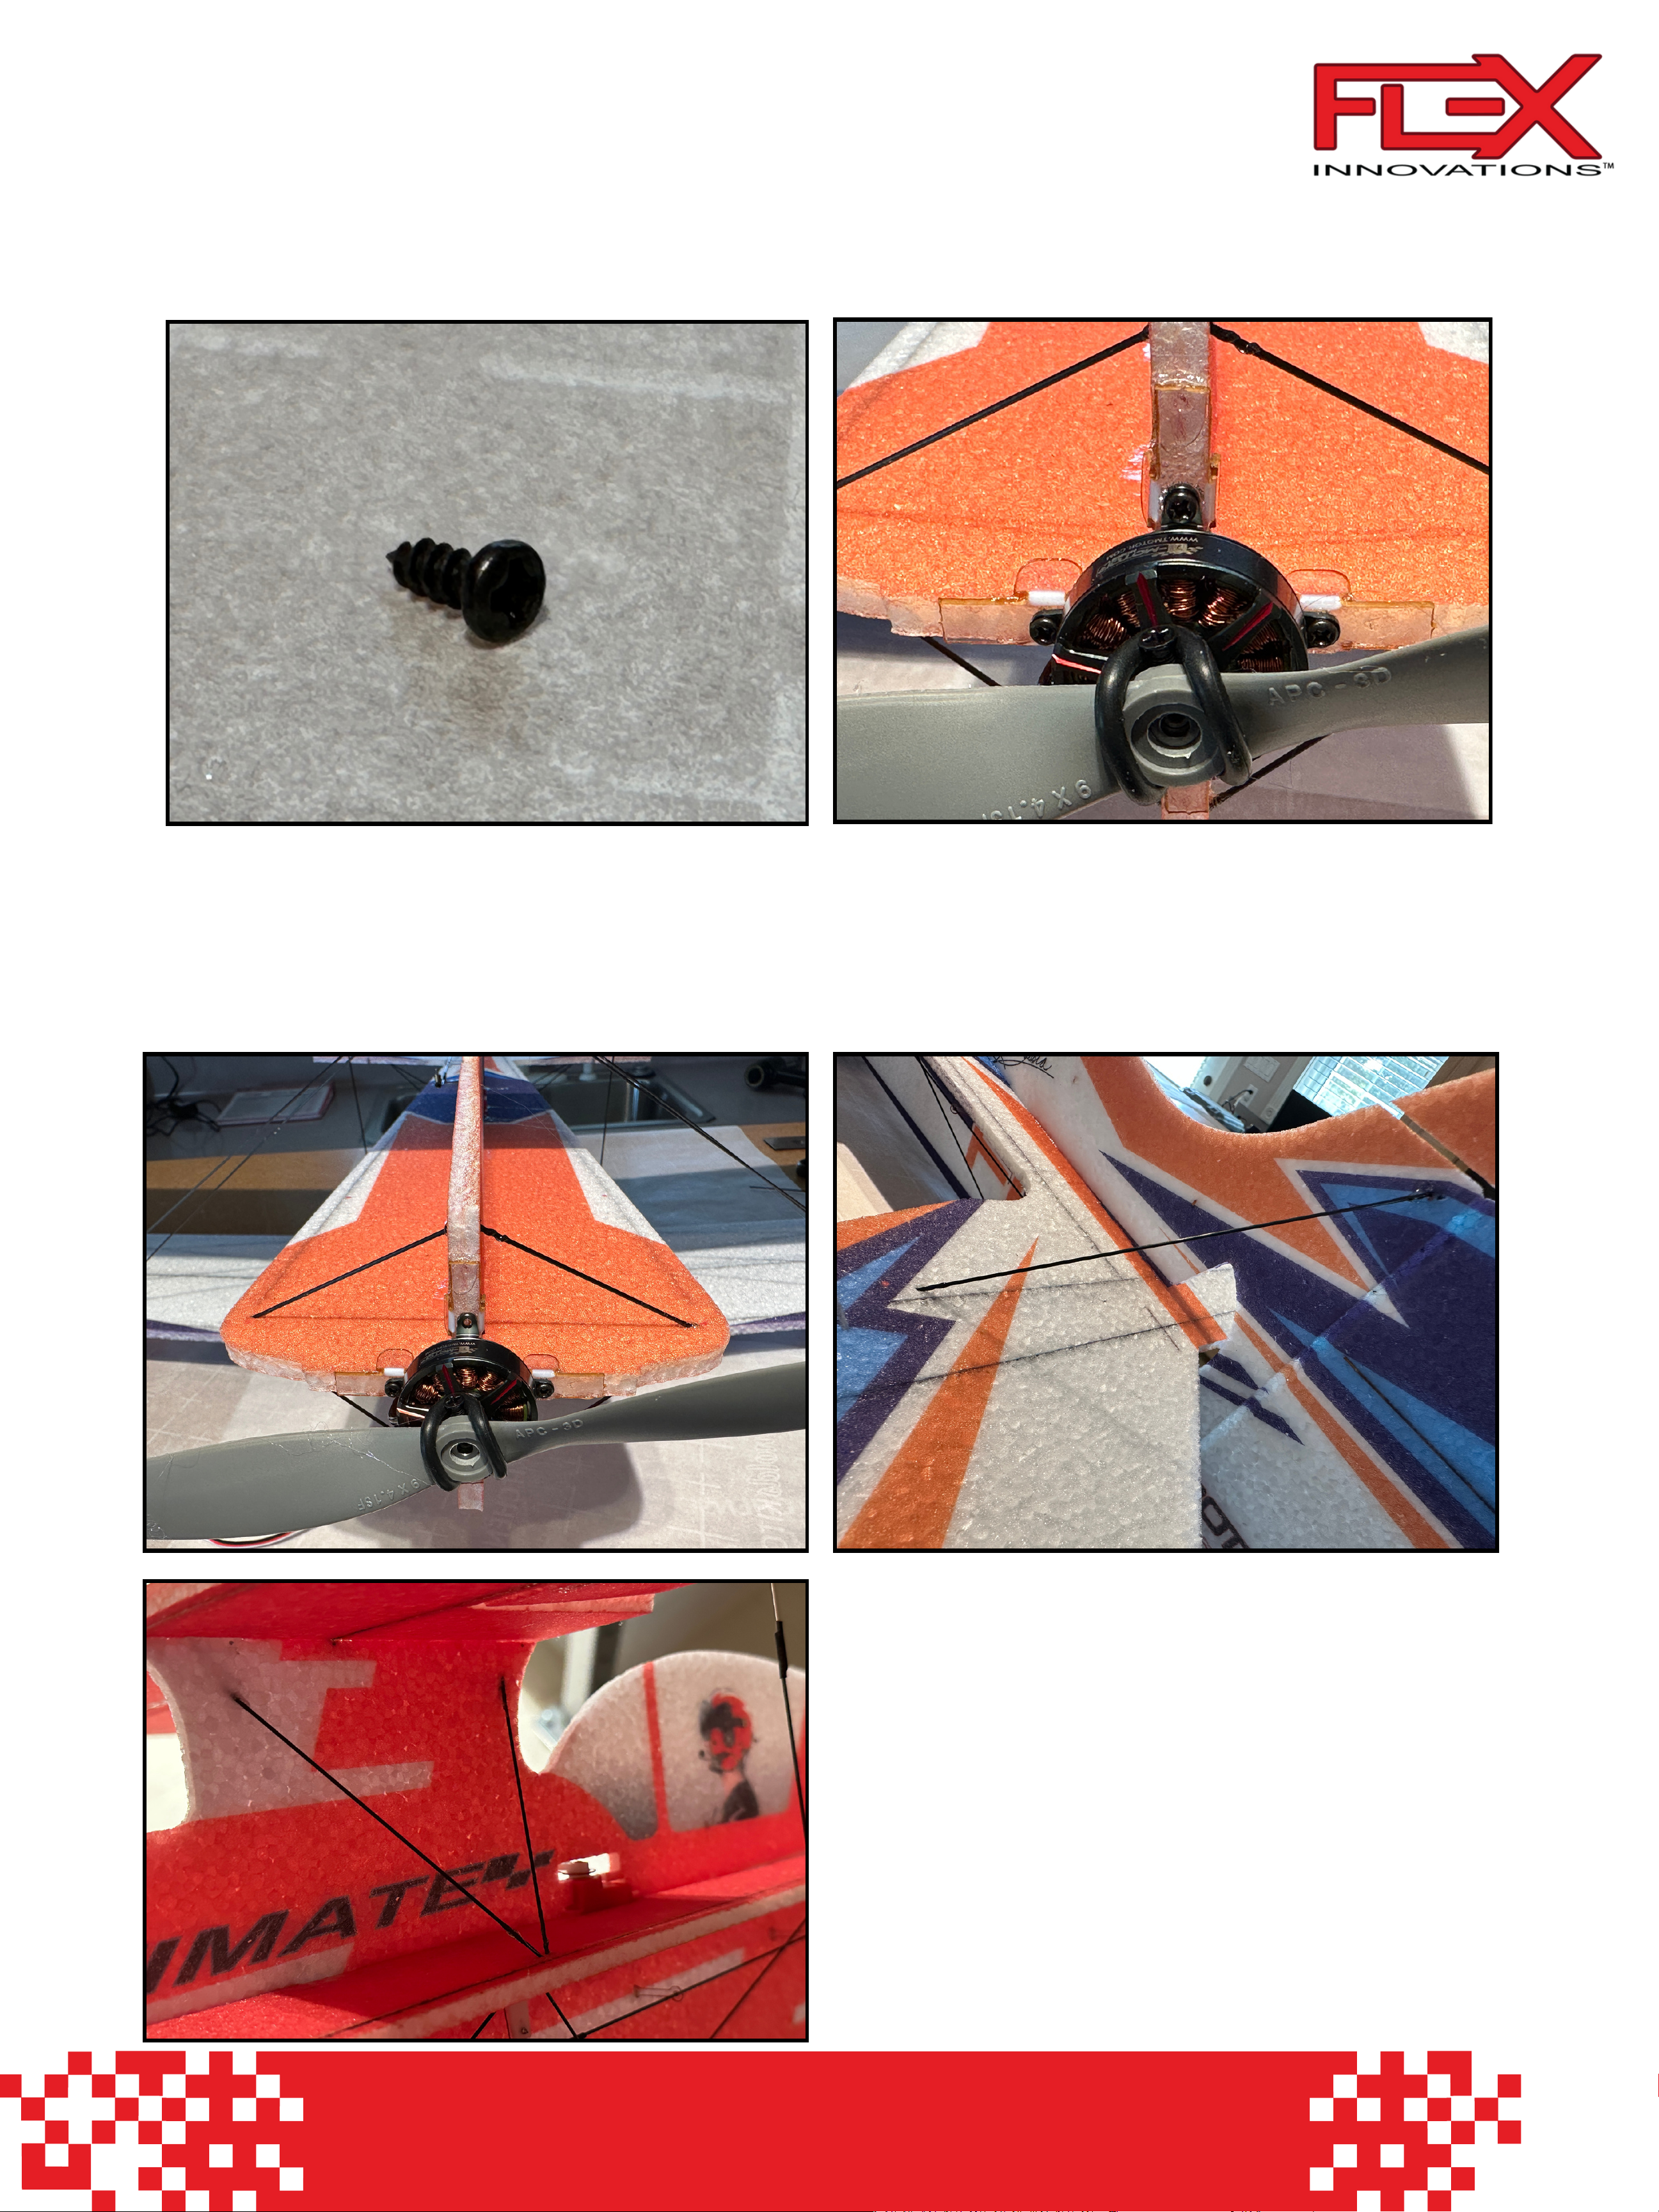
Motor Bolt Installation
1) Locate the top motor bolt found with the motor packaging.
2) Bolt into place and wrap around top motor mount tabs.
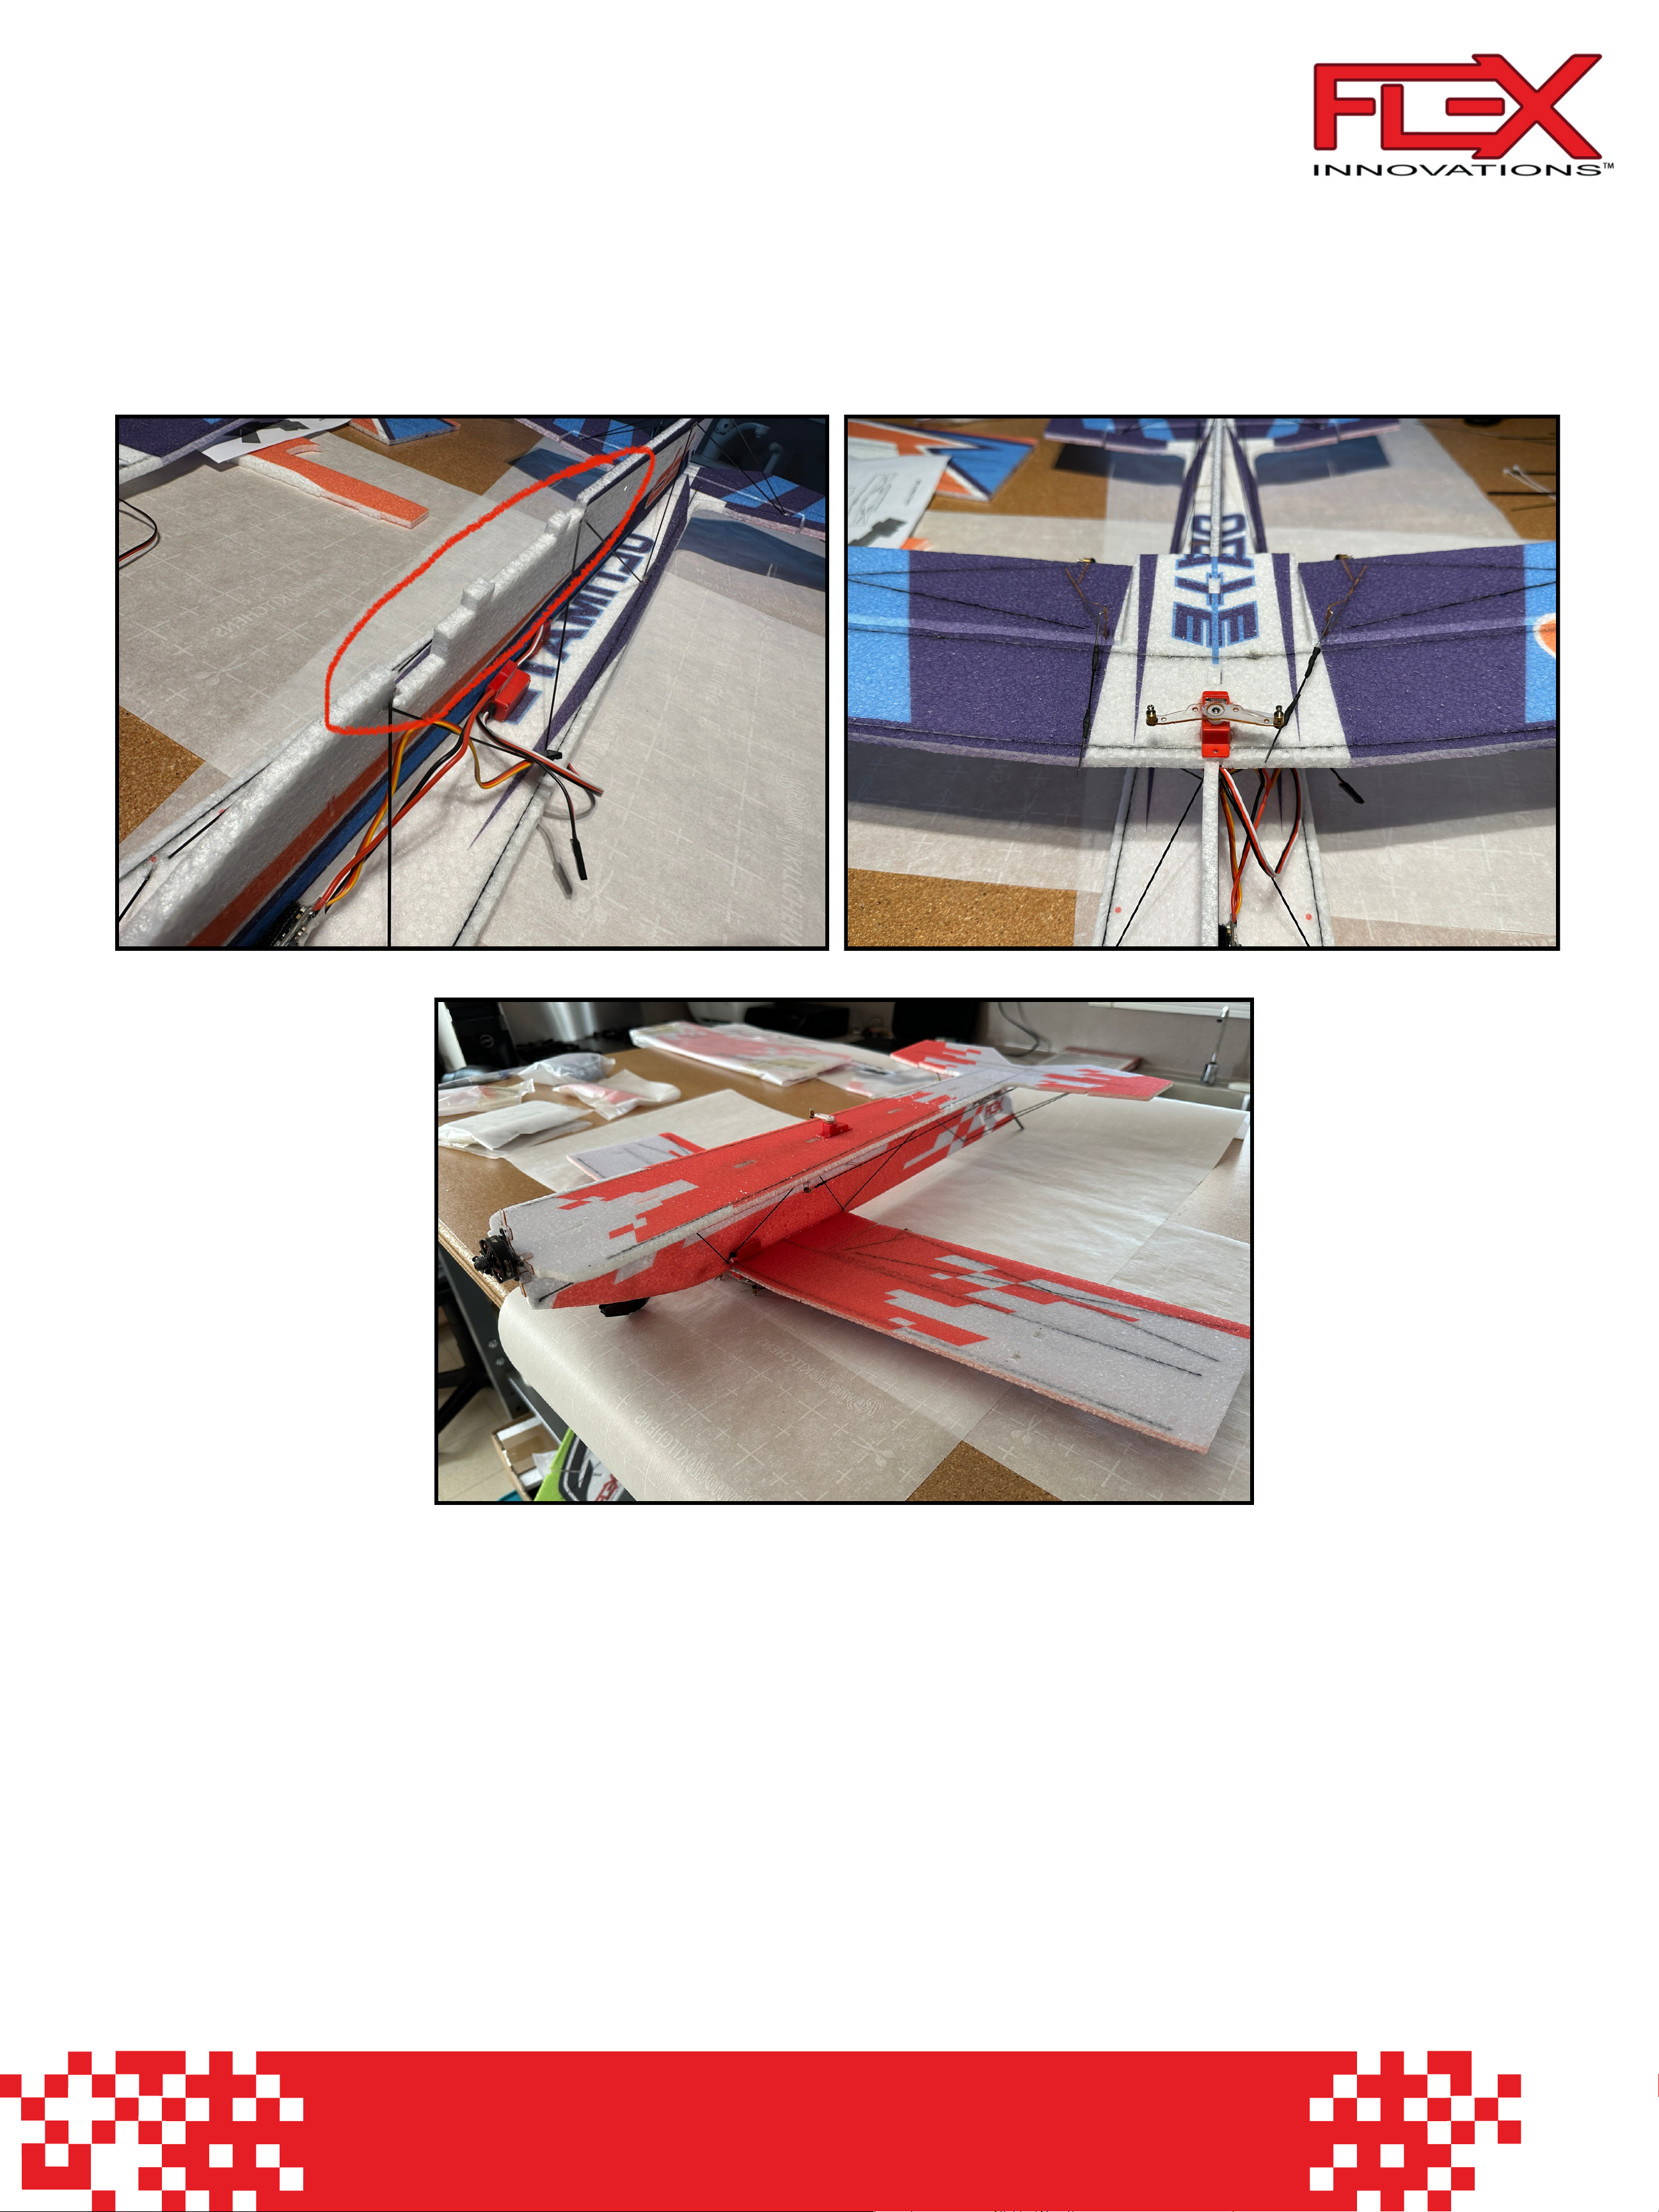
Carbon Fiber Trussing
1) Install small carbon fiber rods on each side of
the front portion of the fuselage to prevent
twisting.
2) Install carbon fiber rods attaching from the
vertical stab to horizontal stab. Make sure
fuselage is set straight 90 degrees after applying
3) On each side of the fuselage cabane
section, install provided carbon fiber rods as
shown to support the top wing.
Page 12
11
Ultimate FP Instructions
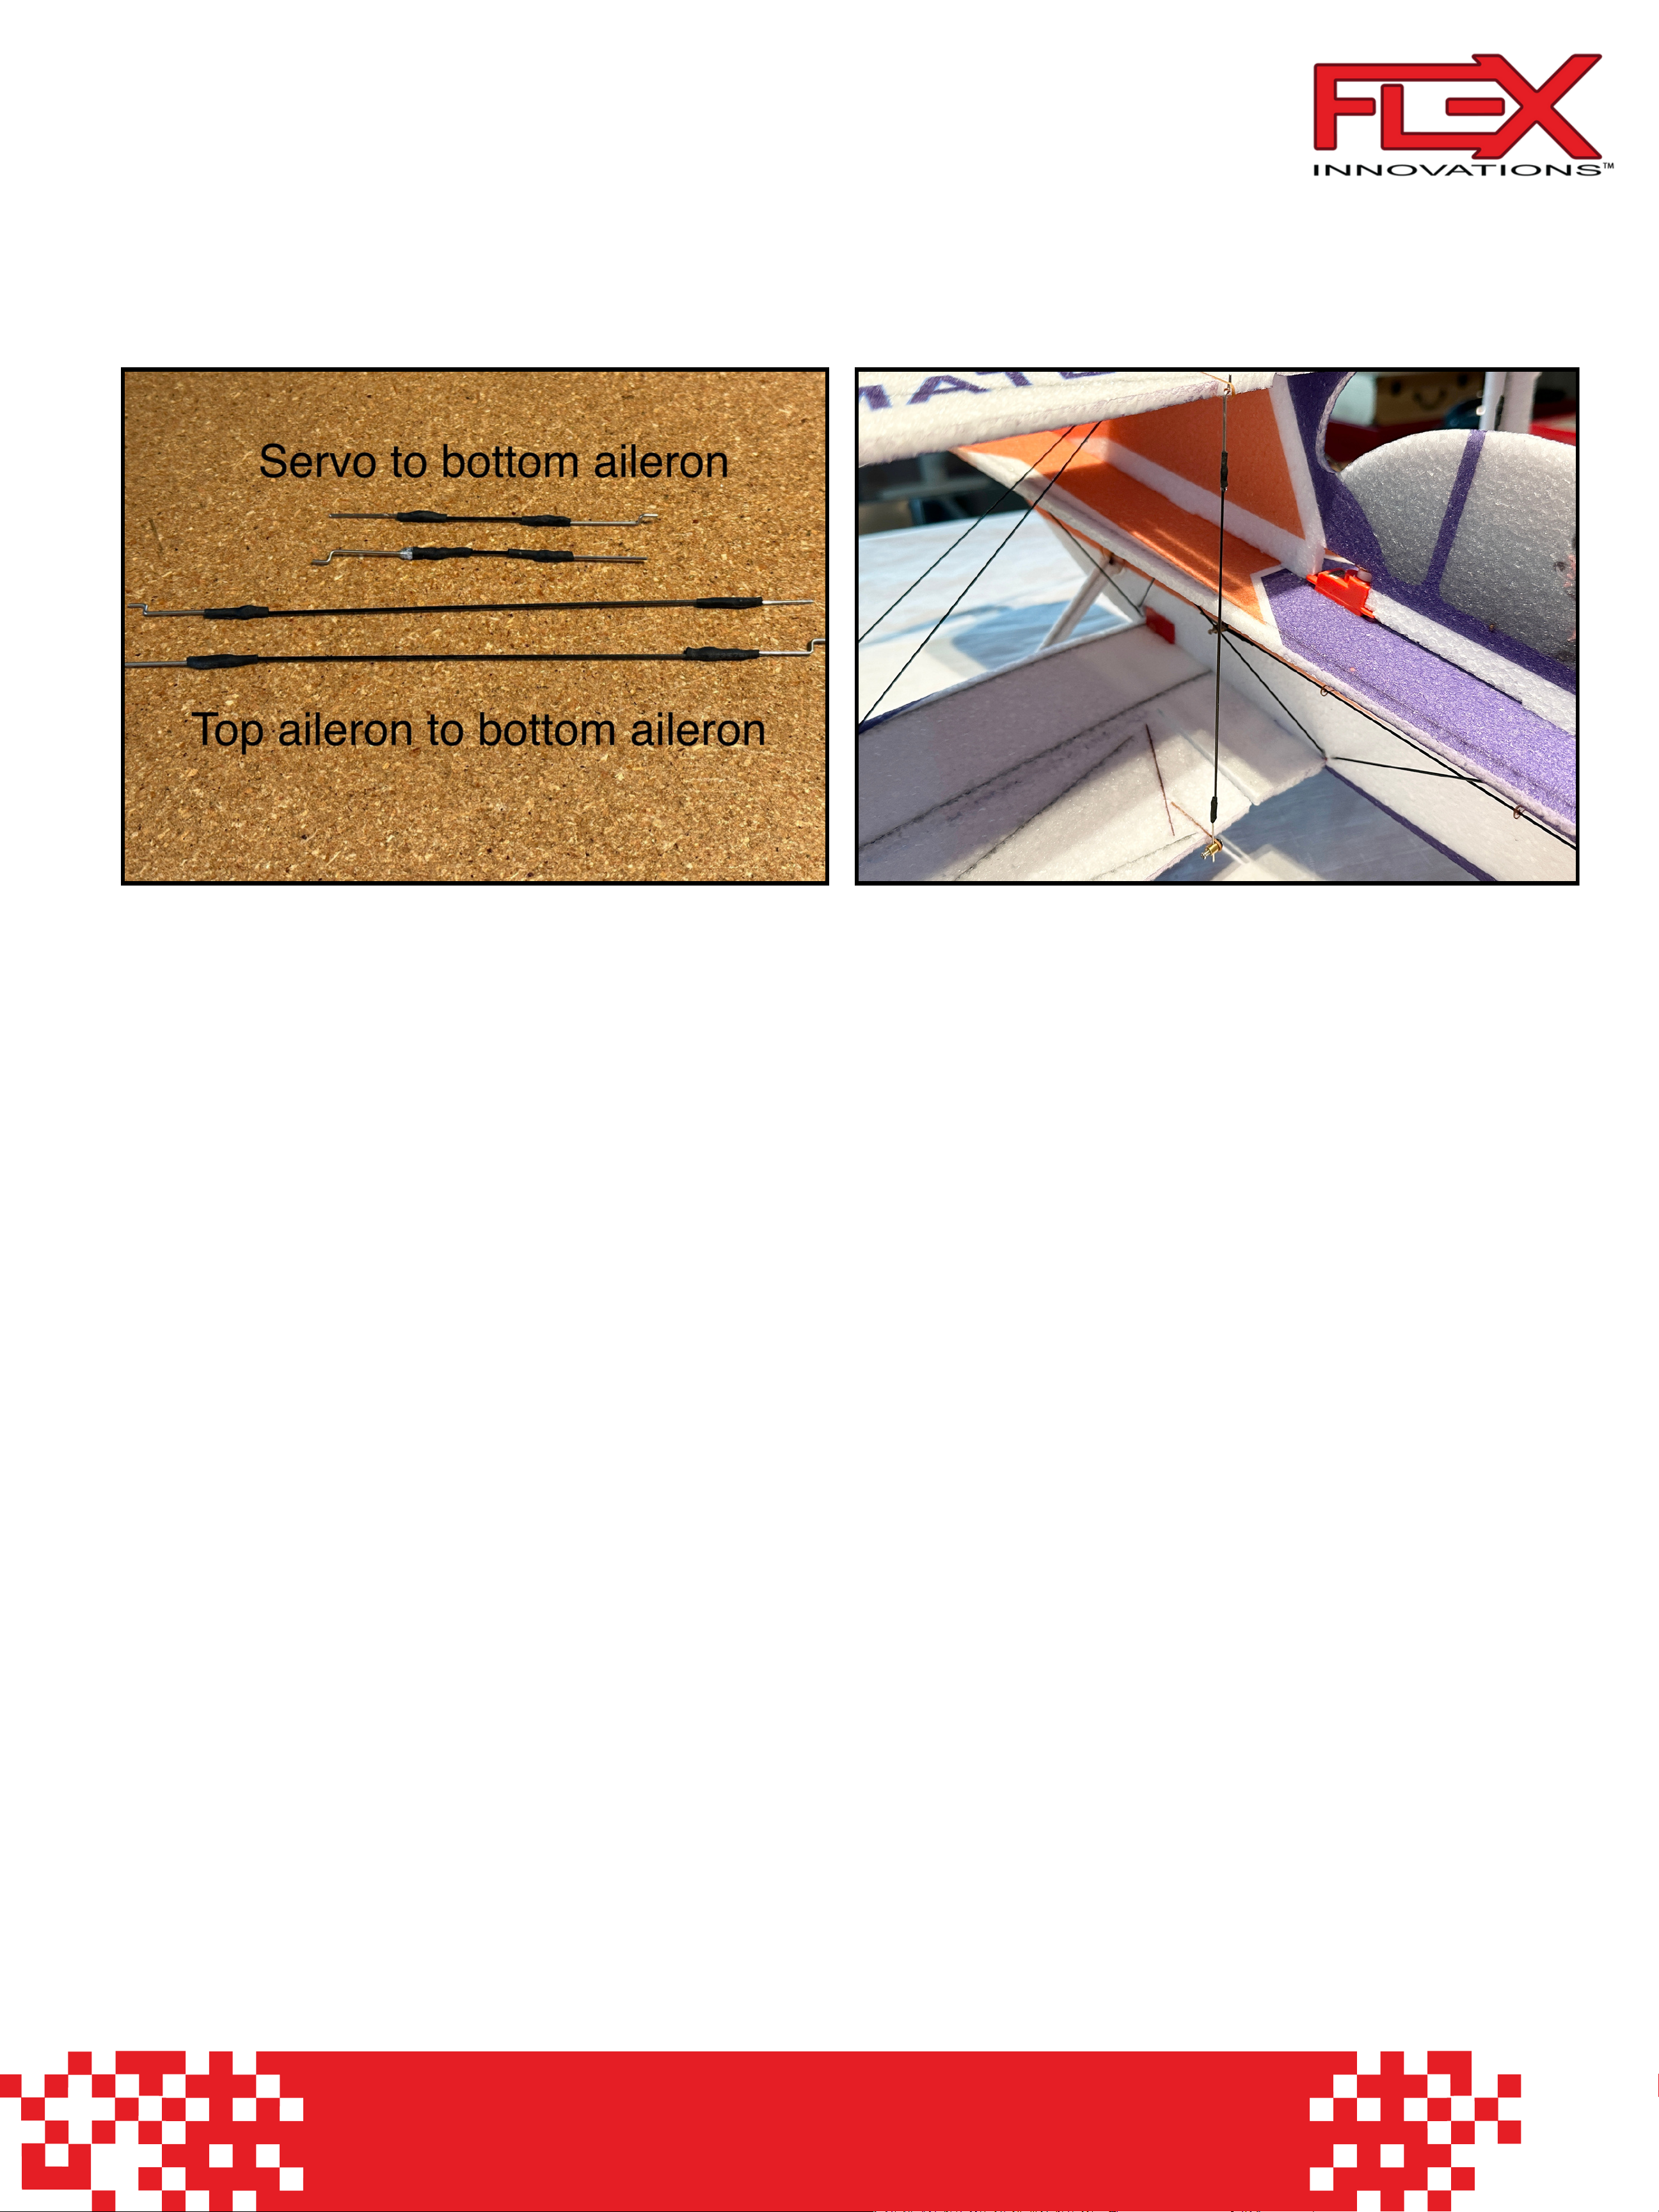
Radio Setup
1) Install RX and bind to your radio
2) Once bound, adjust the linkages in the EZ connectors to make
sure all surfaces are close to the center. Use a Phillips screwdriver
to tighten the connectors once centered.
3) Low Rate/Precision: 50% Dual Rates at 60-70% expo
High/3D/XA Rate: 100% Dual Rates at 50% expo
Center of Gravity:
Ultimate FP: Approximately 45-60mm from top wing root LE
Page 13
12
Ultimate FP Instructions
Page 14

13
Ultimate FP Instructions
LIMITED WARRANTY
Warranty Coverage
Flex Innovations LLC and its authorized resellers (“Flex”) warrant to the original purchaser that this product (the
“Product”) will be free from defects in materials and workmanship at the date of purchase.
Outside of Coverage
The warranty is not transferable and does not cover:
(a) Products with more than 45 days after the purchase date
(b) Damage due to acts of God, accident, misuse, abuse, negligence, commercial use, or due to improper use,
installation, operation, or maintenance
(c) Damage to other components or assemblies associated with the use of the Product.
(d) Modification of or to any part of the Product
(e) Product not purchased from an authorized Flex Innovations dealer or distributor.
(f) Product that has been partially, or fully assembled
(g) Shipping damage
(h) Cosmetic damage
(i) Services or labor associated with the repair, use or assembly of the Product.
OTHER THAN THE EXPRESS WARRANTY ABOVE, FLEX MAKES NO OTHER WARRANTY REPRESENTATION, AND
HEREBY DISCLAIMS ALL IMPLIED WARRANTIES, INCLUDING, WITHOUT LIMITATION, THE IMPLIED WARRANTIES OF
NONINFRINGEMENT, MERCHANTABILITY AND FITNESS FOR A PARTICULAR PURPOSE. THE PURCHASER
ACKNOWLEDGES THAT THEY ALONE HAVE DETERMINED THAT THE PRODUCT WILL SUITABLY MEET THE
REQUIREMENTS OF THE PURCHASER’S INTENDED USE.
Purchaser’s Remedy Flex’s sole obligation and purchaser’s sole and exclusive remedy shall be that Flex will, at its
option, either (i) service, (ii) replace any part of the Product determined by Flex to be defective, or (iii) replace the
Product determined by Flex to be defective. Flex reserves the right to inspect all Product(s) involved in a warranty
claim. Service or replacement decisions are at the sole discretion of Flex. Proof of purchase is required for all
warranty claims.
SERVICE OR REPLACEMENT AS PROVIDED UNDER THIS WARRANTY IS THE PURCHASER’S SOLE AND EXCLUSIVE
REMEDY. Limitation of Liability FLEX SHALL NOT BE LIABLE FOR SPECIAL, INDIRECT, INCIDENTAL OR
CONSEQUENTIAL DAMAGES, LOSS OF WAY, REGARDLESS OF WHETHER SUCH CLAIM IS BASED IN CONTRACT,
WARRANTY, TORT, NEGLIGENCE, STRICT LIABILITY OR ANY OTHER THEORY OF LIABILITY, EVEN IF FLEX HAS BEEN
ADVISED OF THE POSSIBILITY OF SUCH DAMAGES. Further, in no event shall the liability of Flex exceed the
individual price of the Product on which liability is asserted. As Flex has no control over use, setup, assembly,
modification or misuse, no liability shall be assumed nor accepted for any resulting damage and/or injury. By the
act of use, setup or assembly, the user accepts all resulting liability. If you as the purchaser or user are not
prepared to accept the liability associated with the use of the Product, purchaser is advised to return the Product
immediately in new and unused condition to the place of purchase.
 Loading...