

Flex Court FleXtreme Series Installation Manual

FLEX COURT INTERNATIONAL, INC
FleXtreme Series Installation Guide
“Delivering Ultimate Performance in Sports”
Tools You Will Need:
-Level
-Crescent Wrench (2)
-Phillips head Screw Driver
-9/16 Socket
-Rubber Mallet
-Shovel
-Wheelbarrow
-Gardening Hoe
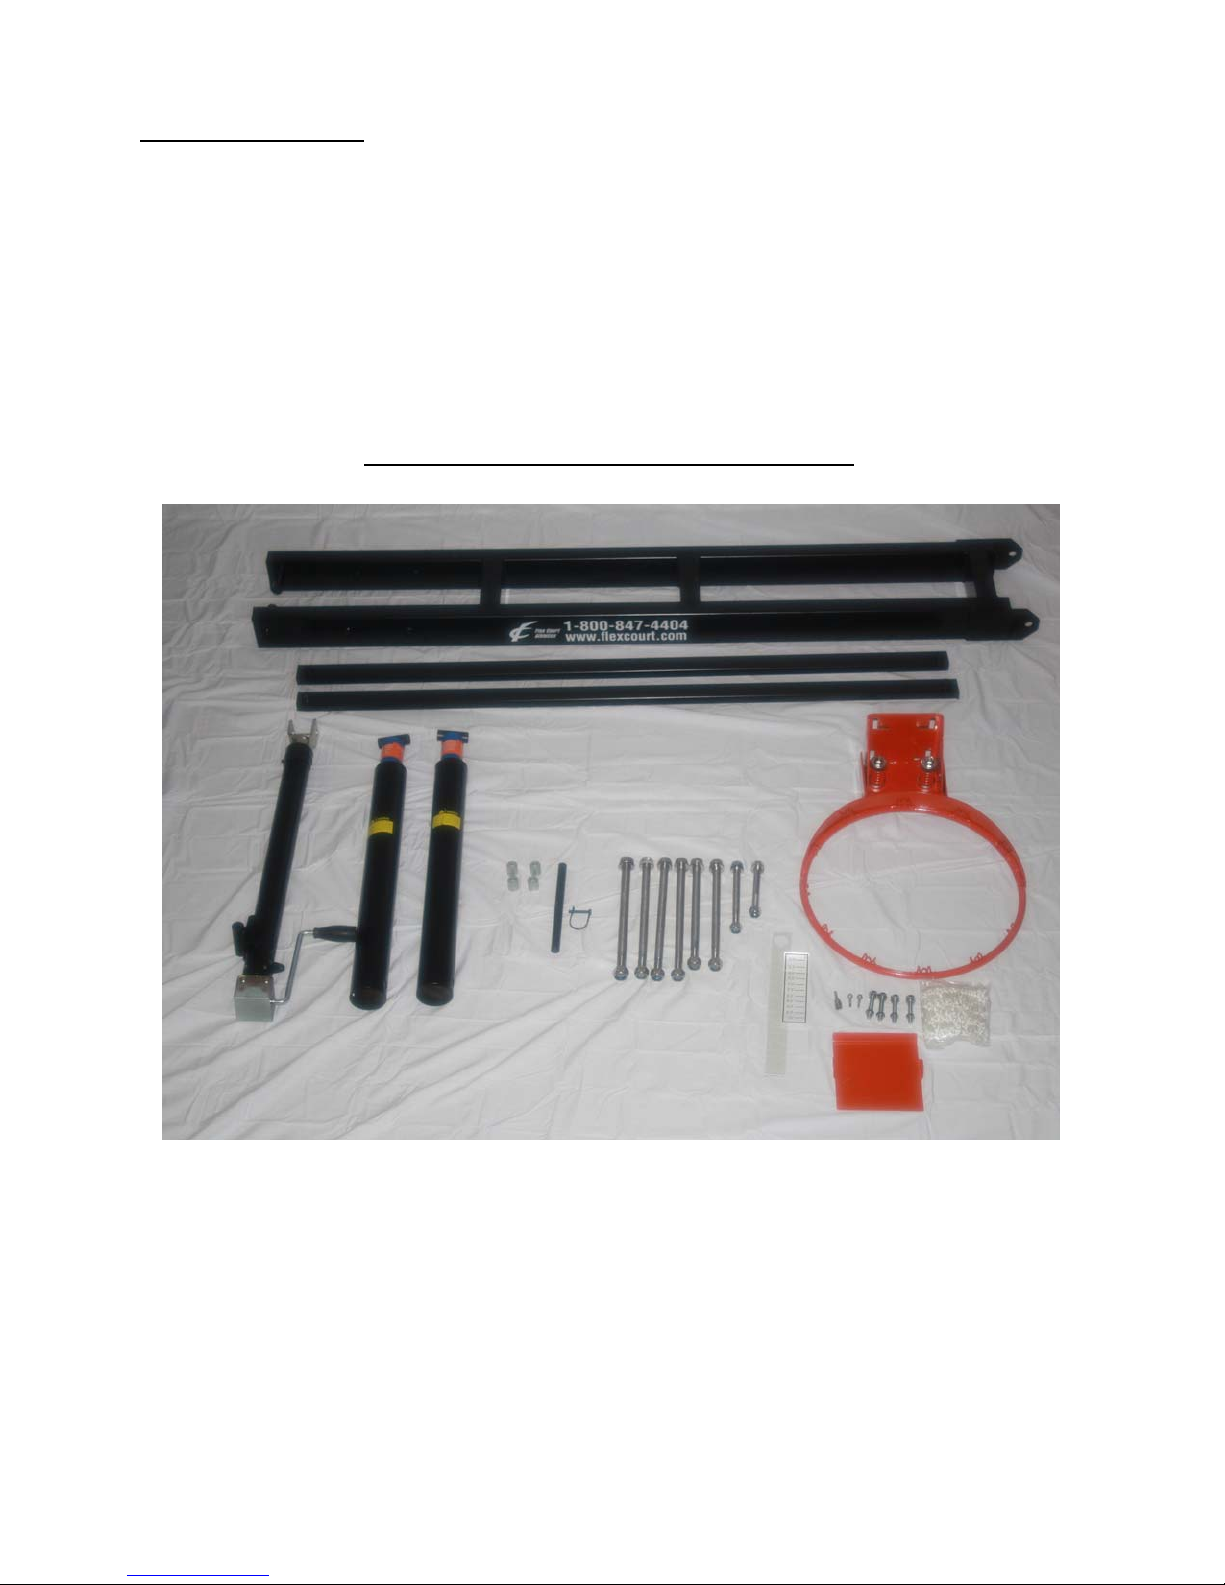
Parts Included with FleXtreme Hoop Systems:
1) Base Pole and Backboard
1) Pier Kit Plate, 4 Jbolts, and Rebar
1) Lower Extension Arm
2) Upper Extension Arms
1) Crank
2) Pistons with 872A and 672A, 1) Piston with 560A and 454A
4) Backboard Bushings
1) Safety bracket and Pin
3) 16mm x 11” Bolts and Nuts, 1) 18mm x 11” Bolt and Nut, 2) 16mm x 10” Bolts and Nuts,
1) 14mm x 5” Bolt and Nut, 1) 14mm x 4.5” Bolt and Nut
1) Plastic Height Indicator and Sticker
1) Rim with hardware, Net and Rim Plate Cover
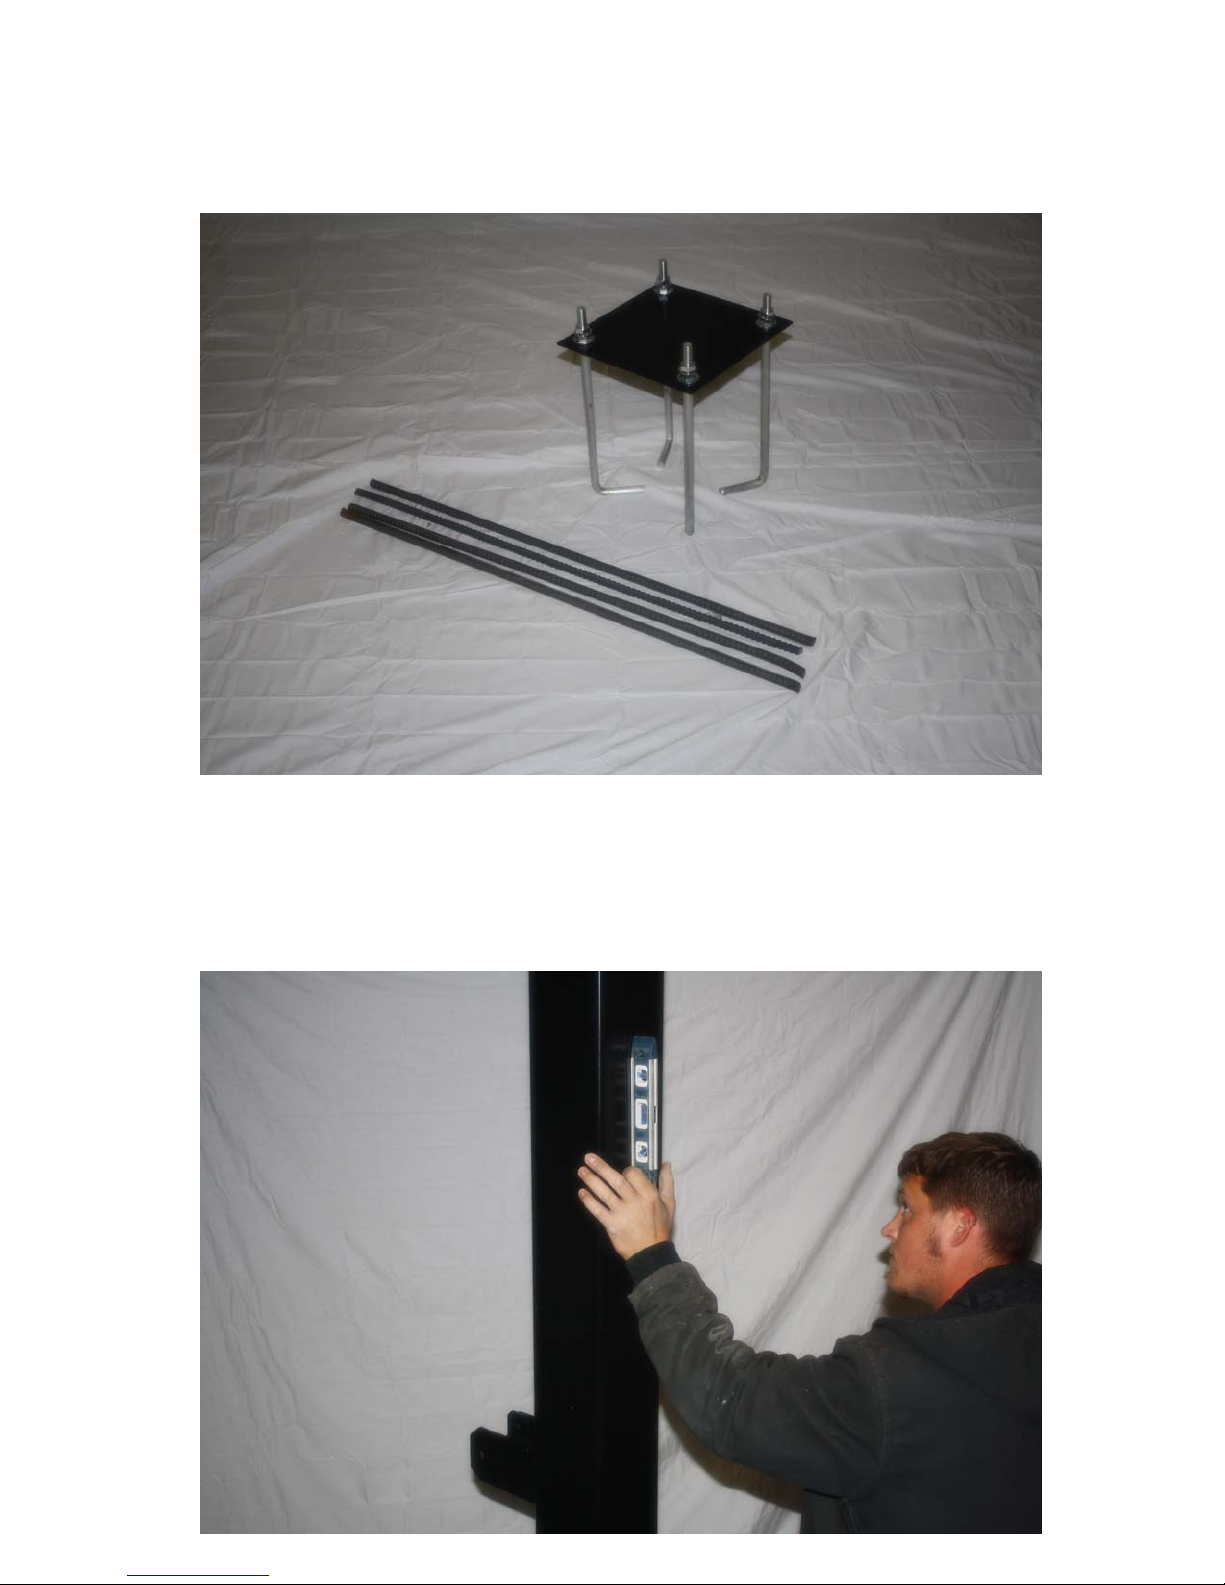
Build Pier Kit by threading 1 Nut on Jbolts, next put the pier kit plate on top of that nut and
then fasten nut on top of the plate, as shown and Place in concrete to bottom of base plate
and let sit min 4-5 days before proceeding to next step
Mount Pole on top of Jbolts, Level and use Locking Nuts to tighten
down pole
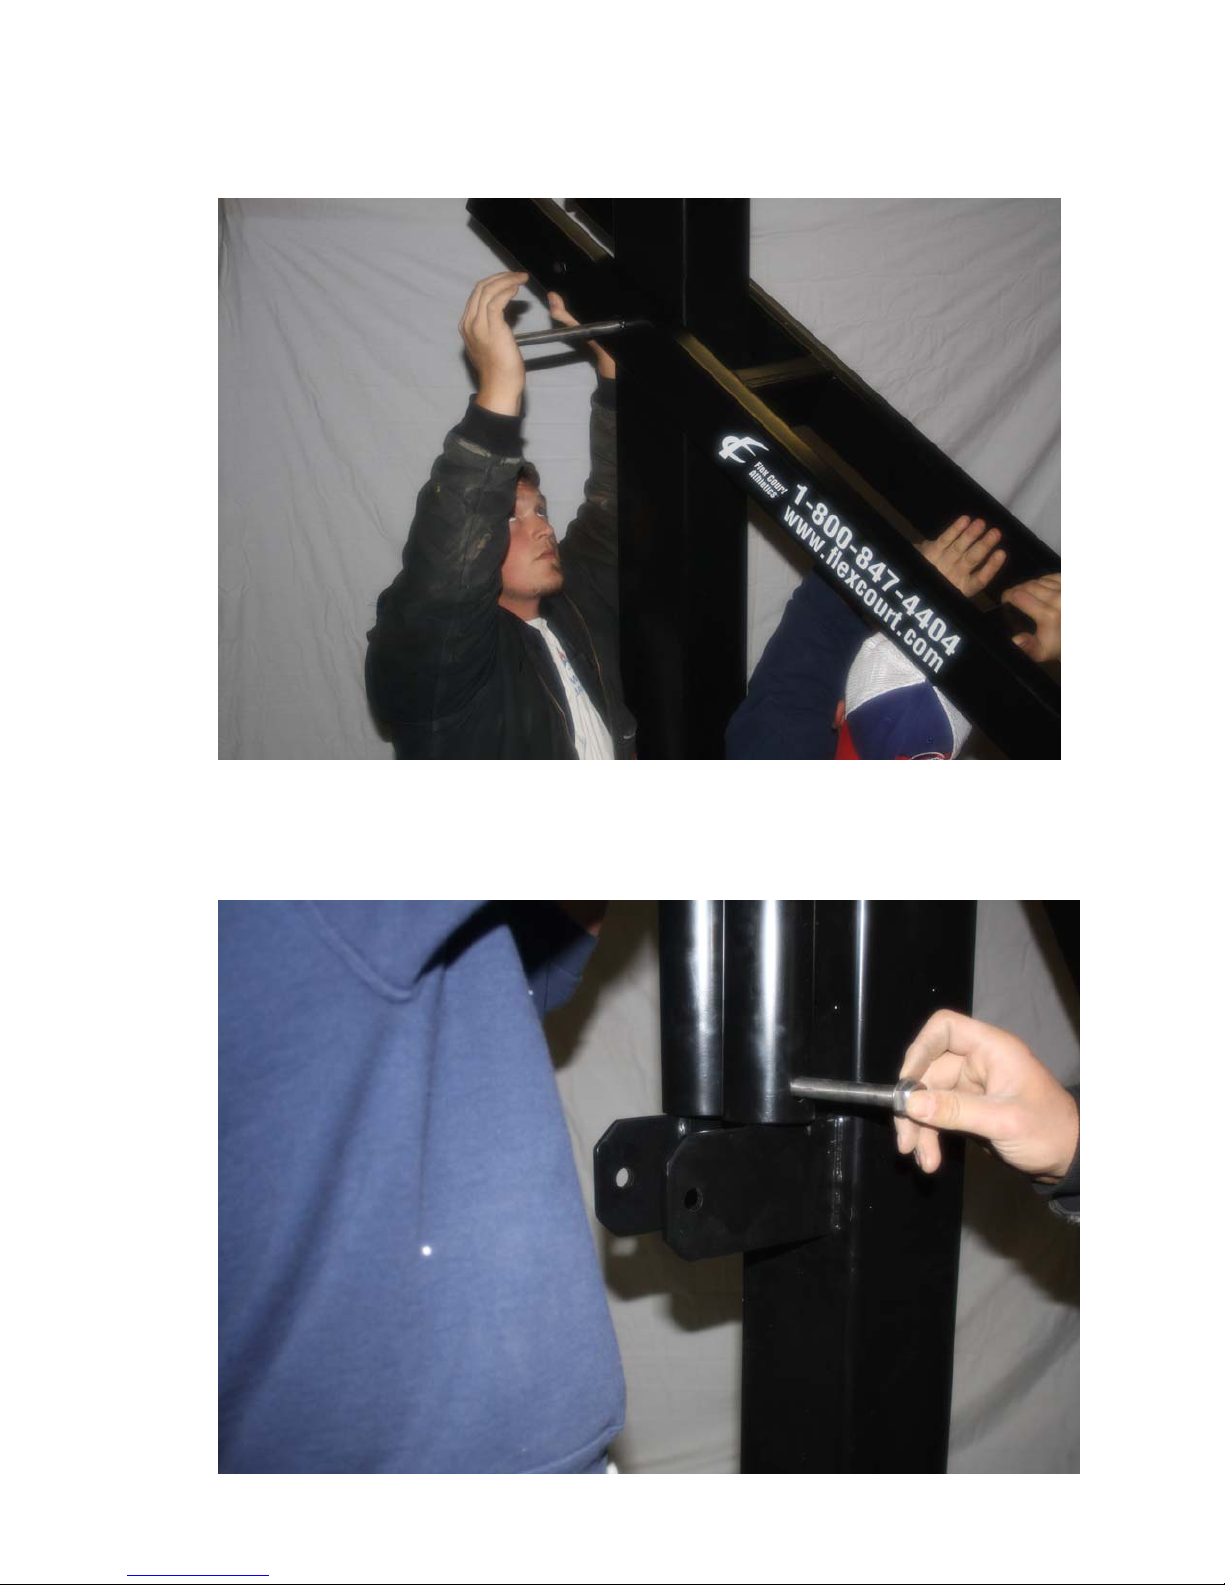
Attach Lower Extension Arm with 16mm x 11” Bolt and Nut.
NOTE: Use the First Set of Holes on the extension arm
Next line up the bottom holes of the pistons and fasten them with the 14mm x 5”
Bolt and Nut
 Loading...