

Page 1
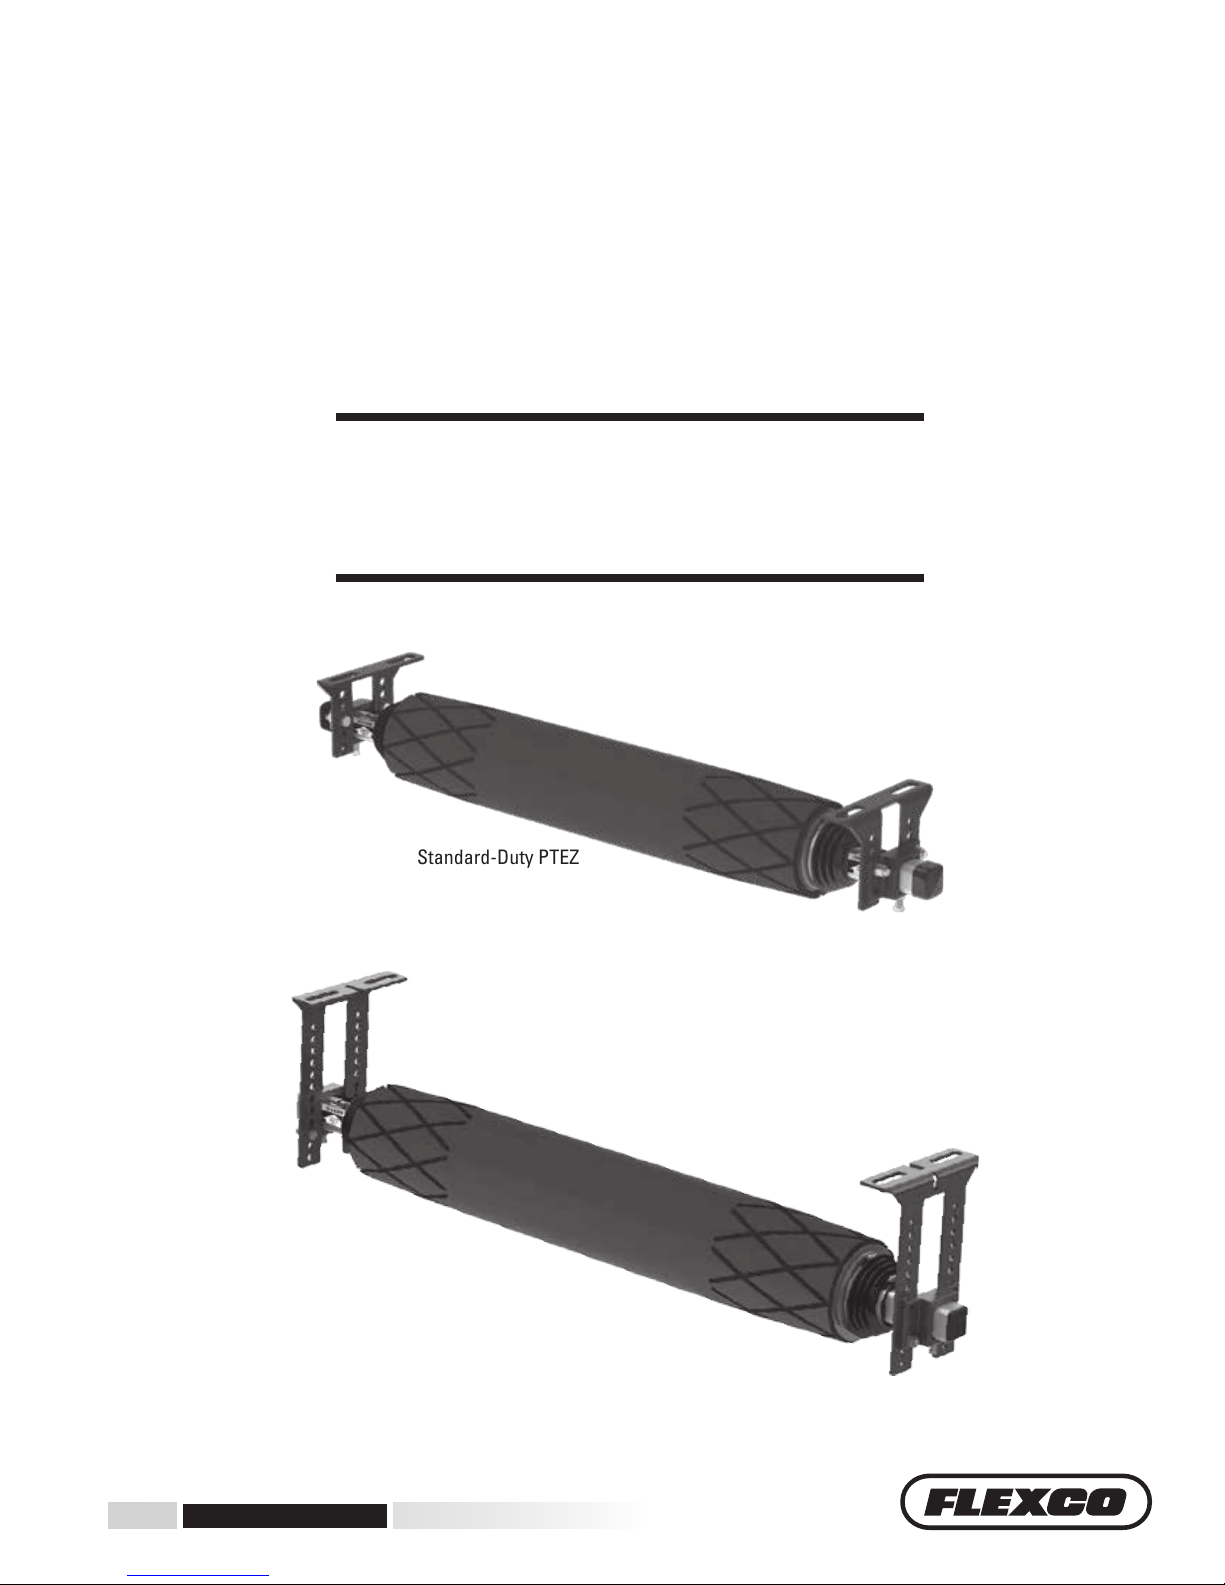
PTEZ™ Belt Trainer
Installation, Operation
and Maintenance Manual
Standard-Duty PTEZ
www.flexco.com
www.flexco.com
Heavy-Duty PTEZ
Page 2

PTEZ
™
Belt Trainer
Serial Number: _____________________________________________________________
Purchase Date: ______________________________________________________________
Purchased From: ____________________________________________________________
Installation Date: ____________________________________________________________
Serial number information can be found on the Serial Number Label
on the product.
is information will be helpful for any future inquiries or questions
about belt cleaner replacement parts, specications or troubleshooting.
2 PTEZ™ Belt Trainer
Page 3

Table of Contents
Section 1 - Important Information ...................................................................................................4
1.1 General Introduction ...........................................................................................................................4
1.2 User Benets .........................................................................................................................................4
1.3 Proper Belt Trainer Selection ..............................................................................................................5
Section 2 - Safety Considerations and Precautions ..........................................................................6
2.1 Stationary Conveyors ...........................................................................................................................6
2.2 Operating Conveyors ...........................................................................................................................6
Section 3 - Pre-Installation Checks and Options ..............................................................................7
3.1 Checklist ................................................................................................................................................7
3.2 Optional Installation Accessories .......................................................................................................8
Section 4 - Installation Instructions ..................................................................................................9
4.1 PTEZ ......................................................................................................................................................9
4.2 HD PTEZ.............................................................................................................................................12
Section 5 - Pre-Operation Checklist and Testing ............................................................................16
5.1 Pre-Op Checklist ................................................................................................................................16
5.2 Test Run the Conveyor ......................................................................................................................16
Section 6 - Maintenance...................................................................................................................17
6.1 New Installation Inspection ..............................................................................................................17
6.2 Routine Visual Inspection .................................................................................................................17
6.3 Routine Physical Inspection .............................................................................................................17
6.4 Roller Replacement Instructions ......................................................................................................18
6.5 Maintenance Log ................................................................................................................................19
6.6 Maintenance Checklist ......................................................................................................................20
Section 7 - Troubleshooting ............................................................................................................21
Section 8 - Specs and CAD Drawings ..............................................................................................22
8.1 CAD Drawing - PTEZ .......................................................................................................................22
8.2 CAD Drawing - HD PTEZ................................................................................................................23
8.3 CAD Drawing - HD PTEZ Underground ......................................................................................24
Section 9 - Replacement Parts .........................................................................................................25
9.1 Replacement Parts List - PTEZ ........................................................................................................25
9.2 Replacement Parts List - HD PTEZ .................................................................................................26
Section 10 - Other Flexco Conveyor Products ................................................................................ 27
3
Page 4

Section 1 - Important Information
1.1 General Introduction
We at Flexco are very pleased that you have selected a PTEZ™ Belt Trainer for your conveyor system.
is manual will help you to understand the installation, operation and maintenance of this product and assist
you in making it work up to its maximum eciency over its lifetime of service.
It is essential for safe and ecient operation that the information and guidelines presented be properly
understood and implemented. is manual will provide safety precautions, installation instructions,
maintenance procedures and troubleshooting tips. In addition, please follow all standard, approved safety
guidelines when working on your conveyor.
If, however, you have any questions or problems that are not covered, please visit our web site or contact our
Customer Service Department:
Customer Service: 1-800-541-8028
Visit www.exco.com for other Flexco locations and products.
Please read this manual thoroughly and pass it on to any others who will be directly responsible for installation,
operation and maintenance of this belt trainer. While we have tried to make the installation and service tasks
as easy and simple as possible, this product does however require correct installation and regular inspection
and maintenance to maintain top working condition.
1.2 User Benets
Belt mistracking is a common problem that produces various problems, ranging from belt and structure damage
to product spillage and safety issues. By utilizing the PTEZ™, it is possible to correct a belt that is mistracking and
causing these problems. Multiple units may be required depending on the length of the mistracking belt.
4 PTEZ™ Belt Trainer
Page 5
Section 1 - Important Information
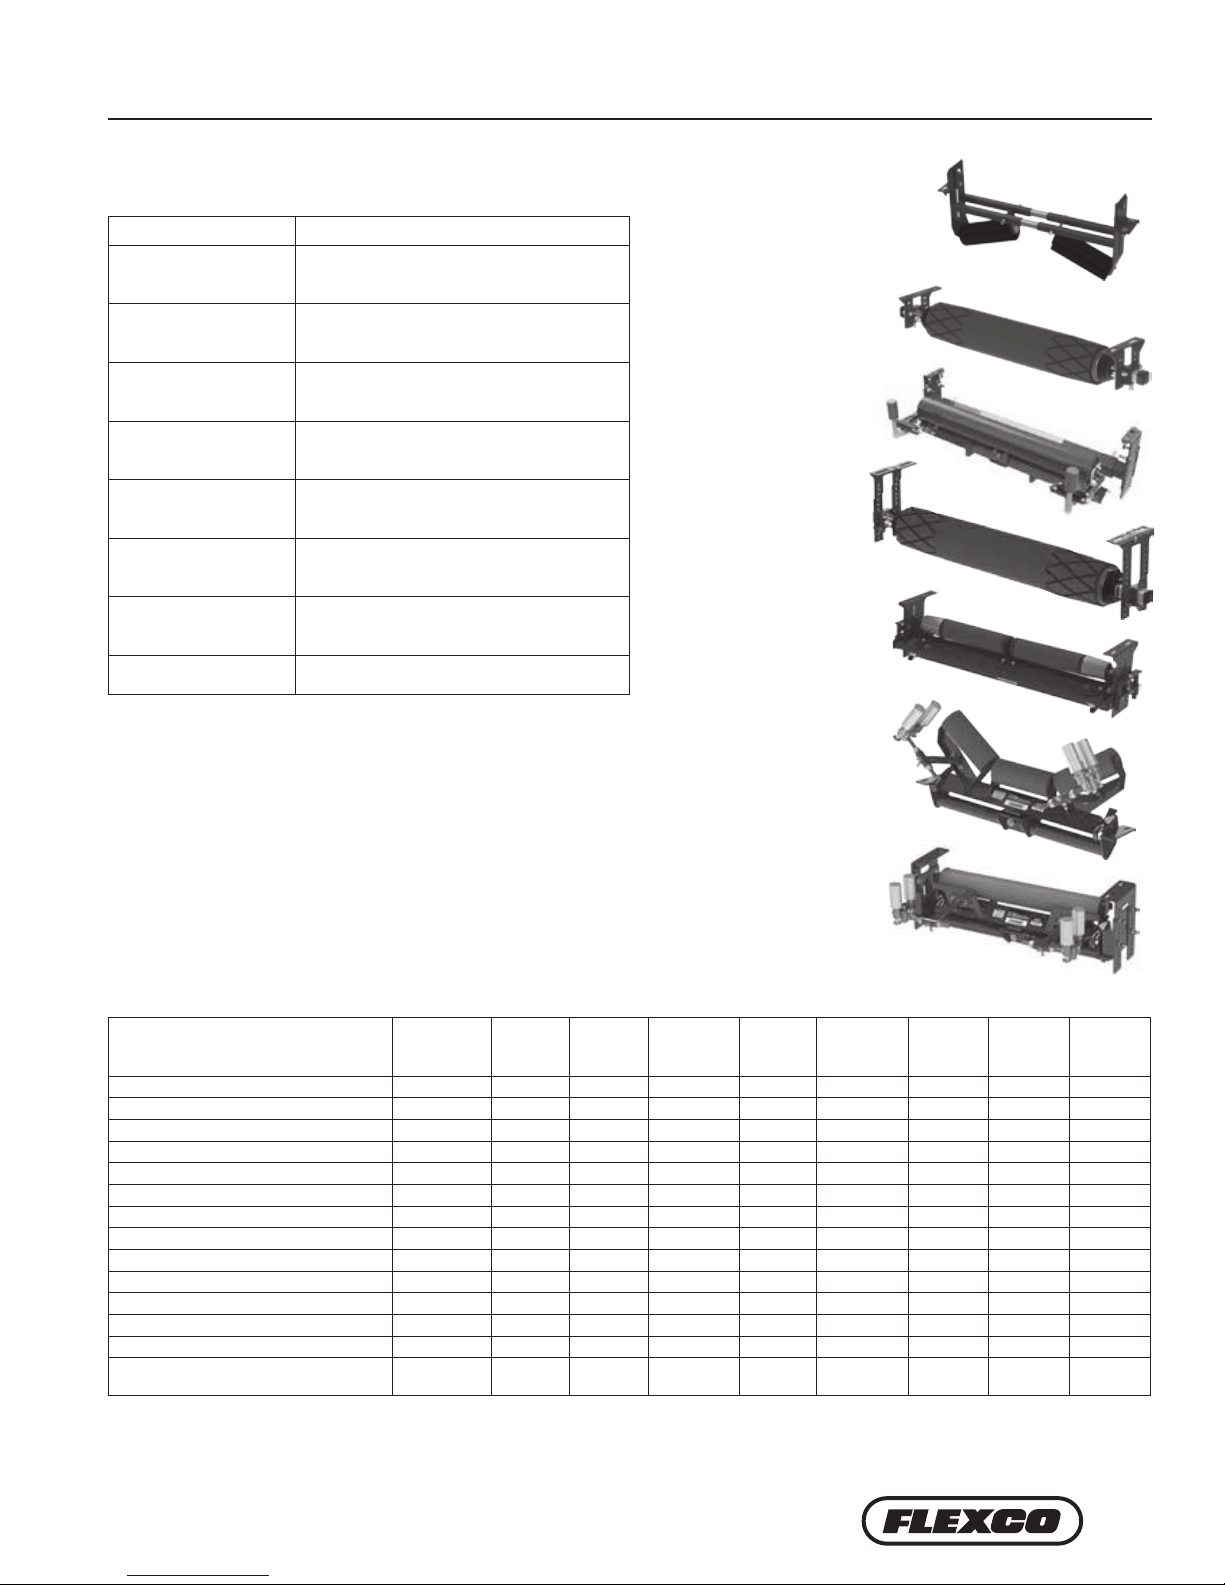
1.3 Proper Belt Trainer Selection
MODEL APPLICATION RANGE
Belt Positioner
™
Return side only, 800 PIW max tension on Small,
Medium and Large; 1200 PIW max tension on Extra
Large. Also works on reversing belts.
PTEZ
™
Medium-duty belts up to 1600 PIW max tension.
Also works on reversing belts. Belt width 18"-48"
(450 - 1200mm).
PT Smart
™
Medium-duty belts up to 1600 PIW max tension.
Belt width 42" - 84" (050 - 2100mm). Belt thickness
1" (25mm) maximum.
HD PTEZ
™
Medium-duty belts up to 2400 PIW max tension.
Belt widths + 9" (225mm) idler. Belt thickness 1"
(25mm) maximum. Also works on reversing belts.
PT Pro
™
Medium-duty belts 150 PIW min to 1600 PIW max
tension. Belt width 18" - 72" (450 - 1800mm). Also
works on reversing belts.
HD PT Pro
™
Heavy-duty belts 300 PIW min to 2400 PIW max
tension. Belt width 48" - 96" (1200 - 2400mm). Also
works on reversing belts.
PT Max
™
Heavy-duty belts up to 3000 PIW max
Generally 3/4" to 1" thick (19mm to 25mm)
Belt width 24" - 60" (600 - 1500mm)
HD PT Max
™
Heavy-duty belts up to 6000 PIW max tension. Belt
width 54" - 84" (1350 - 2100mm)
Belt Positioner
™
PTEZ
PT Smart
™
Standard
HD PTEZ
PT Pro
PT Max
™
™
™
Top Side
™
™
PT Max
Return Side
Conveyor Criteria
Top side mistracking No No No No No No Ye s Yes Ye s
Return side mistracking Yes Yes Yes Ye s Yes Yes Yes Ye s Yes
Reversing Yes Yes Yes No Yes Yes No No No
Belt mistracking to one side Better Better Better Better Better Better Better Better Better
Belt mistracking to both sides Acceptable Better Better Best Better Better Best Best Best
Inconsistent tracking problem Good Better Better Best Better Better Best Best Best
Belt is cupped (heavy) Best ‡ Better ‡ Better ‡ Better Better Better Better Better Better
Belt has edge damage Best Best Best Good Best Best Good Good Good
Ease of Installation Best Better Better Good Good Good Good Good Good
Belt has low running tension (150-300 PIW) Good Good Good Good Good N/A Good N/A N/A
Belt has medium running tension (300-1600 PIW) Better Better Better Better Better Better Best Best Best
Belt has high running tension (1600+ PIW) N/A N/A N/A N/A N/A Best Better Best Best
Approx. "upstream" effect *∆ 50' (15 M) 20' (6 M) 20' (6 M) 20' (6 M) 20' (6 M) 20' (6 M) 50' (15 M) 50' (15 M) 50' (15 M)
Approx. "downstream" effect *∆ 50' (15 M)
‡ Installed on the clean side of the return belt
* Typical results; actual results may vary
∆ Disc idlers have the potential to reduce these numbers
Belt
Positioner
™
PTEZ
100' – 120'
(30 – 36 M)
™
Heavy
Duty
PTEZ
100' – 120'
(30 – 36 M)
PT Smart™PT Pro
™
120' – 150'
(36 – 45 M)
100' – 120'
(30 – 36 M)
™
Heavy
Duty
PT Pro
100' – 120'
(30 – 36 M)
™
PT Max
150' – 200'
(45 – 61 M)
™
Heavy
Duty
PT Max
150' – 200'
(45 – 61 M)
™
Super
Duty
PT Max
150' – 200'
(45 – 61 M)
™
5
Page 6

Section 2 - Safety Considerations and Precautions
Before installing and operating the PTEZ™ Belt Trainer, it is important to review and understand the following safety
information.
ere are setup, maintenance and operational activities involving both stationary and operating conveyors. Each case
has a safety protocol.
2.1 Stationary Conveyors
e following activities are performed on stationary conveyors:
• Installation • Idler replacement
• Cleaning • Repairs
!
DANGER
It is imperative that OSHA/MSHA Lockout/Tagout
(LOTO) regulations, 29 CFR 1910.147, be followed
before undertaking the preceding activities. Failure to
use LOTO exposes workers to uncontrolled behavior of
the belt trainer caused by movement of the conveyor belt
or belt trainer. Severe injury or death can result.
Before working:
• Lockout/Tagout the conveyor power source
• Clear the conveyor area where work is to take place
!
WARNING
Use Personal Protective Equipment (PPE):
• Safety eyewear
• Hardhats
• Safety footwear
Close quarters and heavy components create a worksite
that compromises a worker’s eyes, feet and skull.
PPE must be worn to control the foreseeable hazards
associated with conveyor belt components. Serious
injuries can be avoided.
2.2 Operating Conveyors
ere are two routine tasks that must be performed while the conveyor is running:
• Inspection of belt trainer performance
• Dynamic troubleshooting
!
DANGER
!
WARNING
Every belt conveyor is an in-running nip hazard. Never
touch or prod an operating belt trainer. Conveyor
hazards cause instantaneous amputation and entrapment.
!
WARNING
Conveyors contain moving hazards. Stay as far from the
trainer as practical and use safety eyewear and headgear.
6 PTEZ™ Belt Trainer
Never adjust anything on an operating belt trainer.
Flailing hardware can cause serious injury or death.
Page 7

Section 3 - Pre-installation Checks and Options
3.1 Checklist
• Check the model and size of the belt trainer. Is it the right one for your beltline?
• Check the PTEZ™ to be sure all the parts are included in the shipment.
– Trainer
–
Mounting hardware
– Instruction kit
• Find the information packet in the shipment
• Review the “Tools Needed” section on the front of the installation instructions.
• Prepare the conveyor site:
– Identify the point(s) of mistracking, expecting 100'- 120' (30-37 M) of downstream inuence.
– Position the unit 20' (6.1 M) aer the start of the mistracking.
– Identify an opening of at least 9" (225mm) for Standard Duty, 10.5" (265mm) for Heavy Duty if possible to
avoid interference with roller during installation.
– Remove old tracking devices.
– If the conveyor has disc idlers, replace one idler before and one idler aer the location where the trainer
will be installed with a standard idler.
– If the conveyor has V-return idlers, replace one idler before and aer where the trainer will be located with
a standard at idler.
7
Page 8
Section 3 - Pre-Installation Checks and Options (cont.)
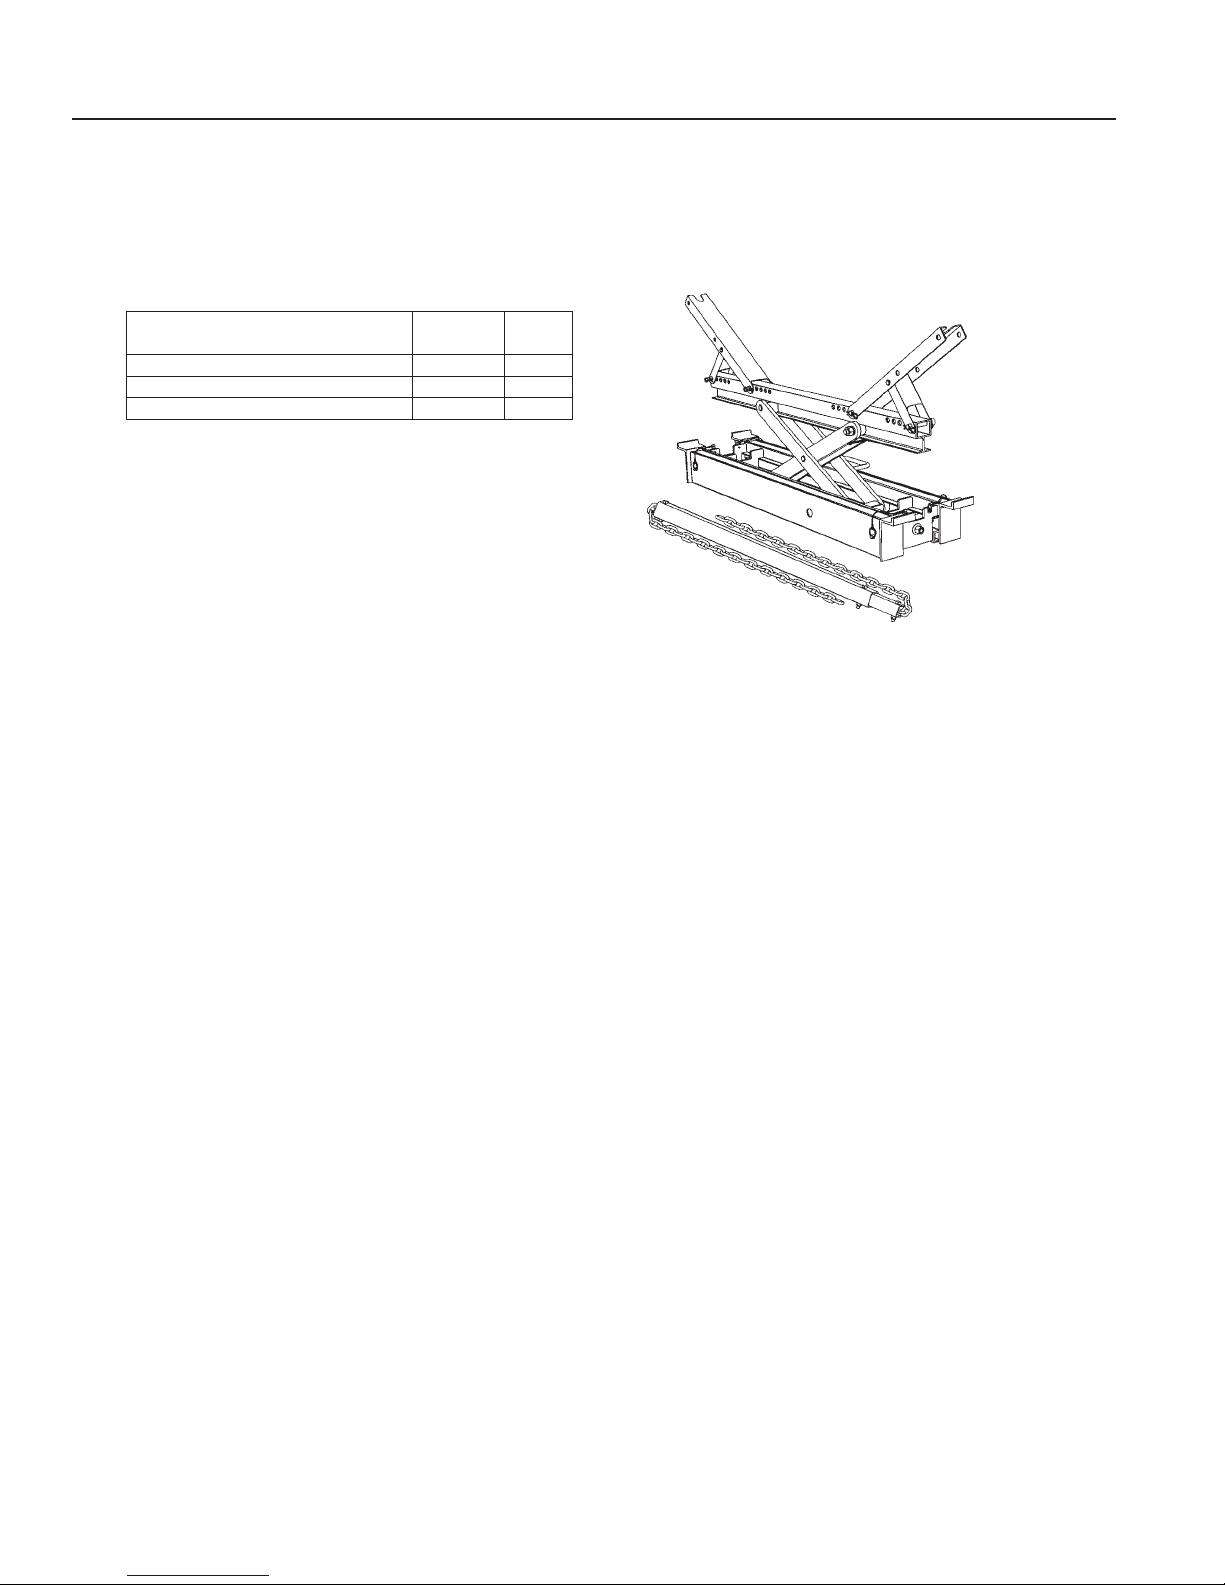
3.2 Optional Installation Accessories
Optional tools can make the installation of the PTEZ™ Belt Trainer easier and faster.
Flex-Lifter™ Conveyor Belt Lifter
Description
Medium Flex-Lifter 36" - 60" (900 - 1500mm) FL-M 76469
Large Flex-Lifter 48" - 72" (1200 - 1800mm) FL-L 76470
XL Flex-Lifter 72" - 96" (1800-2400mm) FL-XL 76983
Ordering
Number
Flex-Lier™ Conveyor Belt Lier
e Flexco Flex-Lier makes the job of liing the
conveyor belt easy and safe. Using two Flex-Liers,
the belt can be quickly lied out of the way to install
the PTEZ™. e Flex-Lier has the highest safe
li rating available at 4000 lbs (1810 kg). And it’s
versatile. It can also be used to li topside or return
side belt for splicing, roller replacement or other
maintenance jobs. Available in three sizes: Medium
for belt widths 36" - 60" (900 - 1500mm), Large for
belt widths 48" - 72" (1200 - 1800mm), and XL for
belt widths 72" - 96" (1800 - 2400mm).
Item
Code
8 PTEZ™ Belt Trainer
Page 9
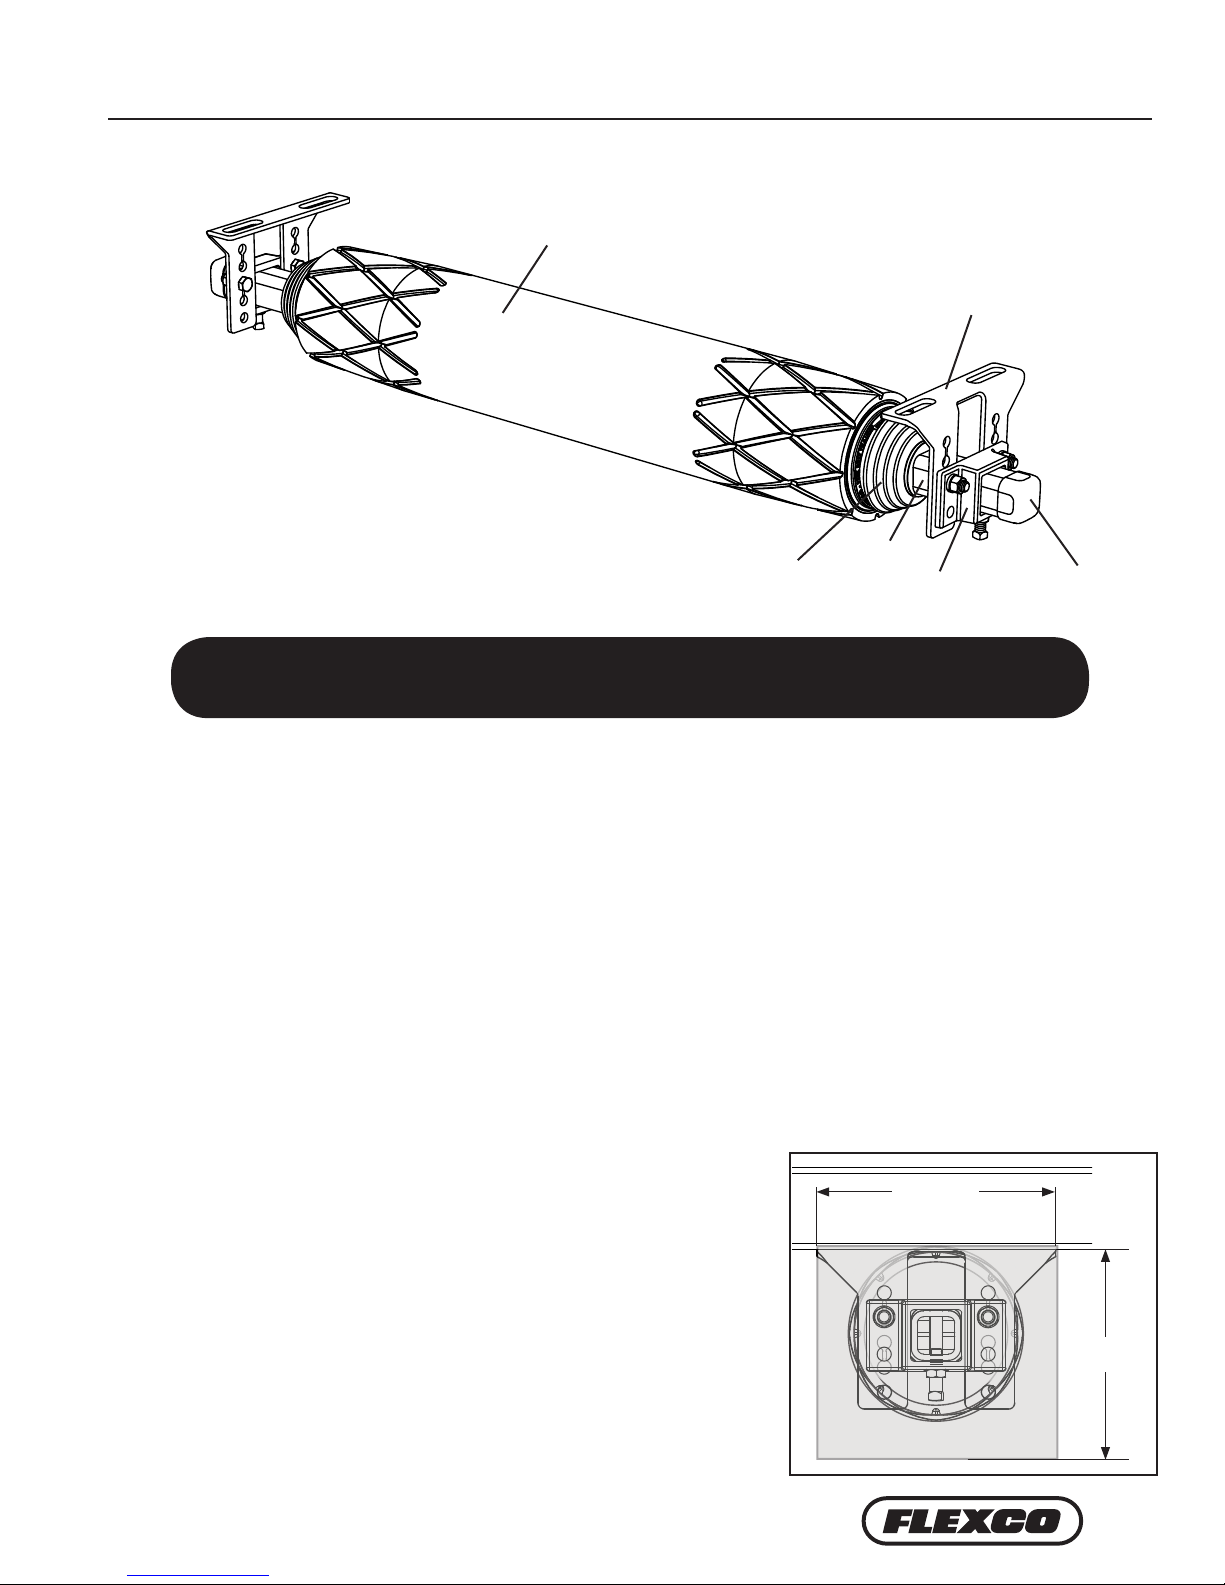
Section 4 - Installation Instructions - PTEZ
™
4.1 PTEZ
™
Roller
Mounting Bracket
Dust Cover
Main Shaft
Main Shaft
Bracket
Physically lock out and tag the conveyor at the power source
before you begin belt trainer installation.
Main Shaft
End Cap
CAUTION: Components may be heavy. Use safety-approved liing procedures.
Before You Begin:
• A serial number label is located in the instruction packet. Following
installation, please locate space on or near the PTEZ to apply this label.
Please use this number in any correspondence.
• Use the necessary mechanical liing equipment (crane, come-alongs,
etc.) for safe installation.
• e trainer should not be positioned closer than 20 feet (6M) from the
tail pulley, take-up pulleys, or head pulley.
• Follow all safety precautions when using a cutting torch.
Conveyor Site Preparation:
• Identify the point(s) of mistracking, expecting 100'- 120' (30-37 M)
of downstream inuence.
• Position the unit 20' (6 M) aer the start of the mistracking.
• Identify an opening of at least 9" (225mm).
• Remove any existing tracking devices that fall in the estimated
tracking range of the PTEZ as multiple dierent tracking devices
may reduce or prevent the PTEZ from tracking as intended.
Tools Needed:
• Tape Measure
• (2) 3/4" Wrenches (19mm)
• Medium or Large Adjustable Wrench
• Cutting Torch/Welder
• (2) Come-Alongs (3/4 Ton
Minimum)
• Any necessary equipment
for moving and liing heavy
components
• Straightedge or Level
• Marking Pen
9" (225mm)
9" (225mm)
9
Page 10

Section 4 - Installation Instructions - PTEZ
4.1 PTEZ
PTEZ Preparation and Installation:
1. Identify location for PTEZ and mount one bracket.
STRUCTURE
BELT
3" (75mm)
Fig. 1
BELT
Lift Belt 3" (75mm)
+
Fig. 2
1-5/8"
(41mm)
a. For push-up installation, use a straightedge to push up
against the belt to remove the slack and make a mark on
the bracket for the bottom of the belt. From that mark,
measure down 3" (75mm) and make a second mark
(Fig. 1). e second mark is where the center of the pole
should line up in Step 6.
b. For push-down or clean-side installation, use a
straightedge to push down against the belt to remove the
slack and make a mark on the bracket for the top of the
belt. From that mark, measure up 3" and make a second
mark. e second mark is where the center of the pole
should line up in Step 6.
2. Li the belt approximately 3" (76mm) where the trainer
will be installed. Remove existing idler (if applicable)
(Fig. 2). NOTE: If the conveyor has disc idlers, replace
one idler with a standard idler before and aer the
location where the trainer will be installed.
™
Fig. 3
Fig. 4
3"
(76mm)
Equal Distance
Main Shaft Bracket
3. Position mounting brackets. May be mounted to
existing idler hole patterns. Overall range of adjustment
on brackets is 1-5/8" (41mm) above the top ange or 3
(76mm) below the top ange (Fig. 3).
4. Square the mounting brackets. Measure from a xed
location on both sides to ensure alignment (Fig. 4).
5. Slide on the main sha brackets. Finger-tighten bolts
for further adjustment later (Fig. 5).
Fig. 5
10 PTEZ™ Belt Trainer
Finger-tighten bolt
Page 11

Section 4 - Installation Instructions - PTEZ
™
4.1 PTEZ
6. Li the roller and main sha bracket assembly. Be sure to use safe and secure liing procedures to li the PTEZ
into position. Ensure the arrows on main sha label point up or down towards the belt (Fig. 6a).Align center of
sha with mark on mounting bracket (from Step 1) and nger-tighten bolts between the mounting bracket and
main sha bracket (Fig. 6b).
STRUCTURE
BELT
Align center of
shaft with mark
Finger-tighten
bolts
Fig. 6a
Fig. 7
Arrows must point to belt
Equal
Belt
Roller
INCORRECT - raise roller
Belt
Roller
Fig. 6b
7. Ensure main sha is centered on main sha
brackets (equal length showing on both sides of
roller) (Fig. 7).
8. Lower the belt onto the roller. Ensure belt completely
contacts roller. Raise extending brackets one hole
if there is not good contact (Fig. 8). Belt should be
pushed up or down approximately 1/2" to 1" (1225mm) from normal running height. If there is still a
gap between the PTEZ and the belt, adjustments may
be made in 1/2" (12mm) increments until the gap
disappears. NOTE: If gap persists consider push-down
installation.
Fig. 8
CORRECT
9. Tighten all bolts, install end caps on main sha, and
proceed to pre-op checklist on page 12.
11
Page 12

Section 4 - Installation Instructions - PTEZ
™
4.2 HD PTEZ
Physically lock out and tag the conveyor at the power source
™
Roller
Dust Cover
Main Shaft
Mounting Bracket
Main Shaft
Bracket
Main Shaft
End Cap
before you begin belt trainer installation.
CAUTION: Components may be heavy. Use safety-approved liing procedures.
Before You Begin:
• A serial number label is located in the instruction packet.
Following installation, please locate space on or near the
HD PTEZ to apply this label. Please use this number in any
correspondence.
• Use the necessary mechanical liing equipment (crane, comealongs, etc.) for safe installation.
• e trainer should not be positioned closer than 20 feet (6M)
from the tail pulley, take-up pulleys, or head pulley.
• Follow all safety precautions when using a cutting torch.
Conveyor Site Preparation:
• Identify the point(s) of mistracking, expecting 100'- 120' (30-37 M
of downstream inuence.
• Position the unit 20' (6 M) aer the start of the mistracking.
• Identify an opening of at least 12" (305mm).
• Remove any existing tracking devices that fall in the estimated
tracking range of the HD PTEZ as multiple dierent tracking
devices may reduce or prevent the HD PTEZ from tracking as
intended.
Tools Needed:
• Tape Measure
• (2) 3/4" Wrenches (19mm)
• Medium or Large Adjustable Wrench
• Cutting Torch/Welder
• (2) Come-Alongs (3/4 Ton Minimum)
• Any necessary equipment for moving and
liing heavy components
• Straightedge or Level
• Marking Pen
12" (305mm)
15" (381mm)
12 PTEZ™ Belt Trainer
Page 13

Section 4 - Installation Instructions - PTEZ
™
4.2 HD PTEZ
™
PTEZ Preparation and Installation:
For Underground J-bolt or wire rope mounting, see page 15.
STRUCTURE
BELT
3.5" (90mm)
Fig. 1
BELT
Lift Belt 5" (125mm)
1. Identify location for HD PTEZ and mount one bracket.
a. For push-up installation, use a straightedge to push up
against the belt to remove the slack and make a mark
on the bracket for the bottom of the belt. From that
mark, measure down 3.5" (90mm) and make a second
mark (Fig. 1). e second mark is where the center of
the pole should line up in Step 6.
b. For push-down or clean-side installation, use the
weight of the roller to deect the belt and remove
cupping. Mount brackets to structure and check
position of mounting holes. Push unit down 1/2"
(50mm) more and bolt in place. Conrm no daylight.
2. Li the belt approximately 5" (125mm) where the
trainer will be installed. Remove existing idler (if
applicable) (Fig. 2). NOTE: If the conveyor has disc
idlers, replace one idler with a standard idler before and
aer the location where the trainer will be installed.
Fig. 2
Fig. 3
1-1/4"
(32mm)
8-3/4"
(222mm)
Equal Distance
+
3. Position mounting brackets. May be mounted to
existing idler hole patterns. Overall range of adjustment
on brackets is 1-1/4" (32mm) above the top ange or
8-3/4" (222mm) below the top ange (Fig. 3).
4. Square the mounting brackets. Measure from a xed
location on both sides to ensure alignment (Fig. 4).
5. Slide on the main sha brackets. Finger-tighten bolts
for further adjustment later (Fig. 5).
Main Shaft Bracket
Fig. 4
Fig. 5
Finger-tighten bolt
13
Page 14

Section 4 - Installation Instructions - PTEZ
™
4.2 HD PTEZ
™
6. Li the roller and main sha bracket assembly. Be sure to use safe and secure liing procedures to li the HD
PTEZ into position. Ensure the arrows on main sha label point up or down towards the belt (Fig. 6a).Align center
of sha with mark on mounting bracket (from Step 1) and nger-tighten bolts between the mounting bracket and
main sha bracket (Fig. 6b).
STRUCTURE
Fig. 6a
BELT
Finger-tighten
bolts
Arrows must point to belt
Align center of
shaft with mark
Fig. 7
Equal
Belt
Roller
INCORRECT - raise roller
Belt
Roller
Fig. 6b
7. Ensure main sha is centered on main sha
brackets (equal length showing on both sides of
roller) (Fig. 7).
8. Lower the belt onto the roller. Ensure belt completely
contacts roller. Raise extending brackets one hole
if there is not good contact (Fig. 8). Belt should be
pushed up or down approximately 1/2" to 1" (1225mm) from normal running height. If there is still a
gap between the HD PTEZ and the belt, adjustments
may be made in 1/2" (12mm) increments until the gap
disappears. NOTE: If gap persists consider push-down
installation.
Fig. 8
14 PTEZ™ Belt Trainer
CORRECT
9. Tighten all bolts, install end caps on main sha, and
proceed to pre-op checklist on page 12.
Page 15

Section 4 - Installation Instructions - PTEZ
™
4.2 HD PTEZ
™
Underground Mounting Instructions
Parts shown below included with PTEZHD-UG items.
10. To attach mounting brackets to 4" or 5" channel structure, use included J-bolt plates as shown (customer
supplied J-bolt). (Fig. 9).
Fig. 6b
11. To mount to wire rope structure, use included U-bolt kit and position as shown. (Fig. 10).
Fig. 6b
15
Page 16

Section 5 - Pre-Operation Checklist and Testing
5.1 Pre-Op Checklist
• Recheck that all fasteners are tight
• Apply all supplied labels
• Be sure that all installation materials and tools have been removed from the belt and conveyor area
• Reconrm the arrows on the main tube point up or down towards the belt
5.2 Test Run the Conveyor
• Run the conveyor for at least 15 minutes and conrm the belt is tracking properly.
• If belt is still mistracking too far to one side, height adjustments may be made in 1/2" (12mm) increments
until air gap disappears. NOTE: Belt wrap around PTEZ should not exceed 10°
• NOTE: If conveyor has disc idlers, the belt may not get the full downstream tracking eect.
16 PTEZ™ Belt Trainer
Page 17

Section 6 - Maintenance
Flexco belt trainers are designed to operate with minimum maintenance. However, to maintain superior performance
some service is required. When the trainer is installed a regular maintenance program should be set up. is program
will ensure that the trainer operates at optimal eciency, and problems can be identied and xed before any damage
is done to the belt, the trainer, other conveyor components, or structure.
All safety procedures for inspection of equipment (stationary or operating) must be observed. e PTEZ™ is in direct
contact with the moving belt. Only visual observations can be made while the belt is running. Service tasks can be
done only with the conveyor stopped and by observing the correct lockout/tagout procedures.
6.1 New Installation Inspection
Aer the PTEZ has run for 15 minutes a visual inspection should be made to ensure the trainer is performing
properly. Make adjustments as needed.
6.2 Routine Visual Inspection (every 2-4 weeks)
A visual inspection of the PTEZ can determine:
• If the belt is tracking as required
• If the trainer is moving freely
• If the trainer is free of material and rolling properly
• If there is damage to the sha or other components
If any of the above conditions exist, a determination should be made on when the conveyor can be stopped for
trainer maintenance.
6.3 Routine Physical Inspection (every 6-8 weeks)
When the conveyor is not in operation and properly locked and tagged out, a physical inspection of the trainer
to perform the following tasks:
• Clean material buildup o the trainer and components.
• Pivot unit to ensure full and easy movement.
• Closely inspect complete unit for damage.
• Inspect all fasteners for tightness and wear. Tighten or replace if needed.
• When maintenance tasks are completed, test run the conveyor to ensure the trainer is performing
prop e r l y.
17
Page 18

Section 6 - Maintenance
6.4 Roller Replacement Instructions
Tapered Idler
Physically lock out and tag the conveyor at the power source
before you begin cleaner installation.
CAUTION: Components may be heavy. Use safety-approved liing procedures.
1. Remove tension from belt. Use a Flex-Lier or other appropriate liing equipment to li the belt approx. 3"
(75mm) o the trainer.
2. Mark the mounting bracket above or below the main sha bracket for reference when installing the new roller to
ensure replaement roller is installed at the same height.
3. Remove roller.
4. Install new roller. Conrm roller turns smoothly.
5. Lower the belt. Ensure belt completely contacts roller. Tighten all bolts.
18 PTEZ™ Belt Trainer
Page 19

Section 6 - Maintenance (cont.)
6.5 Maintenance Log
Conveyor Name/No. _________________________
Date: ____________________ Work done by: ____________________ Service Quote #: ____________________
Activity: ________________________________________________________________________________________
______________________
Date: ____________________ Work done by: ____________________ Service Quote #: ____________________
Activity: ________________________________________________________________________________________
______________________
Date: ____________________ Work done by: ____________________ Service Quote #: ____________________
Activity: ________________________________________________________________________________________
______________________
Date: ____________________ Work done by: ____________________ Service Quote #: ____________________
Activity: ________________________________________________________________________________________
______________________
Date: ____________________ Work done by: ____________________ Service Quote #: ____________________
Activity: ________________________________________________________________________________________
______________________
Date: ____________________ Work done by: ____________________ Service Quote #: ____________________
Activity: ________________________________________________________________________________________
______________________
Date: ____________________ Work done by: ____________________ Service Quote #: ____________________
Activity: ________________________________________________________________________________________
______________________
19
Page 20

Section 6 - Maintenance
6.6 Belt Trainer Maintenance Checklist
PTEZ:
Beltline Information:
Beltline Number: Belt Condition:
Belt Width:
Serial Number:
¨18" ¨24" ¨30" ¨36" ¨42" ¨48" ¨54" ¨60" ¨72" ¨84"
450mm 600mm 750mm 900mm 1050mm 1200mm 1350mm 1500mm 1800mm 2100mm
Belt Speed Belt ickness
Roller Life:
Date roller installed: Date roller inspected: Estimated roller life:
Roller condition:
Frame Condition:
Good Bent Rusted
Overall Performance:
Appearance: Comments:
Location: Comments:
Maintenance: Comments:
Performance: Comments:
Other Comments:
(Rate the following 1 - 5; 1=very poor, 5=very good)
20 PTEZ™ Belt Trainer
Page 21

Section 7 - Troubleshooting
Problem Possible Cause Possible Solutions
Unit installed in wrong location Relocate unit 20' (6M) after start of problem area of belt
Little to no effect on trouble
area of belt
Belt corrected better in one
direction than in other on
reversing belts
Unit does not pivot Buildup of material Clean unit; add belt cleaners
Pivot assembly not turning
Incorrect tension on unit Refer to step 8 in the installation instructions to fine-tune PTEZ
Buildup on roller Clean unit; add belt cleaners
Unit installed too close to head/tail pulley or takeup Move unit 20' (6.0 M) away from head/tail or takeup pulleys
Unit not centered on frame Re-center unit
Unit not square to structure Re-square to structure
Buildup on main roller Clean unit; add belt cleaners
Main roller bearing bad Replace main roller
21
Page 22

Section 8 - CAD Drawings
PART
NUMBER
90265
90266
90267
90268
90269
90270
8.1 CAD Drawing - PTEZ
7.00
.78in
19.8mm
8.00in
203mm
4.00in
102mm
1.50
1.00 TYP
22 PTEZ™ Belt Trainer
DIM "B"
DIM "A"
BELT
36"
DIM "B"
18.75"
DIM "A"
18"
WIDTH
42"
[914mm]
[1067mm]
24.75"
[476mm]
[629mm]
24"
54"
48"
[1219mm]
36.75"
30.75"
[781mm]
36"
30"
66"
60"
[1524mm]
[1372mm]
48.75
42.75
[933mm]
[1086mm]
42"
[1676mm]
[1238mm]
48"
Page 23

Section 8 - CAD Drawings
8.1 CAD Drawing - HD PTEZ
ITEM
CODE
ORDER NUMBER
SPECIFICATIONS
BELT WIDTH
1391 72
72
23
Page 24

Section 8 - CAD Drawings
8.1 CAD Drawing - HD PTEZ Underground
ITEM
CODE
ORDER NUMBER
SPECIFICATIONS
BELT WIDTH
1391 72
72
24 PTEZ™ Belt Trainer
Page 25

Section 9 - Replacement Parts
9.1 Replacement Parts List - PTEZ
1
2
3
Replacement Parts
Ref Description
1 PTEZ Mounting Bracket (2 ea.) PTEZMB 90351 8.0
2 PTEZ Main Shaft Bracket
3 PTEZ Main Shaft Dust Cover
Lead time: 1 working day
(2 ea.) PTEZPB 90352 6.0
Ordering
Number
(2 ea.) PTEZDC 90353 1.0
Item
Code
Wt.
Lbs.
25
Page 26

Section 9 - Replacement Parts
9.2 Replacement Parts List - HD PTEZ
4
1
2
3
5
Replacement Parts
Ref Description
1 Mount Bracket Kit PTEZHD-MBK 90803 19.0
2 Pole Bracket Kit PTEZHD-PBK 90804 8.0
3 Dust Cover Kit PTEZHD-DCK 90805 1.0
4 Wire Rope Bolt Kit PTEZHD-WRBK 90806 1.0
5 J Bolt Bracket Kit PTEZHD-JBBK 90807 2.0
Lead time: 1 working day
Ordering
Number
Item
Code
Wt.
Lbs.
26 PTEZ™ Belt Trainer
Page 27

Section 10 - Other Flexco Conveyor Products
Flexco provides many conveyor products that help your conveyors to run more eciently and safely. ese
components solve typical conveyor problems and improve productivity. Here is a quick overview on just a few of them:
EZP1 Precleaner Flex-Lok™ Skirt Clamps
• Patented ConShear™ blade renews its cleaning edge as it
wears
• Visual Tension Check™ for optimal blade tensioning and
simple retensioning
• Quick and easy one-pin blade replacement
• Material Path Option™ for optimal cleaning and reduced
maintenance
MMP Precleaner
• Extra cleaning power for tough applications
• 10" (250mm) TuffShear™ blade provides increased
blade-to-belt tension
• A 3-piece telescoping pole is lighter to lift and easier
to install
• Dual Quick-Mount Tensioners ensure optimal tension
throughout the life of the blade
• Eliminates transfer zone spillage
• Interlocking design for easy installation and one-person
maintenance
• Unique wedge pin holds rubber securely in place and is easy
to adjust
• Available in various models and in stainless steel
PT Max™ Belt Trainer
• Patented “pivot & tilt” design for superior training action
• Dual sensor rollers on each side to minimize belt damage
• Pivot point guaranteed not or freeze up
• Available for topside and return side belts
MHS Secondary Cleaner with Service
Advantage Cartridge
• An easy slide-out cartridge for service
• Cartridge design to speed up blade-change maintenance
• Patented PowerFlex™ Cushions for superior cleaning
performance
• Compatible with Flexco mechanical splices
Belt Plows
• A belt cleaner for the tail pulley
• Exclusive blade design quickly spirals debris off the belt
• Economical and easy to service
• Available in vee or diagonal models
27
Page 28

The Flexco Vision
To become the leader in maximising
belt conveyor productivity for our customers worldwide
through superior service and innovation.
2525 Wisconsin Avenue • Downers Grove, IL 60515-4200 • USA
Tel: (630) 971-0150 • Fax: (630) 971-1180 • E-mail: info@flexco.com
Visit www.flexco.com for other Flexco locations and products.
©2017 Flexible Steel Lacing Company. 09/14/17. For reorder: X4184
 Loading...