

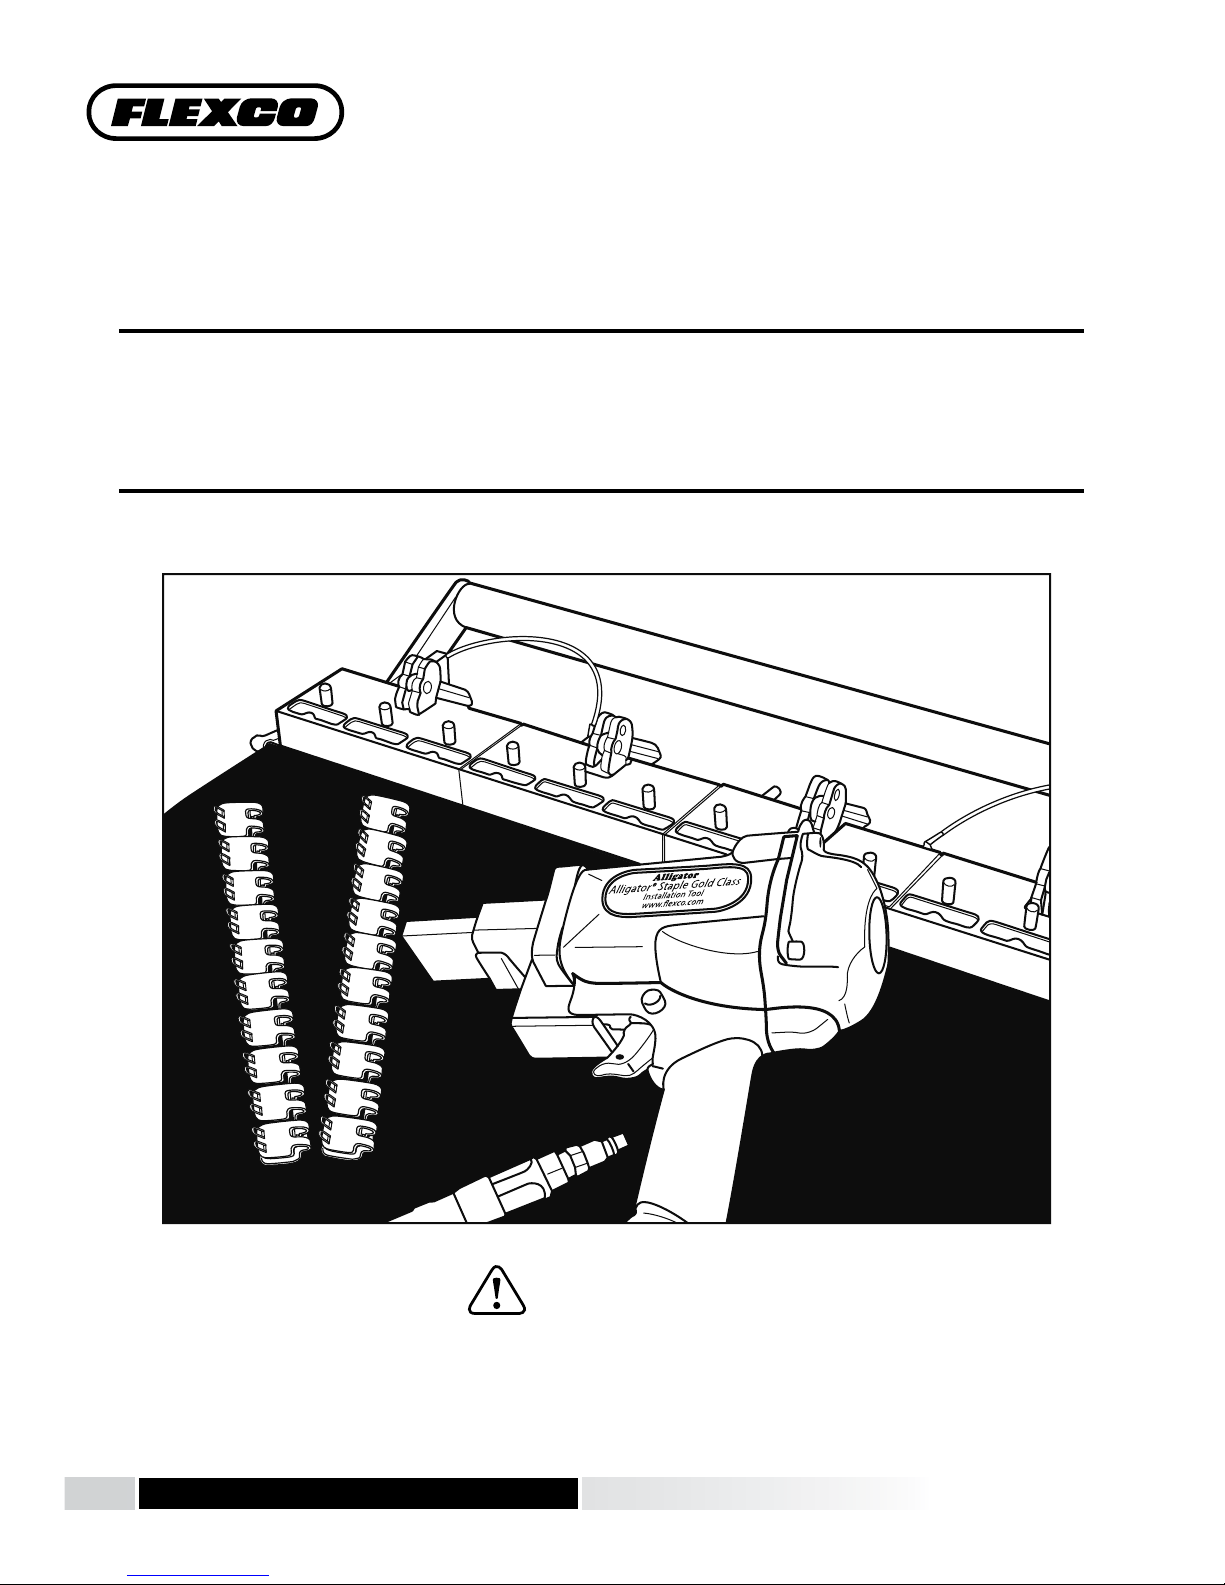
Safety and Operating Manual
Alligator® Staple Gold Class™ Plus
is manual contains important information about product function and safety. Please read and understand
this manual BEFORE operating the tool. Please keep this manual available for other users and owners
before they use the tool. is manual should be stored in a safe place. Also available online at exco.com.
www.flexco.com
www.flexco.com
WARNING

Alligator® Staple Gold Class™ Plus
Table of Contents
Introduction ............................................................................................. pg. 3
Main Components ...................................................................................pg. 3
General Safety Rules .......................................................................... pgs. 4-5
Maintenance and Instructions for Installation .............................. pgs. 6-7
Spare Parts ................................................................................................ pg. 8
www.flexco.com
—2—
Alligator® Staple Gold Class™ Plus
Introduction
e Alligator® Staple Gold Class™ Plus tool is designed to be used in conjunction with the
Alligator® Gold Class Power Driver. Together these tools will install the complete line of Flexco
Alligator® Ready Set™ Staple fasteners.
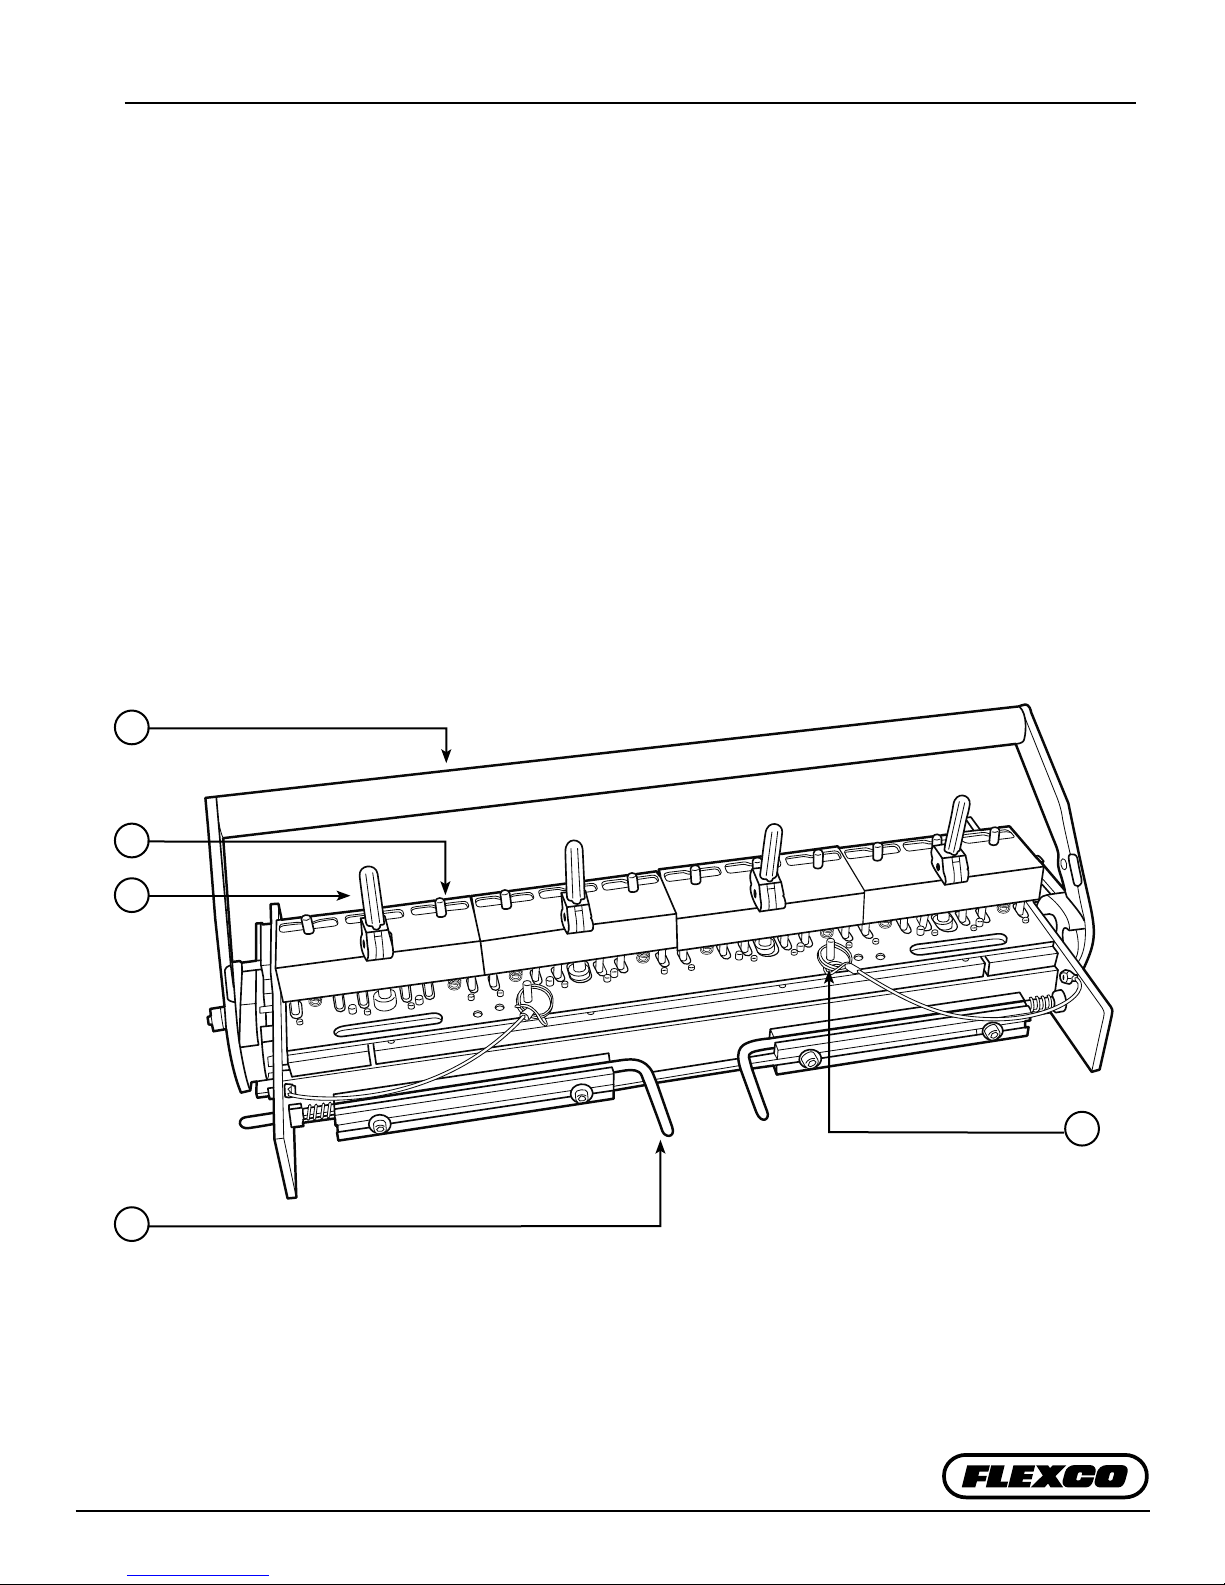
Main Components
1. Handle
2. Guide Block (4)
3. Cam Lever (4)
4. Release Handle (2)
5. Fastener Size Pin (2)
1
2
3
5
4
—3—

Alligator® Staple Gold Class™ Plus
General Safety Rules
–Save ese Instructions–
Signal words:
“DANGER” indicates an imminently hazardous
situation which, if not avoided, will result in
death or serious injury. e signal word is
limited to the most extreme situations.
“WARNING” indicates a potentially hazardous
situation which, if not avoided, could result in
death or serious injury.
“CAUTION” indicates a potentially hazardous
situation which, if not avoided, may result in
minor or moderate injury. It may also be used
to alert against unsafe practices.
Safety Symbol
!
is international safety symbol is used to
identify and call attention to specic safety
matters.
Safety Information
To Avoid Severe Personal Injury or Property
Damage, read carefully and understand the
following Safety Precautions.
1. WORK AREA
!
CAUTION
Keep your work area clean and well lit. Cluttered
benches and dark areas invite accidents.
2. PERSONAL SAFETY
!
WARNING
Stay alert, watch what you are doing and
use common sense when operating a power
tool. Do not use tool while tired or under the
inuence of drugs, alcohol, or medication. A
moment of inattention while operating power
tools may result in serious personal injury.
!
WARNING
Dress properly. Do not wear loose clothing or
jewelry. Contain long hair. Keep your hair,
clothing, and gloves away from moving parts.
Loose clothes, jewelry, or long hair can be
caught in moving parts.
!
WARNING
Do not overreach. Keep proper footing and
balance at all times. Proper footing and balance
enables better control of the tool.
!
CAUTION
Use safety equipment. Always wear eye
protection, dust mask, non-skid safety shoes,
and hard hat. Hearing protection must be used
for appropriate conditions.
!
WARNING
Never alter or remove safety devices.
!
WARNING
Keep hands and ngers away from all moving
parts at all times.
www.flexco.com
—4—

Alligator® Staple Gold Class™ Plus
General Safety Rules
3. TOOL USE AND CARE
!
WARNING
Always use tool on a level, rm surface.
!
CAUTION
Do not force tool.
!
WARNING
Store idle tools out of reach of children and
other untrained persons.
!
CAUTION
Maintain tools with care. Properly maintained
tools are less likely to bind and are easier to
control.
!
CAUTION
Check for misalignment or binding of moving
parts, breakage of parts, and any other condition
that may aect the tool’s operation. If damaged,
have the tool serviced before using. Many
accidents are caused by poorly maintained tools.
4. SERVICE AND MAINTENANCE
!
CAUTION
When servicing a tool, use only Flexco
or equivalent replacement parts. Use of
unauthorized parts or failure to follow
maintenance instructions may create a risk
of injury.
!
CAUTION
Do not wipe plastic parts with solvent. Solvents
such as gasoline, thinner, benzene, carbon
tetrachloride, and alcohol may damage and
crack plastic parts. Clean tool with brush only.
!
WARNING
NEVER use a tool which is defective or
operating abnormally. Stop using it immediately
and arrange for repairs when operating
unusually, making strange noises, vibrating
excessively, or emitting odor.
!
WARNING
Do not remove regulator whip assembly from
Alligator® Staple Gold Class™ Driver.
!
CAUTION
is tool weighs 51 lbs. (23.1 kg)
—5—
!
WARNING
Do not exceed 120 PSI incoming air pressure.
!
WARNING
Do not depress tool trigger before tool is seated
completely down on top of guide block. Oil air
line on Alligator® Staple Gold Class™ Driver with
one to two drops prior to use.

Alligator® Staple Gold Class™ Plus
Operation
UNLOCK
PUSH
LOCK
5
1. Do not remove regulatory whip assembly.
Connect the Alligator® Staple Gold Class™
Driver to a clean, dry air line with a
maximum incoming pressure of 120 PSI.
e driver regulator will bring air source
down to 70 PSI. Oil air line with one to two
drops prior to use.
4. Make sure the tool is in initial position.
is position is when the handle is all the
way back and locked.
2. (a) Square belt ends.(b) Cut belt using a
Flexco belt cutting tool.
5. To change fastener size setting, pull both
pins from the tool base.
3. (a) Skive rough-top belt using Flexco
skiving products. Select correct fastener size
by using the chart on page 7.
R8 187
R8 125
R8 62
6. Move template so corresponding
fastener size matches the base hole. en
reinsert both pins.
7. Center fastener strip in the tool.
Fastener Strip should be tight against tool.
(a) Cam lever(s) should be up. Center belt
in installation tool, equal distance between
belt ends.
www.flexco.com
8. (a) Belt end should be tight against
the fastener belt stops. (b) Depress cam
lever(s).Fastener top should lean forward.
If not, tighten handle clockwise to increase
pressure and repeat. To prevent damage to
the tool, do not overtighten cam levers.
—6—
9. Starting with the center fastener plates,
insert the nose of the Alligator Staple Gold
Class Driver into the guide block. Note: the
driver must be rmly seated into the pin
to activate safety switch. DO NOT depress
tool trigger before tool is seated completely
down on top of guide block, as this will
damage the tool. Apply adequate number
of trigger pulls to produce sucient staple
leg fold. Refer to chart on page 7. Drive
remaining staples as follows.

Alligator® Staple Gold Class™ Plus
22
133
10. Follow the sequence shown above to
drive all remaining fasteners. Staples will be
partially clinched.
13. Return the handle into the initial position
and lock it down. Release Cam Levers and
remove belt from the tool.
AVERAGE TRIGGER PULLS
Average
Fastener
Size
RS62 1-2 1-2
RS125 2-3 2-3
RS187 3-4 3-4
Note: Number of trigger pulls will
vary depending on belt thickness and
durometer. Do not overdrive staples.
Trigger Pulls for:
Initial
Drive
Final
Set
11. Squeeze both release handles to allow the
tool to change position.
14. Using Belt Nippers, notch corners of
trailing edge. Notch at an angle as shown.
12. Move the handle from initial position
into nal position to move anvil into
nishing position. Repeat steps 9 & 10.
Refer to chart below for average trigger pulls.
15. Bring belt ends together and insert hinge
pin. If retaining washer is used, crimp with
pliers. Splice is complete.
Alligator® Ready Set™ Staple Fasteners Selection Chart
Operating
Fastener
Size
RS62 100 17 1/16-1/8 1.5-3.2 2 50 nylon .080, steel .080 nylon 2.0, steel 2.0
RS125 160 28 1/8-3/16 3.2-4.8 3 75 nylon .141, steel .141 nylon 3.6, steel 3.6
RS187 200 35 3/16-1/4 4.8-6.4 4 102 nylon .203, steel .187 nylon 5.2, steel 4.7
Tension
Range
P.I.W. kN/m in. mm in. mm in. (nylon-steel) mm (nylon-steel)
Belt
Thickness
Range
Min.
Pulley
Diameter
Approx.
Hinge Pin Diameter
Maintenance Tips
• Clean tool with brush only.
• DO NOT use air pressure.
• Add lubricant as required.
—7—

Alligator® Staple Gold Class™ Plus
Spare Parts
1. Cam Lever
2. Guide Block
3. Anvil Replacement Kit
1
2
3
Spare Parts List
Description
Cam Lever ST8-Cam 55592
Guide Block ST7-5 55554
Anvil Replacement Kit ST8-A-SN200 55589
Ordering
Number
Item Code
2525 Wisconsin Avenue • Downers Grove, IL 60515-4200 • USA
Tel: (630) 971-0150 • Fax: (630) 971-1180 • E-mail: info@flexco.com
Visit www.flexco.com for other Flexco locations and products.
©2014 Flexible Steel Lacing Company. 08-01-18. For reorder: X2415
—8—
 Loading...