

Page 1
How to Run a Flex RhinoBond
®
Job
THINK OUTSIDE THE SEAMS
With the Flex RhinoBond system, you
have to think differently when it comes to
scheduling and running your job, par-
ticularly when compared to a traditional
mechanically attached installation.
These Best Practice recommendations
are based on several years of Flex
RhinoBond project observation and
Best Practices
evaluation.
It should also be noted that for
improved productivity, a minimum of
two Flex RhinoBond tools should be
used.
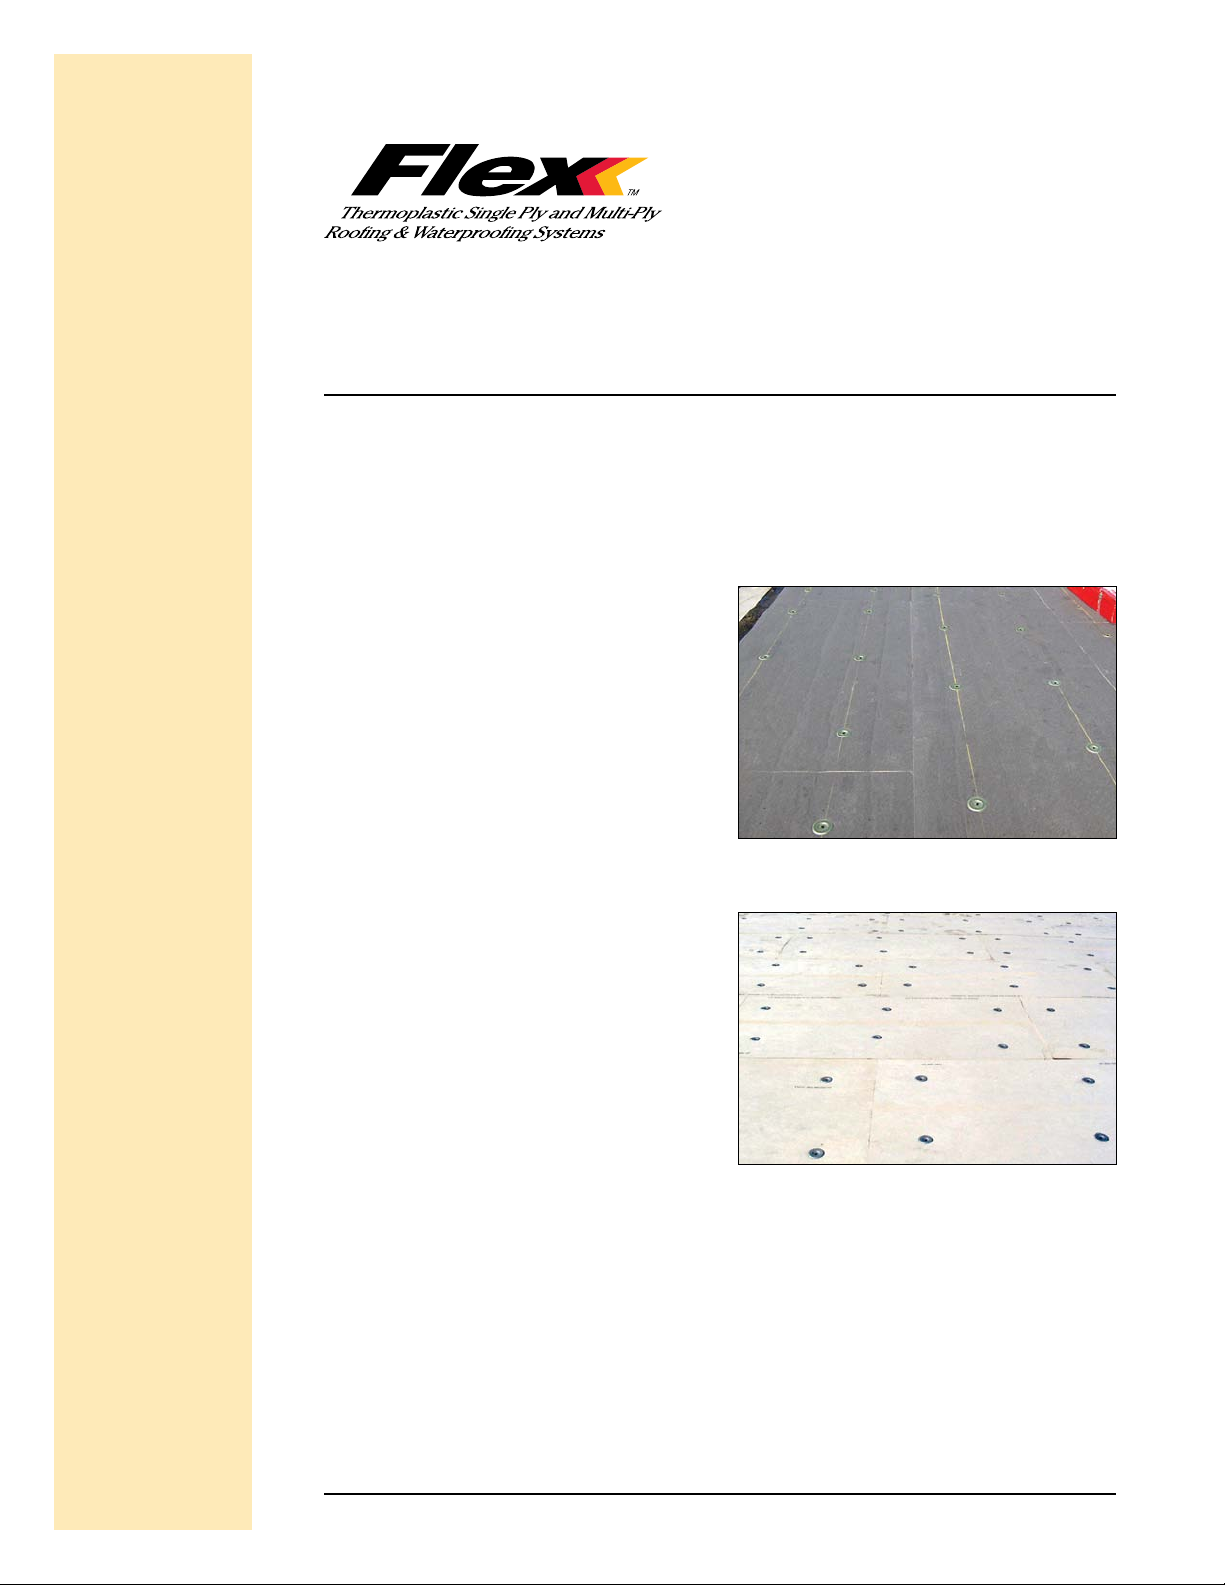
FASTENER INSTALLATION
Fasteners MUST be in a straight row in at least
one direction. The more even the spacing, the easier
they are to find under the membrane, and the faster
the installation.
Straight – good
Random – harder to find
Snap chalk lies to layout grid pattern for corners,
perimeter and field. Build an 8' template bar with grid
measurements marked on it to speed up marking for
chalk lines.
REVISED AUGUST 2012 How to Run a Flex RhinoBond Job • Page 1
Page 2
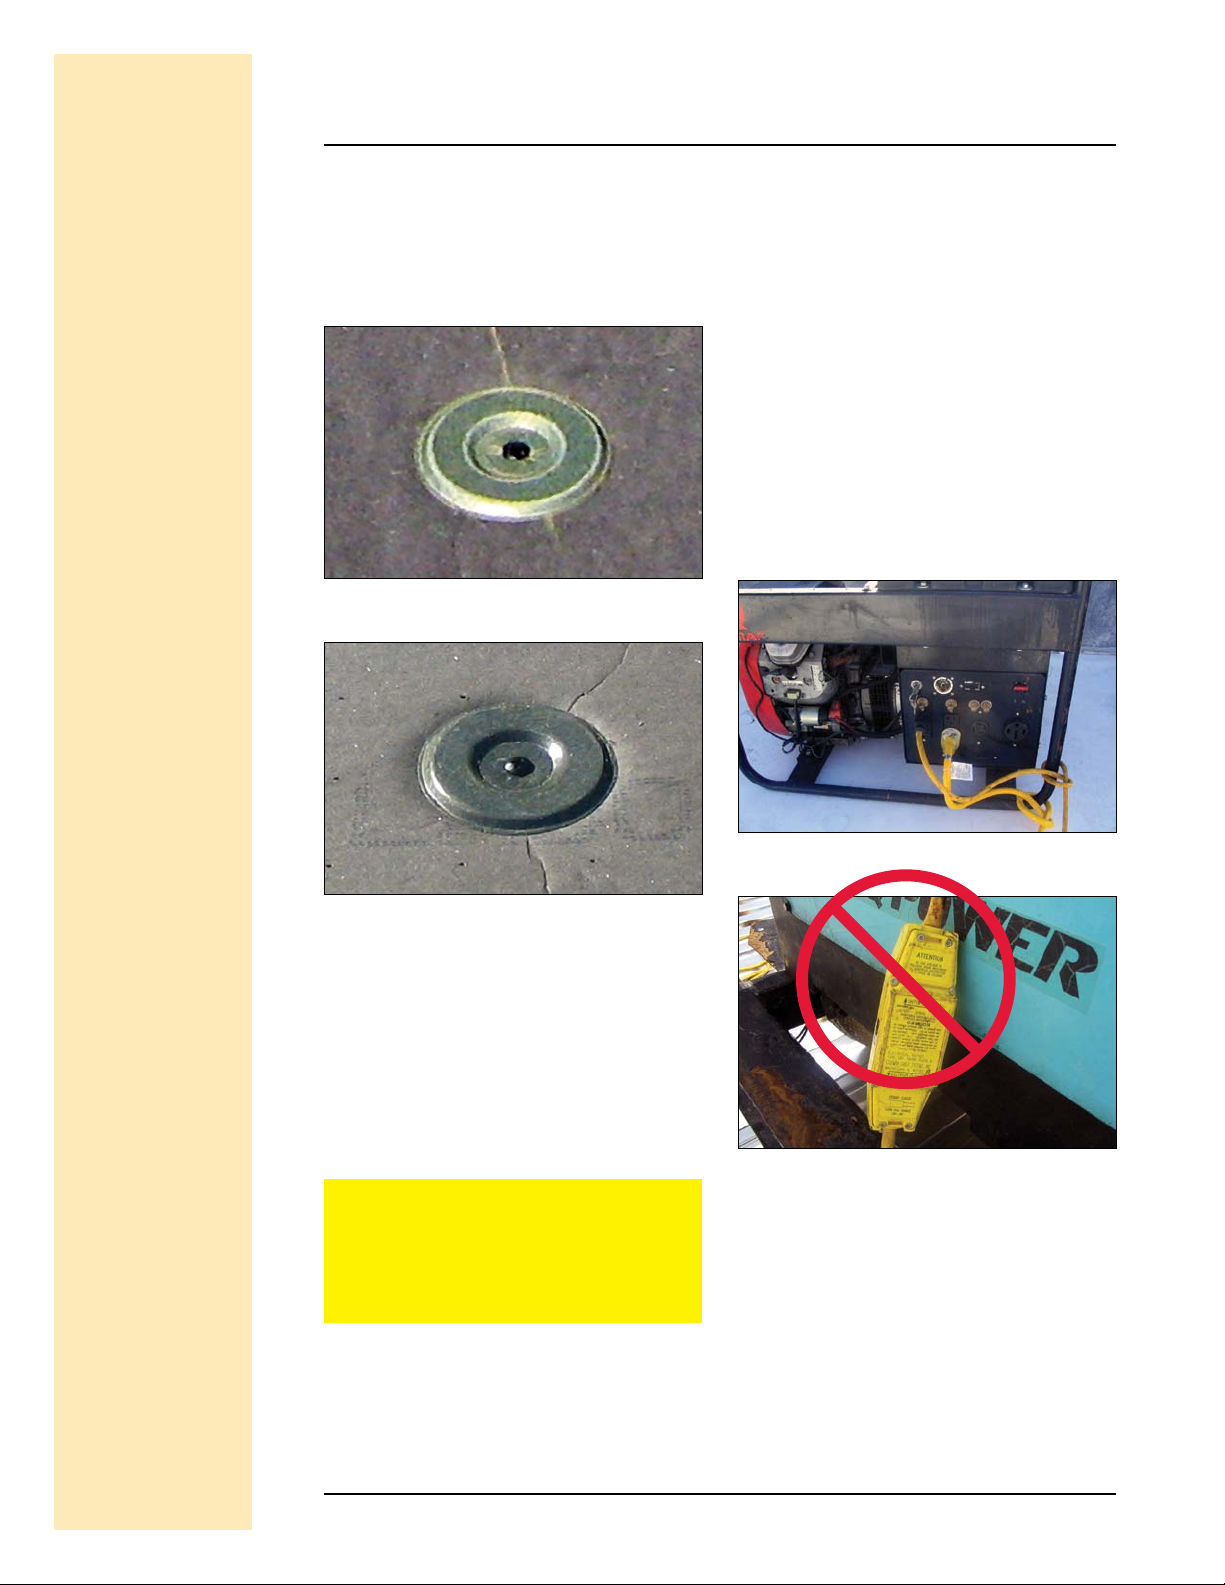
Fasteners must not be overdriven. They should be
tight enough that you can not turn the plates with your
hand. Overdriven fasteners are harder to find, and may
result in a poor or partial bond.
Proper installation
Best Practices
Each Flex RhinoBond tool should run on a dedicated
20A circuit, with no more than 100 feet of good quality
(12 ga. min.) extension cord per tool. Do not plug the
tools into a pigtail, and do not plug them into a 15A
GFCI adapter. Generator power usually works better
than house power because house power often requires
longer extension cords. The tools are designed to run on
105-130V. If the cycle time lasts more than 8 seconds,
check the power source.
Generators should be 5,000 watt (min.) with one 20A
GFCI circuit per tool. Two tools (max.) per 5,000 watt
generator. NO OTHER TOOLS SHOULD BE PLUGGED
INTO DEDICATED FLEX RHINOBOND TOOL
GENERATOR DURING OPERATION.
Overdriven
Position membrane so seams do not pass
directly over Flex RhinoBond plates. It is best to
install the membrane so that the seams are between
the rows of Flex RhinoBond plates. If a seam does
pass directly over a plate, weld the seam and then
bond the membrane to the Flex RhinoBond plate.
POWER REQUIREMENTS
WARNING: Do not plug Flex RhinoBond tool
into generator until the generator is running
at full speed and delivering stable power.
Unstable power during start-up increases the risk
of damage to the Flex RhinoBond tool.
One cord per circuit and per tool
Do not use pigtails
Static interference. If there is a radio on the job
site, you may hear interference (i.e. static) when the
tool is operating. Don’t worry, this is normal. The tool
meets FCC transmission requirements for industrial
tools, but can cause static interference under certain
How to Run a Flex RhinoBond Job • Page 2
Page 3

circumstances, especially if the radio is plugged into
the same circuit as the tool.
TOOL ALIGNMENT
For optimum weld quality, the Flex RhinoBond plate
must be centered under the red dot on the foot of the
tool within 1 inch. This is not hard to do if the operator
pays attention. Best practice is for each new operator
to have a grease pencil, and to outline the base of the
tool on every 10th plate or so, to check the alignment.
After checking the alignment several times, the operator will get the hang of it.
Best Practices
MAGNET ISSUES
Magnet alignment is important. Operators should
make sure the magnet completely covers the plate.
Misalignment will result in less than perfect welds.
Keep the membrane clean. Any debris on the top of
the membrane can be pushed into the surface by the
magnet during the bonding process. Use a leaf blower
to eliminate all debris from the membrane surface
prior to welding.
Keep the magnets clean. If a metal shard or other
debris from the roof sticks to the magnet, it can make
a mark in the membrane on every weld. Therefore,
it’s a good idea to periodically wipe the bottom of
the magnet. As long as the operator and foreman are
paying attention, this should not be an issue.
ALWAYS CALIBRATE THE TOOLS
Calibrate each tool at least once in the morning, and
once after lunch, or whenever the temperature changes
more than +/– 15°F. Use a grease pencil to check alignment when calibrating. Use the up and down arrows on
the Flex RhinoBond tool to change the power level, and
set the tool to the level that provides a 100% bond. Be
sure to allow test assemblies to cool completely before
evaluating bond strength.
The tool must be centered properly over the plate
Train operators to develop the hand-eye coordination
to align the tool consistently.
Evaluate bond strength through calibration
Accurately test weld. When making test welds, be
sure to test the plates in the same assembly used in
the actual installation. As an example, don’t test the
plate on a concrete deck if they are being installed
on polyiso.
How to Run a Flex RhinoBond Job • Page 3
Page 4

WELD IN STRAIGHT LINES
Operator #1 lines all of the magnets up on the first
row. Operator #2 begins work on the adjacent row
after the first operator completes the first five welds.
This procedure helps make sure that the magnets
remain on the plates for at least one minute. This
method also minimizes motion and increases
productivity.
Magnets from the first row are used by the second
operator in the adjacent row. This procedure continues
across the roof.
Best Practices
Work one row after another for maximum productivity
FLEX RHINOBOND STANDING
SEAM RETROFIT PROJECTS
Night before:
Meet with foreman to discuss tool operation and
project coordination. This is KEY!
Day of:
• Load roof
• Fill flutes
• Apply cover board
• Snap lines over purlins
• Apply fasteners and Flex RhinoBond plates
• Blow any debris off cover boards and plates
with a leaf blower
• Roll out membrane (position sheets so seams
do not fall on rows of plates)
• Let sheets “relax”
• Set seam welders for conditions and weld
membrane seams
• Make sure generator is up to full speed and
delivering stable power before plugging in Flex
RhinoBond tool
• Calibrate Flex RhinoBond tools and start bonding
plates
• Ballast any sections that don’t get welded
RP12222 Rev. 0812
Subsequent days:
• 2 guys with Flex RhinoBond tools finish welding
membrane from the previous day
• All other guys in crew repeat the process above.
RESOURCES
Review Flex RhinoBond Owner’s Manual for additional
information.
CONTACT
If you have any questions or need more information, contact the Flex Technical or Sales Department at
1-800-969-0108.
How to Run a Flex RhinoBond Job • Page 4
Flex Membrane International Corp.
2670 Leiscz’s Bridge Road, Suite 400
Leesport, PA 19533 800-969-0108
www.flexroofingsystems.com
RhinoBond® is a trademark of OMG, Inc. Copyright © 2012 OMG, Inc. Used with permission.
 Loading...