

Page 1
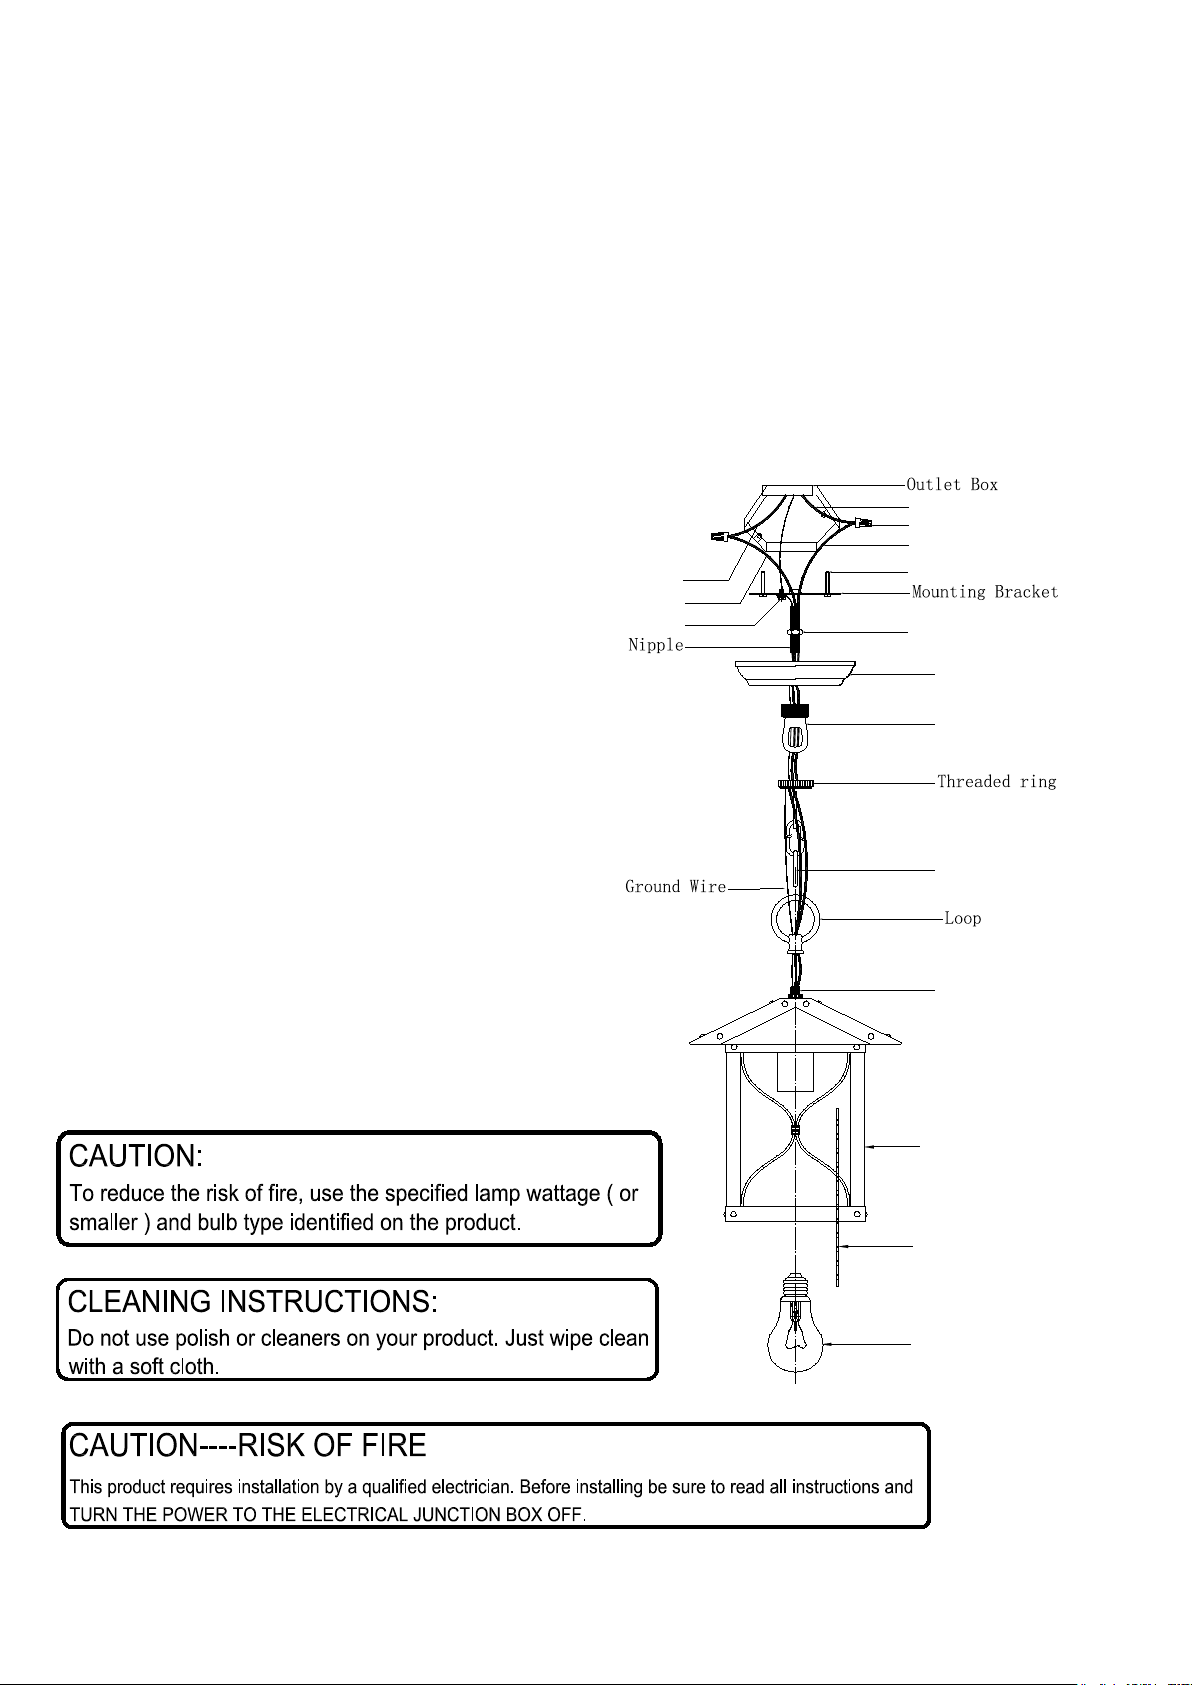
ASSEMBLY AND MOUNTING INSTRUCTION
Frame
Glass
Bulb
Nipple
Outlet Box Screws
White supply Wire
Black supply Wire
1/8"I.P Hex Nut
Chain
Screw Collar Loop
Canopy
Green Ground Screw
Wire connector
Smooth fixture lead
Ribbed fixture lead
Please read the Assembly lnstruction sheet carefully before proceeding. Carefully unpack and
identify all parts prior to building the unit. Each part is identified on the drawing for reference.
DO NOT DISCARD THE ORIGINAL P ACKAGING. If after careful inspection and you must return the
item for any reason. Please repack the unit using the or iginal carton and inner box
STEP 1: Unp ack all the p arts and classify them according to the illustration shown at the side.
Place the part s on a scratch free surface.
STEP 2: Install the glass p anels into
the frame and fix it using the clips.
STEP 2: lnstall the Loop to the Fixture.
STEP 4: lnstall the correct bulbs(not
provided).
STEP 5: Buckle the chain to the fixture
and loop.
STEP 6: Make sure the power is turned
off at the ceiling junction box where
the fixture is to be installed. Secure the
mounting bracket to the junction box
using the outlet box screws.
STEP 7: Use the wire connector to
connect the positive and negative
wires. Connect the ground wire to the
junction box ground port.
STEP 8: Secure the canopy to the
ceiling Junction box using the
threaded ring.
T urn on the power at fuse or circuit
box.
 Loading...