

Page 1
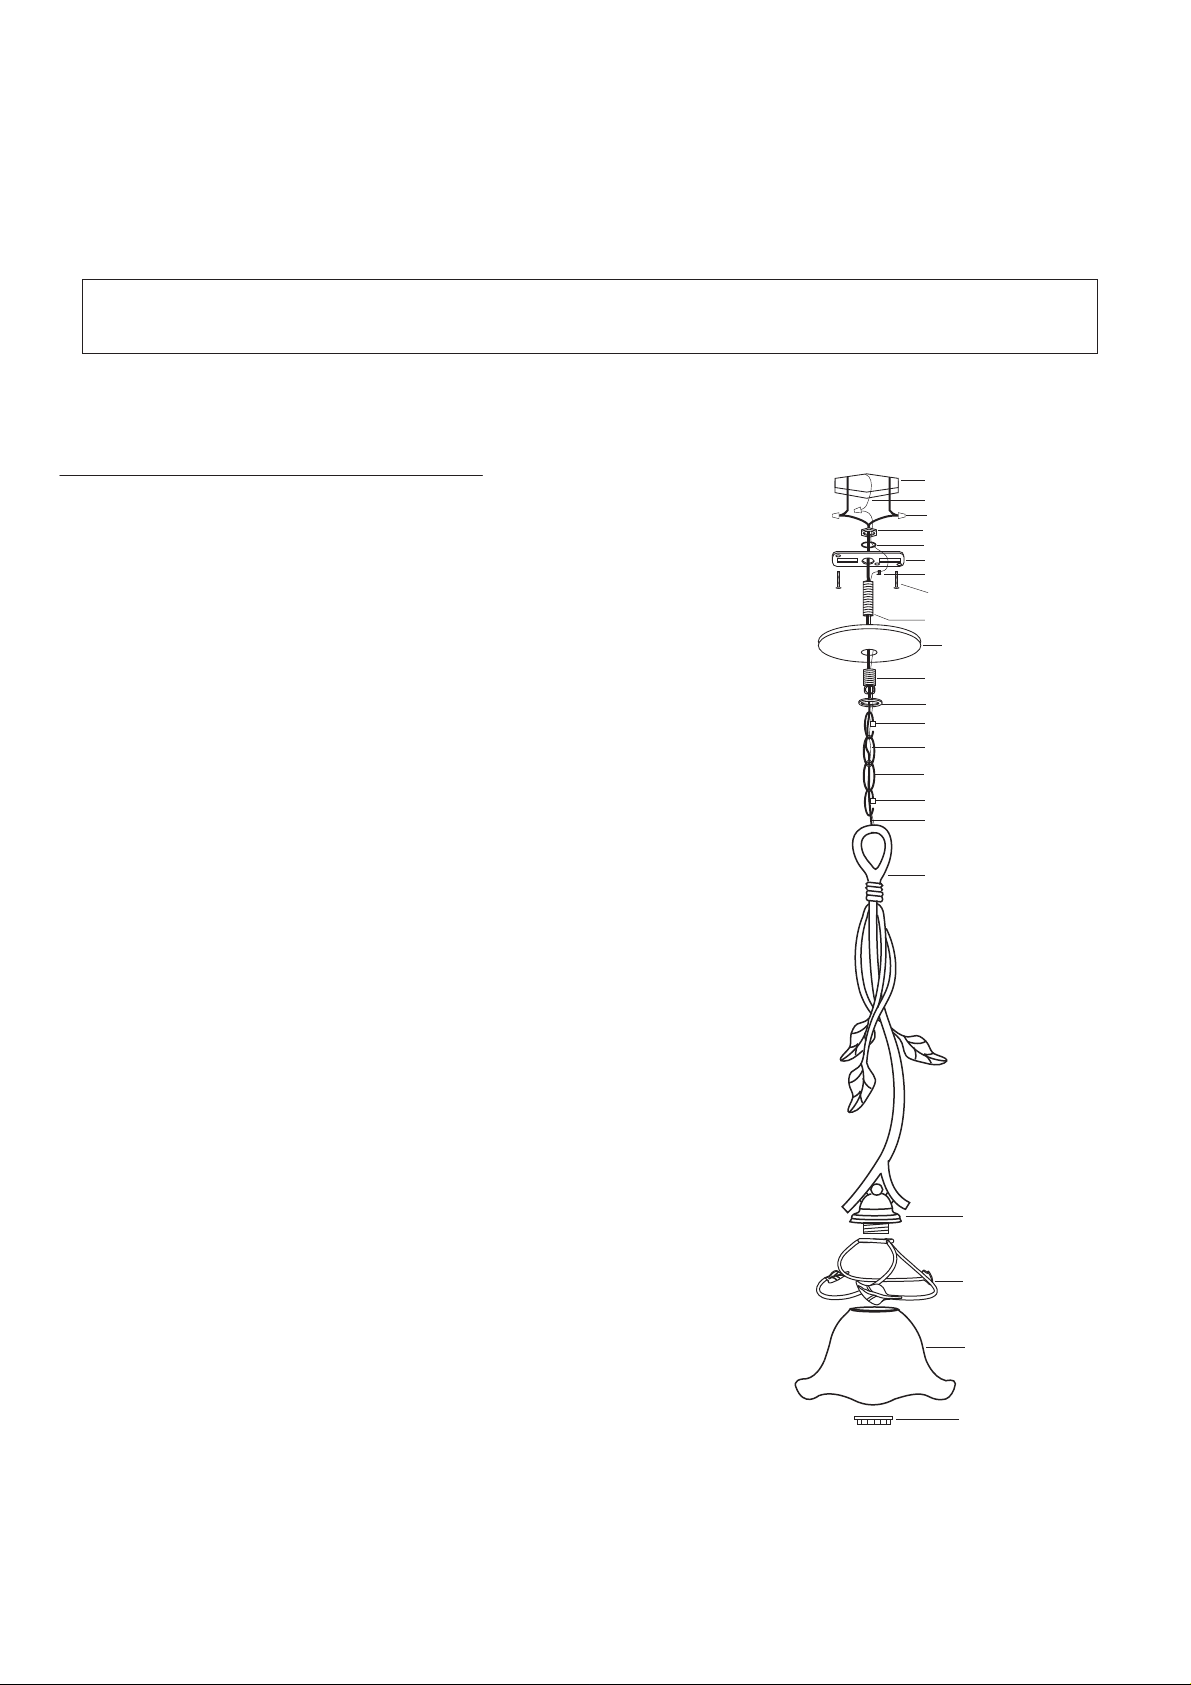
ASSEMBLY AND INSTALLATION
INSTRUCTIONS
TO AVOID RISK OF ELECTRICAL SHOCK, BE SURE TO SHUT OFF
WARNING:
talling, c
s
n
i
fore
E: Be
OT
N
POWER WHILE INSTALLING OR SERVICING THIS FIXTURE.
requi
g
in
d
n
rou
g
nd
a
g
in
wir
r
fo
s
e
d
o
c
l
a
tric
c
le
e
l
a
c
o
l
lt
u
s
n
o
re
m
ents.
Installation Steps
1. Attach the nipple to the mounting strap, and secure with a
washer and a hex nut.
2. Attach the mounting strap to the ceiling box by using two
mounting screws.
3. Choose a certain length of the chain you need, and weave
the fixture wire and the grounding wire through the chain.
Then connect one end of the chain with the fixture by using
the loop lock.
4. Secure the top loop to the nipple tightly .
5. Thread the fixture wire and grounding wire through the collar ,
canopy , top loop, nipple and mounting strap in order .
6. Connect the other end of the chain with the top loop by using
the loop lock.
7. Make wire connections with wire nuts:
---Connect the smooth wire (marked) from fixture to the
black wire from power source.
---Connect the ridged wire(unmarked) from fixture to the
white wire from power source.
---Attach the grounding wire to the mounting strap with the
green grounding screw. Then connect it to the house
grounding wire with the wire nut.
Carefully tuck wires back into the ceiling box.
8. Attach the canopy to the mounting strap by inserting the
top loop, and then secure with the collar.
9. Place the glass shade into the decoration ring, attach
them upwards to the glass holder, and then secure with
the socket ring.
10. Install a bulb.(Please do not exceed the maximum
capacity that is recommended on the package.)
11. Turn on the power at fuse or circuit box.
Ceiling Box
House Grounding Wire
Wire Nut
Hex Nut
Washer
Mounting Strap
Green Grounding Screw
Mounting Screw
Nipple
Canopy
Top Loop
Collar
Loop Lock
Fixture Grounding Wire
Chain
Loop Lock
Fixture Wire
Fixture
Glass Holder
Decoration Ring
Glass Shade
Socket Ring
 Loading...