

Page 1
1
USER’S MANUAL
IMPORTANT
Users of these drivers must read and understand the safety features and operating
instructions outlined in this manual.
The Fletcher-Terry Company
65 Spring Lane Farmington, CT 06032-331 1
T el. 860.677.7331 • 800.843.3826 • Fax 860.676.8858 • www.fletcher-terry.com
FORM 080102
German Seite 11
French Page 21
Español Página 31
Page 2
2
SAFETY INSTRUCTIONS
WARNING: Certain safety precautions are required when using pneu-
matic tools to prevent injury to the user and others in the area. Read and
follow all these instructions.
It is the employer’s responsibility to enforce compliance with these
safety warnings and procedures by all who use this driver. Keep the
manual available so all employees have access to it and the opportunity
to review procedures periodically.
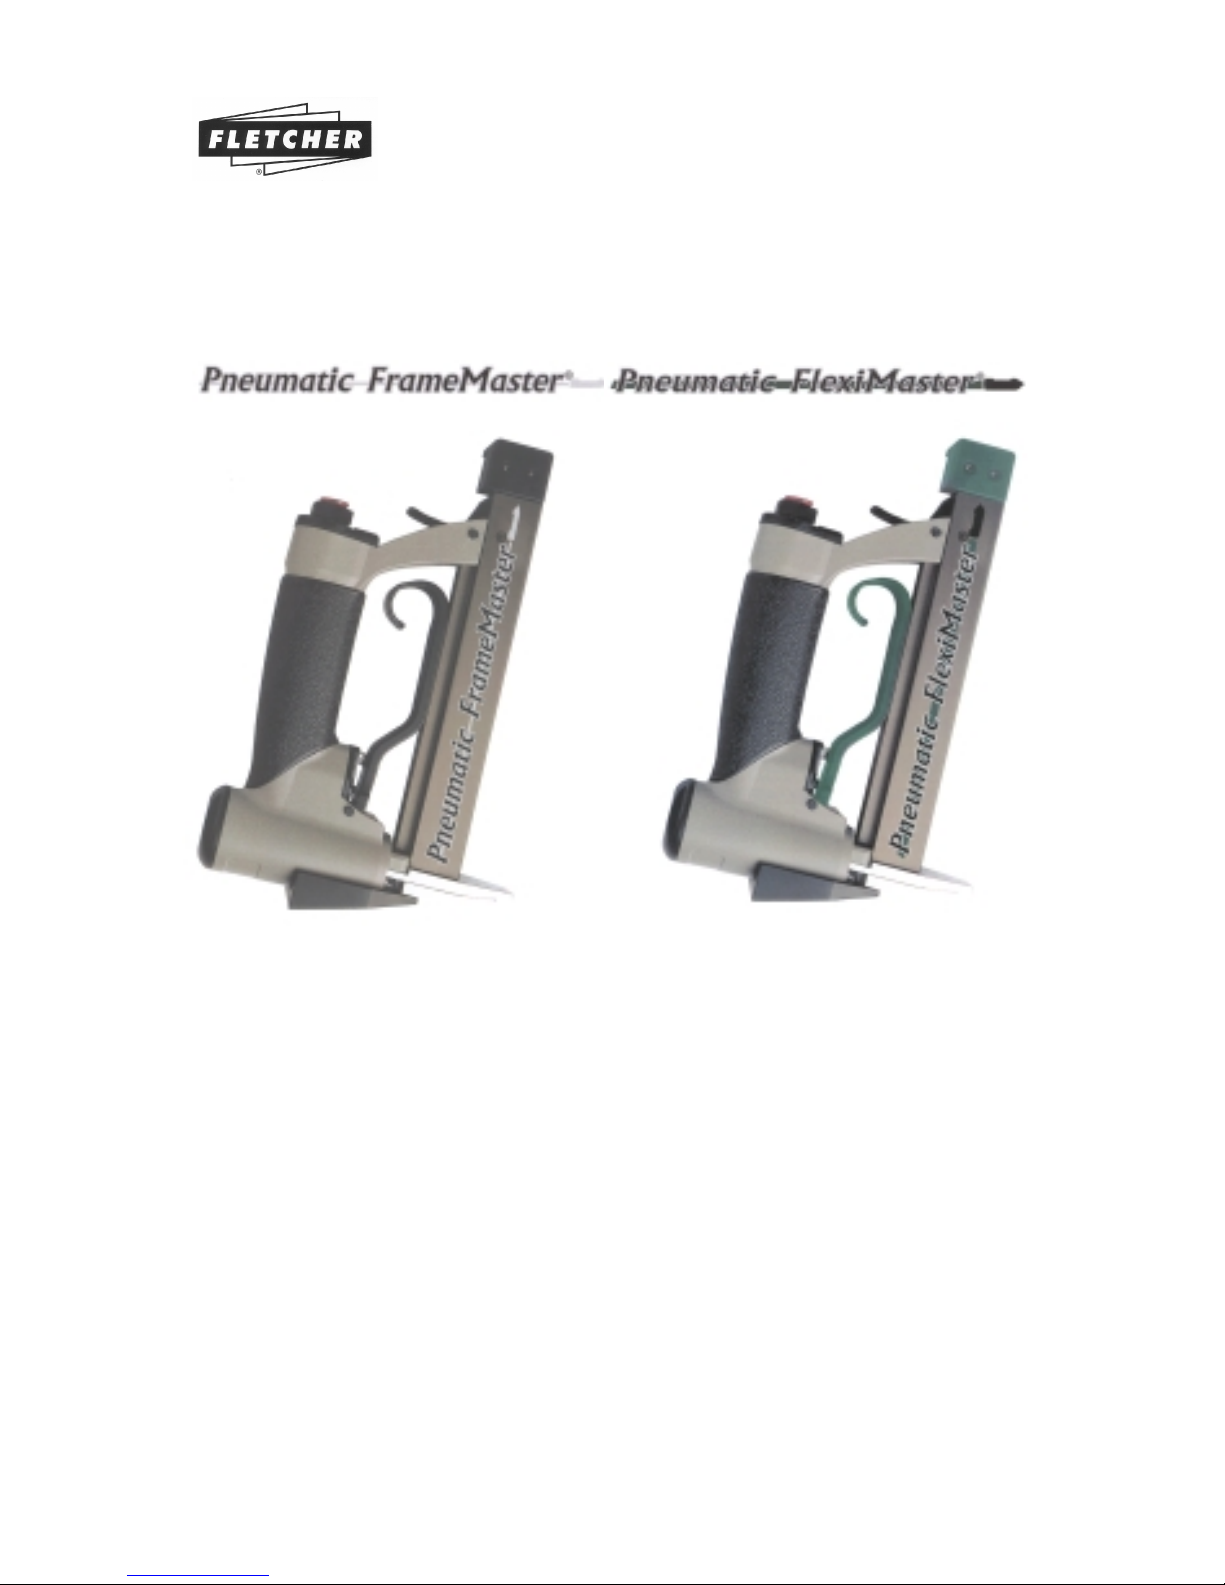
The purpose of the Pneumatic FrameMaster® and Pneumatic
FlexiMaster® is to insert Fletcher Framer’s Points and Flexible Framer ’s
Points in wooden frames to secure the glazing, matboard, artwork and
backing material. It must not be modified or used for any other application.
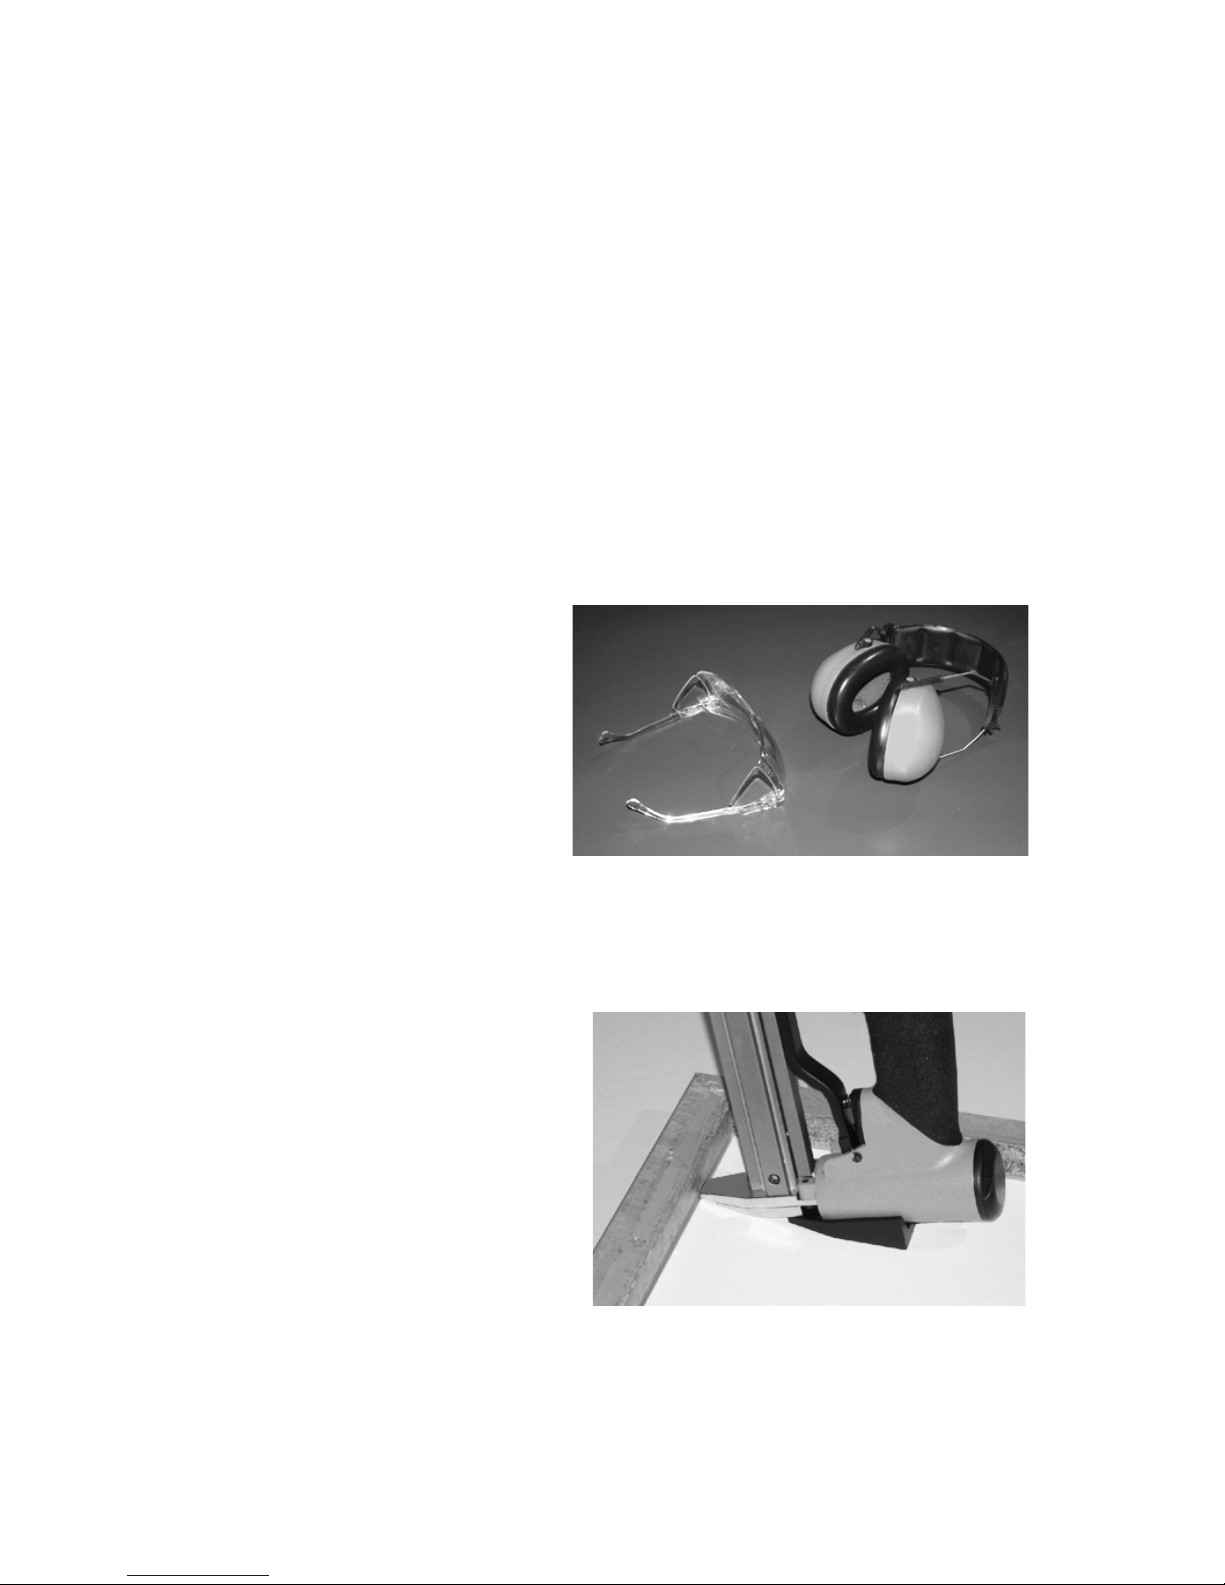
1. Use Safety Glasses.
Safety glasses with rigid
side shields must be worn
by the operator of this
driver as well as all others
in the work area. See
Figure 1.
2. Wear ear protection to
avoid possible hearing loss. See Figure 1.
3. Always assume driver contains points. Do not point the driver at
yourself or others. DO NOT
drive a point freely in the air.
4. Always hold the nose of
the driver tight against the
wooden frame before
operating the trigger. See
Figure 2.
5. Use clean, dry regulated
compressed air at 70 to
100PSI, (5 to 7 BAR). The system should include filter, pressure
regulator, and automatic oiler.
Figure 1
Figure 2
Page 3

3
6. Do not connect this driver to an air supply with
maximum potential pressure greater than 200 PSI,
(14 BAR).
7. Never use oxygen, carbon dioxide, combustible
gases or any type of bottled gas as a source for this
driver. Explosion and serious injury may result.
8. Only connect driver to the air supply with a coupling
that removes all pressure when disconnected.
9. Disconnect the driver from the air supply before doing
maintenance, removing a jam, leaving the work area, moving to
another area or handing the driver to another person.
10. Connect the point driver to air supply before loading points to
prevent driving a point during connection. The driving mechanism may operate when the driver is connected to air supply.
11. Never use the driver if it is leaking, has missing parts, or re-
quires repair. Make sure all screws and caps are securely
tightened.
12. Do not use the driver if the safety warning label is missing or
unreadable. Contact a Fletcher-Terry Customer Care Representative for a replacement.
13. Only use points, parts, and accessories recommended by
Fletcher-Terry.
14. Do not load points with the trigger depressed, to prevent unintentional firing of a point.
16. Release trigger after firing a point. Never carry the driver with
your finger on the trigger.
17. Do not over-reach or use the driver from an awkward or insecure
position.
Page 4

4
OPERATING INSTRUCTIONS
The Pneumatic FrameMaster® and Pneumatic FlexiMaster® are designed to insert points into wooden frames to secure artwork, mat, glass,
and backing material. Fletcher Flexible Framer’s Points are used when it
is likely the secured material may be removed and reinstalled or replaced. Flexible Framer’s Points can be bent away from the material and
subsequently bent back in place.
Fletcher Framer’s Points are stiffer and provide greater holding power.
The two types of points are NOT interchangeable in the two pneumatic
point drivers.
Preparation of Point Driver
1. Attach an air supply nipple (1/4 NPT) in place of the plastic
plug in the handle. Choose the fitting that is compatible to your air
hose fitting. Be sure to use the type which purges air from the driver
when disconnected.
2. Connect the point driver to the air supply hose before loading
points, with the regulator set between 70 and 100 PSI, (5 to 7
BAR).
3. An in-line filter and oiler will extend the life of the driver. If an
oiler is not in the air supply, place one or two drops of Air Tool Oil
(12-648) in the connection nipple each day.
4. Check for air leakage and correct before proceeding.
5. All air line components such as hoses, connectors, filters,
regulators, etc. must have a minimum pressure rating of 150
PSI (10 BAR), or 150% of maximum system potential, whichever
is greater.
Loading Points
Remember, Framer’s Points and Flexible Framer’s Points are not
interchangeable. Use only Fletcher brand points to insure proper fit and
avoid the possibility of damaging the driver and voiding the warranty.
Page 5
5
P
neumatic FrameMaster®:
1. Connect the point driver to the air supply before loading points.
2. Lay the driver on a table, release the magazine latch and slide the
magazine cover fully open.
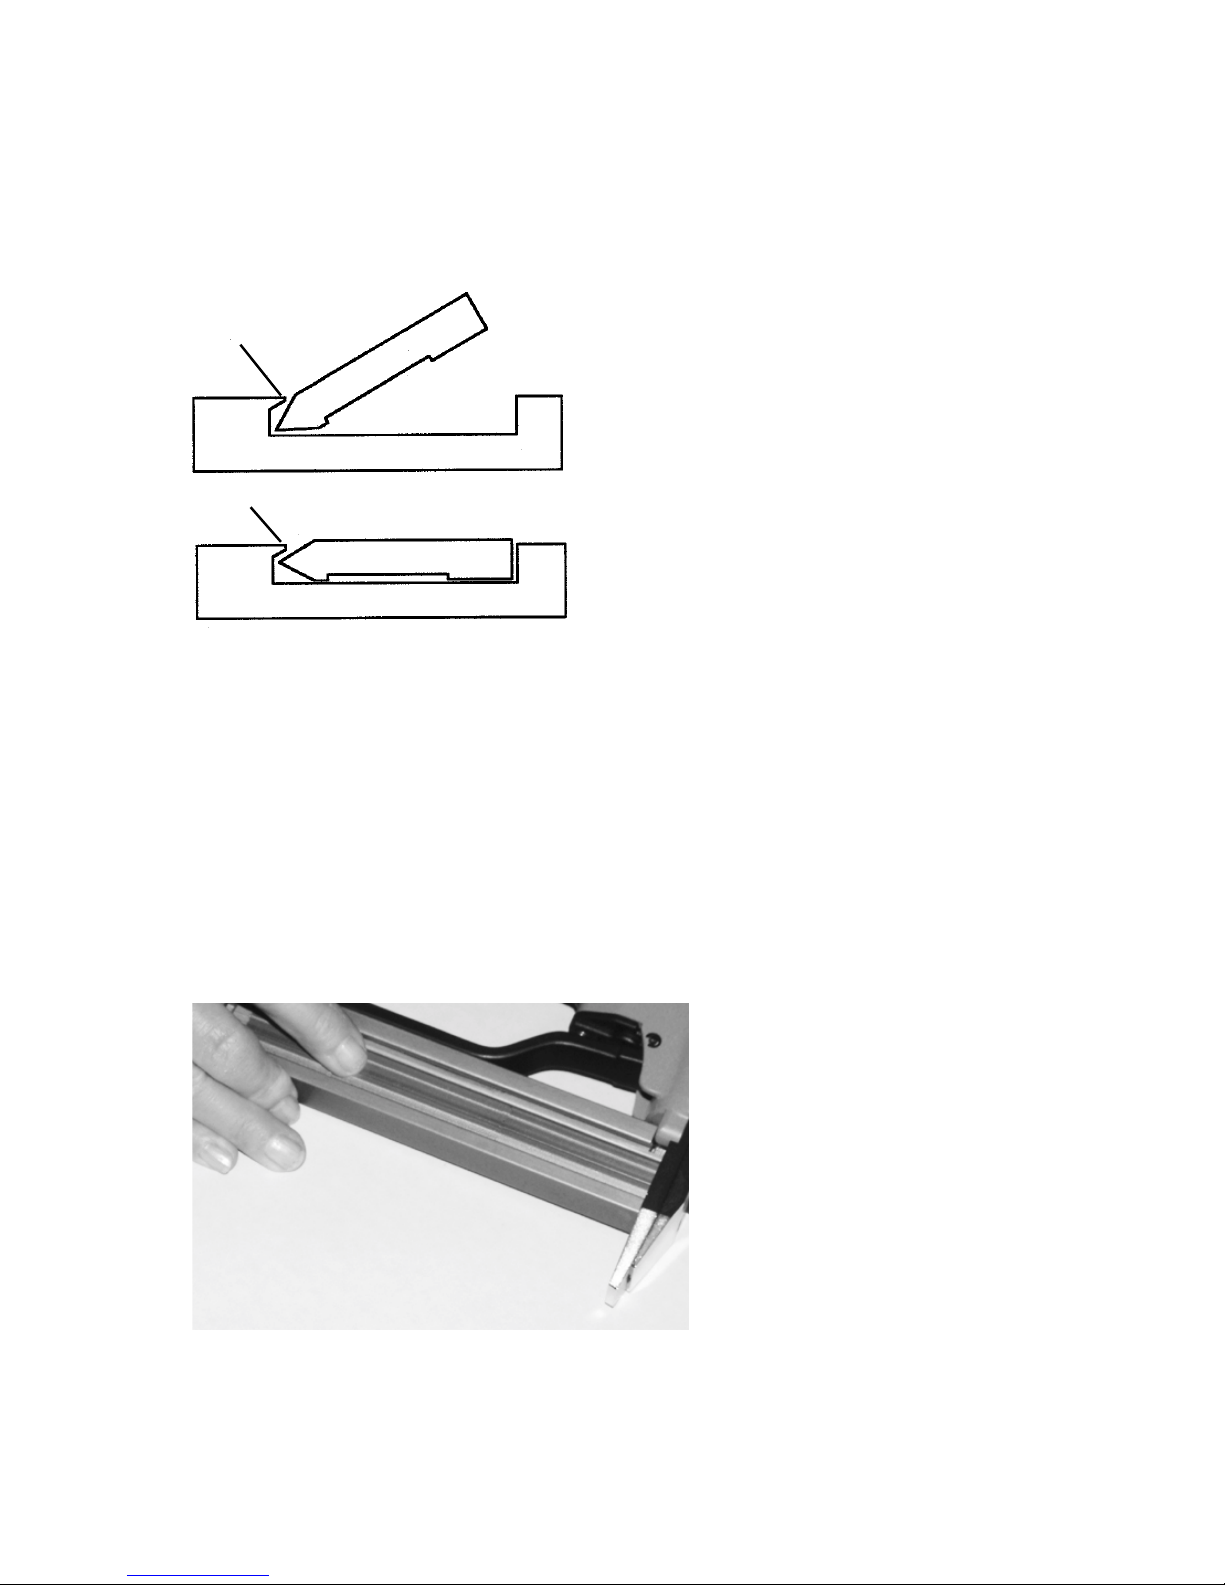
3. Hold a full stack of Framer ’s
Points at an angle with the glue
side down, and the sharp end of
the points under the lip of the
magazine groove as shown at A
in Figure 3.
4. Now lay the stack down so the
pointed ends of the stack
remain trapped under lip A in
the magazine groove.
5. Push on the End Cap to close and latch the cover.
Figure 3
Pneumatic FlexiMaster®
1. Release the magazine latch and slide its cover all the way open.
2. Lay the driver down as shown in Figure 4.
3. Position a stack of Flexible Framer’s Points with the pointed edge
away from the handle and the glue groove in the points facing
toward you and lay the
stack down.
4. Push on the End Cap to
close and latch the
cover.
Figure 4
A
A
Page 6
6
Operation of Pneumatic Point Drivers
1. Wear safety glasses and ear protection recommended in Safety
Instructions, Figure 1.
2. Place the picture frame face down on a flat surface.
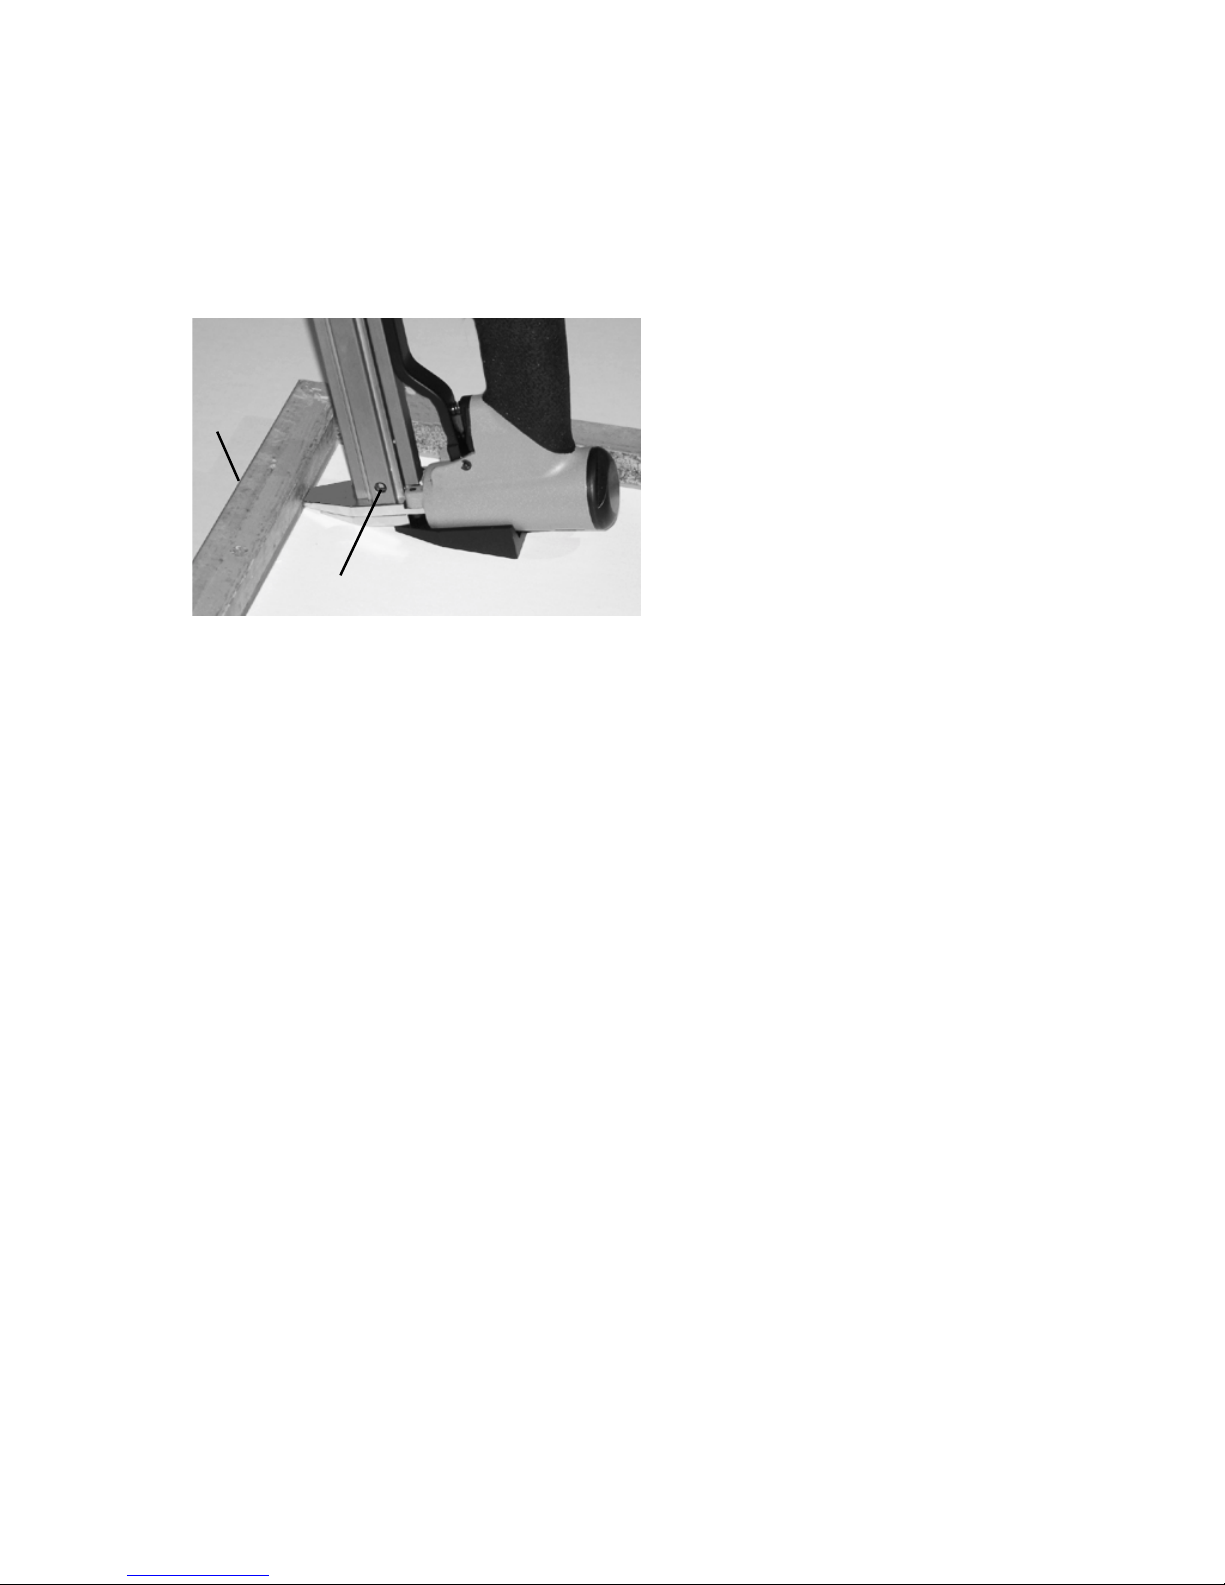
3. Rest the stabilizing shoe
flat on the backing and push
the nose piece firmly
against the frame as shown
in Figure 5.
4. Support the frame at
position A to prevent it
from moving.
5. Pull the trigger and the
point will be fired into the wood. A puff of air will be exhausted from
the top of the driver which is normal.
6. The depth of penetration into wood is affected by the density of
the wood and can be adjusted by the amount of air pressure. Do not
exceed 100 PSI.
7. If the backing places the driver too close to the edge of the frame,
tilt the driver so the point will be driven at a downward angle into
the wood; otherwise it may ricochet off the frame and create a
hazard.
8. When you can no longer see points in sight hole B, add another
stack.
CAUTION: Remove your finger from the trigger before carrying the
driver. If some time will pass between frames, disconnect the air hose from the driver. Keep the driver pointed in
a safe direction at all times.
Figure 5
A
B
Page 7
7
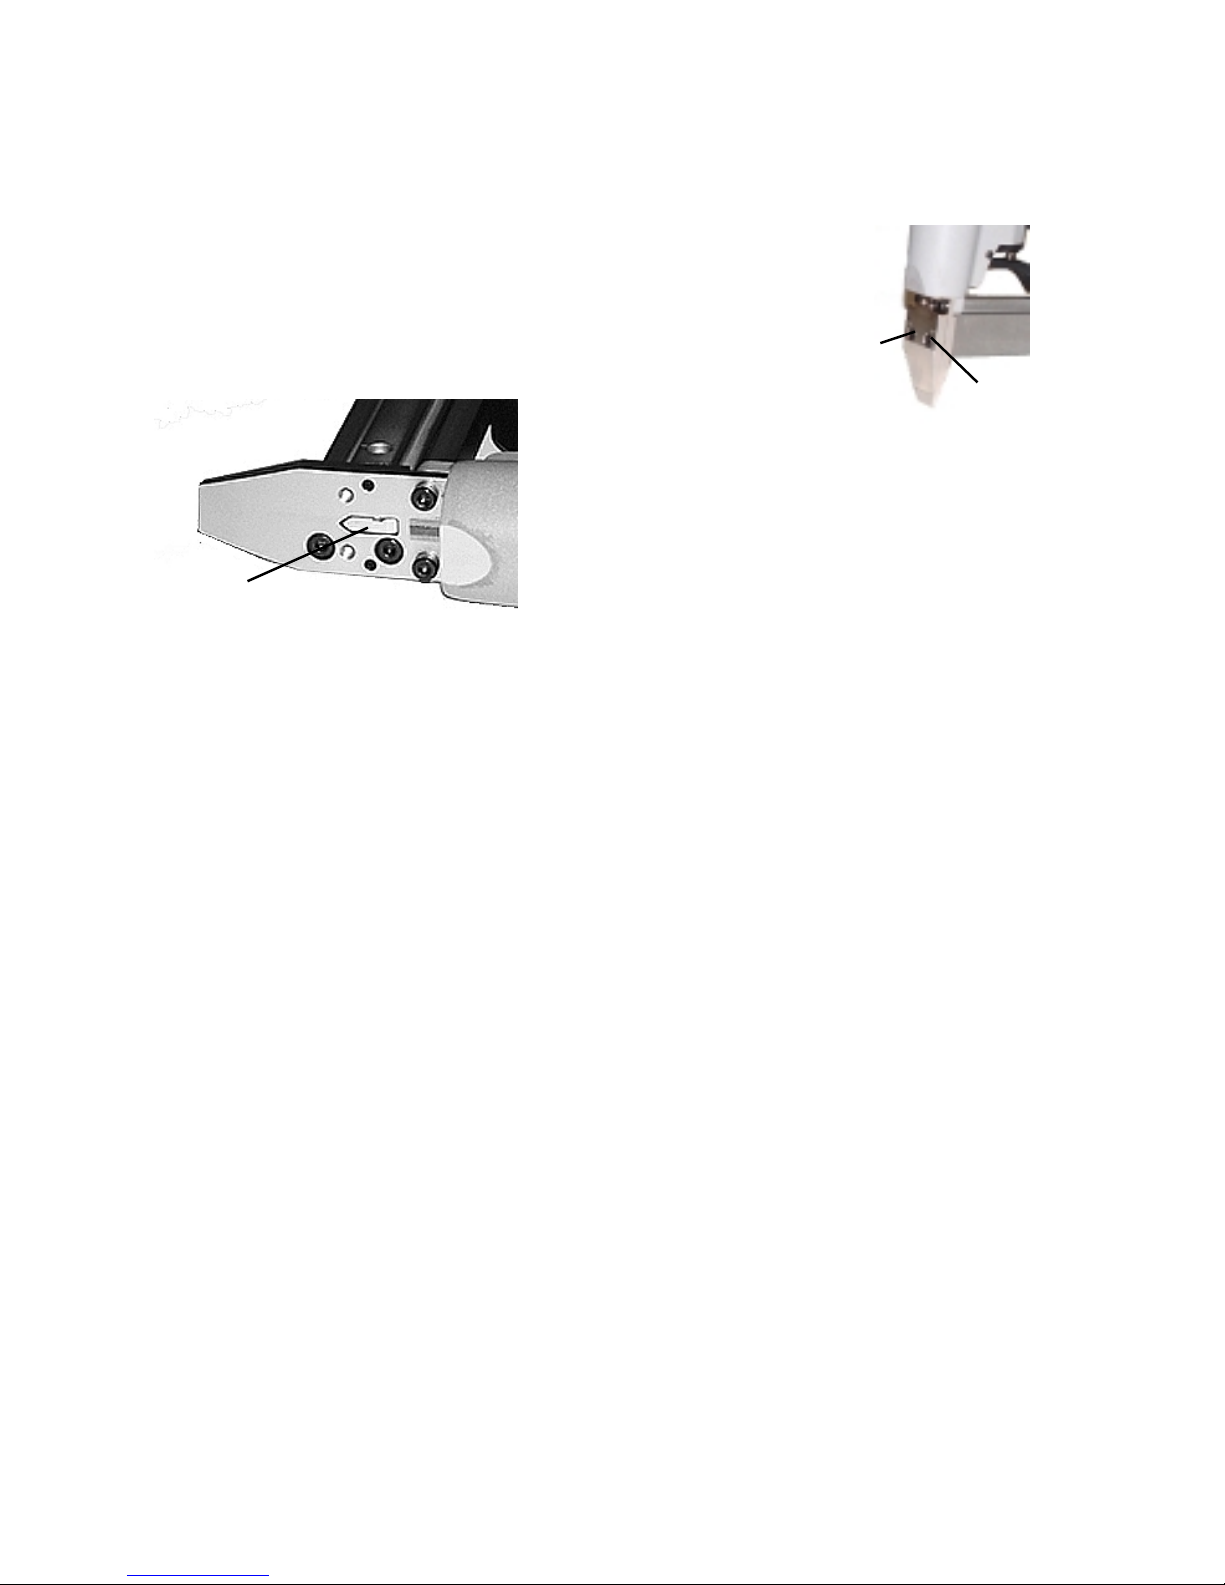
How to Clear a Jammed Point
1. IMPORTANT: Disconnect the driver from the air supply.
2. Remove the two Lower Guide Mounting Screws (A),
Figure 6. The Lower Guide and the Stabilizing Shoe
can now be removed as an assembly.
3. Unlatch the magazine and slide the cover open.
Maintenance (Daily)
1. Disconnect the driver from its air supply.
2. Clean the driver by wiping with a cloth. A non-flammable cleaning
solution may be used sparingly, but do not permit it to seep into the
driver where it may cause damage.
3. Check all accessible screws to insure they are tight.
4. Remove points and clean and inspect the magazine interior.
5. Call a Fletcher-Terry Customer Care Representative if more extensive repair or assistance is required. 1.800.843.3826.
A
Figure 6
4. Push the jammed
point out of the opening
(B) in Figure 7. You can access it
from inside the magazine.
5. Reassemble the Lower Guide and
Stabilizing Shoe to the driver with
the two screws removed in step 2.
6. This procedure applies to both the Pneumatic FrameMaster® and
Pneumatic FlexiMaster®.
7. Connect the driver to air supply, reload a stack of points and close
the magazine cover.
Figure 7
B
A
Page 8

8
T rouble Shooting
CAUTION: ALWAYS disconnect air supply before performing any
service procedure.
Symptom Probable Cause Correction
Air leak Loose screws Tighten screws
Connector nipple loose Tighten connector
Driver does not Inadequate air supply Verify and correct
fire, or is sluggish supply and pressure
Inadequate lubrication Put 1 or 2 drops of oil in
air supply connector
Frequent jams Incorrect points Use Fletcher brand
Points
Loose screws on Upper Tighten screws
or Lower Guides
Foreign matter in Open and clean
magazine magazine
Foreign matter between Remove Lower Guide
Upper and Lower Guides and clean the point
path
Other Contact a Fletcher-
Terry Customer Care
Representative at
800.843.3826
Page 9
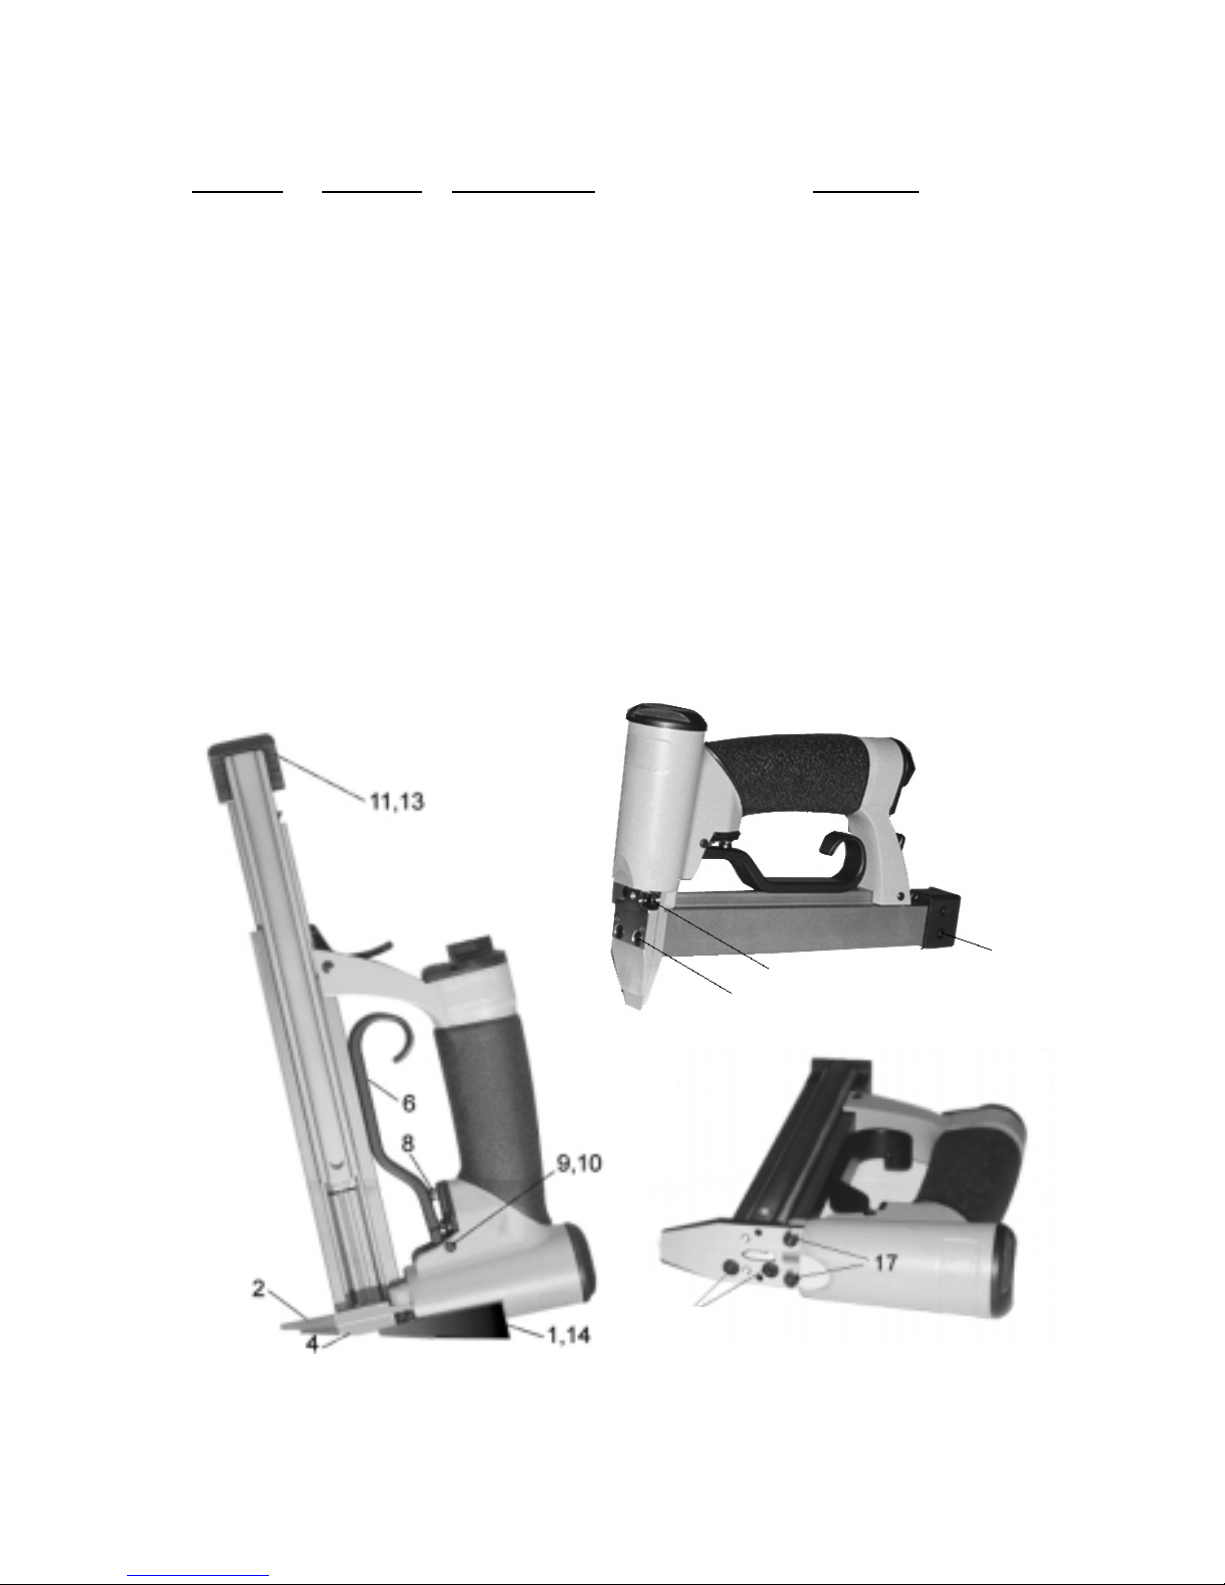
9
Pneumatic FrameMaster®
Ref.No. Part No. Description Quantity
1 12-635 Stabilizing Shoe 1
2 12-636 Upper Guide 1
4 12-637 Lower Guide 1
6 12-638 Trigger 1
8 12-639 Trigger Spring 1
9 12-640 Trigger Pin 1
10 12-641 Retaining Clip 1
11 12-642 End Cap 1
13 12-643 End Cap Screw 2
14 12-644 Stabilizing Shoe Screw 1
15 12-645 Lower Guide Mtg. Screw 2
16 12-645 Upper Guide Mtg. Screw 2
17 12-646 Guide Assembly Mtg. Screw 2
18* 12-647 3mm Hex Wrench 1
19* 12-648 Air Oil 1
*Not Shown
13
17
15
16
Page 10
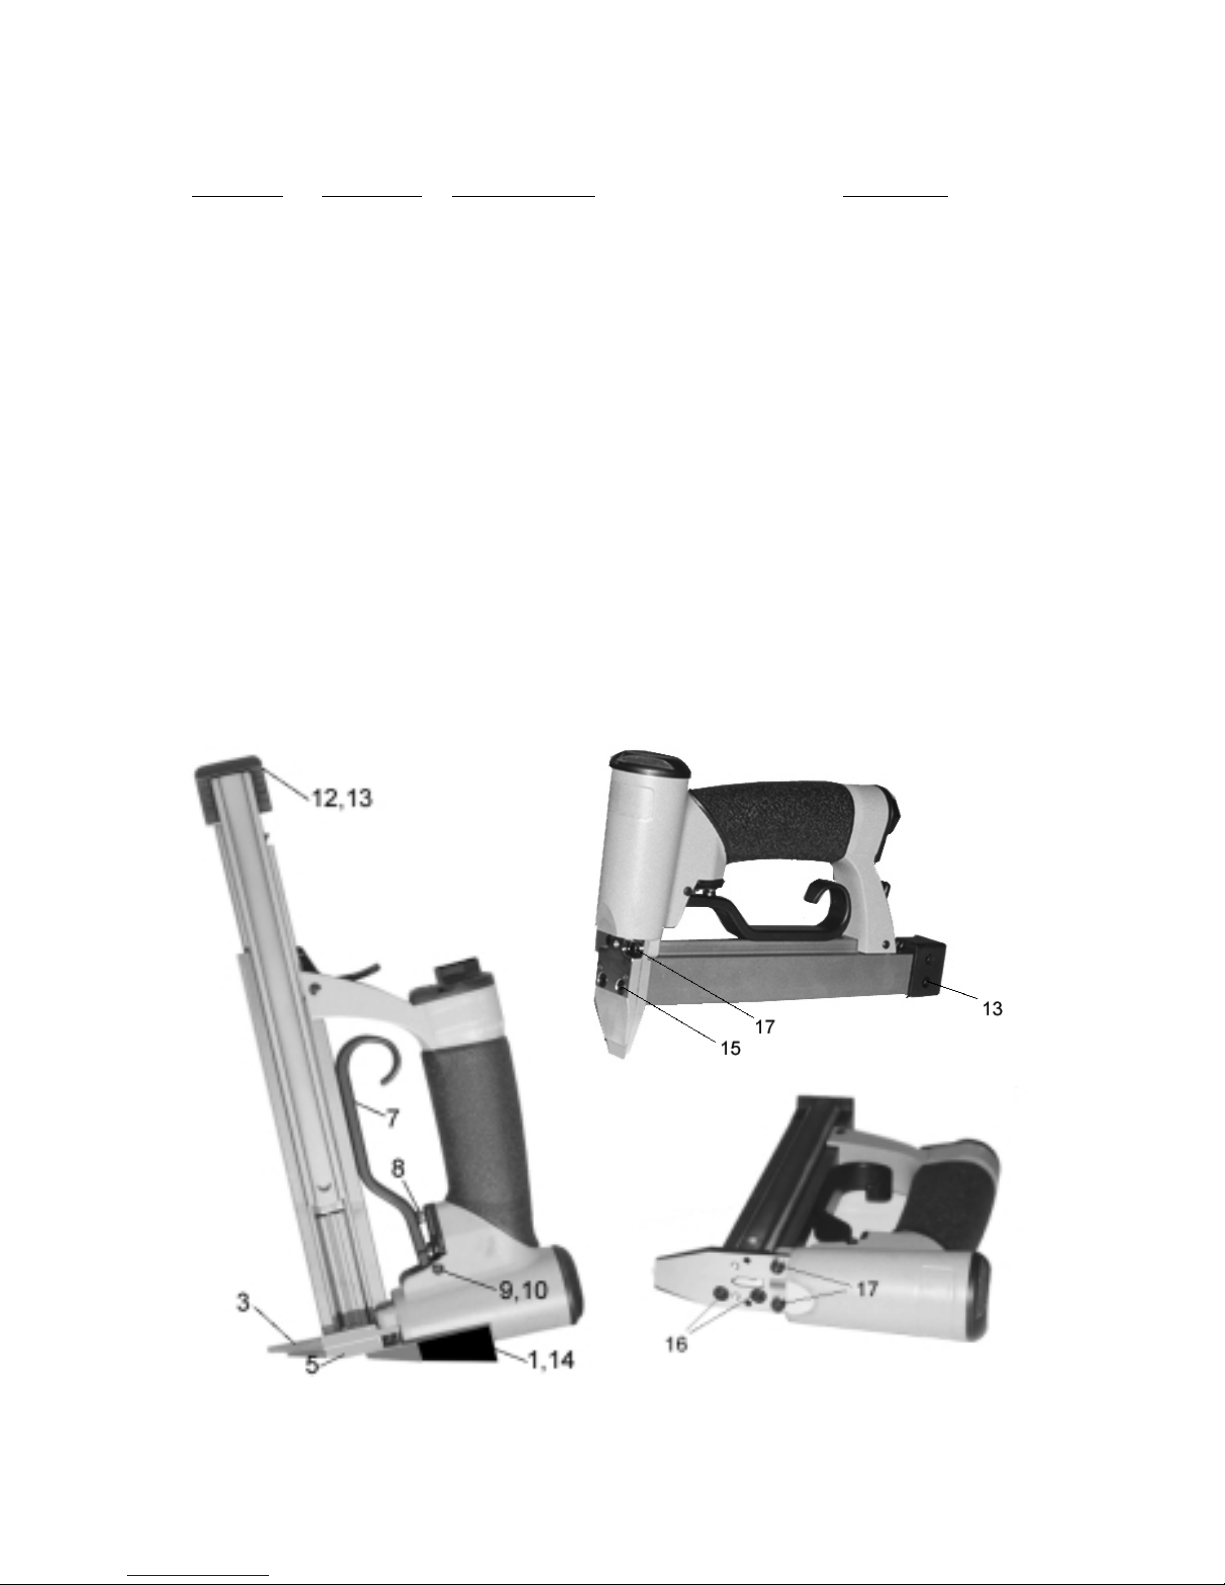
10
Pneumatic FlexiMaster®
Ref.No. Part No. Description Quantity
1 12-635 Stabilizing Shoe 1
3 12-670 Upper Guide 1
5 12-671 Lower Guide 1
7 12-672 Trigger 1
8 12-639 Trigger Spring 1
9 12-640 Trigger Pin 1
10 12-641 Retaining Clip 1
12 12-673 End Cap 1
13 12-643 End Cap Screw 2
14 12-644 Stabilizing Shoe Screw 1
15 12-645 Lower Guide Mtg. Screw 2
16 12-645 Upper Guide Mtg. Screw 2
17 12-646 Guide Assembly Mtg. Screw 2
18* 12-647 3mm Hex Wrench 1
19* 12-648 Air Oil 1
* Not Shown
 Loading...