

Fleetworks FLTW-7633, FLTW-7634 Installation Instructions Manual
!!!!!!!!!!INSTALLATION!INSTRUCTIONS!
Kit Contents:
Chassis Harness
1 bubble bag containing:
Tailgate Handle Camera
1 bag containing:
8.4” Factory Touch Screen Jumper Harness
2 pieces ½” glued heat shrink tube
These instructions
Tools & Supplies Required:
Socket Wrench or Socket Driver
Plastic Trim Removal Tool
Phillips and Flat Blade Screwdrivers
Power Drill
Center Punch
Heat Shrink Tubing
(recommended) or Electrical Tape
Soldering Iron and Solder
(optional) or T-taps
Heat Gun
Corrosion Inhibitor
(recommended)
Wire Ties
(recommended)
Preparation
1. Ensure all lamps and accessories are OFF.
2. Ensure ignition switch is in the OFF position.
3. Loosen negative battery cable bolt. Remove
negative battery cable from terminal and positi
on
away from battery
4. Wa
it one (1) minute prior to working on vehicle to
assure SIR roof rail airbag system has been disabl
ed
for your safety
Install Camera into Tailgate
5. Lower Tailgate and (if equipped) remove plastic
Tailgate Protector.
6. Remove the Tailgate Access Panel. (Figure 1)
Figure 1
2013-Current RAM Truck Rear Vision Parkline Camera with
RCA and Factory Display Harnesses (Kit part number
FLTW-7633)
Note: We strive to provide accurate and up-to-date installation instructions.
IMPORTANT: Verify kit contents are complete against list above before beginning installation.
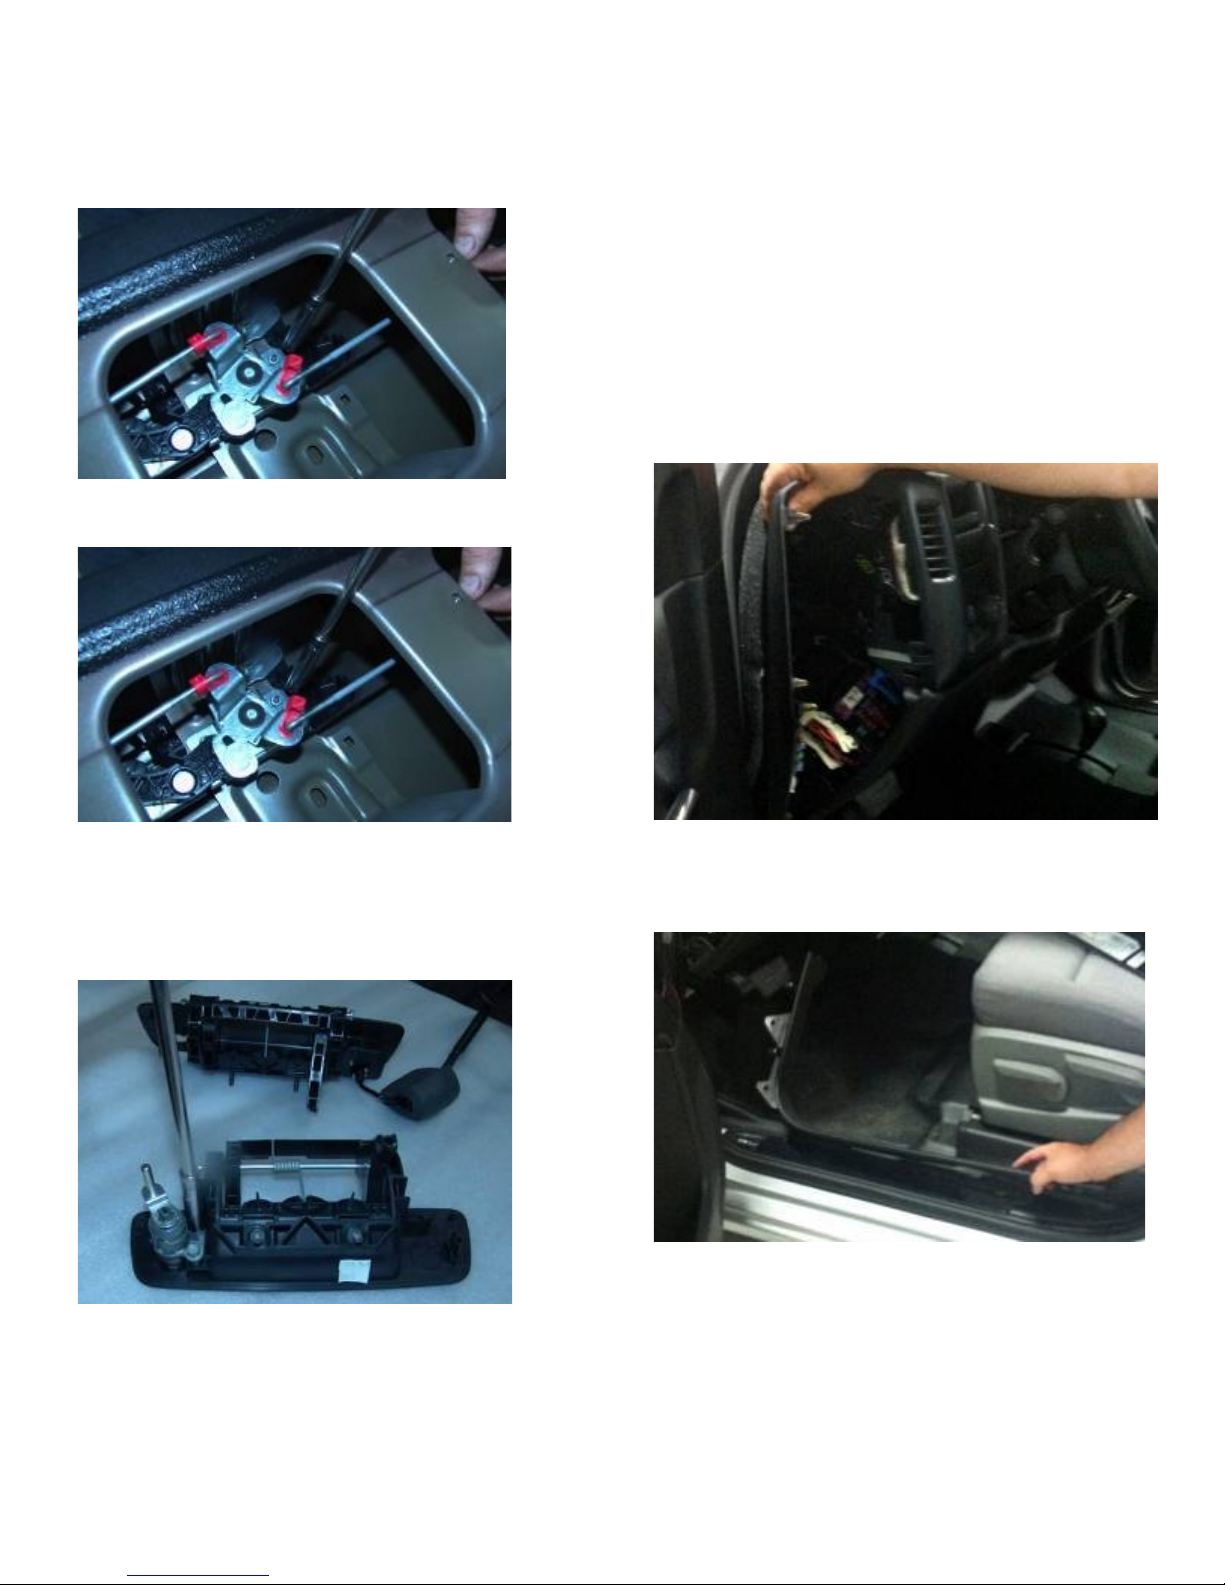
7. Disengage (2) plastic Latch Rod Retainer Clips using
your fingers. (Figure 2)
Figure 2
8. Remove Tailgate Handle using a Socket. (Figure 3)
Figure 3
9. Remove lock cylinder from original Tailgate Handle.
Remove Tailgate Lock Cylinder Retaining Clip and
then Tailgate Lock Cylinder and reinstall into
supplied Tailgate Handle Camera. (Figure 4)
Figure 4
10. Route Tailgate Handle Camera connector down
through Tailgate Handle opening then out through
the hole at bottom of Tailgate.
11. Pull Tailgate Handle Camera connector through the
pass-through hole in the rear of the pickup box.
12. Reinstall Tailgate Handle.
13. Reattach (2) plastic Latch Rod Retainer Clips using
your fingers.
14. Reattach Tailgate Access Panel.
15. (If equipped), reinstall plastic Tailgate Protector.
16. Close Tailgate.
Chassis Harness Pass Through
17. Using a Plastic Trim Removal Tool, remove Left
Instrument Panel Outer Trim Cover. (Figure 5)
Figure 5
18. Remove driver side door sill cover/kick panel cover.
(Figure 6)
Figure 6
19. Pull back driver side floor carpet.
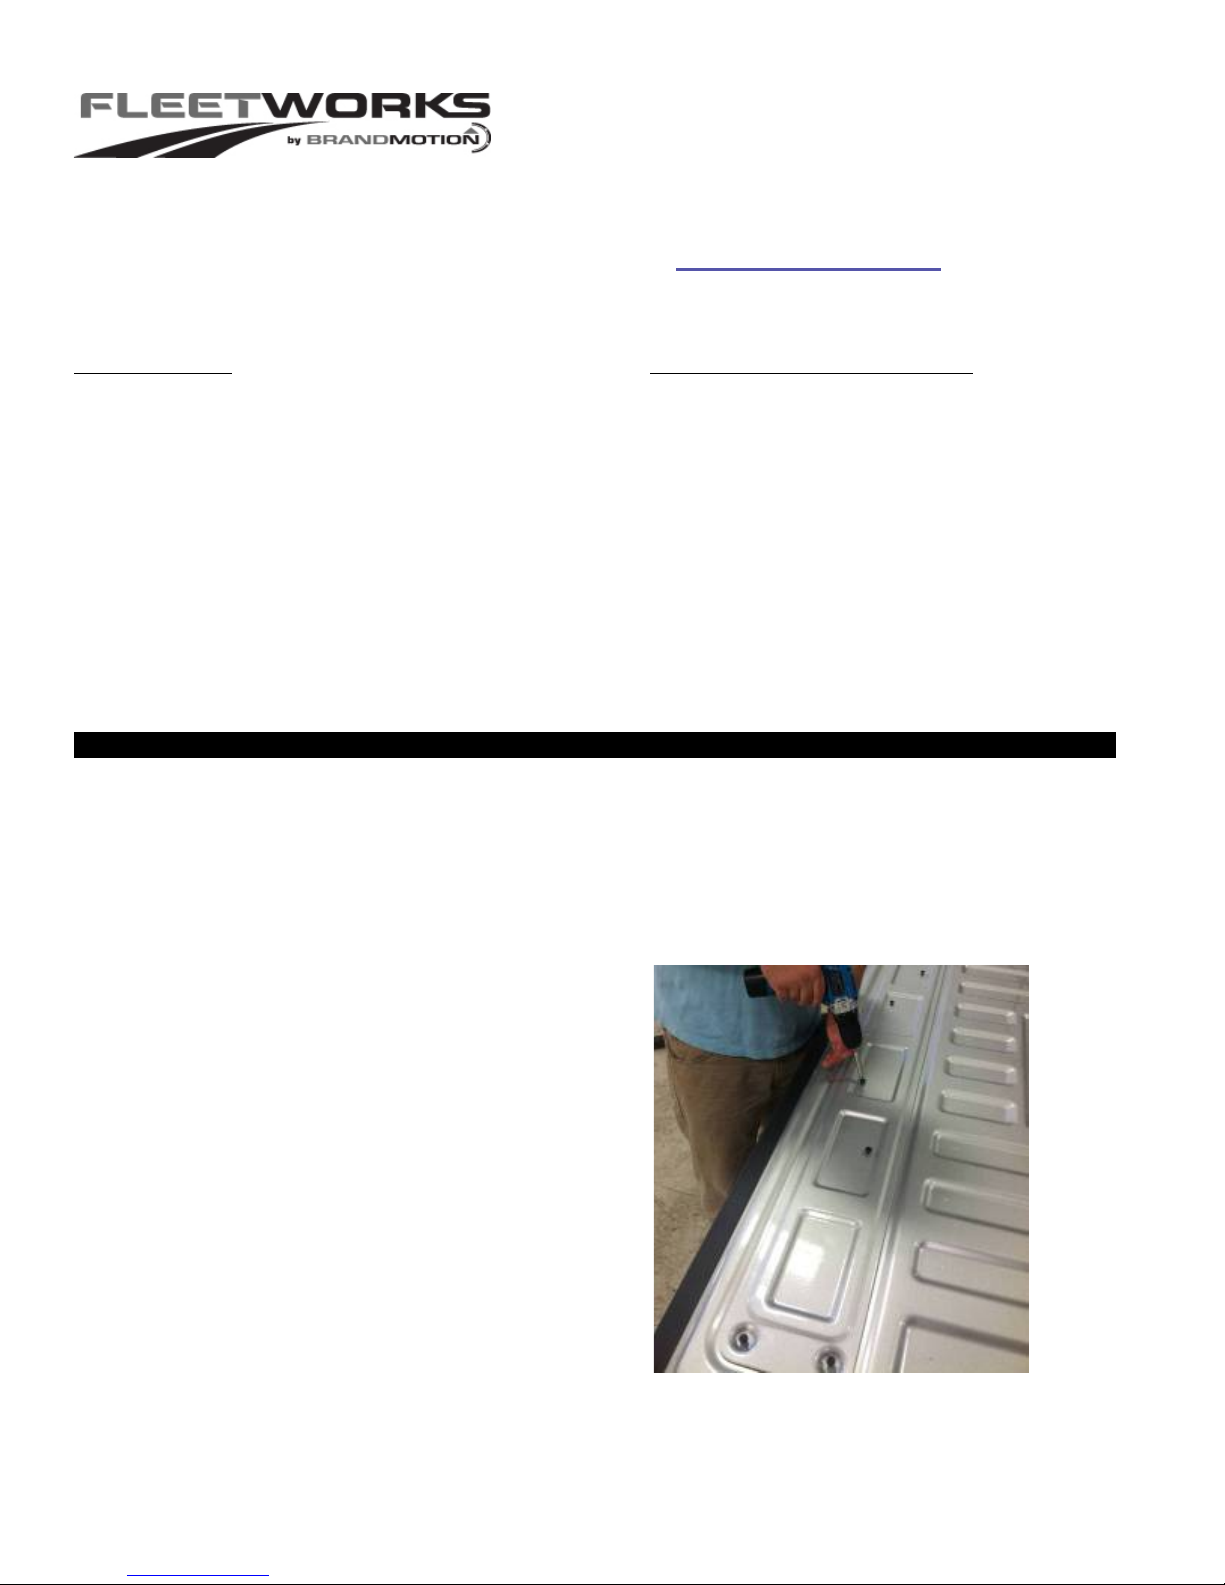
20. Look for existing grommet or hole to run chassi
s
harness through. If no existing hole is available make
sure that there is nothing on the back side of pa
ss
through opening (wiring, parking brake cable, etc),
mark center with a Center Punch and use a 1/2” Drill
Bit to make a pilot hole. (Figure 7)
 Loading...