

Fleetwood PaceArrow 1995 Owner's Manual

BY
FLEE7WCOD.
1995
owner's
manual

1995
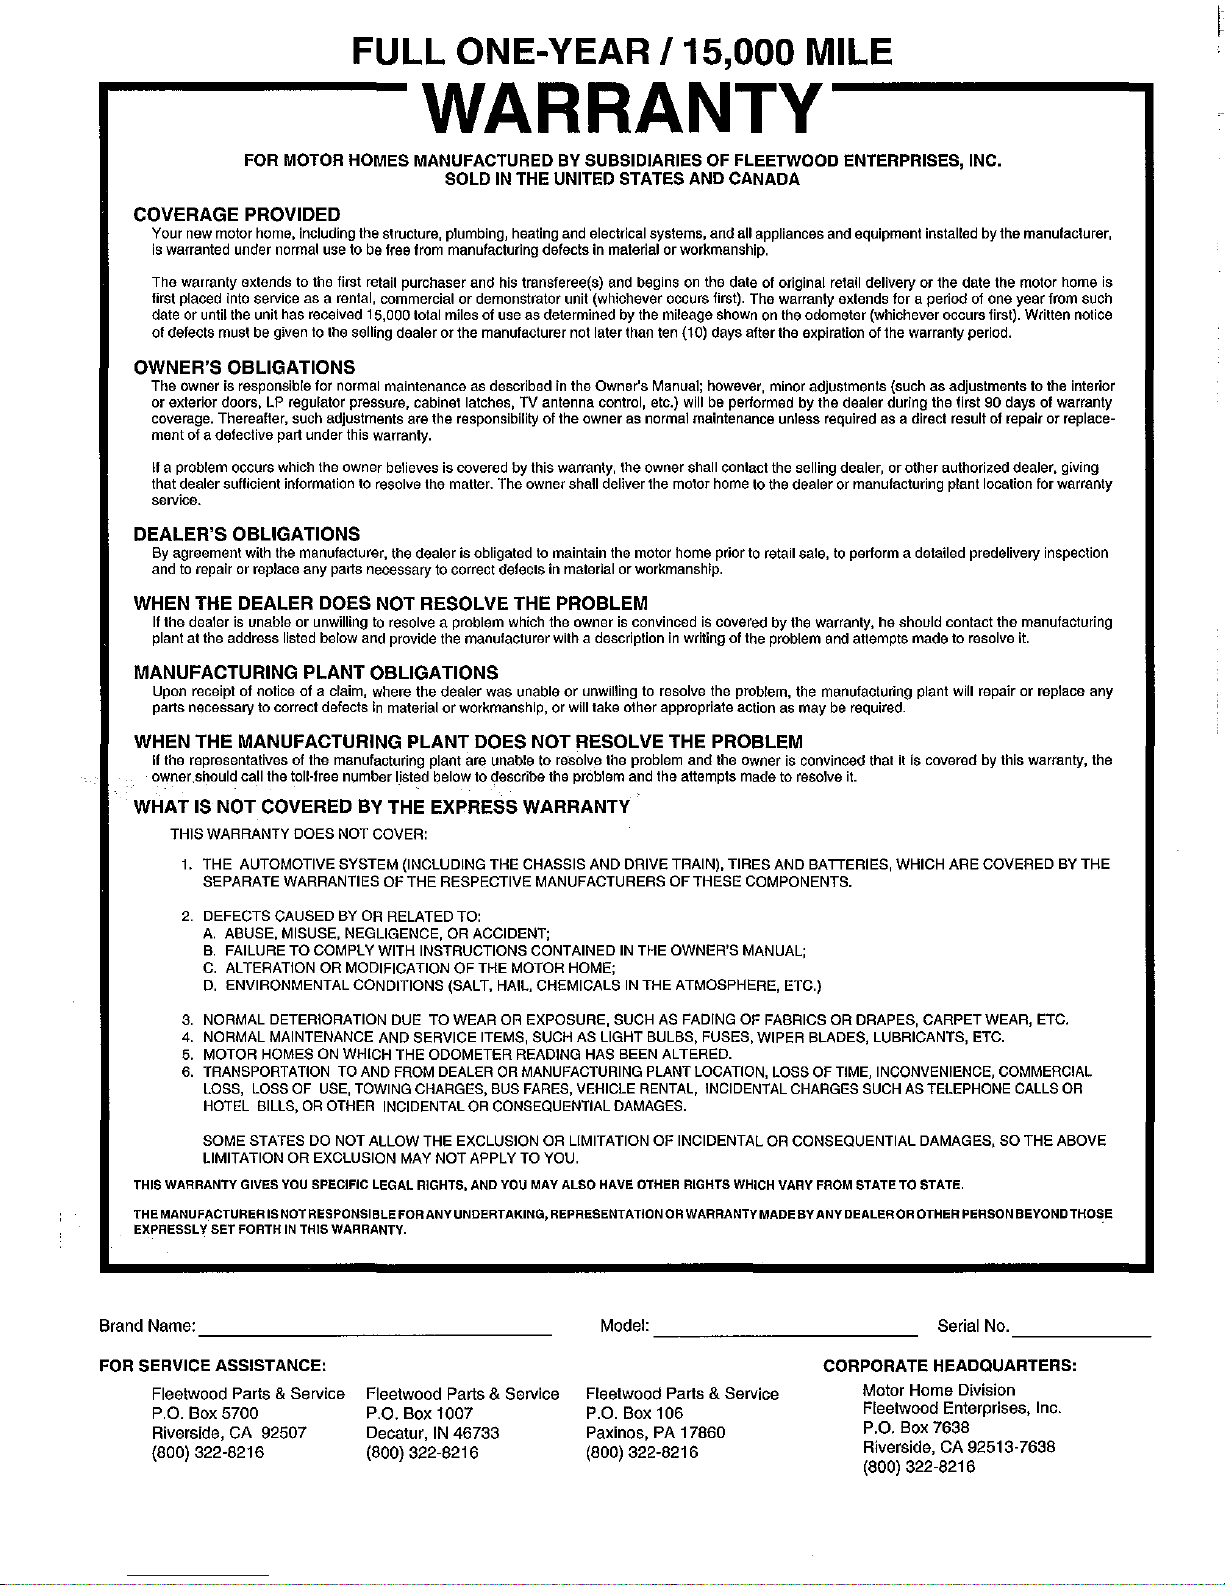
FULL ONE-YEAR 115,000 MILE
...----
WARRANTy---
.....
FOR
MOTOR
HOMES MANUFACTURED
BY
SUBSIDIARIES
OF
FLEETWOOD ENTERPRISES,
INC.
SOLD
IN
THE
UNITED STATES AND CANADA
COVERAGE
PROVIDED
Your new motor home. including the structure, plumbing, heating and electrical systems,
and
all appliances and equipment installed
by
the manufacturer,
is warranted under normal use to be free from manufacturing defects in malerial
or
workmanship.
The warranty extends to the first retail purchaser and his transferee(s) and begins
on
the date of original retail delivery or the date the motor home is
first placed
Into service as a rental, commercial
or
demonstrator unit (whichever occurs first). The warranty extends for a period of one year from such
date
or
until the unit has received 15,000 tolal miles
of
use
as
determined
by
the mileage shown
on
the odometer (whichever occurs first). Written notice
of
defects must be given to the selling dealer
or
the manufacturer not later than ten (10)
days
after the expiration
of
the warranty period.
OWNER'S
OBLIGATIONS
The owner is responsible for normal maintenance as described in the Owner's Manual; however, minor adjustments (such
as
adjustments to the interior
or
exterior doors, LP regulator pressure, cabinet latches, TV antenna control, etc.) will be performed
by
the dealer during the first
90
days
of
warranty
coverage. Thereafter, such adjustments are the responsibility
of
the owner as normal maintenance unless required as a direct result of repair
or
replace-
ment
of
a defective part under this warranty.
If a problem occurs which the
owner
believes is covered
by
this warranty, the owner shall contact the selling dealer,
or
other authorized dealer, giving
that dealer sufficient information to resolve the matter. The owner shall
deliver the motor home to the
dealer
or
manufacturing plant location for warranty
selVice.
DEALER'S
OBLIGATIONS
By agreement with the manufacturer, the dealer is obligated to maintain the motor
home
prior to retail sate, to perform a detailed predelivery inspection
and to repair
or
replace
any
parts necessary to correct defects in material
or
workmanship.
WHEN
THE
DEALER
DOES
NOT
RESOLVE
THE
PROBLEM
If the
dealer
is unable
or
unwilling to resolve a problem which the owner is convinced is covered
by
the warranty,
he
should contact the manufacturing
plant
at
the address listed below
and
provide the manufacturer with a description in writing
of
the problem and attempts
made
to resolve
it.
MANUFACTURING
PLANT
OBLIGATIONS
Upon receipt
of
notice
of
a claim, where the
dealer
was
unable
or
unwilling to resolve the problem, the manufacturing plant will repair
or
replace
any
parts necessary to correct defects in material
or
workmanship,
or
will take other appropriate action as
may
be required.
WHEN
THE
MANUFACTURING
PLANT
DOES
NOT
RESOLVE
THE
PROBLEM
If the representatives
of
the manufacturing plant are unable to resolve the problem
and
the owner is convinced that il is covered by this warranty, the
owner.should
call the toll-free
number
nsted
below
to describe the problem and the attempts made to resolve it.
WHAT
IS
NOT
COVERED
BY
THE EXPRESS
WARRANTY
THIS WARRANTY
DOES
NOT
COVER:
1.
THE
AUTOMOTIVE SYSTEM (INCLUDING THE CHASSIS AND DRIVE TRAIN), TIRES
AND
BATTERIES, WHICH
ARE
COVERED
BY
THE
SEPARATE WARRANTIES
OF
THE
RESPECTIVE MANUFACTURERS
OF
THESE
COMPONENTS.
2.
DEFECTS CAUSED
BY
OR
RELATED TO:
A.
ABUSE, MISUSE, NEGLIGENCE,
OR
ACCIDENT;
B.
FAILURE
TO
COMPLY
WITH INSTRUCTIONS CONTAINED IN THE
OWNER'S
MANUAL;
C.
ALTERATION
OR
MODIFICATION
OF
THE MOTOR HOME;
D.
ENVIRONMENTAL CONDITIONS (SALT, HAIL, CHEMICALS IN
THE
ATMOSPHERE, ETC.)
3.
NORMAL DETERIORATION DUE
TO
WEAR
OR
EXPOSURE, SUCH AS FADING
OF
FABRICS
OR
DRAPES,
CARPET
WEAR, ETC.
4.
NORMAL
MAINTENANCE AND SERVICE ITEMS, SUCH AS LIGHT BULBS, FUSES, WIPER BLADES, LUBRICANTS, ETC.
5.
MOTOR HOMES ON WHICH
THE
ODOMETER
READING HAS BEEN ALTERED.
6.
TRANSPORTATION TO AND FROM DEALER OR MANUFACTURING PLANT LOCATION, LOSS OF TIME, INCONVENIENCE, COMMERCIAL
LOSS, LOSS OF USE, TOWING CHARGES, BUS FARES, VEHICLE
RENTAL, INCIDENTAL CHARGES SUCH AS TELEPHONE CALLS OR
HOTEL BILLS,
OR
OTHER INCIDENTAL OR CONSEQUENTIAL DAMAGES.
SOME STATES DO
NOT
ALLOW
THE EXCLUSION
OR
LIMITATION
OF
INCIDENTAL
OR
CONSEQUENTIAL DAMAGES,
SO
THE
ABOVE
LIMITATION
OR
EXCLUSION MAY
NOT
APPLY
TO YOU.
THIS WARRANTY GIVES YOU SPECIFIC
LEGAL
RIGHTS, AND YOU
MAY
ALSO
HAVE OTHER RIGHTS WHICH VARY FROM STATE
TO
STATE.
THE MANUFACTURER
ISNOT
RESPONSIBLE
FORANY
UNDERTAKING, REPRESENTATION OR WARRANTY MADE
BY
ANY
DEALER OR OTHER PERSON BEYOND THOSE
EXPRESSLY
SET
FORTH
IN
THIS WARRANTY. .
Brand
Name:
_______________
_
FOR
SERVICE ASSISTANCE:
Fleetwood Parts & Service
P.O.
Box
5700
Riverside,
CA
92507
(800)
322·8216
Fleetwood Parts & SelVice
P.O.
Box
1007
Decatur,
IN
46733
(800) 322·8216
Model:
__________
_
Serial
No.
_____
_
Fleetwood Parts & Service
P.O.
Box
106
Paxinos, PA 17860
(800)
322·8216
CORPORATE HEADQUARTERS:
Motor Home Division
Fleetwood Enterprises,
Inc.
P.O.
Box
7638
Riverside.
CA
92513·7638
(800)
322·8216
IMPORTANT NOTICE
Our forest product suppliers have advised that urea-formaldehyde is used in
the production of
particle board, hardwood plywood
or
paneling which they
supply us and which we utilize in our finished product. These suppliers have
requested that we communicate this to our customers.
For your information, we are reproducing
samples
of
statements which have
been provided to us by
our
suppliers.
WARNING: THIS PRODUCT IS MANUFACTURED WITH UREA-FORM-
ALDEHYDE
RESIN. FORMALDEHYDE VAPOR MAY
IN
SOME PEOPLE
CAUSE HEADACHES, EYE, NOSE AND THROAT IRRITATION, AND
AGGRAVATION OF ALLERGIES AND RESPIRATORY PROBLEMS, SUCH
AS ASTHMA.
PROPER VENTILATION SHOULD REDUCE THE RISK
OF
SUCH PROBLEMS.
Champion
International
Corporation
WARNING: IRRITANT: THIS PRODUCT CONTAINS A UREA-FORMAL-
DEHYDE
RESIN AND MAY RELEASE FORMALDEHYDE VAPORS
IN
LOW CONCENTRATIONS. FORMALDEHYDE CAN BE IRRITATING TO
THE EYES AND UPPER RESPIRATORY SYSTEM
OF
ESPECIALLY
SUSCEPTIBLE PERSONS SUCH AS THOSE WITH ALLERGIES OR
RESPIRATORY AILMENTS. USE WITH
ADEQUATE VENTILATION. IF
SYMPTOMS DEVELOp, CONSULT YOUR PHYSICIAN.
Georg;a~Pacific
Corporation
WARNING: THIS PRODUCT IS MANUFACTURED WITH A UREA-
FORMALDEHYDE
RESIN AND WILL RELEASE SMALL QUANTITIES
OF
FORMALDEHYDE. FORMALDEHYDE LEVELS
INTHE
INDOOR AIR CAN
CAUSE
TEMPORARY EYE AND RESPIRATORY IRRITATION, AND MAY
AGGRAVATE
RESPIRATORY CONDITIONS OR ALLERGIES. VENTILA-
TION WILL
REDUCE INDOOR FORMALDEHYDE LEVELS.
Weyerhaeuser
Company
Ventilation is important
in
maintaining a comfortable environment and we
direct your attention to the discussion of ventilation contained in your
Owner's
Manual.
SAFETY REGULATIONS REGARDING
LP
GAS
SYSTEMS
AND
LP
GAS APPLIANCES
The
manufacturer
of
this
recreational
vehicle
is
required
to
furnish
the
following
consumer
information
as
provided
by
the
National
Fire
Protection
Association
and
the
American
National
Standards
Institute.
The
information
and
warnings
found
here
may
also
be
found
in
other
chapters
of
this
Owner's
Manual.
Please
see
chapters
titled
"LP GAS SYSTEM"
and
"APPLIANCES"
for
other
safety
and
operating
information.
WARNING
LP GAS CONTAINERS SHALL NOT BE PLACED
OR
STORED INSIDE THE VEHICLE. LP GAS CONTAINERS ARE
EQUIPPED WITH SAFETY DEVICES WHICH RELIEVE EXCESSIVE PRESSURE BY DISCHARGING GAS
TO
THE
ATMOSPHERE.
WARNING
IT
IS
NOT SAFE TO USE COOKING APPLIANCES FOR COMFORT HEATING. COOKING APPLIANCES NEED
FRESH AIR FOR SAFE OPERATION. BEFORE OPERATION:
1.
OPEN OVERHEAD VENT OR TURN ON EXHAUST FAN, AND
2.
OPEN WINDOW.
THIS WARNING
LABEL HAS BEEN LOCATED
IN
THE COOKING AREA TO REMIND YOU TO PROVIDE AN
ADEQUATE
SUPPLY OF FRESH AIR FOR COMBUSTION. UNLIKE HOMES, THE AMOUNT OF OXYGEN SUPPLY
IS LIMITED
DUE
TO
THE SIZE OF THE RECREATIONAL VEHICLE, AND PROPER VENTILATION WHEN USING
THE COOKING APPLIANCE(S) WILL AVOID DANGERS OF ASPHYXIATION.
IT
IS
ESPECIALLY IMPORTANT
THAT COOKING APPLIANCES NOT BE USED FOR COMFORT HEATING AS THE DANGER OF ASPHYXIATION
IS
GREATER WHEN THE APPLIANCE IS USED FOR LONG PERIODS OF TIME.
WARNING
PORTABLE FUEL-BURNING EQUIPMENT, INCLUDING WOOD AND CHARCOAL GRILLS AND STOVES, SHALL
NOT
BE USED INSIDE THIS RECREATIONAL VEHICLE. THE USE OF THIS EQUIPMENT INSIDE THE RECREA-
TIONAL VEHICLE MAY CAUSE FIRES OR ASPHYXIATION.
WARNING
DO NOT BRING OR STORE LP GAS CONTAINERS, GASOLINE, OR OTHER FLAMMABLE LIQUIDS INSIDE THE
VEHICLE BECAUSE A FIRE
OR
EXPLOSION MAY RESULT.
A warning label has been located near the LP gas container. This label reads: DO NOT FILL CONTAINER(S) TO MORE
THAN
80
PERCENT OF CAPACITY.
Ovetiilling
the
LP
gas
container
can
result
in
uncontrolled
gas
flow
which
can
cause
fire
or
explosion. A properly
filled
container-will
contain
approximately
80
percent
of
its
volume
as
liquid
LP
gas.
The
following
label
has
been
placed
in
the
vehicle
near
the
range:
IF YOU
SMELL
GAS:
1.
Extinguish
any
open
flames,
pilot
lights
and
all
smoking
materials.
2.
Do
not
touch
electrical
switches.
3.
Shut
off
the
gas
supply
at
the
tank
valve(s)
or
gas
supply
connection.
4.
Open
doors
and
other
ventilating
openings.
5,
Leave
the
area
until
odor
clears.
6,
Have
the
gas
system
checked
and
leakage
source
corrected
before
using
again.
LP
gas
regulators
must
always
be
installed
with
the
diaphragm
vent
faCing
downward,
Regulators
that
are
not
in
compartments
have
been
equipped
with a protective
cover.
Make
sure
that
regulator vent
faces
downward
and
the
cover
is
kept
in
place
to
minimize
vent
block~ge
which
could
result
in
excessive
gas
pressure
causing
fire
or
explosion.

WARRANTY
NOTICES AND WARNINGS
Introduction
'"
........ ,
..
,',
..
,' ........ , .... ,
.. " ..
, .... ,
..
" .... ,
..
,' 1
Warranties" ...... , ......
",
..
, .... ,
.. , .. , ..
" .... ,
..
, ........ , ,
.. ' ..
" 1
Warranty
Service .................................................. , 2
Reporting
Safety Defects ...... , ..............................
,2
Owner's Information Package ..............................
,3
Chassis And
Vehicle Identification .......................................... 3
Driver's Controls ....................................................
4
On The Road ..........................................................
,7
Motor Home Loading ............................................
,7
Responsibility for Proper Loading ...................... 7
A Few Definitions First ......................................
,7
Towing a Vehicle or Trailer .................................... , 7
Carrying Capacity
and
Load
Distribution .......... , 8
How
To
Weigh Your Loaded Motor Home
Without A Trailer
or
Other Towed
Load
.......... , 8
How
To
Weigh Your Loaded Motor Home
With A Trailer
or
Other Towed Load ................ 9
Loading Tips ......................................................
9
Tires,
..
" .... , ...... , ........ ,
..
,' .... ,
..
,',
..
,',
.. " ..
" ........ , ,
..
,,, 1 0
Tire Inflation .................................................... , 1 0
Tire Replacement .......... , ........ , ............ , ............ 10
If
You
Get a Flat Tire ........................................ ,
11
Changing a Flat Tire ............................................
11
Seats and Seat Belts .......................................... , 12
Combination Lap
and
Shoulder Belts .............. , 12
Safety Belt Maintenance .................................. 12
Safety Restraints for Children .......................... 12
Safety Belts for Children .... , ........ , .................... 13
Safety Seats for Children ................................ , 13
Driving,
Parking and Mirrors ................................ 13
Rear View Video Monitor ....................................
,14
Body Undercoating
.. " ..
",
......
",
..
" ............ ,
..
" .... ,
..
14
Fuel and Fuel Systems ......................................
,15
Fuel Fill ............................................................ 15
Fuel Types
And
Vapor Lock .............................. 15
General Chassis Topics ......................................
, 15
Variable
Speed Engine Fan .............................. 15
Exhaust
System Heat ...................................... 15
Engine Temperature Gauges ..............................
, 15
Carbon Monoxide
Safety Precautions .......................................... , 16
Carbon Monoxide Detector .............................. 16
Emergency Towing .............................................. 16
Attaching Accessories to
Your Motor Home ............................................ , 17
TABLE OF CONTENTS
Living With Your Motor Home ............................ , 19
Automatic Leveling System ................................
,19
Power Entry Steps .............................................. , 19
Entry Assist Handle ............................................
,19
Entry Doors and Screens .............. , .... ,
..
, .... , ........ 19
Windows,
.. " ..
" ,
.. " .. " ..
,',
.. " ..
,',
.. , ..
" .... "
.. , ..
,',
..
" .... , 19
Emergency Exit Window .................................. 19
Power Windows, ............
, .................................. 19
Side Slider Windows ........................................ 19
Remote Mirror Control ........................................
, 20
Driver/Passenger Light Control .......................... , 20
Mini-Blinds "
.. " ..
,',
.. " .. " ..
,' ,
..
, .... ,
..
" .... ,
..
" ......
",
..
" 20
Day/Night Shades .............................................. , 20
Storage "
..
" .... ,
..
" ...... ,',
.. " .. " ..
" ........ , ......
," , ..
" ,
..
, 20
Exterior Compartments .................................... 20
Interior Storage ................................................ 20
Interior and Furnishings ......................................
21
Dinette Conversion
..
, .... ,
..
" .............................. ,
21
Sofa/Lounge Conversion ..................................
21
Folding Doors/Privacy Curtain Dividers .......... ,21
Interior Lighting ........
, ...................................... ,
21
Overhead Vents .............................................. ,
21
Folding Chairs ..................................................
21
Monitor Panel ......................................................
21
Effects
of
Long-Term Occupancy ........................ 22
Ventilation
And
ContrOlling Condensation ........ 22
Fi
re
Safety .......................................................... , 23
Fire
Safety Precautions .......... , ........................
,23
Smoke Detector ...................... , .............. , ........ , 24
Plumbi ng Systems .............................................. , 27
Fresh Water
System ............................................ 27
External Fresh Water Hookup .......................... 27
Filling The On-Board Water Tank ....................
,27
Draining the Fresh Water Tank ........................ , 28
Water Pump .................................................... ,
28
Water Filter ......................................................
28
Low
Point Drains ............ ,
..
, .............................. 29
Sanitizing The Fresh Water
System ................
,30
Exterior Shower .............................................. , 30
Drinking Water Filter System ............................ 30
Waste Water System .......................................... , 30
Toilet .......... ,
..
, , .... , ................................ , ,
..
, .... ,
..
30
Draining The Holding Tanks ............................
,30
Holding Tank Care ............................................ 32
Electrical Systems
.. , ..
",
.. " ..
",
.. , .. " ..
",
.. " ..
",
.. , .. " ..
, 35
Chassis Electrical
System .................................. , 35
Chassis Bulbs
And
Fuses ................................ 35
12-Volt Coach
System ........................................ , 35

TABLE OF CONTENTS
Battery Disconnect ........................................... 35
TV Antenna .........................................................
51
Battery Inspection
And
Care ............................ 35
TV
and Radio Interference ..................................
51
Auxiliary Start System ...................................... 36
Miscellaneous Appliances ................................... 52
Battery Charging .............................................. 36
Washer/Dryer Drain Screen ............................. 52
Selecting A Replacement Battery .................... 36
Solar Panel .......................................................... 37
Maintenance .......................................................... 53
120-Volt System .................................................. 37
Power Cord Hook-Up ....................................... 37
Power Converter .............................................. 37
Ground Fault Interrupter ................................... 37
Motor Home Fuses
Exterior ................................................................ 53
Stains ............................................................... 53
Windows, Doors, Vents & Locks ....................... 53
Rubber Roof System ........................................... 53
Cleaning ........................................................... 53
And Circuit Breakers ........................................ 38
Care ................................................................. 54
Generator ............................................................ 38
Generator Fuel Supply ..................................... 39
Generator Operation ........................................ 39
Generator Operating Safety Precautions ......... 39
Electrical System Wiring ..................................... 40
Sealant Renewal .............................................. 54
Door, Window,
Roof
Component
And
Molding Resealing ................................. 54
Interior ................................................................. 54
Fabrics ............................................................. 54
Corian
Top
Care ............................................... 55
LP Gas System .....................................................
43
Laminate
Top
Care ........................................... 55
LP
Gas Safety Precautions ................................. 43
Walls
And
Ceiling Panels ................................. 55
System Components ........................................... 44 Bathtub
And
Plastic Shower Stall ..................... 55
Hoses ............................................................... 44 Floors
And
Carpeting ....................................... 55
LP
Gas Regulator ............................................ 44 Wood Floor Care .............................................. 55
Using
LP
Gas System
Brass Components ..........................................
55
At Low
Temperatures ....................................... 44
Engine Access ................................................. 55
Filling
LP
Gas Tanks ............................................ 45
Maintenance
Checklist ........................................ 55
LP
Gas System Leak Checks .............................. 45 Lamps and bulbs ................................................. 56
LP
Leak Detector ................................................ 46 Interior .............................................................. 56
Lighting
LP
Gas Appliances
.,
.............................. 46
Exterior ............................................................ 56
Appliances
...
......................................................... 49
Water Heater ....................................................... 49
Exterior
Sealant Recommendations .................... 57
Fuses and Circuit Breakers ................................. 57
Water Heater Bypass Valve .............................. 49 Motor Home Storage ............................................ 59
Refrigerator ......................................................... 49
Storage
Checklists .............................................. 59
Furnace ............................................................... 49
Short-
Term
Storage ......................................... 59
Range .................................................................
50 Long-
Term
Storage .......................................... 59
Range Exhaust Hood ...........
, .............................. 50 Winterization ....................................................... 60
Air Conditioner .................................................... 50
Water System Winterizing ................................ 60
Dual
air
Conditioners - 50-amp Service ........... 50
Reactivating the Motor Home
Entertainment Equipment ....................................
50
After Storage ....................................................
61
120-volt VCR ....................................................
51
120/12-volt Television .......................................
51
Maintenance Chart ............................................... 65
Video Switcher .................................................
51
Welcome to the recreational vehicle life-style and the
growing family of motor
home
owners. We sincerely
thank you for choosing a Fleetwood motor home!
Your motor home has been designed to provide you
with years
of
carefree, pleasant traveling and vacation-
ing. Your motor home conforms with,
or
exceeds, the
American
National
Standards
Institute A 119.2,
CSA
Standard Z-240 (units built for Canada), and applicable
Federal
Motor Vehicle Safety Standards. These standards establish the plumbing, heating, electrical and
other requirements for
quality and safety. Compliance
with
ANSI and CSA standards is indicated by the seal
attached just outside the entry door.
Like
all finely crafted equipment, your motor home will
require care and regular maintenance in order to deliver
maximum value and performance.
The
dealer will give
you basic operating and maintenance instructions;
however,
supplement
this
by
reading
all
instruc-
tional
material
furnished
with
the
motor
home
in
the
Owner's
Information
Package
and
Chassis
Operator's
Manual.
This information outlines impor-
tantareas
of
maintenance and provides a maintenance
schedule for you to follow for safe, trouble free service
from your
motor
home. Study these instructions care-
fully
before you operate the motor home for the first
time. A good working knowledge
of
your motor home
and
how
to care for it will help you enjoy many miles and
years
of
recreational living.
NOTE: This manual describes many features
of
your
motor
home and includes instructions for
its safe use. This manual, including photographs
and
illustrations, is
of
a general nature
only.
Some equipment
and
features described
or
shown in this manual may
be
optional. Because
of
the continuous program
of
product improve-
ment conducted
by
Fleetwood, it is possible
that recent product changes may
not
be
in-
cluded. The instructions included
in
this manual
are intended
as
a guide,
and
in
no
way extend
the responsibilities
of
the manufacturing sub-
sidiary, parent company
or
affiliates beyond the
standard written warranty
as
presented in this
manual.
1
INTRODUCTION
In this manual, statements preceded by the following
words are of special significance:
"WARNING"
means that there is the possibility
of
personal injury to yourself and others.
"CAUTION"
means that there is the possibility
of
damage to the vehicle.
"NOTE"
indicates points
of
particular interest for
more efficient and convenient operation.
Please pay close attention to these statements while
you read this manual.
NOTE: This product is designed for recreational
use and short term occupancy
only.
It is
not
designed
or
intended to
be
used
as
permanent
housing.
Use
of
this product for long term
or
permanent occupancy may lead to premature
deterioration
of
interior finishes, fabrics, carpet-
ing, drapes,
and
appliances
and
fixtures. Dam-
age
or
deterioration due to long term occu-
pancy is not considered normal,
and
will under
the terms
of
the warranty constitute misuse,
abuse,
or
neglect, thereby reducing
your
warranty protection. Before considering this motor
home for long term occupancy, consult the
relevant sections
in
this manual.
If you have any questions regarding operation, maintenance, or service, please contact your dealer immediately
so he can assist you. Your dealer's Service
or
Sales Department will handle any normal problems
which might occur.
WARRANTIES
Your motor home is covered by one of the most comprehensive warranty programs
in
the RV industry. Please
refer to the warranty
in
the front
ofthis
manual. It explains
your rights and obligations, as well as the rights and
obligations of the dealer and manufacturer. Please read
this section carefully.
You
will be better informed
in
case
you have a warranty-related
problem, and your dealer
will be better able to get you on the road again.
If
you have
any questions about the warranty
or
what it does or does
not cover,
please contact your dealer.
1-
,-
2
The materials
in
your .Owner's
Information
Package
contain warranty information and operating instructions
on the various
appliances and components
in
your
motor home. Warranty registration cards for these items
should be filled out and mailed as soon as possible after
you take
delivery of your motor home. If you do not have
operating instructions for a
particular appliance, con-
tact your dealer.
You
will automatically receive an Ownercare Card ap-
proximately
3-4 weeks after delivery of your new motor
home. This
plastic card is imprinted with your name, the
motor home
serial number, and manufacturing subsidi-
ary location. If your motor home ever needs warranty
service, present this card to the dealer.
The motor home has been thoroughly inspected before
shipment. Your
dealer is responsible for performing a
complete pre delivery inspection of the chassis and all
motor home components as specified
in
the predelivery
checklists supplied
by the motor home and chassis
manufacturers. You
should
receive a
copy
of
these
completed
checklists
from
your
dealer
when
your
motor
home
is
delivered
to
you.
As a part of the
predelivery inspection procedure, the
dealer
is
responsible for road testing the motor home,
noting and correcting any steering
problems before deliv-
ery.
FLEETWOOD AND ITS SUBSIDIARIES WILL NOT
BE
RESPONSIBLE FOR FRONT END ALIGNMENT
AFTER
THIS PREDELIVERY INSPECTION IS DONE.
You
should return your motor home to the selling dealer
for warranty service. If this is not possible, you may
contact any other authorized Fleetwood motor home
dealer. The service department at any of the locations
listed
at the back of this manual can help you find a
dealer
in
your area.
If,
for some reason, a problem is not handled to your
satisfaction:
1.
Discuss any warranty-related problems directly
with the manager and/or owner of the dealership, giving them an opportunity to help the
service department resolve the matterforyou.
2.
If a problem arises that has not been resolved
to your satisfaction by your local dealer, contactthe manufacturing subsidiary service cen-
ter. The locations are listed
in
this manual.
Please
contact the one nearest you.
3.
We sincerely believe that your dealer and the
factory representative
will be able to solve any
problem which might arise. If their combined
efforts are not satisfactory,
please send a
letter describing the circumstances to:
Fleetwood
Enterprises,
Inc.
Motor
Home
Division -Service
P.O.
Box
7638 Riverside,
CA
92513-7638
Please include the brand name and serial
number of your motor home. The serial number
is
located on the identification tag next to the
entry door.
4.
If you wish to call for assistance, please use
this
toll-free telephone number:
(800) 322-8216
There may be times when your motor home will need
repairs
or
parts while you are on the road. If your motor
home is repaired by a non-authorized repair facility
(non-Fleetwood
dealer), be sure to save receipts and
especially any parts that are replaced. These parts will
usually have to be returned to your dealer before you
can be reimbursed for their cost.
Warranty Service
If you need service
or
warranty information, please see
the
booklets and other documents included in your
Owner's
Information
Package. When contacting any
of the equipment manufacturers,
always have the model
and serial numbers available. Appliance identification
numbers will be found on tags
or
plates attached to the
appliance.
Chassis component (engine, transmission, axles, etc.)
identification numbers
will be located
in
the manuals
included
with your motor home.
Reporting Safety Defects
If you believe that your vehicle has a defect which could
cause a crash
or
could cause injury or death, you
should immediately inform the National HighwayTraffic
Safety Administration (NHTSA)
in
addition to notifying
Fleetwood Enterprises Consumer Affairs Department.
If NHTSA receives similar complaints, it may open an
investigation, and if it finds that a safety defect exists in
a group of
vehicles, it may
mder
a recall and remedy
campaign. However, NHTSA cannot become
involved
in
individual problems between you, your dealer
or
Fleetwood's manufacturing subsidiary.
·
To
contact NHTSA, you may either call the Auto Safety
,
Hotline toll-free at 1-800-424-9393 (or 366-0123
in
, Washington, D.C.)
or
write to:
NHTSA
U.S.
Department ofTransportatlon
Washington,
DC
20590.
·
You
can also obtain other information about motor
, vehicle safety from the Hotline.
OWNER'S INFORMATION PACKAGE
, This package contains important documents about
! your motor home and its equipment and systems. This
i Owner's Manual is in the package. Since this manual
, does not cover every possible detail of equipment and
, options installed on
or
in
your motor home, there are
, booklets and instructional material
in
the package that
! will help you safely operate, maintain and troubleshoot
i those items. Be sure you read all this information and
understand the safety and operating instructions
in-
! cluded
in
the package. Additionally, you must follow all
I maintenance instructions to insure full warranty cover-
! age. If you ever decide to sell ortrade your motor home,
! be sure the new owner gets all the material
in
this
package.
CHASSIS AND
VEHICLE IDENTIFICATION
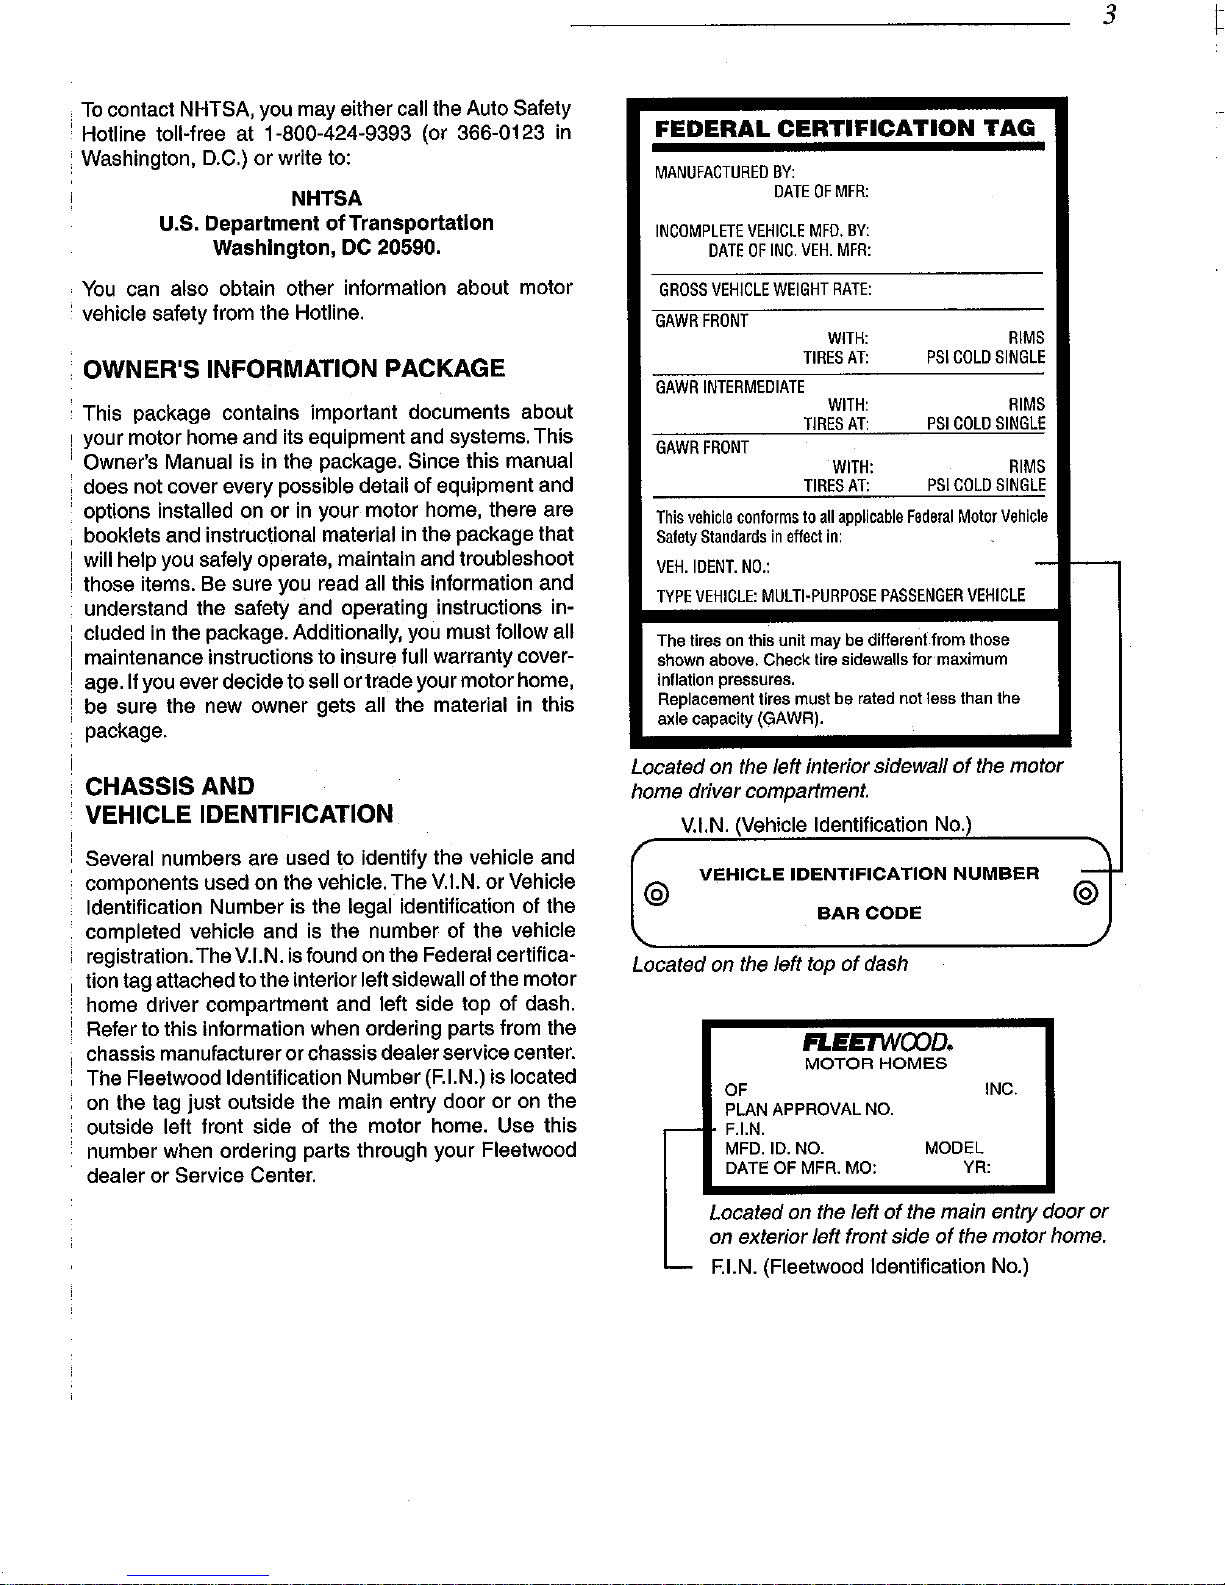
! Several numbers are used to identify the vehicle and
components used on the vehicle. The V.LN.
or
Vehicle
Identification Number is the legal identification of the
completed vehicle and is the number of the vehicle
registration. The V.LN. is found on the Federal certifica-
I tion tag attached to the interior left sidewall of the motor
· home driver compartment and left side top of dash.
Refer to this information when ordering parts from the
chassis manufacturer or chassis dealer service center.
, The Fleetwood Identification Number
(F.
LN.) is located
on
the tag just outside the main entry door
or
on the
outside left front side of the motor home. Use this
number when ordering parts through your Fleetwood
dealer
or
Service Center.
3 t
FEDERAL CERTIFICATION TAG
MANUFACTURED
BY:
DATE
OF
MFR:
INCOMPLETE
VEHICLE
MFD.
BY:
DATE
OF
INC.
VEH.
MFR:
GROSS
VEHICLE
WEIGHT
RATE:
GAWR
FRONT
WITH:
RIMS
TIRES
AT:
PSI
COLD
SINGLE
GAWR
INTERMEDIATE
WITH:
RIMS
TIRES
AT:
PSI
COLD
SINGLE
GAWR
FRONT
WITH:
RIMS
TIRES
AT:
PSI
COLD
SINGLE
This
yehlcl,
conlorms
to
all
applicable
Federal
Motor
Vehicle
Salety
Standards
in
effeclln:
VEH.
IDENT.
NO.:
TYPE
VEHICLE:
MULTI·PURPOSE
PASSENGER
VEHICLE
The
tires
on
this
unit
may
be
different
from
those
shown
above.
Check
tire
sidewalls
for-maximum
inflation
pressures.
Replacement
tires
must
be
rated
not
less
than
the
axle
capacily (GAWR).
Located on the left interior sidewall
of
the motor
home driver compartment.
V.LN.
(Vehicle Identification No.)
VEHICLE
IDENTIFICATION
NUMBER
-
@
@
BARCODE
Located on the left top
of
dash
FLEETWOOD.
MOTOR
HOMES
OF
INC.
PLAN
APPROVAL
NO.
r--
F.I.N.
MFD.
ID.
NO.
MODEL
DATE
OF
MFA.
MO:
YR:
Located on the left
of
the main entry door
or
on exterior left front side
of
the motor home.
-
F.LN.
(Fleetwood Identification No.)
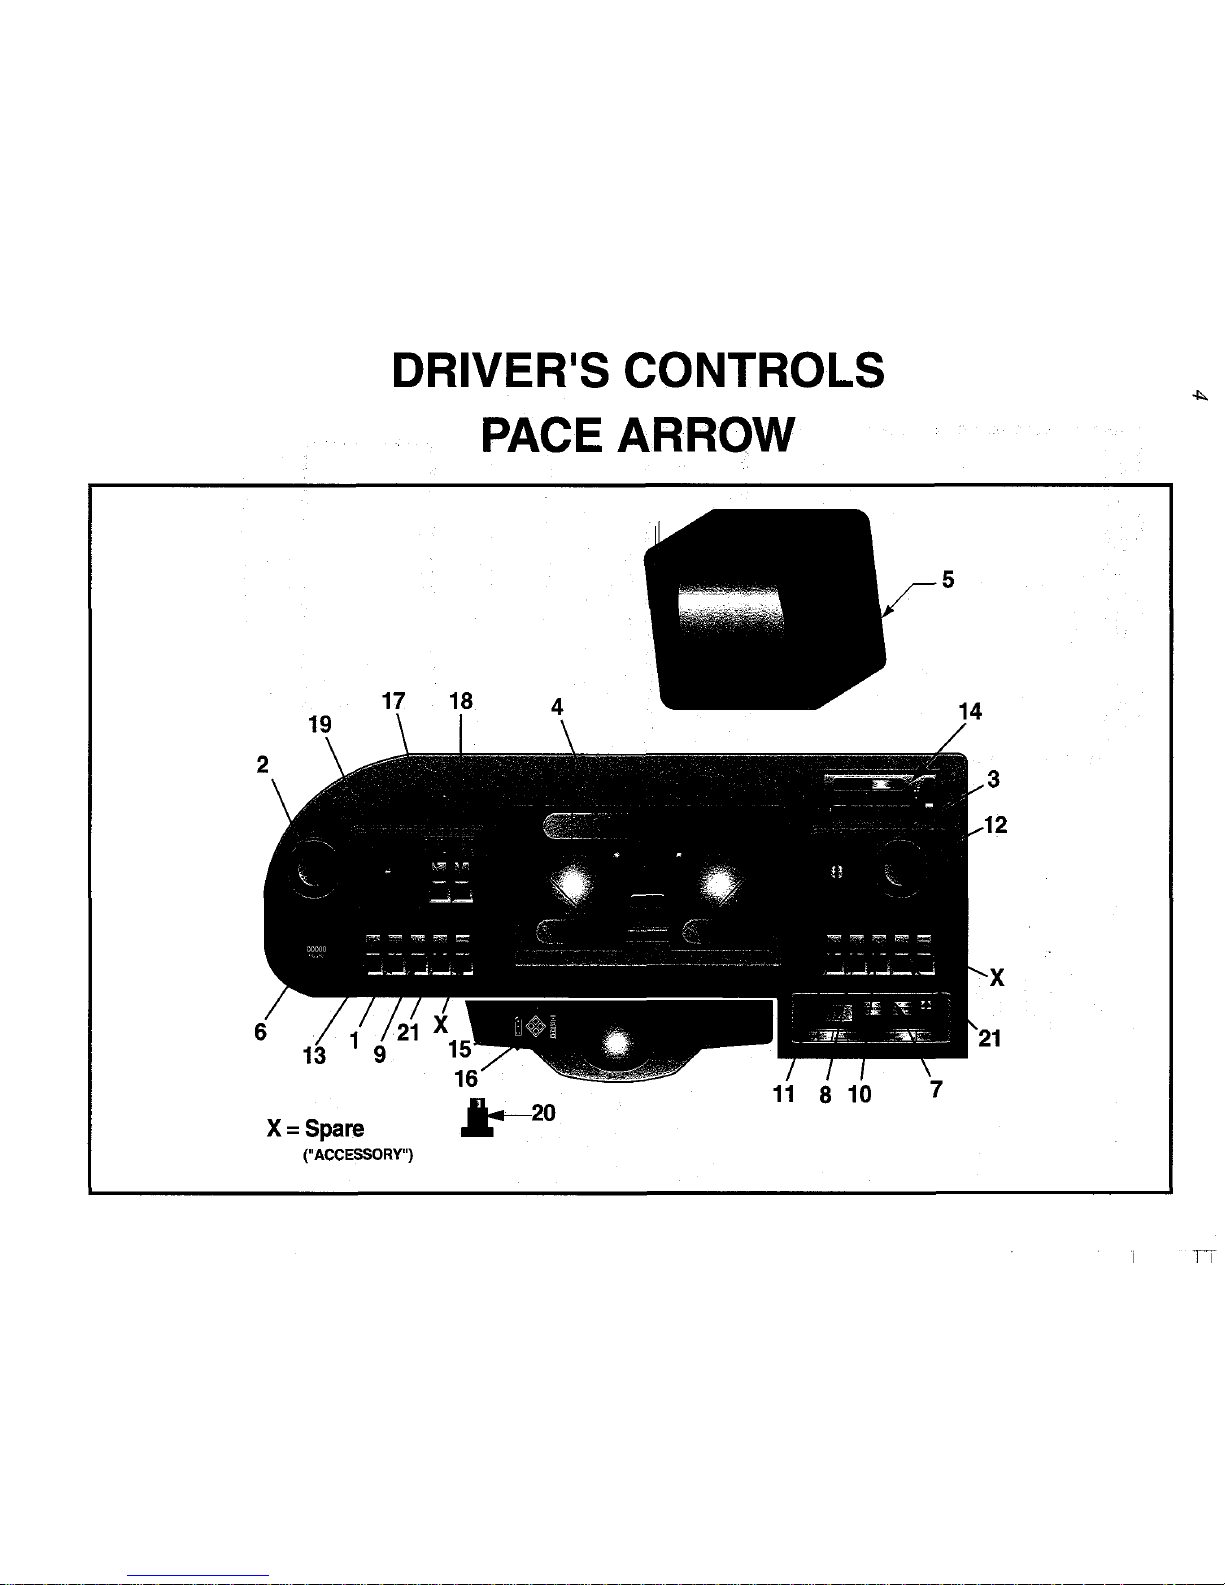
DRIVER1S CONTROLS
PACE ARROW
17 18 4
X=Spare
("ACCESSORY")
15
16
.i--
20
11
8 10
5
IT
PACE ARROW
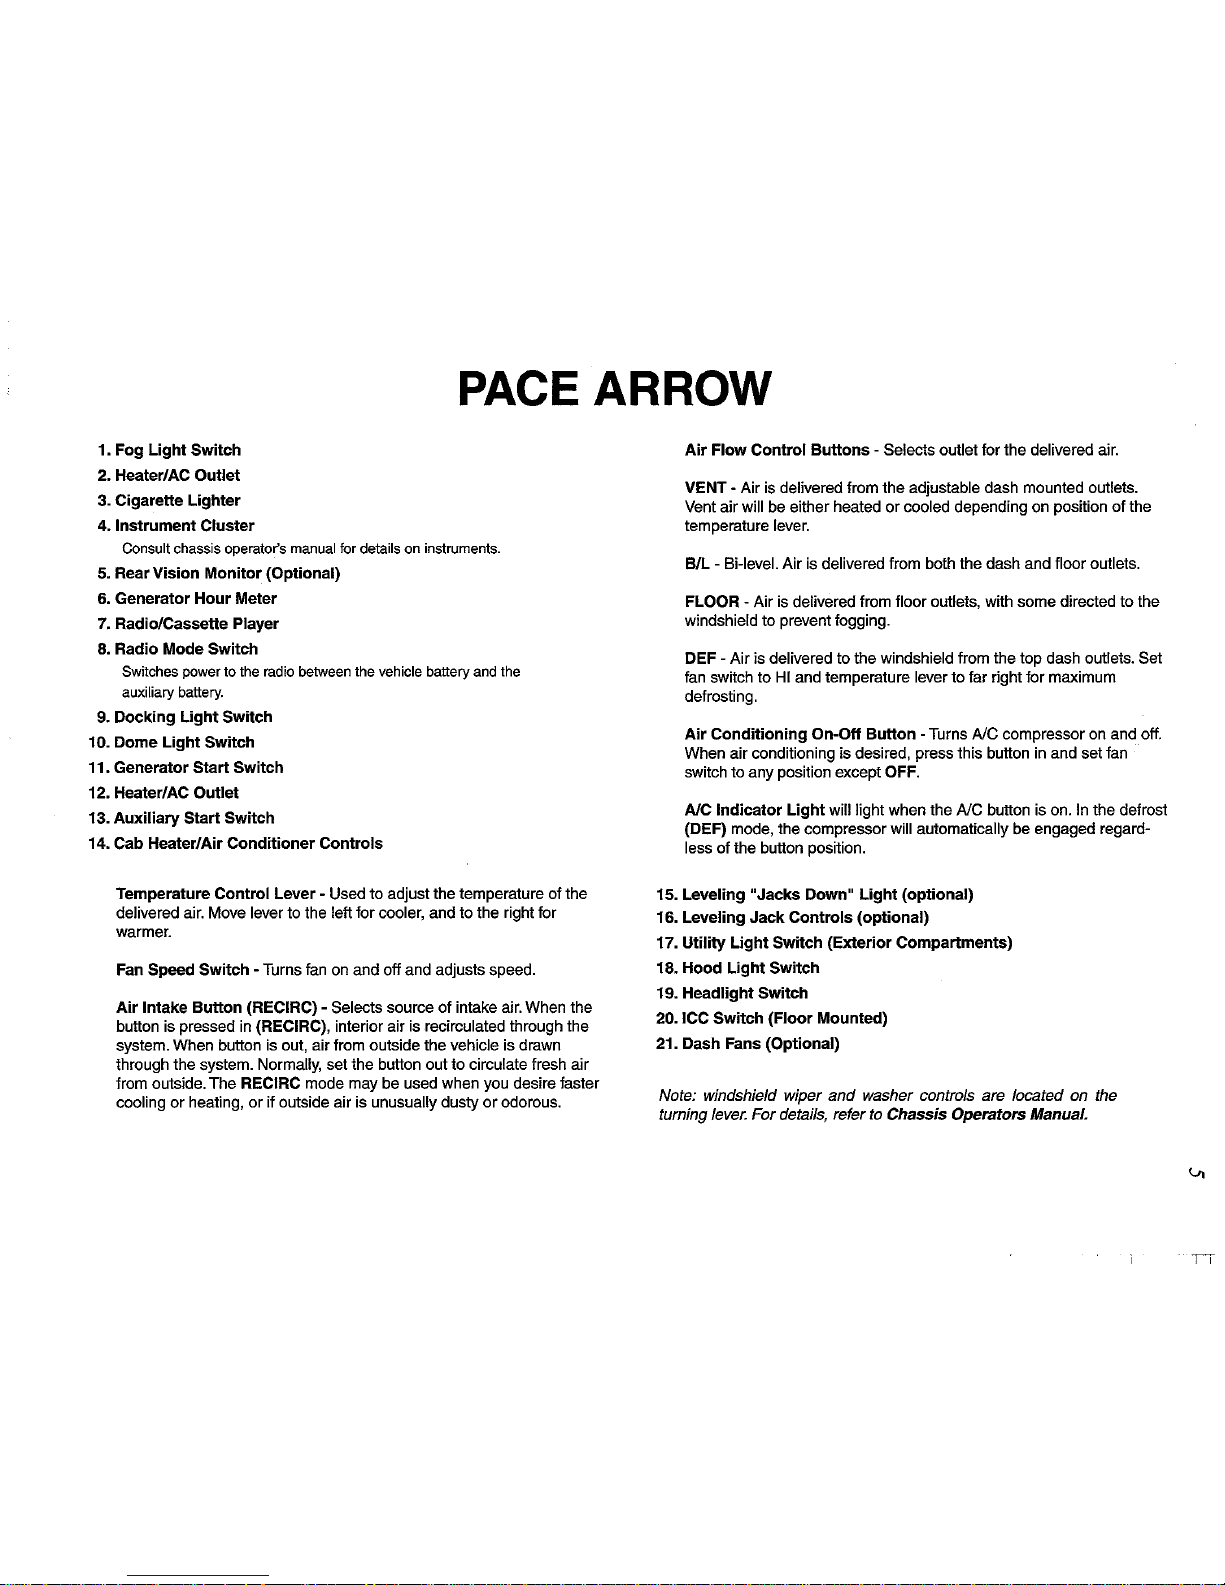
1. Fog
Light
Switch
2. Heater/AC
Outlet
3. Cigarette
Lighter
4.
Instrument
Cluster
Consult chassis operator's manual for details on instruments.
5.
Rear
Vision
Monitor
(Optional)
6.
Generator
Hour
Meter
7. Radio/Cassette Player
8.
Radio
Mode
Switch
Switches power
to
the radio between the vehicle battery and the
auxiliary battery.
9.
Docking
Light
Switch
10. Dome
Light
Switch
11. Generator
Start
Switch
12. Heater/ AC
Outlet
13.
Auxiliary
Start
Switch
14. Cab Heater/Air
Conditioner
Controls
Temperature
Control
Lever - Used to adjust the temperature of the
delivered air. Move
lever to the left for cooler, and to the right for
warmer.
Fan
Speed
Switch
- Turns
fan
on and off and adjusts speed.
Air
Intake
Button
(RECIRC) - Selects source of intake air. When the
button is pressed
in
(RECIRC), interior air is recirculated through the
system. When button is out, air from outside the
vehicle is drawn
through the system. Normally, set the button out to circulate fresh air
from outside. The RECIRC mode may be used when you desire faster
cooling
or
heating,
or
if outside air is unusually dusty
or
odorous.
Air
Flow
Control
Buttons·
Selects outlet for the delivered air.
VENT - Air is delivered from the adjustable dash mounted outlets.
Vent
air will be either heated
or
cooled depending on position of the
temperature
lever.
BIL - Bi-Ievel. Air is delivered from both the dash and floor outlets.
FLOOR·
Air is delivered from floor outlets, with some directed to the
windshield to prevent fogging.
DEF
• Air is delivered to the windshield from the top dash outlets. Set
fan
switch to
HI
and temperature lever to far right for maximum
defrosting.
Air
Conditioning
On-Off
Button·
Turns
AlC
compressor on and off.
When air conditioning is desired, press this button
in
and set fan
switch to any position except OFF.
AlC
Indicator
Light
will light when the
AlC
button is on.
In
the defrost
(DEF) mode, the compressor will automatically be engaged
regard·
less
of the button position.
15. Leveling
"Jacks
Down"
Light
(optional)
16. Leveling
Jack
Controls
(optional)
17.
Utility
Light
Switch
(Exterior
Compartments)
18.
Hood
Light
Switch
19.
Headlight
Switch
20. ICC
Switch
(Floor
Mounted)
21. Dash Fans (Optional)
Note: windshield wiper and washer controls are located on the
turning
lever.
For details, refer
to
Chassis Operators Manual.
IT

This page intentionally left blank
MOTOR HOME LOADING
Responsibility
for
Proper
Loading
As the operator of this motor home, you bear the sole
responsibility for proper, safe loading. This section will
guide you through the steps necessary to properly and
safely load your vehicle.
Your
motor home chassis
is
designed to carry a specific
maximum weight. This weight includes everything: the
weight of the empty motor home itsel!, all occupants and
their belongings, fuel, fresh water, waste water and
any-
thing else that may be
in
or attached to the motor home.
A Few
Definitions
First
Before discussing loading and weighing, we need to
explain some common weight terms. We'll use
abbre-
viations
in
our discussion. These terms are:
GVWR
(Gross
Vehicle
Weight
Rating): This is
the maximum allowable load that this motor
home was designed to carry. Modifications to
your motor home, such as installing bigger
tires
or
changing spring load capacities, will
not
in
any way increase this weight rating. The
GVWR is shown on the Federal certification
tag posted on the left interior sidewall of the
driver's compartment.
GAWR
(Gross
Axle
Weight
Rating): This is the
maximum allowable weight a specific axle is
designed to carry. Each axle has its own
GAWR. When you add the GAWRs, they will
not necessarily add up to the
GVWR. The
GAWR is also shown on the Federal
certification tag posted on the left interior sidewall of
the driver's compartment.
GCWR
(Gross
Combined
Weight
Rating): This
is the maximum allowable combined weight of
the fully equipped and loaded motor home
(including passengers, all cargo, fluids, etc.)
plus the weight of any fully loaded towed load
(such as a trailer, boat,
or
automobile). The
Gross Combined Weight Rating (GCWR) is
listed on the wardrobe door tag. Exceeding
the GCWR will cause damage to your motor
home drivetrain
or
chassis, unstable driving
and handling characteristics, and will reduce
your warranty protection.
ONTHE ROAD
GTW
(Gross
Towed Weight): This is the maximum allowable loaded weight that this motor
home has been designed to tow. This cannot
be increased by changing the trailer hitch. The
GTW is listed on the wardrobe door tag.
MTW
(Maximum
Tongue Weight): means the
maximum vertical load that the towed load
applies to the hitch of the motor home. The
MTW is listed on the wardrobe door tag.
UVW (Unloaded Vehicle Weight): This is the
calculated weight of the motor home, as built
at the factory with full fuel, engine oil (and
other engine/drivetrain fluids) and
LP
gas.
The
UVW does not include cargo, fresh water,
passengers,
or
accessories installed by the
dealer. The
UVW is listed on the wardrobe
door tag.
TOWING A VEHICLE OR TRAILER
("TOWED
LOAD")
Note: Some states
and
provinces require brakes
and
safety chains on towed vehicles. Consult
the
proper
authorities in the states
or
provinces
through which you will
be
traveling.
You
must consider other important weight factors if you
expect to pull a trailer, tow dolly,
or
another vehicle
behind your motor home. These factors have limitations
just like the weight factors above. These factors are:
GCWR-Gross
Combined Weight Rating
GTW-Gross
Towed Weight
MTW-Maximum
Tongue Weight
GAWR-Rear-Gross
Axle Weight Rating-Rear
axles or axles (if equipped with tag axles)
The ratings for these factors are all listed on the
ward-
robe door tag.
I!
you expect to pull a vehicle with your motor home,
there are additional guidelines that you must follow:
•
Do
not
use a load equalizing hitch.
It
could
cause structural damage to the
motor
home
frame components.
8
•
•
Limit the tongue weight
of
the trailer
or
towing
device to the
MTWas
listed on the ratings tag.
Heavier tongue weights can damage your
motor home frame
and
body, cause unstable
driving
and
handling characteristics,
and
will
restrict your coverage under the Ownercare
warranty.
Do not tow
a vehicle weighing more than the
GTW
listed on the wardrobe door tag. Heavier
towed loads can cause braking problems,
damage the motor home structure
or
drive
train, cause unstable driving
or
handling char-
acteristics,
and
restrict your coverage under
the Ownercare warranty. Changing the trailer
hitch will
not
increase the tow capacity
of
the
motor home.
The way your motor home handles will be affected by
the way the towed unit is loaded.
If
the tongue weight is
too light
in
relation to the GTW, handling problems can
result. Careful load planning and safe experimentation
with different loading patterns can help improve motor
home handling stability and make your driving and
towing experience more enjoyable.
WARNING
DO NOT EXCEED THE RATED LOAD OFTHE
MOTOR HOME, OR THE RATED LOAD OF
ANY AXLE. EXCEEDING THE GVWR, GAWR
OR GCWR OF YOUR MOTOR HOME
WILL
REDUCE YOUR WARRANTY PROTECTION,
CAN CAUSE UNDESIRABLE HANDLING
CHARACTERISTICS AND MAY CREATE A
SAFETY HAZARD.
Carrying
Capacity
and
Load
Distribution
The allowable carrying capacity of the motor home is
the difference between the GVWR and the weight of the
empty motor home. When the motor home is being
designed, the number and size of storage compartments, the liquid tank capacities and number of belted
seating positions are maximized for value and
conve-
nience.lf you fill all liquid tanks to capacity, fill all storage
MOTOR HOME READINGS (from
tags)
compartments and cupboards to maximum volume and
fill all available seating positions with passengers, the
motor home will be overloaded. The number of passengers and placement of cargo will affect the amount of
water and cargo that you can carry
(See" Loading
Tips") .
In
addition to knowing the overall weight that can be
safely loaded
in
or
attached to the motor home, you
must know how to distribute the weight so that correct
amounts of weight are placed on the axles. When the
load is properly distributed, your motor home will handle
better, and you as the driver will be more confident and
comfortable.
If your motor home is improperly loaded, driving will be
more uncomfortable and much of your driving attention
will be given to correcting vehicle wandering, drift, pull
and sudden directional changes caused by wind blasts.
If the front axle load is below 80-85% of the front axle
capacity, these handling discomforts will be more
noticeable. Always aim to load your motor home so that
the front axle is loaded to at least 80-85% of the front
GAWR.
Note: Carrying capacities
of
your motor home
are specified on
a label affixed to the inside
of
a wardrobe door. The label includes all factory
installed options.
If
other equipment such as
leveling jacks, awnings, roof pods, etc., are
installed after the motor home leaves the
fac-
tory,
the weight
of
these items must be sub-
tracted from the total
of
the passenger
and
cargo carrying capacities.
How
To Weigh Your Loaded
Motor
Home
Without
A Trailer
or
Other
Towed
Load
Refer to your local telephone directory to find a public
weigh station. The following procedures will help you
determine whether your loaded motor home (complete
with cargo, fluids, passengers, and driver) is within
GAWR, GVWR, and GCWR limits. When you arrive at
a weigh station, the attendant will guide you through the
correct positioning of the motor home on the scales.
SCALE READINGS
GVWR MOTOR HOME
Reading 2
____
_
Front GAWR FRONT
AXLE
Reading 1
____
_
Rear GAWR REAR
AXLE
Reading 3
____
_
Hitch Rating TOWED VEHICLE
Reading 4
____
_
GCWR COMBINED
VEHICLES
Add 2 and 4
___
_
I-
I-
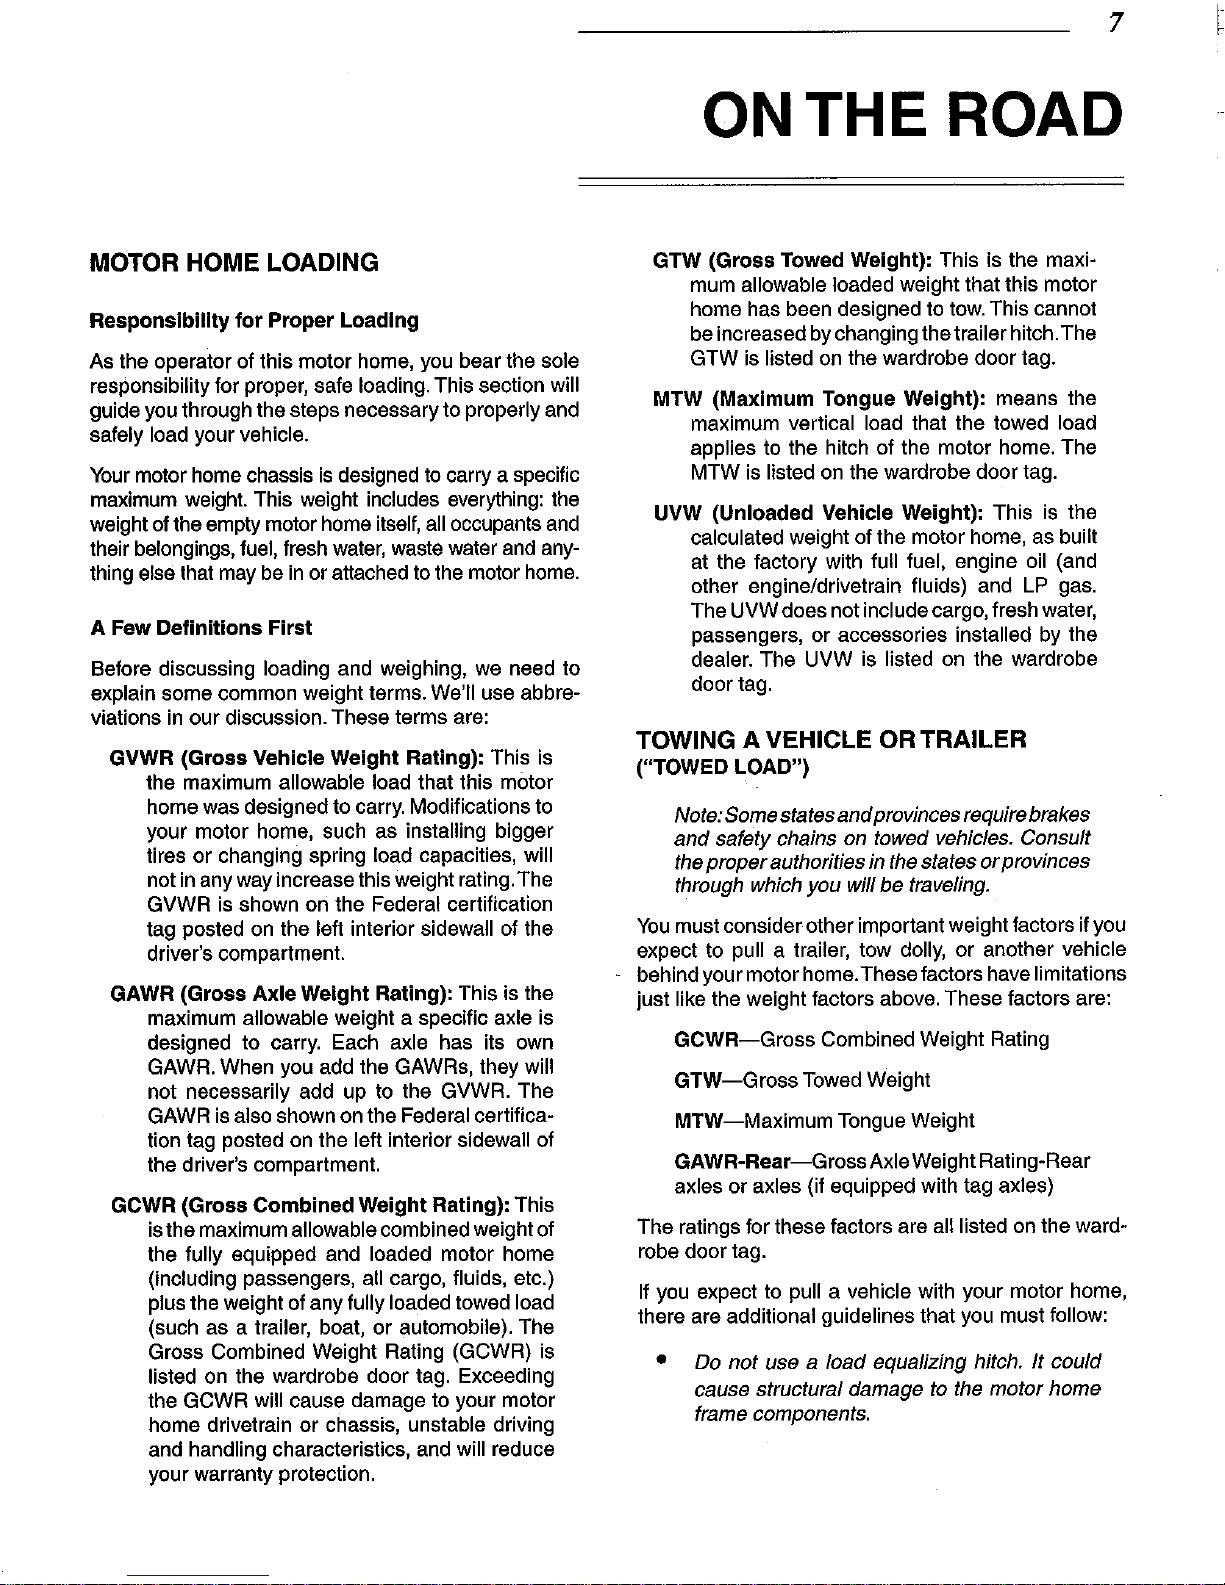
1.
Center the front wheels on the scale platform
and take a reading. This is the front Gross
Axle
Weight (Reading 1).
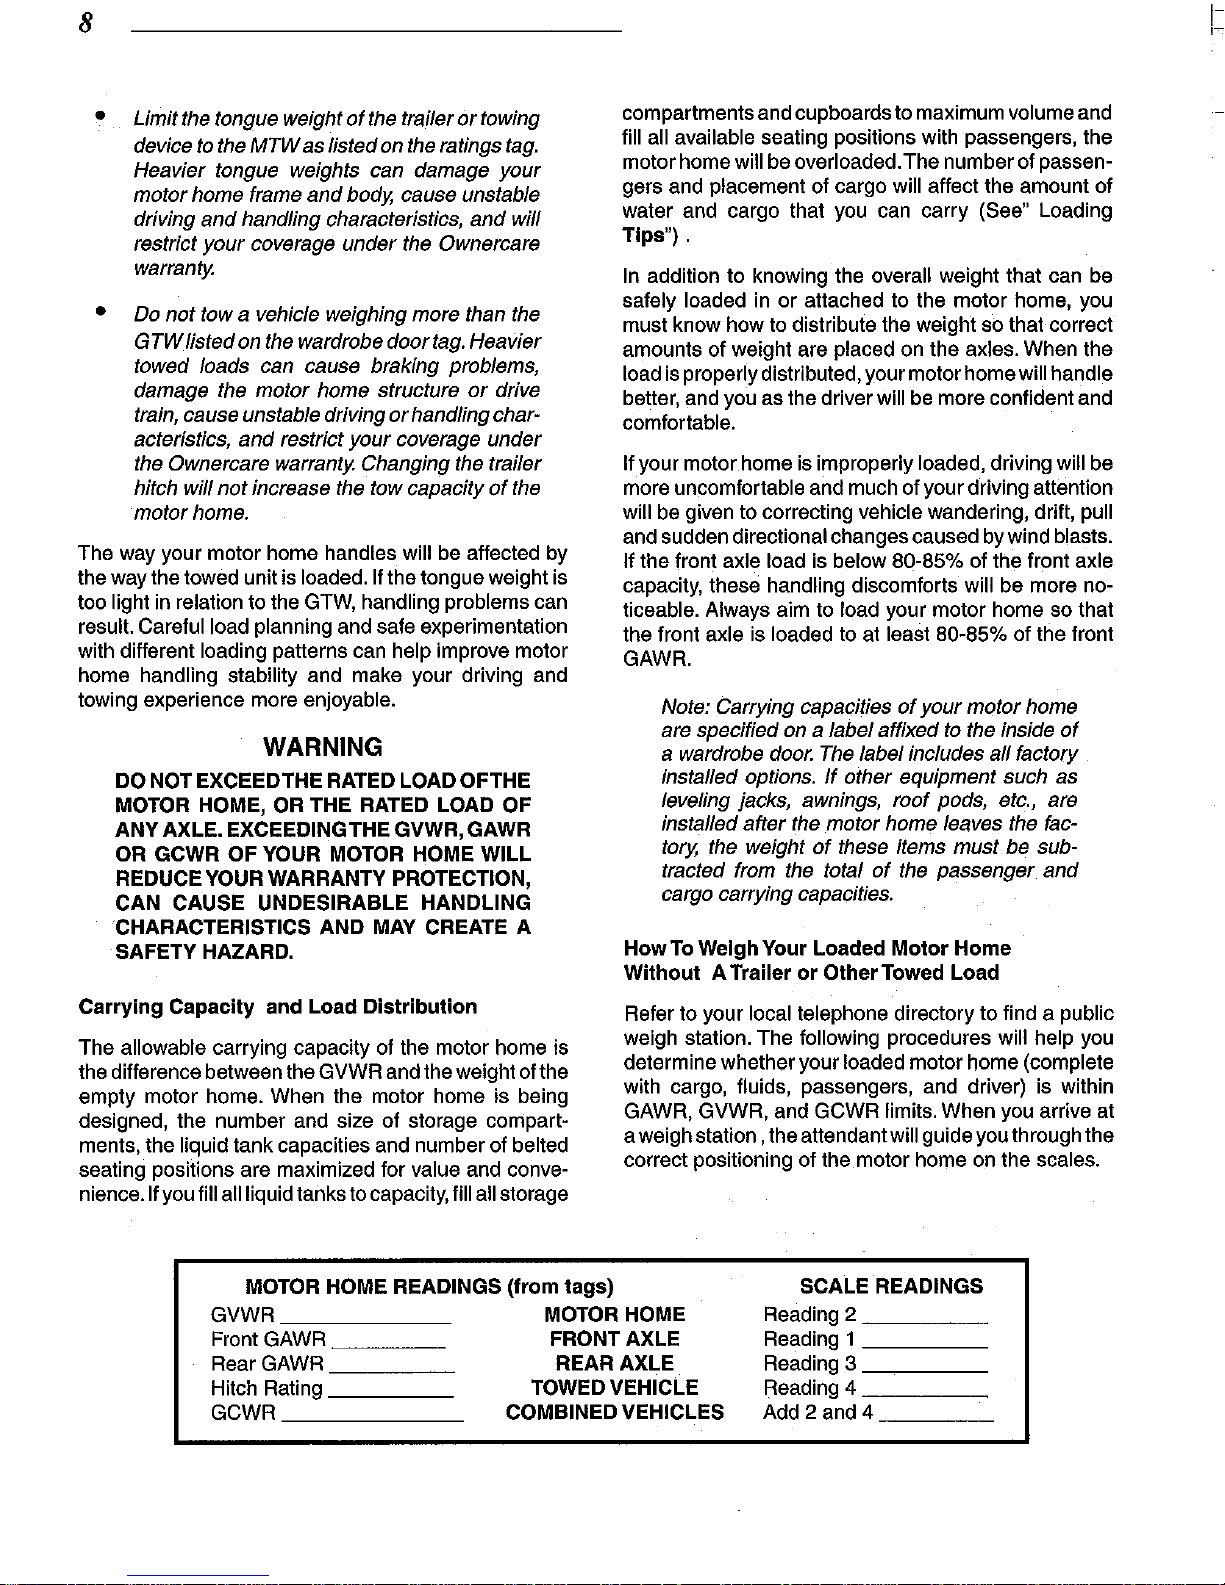
2. Center the entire motor home
(all axles) on the
scale and take a reading. This is the Gross
Vehicle Weight (Reading 2).
3.
Center the rear axle (or both rear axles if your
motor home is equipped with tag
axles) on the
platform and take a reading. This reading is
the rear Gross
Axle Weight (Reading 3).
Compare the readings taken on the
scales to the weight
ratings on. the Federal certification tag and wardrobe
door tag.
Fill in the chart
althe
back of this manual to aid
in comparing weights.
If any readings are higher than the rating, you will have
to adjust
or
remove the load.
How
To
Weigh Your
Loaded
Motor
Home
With
A Trailer
or
Other
Towed
Load
1. Center the front wheels on the scale platform
and take a reading. This is the front Gross
Axle
Weight (Reading 1).
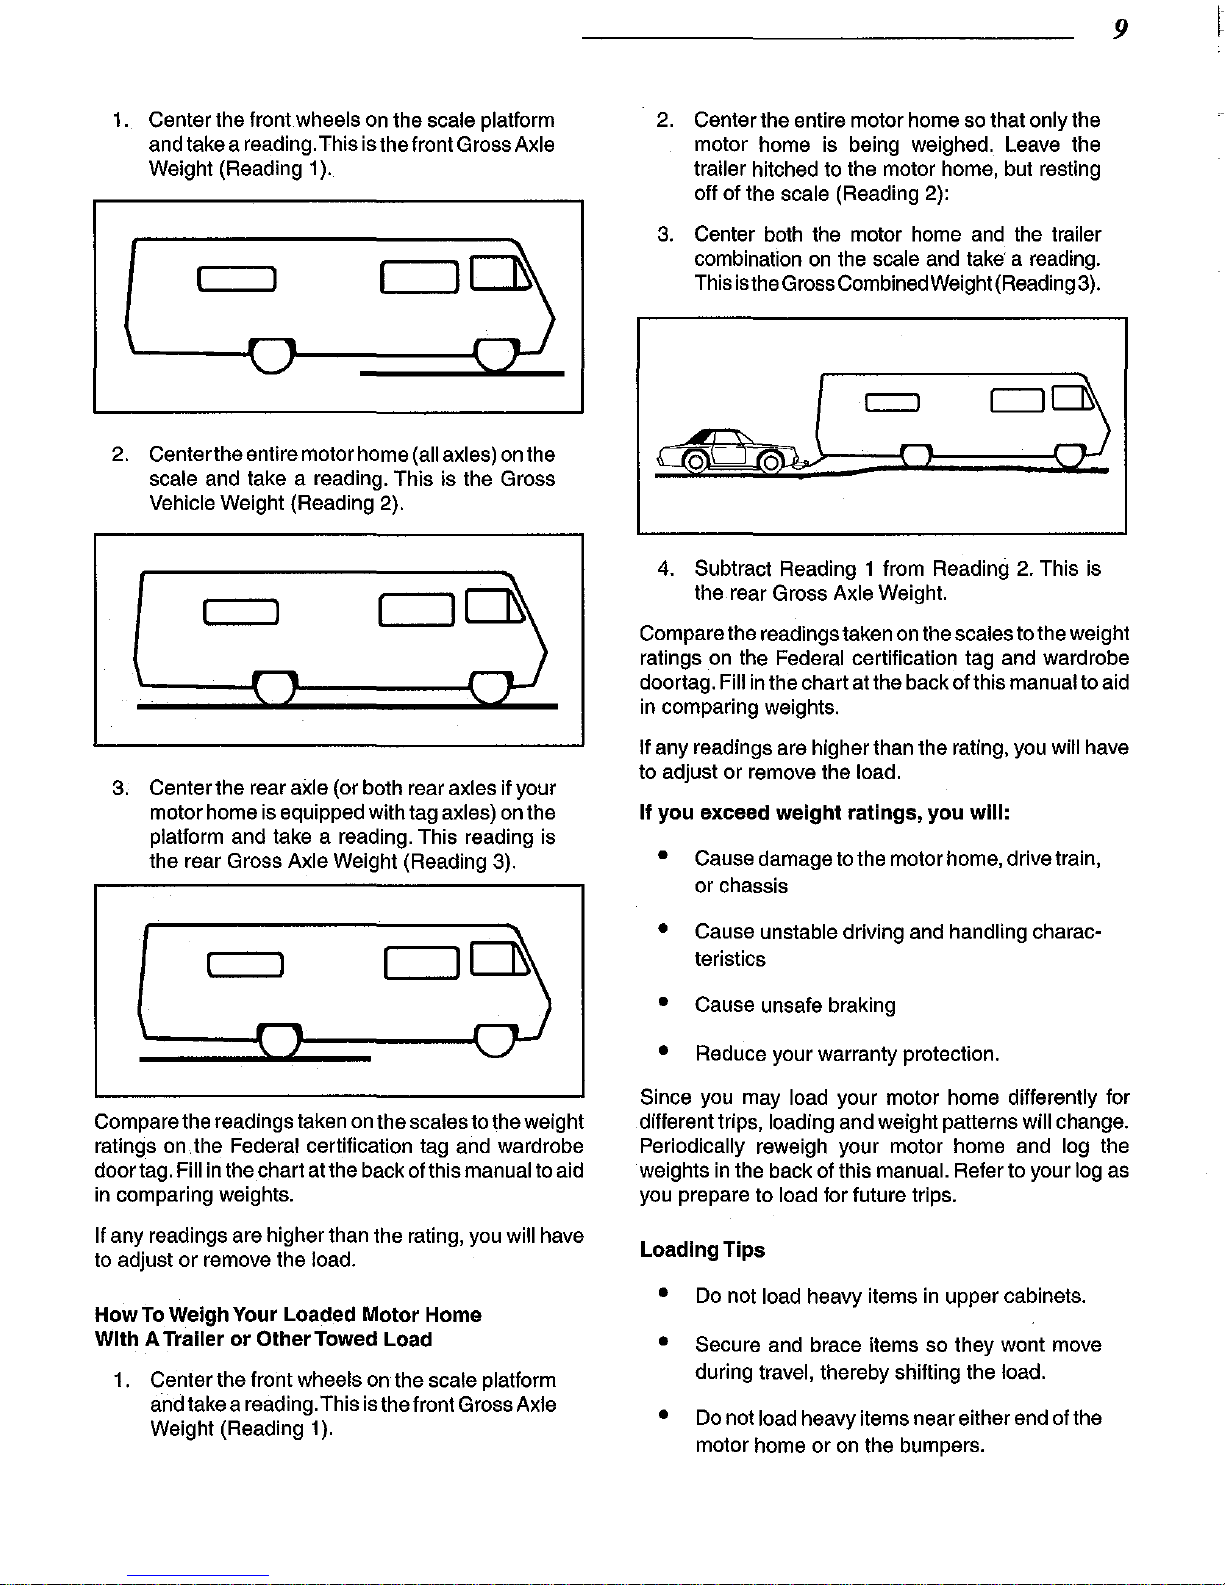
2. Center the entire motor home so that
only the
motor home is being weighed. Leave the
trailer hitched to the motor home, but resting
off of the
scale (Reading 2):
3.
Center both the motor home and the trailer
combination
on
the scale and take a reading.
This isthe Gross Combined Weight (Reading 3).
o
4.
Subtract Reading 1 from Reading 2. This is
the rear Gross
Axle Weight.
9
~
Compare the readings taken on the scales to the weight
ratings on the Federal certification tag and wardrobe
doortag.
Fill in the chart at the back of this manual to aid
in comparing weights.
If any readings are higher than the rating, you will have
to adjust or remove the
load.
If
you
exceed
weight
ratings,
you
will:
•
•
•
•
Cause damage to the motor home, drive train,
or chassis
Cause unstable driving and
handling charac-
teristics
Cause unsafe braking
Reduce your warranty protection.
Since you may load your motor home differently for
different trips, loading and weight patterns
will change.
Periodically reweigh your motor home and log the
weights in the back of this
manual. Refer to your log as
you prepare to
load for future trips.
Loading
Tips
•
•
•
Do not load heavy items in upper cabinets.
Secure and brace items so they wont move
during travel, thereby shifting the
load.
Do not load heavy items near either end of the
motor home
or
on the bumpers.
10
•
•
Adjust cargo storage to keep the side to side
wheel loads as equal as possible.
Fresh water and waste water weigh
over
pounds per gallon. Carry only as much water
as needed
fortravel
useorto
balance the load,
and whenever possible, empty the holding
tanks before traveling.
WARNING
MODIFICATION
OF
YOUR
VEHICLE
BY
ADDITION
OF
RACKS
NOT
ORIGINALLY
EQUIPPED
BY
THE
MANUFACTURER
TO
CARRY
ADDITIONAL
EQUIPMENT,
"'VE'HlC't:.ES'Orr"C')HfG'O
WII:L
REDUCE
YOUR
WARRANTY
COVERAGE
AND
MAY
CAUSE
PERSONAL
INJURY
OR
PROPERTY
DAMAGE.
•
Make a loading diagram of your properly loaded
motor home. This diagram and your loading
log will help you locate where specific items
are stored, and will help speed the loading
process.
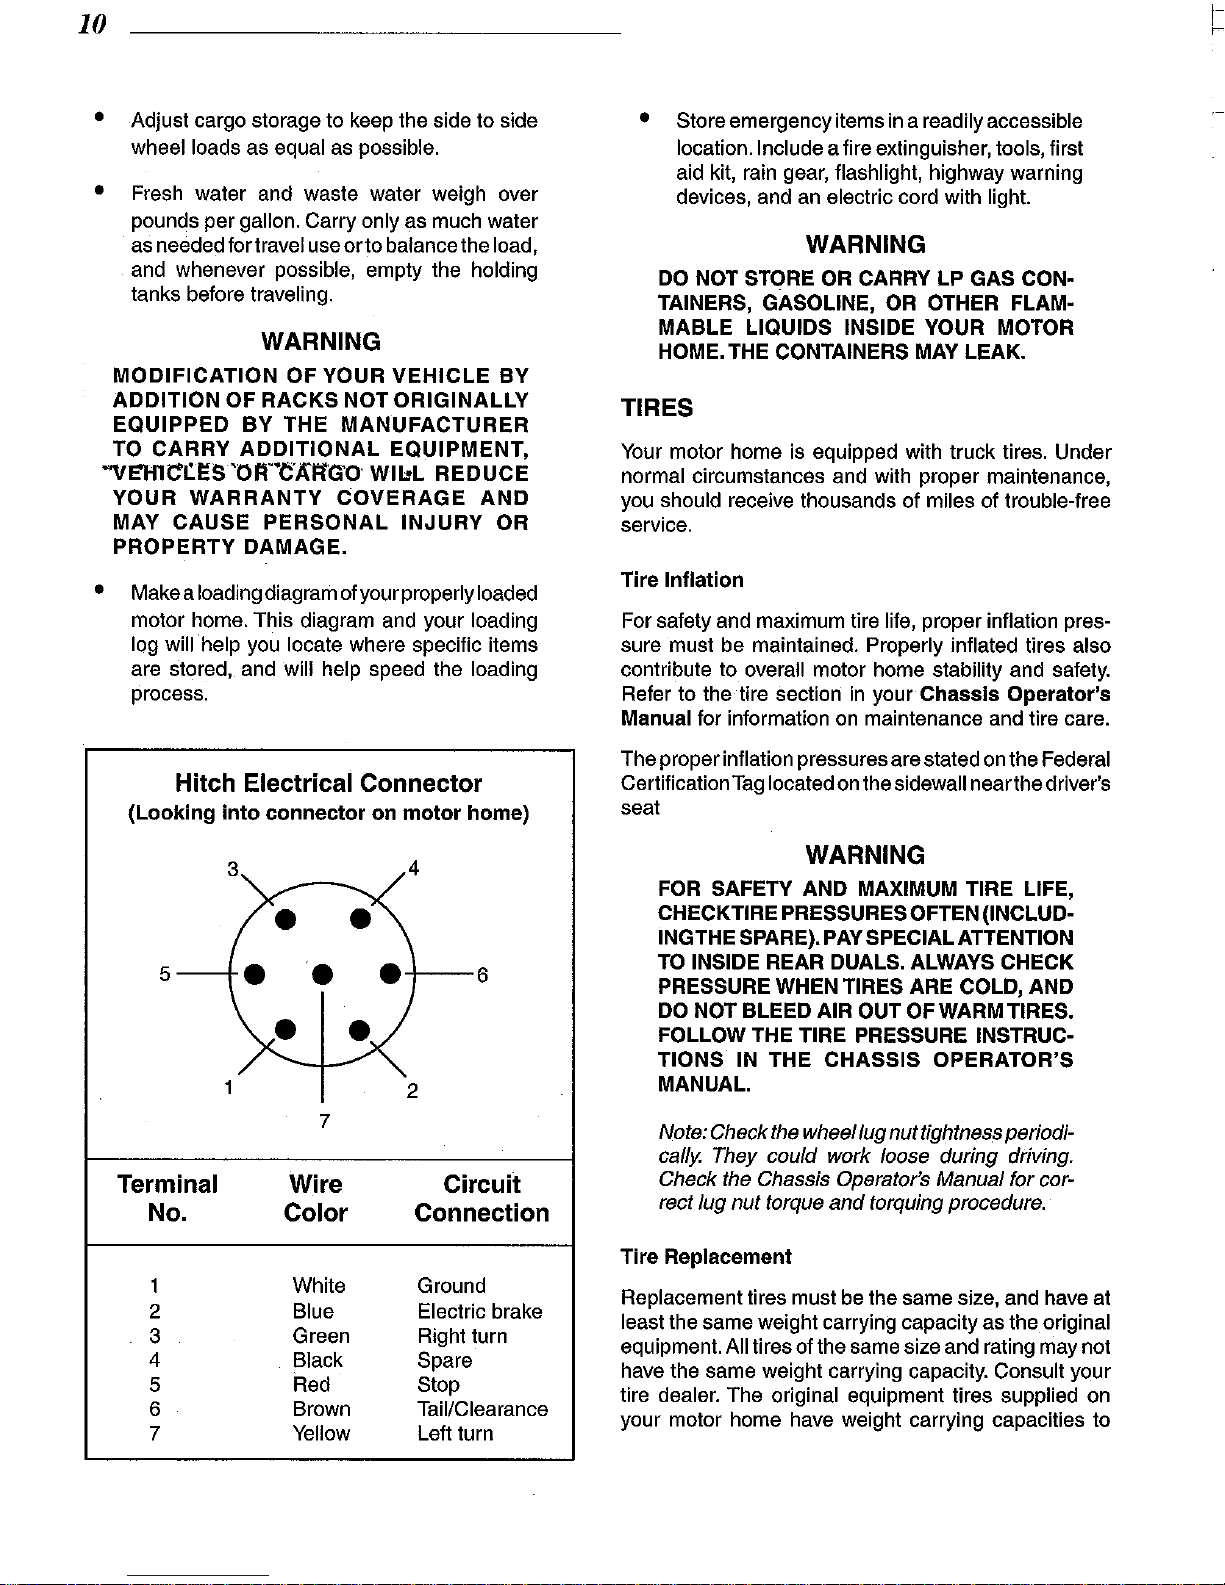
Hitch Electrical Connector
(Looking
into
connector
on
motor
home)
3
4
•
5
•
6
•
1
2
7
Terminal Wire Circuit
No.
Color Connection
White Ground
2 Blue Electric brake
3
Green Right turn
4 Black
Spare
5 Red Stop
6 Brown Tail/Clearance
7 Yellow Left turn
• Store emergency items
in
a readily accessible
location.
Include a fire extinguisher, tools, first
aid kit, rain gear, flashlight, highway warning
devices, and an electric cord with light.
WARNING
DO
NOT STORE OR CARRY LP GAS CON-
TAINERS, GASOLINE, OR OTHER FLAM-
MABLE
LIQUIDS INSIDE YOUR MOTOR
HOME. THE CONTAINERS MAY LEAK.
TIRES
Your
motor home is equipped with truck tires. Under
normal circumstances and with proper maintenance,
you should receive thousands of miles of trouble-free
service.
Tire
Inflation
For safety and maximum tire life, proper inflation pressure must be maintained. Properly inflated tires also
contribute to
overall motor home stability and safety.
Refer to the tire section
in
your
Chassis
Operator's
Manual for information
on
maintenance and tire care.
The proper inflation pressures are stated
on
the Federal
Certification
Tag
located
on
the sidewall nearthe driver's
seat
WARNING
FOR SAFETY AND MAXIMUM TIRE LIFE,
CHECKTIRE PRESSURES OFTEN (INCLUDINGTHE SPARE).
PAY
SPECIAL ATTENTION
TO
INSIDE REAR DUALS. ALWAYS CHECK
PRESSURE WHEN TIRES ARE COLD, AND
DO
NOT BLEED AIR OUT OF WARM TIRES .
FOLLOW THE TIRE PRESSURE INSTRUCTIONS IN
THE
CHASSIS
OPERATOR'S
MANUAL.
Note: Check the wheel lug
nut
tightness periodically. They could work loose during driving.
Check the Chassis Operator's Manual for
cor-
rect lug
nut
torque
and
torquing procedure.
Tire Replacement
Replacement tires must be the same size, and have at
least the same weight carrying capacity as the original
equipment. All tires of the same size and rating may not
have the same weight carrying capacity. Consult your
tire dealer. The original equipment tires supplied on
your motor home
have weight carrying capacities to
support Gross Axle Weight Ratings (GAWR) as stated
on the
Federal Certification
Tag
located on the sidewall
near the driver's seat.
If
You Get a
FlatTire
In
case of sudden tire failure:
•
•
•
•
Avoid heavy brake application
Gradually
decrease speed
Hold the steering wheel firmly and move slowly
to a safe, off· road place
Park on a firm level spot
• Turn off the ignition
•
Turn
on
the hazard flasher system
CHANGING A FLATTIRE
Even with good tire maintenance and normal driving,
you may experience a
flat tire. Summon professional
help
through your auto club, travel service, or a local
truck service facility. Your motor home is not equipped
with a jack
or
other lifting device. Do not attempt to lift
the motor home with a jack. Consult the
Chassis
Operator's
Manual for additional information on tire
inflation and proper torque.
WARNING
TO AVOID PERSONAL INJURY AND/OR
PROPERTY DAMAGE IF A BLOWOUT
OR
OTHER TIRE DAMAGE OCCURS, OBTAIN
EXPERT TIRE SERVICE HELP. DO NOT
AT·
TEMPTTO CHANGE THE TIRE YOURSELF.
WARNING
TRUCK
WHEELS
AND
TIRES
ARE
EX-
TREMELY HEAVY AND MAY WEIGH 100
POUNDS OR MORE. DO NOT
ATTEMPT
TO
REMOVE THE SPARE TIRE UNLESS
YOU
ARE CAPABLE OF HANDLINGTHEWEIGHT.
The spare tire is mounted under the rear floor of the
motor home. An
elevator mechanism allows you to
lower the spare tire to ground level.
11
~
To
lower the tire and wheel assembly:
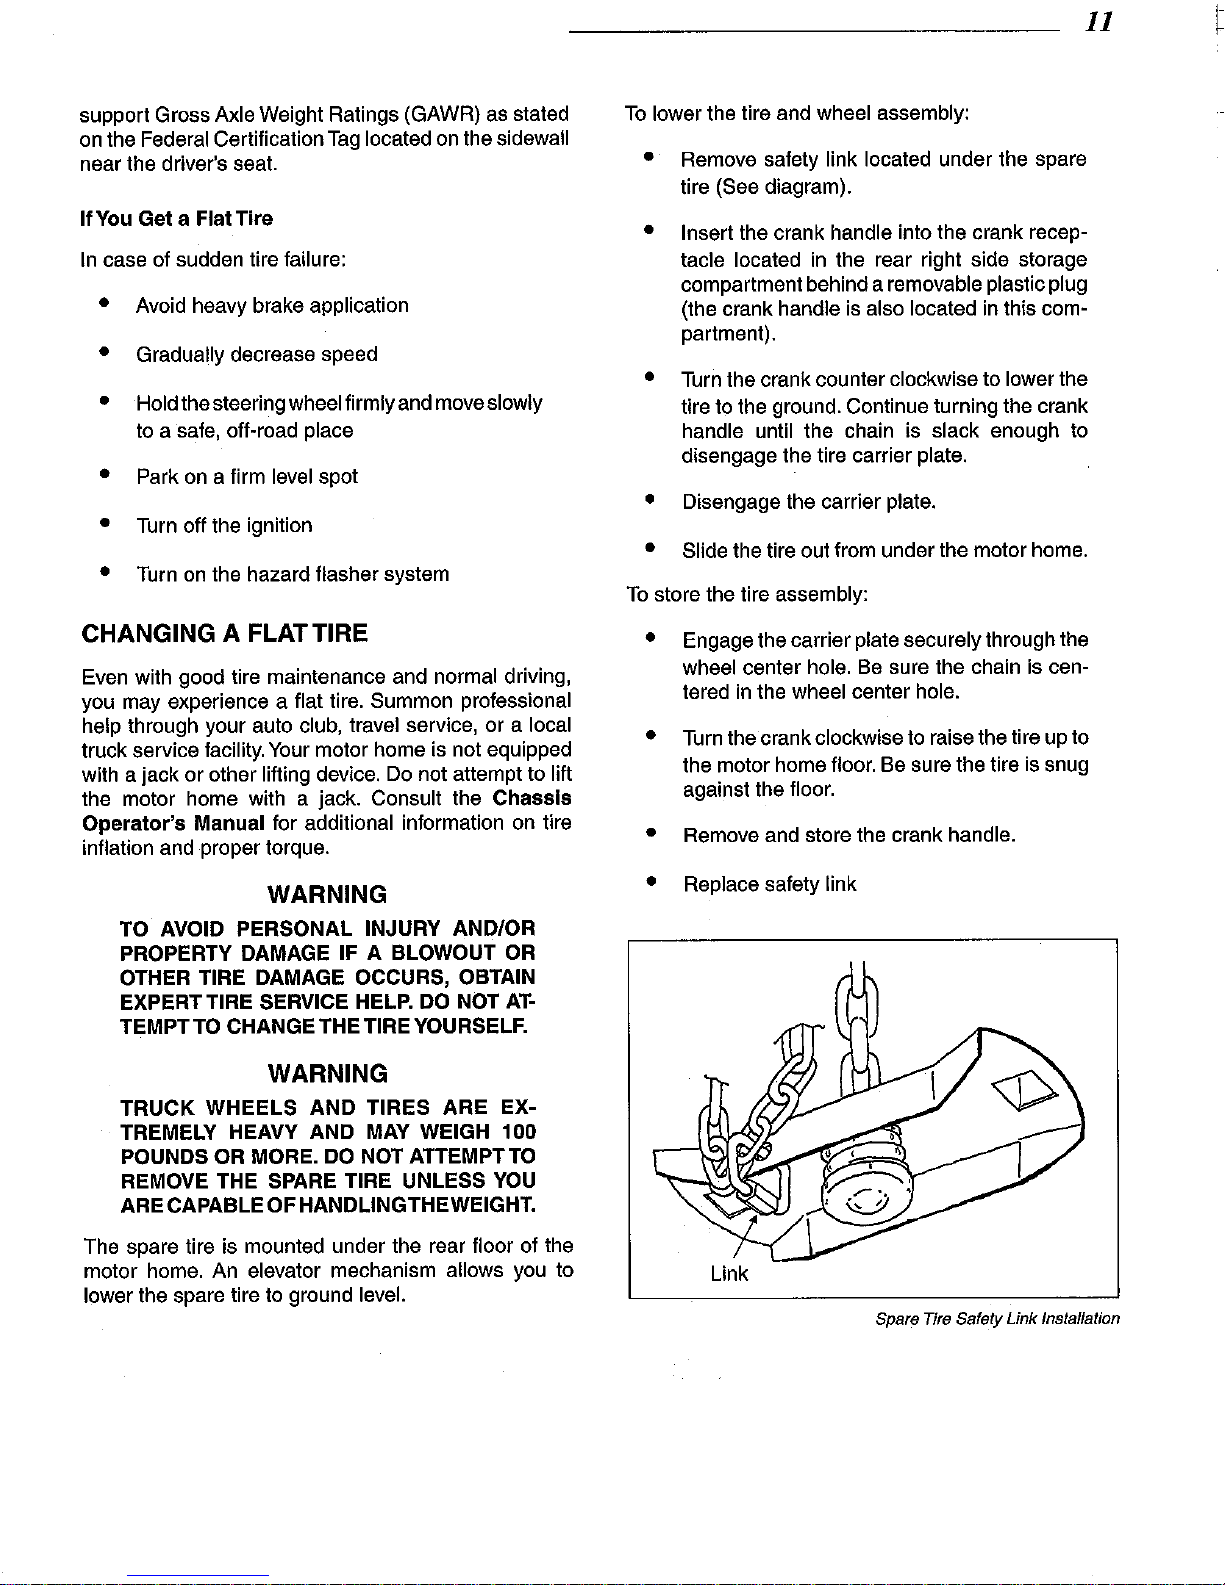
•
•
Remove safety link located under the spare
tire
(See diagram).
Insert the crank handle into the crank recep·
tacle located
in
the rear right side storage
compartment behind a removable plastic plug
(the crank handle is also located
in
this com·
partment).
• Turn the crank counter clockwise to lower the
tire to the ground. Continue turning the crank
handle until the chain is slack enough to
disengage the tire carrier plate.
•
Disengage the carrier plate.
• Slide
the tire out from under the motor home.
To
store the tire assembly:
•
•
•
•
Engage the carrier plate securely through the
wheel center hole.
Be
sure the chain is cen·
tered
in
the wheel center hole.
Turn the crank clockwise to raise the tire up to
the motor home
floor. Be sure the tire is snug
against the
floor.
Remove and store the crank handle.
Replace
safety link
Link
Spare Tire Safety Link Installation
12
SEATS AND SEAT BELTS
Seat belts helpto restrain you and your passengers
in
case
of a collision.
In
most states, the law requires their use
Seat belts provide the best restraint when:
• The seat back is upright
•
The occupant
is
sitting upright (not slouching)
•
The lap belt is snug and low on the hips the
•
Shoulder belt is snug against the chest
• The knees are straight forward
For your safety, your vehicle has combination lap and
shoulder belts for the driver and front seat passenger
and lap belts without retractors in
all other designated
seating positions
WARNING
MAKE SURETHATYOU ANDYOUR PASSENGERS, INCLUDING
PREGNANT WOMEN,
WEAR SAFETY BELTS. BE SURE THAT LAP
BELTS FIT SNUGLY AND AS LOW AS POSSIBLEAROUNDTHE
HIPS.lF SAFETY BELTS
ARE NOT USED PROPERLY, THE RISK OF
YOU
OR
YOUR PASSENGERS BEING IN-
JURED
IN A
COLLISION
GREATLY
INCREASES.
ALWAYS DRIVE
AND RIDE WITH YOUR
SEATBACK UPRIGHT AND THE LAP BELT
SNUG AND LOW ACROSS THE HIPS
TO
REDUCETHE RISK OF SERIOUS INJURYTO
THE ABDOMEN
OR
NECK
THAT COULD BE
CAUSED BY SLIDING UNDER THE SAFETY
BELTS
IN
A COLLISION.
NEVER
LET A PASSENGER
HOLD A CHILD
ON
HIS
OR
HER
LAPWHILETHEVEHICLE
IS
MOV-
ING.THE PASSENGER CANNOT PROTECTTHE
CHILD
FROM
INJURY
IN
A COLLISION.
CHILDREN SHOULD
ALWAYS
RIDE WITH
THE SEATBACK
IN
THE FULLY UPRIGHT
POSITION.
WHEN THE SEATBACK IS NOT
FULLY UPRIGHT, THERE IS A GREATER
RISK THAT THE CHILD WILL SLIDE UNDER
THE
SAFETY BELT AND BE SERIOUSLY
INJURED
IN
A COLLISION.
NEVER USE
A SINGLE BELT FOR MORE
THAN ONE PERSON OR ACROSS MORE
THAN
ONE
SEATING
POSITION.
THIS
GREATLY INCREASES THE RISK THAT ONE
OR BOTH OF
THE PEOPLE WILL BE IN-
JURED
IN
A COLLISION. EACH DESIG-
NATED SEATING POSITION
IN
YOUR VE-
HICLE HAS
A SPECIFIC SAFETY BELT AS-
SEMBLY WHICH IS
MADE UP OF ONE
BUCKLE AND ONE TONGUE THAT ARE
DESIGNED
TO
BE USED AS A PAIR.
WARNING
USE THE SHOULDER BELT ON THE OUTSIDE SHOULDER
ONLY.
NEVER
WEAR
THE
SHOULDERBELTUNDERTHEARM.NEVER
SWING IT AROUND THE NECK OVER THE
INSIDE SHOULDER. FAILURE
TO
FOLLOW
THESE PRECAUTIONS COULD INCREASE
THE RISKAND/OR SEVERITY OFINJURY
IN
AN
ACCIDENT.
Combination Lap and Shoulder Belts
While your vehicle is in motion, the combination lap and
shoulder belt adjusts to your movement. However, if you
brake hard, corner hard
or
if your vehicle receives an
impact, the lap and shoulder belt locks and prevents
you from moving
To
fasten the belt, pull the lap-shoulder belt from the
extractor so that the shoulder portion of the belt crosses
your shoulder and chest.
Insert the belt tongue into the
proper buckle until you hear a snap and feel it latch
To
tighten the lap portion
of
the belt, pull up on the
shoulder belt until it fits you snugly. The belt should rest
as low on your hips as possible.
Safety Belt Maintenance
Check your safety belt system periodically to make sure
that it works properly and isn't damaged.
If the webbing
shows any wear, nicks
or
cuts, have it examined by a
qualified technician to determine if replacement is necessary. Always have your safety belt system checked
after a collision.
Safety Restraints for Children
In
most states, you are required by law to use safety
restraints for children.
If small children (less than four
years old, and under
40 pounds) ride in your vehicle,
you must put them in safety seats that are made
specially for children. Safety belts alone do not provide
maximum protection for these children.
Check your
local and state laws for specific requirements.
WARNING
WHEN USING ANY INFANT OR CHILD RE·
STRAINT SYSTEM, IT IS IMPORTANT
THAT
YOU
FOLLOW THE INSTRUCTIONS AND
WARNINGS PROVIDED BY THE MANUFAC·
TURER
CONCERNING ITS INSTALLATION
AND USE. FAILURE TO FOLLOW EACH OF
THE
RESTRAINT MANUFACTURER'S IN·
STRUCTIONS
COULD INCREASE THE RISK
OR SEVERITY OF AN INJURY INTHE EVENT
OF A COLLISION
OR
SUDDEN STOP.
SAFETY BELTS AND SEATS CAN BECOME
HOT
IN AVEHICLETHAT HAS BEEN CLOSED
UP IN SUNNY WEATHER, AND COULD BURN
A
SMALL
CHILD. CHECK SEAT COVERS
AND BUCKLES BEFORE YOU PLACE A
CHILD ANYWHERE NEAR THEM.
WARNING
NEVER LEAVE A CHILD UNATTENDED IN
YOURVEHICLE.
ALWAYS REMOVETHE KEY
FROM THE
IGNITION AND TAKE IT WITH
YOU.
Safety
Belts
for
Children
Children who are too large for child safety seats should
always wear safety belts.
WARNING
IF SAFETY BELTS ARE NOT PROPERLY
WORN ANO ADJUSTED
AS
DESCRIBED,
THE RISK OF SERIOUS INJURY TO THE
CHILD IN A COLLISION WILL BE MUCH
GREATER.
IFTHE SHOULDER BELT CANNOT BE PROp·
ERLY POSITIONED SO THAT IT DOES NOT
CROSS
OR
REST IN FRONT OFTHE CHILD'S
FACE OR NECK, MOVE THE CHILDTO ONE
OFTHE
SEATSWITH A LAP BELT ONLY AND
USE THE
LAP
BELT.
LAP
BELTS ANDTHE LAP PORTION OF LAP
AND SHOULDER
BELTS SHOULD ALWAYS
BEWORN SNUGLY AND BELOWTHE
HIPS,
TOUCHING
THE CHILD'S THIGHS.
CHILDREN SHOULD
ALWAYS RIDE WITH
THE SEATBACK
IN
THE FULLY UPRIGHT
POSITION.
WHEN THE SEATBACK IS NOT
FULLY
UPRIGHT, THERE IS A GREATER
RISK THAT THE CHILD WILL SLIDE UNDER
THE SAFETY BELT AND BE
SERIOUSLY
INJURED IN
A COLLISION.
13
Safety Seats
for
Children
Use a safety seat that is recommended for the size and
weight of the
child.
WARNING
CAREFULLY
FOLLOW
ALL
OF
THE
MANUFACTURER'S INSTRUCTIONS THAT
COME
WITH THE SAFETY SEAT THAT
YOU
PUT IN YOUR VEHICLE. MAKE SURE THAT
THE SHOULDER BELT
(IF PROVIDED AT
THE
SEATING
POSITION
WHERE
THE
SAFETY SEAT IS BEING USED) DOES NOT
CROSS OR REST IN FRONT OFTHE CHILD'S
FACE OR NECK. IF YOU
Db
NOT INSTALL
AND USE THE SAFETY SEAT PROPERLY,
THE
CHILD MAY BE INJURED
INA
SUDDEN
STOP OR COLLISION.
SEAT BACKS SHOULD
BE UPRIGHT FOR
USE WITH CHILD SAFETY SEATS.
DRIVING, PARKING AND MIRRORS
Driving your motor home will be different from driving
your family car or truck. Your motor home is
large and
heavy.
You
need to be alert to your vehicle's position
in
traffic.
You
may have to adjust or learn new driving
techniques to
safely operate your motor home.
Be
cautious when maneuvering to allow for the length
and width of the vehicle. Always allow room to corner
and to change
lanes. Your vehicle's side and rear view
mirrors
will help you keep aware of your vehicle's
position and the position of other
vehicles and/or ob·
structions near your motor home.
You
must monitor
them constantly
while you are driving. Become familiar
with the operation of the side mirrors and learn to use
them to view objects and the road beside and behind
the motor home.
The rear view mirrors are
controlled from a panel
located
on the driver's door arm rest.
To
adjust the
mirrors,
select either LEFT
or
RIGHT mirror and press
the appropriate arrow. Activate the mirror heaters by
pressing the HEATER position.
Remember that your motor home is heavier than a car,
making it
less maneuverable and harder to stop. Also,
because of its greater side surfaCe area, it is more
easily affected by cross winds.
Allow extra distances for
passing and stopping, and drive at a moderate speed,
particularly
in
traffic and
in
gusty wind conditions.
Driving on winding or mountain roads is not difficult if
done with reasonable care.
Observe proper vehicle
speeds when ascending
or
descending hills and always

14
operate
in
the proper transmission range. Downshift on
hills to avoid overheating
or
undue engine loads. Downshift when descending grades. Engine braking power
will
help control vehicle speed, and relieve some of the
strain on the brakes.
Mountain driving or desert temperatures can put
extreme demands on chassis components. Under extreme use conditions, you may need to turn off the
vehicle air conditioner to improve engine and
transmis-
sion cooling.
Be aware
of
the
extra
height
of
your
motor
home.
Check for low hanging tree branches of other obstructions whenever you drive
or
park. Avoid low overhangs
when pulling
in
for service. Always check overhead
clearances of over-passes and bridges. This may be
particularly important if you drive with the overhead
vents open or if the motor home is equipped with a roof
air conditioner, roof rack, CB
or
TV/radio
antenna.
Before leaving
on
a trip, check your route. Some tunnels
prohibit motor homes with
LP
gas systems.
When parking
parallel to a curb, be sure to allow for
poles
or
obstructions as the front and rear portions of
the motor home swing wider than an automobile. When
parking on
an
incline, turn the front wheels into the curb
in
the direction of the roll to aid the parking brake. When
parking, always shift the transmission to neutral and set
the parking brake.
NOTE: Although your motor home is equipped
with power steering, the front wheels may be
difficult to turn when
at
a dead stop. When
maneuvering
in
some close situations, give
yourself some room to move either forward
or
backward. The vehicle has to be in motion for
the front wheels to be turned with ease.
WARNING
DO NOT PARK OR IDLE THE MOTOR HOME
OVER COMBUSTIBLE MATERIALS SUCH
ASTALL GRASS
OR
DRIED LEAVES. THIS IS
PARTICULARLY IMPORTANT IF
THE EX-
HAUST SYSTEM HAS NOT
BEEN PROPERLY MAINTAINED. COMBUSTIBLE MATERIALS MAY CATCH FIRE FROM THE HOT
EXHAUST GASES, SOOT OR SPARKS
THAT
COULD ESCAPE THROUGH CORROSION
HOLES OR CRACKS.
If
operating, parking or idling your vehicle off-road is
unavoidable, as is often the case
in
recreational use:
Be aware that combustible materials could
catch fire from the vehicle's hot exhaust system.
Avoid driving your vehicle through
or
over combustible materials such as leaves, grass, vegetation or stubble high enough to touch, catch
or
collect on its hot exhaust system.
Parking
or
idling should be done only in
an
area
where there are no combustible materials under
the vehicle.
REAR VIEW VIDEO MONITOR
If your motor home is equipped with rear view video
monitor, the camera is located at the top rear of the
motor home. The rear view picture is displayed on a
screen
on
the motor home instrument panel. The monitor screen may be overlaid with a distance scale reference which gives approximate distance of objects to the
rear of the motor home.
To
operate the video monitor, the ignition switch must
be on and the gear shift
in
reverse.
To
override normal
operation, the ignition switch must be on and power on
at the monitor.
Using the video monitor
will take practice. Always allow
more space for maneuvering until you are comfortable
with the system. Check the side-mounted mirrors often
while driving and
especially during lane changes and
when backing
up.
CAUTION
The rear
view
video
monitor
system
pro-
vides
a general
view
of
the
road and
objects
to
the
rear
of
the
motor
home.
Your percep-
tion
of
this
view
and
the
relationships
of
objects
to
the
motor
home
and
each
other
will
be
different
from
that
seen
in
a rear
view
mirror.
Light
conditions
and
the
adjustment
of
the
screen
controls
will
also
affect
your
perception.
Always
use
the
side-mounted
rear
view
mirrors
with
the
video
monitor
system.
The camera lens is exposed to road dirt and will get dirty
often.
Clean the camera lens and monitor screen with
a
quality glass cleaner and nonabrasive cloth
or
towel.
BODY UNDERCOATING
In
keeping with good engineering practice, and to meet
the requirements of chassis manufacturer's, certain
chassis and underbody components of your motor
home have been coated with an undercoating
material.
This material is intended to assist
in
protecting these
components from corrosion
or
other effects of weather
and road conditions. Please be aware that certain
areas of the motor home do not have undercoating
applied.
FUEL
AND
FUEL SYSTEMS
See the
Chassis
Operator's
Manual
in
the
Owner's
Information
Package for chassis fuel recommenda-
tions. The optional generator is designed to
run
on the
same
fuel as the chassis. Consult the generator oper-
ating instructions for special cautions about mainte-
nance with different types of fuels.
Fuel
Fill
The
fuel fill is located on the rear of the motor home.
Modern
fuel systems may build up vapor pressure
within the tank as the
fuel warms during use
or
hot
weather. Under certain conditions, sudden
release of
this pressure when removing the
fuel cap can cause
fuel to spray from the fill opening, creating a fire hazard.
WARNING
WHEN REMOVING THE FUEL CAP, ROTATE
SLOWLY ONLY
FAR ENOUGH TO ALLOW
PRESSURE TO
RELEASE. AFTER "HISS-
ING"
SOUND STOPS, COMPLETE THE RE-
MOVAL
OFTHE
CAP.
To
protect the fuel system from excessive pressure
or
vacuum,
or
from sudden release of pressure, replace
lost
or damaged caps with caps of the same design
which are
available from your Fleetwood motor home
dealer.
Clean
up fuel spills immediately. Raw fuel spilled on the
motor home could damage the exterior finish, and is a
serious fire hazard.
Fuel Types
And
Vapor
Lock
Your motor home's automotive fuel and emissions
systems are sophisticated and
highly engineered to
meet
Federal and State emissions standards. They are
sometimes sensitive to
fuel types and blends, particularly fuels blended for certain altitudes and climates.
Fuel suppliers
provide customers with the correct fuel
for their location and seasonal conditions. Sometimes,
though,
fuel blended for winter is supplied during sum-
mer months.
"Vapor lock" occurs when gasoline vaporizes, and va-
por pockets block the flow of liquid fuel to the engine.
I!
you experience engine stall
or
stutter, you may be
experiencing vapor lock.
I!
your engine and fuel system
are properly tuned and maintained, you
should not
15
~
experience this problem.
I!
vapor lock occurs, the fuel
itsel! could
be the cause.
I!
at all possible, check with the
service station operator as to the
fuel blend before filling
your fuel tank. I! you purchase your fuel from nationally
recognized fuel dealers. Your chances of vapor lock can
be reduced.
I! you store your motor home during the
winter months, be aware that when you take the
vehicle
out of storage
In
the spring
or
summer, winter fuel may
cause vapor
lock until it is consumed.
GENERAL CHASSIS TOPICS
Variable Speed
Engine
Fan
When the engine is under
load
or
requires maximum
cooling, the engine
fan
adjusts and turns faster. The
fan
may become very noisy at high speed and when maximum cooling is required. High speed fan noise can
sometimes be misinterpreted as transmission
slippage.
This is not the case. High engine speed and temperature conditions, such as
pulling away from a stop after
long freeway driving, can cause loud
fan
noise until the
engine
cools down. This fan noise indicates that the fan
is doing what it is supposed to
do.
This noise is not a
defect
in
the
fan
or the transmission.
Exhaust
System
Heat
Your motor home engine has been designed to conform
to
Federal and State emission requirements.
To
meet
these requirements, engine operating temperatures
are high. As a
result, the engine and exhaust systems
radiate a great
deal of heat.
Special heat shields are built into your motor home to
protect wiring and other components from possible
heat damage caused by the exhaust system. Do not
remove these
shields, modify the exhaust system,
or
add additional equipment, such as wiring, plumbing,
or
other components, which will be affected by exhaust
system heat.
ENGINE TEMPERATURE GAUGES
Engine temperature gauges have been calibrated to
indicate a midrange reading as the
"normal" operating
temperature. The reason for this is that many owners
perceive
212°F
asthe
boiling point. However, this is not
the case
in
an engine with a pressurized cooling system
and a coolant mixture of glycol and water. As a motor
home owner, be aware that the gauge is intended to
provide a warning of any rapid change
in
engine coolant
temperature from the "normal" reading of the gauge
rather than an absolute temperature reading.
 Loading...