

Fleetwood Pace Arrow 1983 User Manual
· .
PaceArraw
BYFLEETWaJO
1983

INTRODUCTION
Welcome to
the
recreational vehicle lifestyle
and
the
grow-
ing family of
motor
hor
'8
owners.
We
sincerely
thank
you
for choosing our
product.
. Your
motor
home has been designed
to
provide you with
many
years of carefree, pleasant traveling and vacationing.
This
manual describes
many
features of
your
motor
home
and provides a guide
to
operating
procedure~
so
that
you can
obtain
optimum
performance
from
those
features. Like
all
finely
crafted
equipment,
your
motor
home
w(1I
require care
and
regular maintenance
in
order
to
retain its
maximum
performance
characteristics. This manua.l. along
with
the
information provided
in
your
Owner's
Information
Kitoutlines
the
important
areas
of
maintenance and provides a mainten-
ance schedule
that
you
should follow
to
assure sale, trouble-free
service from
your
motor
home.
Study
these
instructions
care-
fully.
A good working knowledge of
your
motor
home
and
how
to
care for it will help you enjoy
many
miles
of
recreational pleasure.
Your
motor
home
has been designed
to
conform
with,
or
exceed
the
American National
Standards
Institute A 119.2,
ANSI/NFPA
501
C,
Canadian CSA
Standard
Z-240
(Canadian-built,
or
units built for Canada).
and/or
applicable
motor
home
vehicle standards. These
standards
establish
the
plumbing, heating, electrical., and .other
requirements
for
quality and safety. Compliance with these
standards
is
indicated by
the
seal
attached
just
outside
the
entry
door.
This
seal
is
the
outward
sign
of
internal quality.
The
motor
horpe has. been
thoroughly
inspected before ship-
ment. It
is
the
duty
of
your
dealer
to
inspect
the
motor
home
and
to
prepare it
for
you during
the
predelivery phase
of
the
sale. He will instruct you
in
its basic use; however,
this
should
be
supplemented
by'your
reading all instructional material
furnished with
the
motor
home.
If,
after
taking
delivery
of
your
new
motor
home,
you
feel it requires additional
cpnditioning
or
adjustment,
please return it
to
your
dealer
as
soon
as
possible.
If
You
have any
questions
regarding
operation,
maintenance,
or
service, please
contact
your
dealer immediately so he can
assist
you.
Your dealer's service
or
sales
department
will
promptly
handle
any
normal problem which might occur.
Customer
service
is
of
utmost
importance
to
your
dealer,
as well as
to
the
manufacturer.
If, for
some
reason, a
problem
is
not
handled
to
your
satisfaction, we make
the
following suggestions:
1. Discuss
any
warranty-related
problems
directly with
the
General Manager or
the
Owner
of
the
dealership,
giving him
an
opportunity,
to
help his service depart-
ment
resolve
the
matter
for
you.
2. Should a
problem
arise
that
cannot
be resolved
to
your
satisfaction by
your
local dealer,
contact
the
factory service superviso". The back page
of
this
manual has a
factory
listing. Please
contact
the
one
nearest you.

I
IMPORTANT NOTICE
This instructional manual
is
of general
nature
only.
Because
of
the
continuous
program of
product
improvement
conducted
by
Fleet·
wood, it
is
possible
that
recent
product
changes may
not
be included
in
this manual.
Specifications may change
without
notice.
The
instructions
included
in
this manual are
intended
as
a guide, and
in
no respect
extend
the
responsibilities
of
Fleetwood
Enterprises,
Inc.,
or
its subsidiaries
beyond
the
standard
written
warranty
as presented
in
this manual.
3.
If
these
efforts
have
not
satisfactorily solved
your
problem, please send a letter describing
the
circumstances
to:
Fleetwood
Enterprises, Inc.,
P.O.
Box
7300,
Riverside, California
92523.
Please include
the
brand
name and serial
number
of
your
motor
home.
4.
If
you wish
to
call
for
assistance, please use these
toll free
telephone
numbers:
From
California: (800)
442-4804
From
Outside
California: (800)
854-4755
Thank
you for choosing
our
produCL
Your
dealer and we,
the
manufacturer,
will
continually
strive
to
merit
your
confidence.
In
this manual,
statements
preceded
by
the
NOTE:
Some
equipment
and features described
or
shown
in
this
manual
may
be
optional
at
extra
cost.
following
words
are of special significance:
"WARNING"
means
that
there
is
the
pos·
sibility
of
personal injury
to
yourself and others.
"CAUTION"
means
that
there
is
the
pos·
sibility
of
damage
to
the
vehicle
or
its
components.
"NOTE"
indicates
points
of
particular
interest
for
more
efficient 'and
convenient
operation.
Please
pay
close
attention
to
these
statements
while
you
read this manual.
NOTE
This
product
is
a recreational vehicle
only.
It
is
not
designed
or
intended
to
be used as
perm~nent
housing.
NOTICE
Your
selling dealer
is
responsible for performing a
complete
predelivery inspection
of
the
chassis and all
motor
home
components
as
specified
in
the
predelivery
checklists
supplied by Fleetwood and
the
chassis
manufacturer.
You should receive
acopy
of
these
completed
checklists from your dealer when
your
motor
home
is
delivered
to
you.
FRONT
END
ALIGNMENT
As a
part
of
the
predelivery inspection procedure,
the
dealer
is
to
road test
the
motor
home,
noting
and
correcting
any
steering performance problems before
delivery
to
the
retail customer.
Therefore,
Fleetwood
and its subsidiaries will
not
be
responsible for
front
end alignment
after
this required
predelivery inspection
is
made.
A FEW
WORDS
ON
ENERGY
........
.
To
all
of
us
who
drive cars'
or
trucks,
or
heat
and
cool
homes and businesses, very
little needs
to
be
said
about
energy.
Discussions
of
the
topic
often
lead
to
the
question,
"What
can
be
done
to
save
our
natural energy resources?"
There
is
no
single simple answer.
To
some, energy·
efficiency
is
a problem.
Fleetwood
thinks
of
energy
conservation
as
an
opportunity
to
research new ideas, while giving you
the
best
in
recreational living. Space·age
technology
has given us lightweight,
but
strong
and
attractive
materials.
Sophisticated
manufacturing
techniques
offer
the
best
in
time
and energy
management
to
bring you a
motor
home
that
has saved
energy
even
before you drive it
away.
It's
"energy·
efficient engineering."
But
we
want
you
to
be
involved,
too.
And
to
help
you,
we've included energy._
saving tips
throughout
this
Owner's
Manual. Whenever
you
see this symbol
take
a second
to
read
the
few
words
beside
it.
Try
these
and
other
ideas
to
save energy.
And
then
put
the
ideas
to
work.
We're sure
you'll feel a lot
better
about
your
next
outing.
Fleetwood
is
thinking
about
energy.
And
we're
helping.
TABLE
OF
CONTENTS
PLANNING
AND
PREPARATION
......................
1
. Vehicle Load Capacity Weighting
....................
.4
READY
TO
LEAVE
.................................
5·
Starting
and
Warm-up
..............................
5
. . .Safety, Belts
......................................
5
ON
THE ROAD
....................................
6
Driving
and
Parking
................................
6
Miscellaneous Safety Tips
...........................
6
Overheating
......................................
7
Windsh
ield Defrost -
Comfort
Control
.................
7
12-Volt
Fuse
Replacement
..........................
7
Tire
...........................................
7
Emergency
Start System
............................
7
SERVICING
.......................................
9
Motor
Home
Chassis
Operator's Manual
................
9
Engine
Service
.....................................
9
Battery
Service
.•.................................
9
Generator Power
Plant System Service
.................
9
Automotive
Air
Conditioner (Optional)
.............•..
9
INTERIOR AND FURNiSHINGS
.....................
10
Pull-out
Lounge
Beds
.............................
10
Spring-Balanced
Bunk
Beds
.........................
10
Pedestal
Seats
...................................
10
Swing-Down Dinette Table
.........................
10
Storage
...•...................................•
11
Condensation
and
Ventilation
.......................
11
LIQUEFIED
PETROLEUM GAS SySTEM
...............
13
Using
LP
Gas
System
At
Low Temperatures
.... , .......
13
Filling The Chassis-Mounted
LP
Gas
Tank
..............
13
LP
Gas
System Leak Checks
........................
14
PLUMBING
.......................................
15
Fresh
Water
.....................................
15
External Water Supply
............................
15
Filling
Fresh
Water Supply
.........................
15
Troubleshooting Water
System
......................
16
Sanitizing Water Tank
.............................
16
Waste
Water System
..............................
17
Waste
Water Draining
.............................
17
Do's
and
Don'ts - Waste Tanks
......................
18
Winterizing the Water
System
....................•..
18
Winter
Storage Checklist
....................•......
19
E LECTR
ICAL
.....................................
21
115-Volt System
............................•....
21
12-Volt
System
..................................
21
115-Volt AC to
12-Volt
DC
Converter
................
21
Fuses
........................................•.
22
Auxiliary
12-Volt Batteries
........................
22
Auxiliary
Generator Power Plant (Optional)
............
22
APPLIANCES
......................................
24
LP
Gas
Appliances
................................
24
Roof
Air
Conditioners (Optional)
.................•..
25
ACCESSORIES
....................................
26
TV
Antenna
....................................
26
AM/FM
Stereo Radio/Tape Player
...................
26
CARE
AND
MAINTENANCE
Interior Cleaning
Windows
Locksets
Plumbing
Fire Safety
Exterior
Repairs
THE
DIESEL
Diesel
.......................................
and
.......................................
.....................................
Care
........................................
PACE ARROW
Fuel Requirements
Starting The
Emergency Starting
Engine
Auxiliary
Oil
and
Generator Power Plant
.........................
................................
Latches
.............................
....................................
.........................
..........................
Diesel
Engine
.........................
...............................
Filter
Recommendations
.....................
...............
27
27
28
28
29
29
29
30
32
33
33
35
35
35
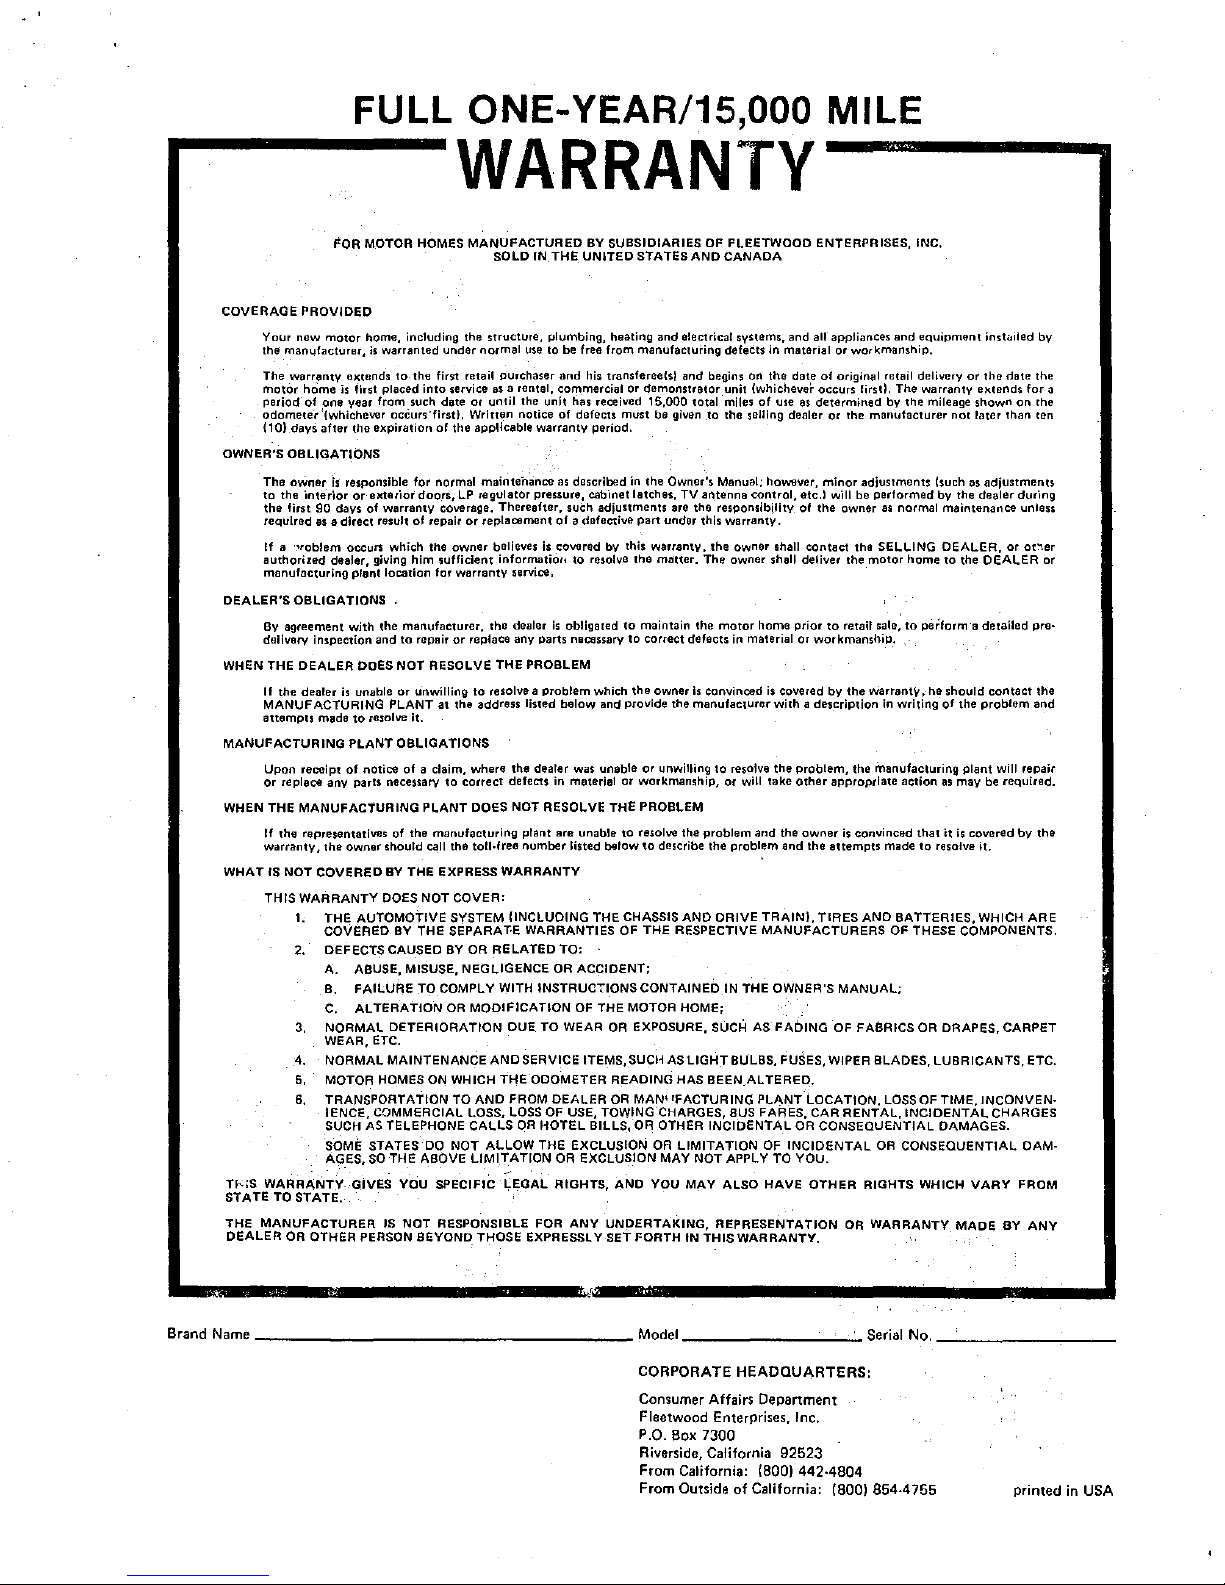
FULL ONE-YEAR/15,OOO MILE
....---WARRANTy----.
FOR
MOTOR
HOMES
MANUFACTURED
SOLD IN,
BY SUBSIDIARIES OF
THE
UNITED
STATES
AND
CANADA
FLEETWOOD
ENTERPRISES, INC.
COVERAGE
OWNER'S OBLIGATIONS
DEALER'S
WHEN THE DEALER
MANUFACTURING PLANT OBLIGATIONS
WHEN
WHAT
TI--;S WARRANTY· GIVES YOU SPECIFIC
STATE TO
THE
DEALER OR OTHER PERSON BEYOND THOSE EXPRESSL Y
PROVIDEO
Your
new
motor
home,
including
the
the
manufacturer,
The
warrantY
motOr
home
period of
OdOmeler'lwhicheVl,lr occurs·first!. Written notice
(10)
days
The owner
to
the interior
the
first
required
If a '''oblem
authorized dealer,
manufacturing
OBLIGATIONS
By
agreement with the manufacturer,
delivery inspection end
If
the dealer
MANUFACTURING
attemplS
Upon
receipt of nOtice of
or
replace any parts necessary
THE MANUFACTURING PLANT DOES NOT RESOLVE THE PROBLEM
If
the representatives of the manufacturing plant are unable
warranty,
IS
NOT COVERED
THIS WARRANTY DOES NOT COVER:
1.
2, DEFECTS CAUSED
3. NORMAL DETERIORATION DUE TO WEAR
. 4. NORMAL MAINTENANCE AND SERVICE ITEMS, SUCH
5,
6,
STATE,
MANUFACTURER
is
warranted
OXlllnds
to
is
one
year from_such date or
after
is
responsible for normal maintenance
90
days of warranty
es
a direct result of repair
occurs which the owner balieves
is
mede
the
owner should call the toll·free number listed below
THE AUTOMOTIVE SYSTEM (INCLUDING THE CHASSIS AND DRIVE TRAIN),
COVERED
A. ABUSE, MISUSE, NEGLIGENCE OR ACCIDENT;
B.
C, ALTERATION
WEAR,
MOTOR HOMES
TRANSPORTATION
IENCE, COMMERCIAL LOSS,
SUCH
SOME STATES
AGES, SO
the
lIut
placed
into
the expiration
or
eleterior
doors,
gilling
him sufficient information to resollle the malter. The owner shell deliver the motor
plant location for warranty service,
to
repair
DOES NOT RESOLVE THE PROBLEM
unable
or
unwilling
PLANT
to
resolve it.
01
BY
THE EXPRESS WARRANTY
BY
THE SEPARAT,E WARRANTIES OF THE RESPECTIVE MANUFACTURERS OF THESE COMPONENTS.
FAILURE TO COMPLY
ETC
.
ON
AS
TELEPHONE CALLS
00
THE ABOVE LIMITATION OR EXCLUSION
IS
NOT RESPONSIBLE FOR ANY UNDERTAKING, REPRESENTATiON
structure,
under
normal
first retail
service as a rental, commerci,d or
unlillhe
of
the applicable warranty period.
LP
ragulator pressure, cabinet latches,
COVl,lrage.
or
replacement
or
replace any parts naC6ssary
to
at
the address listed below and provide the manufaclurer with a dll'Scription
claim, where
to
correct defects
BY
OR RELATED TO:
OR
MODIFICATION
WHICH THE ODOMETER READING HAS BEEN.AL TERED.
TO
AND FROM DEALER
NOT ALLOW THE EXCLUSION
I1lumbing,
use
to be free
purchaser
and
his transferee{s!
unit has received 15,000 total miles
of
defects must be given
as
described
Thereafter, such adjustments are the responsibllity of
of
a defective
is
covered by this warrentY.
the
dealer
is
oblig8led
resolve a problem which
the
dealer was unable
in
material or workmanship, or
WITH
INSTRUC710NSCONTAINED
OF
THE MOTOA HOME;
LOSS
OF USE, TOWING CHARGES,
OR
HOTEL BILLS, OR OTHER INCIDENTAL OR CONSEQUENTIAL DAMAGES.
LEGAL RIGHTS, AND YOU
heating
and
electrical
systems.
and
all
from
manufacturing
demonstrator
in
the Owner's Manual; however, minor adjustments (such
part
under this warranty.
to
maintain tha
to
correct defects
the
owner
or
unwilling
to
resolve the problem
to
describe
OR
EXPOSURE, SUCH AS FADING OF FABRICS OR DRAPES, CARPET
OR
MAN' rFACTURING PLANT'LoCATION,
OR
MAY
seT
FORTH
defects
in
and
begins
on
th(t
unit
(whichev(lr occurs firsll. The
of
to
the selling dealer
TV
antenna control, etc,)
the
owner shall contact
motor
home prior
in
material or workmanship.
is
convinced
AS
LIGHT BULBS, FUSES, WIPER BLADES, LUBRICANTS, ETC.
LIMITATION
NOT APPLY TO YOU.
MAY
IN
THIS WARRANTY.
is
to
resOllle
will
take
and
the
problem
IN
THE OWNER'S MANUAL;
BUS
FARES, CAR RENTAL,INCIDENTAL CHARGES
OF
ALSO HAVE OTHER RIGHTS WHICH VARY FROM
material
date
of
use
as
determined
or
the
to
covered by
the
problem,
other
the
owner
and
the
attempts
TIRES
INCIDENTAL
appliances
will
epproprlate action
lind
or
workmanship,
original retail delivery
the manufacturer
be performed by the dealer during
owner
thl
retail sale,
the
the
is
convinced
OR
eQuipment
warranty
by
the
as
normal maintanance unless
SELLING DEALER,
home
to
perform'a detailed pre-
warranty,
in
writing
manufacturing
that
made
to
AND BATTERIES, WHICH ARE
LOSS
OF TIME,INCONVEN·
OR
CONSeQUENTIAL DAM-
WARRANTY MADE
inst"iled
or
the
extends
mileage shown
nOllater
as
adjustments
to
the DEALER or
he
should
contact
of
the problem and
plant
as
may be required.
it
is
covered
resolve it.
by
datI!
the
for
on
the
than len
or
ot"!er
tha
will repair
by
the
BY
ANY
a
Brand Name
____________________
Model
__________
CORPORATE
HEADQUARTERS;
Serial No.
Consumer Affairs Department
Fleetwood Enterprises,
P.O.
Box
7300
Inc.
Riverside, California 92523
California: (800) 442·4804
From
From Outside of California: (800) 854·4755
_______
printed
in
---
USA
1
\
",=,,~-~--=
---
'ii"
"
.,
'.
'.~
-,
7 8
o
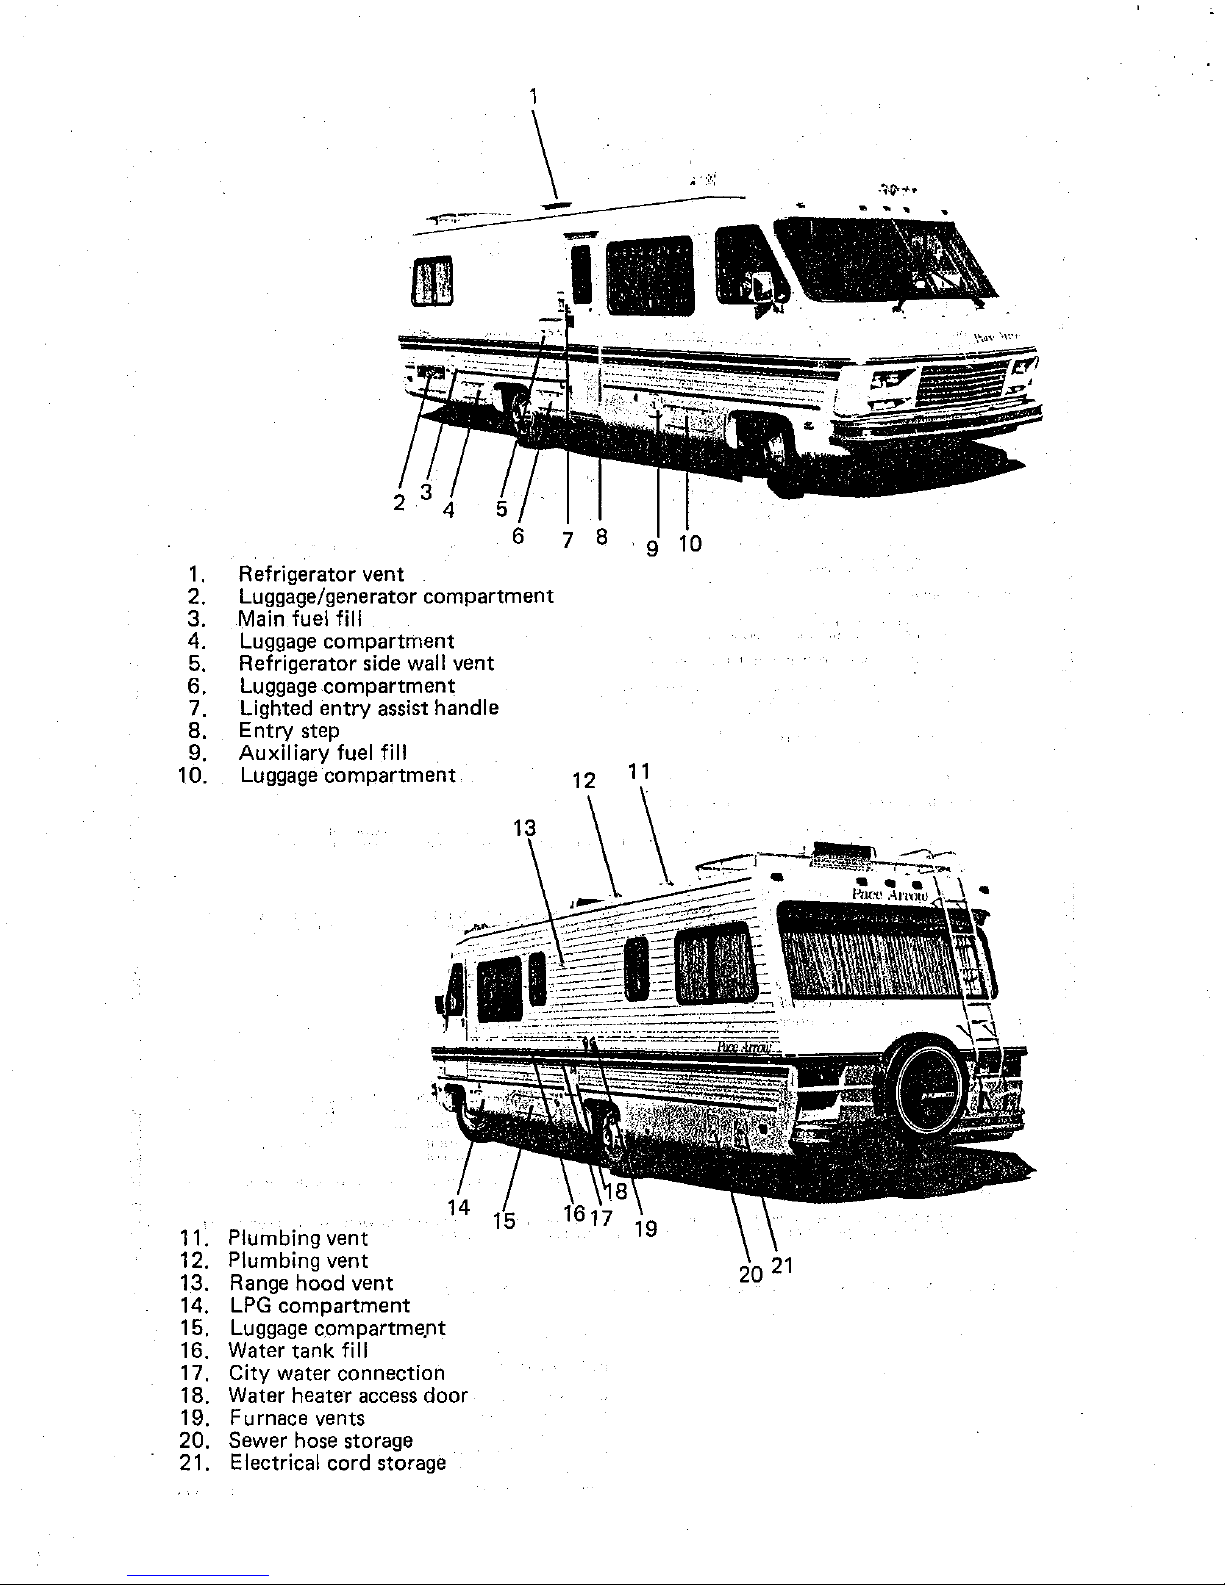
1,
Refrigerator
vent
2. Luggage/generator
compartment
3.
Main fuel fill
4. Luggage
compartment
5. Refrigerator side wall vent
6.
Luggage
compartment
7. Lighted
entry
assist handle
8.
Entry step
9. Auxiliary fuel fill
10. Luggage
compartment
12
11. Plumbing vent
12. Plumbing
vent
13. Range
hood
vent
14.
LPG
compartment
15. Luggage compartme.nt
16. Water
tank
fi
II
17. City
water
connection
18. Water heater access
door
19. Furnace vents
20.
Sewer hose storage
21. Electrical cord storage

Camping trips
save
more energy (and money)'than you
think.
(heating, air conditioning, etc.)
minimum
an
completely
doesn't
as
your
ALWAYS
AND
ANCES BEFORE
LINE
Turn
extended
need
an
occupied one.
house
OPEN
TANK(S).
and
recreational living
your
home living
while you're gone.
trip,
turn
unneeded systems
off.
An
unoccupied house
to
consume
So
remember
off".
WARNING.
EXTINGUISH
FLAMES
FILLING
PILOT LIGHTS
ON
as
YOUR APPLI·
can
systems
to
If
yoLi
pian
much energy
to
"turn
YOUR GASO-
PLANNING
PREPARATION
Plan
your
trip
and
organize all preparations before you
leave.
Proper preparation
enjoyment from
are
provided
ing
on
your
make note
more enjoyable.
·Plan
•
your
Become aware beforehand
availability
BE
SURE
FOR
TRAVEL.
a.
Check all fluids including:
Motor
Transmission
Power Steering Fluid
Radiator
Master Cylinder Brake Fluid
Battery Electrolyte
Windshield
b.
Inspect wheel lugs
Manual
for
as
recommended
conditions appropriate
in the
Operator's Manual, note
for
conditions. Always refer
your
c.
Check oil level in the generator power plant
installed). Refer
manual provided by the generator manufacturer
other
equipment. Check
supplies
the
d.
Check
properly stowed.
NOTE: The
tire bolts.
remove the
your
as
a guide. Review them carefully before start-
first trip. Refer
of
items forgotten
route carefully. Consult maps and guidebooks.
or
other circumstances .
ALL
EQUIPMENT
Check the
Home Engine Crankcase Oil
Recovery System Reservoir Level
Washer
for
Torque Specifications). Examine all tires
road
damage,
Chassis
cold tires
motor
motor
home. .
pre-use
are
provided
home
that
jack, jack handle
chassis
Be
spare
AND
is
the key to getting the most
motor
Fluid
Operator's Manual. In using
used
service requirements applicable
sure you
home. The
to
the list when on trips
to
make subsequent trips
of
road conditions, campsite
IS
following
Level
Reservoir
for
tightness.
then inflate
for
tl)e tire
for
that
under normal driving
to
to
instructions
that
extra oil and other service
for
the generator power
is
to
be
used
lugwrench may
have
tire.
following
SERVICED
items:
.
Level
(See
to
the proper pressure
size
and the operating
your
motor
tire
pressures
the procedures applicable to
and
for
extended periods.
and
lug wrench
the proper
suggestions
AND
Chassis
home
your
and
maintenance
not
fit
size
and
even
READY
Operator's
as
directed
Chassis
are
given
load
(if
for
to
this
plant
are
the
spare
wrench
1
if
to
2
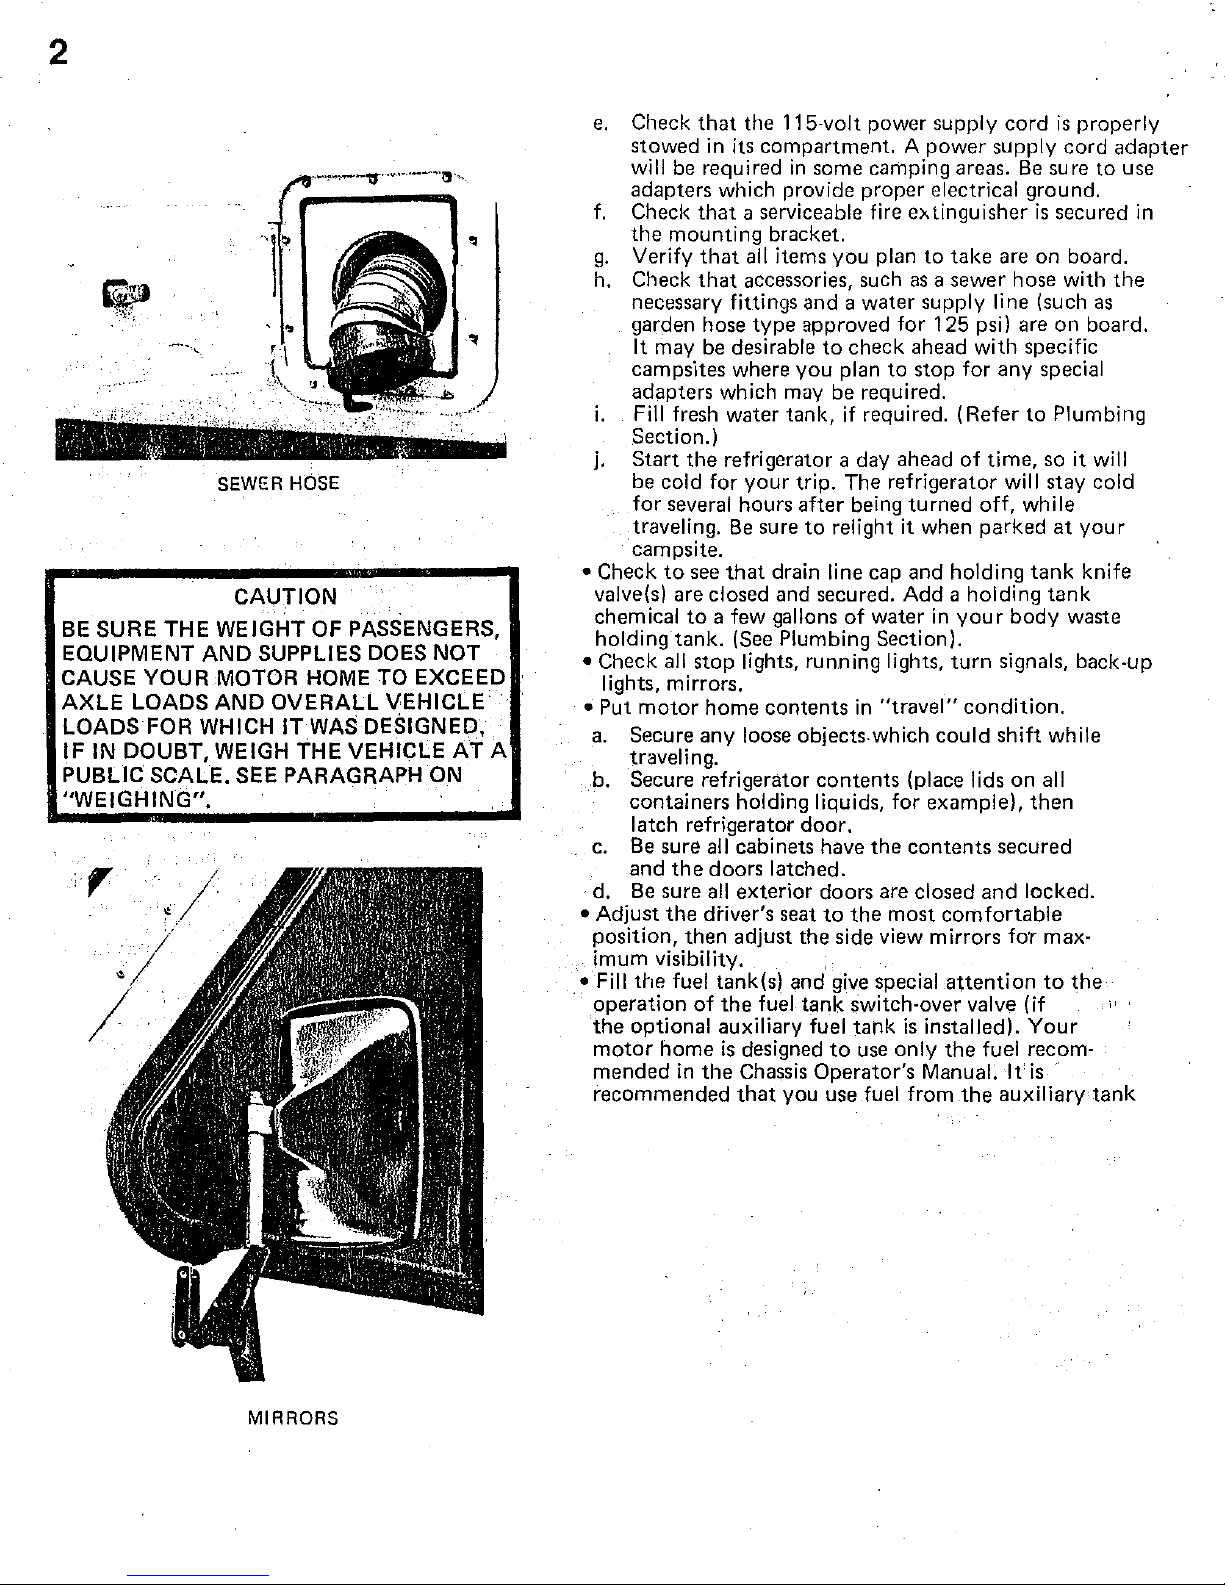
SEWER HOSE
CAUTION
BE
SURE THE WEIGHT OF PASSENGERS,
EQUIPMENT
CAUSE YOUR MOTOR HOME TO EXCEED
AXLE
LOADS FOR WHICH
IF
PUBLIC SCALE. SEE PARAGRAPH ON
"WEIGHING".
LOADS
IN DOUBT, WEIGH THE VEHICLE
>,.
AND
AND
/
SUPPLIES
OVERALL
IT
WAS
DOES
DESIGNED,
NOT
VEHICLE
AT
./
./
I
A
e.
Check
stowed
will be required
adapters
f.
Check
the
g.
Verify
h. Check
necessary fittings and a water supply line (such
garden hose
It may be desirable
campsites where
adapters
i.
Fill fresh water
Section.)
j.
Start
be cold for
for
traveling.
campsite.
• Check
valve(s) are closed and secured. Add a holding
chemical
holding
Check all
•
lights, mirrors.
• Put
a.
Secure
traveling.
Secure refrigerator
b.
containers
I atch refrigerator
c.
Be
and
· d.
Be
• Adjust
position,
imum visibility.
Fill
the
•
.
operation
the
optional auxiliary fuel
motor
mended
recommended
that
the
115-volt power supply
in its
compartment. A power
in
some
which provide
that
a serviceable fire
mounting
that
that
the
several hours
to
see
to
tank.
stop
motor
home
any
sure all cabinets have
the
doors
sure all
the
driver's seat
then
fuel tank(s) and give special
of
home
in
the
bracket.
all items you plan
accessories, such
type
approved
to
check
you
plan
which may be required.
tank,
if
refrigerator a day ahead
your
trip. The refrigerator will stay cold
after
being
Be
sure
to
relight it when
that
drain line cap and holding
a few gallons
(See Plumbing Section).
lights, running lights,
contents
loose objects. which
holding liquids, for
latched.
exterior
adjust
the
fuel
is
designed
Chassis
that
you use fuel from
of
in
contents
door.
doors are closed
to
the
the
side view mirrors
,
tank
switch-over valve (if
tank
to
use only
Operator's
camping areas.
proper
required.
the
electrical ground.
extinguisher
to
take
as a sewer
for
125 psi) are
ahead
to
stop
for
(Refer
of
turned
water
in
"travel"
could
(place I ids
example),
contents
most
comfortable
is
installed).
the
Manual. I
your
turn
condition.
attention
the
with
off, while
parked
and
fuel recom-
cord
is
properly
supply
are on board.
any
time,
signals, back-up
shift
secured
auxiliary
cord
Be
sure
is
secured
hose with
on
specific
special
to
Plumbing
so
it will
at
your
tank
knife
tank
body
waste
while
on
all
then
locked.
for
maxto
the
Your
tis
.
adapter
to
the
as
board.
tank
use
in
MIRRORS
1 2 3 4 5
6
7
8
.9
10
11
22
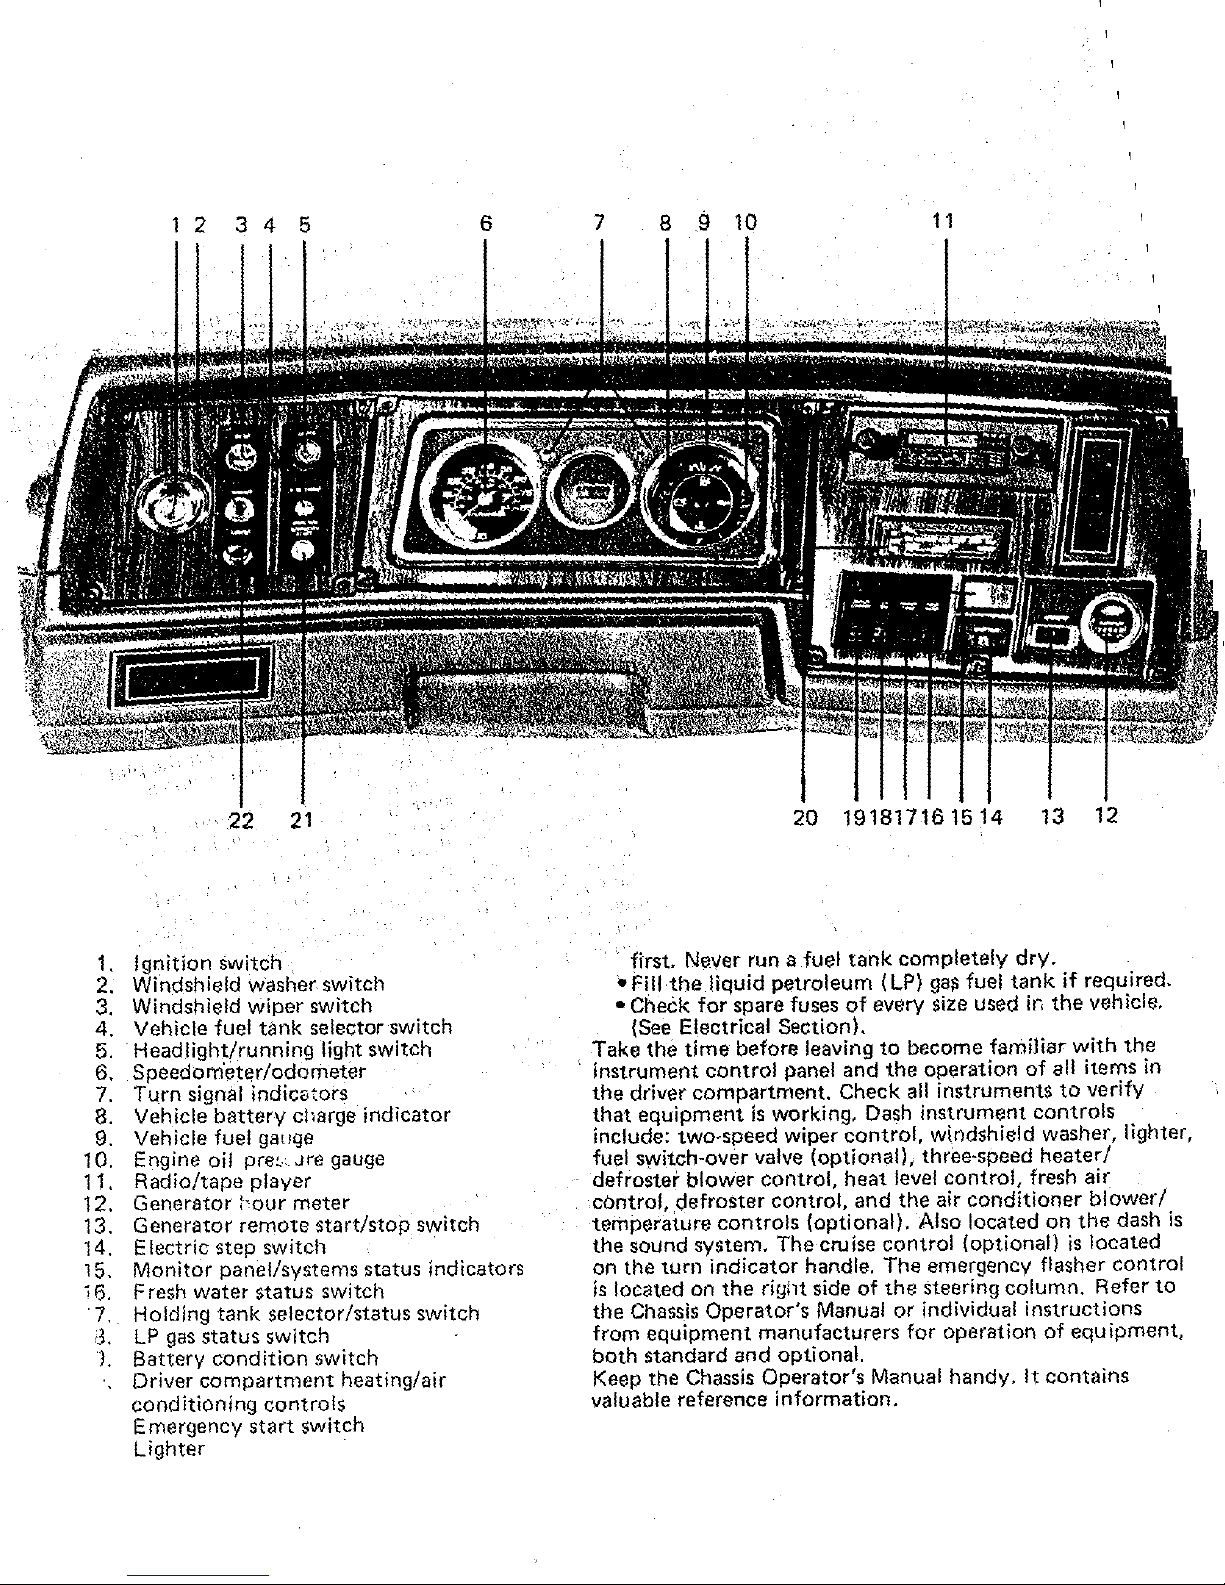
1.
Ignition
2.
Windshield Washer switch
3.
Windshield
4. Vehicle fuel
5.
Headlight/running light switch
6. Speedom'eter/odometer
7.
Turn
8. Vehicle
9. Vehicle fuel
10. Engine
switch.
signal indicB:ors
battery
oil
21
wiper
pre~·.Jre
switch
tank selector switch
cl1arge
gauge
Indicator
gauge
11. Radio/tape player
12. Generator
:'our
meter
13. Generator remote start/stop switch
14. Electric step switch
15.
Monitor
;
6. F rash
.. Holding tank selector/status switch
. 7
J.
LP
1.
Battery
Driver
conditioning
Emergency start switch
Lighter
panel/systems status indicators
water status switch
gas
status switch
condition
compartment
switch
heating/air
controls
20
1918171615
first. Never run a fuel
•
Fill
the
liquid
• Check
(See
. Take the
Instrument
.
the driver compartment. Check
that
equipment
include: two·speed wiper
fuel sWitch-over valve (optional), three-speed heater!
defroster
control, defroster control, and the air
temperature
the sound system. The cruise
on the
is
located
the
Chassis
from
both standard and optional.
Keep the
valuable reference
for
Electrical Section).
time
control
blower
turn
indicator
on
Operator's Manual
equipment manufacturers
Chassis
petroleum (LP)
spare fuses
before leaving
panel and the operation
Is
working.
contrOl, heat level
controls
the
right
Operator's Manual handy.
information.
tank
completely
ga~
fuel
of
every
size
used
to
become
all instruments
Dash
instrument
control,
(optional). Also located on
handle. The emergency flasher
side
of
wlndshield washer, lighter,
control,
conditioner
control
the
or
(optional)
steering column. Refer
individual instructions
for
operation
13 12
4
dry.
tank
il'<
the vehicle.
familiar
of
all items in
controls
fresh
of
It
contains
if
to
is
equ ipment,
required.
with
the
verify
air
blowerl
the
dash
located
control
is
to
4
CAUTION
EXCEEDING THE GAWR
YOl'q
DES,AABLE
ISTICS
HAZARD.
VEHICLE
SPECIFIED
CARRY
VEHICLES
MAY
MOTOR HOME CAN CAUSE UN-
HANDLING
AND
MAY
CREATE A
MODIFICATION
BY
ADDITION
BY
THE
MANUFACTUREI1
ADDITIONAL
IS
NOT
RECOMMENDED
VOID
YOUR
WARRANTY.
....
OR
GVWR OF
CHARACTER-
SAFETY
OF YOUR
OF RACKS
EQUIPMENT
NOT
OR
AND
TO
VEHICLE
Your
the
Gross
LOAD
motor
home
CAPACITY
is
designed
Axie Weight Rating (GAWR)
WEIGHING
to
carry the loads defined by
and
Gross Vehicle
Weight Rating (GVWR) shown on the certification tag posted
on
or
are
for
belongi
nearthe
fully-loaded vehicles including
ngs.
.
Periodically weigh the fully-loaded
scale
to determine axle loads. The following procedure
.
suggested,
left
edge
although any
of
the instrument panel.
passengers
motor
method
recommended
These
and normal
home at a public
by
operator which correctly determines weight values
ceptable. During all measurements,it
be
kept
as
level
as
front
possible.
wheels
vehicle
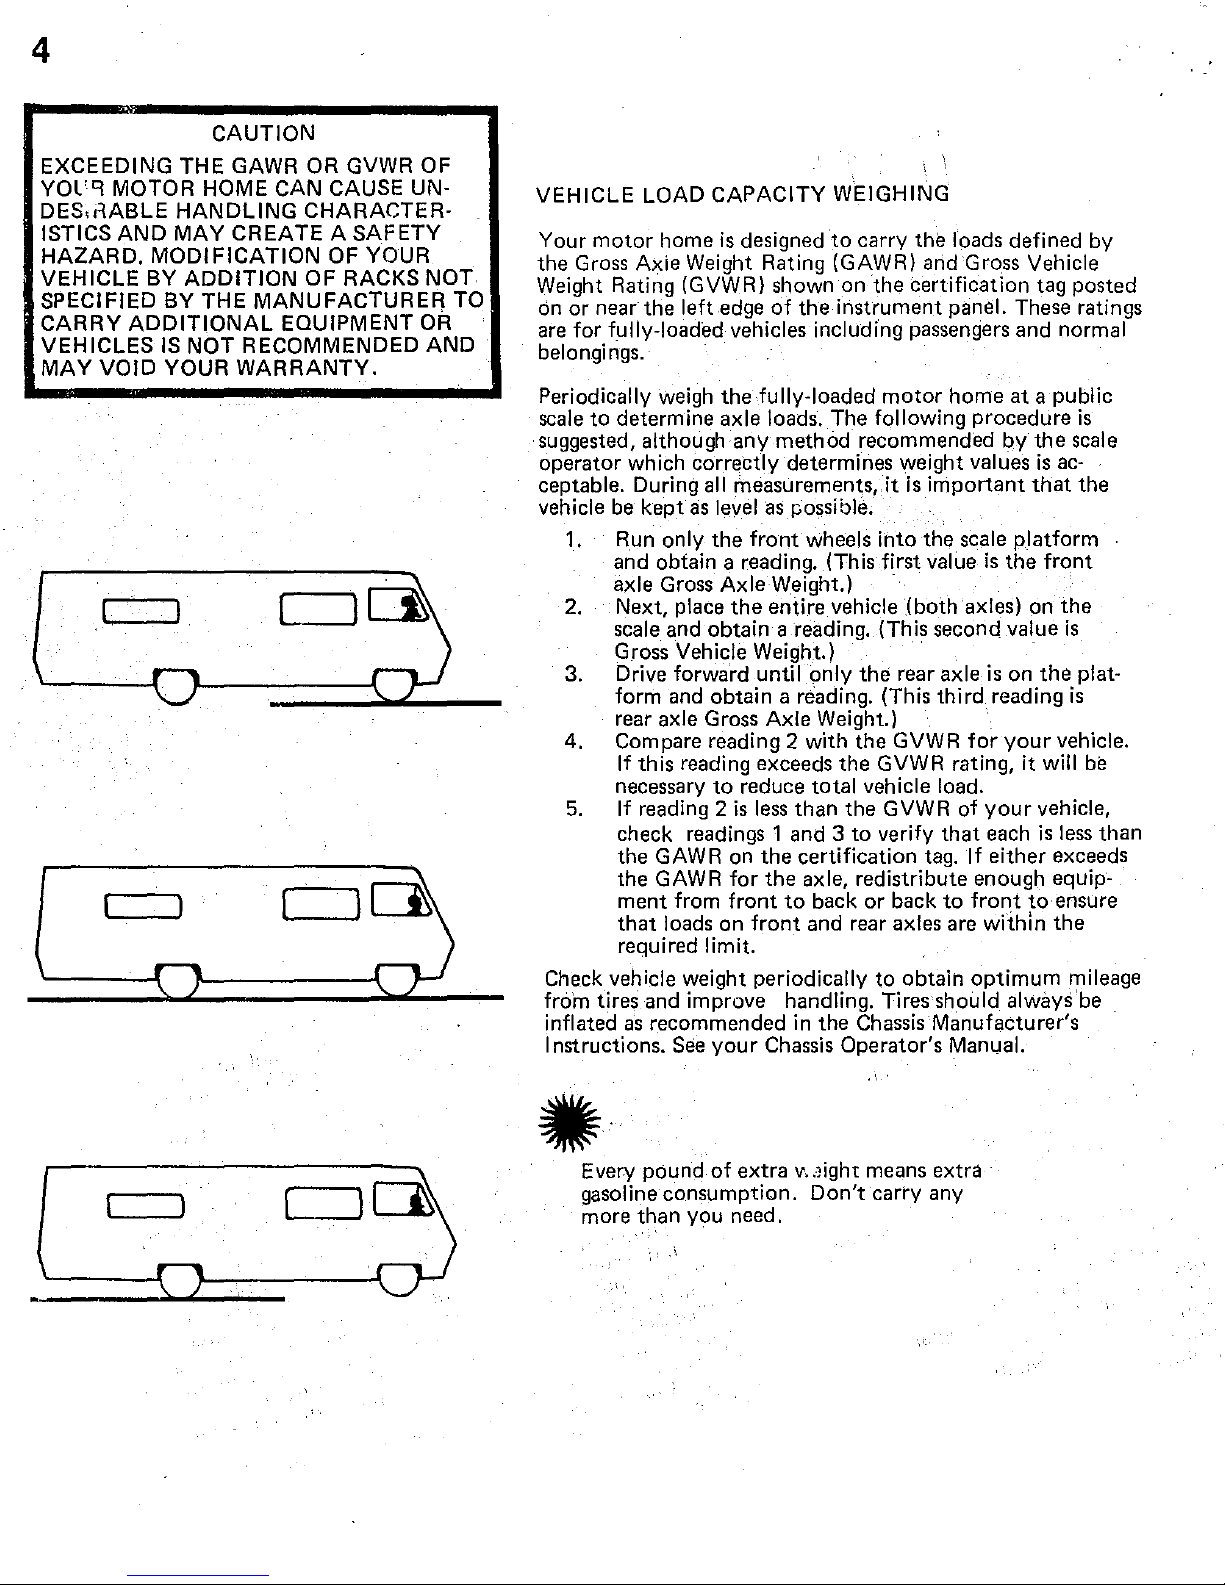
1.
Run only the
and obtain a reading. (This
axle
Gross
2.
Next, place the entire vehicle (both axles) on the
scale
Gross
3.
Drive forward
form
rear axle
4. Compare reading 2
If
this reading exceeds the GVWR rating,
necessary
5.
If
reading 2
check readings 1
the GAWR
the GAWR
ment from
that
required
AxleWeight.)
and
obtain a reading. (This second value
Vehicle Weight.) . .
until
only the rear axle
and
obtain a reading. (This
Gross
Axle
Weight.) .
with
to
reduce total vehicle load.
is
less
than the GVWR
and 3 to
on
the certification
for
the axle, redistribute enough equip-
front
to
back
loads on
front
and
limit.
Check vehicle weight periodically to obtain
from tires
inflated
I nstructions.
and
improve handling. Tires should always
as
recommended in the
See
your
Chassis
Operator's Manual.
is
important
into
the
first
value
.
third
the GVWR
verify
tag.
or
back
rear axles
Chassis·
Manufacturer's
scale
platform
is
the
is
on the plat-
reading
for
your
of
your
that
each
If
either exceeds
to
front
are
within
optimum
the
is
ac-
that
front
vehicle.
it
will
vehicle,
is
less
to
ensure
the
ratings
is
scale
the
is
is
be
than
'TIileage
be
.
of
Every pound
extra v .
gasoline consumption.
more than you need.
..Jight
Don't
means
extra
carry any
5
Avoid idling. When an engine idles it
•
getting zero miles
stand
for
more
efficient
it again.
to
turn
per
gallon.
than
one
minute, it's
the
engine off and restart
If
you
is
must
more
READY
The following suggestions may be helpful when
to
leave.
STARTING AND WARM·UP
For
best results, always follow
Chassis Operator's Manual when starting
engine.
NOTE:
SAFETY BELTS
Seat
For
fastened while
seat and
way have been
NOTE:
Safety
the
belt, tip
buckle
the
buckle until
belts, make sure
end
goes
loose
Be
sure transmission
is
engaged
the
parking brake
Operator's Manual for
belts are an
your
protection,
all
other
All
belts while
not
equipped
occupied while vehicle
labeled:
IS
IN
belts are adjusted in the following manner. To. lengthen
the
in
this position permits
of
one
belt into
in
all
the
way
end
of
the
to
important
it
your
motor
seats designed
equipped
riders
should
the
"NOT
MOTION".
buckle
the
desired length
the
belts are
the
and
belt
while holding
TO
the
is
keep the
neBds
safety
is
recommended
home
with lap belts.
be furnished with
vehicle
with safety belts
FOR USE WHILE THE VEHICLE
at
right angles
the
not
buckle
that
of
it latches. Tighten by pulling
LEAVE
recommendations
or
operating
in
P (park) and
motor
proper
is
to
is
is
home
adjustment,
adjustment
feature
in
carry passengers while
in
in
belt
is
twisted,
the
the
o·f
your
that
all
motion.
motion.
should
motion
to
the
belt.
to
slide
obtained.
then
mating belt.
buckle.
you
are ready
in
your
your
parking
from rolling.
see
the
vehicle.
belts be
The
and
Seats which are
not
and will be
Holdirg
through.
To
fasten
push
brake
If
Chassis
instructions.
driver's
under
use
seat
be
the
Pull
the
the
tongue
Be
sure
it
the
on
the
belt
as
low
on
the
Adjust
will allow, for greatest safety. Never use a
one
person
retractors, be sure
To
release
buckle and slide
at
a time. If
belt
the
belt, depress the
the
tongue
abdomen
your
belts have been
is
pulled
out
all
button
of
the
the
and
way
in
buckle.
as snug
belt
equipped
out
the
center
for
of
as
comfort
more
the
of
than
with
retractor.
the
6
•
Always abserve'the speed limit.
Remember
that
far
every 10 miles aver
50
miles per hour,
yau
cauld
be
w~sting
between 10% . 15%
mare
fuel.
Drive
at
an easy pace, avaiding jackrabbit
starts.
Try
to.
pace
yaur
driving
to.
avaid
red lights.
ON
THE
ROAD
DRIVING AND PARKING
Once
yau
became
accustamed
to.
the feel
af
the
cantrals
and
the
reference
paints
from
the
driver's seat,
yau
will
cind
driving
the
matar
hame
camparable
to.
driving
yaur
family car. Became
familiar with
the
pasitian
af
the
matar
hame
in
traffic,
and
be
cautiaus when maneuvering
to.
allaw
far
the
length
and
width
af
the
vehicle. Always allaw extra
raam
to.
carner
and
to.
change
lanes. Learn
to.
use
the
side mirrars
to.
view
the
road behind.
Check them
aften
as a reference
to.
keep a
gaad
road/lane
pasitian.
"
Drive with cansideratian
an
the
highway, abserving
all
speed and safety regulatians. The best cruising speed
far
yaur
matar
hame
will vary with road and
weather
canditians.
Re·
member
that
higher speeds may result
in
a sharp increase in fuel
cansumptian.
Driving
an
winding
ar
mauntain
raads
is
nat
difficult if
dane
with reasanable care. Observe
praper
vehi~le
speeds when
ascending
ar
descending hills
and
always
aperate
in
the
praper
transmissian range. Dawnshift
an
hills
to.
avaid averheating
ar
undue engine laads. Dawnsh ift when descending grades.
Engine braking
pawer
will help
cantral
vehicle speed, and
will relieve
same
af
the
strain on .the brakes.
Allaw
far
the
extra height
af
yaur
matar
hame
and
avaid areas
having
law
averhead c:learance. Check
far
laW-hanging
tree
branches
ar
ather
abstructians
whenever
yau
drive
or
park.
Avoid
law
roofs when pulling
in
far
service. This may be
particularly
important
if you drive with
the
averhead vents
open
ar
if
the
matar
hame
is
equipped with a
roof
air
conditioner, a roof rack or
CB
antenna.
When parking parallel, be sure
to
allow for poles
or
ob-
structions near
the
cu rb, as
the
front and rear
partions
of
the
motor
hame
swing wider than an
autamobile.
When park-
ing on an incline,
turn
the
frant
wheels into
the
curb
in
the
direction
af
the
toll
to.
aid the parking brake. Always
shift
the
transmissian
to.
PARK (Pl when parking.
MISCELLANEOUS SAFETY TIPS
•
When backing
the
motar
hame, have a persan
stand
to
the rear
on
the driver's side, if possible,
to
guide
yau.
• Befare departing
an
a trip, check
yaur
routes. Remember,
some tunnels prohibit
motarhomes
with
LP
gas
systems.
• While traveling, make sure
all
occupants use
their
seatbelts.
• While traveling, make sure
all
doors are closed
and
that
cabinets, drawers, and loose objects are secure.
• Instruct
yaur
family on
what
to
do.
in case
af
fire,
and
hold fire drills periadically.
• Maintain
praper
charge
in
the
fire extinguisher.
• Gas and smoke detectors are available from
RV
equipment
dealers, and may be considered
as
safety accessories.
 Loading...