

Fleetguard AF25119 Installation Instructions Manual
AF25119 (Thermo King 11-9300)
Installation Instructions
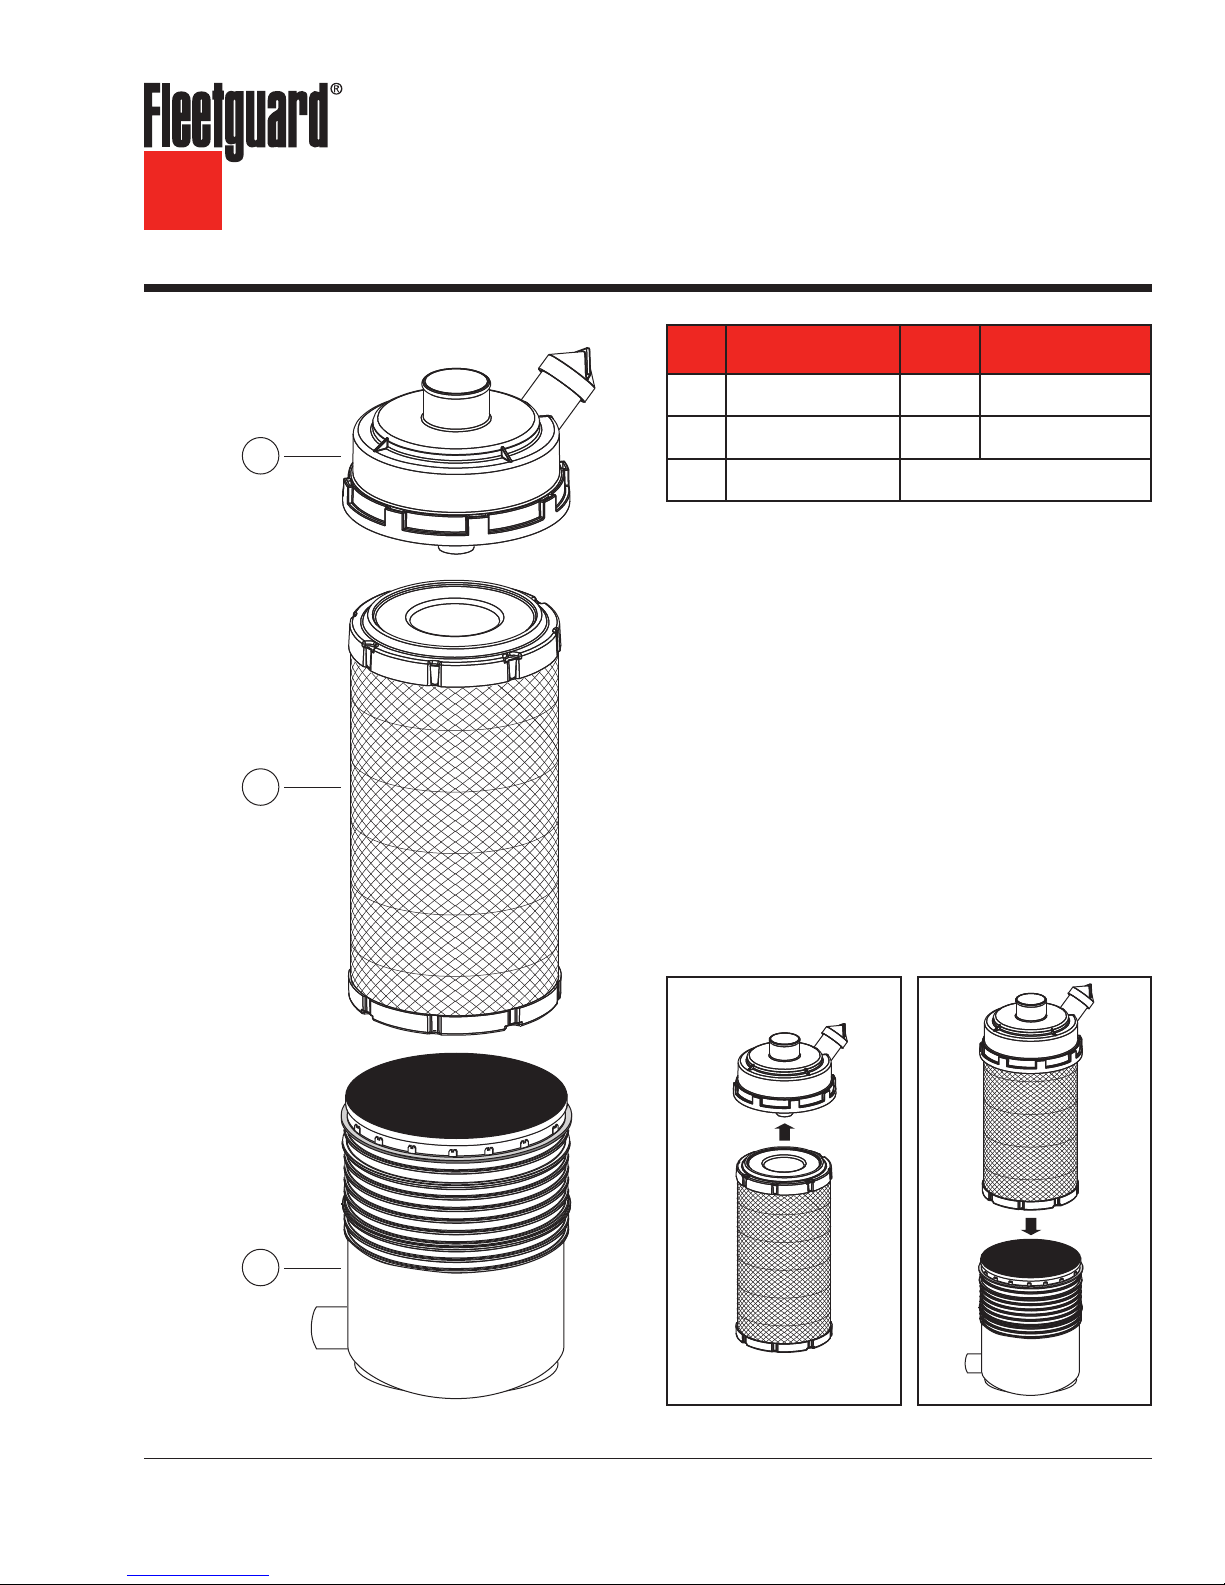
A
B
Part Description
A
Cover 1 Included with AF25119
B
Filter 1 AF25119
C
OEM Air Housing –
Number
Required
Part
Number
Installation
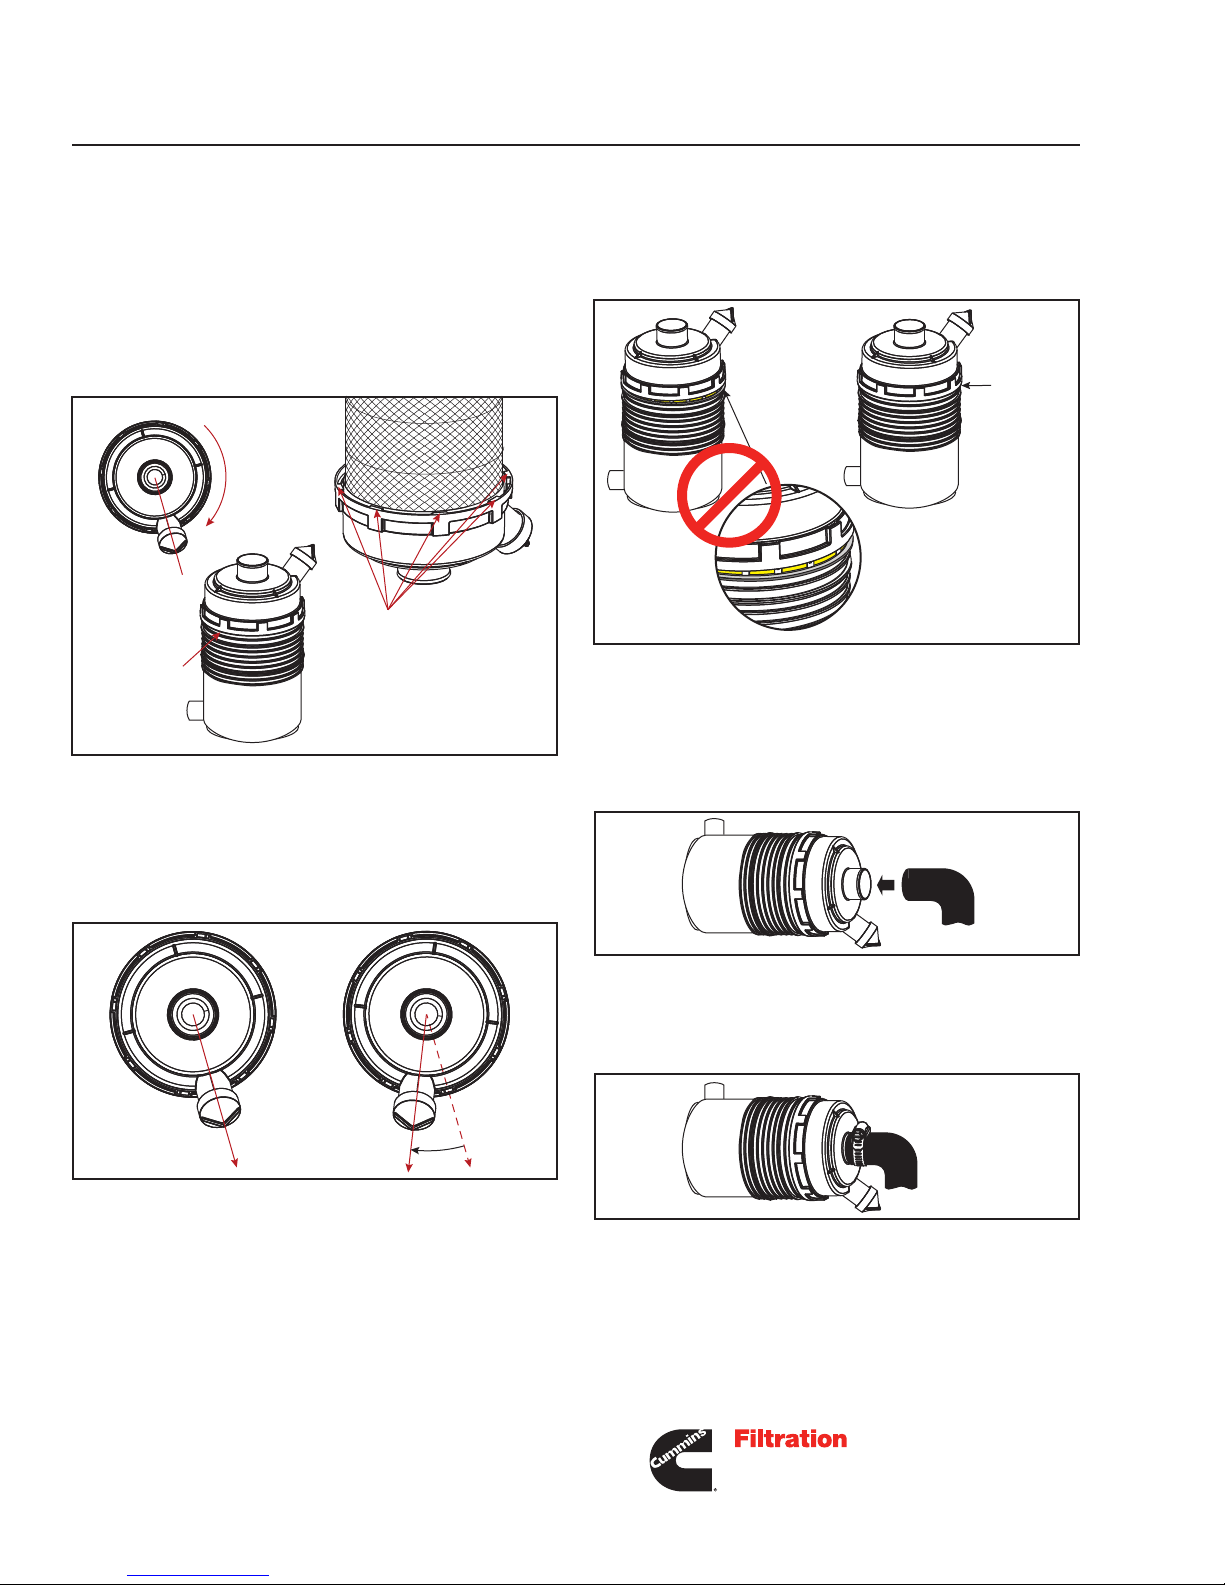
E CAUTION DO NOT tighten the clamp on the
clean-side outlet duct until the air
cleaner cover is securely attached
to the air cleaner housing. The
cover must be free to rotate
during installation.
To properly and securely attach the air cleaner cover
of the AF25119 filter to the air cleaner housing:
1. Ensure that the air filter element with the radial
seal is securely installed onto the air housing
cover. Bottom the filter into the cover.
2. Insert the new AF25119 filter assembly into the
air cleaner housing.
C
E CAUTION: These instructions are intended for use by professional mechanics who are trained in the proper
use of power and hand tools, using appropriate safety precautions (including eye protection).
Figure 1 - Assembling and Installing the Filter
page 2
3. Orient the dust ejector valve (“duckbill”) in
approximately the five o’clock or six o’clock
position so that the leading edge of the cover
squarely mates with the flange of the filter
housing. There should be no misalignment
of the cover that would keep the cover from
rotating and properly engaging all of the eight
locking tabs.
Five or
Six O’clock
Cover and
Housing
Properly
Aligned
(no gaps)
Cover Leading Edge and
5 of 8 Locking Tabs
Figure 2 - Proper Orientation
4. Rotate the filter housing cover approximately
22.5-degrees in the clock-wise direction. You
MUST feel or hear the cover and housing
locking tabs click or snap into place.
5. If the cover feels difficult to rotate, check to
ensure that the cover to housing mating interface
is properly aligned. There should be no gaps
between the two surfaces.
Cover and
Housing
Properly
Aligned
(no gaps)
Cover and
Housing
Misaligned
Figure 4 - Proper Alignment
6. Once the cover has been properly rotated into
place with the feel or audible snap of the locking
tabs, the clean air duct can be reattached to the
outlet duct of the new filter cover.
Clean Air Duct
Figure 3 - Cover and Housing Snap Into Place
22.5°
“Click”
Figure 5 - Reattach Air Duct
7. Tighten the hose clamp on the duct according to
the OEM recommendations.
Hose Clamp
Figure 6 - Tighten Hose Clamp
For more information, visit
cumminsfiltration.com
LT36467
©2015 Cummins Filtration Inc.
Printed in the U.S.A.
 Loading...