

Page 1
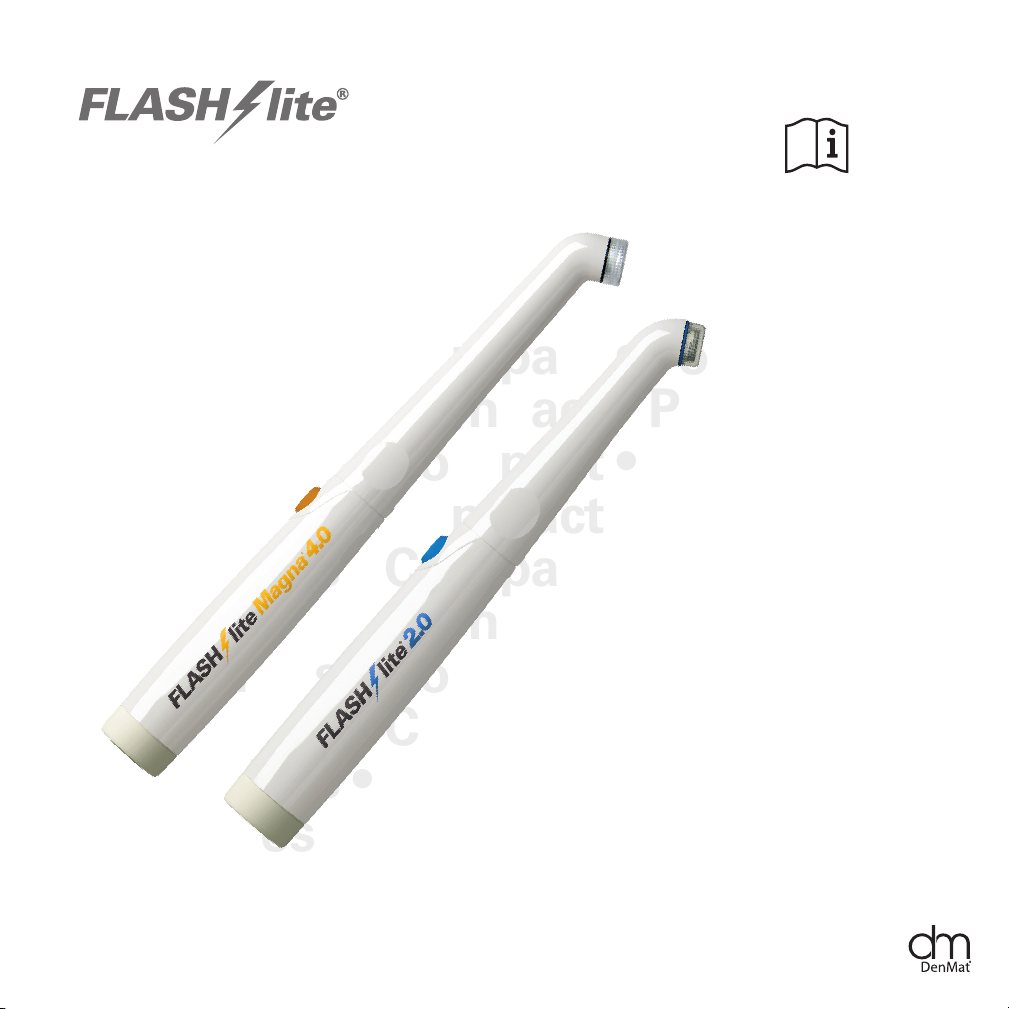
LED Dental Curing Lights
Instruction Manual
Cordless • Compact • Powerful
Cordless • Compact • Powerful
Cordless • Compact • Powerful
Cordless • Compact • Powerful
Cordless • Compact • Powerful
Cordless • Compact • Powerful
Cordless • Compact • Powerful
Cordless • Compact • Powerful
Cordless • Compact • Powerful
Cordless • Compact • Powerful
Page 2
LED Dental Curing Lights
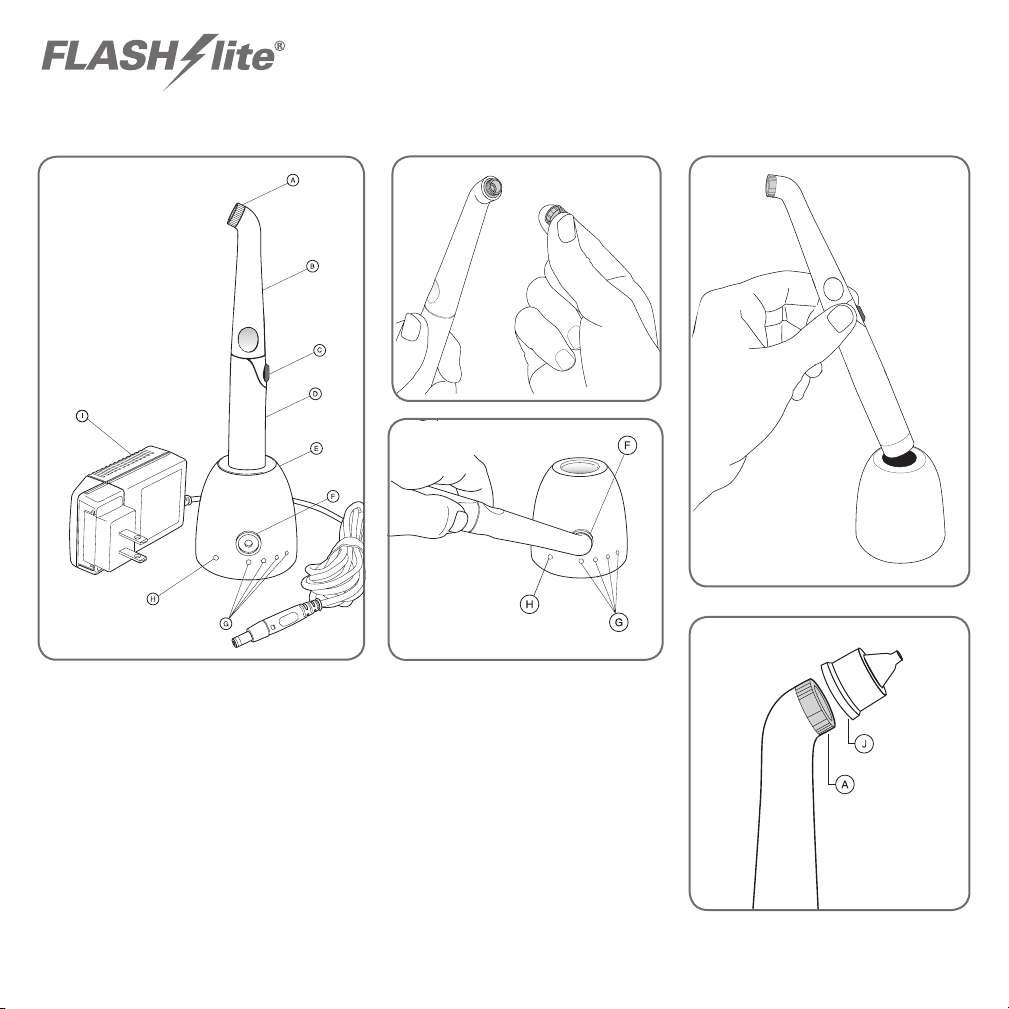
Figure 1 Figure 2 Figure 3
Figure 4
Figure 5
A. Lens Cap
B. Extension
C. On/Off Switch
D. Base Handle
E. Charger Base
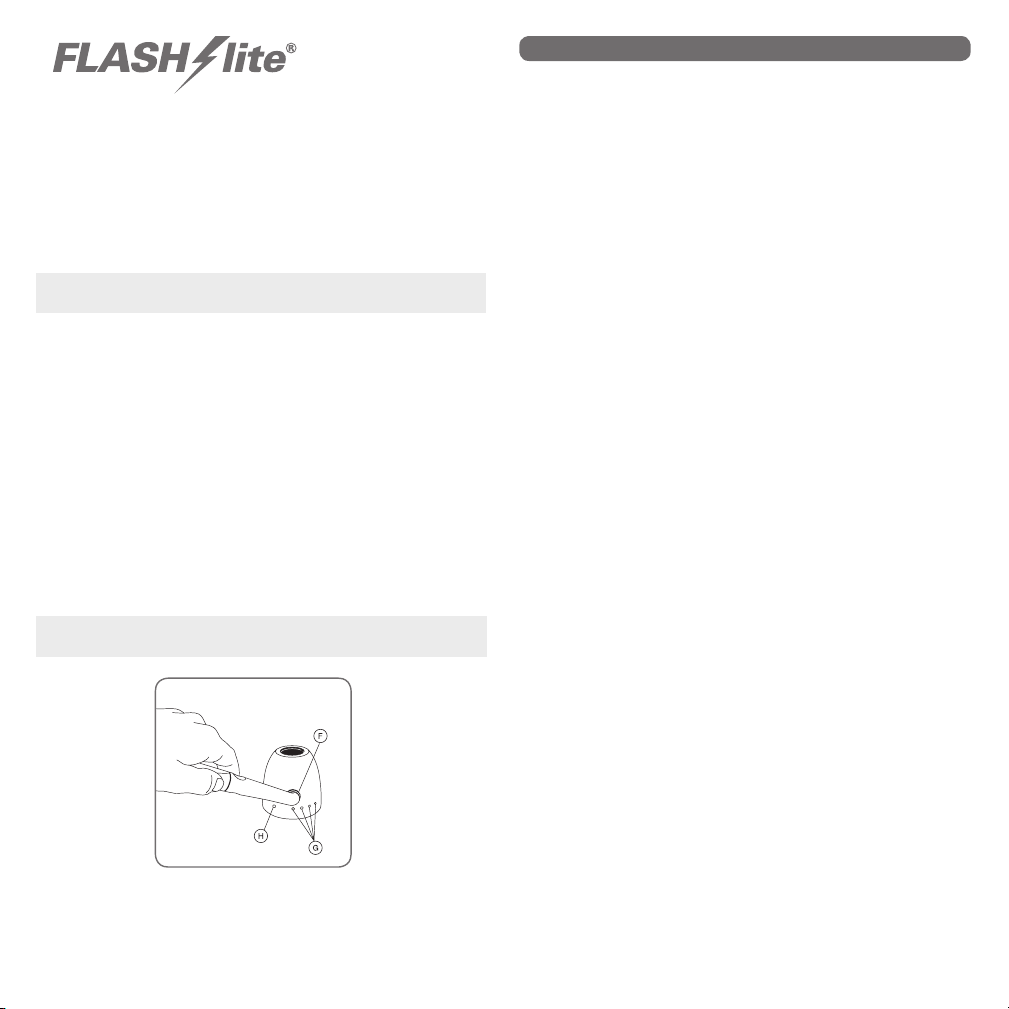
F. Radiometer Aperture
G. Output Intensity LEDs
H. Charger Status LED
I. AC/DC Wallplug Adapter
J. Tacking Tip
2
Page 3
Instruction Manual
Product Description
The Flashlite® LED Curing Lights are revolutionary LED
dental curing lights utilizing a light emitting diode (LED)
for the polymerization of composite materials that
contain the photo-initiator camphorquinone (CQ). The
Flashlite LED Curing Lights are powered by a
rechargeable lithium-ion battery pack that comes with a
charger and a 9V/2A wall plug adapter.
Contents* (See Illustrations on page 2)
• AC/DC Wall Plug Adapter
• Charger Base with Built-in Radiometer
• Flashlite LED Curing Light
• Three Replacement Lens Caps
• Instruction Manual
• Light Shield (included with Flashlite Magna 4.0)
• Tacking Tip (pack of 5)
* Additional Accessories Available
Note: International units include power adapters.
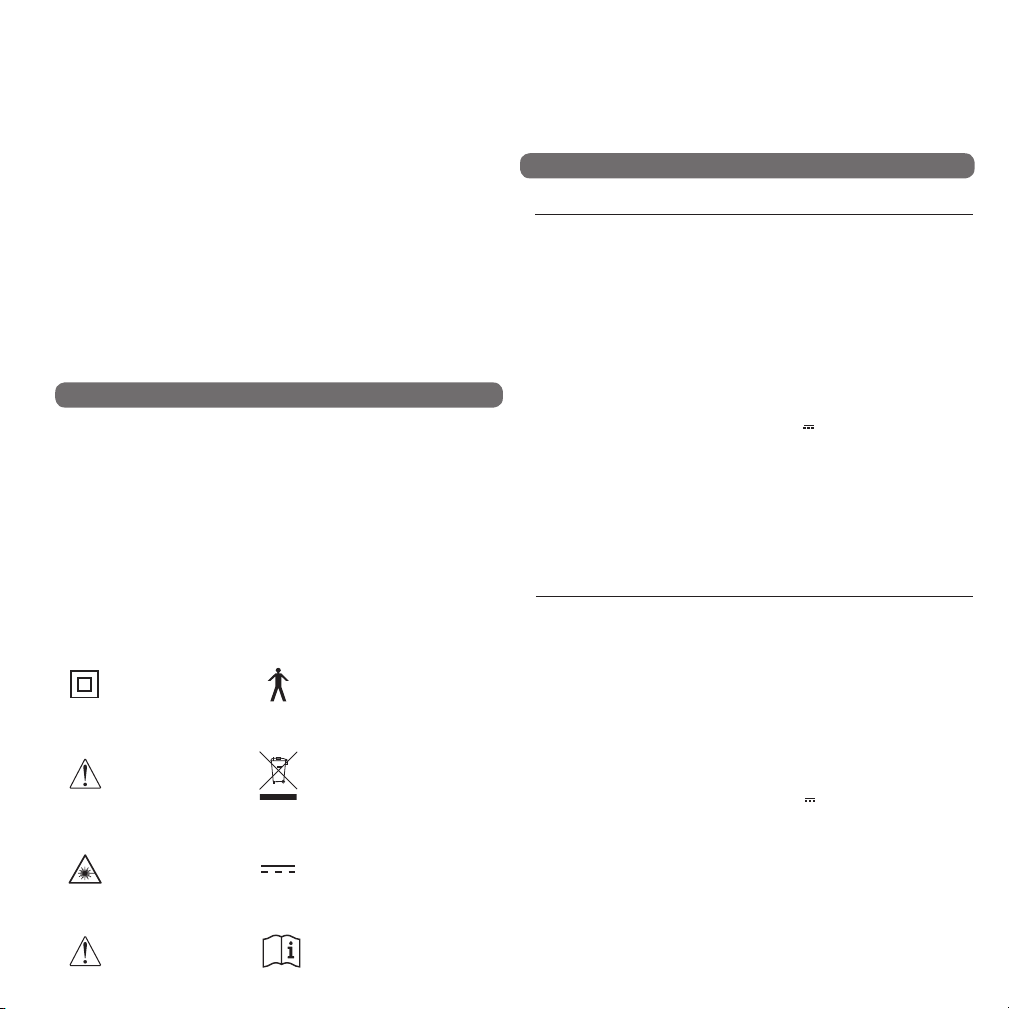
Type B Applied Part
Class II Equipment
Caution Consult
Accompanying
Documents
(The applied part is the extension
of the handpiece)
Recycle or Dispose of Properly
Technical Data
Flashlite Magna® 4.0
Battery: Lithium
Wavelength Range: 440-490 nm
Light Intensity: 1300 mW/cm
2
±200
Total Continuous Runtime with
Fully Charged Battery: 120 minutes
Dimensions: Diameter: .86 in / 22 mm
Length: 8.6 in / 219 mm
Weight: 4.3 oz / 121 g
AC/DC Wall Plug Adapter – Class II
Input Voltage: 100-240V ~ 50/60Hz 600mA
Output Voltage: 9V /2.0A max
Charger Base with Built-in Radiometer – Class II
Time to Charge Discharged Battery: Max 5 hours
Operating Temperature: 15˚C - 32˚C (59˚F - 90˚F
Operating Humidity: 10% - 93%
Flashlite® 2.0
Battery: Lithium
Wavelength Range: 460-480 nm
Light Intensity: 1100 mW/cm2 ±200
Total Continuous Runtime with
Fully Charged Battery: 210 minutes
Dimensions: Diameter: .86 in / 22 mm
Length: 7.8 in / 198 mm
Weight: 3.8 oz / 105 g
AC/DC Wall Plug Adapter – Class II
Input Voltage: 100-240V ~ 50/60Hz 600mA
Output Voltage: 9V /2.0A max
LED Light
Not for use in oxygen
rich environment
Direct Current
Users must read
Instruction Manual
Charger Base with Built-in Radiometer – Class II
Time to Charge Discharged Battery: Max 5 hours
Operating Temperature: 15˚C - 32˚C (59˚F - 90˚F)
Operating Humidity: 10% - 93%
3
Page 4
LED Dental Curing Lights
Warnings and Precautions
1. The Flashlite LED Curing Light must be used in strict
accordance with the following operating instructions. DenMat
accepts no liability for any damage resulting from the use of
this unit for any purpose.
2. Exposure must be restricted to the area of the oral cavity in
which clinical treatment is intended.
3. Do not touch the tip to the patient especially during and after
activation of the light. Do not point the light into the eyes.
4. Avoid having the Flashlite LED curing light in contact with
the patient.
5. The use of third party chargers and/or AC/DC wall plug
adapters may result in damage to the unit, may be hazardous
to users/patients and will void warranty. Use only supplied wall
plug adapter with the supplied charger for Flashlite LED curing
lights. Do not use wall plug adapter to power other devices.
6. Removing the wall plug adapter from the wall outlet is the
means of isolating this Flashlite LED Curing Light from the
supply means.
7. Do not allow cleaning agents to directly enter the unit as this
may cause premature failure. See Maintenance and Care.
8. Do not use on patients with a history of heat sensitivity or
photo biological conditions including urticarial solaris or
erythropoetic protoporphyria or are on photosentisizing
medications.
9. Suitable blue-filtering safety goggles must be worn by patient
and dentist during use.
10.Do not use any of these components/devices if damaged or
potentially damaged from impact.
11. Only a DenMat Authorized Representative can service the unit.
Please call DenMat with any questions. Phone numbers are on
the back of this manual.
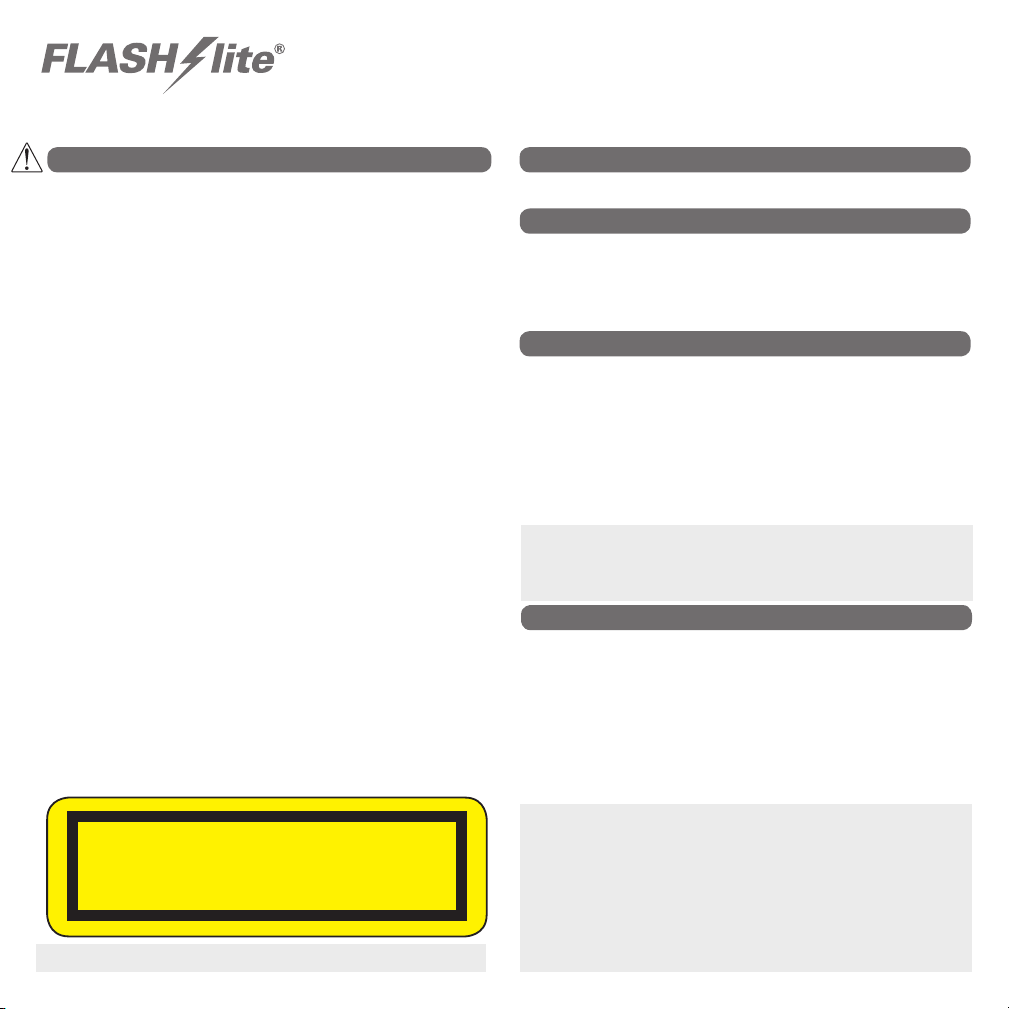
RISK GROUP 2
CAUTION: Possibly hazardous optical radiation emitted from this
product. Do not stare at operating lamp. May be harmful to the eyes.
WARNING: No modification of this equipment is allowed.
Classification
• Conforms to IEC 60601-1, IEC 60601-1-2, IEC 62471
FCC Statement
This device complies with part 15 of the FCC rules. Operation is
subject to the following two conditions: (1) this device may not cause
harmful interference, and (2) this device must accept any interference
received, including interference that may cause undesired operation.
Unpacking / Setup
1. Ensure all parts contained within package match the contents list.
2. Plug the AC/DC wall plug adapter into the mating connector on the
back of the charger base.
3. Plug the AC/DC wall plug adapter connector into an AC outlet.
4. Place the Flashlite LED Curing Light into the charger base. Allow
the Flashlite LED Curing Light to fully charge prior to first use.
Refer to Techical Data for charge times. Indicator will turn green
when unit is fully charged. Store light in charger when not in use.
NOTE: The AC/DC wall plug adapter provides power to the charger base. In
turn, the charger base provides power (at a lower voltage) to the Flashlite
LED Curing Light. These form a Medical Device System. The Flashlite Curing
Light device is used separately after fully charged.
Operation
The Flashlite LED Curing Light is supplied with the lens cap attached.
A button on the Flashlite LED Curing Light turns the light on and off.
Simply press the button once and release to activate or de-activate
the light. A clean barrier sleeve must be used for each new patient
use. Aim the beam at the area of the oral cavity in which clinical
treatment is intended and activate the light. Deactivate the light right
after treatment. Do not touch the tip to the patient especially during
and after activation of the light.
WARNING: The curing intensity of the FLASHlite LED Curing Light can
result in a buildup of heat around the tip of the device. In worst case
conditions (which included 32°C ambient conditions), tip temperatures
of 61°C (142°F) have been measured. Do not use on patients who
cannot give immediate and clear feedback to the clinician in the event
any elevated temperatures are causing pain. Use extreme caution if
using on patients with increased oral heat sensitivity or with conditions
or medications which might cause increased oral heat sensitivity. This
device is for professional use only.
4
Page 5

Instruction Manual
Duty Cycle
Flashlite Magna 4.0 – Intermittent use of 10-20 second curing times
with twice the cooling time.
Flashlite 2.0 – Intermittent use of 10-20 second curing times with
twice the cooling time, or continuous for maximum of 2 minutes
curing with twice the cooling time.
The Flashlite LED Curing Light produces several audible signals
including:
• Flashlite Magna 4.0 Timing Beeps
Audible beeps will occur every five seconds during operation. After
20 seconds a long beep will sound and the light will automatically
shut off.
• Flashlite Magna 4.0 Audible Indicators
10 slow beeps — low battery warning
25 fast beeps — overheat alarm
• Flashlite 2.0 Timing Beeps
Audible beeps will occur every 10 seconds during operation: 1 beep
indicates 10 seconds, 2 beeps indicates 20 seconds, etc. The system
counts up to 6 beeps indicating 60 seconds and then repeats
starting with 1 beep. Unit will only shut off after manual press of
power button.
• Flashlite 2.0 Audible Indicators
10 slow beeps — low battery warning
25 fast beeps — overheat alarm.
WARNING: Rated for non-continuous operation
Lens Cap (See Fig. 2)
The lens cap should be inspected prior to each use for blemishes,
scratches, cracks or foreign substances that may impair the optical
output of the Flashlite LED Curing Light. It is recommended that the lens
cap be replaced every 2-4 weeks.
Barrier Sleeve
To provide optimum protection, a clean plastic barrier sleeve should be
used for each new patient.
Light Shield
To help block reflected light, the light shield can be attached to the
Flashlite LED Curing Light by assembling the shield over the tip and
sliding into place.
Tacking Tip (See Fig. 5)
Use a tacking tip to direct the light to cure only a small amount of
product (approximately 2mm radius). Align the wide end of the Tacking
Tip with the Lens Cap and use moderate pressure to push into place.
To avoid the possibility of the Tacking Tip falling off during use, make
certain that it is tightly and properly attached on the lens cap.
Note: The Tacking Tip is disposable and should be replaced after every use.
Cure Times
Due to the variation in VLC (visible light cured) materials, curing times
will differ. Review manufacturer product instructions for recommended
curing times. ALWAYS bench test new materials before use in vivo.
Curing Test Rings
DenMat recommends the following steps when using the enclosed
curing test rings for this purpose:
a. Fill the 2mm deep well of the test ring and level material.
b. Position the light transmitting element perpendicular to and
approximately 2mm-5mm above the top surface of the ring.
• With Flashlite LED lights (all models) start with
10-second exposures.
• With Sapphire PAC lights (all models) start with
5-second exposures.
• For all other curing lights; halogen, LED and other refer to
the manufacturer instructions. A minimum of 10-30 seconds
is recommended.
c. Use a dental probe to scrape test the hardness of the top
and bottom surfaces. The bottom surface should be as hard
as the top surface.
d. If the bottom surface is not completely cured repeat steps (b) to (c).
Repeat until the bottom surface is completely cured.
e. Maintain a log including material, shade and associated curing
exposure time. Use the log to monitor system performance.
Note: If a cavity preparation is deep, curing exposure times must also
be increased due to beam divergence and angular placement of the
light transmitting element to the restoration. An incremental filling
technique is recommended and each increment should be fully cured
prior to applying additional layers.
5
Page 6
Maintenance and Care
LED Dental Curing Lights
Charger with Built in Radiometer
To charge, place the Flashlite LED Curing Light into the charger base
contact side down. (See Fig. 3) The light indicator (See Fig. 4) on the
charger base will provide you with the information needed:
• Amber Light – Unit is charging
• Green Light – Unit is fully charged
Note: Even if the light is indicating a charging status (amber light), the
Flashlite LED Curing Light can be used.
For optimal performance, place the Flashlite LED Curing Light back in
charger base when not in use.
Measuring Output Intensity
Light intensity can be measured using the radiometer built into the
charging base (See Fig. 4). To measure the intensity of the light being
emitted from the unit, place the lens tip directly onto the black
aperture located on the charger base. Activate the Flashlite LED
Curing Light by pressing the on/off button. The number of indicator
lights that illuminate will identify the output of the light:
• 4 lights: 100% of the light intensity available
• 3 lights: 80% of the light intensity available
• 2 lights: 60% of the light intensity available
• 1 light: 40% of the light intensity available
Note: If only 3 lights are illuminated, try tilting the Flashlite at a slight angle
to illuminate all 4 lights.
Figure 4
Keep the Flashlite LED Curing Light in charger when not in use.
Take care to keep charging contacts on the bottom of the device
and charger pins in the charger base clean and dry.
Recommended Disinfecting Agents:
• 70% Isopropyl Alcohol
• Mild Soap Solution
Avoid iodine based solutions.
Avoid wetting of internal parts.
Do not spray disinfecting solution directly onto the curing light.
Dampen a clean cloth and wipe down the unit per your disinfectant
product instructions. Be careful not to let solution soak into the
power button or inside the lens cap.
Use of barrier sleeve over the unit is a must. Clean and sanitize unit
prior to every use.
DISPOSAL: Device components are electronic and handpiece
has internal lithium-ion battery. Dispose or recycle device per local
or country laws. Please contact your local disposal contractor.
Note: This unit contains a lithium-ion battery. As a result please
be sure to not store the unit uncharged for an extended period
of time as this may cause the battery to discharge and reduce
the lifetime of the unit.
Transport and Storage
Ambient Temperature − 4ºF to 104ºF (−20ºC to 40ºC)
Relative Humidity 10% to 90% Non-condensing
Atmospheric Pressure .5 atm to 1.0 atm (500 hPa to 1060 hPa)
2-year Warranty
Den-Mat Holdings, LLC warranties your Flashlite LED Curing Light
against defects in material and workmanship for 24 months
from date of purchase with proper usage. During that 24-month
warranty period, DenMat will repair or replace a defective unit at
no cost to you.
Accurate light measurements are only possible with the charger of the
Flashlite LED Curing Light. Portable and/or handheld radiometers have
been shown to have variability in accuracy and precision in measuring
total spectral output.
6
Please contact your local DenMat Representative for any additional
questions, comments or product information.
Defects caused by misuse, neglect, accident, or abuse are
not covered by warranty. If the required repairs are not covered
by warranty, DenMat will contact you promptly with a price
quotation for the cost of repair(s) or replacement prior to
performing any services.
Page 7
Accessories and Replacement Parts
Flashlite Magna 4.0 LED Curing Light – CR1079
Part No. Description
Part No. Description
CR1024 Replacement Lens Caps (pack of 25)
CR1082 Replacement Lens Caps (pack of 25)
CR1063 Charger Base
CR1083
CR1074 AC/DC Wallplug Adapter
CR1074 AC/DC Wallplug Adapter
CR1075 Tacking Tips (pack of 5)
CR1075 Tacking Tips (pack of 5)
CR1077 Light Shield
CR1077 Light Shield
CR1078 Barrier Sleeves (pack of 500)
CR1078 Barrier Sleeves (pack of 500)
043952220 Curing Rings (100 pcs)
Flashlite Magna 2.0 LED Curing Light – CR1080
Part No. Description
Part No. Description
CR1024 Replacement Lens Caps (pack of 25)
CR1024 Replacement Lens Caps (pack of 25)
CR1063 Charger Base
CR1074 AC/DC Wallplug Adapter
CR1074 AC/DC Wallplug Adapter
CR1075 Tacking Tips (pack of 5)
CR1075 Tacking Tips (pack of 5)
CR1077 Light Shield
CR1077 Light Shield
CR1078 Barrier Sleeves (pack of 500)
CR1078 Barrier Sleeves (pack of 500)
043952220 Curing Rings (100 pcs)
Charger Base
Instruction Manual
Troubleshooting Guide
Problem Causes Solution
1. Continuous slow beeps Low battery Recharge battery. Light will turn off automatically when battery is low.
2. Continuous fast beeps Device too warm Place device in the charger. Allow device to cool.
3. No light, no beeps Device malfunction or very low battery Recharge batter y. Contact Customer Service.
4. No light, one beep Device in charger Device will not turn on when in charger. Remove the device from the charger to operate.
5. Lens cap cracked Damage due to dropping
6. Light is completely
charged (green indicator),
but beeps while in use
Damage due to cleaning material
over-exposure
Wear and tear
Handle bottom or charger pins
contaminated with debris
1. Carefully remove lens cap.
2. Replace with new lens cap.
1. Unplug the charger base.
2. Wipe pins in the base to remove debris. Do not allow any liquid to drip into the base.
3. Check bottom of handle for debris. Wipe with dry cloth to remove debris.
4. Plug in charger base and place hand held device into base.
Guidance and Manufacturer's Declaration - Electromagnetic Emissions
The Flashlite Magna 4.0 and 2.0 Curing Lights are intended for use in the electromagnetic environment specified below. The customer or the user
should assure that they are used in such an environment.
Emissions Compliance Electromagnetic Environment - Guidance
RF emissions CISPR 11
RF emissions CISPR 11
Power Line Harmonics
IFC/EN 61000-3-2
Power Line Harmonics
IFC/EN 61000-3-2
Group 1
Group A
Group A
Complies
The Curing Lights use RF energy only for their internal functions. Therefore, their RF emissions are very low and are not likely
to cause any interference in nearby electronic equipment.
The Curing Lights are suitable for use in all establishments other than domestic and may be used in domestic establishments
in those directly connected to the public low-voltage power supply network that supplies buildings used for domestic purposes,
provided the following warning is needed:
The Curing Lights are suitable for use in all establishments other than domestic and may be used in domestic establishments
in those directly connected to the public low-voltage power supply network that supplies buildings used for domestic purposes,
provided the following warning is needed:
Warning: This equipment/system is intended for use by healthcare professionals only. This equipment/system may cause radio
interference or may disrupt the operation of nearby equipment. It may be necessary to take mitigation measures, such as
re-orienting or relocating the Curing Light or shielding the location.
7
Page 8
LED Dental Curing Lights
Den-Mat Holdings, LLC
1017 W. Central Avenue
Lompoc, CA 93436 USA
800-433-6628
denmat.com
Instruction Manual
Symbols Glossary available at: denmat.com
MDSS GmbH
Schiffgraben 41
REP
4010489
Conforms to AAMI Std ES60601-1, IEC Stds 60601-1-6, 80601-2-60 & 62366.
Certified to CSA Std C22.2 NO. 60601-1-6.
©2019 Den-Mat Holdings, LLC. All rights reserved. 750192934 R:4 01/19CM
EC
30175 Hannover, Germany
Contact your DenMat Representative,
or local distributor for further information.
 Loading...