

Flash butrym LED Six Hole RGB, F7300236 User Manual

USER MANUAL / INSTRUKCJA OBSŁUGI
Introduction
Thank you for purchasing LED Six Hole RGB. For safety reasons and to ensure the trouble-free operation,
carefully read the instructions.
1 SAFETY INFORMATION
1. Installation should be done by qualified personnel in order to minimize the risk of accidental
electric shock
2. Disconnect the power supply before installation.
3. Before connecting the unit to the mains, make sure it is not damaged mechanically. If you
notice any signs of damage you should contact your dealer immediately. Do not connect the
device to the mains.
4. Do not use the device in high humidity conditions and at temperatures above 40° C
5. The device must be installed on stable structures
2 PRODUCT INFORMATION
2.1 Specification
Power consumption: 20W
Power supply voltage: 250V
Voltage frequency: 50/60Hz
Diode type: 3in1
Number of diodes: 1
Display: LED - 4 characters
Color: RGB
Dimming: Linear: 0 - 100%
Number of DMX channels: 7
DMX standard: DMX 512
Control interface: 4 buttons
Operating modes: Auto, DMX, Sound control, Master/Slave
AC IN: IEC - C14
AC OUT: IEC - C13
DMX IN: XLR - 3 pin
DMX OUT: XLR - 3 pin:
Housing made: ABS
Height [cm]: 21
Width [cm]: 21
Depth [cm]: 17,5
Weight [kg]: 1,8
Weight with packaging [kg]: 2,6
Set includes: power cable, Mounting bracket
3 INSTALLATION
After removing the packaging, check if the device was not damaged during transport. Before connecting to
the mains, make sure that the device is securely mounted. The manufacturer is not responsible for damage
caused by unstable mounting.
LED Six Hole RGB F7300236
www.flash-butrym.pl
1
Ensure proper connection to the mains and proper grounding. Make sure that the electrical parameters are
consistent with device requirements. All activities, including connecting the device to the mains must be
performed by qualified personnel.
4 CONNECTIONS
The device is equipped with the following interfaces:
1. DMX (in/out): XLR 3-pin socket
2. Power (in/out): IEC-C14/IEC-C13
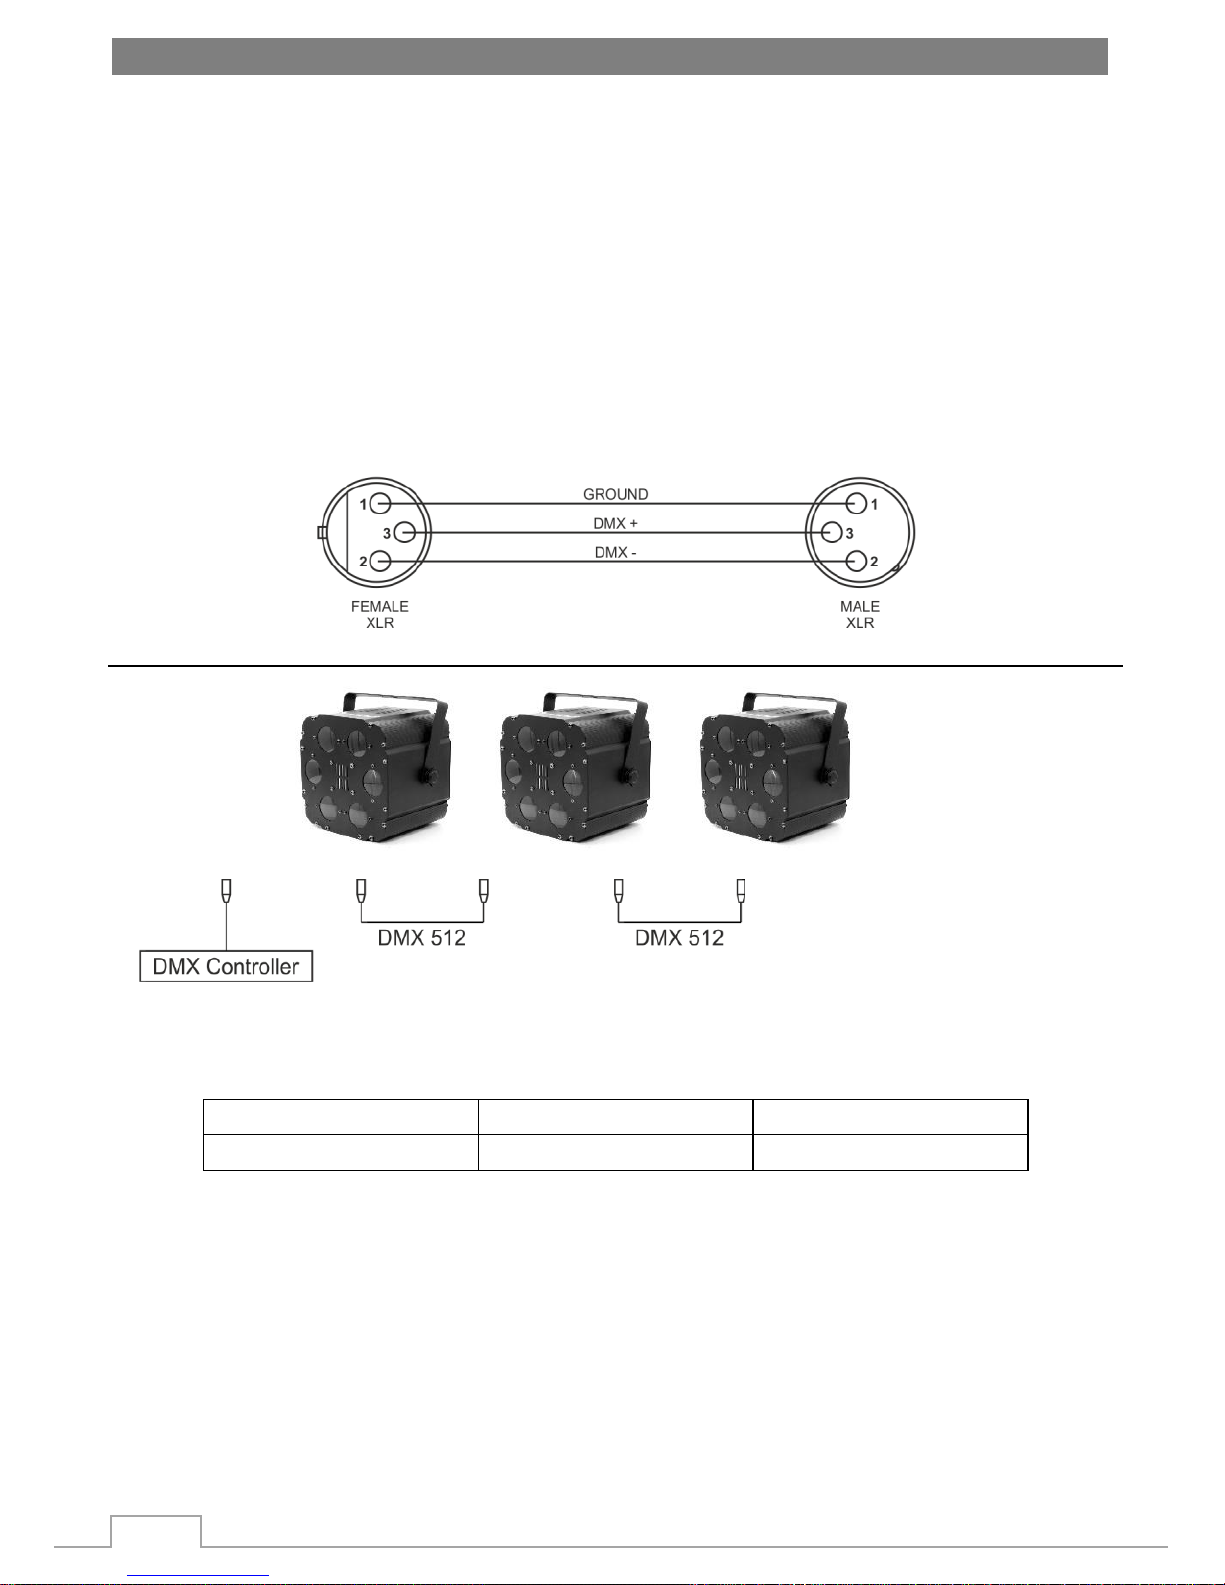
4.1 Connecting DMX signal
The connection is performed using cable with XLR-female -> XLR-Male plugs.
4.2 Voltage specification
Input Voltage
Total Power
Frequency
250V
20W
50/60Hz
4.3 Connecting power supply
The connection is performed using power cable with IEC-C14 connector (included).
The device must be operated by qualified personnel. Make sure that the power grid supply parameters are
consistent with device parameters and limitations are not exceeded.
 Loading...