

Flarion FPC 1070 Quick Start Manual

Flarion Wireless Broadband PC Card
Quick Start Guide
General Warning-
The Flarion Mobility Manager software needs to be installed on your PC
before
inserting the Flarion Wireless Broadband PC card into your PCMCIA slot.
Package Contents
•
Flarion Wireless Broadband PC Card
•
Antenna
•
Extended Range Antenna Cable Kit
•
Installation CD-ROM
•
This Quick Start Guide
Requirements
Operating Systems
- Windows
®
98SE, 2000, XP
Hardware Requirements
- Card Slot: Type II PCMCIA
- RAM: 128 MB
- Hard Disk Space: 10 MB
- Disk Drive: CD-ROM
- I/O Resources: 1 IRQ, 256 bytes I/O space
- Suggested processor speed: 600Mhz
CAUTION - INSTALL THE SOFTWARE BEFORE INSERTING THE FLARION WIRELESS
BROADBAND PC CARD.
FPC 1070
QS 46-0454-001
© 200
5
Flarion Technologies, Inc. Flarion
®
, FLASH-OFDM®, and Vector-LDPC® are trademarks of Flarion Technologies, Inc. All other
trademarks contained herein are the property of their respective owners.
QS-46-0454-001.qxd 6/3/05 12:54 PM Page 1
Step 1 - Install the Flarion Mobility Manager software onto your notebook PC
1. Close all Windows programs that are running.
2. Insert the Flarion Mobility Manager installation CD-ROM into the CD-ROM drive.
•
If the CD starts automatically, click “Install Software” on the CD launcher menu and then select
the option for your operating system to launch the Flarion Mobility Manager Setup.
•
If the Mobility Manager Setup dialog box does not appear (it may be hidden behind the CD
launcher menu), press the Esc key; it should be now visible.
•
If the CD-ROM does not start automatically, click “Start”, then “Run”; type D:\install.exe (where
D is the drive letter of the CD-ROM Drive) or click “Browse” and select the install.exe file from
the CD-ROM. Click “OK”.
3. Follow all on-screen directions, and click “Next” after each step.
Note: At the software license agreement step, click “Next” if you wish to accept the agreement and
“Cancel” if you wish to reject it.
4. Click “Finish” to complete the software installation. The software is now installed.
Note: If the CD launcher menu is still visible, click “Main Menu” and then“Exit Browser.”
If prompted, restart your PC.
5. You can now take the Flarion Mobility Manager installation CD-ROM out of your CD-ROM drive.
Step 2 - Insert the Flarion Wireless Broadband PC card to load the driver
After successfully installing the software, insert the Flarion Wireless Broadband PC card, graphic label
facing up, into an available Type II PCMCIA slot on your notebook PC (note: a blue light
will appear on the side of the card when inserted correctly). The “Found New Hardware"
message appears as Windows attempts to install the appropriate drivers. Note: you may need to have
your original Windows operating system CD-ROM on hand if you utilize Windows 98 SE applications.
•
For Windows 98 SE
It is recommended that Windows 98 SE users check with Microsoft to upgrade to the latest Service Packs.
When the "Welcome to the Found New Hardware Setup" appears, if prompted, insert your
original Windows operating system CD-ROM into the CD-ROM drive. Select the option to
install the software automatically (recommended) or to install from a specific location
(advanced). Then click “Next.” From the “Completing the Found New Hardware Setup” page,
click “Finish.” If prompted, restart your PC.
•
For Windows 2000/Windows XP users
When the certification message appears (titled “Hardware Installation” in XP or “Digital
Signature Not Found” in 2000), click “Continue Anyway” or “Yes”. At the “Completing the
Found New Hardware Wizard” page, click “Finish.” If prompted, restart your PC.
Step 3 – Attach the Antenna (standard and extended)
Standard Antenna set–up
1. Attach the antenna into the circular connector at the exposed
end of the installed Flarion Wireless Broadband PC Card. PRESS
FIRMLY (YOU SHOULD HEAR A CLICK WHEN INSERTED
CORRECTLY).
2. Keep the antenna pointed up to ensure optimum performance.
*UDSKLFODEHOIDFLQJXS
Extended Range Antenna Kit set-up
Step 4 –
1. The card light blinks until connected to the network.
2. The Flarion Wireless Broadband PC Card icon appears on your screen’s system tray.
3. The Flarion Mobility Manager is launched (unless auto-launch has been disabled).
4. When the Flarion Mobility Manager shows “Connected,” you have Flarion Wireless Broadband
access.
5. A new browser window opens to the
Disconnecting the Session/Removing the Flarion Wireless Broadband PC Card
1. To exit the Mobility Manager program, click “Options”, and then “Exit.”
Note: this does not end your Flarion Wireless Broadband session.
2. To end your Flarion Wireless Broadband session, shut down your computer, or click the
“Options” tab on the Flarion Mobility Manager, and then click “Disable.” Disable is meant to
quickly end the session without the need to shut down the PC. This is especially useful while in
flight or inside hospitals. Note: to restart your session, boot up your computer (if powered off)
or click the wireless card icon on your desktop, then “Options” and “Enable”.
3. To remove your Flarion Wireless Broadband PC Card, select the Unplug or Eject Hardware icon
on your system tray, and then press the Ejector button at the side of the PCMCIA slot. Not doing
so can lock up or crash your PC.
Uninstalling the Software from the Notebook PC
To uninstall the Flarion Mobility Manager software, follow these steps:
1. Click the “My Computer” icon on your desktop.
2. Click the “Control Panel” icon in your “My Computer” folder
3. Click the “Add/Remove Programs” icon.
4. Scroll down to “Mobility Manager” and click it. Then click on “Change/Remove.” Follow
instructions. Click “Next” and then “Finish.” The software is now uninstalled.
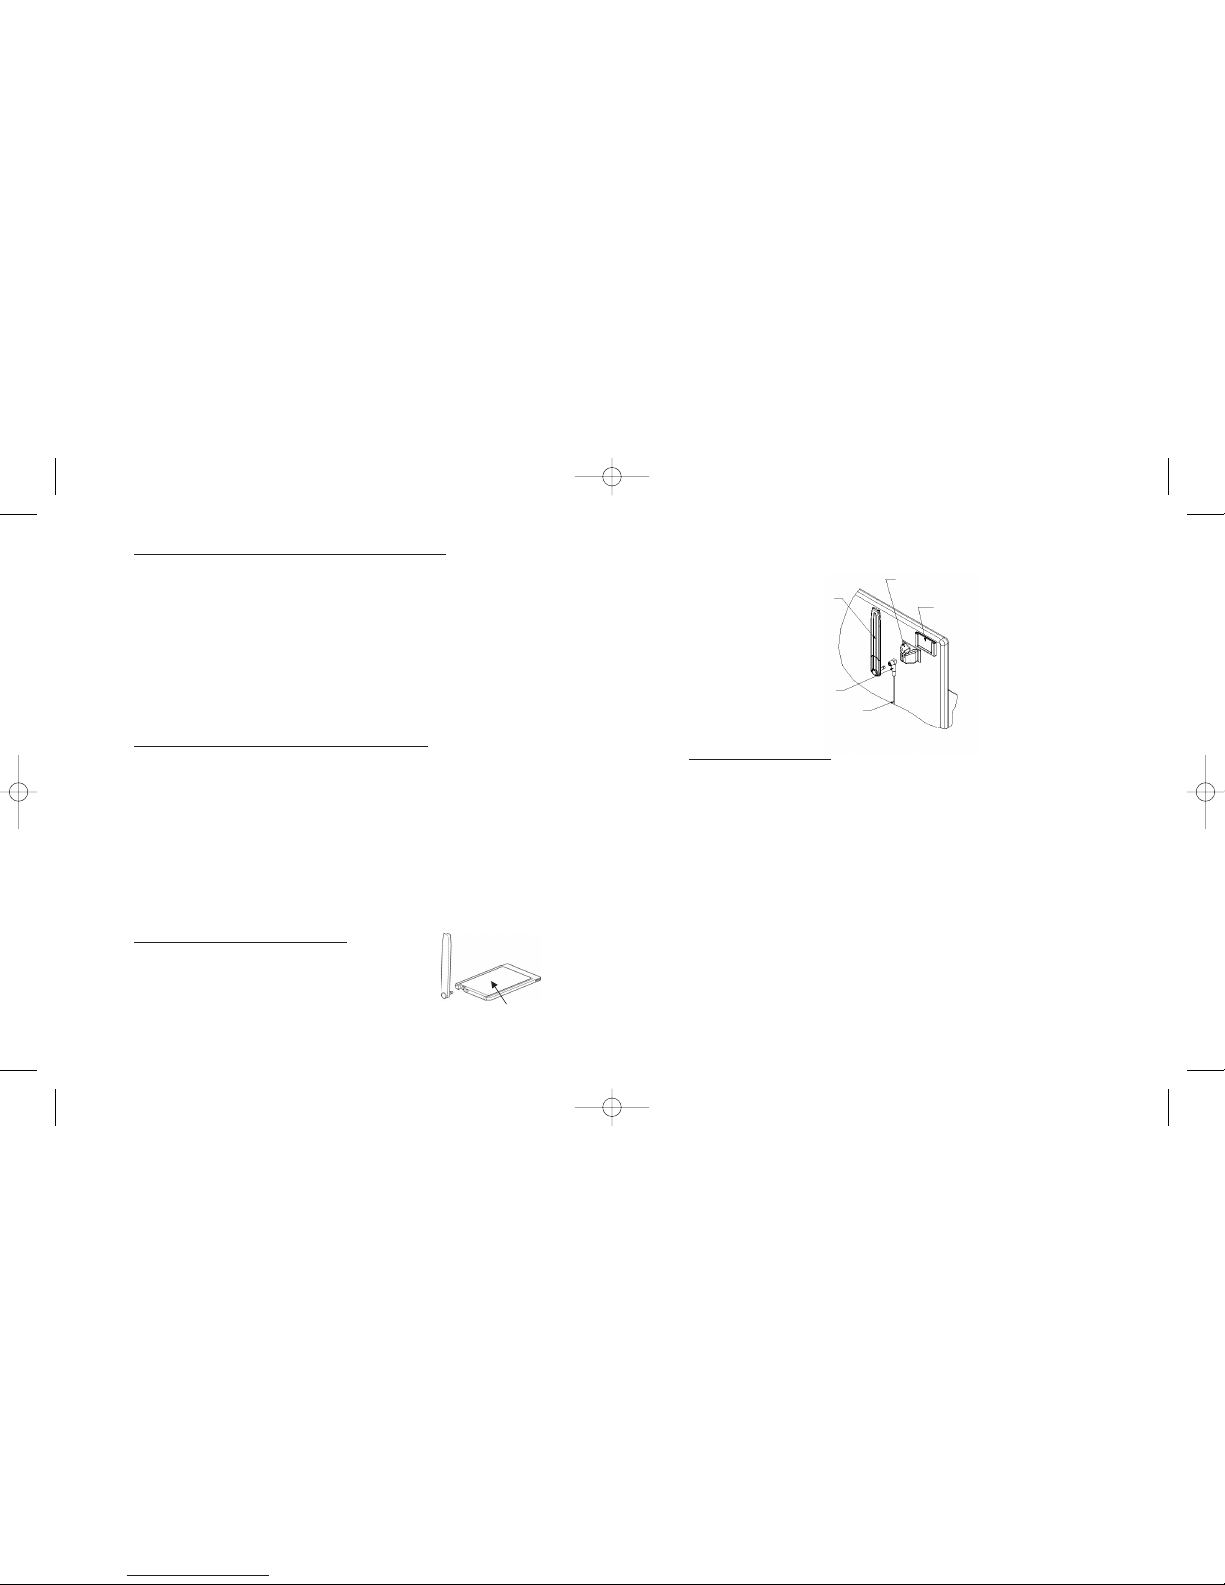
Extended Range Antenna Cable Assembly
1. Place the foam tape
bracket retainer on back of
the laptop screen. Ensure
that open edge is facing
upwards.
3. Slide the antenna bracket into
foam tape bracket retainer.
5. Connect other end of
cable into wireless network
card, which should be
inserted into PCMCIA slot.
2. Insert connector end of
cable into antenna bracket.
The connector should snap
into place.
4. Mount antenna into
antenna bracket.
Make sure antenna is
pointed up.
Flarion Technologies Home Page.
Connecting to the Network
QS-46-0454-001.qxd 6/3/05 12:54 PM Page 3
 Loading...