

Page 1

Table of contents:
FLANDER PRESENTER
USER MANUAL
Page 2

1. USING THE PRESENTER DEVICE..................................................................................... 3
1.1 Hardware Requirements ................................................................................................. 3
1.2 Getting Started................................................................................................................ 4
1.3 Using the Control Button................................................................................................. 4
1.4 Pairing............................................................................................................................. 5
1.5 Selecting the Composite video (TV output) mode........................................................... 5
1.6 Led indications................................................................................................................ 6
1.7 OBEX transfer................................................................................................................. 6
1.7 Powering off.................................................................................................................... 6
1.8 Removing the Battery cover............................................................................................ 6
1.9 Regulatory Notice ...........................................................................................................7
2. USING PRESENTER APPLICATION WITH S60 PHONES ................................................ 7
2.1 Hardware Requirements ................................................................................................. 7
2.2 Installation....................................................................................................................... 8
2.2.1 Installation using Nokia PC Suite .......................................................................................... 8
2.2.2 Installation using Bluetooth.................................................................................................... 8
2.2.3 Installation from the web site ................................................................................................. 9
2.3 Presenter application features ........................................................................................ 9
2.3.1 Connection to Presenter device ............................................................................................9
2.3.2 Showing presentations .......................................................................................................... 9
2.3.3 Screen capture .................................................................................................................... 10
2.3.4 Camera................................................................................................................................ 10
2.3.5 Saving presentations to Presenter ...................................................................................... 10
2.3.6 Delete presentations............................................................................................................ 10
2.3.7 Automatic run ...................................................................................................................... 10
2.3.8 Change start up picture ....................................................................................................... 11
2.3.9 Change BT name ................................................................................................................ 11
2.3.10 Device info......................................................................................................................... 11
2.3.11 About ................................................................................................................................. 11
3. USING THE PRESENTER WITH NOKIA 9500 COMMUNICATOR AND 9300
SMARTPHONE...................................................................................................................... 12
3.1 Hardware requirements ................................................................................................ 12
3.2 Software requirements.................................................................................................. 12
3.3 Installation..................................................................................................................... 12
3.3.1 Installation using Nokia PC Suite ........................................................................................ 12
3.3.2 Installation using Bluetooth.................................................................................................. 13
3.3.3 Installation from the web site ............................................................................................... 13
3.4 Showing the Presentation ............................................................................................. 14
3.5 Using the Screen Export ............................................................................................... 15
3.6 Using the PPT helper.................................................................................................... 15
4. USING THE PRESENTER WITH NOKIA E60, E61 AND E70........................................... 16
4.1 Hardware Requirements ............................................................................................... 16
4.2 Software Requirements ................................................................................................ 16
4.3 Installation..................................................................................................................... 16
4.3.1 Installation using Nokia PC Suite ........................................................................................ 16
4.3.2 Installation using Bluetooth.................................................................................................. 17
4.3.3 Installation from the web site ............................................................................................... 17
4.4 Showing Presentation ................................................................................................... 17
4.5 Using the Screen Export ............................................................................................... 19
Page 3

1. USING THE PRESENTER DEVICE
1.1 Hardware Requirements
Page 4

- Presenter Device
- Power charger
- External display with VGA or composite video connection (The VGA output uses 800x600 SVGA mode with 75 Hz vertical refresh
frequency. The Composite video can be configured as PAL or NTSC).
1.2 Getting Started
1. Switch on the data projector or display unit. Connect the Presenter device to it using a VGA or RCA connector cable.
2. Plug in the Presenter power supply (or make sure that there is enough power in the battery).
3. To power on the device, long press the Control button.
4. The device powers on with showing the boot up image on external display and after completed booting the start up image is
displayed.
1.3 Using the Control Button
1. The Power status bar is revealed when pressing the Control button less than 2 seconds. The Power status bar indicates the power
level of the battery.
Page 5
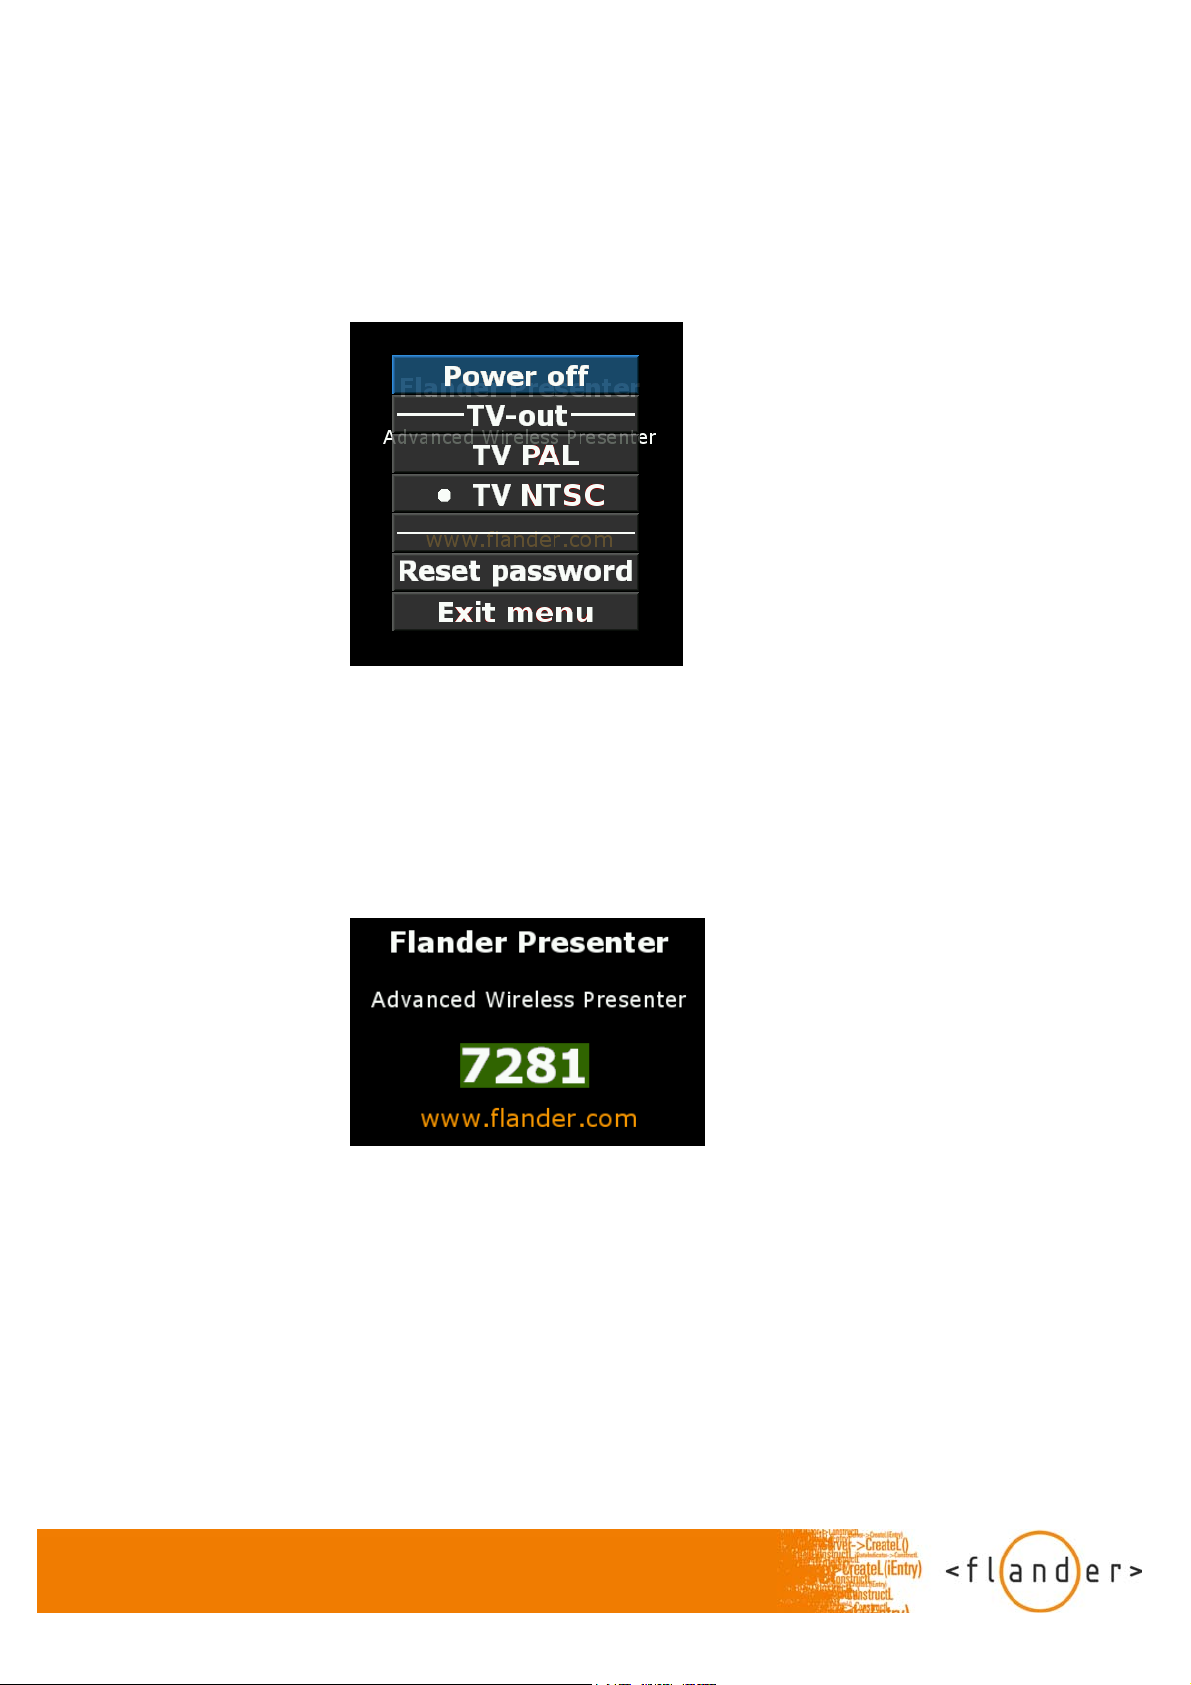
2. To reveal the menu, keep the Control button pressed for 2 seconds.
3. To move to the next menu option, press the Power button shortly. To select the option, long press the Control button.
4. To exit menu and reveal the start up picture select “Exit menu”
1.4 Pairing
Note! It is recommended that the pairing is done in a secure location
1. Power on the Presenter device. If the device is started for the first time or the password has been reset, the four digit pairing code
is displayed on external display. Otherwise select “Reset password” from the menu.
2. Perform a Bluetooth search with your phone and select Presenter device from the list.
3. Enter the pairing code showing on external display.
4. To reset the password, select Reset password from the Presenter menu.
1.5 Selecting the Composite video (TV output) mode
The Presenter device detects the composite video cable automatically and turns on the composite video output. The selection
between PAL/NTSC can be done using the menu (In some cases this may require temporarily using a VGA monitor for the
Page 6

PAL/NTSC change, if the composite video device used does not support the currently selected format).
The menu indicates the current selection with a filled circle in front of the “TV PAL” or “TV NTSC” selection. To change the selection,
enter the menu (by a long button press), select the desired mode (“TV PAL” or “TV NTSC”) and select the item with a long button
press (you can enter the menu again to check that the selection has been made correctly).
Note! The composite video output can not be directly connected to a TV antenna connector.
1.6 Led indications
Steady green Battery power over 15%, device turned on.
Blinking green Running out of battery power (under 15%), device turned on.
Blinking red Blinks red 4 times if there is not enough power available to turn on the device.
Steady Yellow Connected to the power outlet, charging is in progress (device is turned on or off).
No light Device is turned off, not charging.
1.7 OBEX transfer
1. Select a picture from phone memory or MMC.
2. Select Options > Send > Bluetooth. List of previously found Bluetooth devices is displayed or new Bluetooth search is started.
3. When the name of the Presenter device appears on the screen, select it and click Select. Pair the phone with Presenter device if
not done earlier (see 4.5 Pairing).
4. Picture is sent to external display.
1.7 Powering off
1. Power on the Presenter device and reveal the menu by long pressing the Control button.
2. Select “Power off”
3. You can also power off the Presenter in any time by pressing the Control button for 5 seconds
1.8 Removing the Battery cover
1. Make sure that the device is powered off
2. Push the battery cover away from the front end
Page 7

1.9 Regulatory Notice
Federal Communication Commission Notice
15.21
You are cautioned that changes or modifications not expressly approved by the part
responsible for compliance could void the user’s authority to operate the equipment.
Note: This equipment has been tested and found to comply with the limits for a Class B digital device, pursuant to part 15 of the FCC
Rules. These limits are designed to provide reasonable protection against harmful interference in a residential installation. This
equipment generates, uses and can radiate radio frequency energy and, if not installed and used in accordance with the instructions,
may cause harmful interference to radio communications. However, there is no guarantee that interference will not occur in a
particular installation. If this equipment does cause harmful interference to radio or television reception, which can be determined by
turning the equipment off and on, the user is encouraged to try to correct the interference by one or more of the following measures:
• Reorient or relocate the receiving antenna.
• Increase the separation between the equipment and receiver.
• Connect the equipment into an outlet on a circuit different from that to which the receiver is connected.
• Consult the dealer or an experienced radio/TV technician for help.
Use of shielded cable is required to comply with class B limits in Subpart B of Part 15 of FCC Rules.
Do not make any changes or modifications to the equipment unless otherwise specified in the instructions. If such changes or
modifications should be made, you could be required to stop operation of the equipment.
2. USING PRESENTER APPLICATION WITH S60 PHONES
Presenter application is available for S60 2nd edition and S60 3rd edition phones. Check the compatibility list from manufacturer to
see which application is suited for your phone.
2.1 Hardware Requirements
- S60 2nd edition phone or S60 3rd edition phone
Page 8
2.2 Installation
2.2.1 Installation using Nokia PC Suite
1. Make sure that appropriate software is installed on your S60 phone (see software requirements) and that appropriate software
from the CD-ROM supplied with the S60 phone is installed on your PC workstation (PC Suite for S60 phone). If not, install the
software. Follow the instructions given in the operating instructions for the S60 phone. If needed require additional help from Nokia
care.
2. If you have previous installations of Presenter application, uninstall the software from your S60 phone.
3. Connect your S60 phone to Nokia PC Suite (see Nokia PC Suite help).
4. Insert the CD-ROM that is supplied with the Presenter into the CD drive of the PC-workstation. If you have a feature called
“Autorun” activated, this will start your installation process automatically. If you do not have “Autorun” activated, you can go to My
Computer > Click on the letter of the CD/DVD drive > click setup.exe.
5. Accept the Licence Agreement in order to continue the installation.
6. Select “S60 phone” from the application list.
7. Select “Install for S60 phone”.
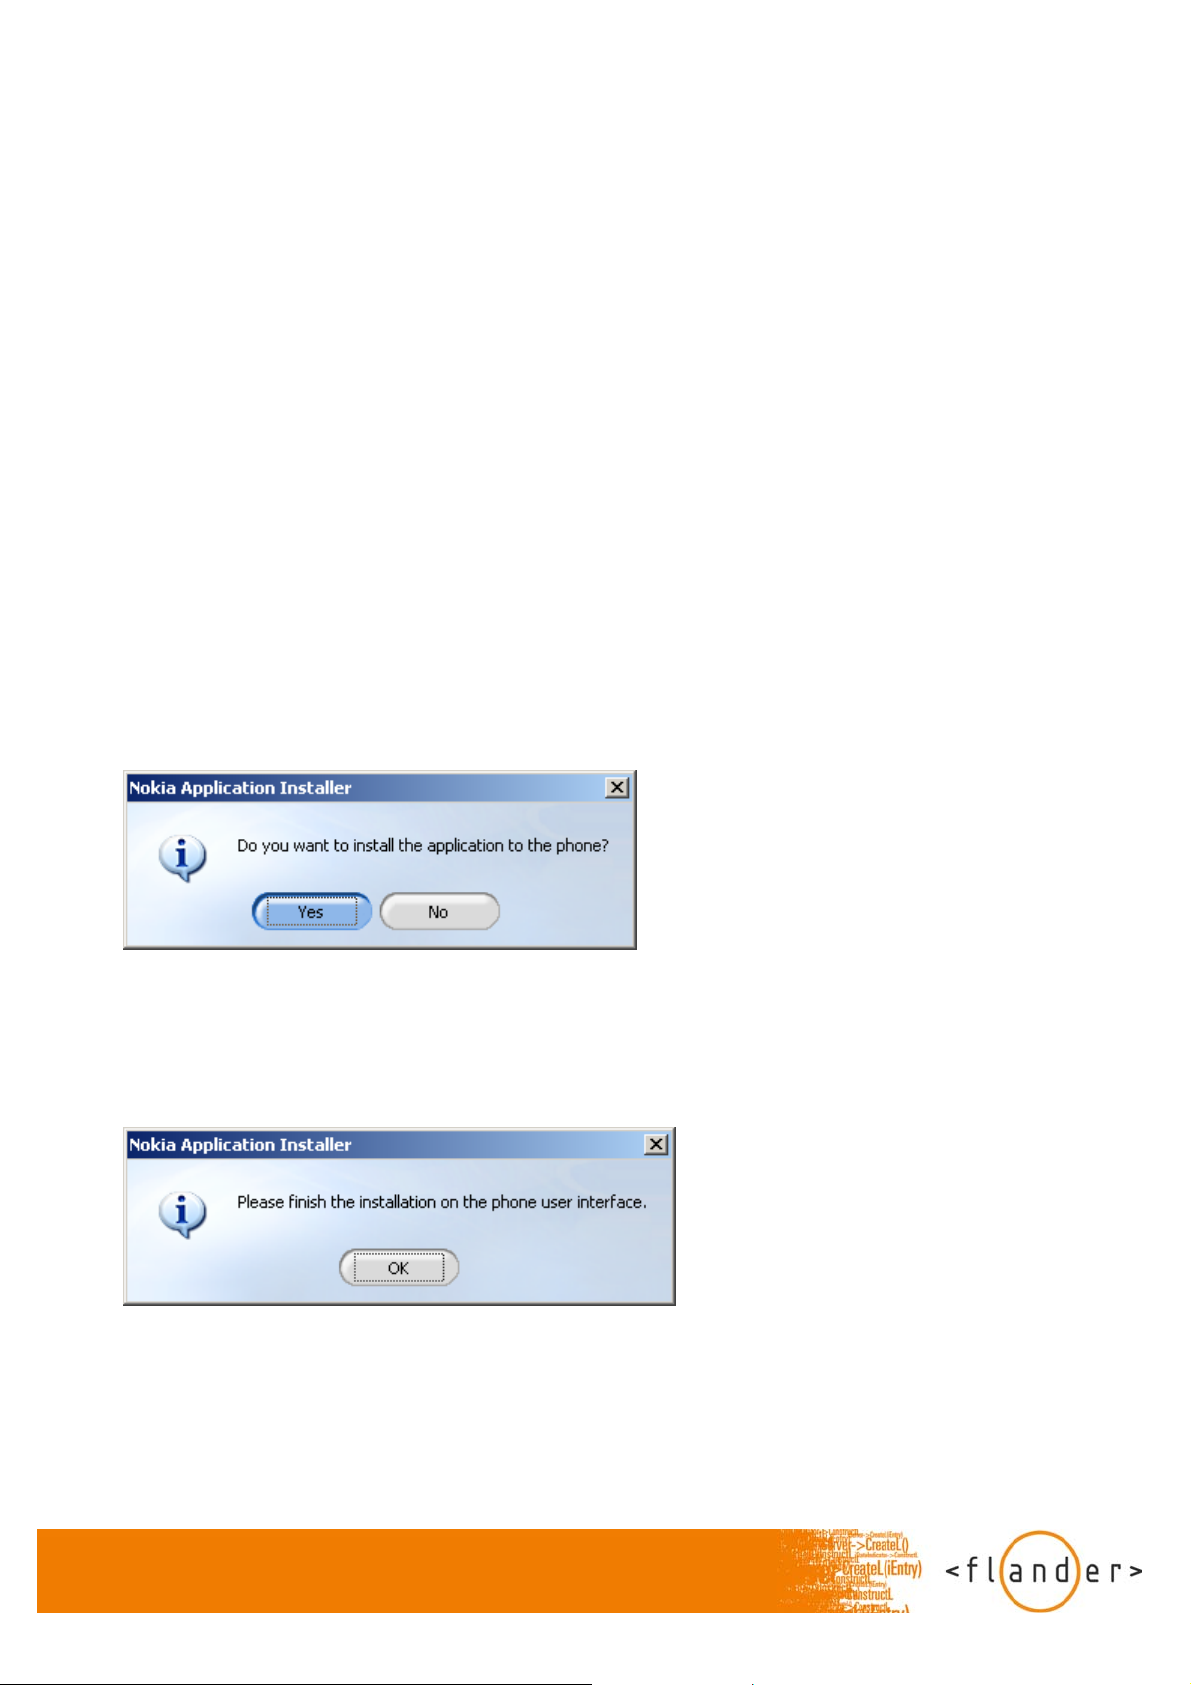
8. Select ‘Yes’ to “Do you want to install the application to the phone?”.
9. Select ‘OK’ to “Please finish the installation on the phone user interface.” and follow the prompts until you are finished installing the
software.
2.2.2 Installation using Bluetooth
1. Make sure that appropriate software is installed on your S60 phone (see software requirements.) If not, install the software. Follow
the instructions given in the operating instructions for the S60 phone. If needed require additional help from Nokia care. Make sure
also that PC-workstation has appropriate Bluetooth hardware and software installed.
Page 9

2. If you have previous installations of Presenter application, uninstall the software from your S60 phone.
3. Make sure that the Bluetooth is activated on your S60 phone and your PC-workstation.
4. Insert the CD-ROM that is supplied with the Presenter into the CD drive of the PC-workstation. Select a file [Add file name].
5. Right click the mouse and select ‘Send to’ > ‘Bluetooth’. If your phone is not in the list select ‘Other’ > ‘Refresh’.
6. Select your phone on the list and press ‘Ok’. (If your phone is not paired with the computer you have to do it first. Instructions for
pairing are shown in such a case) The installation file is sent to your phone.
7. Open the received message and follow the prompts until you are finished installing the software.
2.2.3 Installation from the web site
1. Open the web application on your S60 phone and go to
[Add web link].
2. Select the link “[Add web link]”.
3. Select “Continue Download” in order to download the installation file.
4. Follow the prompts until you are finished installing the software.
2.3 Presenter application features
2.3.1 Connection to Presenter device
1. Turn Bluetooth on in your S60 phone.
2. Switch on the data projector or display unit. Connect the Presenter device to it using a VGA or RCA connector cable.
3. Plug in the Presenter power supply (or make sure that there is enough power in the battery) and power it on.
4. Select the application icon to launch the application.
5. Select ‘Yes’ to “Allow file writes to memory card for image previews”.
6. Select ‘Yes’ to “Connect to Presenter?”.
7. The list of previously found devices is displayed or new Bluetooth search starts.
8. When the name of the Presenter device appears on the screen, select it and click ‘Select’. Pair the phone with Presenter device if
not done earlier (see 4.5 Pairing).
9. Select ‘Yes’ to “Use this device as default?” if you want to use your phone as a default handset. Otherwise select ‘No’.
10. To disconnect the connection to Presenter device, select ‘Options’ > ‘Disconnect’. To exit from the Presenter application select
‘Options’ > ‘Exit’.
2.3.2 Showing presentations
1. Get connected to Presenter device. List of presentations is showing on each tab showing the preview image of the first slide of the
presentation. (Preview image is not shown on Device tab).
2. If you want to show presentations from your phone select “Phone” tab. If you want to show images from your phone or
presentations installed in Presenter device, select “Images” or “Device” tab.
Page 10

3. To start showing the presentation to external display open it by pressing the central button in your phone. You can now view the
preview image on each slide. To send the slide to external display press central button on it or select ‘6’ for showing the next slide or
‘4’ for showing the previous slide. Select ‘Options’ to rotate or change the scale of the slide. You can also change the slide scaling in
“Settings menu”.
2.3.3 Screen capture
1. Get connected to Presenter device.
2. Select ‘Options’ > ‘Screen capture’ > ‘Single shot’.
3. Take screen captures by pressing ‘#’. You can open other application while taking screen captures. Presenter application is
running on the back ground while screen captures are being taken.
4. To stop screen capturing go back to Presenter application and press ‘Ok’.
5. To use Real-time screen capturing mode, select ‘Options’ > ‘Screen capture’ > ‘Real-time’. Screen captures are now taken
automatically until your stop the capturing by returning to the Presenter application.
6. You can configure the screen capture scaling and saving options in ‘Settings” menu.
2.3.4 Camera
1. Get connected to Presenter device.
2. Select ‘Options’ > ‘Tools’ > ‘Camera’ to activate the camera mode.
3. Select ‘Send’ to transfer the camera shot to external display.
4. Return the Presenter application by pressing ‘Back’.
5. You can change the scaling of camera shots and configure saving options in ‘Settings” menu.
2.3.5 Saving presentations to Presenter
1. Get connected to Presenter device.
2. Go to the “Phone” tab, select one of the presentations and select ‘Options’ > ‘Presentation’ > ‘Save to device’.
3. Presentation is now saved to Presenter memory and can be opened from “Device” tab.
2.3.6 Delete presentations
1. Get connected to Presenter device.
2. Go to the “Phone” tab, select one of the presentations and select ‘Options’ > ‘Presentation’ > ‘Delete’.
3. You can also delete all presentations at the same time by selecting ‘Options’ > ‘Presentation’ > ‘Delete all’.
4. To delete presentations from Presenter device, go to the “Device” tab and select ‘Options’ > ‘Presentation’ > ‘Delete’.
2.3.7 Automatic run
Page 11

1. Get connected to Presenter device.
2. Go to the “Device” tab” and select the presentation that you want to start showing automatically.
3. Select ‘Options’ > ‘Automatic run’ > ‘Start now’.
4. Select the delay between slides and press ‘Ok’. The presentation is now showing automatically on external display. You can
disconnect the connection to Presenter device while automatic run is activated.
5. To disable automatic run, select ‘Options’ > ‘Automatic run’ > ‘Disable’.
6. To configure the presentation to be shown automatically after rebooting the Presenter device go to the “Device” tab, select one of
the presentations and select ‘Options’ > ‘Automatic run’ > ‘After reboot’.
7. Select the delay between slides and press ‘Ok’.
8. Select ‘Yes’ to “Presentation will start after rebooting the device, reboot now?”.
9. Presenter device reboots and starts showing the presentation automatically.
10. To disable automatic run get connected to Presenter device, go to the “Device” tab and select ‘Options’ > ‘Automatic run’ >
‘Disable’.
2.3.8 Change start up picture
1. Get connected to Presenter device.
2. Select ‘Options’ > ‘Tools’ > ‘Change start up picture’.
3. Select picture file from phone memory and press ‘Select’.
4. The picture is saved to Presenter memory and is shown every time the Presenter is powered on.
2.3.9 Change BT name
1. Get connected to Presenter device.
2. Select ‘Options’ > ‘Tools’ > ‘Change BT name’.
3. Type some name and select ‘Ok’. The name is now the name for Presenter device which is showing on Bluetooth search.
2.3.10 Device info
1. Get connected to Presenter device.
2. Select ‘Options’ > ‘Device info’.
3. The device info is displayed showing size of free memory and total memory, number of presentations and slides that saved to
device memory, and the Presenter version number.
2.3.11 About
1. Get connected to Presenter device.
Page 12

2. Select ‘Options’ > ‘About’.
3. Information about the Presenter application is displayed.
3. USING THE PRESENTER WITH NOKIA 9500
COMMUNICATOR AND 9300 SMARTPHONE
3.1 Hardware requirements
- Nokia 9500 Communicator or 9300 Smartphone.
Note: The manual refers to Nokia 9500 Communicator but the instructions apply for Nokia 9300 Smartphone as well.
3.2 Software requirements
-Presentation Editor and External View Framework (Native software from Nokia, installed in your phone)
-Screen Export (software from Nokia, supplied from Nokia web)
Important: There are references to Nokia 9500 Communicator and 9300 Smartphone software functionality in the Presenter manual.
Please consult the Nokia 9500 Communicator or 9300 Smartphone manual for detailed instructions on how to use the Nokia 9500
Communicator or 9300 Smartphone functionality.
3.3 Installation
3.3.1 Installation using Nokia PC Suite
1. Make sure that appropriate software is installed on your Nokia 9500 Communicator (see software requirements) and that
appropriate software from the CD-ROM supplied with the Nokia 9500/9300 Communicator is installed on your PC workstation (PC
Suite for Nokia 9500 Communicator). If not, install the software. Follow the instructions given in the operating instructions for the
Nokia 9500 Communicator. If needed require additional help from Nokia care.
Page 13
2. If you have previous installations of [Add plugin name], uninstall the software from your Nokia 9500 Communicator.
3. Connect your Nokia 9500 Communicator to Nokia PC Suite (see Nokia PC Suite help).
4. Insert the CD-ROM that is supplied with the Presenter into the CD drive of the PC-workstation. If you have a feature called
“Autorun” activated, this will start your installation process automatically. If you do not have “Autorun” activated, you can go to My
Computer > Click on the letter of the CD/DVD drive > click setup.exe.
5. Accept the Licence Agreement in order to continue the installation.
6. Select “Nokia 9500/9300” from the application list.
7. Select “Install for Nokia 9500/9300”.
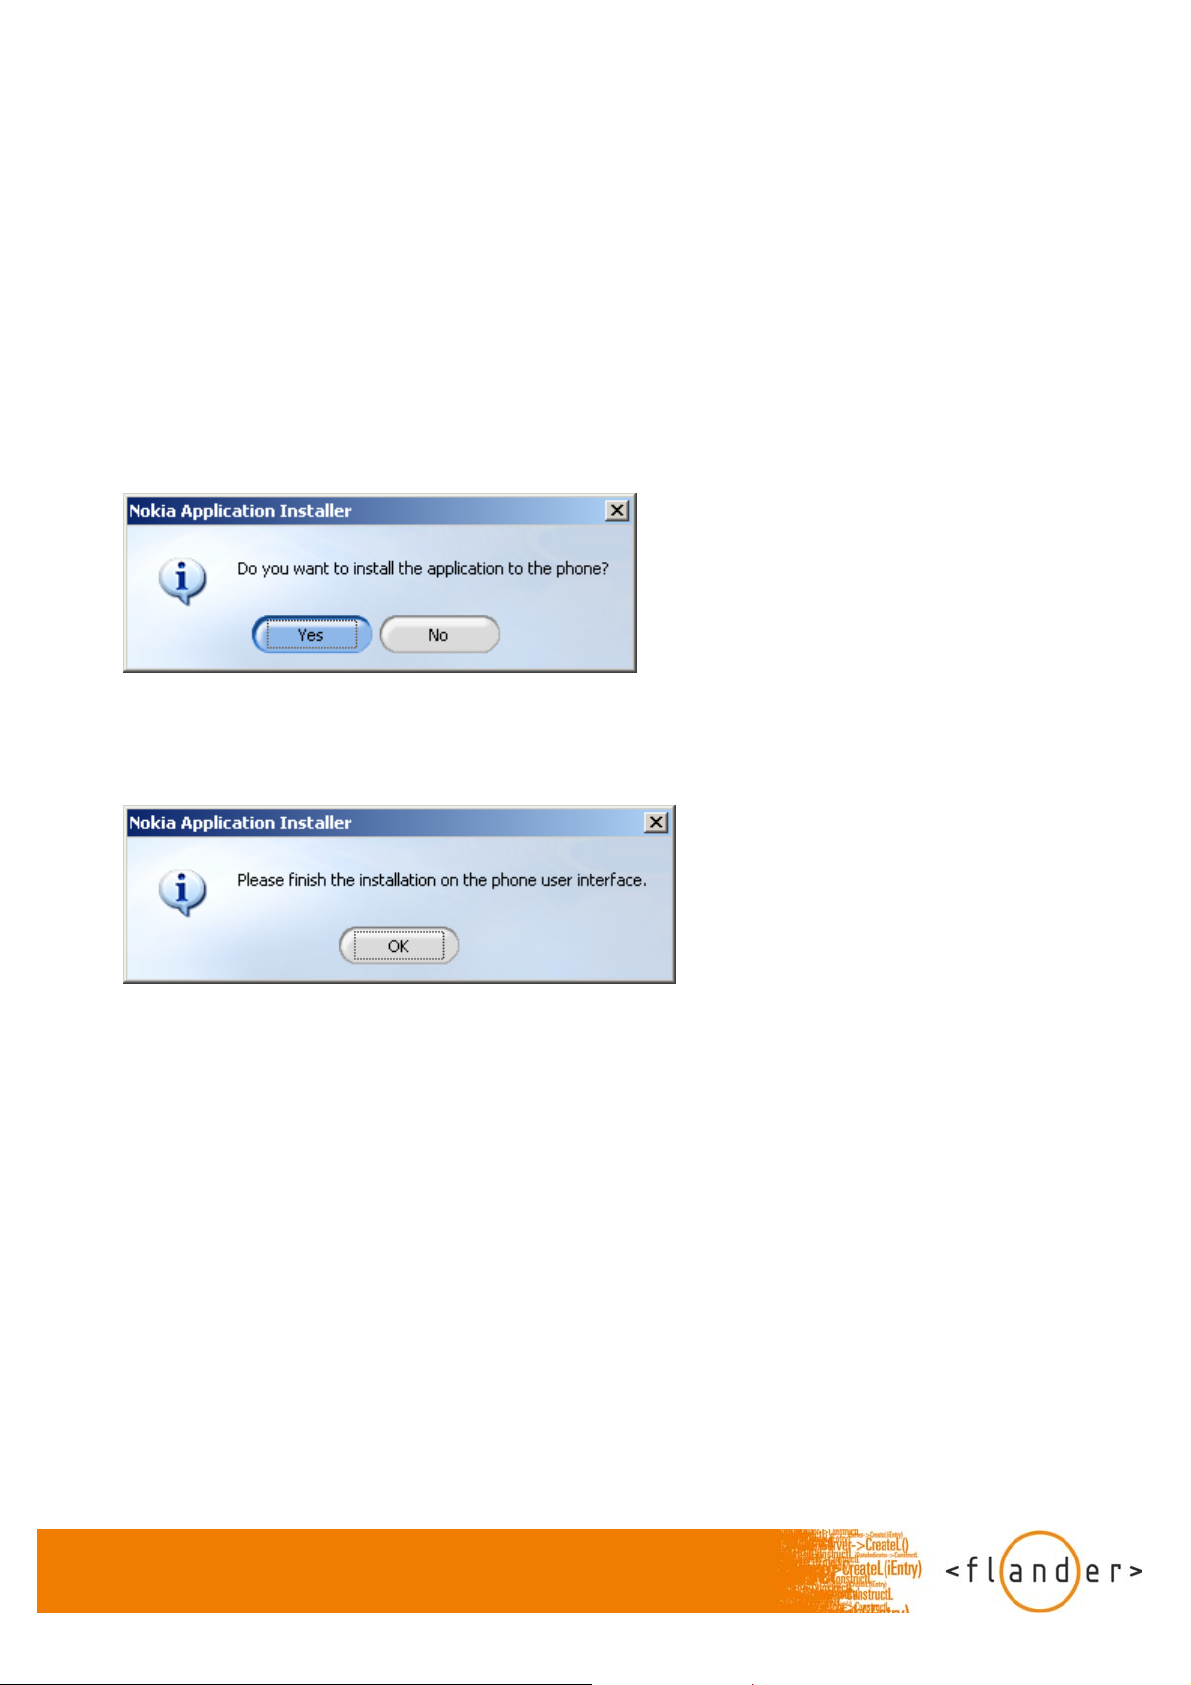
8. Select ‘Yes’ to “Do you want to install the application to the phone?”.
9. Select ‘OK’ to “Please finish the installation on the phone user interface.” and follow the prompts until you are finished installing the
software.
3.3.2 Installation using Bluetooth
1. Make sure that appropriate software is installed on your Nokia 9500 Communicator (see software requirements.) If not, install the
software. Follow the instructions given in the operating instructions for the Nokia 9500 Communicator. If needed require additional
help from Nokia care. Make sure also that PC-workstation has appropriate Bluetooth hardware and software installed.
2. If you have previous installations of Presenter, uninstall the software from your Nokia 9500 Communicator.
3. Make sure that the Bluetooth is activated on your Nokia 9500 phone and your PC-workstation.
4. Insert the CD-ROM that is supplied with the Presenter into the CD drive of the PC-workstation. Select a file “[Add plug in name]”.
5. Right click the mouse and select ‘Send to’ > ‘Bluetooth’. If your phone is not in the list select ‘Other’ > ‘Refresh’.
6. Select your phone on the list and press ‘Ok’. (If your phone is not paired with the computer you have to do it first. Instructions for
pairing are shown in such a case.) The installation file is sent to your phone.
7. Open the installation file in File storage > Communicator > My files and follow the prompts until you are finished installing the
software.
3.3.3 Installation from the web site
Page 14
1. Open the web browser on your Nokia 9500 Communicator and go to
[Add web link].
2. Select the link “[Add web link]”.
3. Select ‘Continue Download’ in order to download the installation file.
4. Follow the prompts until you are finished installing the software.
3.4 Showing the Presentation
1. Transfer a Presentation to your Nokia 9500 Communicator, or create the Presentation with the Presentation Editor.
Presentation can be transferred using Bluetooth, Infrared, USB-cable or it can be sent to phone using MMS or Email. Also Nokia PC
Suite can be used for transfer. Follow the instructions given in the operating instructions for the Nokia 9500 Communicator.
2. Turn Bluetooth on in your Nokia 9500 Communicator.
3. Switch on the data projector or display unit. Connect the Presenter device to it using a VGA or RCA connector cable.
4. Plug in the Presenter power supply (or make sure that there is enough power in the battery) and power it on.
5. Start the Presentations program from the Office folder.
6. Open a Presentation selecting ‘Menu’ > ‘File’ > ‘Open’.
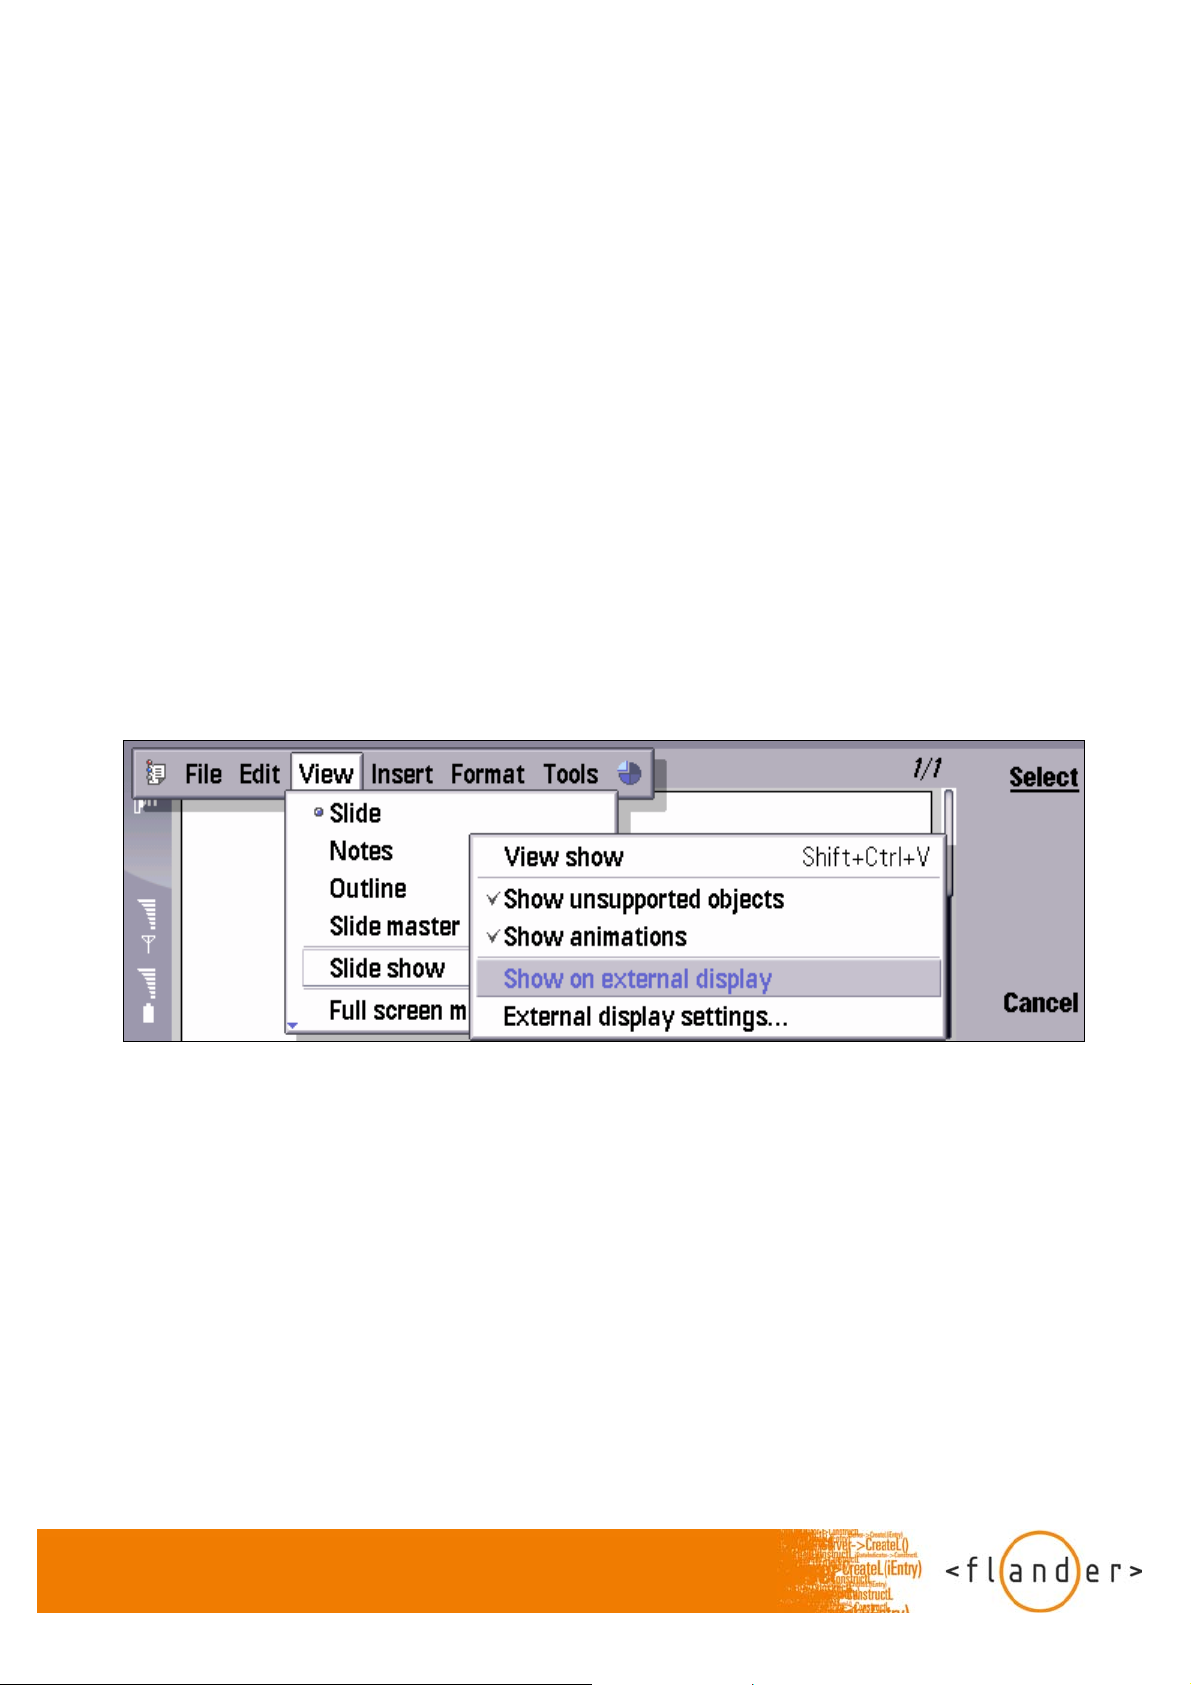
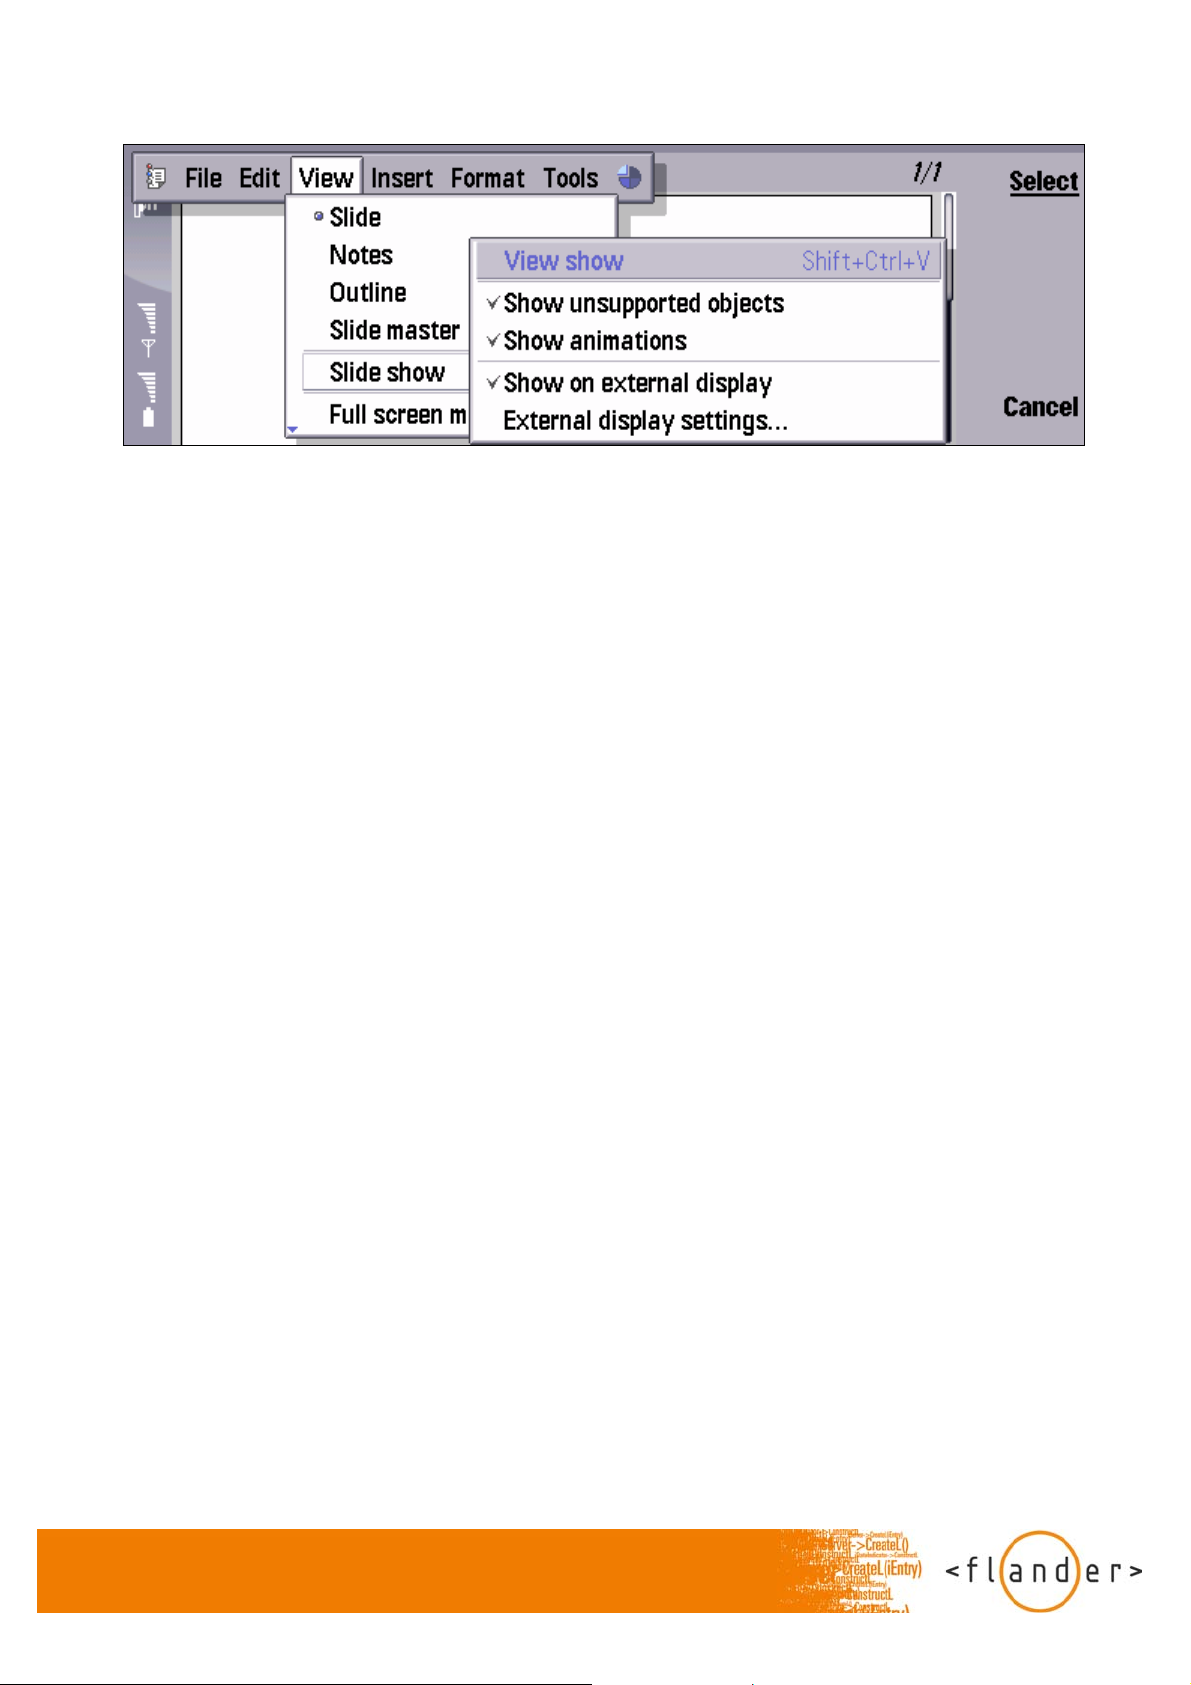
7. Select from the menu: ‘View’ > ‘Slideshow’ > ‘Show’ on external display. Select ‘Presentations’ for ‘External display’ and press
‘Connect’. The search for Bluetooth devices begins or list of previously found devices is shown.
8. When the name of the Presenter device appears on the screen, select it and click ‘Select’. Pair the phone with Presenter device if
not done earlier (see 4.5 Pairing). A Bluetooth connection between the Presenter device and the Nokia 9500 Communicator will be
established. After connecting, select ‘Done’.
9. To view show on external display select from menu: ‘View’ > ‘Slideshow’ > ‘View show’. Now the Presentation is shown on external
display.
Page 15
10. You can select slides by pressing ‘Next’ or ‘Previous’. More options for showing slides can be found in menu.
3.5 Using the Screen Export
1. Turn Bluetooth on in your Nokia 9500 Communicator.
2. Switch on the data projector or display unit. Connect the Presenter device to it using a VGA or RCA connector cable.
3. Plug in the Presenter power supply (or make sure that there is enough power in the battery) and power it on.
4. Select the Screen Export icon from the location you have installed it to launch the Screen Export application.
5. Press ‘Connect’ to get connected to Presenter device. List of previously found Bluetooth devices is displayed or new Bluetooth
search is started.
6. When the name of the Presenter device appears on the screen, select it and click ‘Select’. Pair the phone with Presenter device if
not done earlier (see 4.5 Pairing). A Bluetooth connection between the Presenter device and the Nokia 9500 Communicator will be
established.
7. Press ‘Enable’ to enable screen exporting. You can go to Desk and start other applications while screen capturing continues on the
back ground.
8. To disable the screen exporting, go back to the Screen Export application and press ‘Disable’.
9. To disconnect the connection select ‘Disconnect’.
10. To change the scaling select ‘Settings’.
3.6 Using the PPT helper
1. Turn Bluetooth on in your Nokia 9500 Communicator.
2. Switch on the data projector or display unit. Connect the Presenter device to it using a VGA or RCA connector cable.
3. Plug in the Presenter power supply (or make sure that there is enough power in the battery) and power it on.
4. Select the PPT helper icon from the location you have installed it to launch the PPT helper application.
5. All the PPT files in your phone are listed. You can open the selected PPT file by pressing ‘Open’.
6. Select ‘Show’ if you want to show selected presentation on external display. Select “Presentations” for external display and press
‘Connect’. List of previously found Bluetooth devices is displayed or new Bluetooth search is started. When the name of the
Page 16

Presenter device appears on the screen, select it and click ‘Select’. Pair the phone with Presenter device if not done earlier (see 4.5
Pairing). The slide show starts automatically. You can change slides by pressing ‘Next’ or ‘Previous’.
7. To send the presentation to Presenter device before starting the slide show, select ‘Send’ on selected presentation (Browsing the
slides is faster if the slides are sent to device memory before starting the slide show). Select “Presentations” for external display and
press ‘Connect’. List of previously found Bluetooth devices is displayed or new Bluetooth search is started. When the name of the
Presenter device appears on the screen, select it and click ‘Select’. Pair the phone with Presenter device if not done earlier (see 4.5
Pairing). The slides are being sent to Presenter device. While sending, the first slide of the presentation is showing on external
display. After sending, the slide show starts automatically. You can change slides by pressing ‘Next’ or ‘Previous’.
Note! If you don’t want the first slide of the presentation to be shown on external display while slides are being sent to
Presenter device, you can unplug the VGA/RCA cable.
4. USING THE PRESENTER WITH NOKIA E60, E61 AND E70
4.1 Hardware Requirements
- Nokia E60, E61or E70 Smartphone
4.2 Software Requirements
- Presentation Editor and External View Framework (Native software from Nokia, installed in your phone)
- Screen Export (software from Nokia, supplied from Nokia web)
Important: There are references to Nokia E60/E61/E70 software functionality in the Presenter manual. Please consult the Nokia
E60/E61/E70 manual for detailed instructions on how to use the Nokia E60/E61/E70 functionality.
4.3 Installation
4.3.1 Installation using Nokia PC Suite
1. Make sure that appropriate software is installed on your Nokia E70 (see software requirements) and that appropriate software from
the CD-ROM supplied with the Nokia E70 is installed on your PC workstation (PC Suite for Nokia E70). If not, install the software.
Follow the instructions given in the operating instructions for the Nokia E70. If needed require additional help from Nokia care.
2. If you have previous installations of [Add plug in name], uninstall the software from your Nokia E60/E61/E70.
3. Connect your Nokia E60/E61/E70 to Nokia PC Suite (see Nokia PC Suite help).
4. Insert the CD-ROM that is supplied with the Presenter into the CD drive of the PC-workstation. If you have a feature called
“Autorun” activated, this will start your installation process automatically. If you do not have “Autorun” activated, you can go to My
Computer > Click on the letter of the CD/DVD drive > click setup.exe.
5. Accept the Licence Agreement in order to continue the installation.
6. Select “Nokia E60/E61/E70” from the application list.
7. Select “Install for Nokia E60/E61/E70”.
Page 17
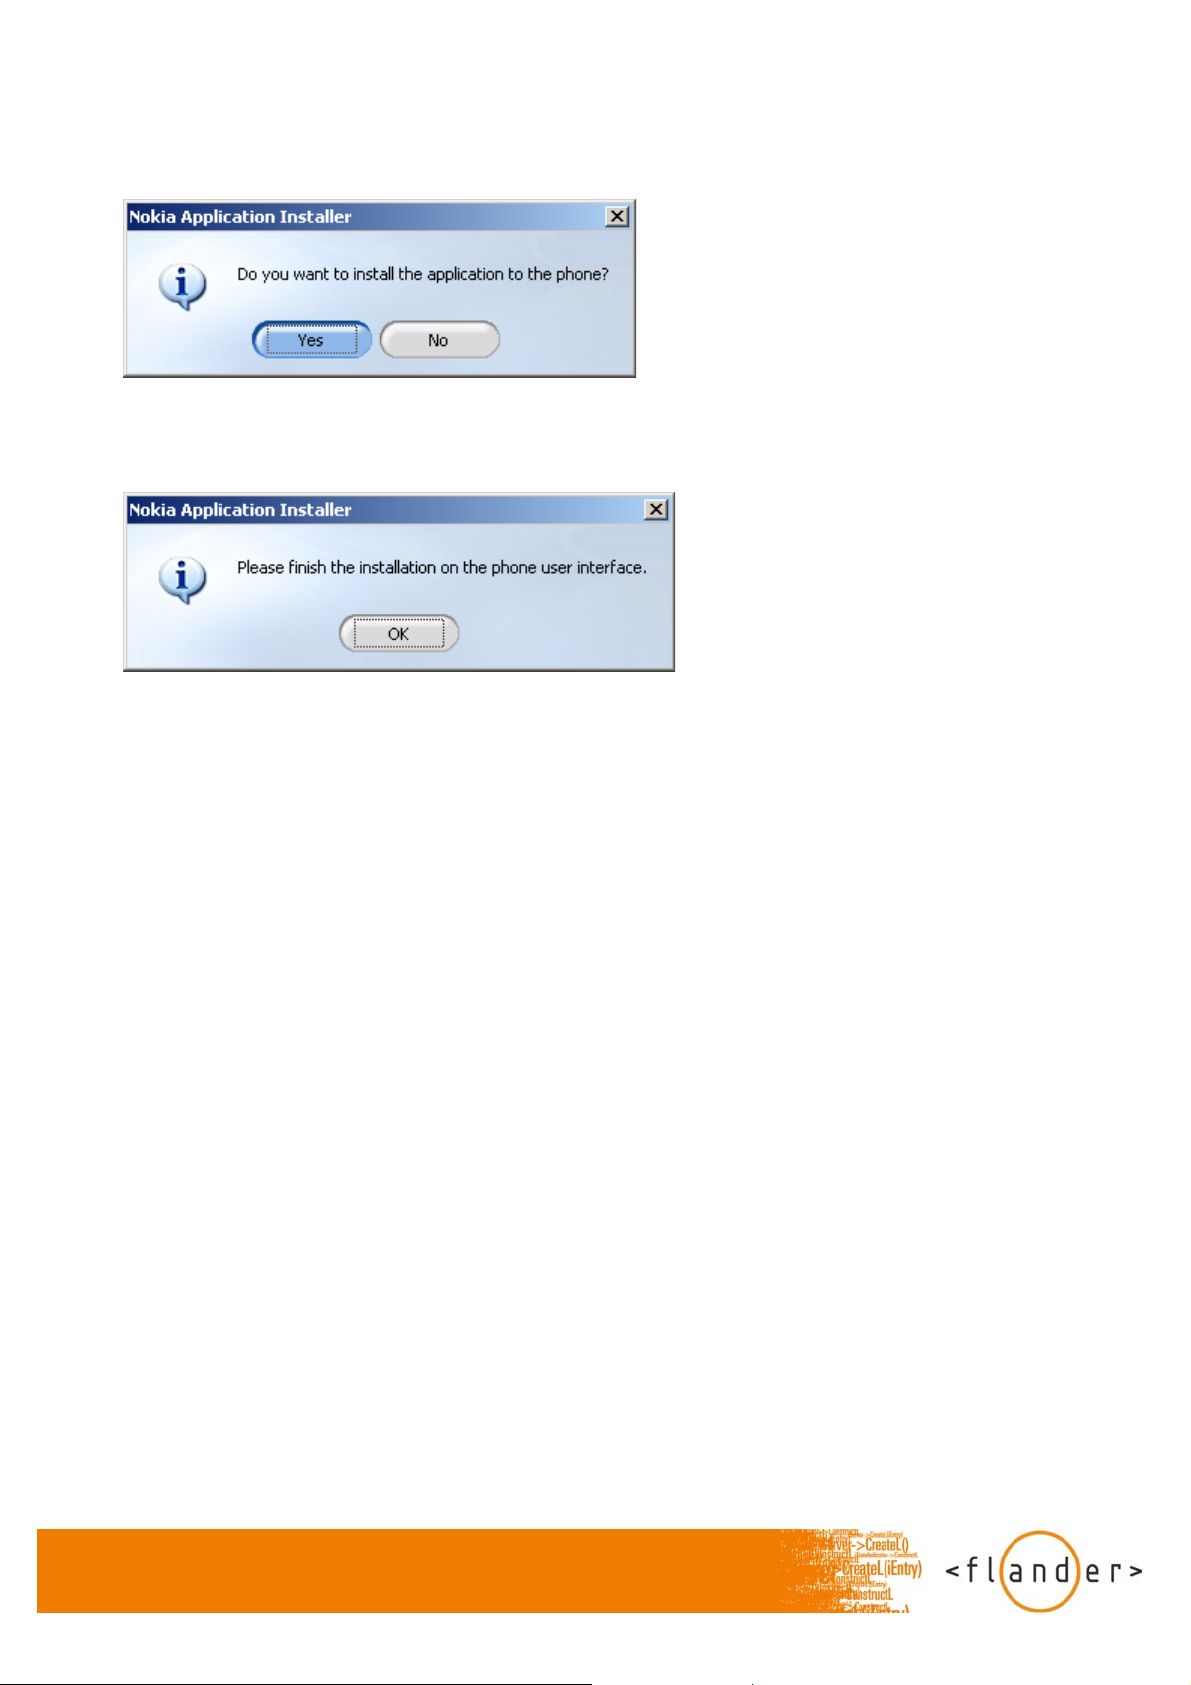
8. Select ‘Yes’ to “Do you want to install the application to the phone?”.
9. Select ‘OK’ to “Please finish the installation on the phone user interface.” and follow the prompts until you are finished installing the
software.
4.3.2 Installation using Bluetooth
1. Make sure that appropriate software is installed on your Nokia E60/E61/E70 (see software requirements.) If not, install the software.
Follow the instructions given in the operating instructions for the Nokia E60/E61/E70. If needed require additional help from Nokia
care. Make sure also that PC-workstation has appropriate Bluetooth hardware and software installed.
2. If you have previous installations of [Add plug in name], uninstall the software from your Nokia E60/E61/E70.
3. Make sure that the Bluetooth is activated on your Nokia E60/E61/E70 phone and your PC-workstation.
4. Insert the CD-ROM that is supplied with the Presenter into the CD drive of the PC-workstation. Select a file “[Add plug in name]”.
5. Right click the mouse and select ‘Send to’ > ‘Bluetooth’. If your phone is not in the list select ‘Other’ > ‘Refresh’.
6. Select your phone on the list and press ‘Ok’. (If your phone is not paired with the computer you have to do it first. Instructions for
pairing are shown in such a case) The installation file is sent to your phone.
7. Open the received message and follow the prompts until you are finished installing the software.
4.3.3 Installation from the web site
1. Open the web application on your Nokia E70 and go to
[Add web link].
2. Select the link “[Add web link]”.
3. Select “Continue Download” in order to download the installation file.
4. Follow the prompts until you are finished installing the software.
4.4 Showing Presentation
1. Transfer a Presentation to your Nokia E60/E61/E70, or create the Presentation with the Presentation Editor.
Page 18
Presentation can be transferred using Bluetooth, Infrared, USB-cable or it can be sent to phone using MMS or Email. Also Nokia PC
Suite can be used for transfer. Follow the instructions given in the operating instructions for the Nokia E60/E61/E70.
2. Turn Bluetooth on in your Nokia E60/E61/E70.
3. Switch on the data projector or display unit. Connect the Presenter device to it using a VGA or RCA connector cable.
4. Plug in the Presenter power supply (or make sure that there is enough power in the battery) and power it on.
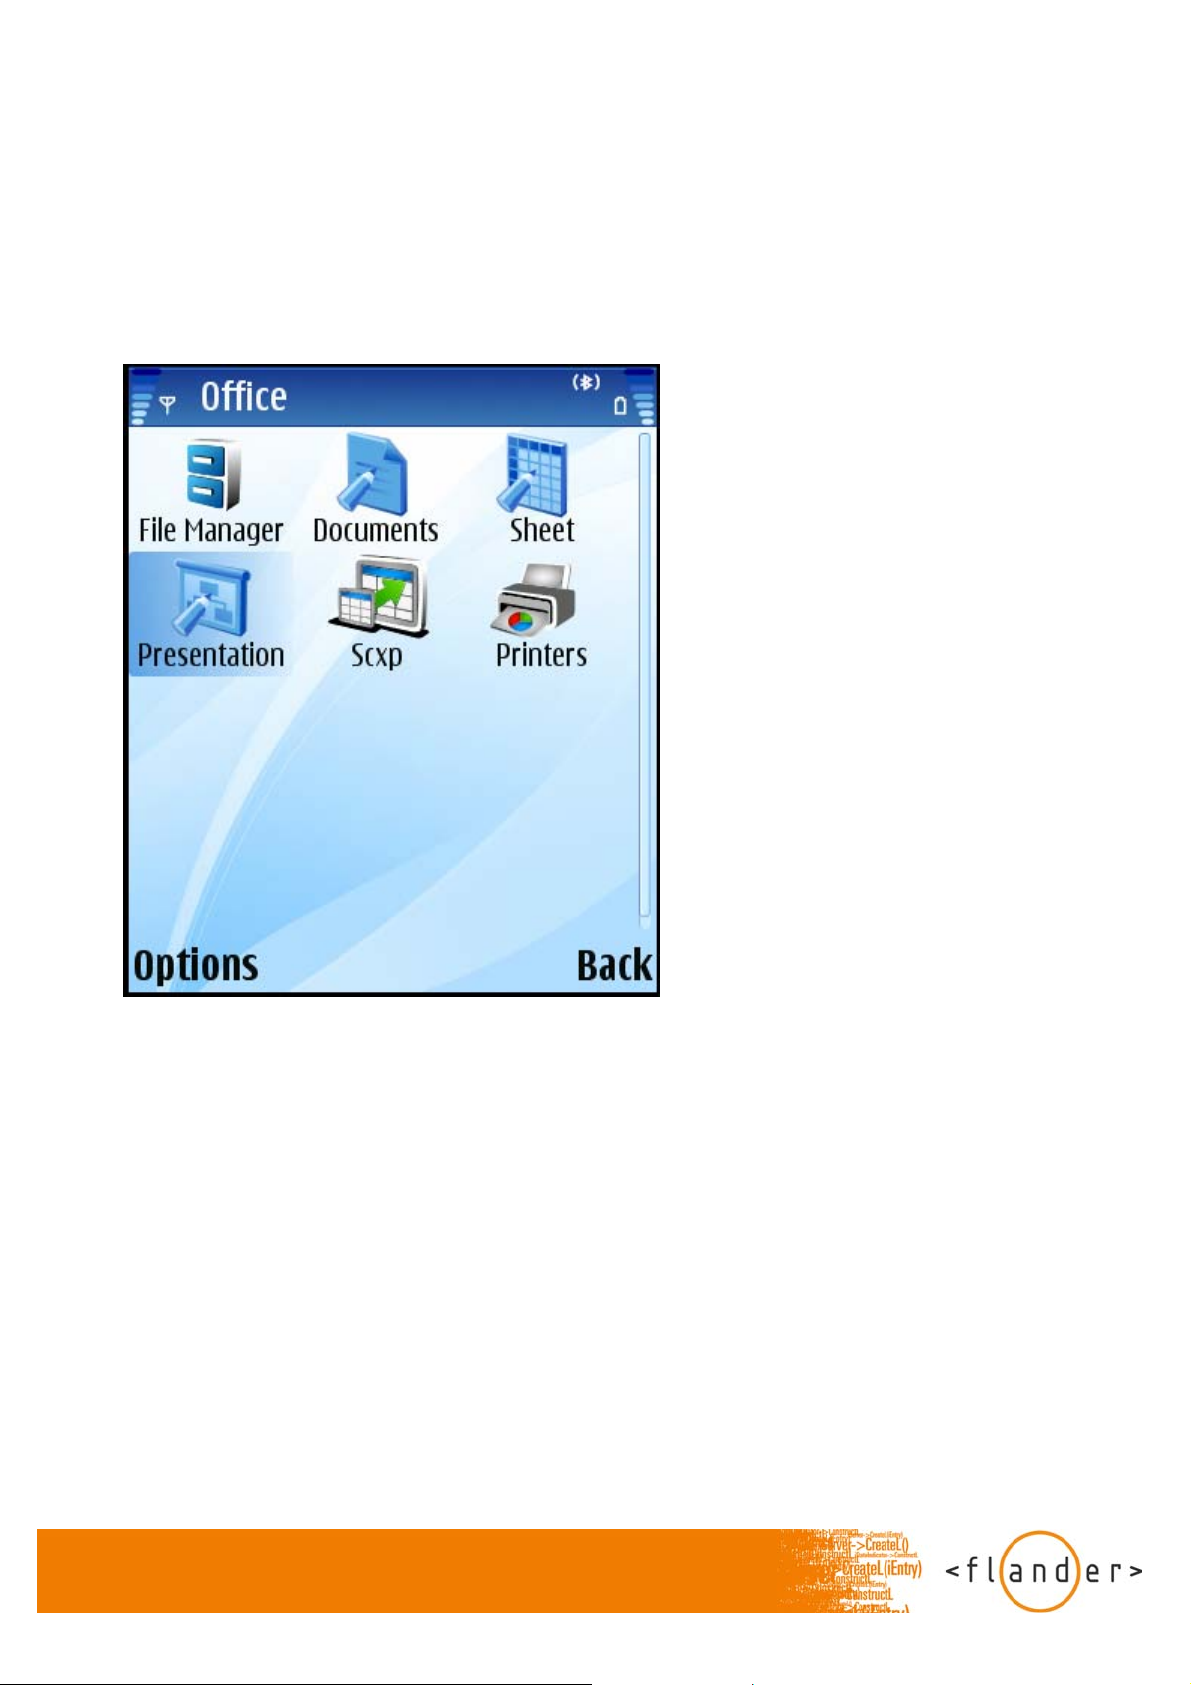
5. Start the Presentation program in the Office folder.
6. Open a Presentation from the folder you have installed it. If you have transferred the Presentation to your phone like described in
step 1, you can open the Presentation straight from the Inbox and skip step 5.
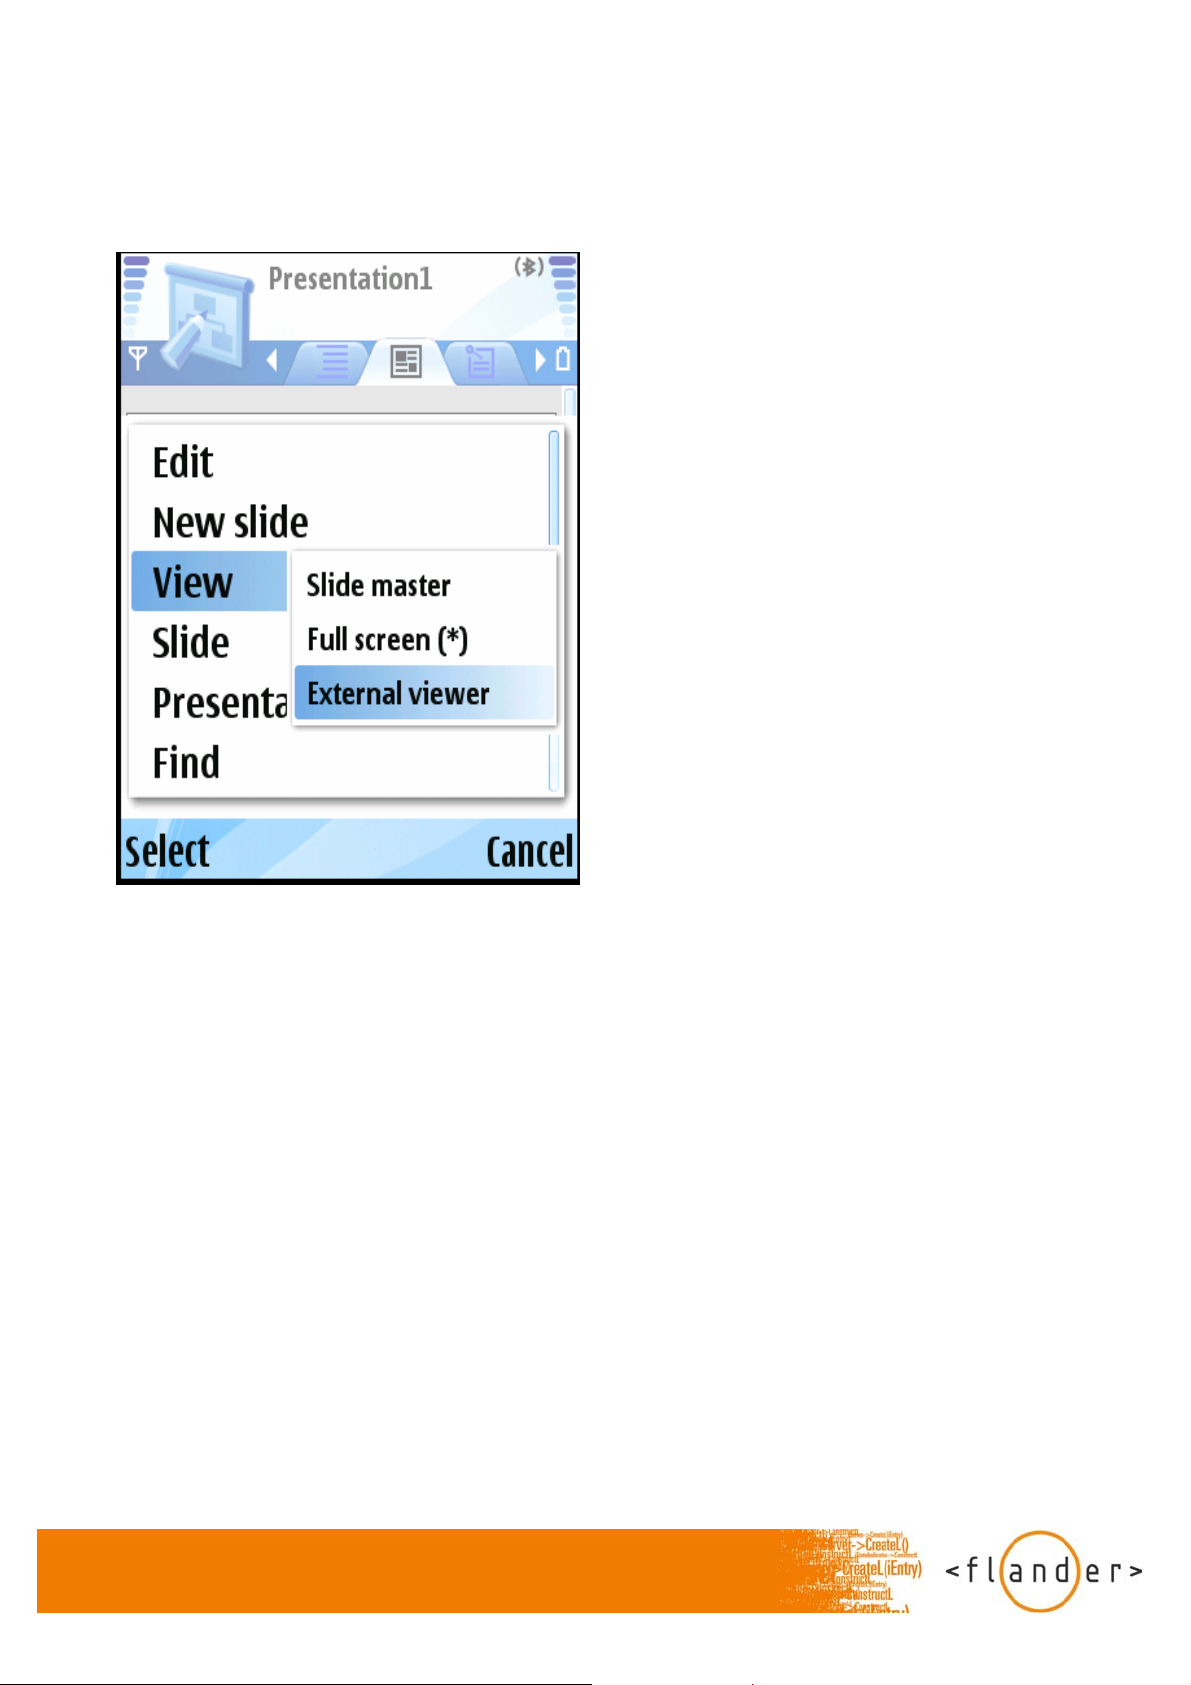
7. Select ‘Options’ > ‘View’ > ‘External viewer’. Select “Presentations” for external viewer. The list of previously found devices is
displayed or new Bluetooth search starts.
Page 19
8. When the name of the Presenter device appears on the screen, select it and click ‘Select’. Pair the phone with Presenter device if
not done earlier (see 4.5 Pairing). A Bluetooth connection between the Presenter device and the Nokia E60/E61/E70 will be
established.
9. You can select slides using the joystick button. You can also go to any slide by selecting Options > Goto slide.
4.5 Using the Screen Export
4. Select the Screen Export icon from the location you have installed it to launch the Screen Export application.
5. Select ‘Options’ > ‘Connect’ to get connected to Presenter device. List of previously found Bluetooth devices is displayed or new
Bluetooth search is started.
6. When the name of the Presenter device appears on the screen, select it and click ‘Select’. Pair the phone with Presenter device if
not done earlier (see 4.5 Pairing). A Bluetooth connection between the Presenter device and the Nokia E60/E61/E70 will be
established.
7. Select ‘Options’ >’Begin’ to enable screen exporting. Press application button to start other applications while screen capturing
continues on the back ground.
8. To disable the screen exporting, go back to the Screen Export application and select ‘Options’ > ‘End’.
9. To disconnect the connection select ‘Options’ > ‘Disconnect’.
10. To change the scaling select ‘Settings’.
 Loading...