

Flair Puck Installation Manual

Puck Installation Guide

Welcome to the Flair
community!
Our users are energy nerds, home automation gurus,
and HVAC Pros.
If you have any questions, feel free to check out the
forums at forum.flair.co.
If you don’t see what you are looking for there, you can
reach us at one of the following:
support@flair.co
+1 (800) 590 6943
Monday-Friday, 9am to 5pm PST
2
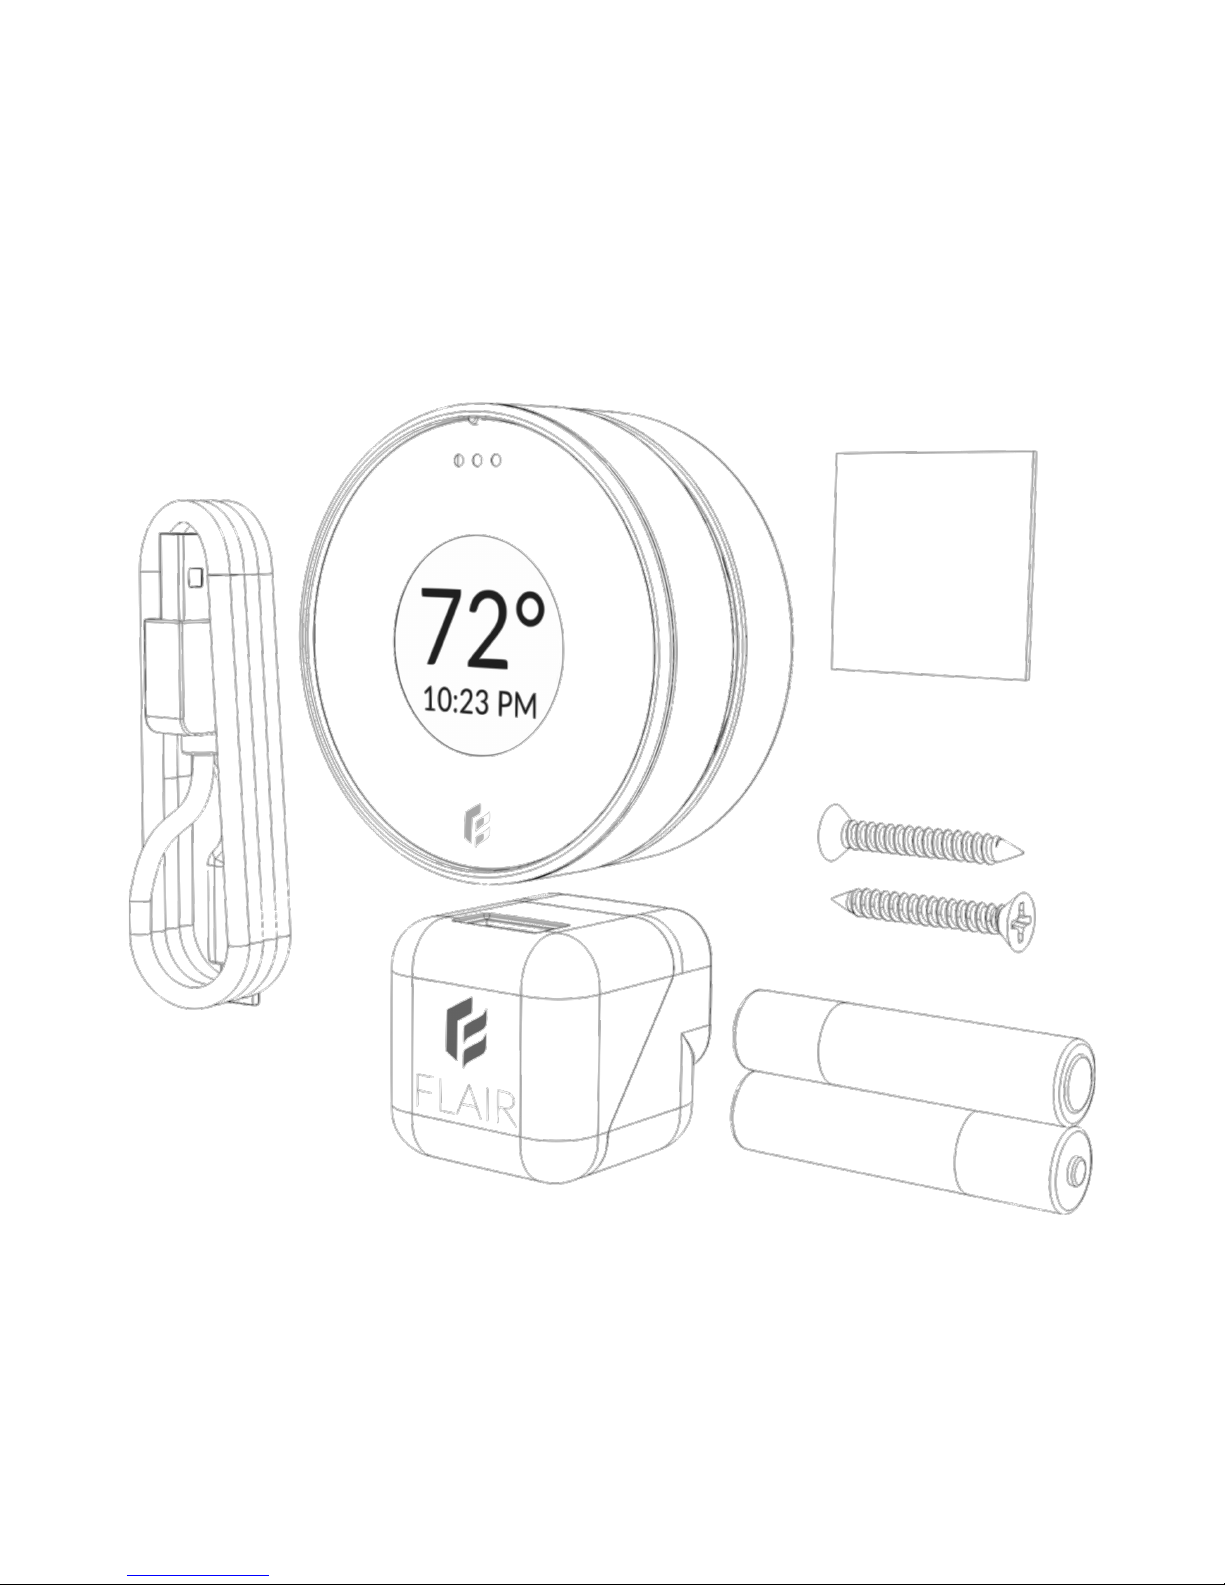
What’s in the Box?
3
A. Puck
B. USB Cable
C. Batteries
D. Screws
E. Mounting Adhesive
F. Power Adapter
A
B
C
D
E
F

Quick Start
Install the Flair App
Install our App from the Google Play Store or Apple App Store. If
you don’t have an Android or iOS device, go to my.flair.co in
your web browser for setup. Create an Account and Log In.
WIFI
If you are setting up your first Puck, plug it in with the power
adapter and follow the instructions in the App for Connecting to
WIFI. If you need to make a change to your WIFI settings at
anytime, go to Home Settings → Change Puck WIFI Settings.
Remaining Devices
After connecting the first Puck to WIFI, install and power on your
remaining devices.
Rooms, Integrations, Settings
In the App you can create rooms, associate devices with rooms,
set up integrations, and set your preferred settings.
4

Controlling Your System
Your Flair system can be controlled through the App or directly with
your Puck(s).
For details on the App, see Flair App Overview.
Controlling the Puck is simple. You can push the front surface or
rotate the collar.
5
Push
Rotate

Powered by Adapter
Always on WIFI
Serves As Hub
Wired or Battery Power
Only on WIFI for Updates
Puck Overview
Puck works with most IR controlled heating and cooling devices
including Minisplits, Window ACs and Portables.
Puck also works with Central Heating and Cooling systems as a
remote temperature and occupancy sensor. For these systems, Puck
integrates with popular Smart Thermostats and our Smart Vents to
deliver precise control and comfort using as little energy as possible.
There are two principle modes for Puck: Gateway or Sensor Mode
6
Gateway Sensor
(additional modes coming soon)
 Loading...