

Page 1
BACK
BACK
后面
后面
1 2 3 4 5 6 7
1 2 3 4 5 6 7
8
Getting Started
Welcome and congrats on your
Zendo Smart Cam Mini purchase!
Using this Quick Start Guide, you’ll walk
through the installation and initial setup
of your Smart Cam Mini.
For the latest information, product
updates, and everything Zendo visit
GoZendo.com/Support.
Still have questions? Reach our
Customer Experience team at
[email protected] or toll free
at 1-844-77-ZENDO (93636).
FRONT
FRONT
前面
前面
1 2 3 4 5 6 7
1 2 3 4 5 6 7
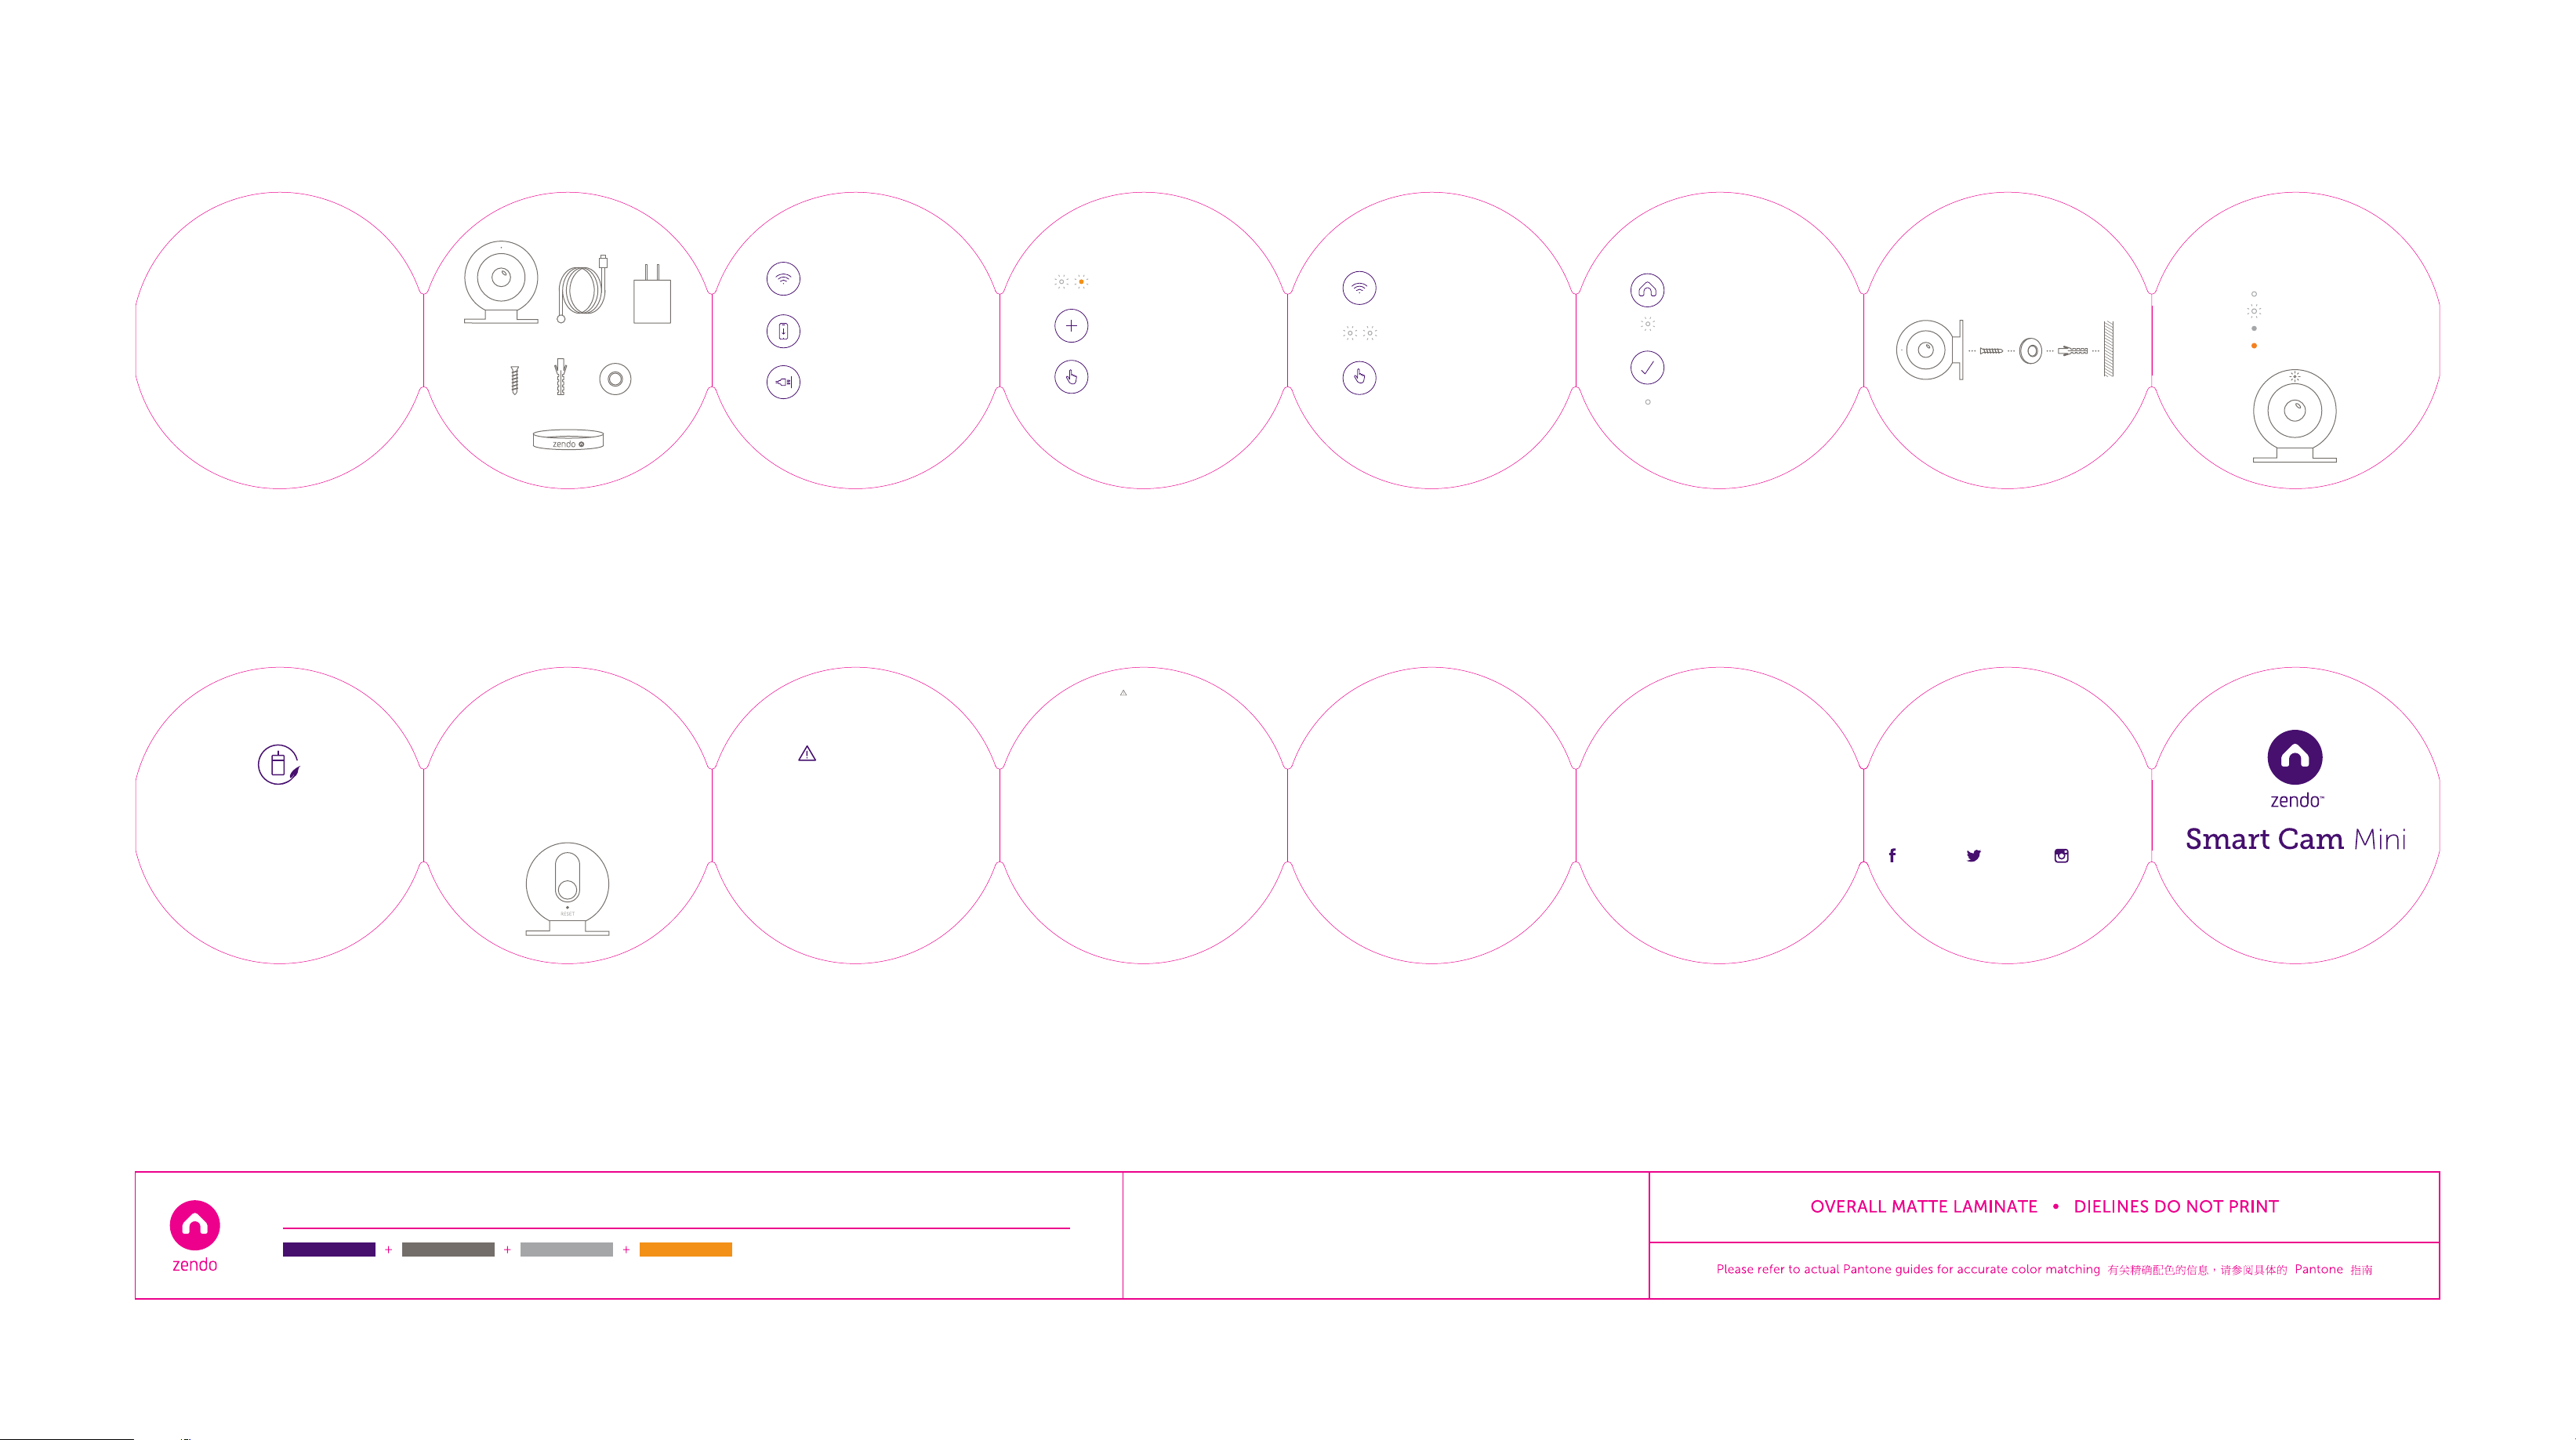
Included Setup Mounting
Smart Cam Mini
& Magnetic Base
Screw Magnetic
Drywall
Anchor
Wristband
(Remove from cap)
USB
Power Cable
Plug-in
AC Adapter
Disk
Indicator Lights
To attach your Smart Cam Mini
1.
2.
3.
Ensure your iOS device is
on your Wi-Fi network.
Download the Zendo
View app and sign up
for an account.
Plug your Smart Cam Mini
power cable into the camera
and an outlet, and remove
the protective film from
camera lens.
Wait until the LED light is
alternating white & amber.
4.
Open the Zendo View
6.
app, tap + to start setup.
5.
Once available, select your
7.
Smart Cam Mini then tap
“Add to My Network.”
Ensure the Wi-Fi network
selected matches your iOS
device Wi-Fi connection
then tap “Next.”
Once connected, the LED
light will double-blink white.
Once your Smart Cam Mini
has successfully joined the
network, tap “Done.”
8.
Tap “Enter Code” then input
the 8-digit code found on the
included Setup Code Card.
The LED light will flash white
during setup (up to 5 minutes).
9.
Done! Your Smart Smart
Cam Mini will now appear
in the Zendo View app.
The LED light will be solid
white after a successful setup.
to a wall or ceiling, use the included
mounting hardware.
After successful setup, the LED
light on the front of the Smart Cam
Mini displays its current status.
Power On
Busy
Power O
Oine/Error
8
Consciously
Packaged
Zendo packaging is
made using recyclable and
biodegradable materials.
Troubleshooting
If your camera’s LED light is
amber immediately after setup, try
resetting the camera then starting the
setup process over again. Insert a pin into the
“Reset” hole on the back of the camera – hold
in place until the white and amber LED lights are
both on. This will initiate the reset process. Do
not restart the setup process until the LED light
alternates white and amber.
Warning
Read this Quick Start Guide and
Product Usage Guidelines found at
GoZendo.com/Support carefully
before using this product. Failure to
follow precautions in these documents
can result in serious injury, death, and/or
property damage. Keep this guide for
future reference.
WARNING:
CHOKING HAZARD
Keep away from children. Contains small
parts that may cause choking. Contains power
cable that may present strangulation hazard.
Do not use near water. Install and use in accordance with
This device complies with part 15 of the FCC Rules. Operation is
subject to the following two conditions: 1) This device may not cause
harmful interference and 2) this device must accept any interference
received, including interference that may cause undesired operation. This
equipment has been tested and found to comply with the limits for a Class
B digital device, pursuant to part 15 of the FCC Rules. These limits are
designed to provide reasonable protection against harmful interference in a
residential installation. This equipment generates, uses and can radiate radio
frequency energy and, if not installed and used in accordance with the
instructions, may cause harmful interference to radio communications.
However, there is no guarantee that interference will not occur in a
particular installation. If this equipment does cause harmful interference
to radio or television reception, which can be determined by turning
the equipment o and on, the user is encouraged to try to correct
the interference by one or more of the following measures:
Reorient or relocate the receiving antenna, increase the
separation between the equipment and receiver, connect
the equipment into an outlet on a circuit dierent from
RISK OF ELECTRIC SHOCK
applicable electrical codes and regulations.
that to which the receiver is connected, consult
FCC NOTICE
the dealer or an experienced radio/TV
technician for help. To assure
continued compliance, any
changes or
modifications not
expressly approved by the party
responsible for compliance could void the
user's authority to operate this equipment. This
equipment complies with FCC RF radiation exposure
limits set forth for an uncontrolled environment. This
equipment should be installed and operated with a minimum
distance of 20 cm between the radiator and your body. This
transmitter must not be co-located or operating in conjunction
with any other antenna or transmitter. The antennas used for this
transmitter must be installed to provide a separation distance of at least
20 cm from all persons and must not be co-located or operating in
conjunction with any other antenna or transmitter.
Under Industry Canada regulations, this radio transmitter may only operate
using an antenna of a type and maximum (or lesser) gain approved for the
transmitter by Industry Canada. To reduce potential radio interference to
other users, the antenna type and its gain should be so chosen that the
equivalent isotropically radiated power (e.i.r.p.) is not more than that
necessary for successful communication. This device complies with
Industry Canada license-exempt RSS 247 standard(s). Operation is
subject to the following two conditions: (1) this device may not cause
interference, and (2) this device must accept any interference,
including interference that may cause undesired operation of the
device. This device complies with RSS 247 of Industry Canada.
This Class B device meets all the requirements of the
Canadian interference-causing equipment regulations.
This equipment complies with IC RSS-102 radiation
exposure limits set forth for an uncontrolled
environment. This equipment should be
IC NOTICE
installed and operated with a
minimum distance of
20 cm
between the radiator and
your body. This transmitter must not
be co-located or operating in conjunction
with any other antenna or transmitter. The
antennas used for this transmitter must be installed to
provide a separation distance of at least 20 cm from all
persons and must not be co-located or operating in
conjunction with any other antenna or transmitter.
For pluggable equipment, the socket-outlet shall be installed near
the equipment and shall be easily accessible. “Made for iPod,” “Made
for iPhone,” and “Made for iPad” mean that an electronic accessory has
been designed to connect specifically to iPod, iPhone, or iPad,
respectively, and has been certified by the developer to meet Apple
performance standards. Apple is not responsible for the operation of this
device or its compliance with safety and regulatory standards. Please note
that the use of this accessory with iPod, iPhone, or iPad may aect wireless
performance. The Bluetooth
trademarks owned by Bluetooth SIG, Inc. and any use of such marks by
Zendo is under license. Wi-Fi
and the Wi-Fi Alliance logo are trademarks of Wi-Fi Alliance. All other
product and service names mentioned herein are the marks of their
One year limited warranty. For expanded warranty information, visit
GoZendo.com/Support. Designed in South Florida. Made in
China. © 2015 Zendo. All rights reserved. Zendo is a trademark
of Five Interactive, LLC. Fort Lauderdale, Florida. Use of the
product is subject to your registration with Zendo and
your agreement to the Terms of Service found at
®
word mark and logos are registered
®
, the Wi-Fi logo, the Wi-Fi CERTIFIED logo,
respective owners.
GoZendo.com/Support.
Let’s Get Social
Want to give us a shout? Or stay
informed on the latest Zendo happenings?
Connect with us on social media.
@GoZendo/GoZendo @GoZendo
Quick Start Guide
Smart Cam Mini (CFX-WN-0100) / Quick Start Guide / English / Scale: 1 = 1
PMS 2607 PMS WARM GRAY 11
PMS COOL GRAY 5 PMS 130
11-13-2015
 Loading...