

Page 1
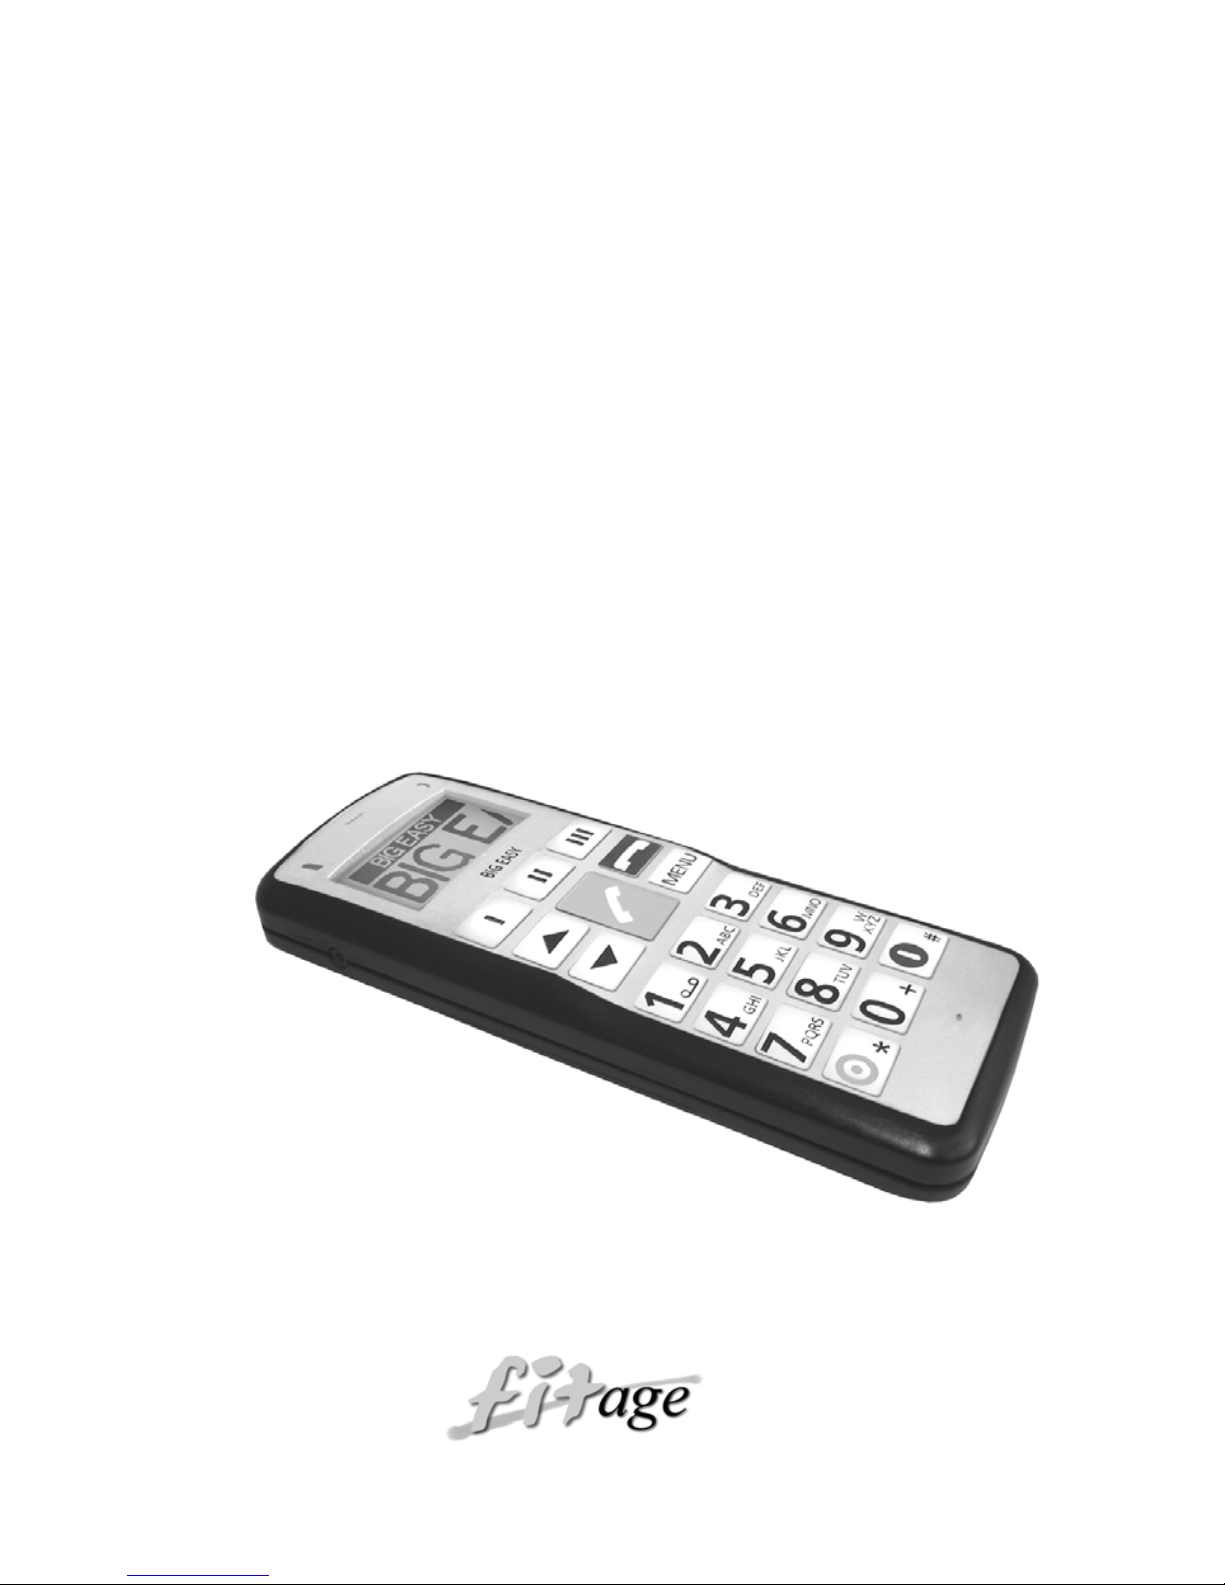
Operating manual
BIG EASY 2
convenient
mobile
phone
Made by in Germany
162
Page 2
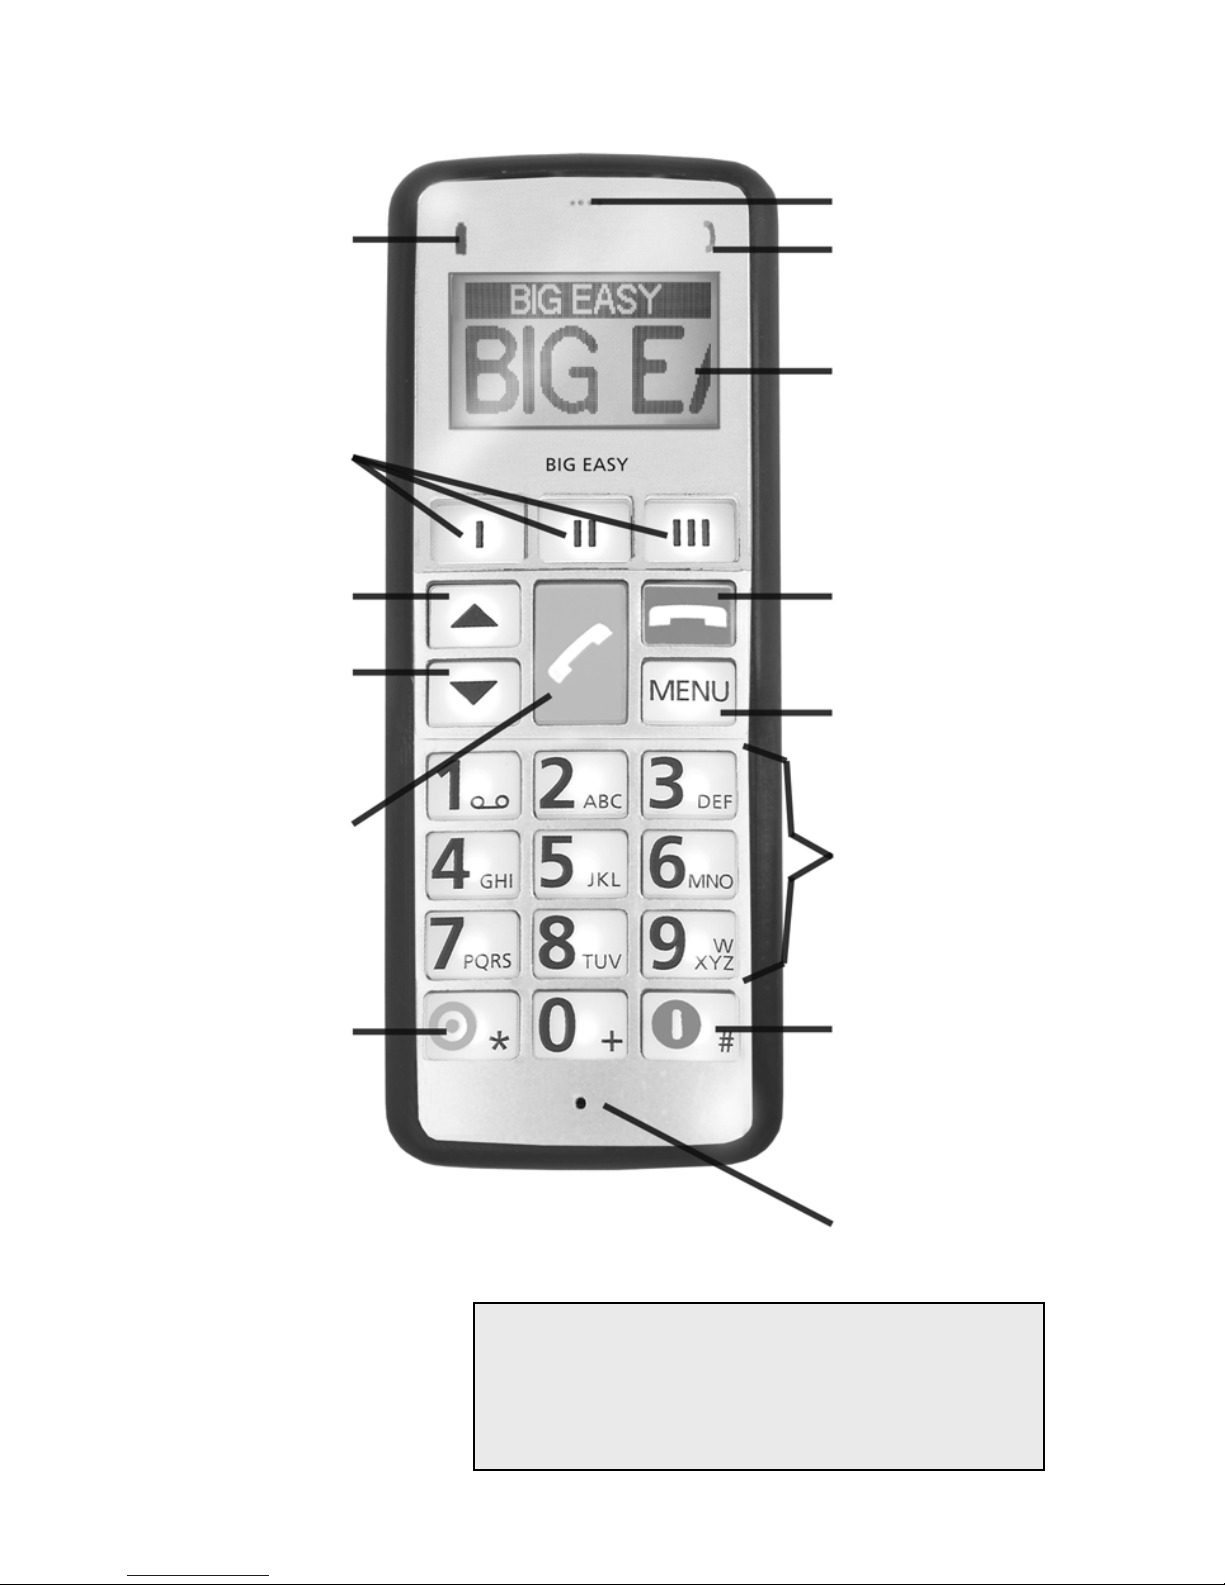
Battery warning
light
P. 17, P.21
Direct dial keys
P. 51
Emergency group
call
P. 57
Scroll forward
Handset louder
Scroll back
Handset quieter
Accept call
P. 41, P.45
Confirm entry
Loudspeaker
Warning light for
incoming calls and
network reception
P. 40, P. 42
Display P. 13
End call P. 43
Cancel entry
More functions
P. 48 ff
Number keys,
letter keys
(P. 153 onwards)
Switch on phone
P. 37
Electronic
key lock P. 12
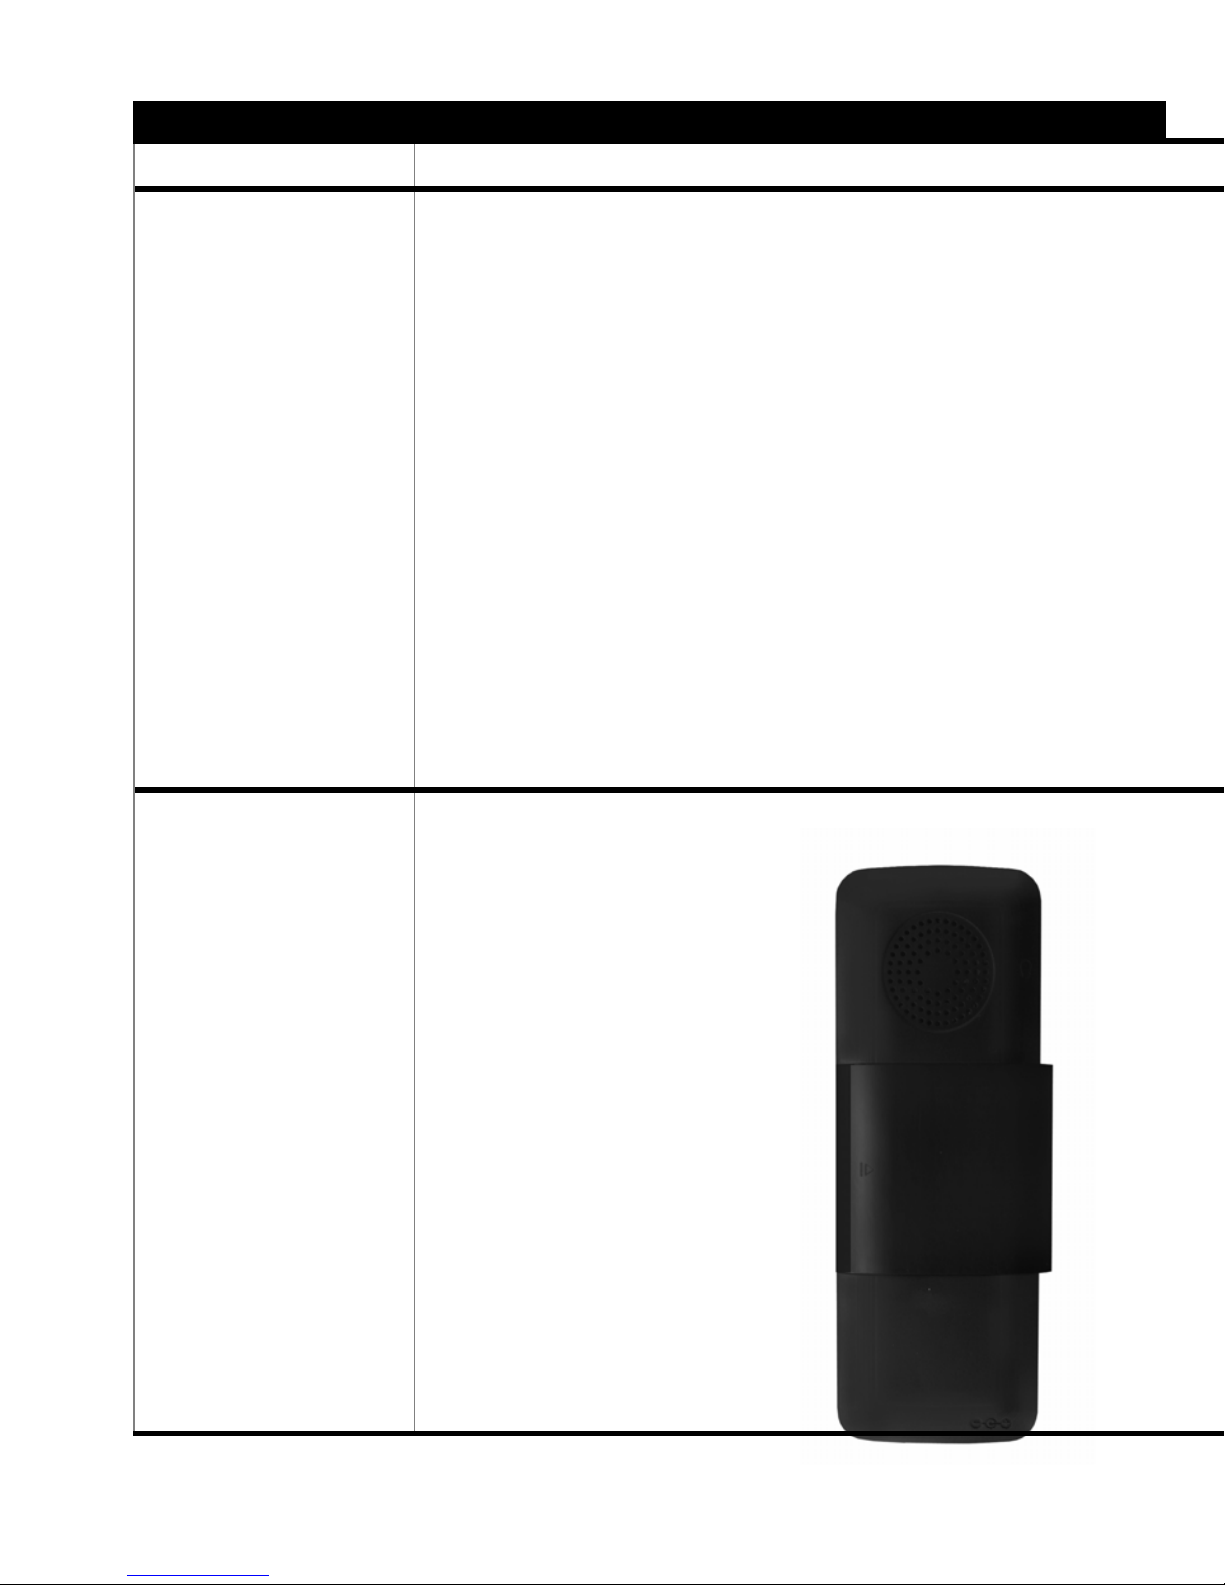
Reverse:
- Handsfree
loudspeaker
- Battery compartment
163
Switch off phone
P. 45
Microphone P.11
Quick guide to number keys
and direct dial keys on pages
153-156
Page 3
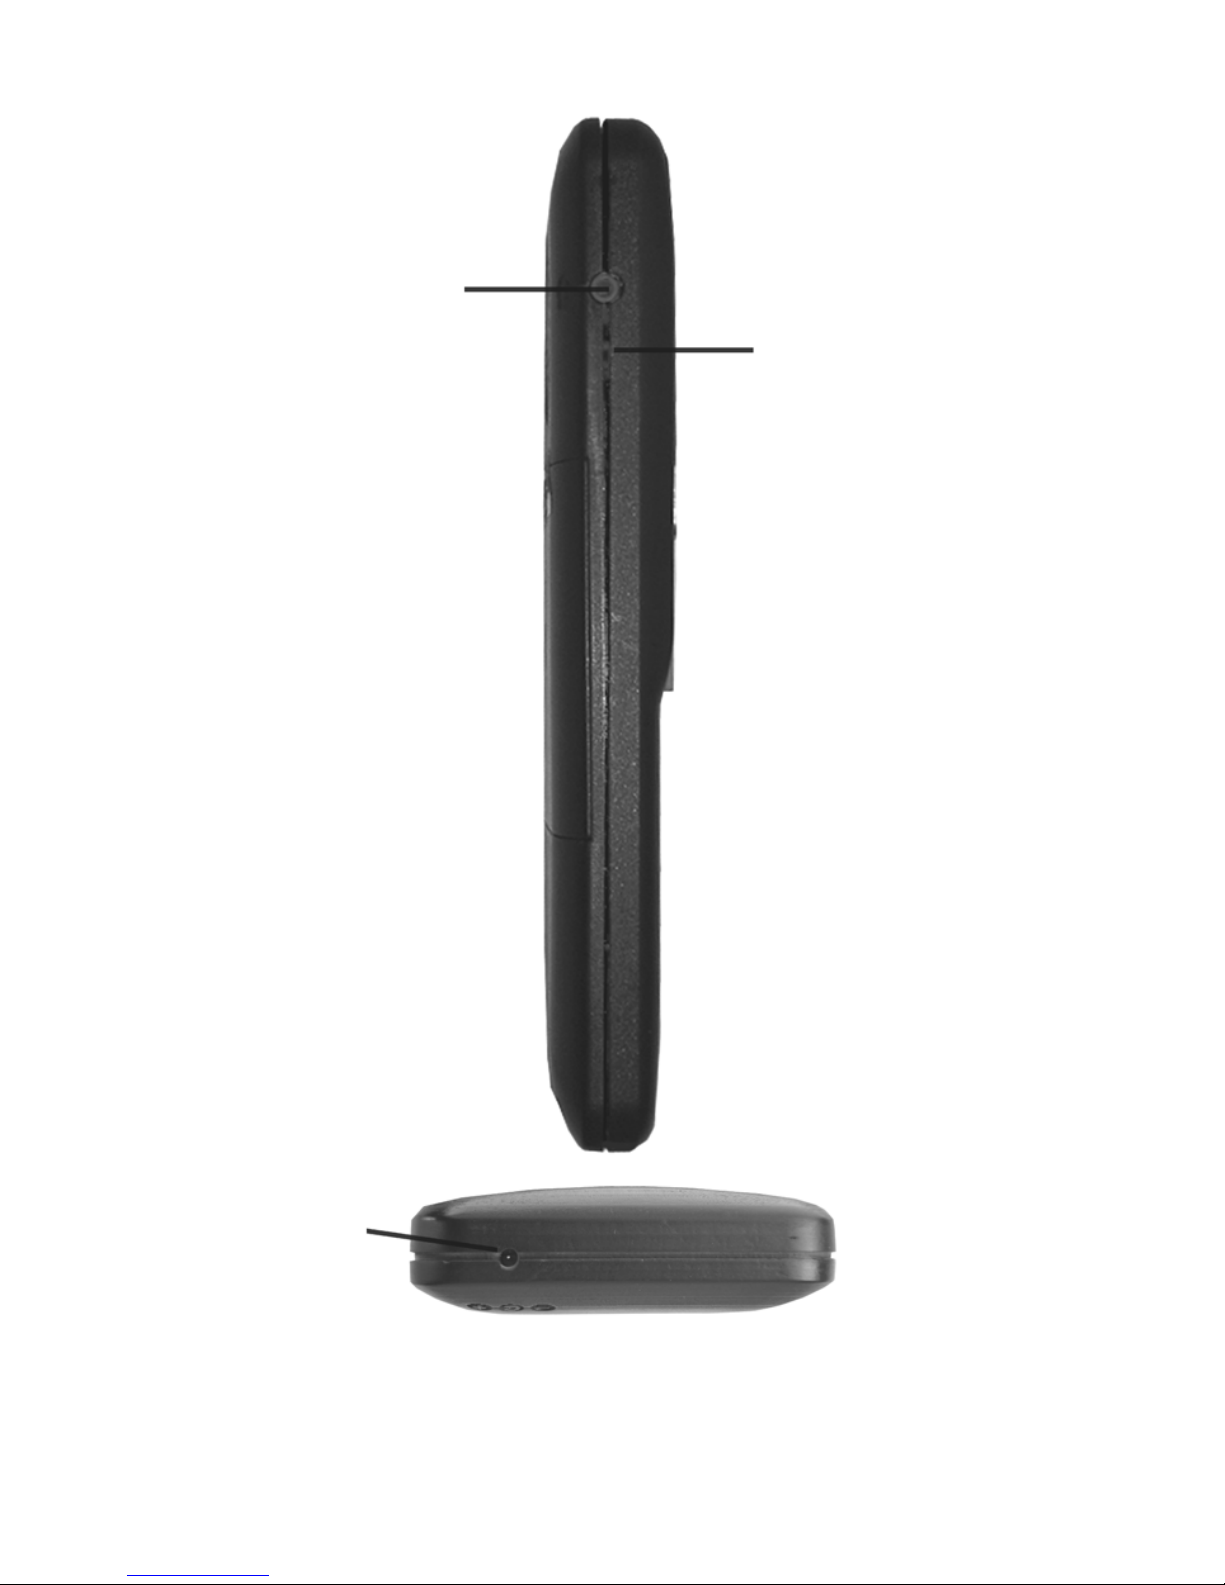
Jack for earphones
with microphone Output aperture
P. 28 for acoustic signals
and ringtones
Jack for charger
P. 21
164
Page 4
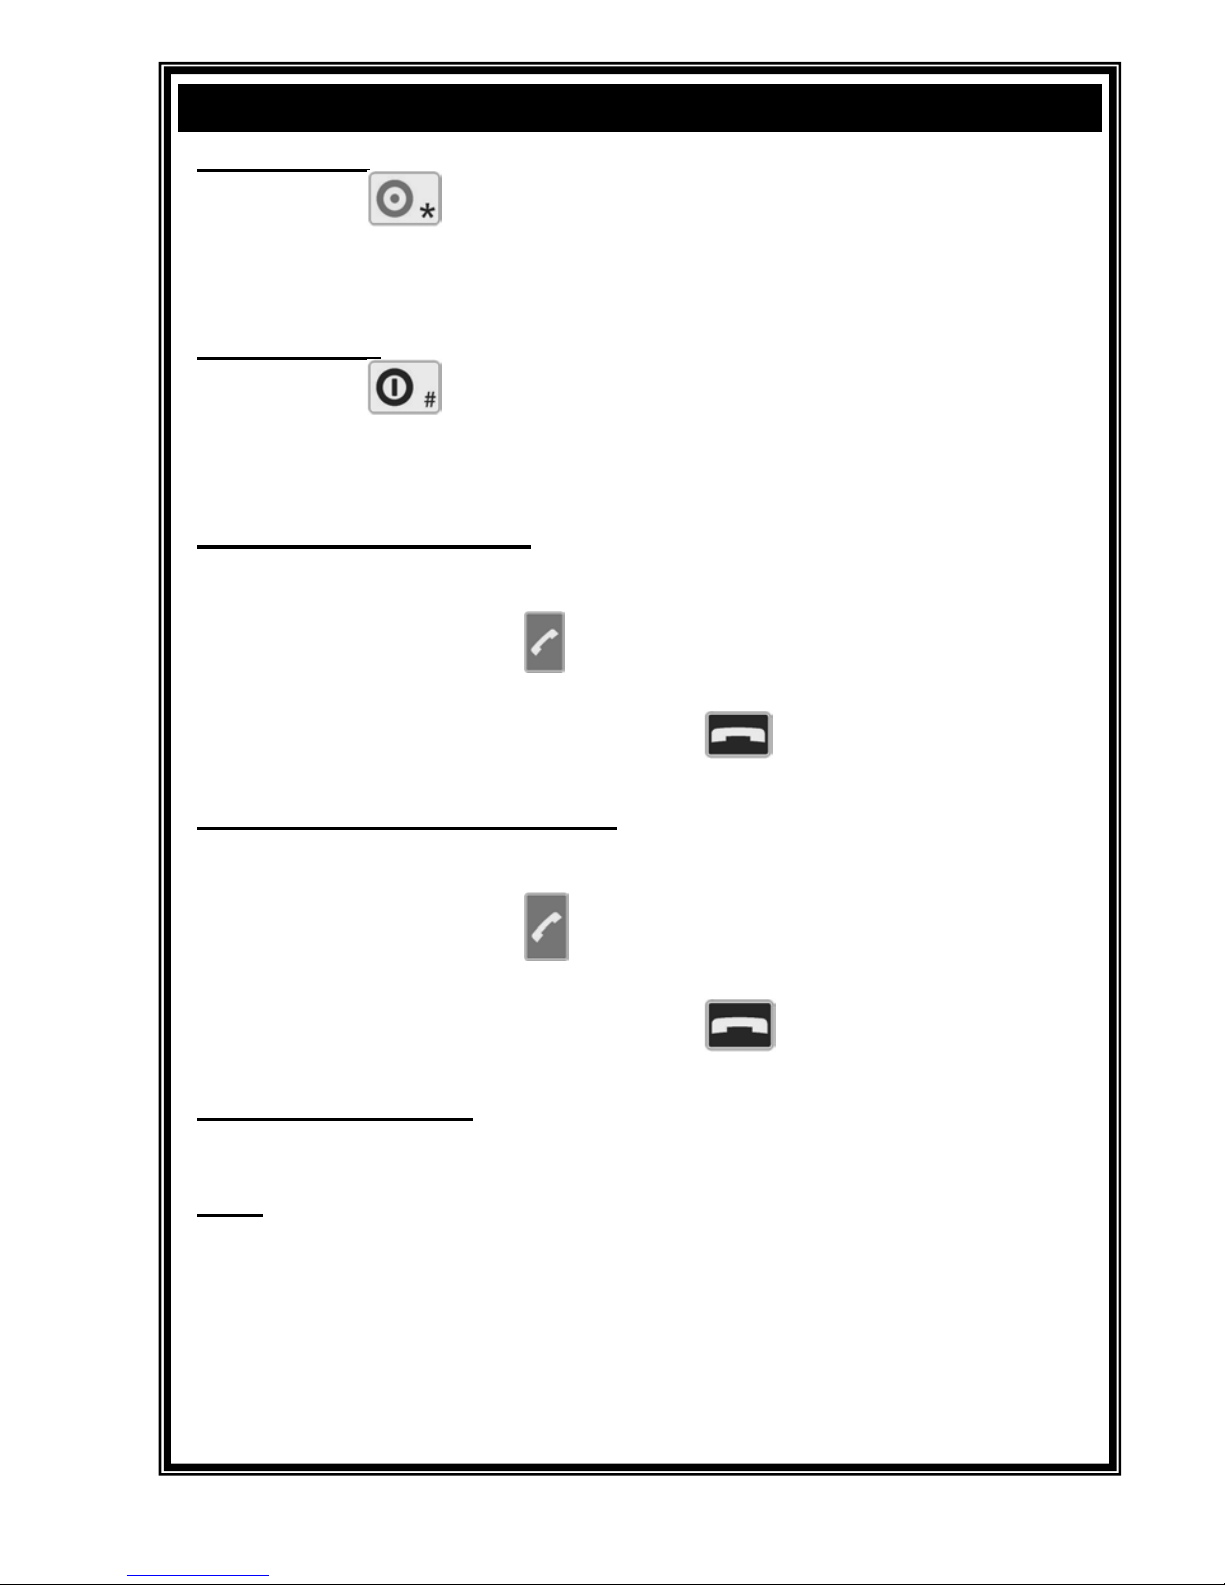
“BIG EASY 2” Quick Guide
Switching on:
• Press the
key on the bottom left for approx. 2 seconds until
the display lights up and the “Please wait” message appears.
• Wait until the phone is ready and the “Service Provider” appears
on the screen. (A green light will flash at the top right.)
Switching off:
• Press the
key on the bottom right for approx. 2 seconds
until the light comes on (the display will say “Goodbye”). The phone
will then switch off.
Making a call by dialling:
• Dial the number.
• Check that the number in the display is correct.
• Press the large green
key briefly to connect the call and put
the phone to your ear.
• At the end of the call, press the red
key briefly to discon-
nect the call.
Making a call using key I, II or III
:
• Press one of the keys I, II, or III briefly to display a previously
stored contact.
• Press the large green
key briefly to connect to this number
and put the phone to your ear.
• At the end of the call, press the red key briefly to disconnect the call.
Emergency function:
Press key I, II or III for approx. 2 secs. and
hold it down until the alarm sounds (N.B. You need to activate the
Emergency Function first.)
Tips:
• A flashing green light on the top right means the phone is ready
for use.
• A flashing red light on the top left plus an audible signal means
the battery needs to be recharged urgently. The battery light
stays on while the phone is being charged. (Always keep the
phone on charge when you are at home – this will not damage the
phone.)
Page 5

1 Introduction
®
Thank you very much for choosing the BIG EASY 2
Mobile Phone.
This mobile phone was developed with one particular
aim in mind: to make the basic function of a phone. i.e.
making phone calls, a priority and to design it so it’s
convenient to use. In addition, we have put particular
emphasis on its user-friendly qualities and fully accessible design. This mobile phone can also increase your
personal safety and provide more health safeguards.
We would especially like to thank all those who have
been unceasing over the years in their demands for a
®
phone like the BIG EASY 2
. The mobile phone you
see before you is the result of your efforts, suggestions
and ideas. The process of development, unit design
and production was established and remains in Germany.
If you have any suggestions for improvement, we‘d be
delighted to hear about them.
Dr. Darius Khoschlessan
CEO
fitage GmbH & Co. KG, Mannheim
®
Operating instructions for BIG EASY 2
As of 9/2007 Subject to alteration
Item. B2TH
2
Page 6

2 Table of contents
Summary screen of the mobile phone
Quick Guide ..................................................... 1
1 Introduction ........................................................ 2
2 Table of contents ................................................ 3
3 Safety advice ...................................................... 7
4 Your mobile phone and its parts …………...... 10
4.1 Housing .................................................... 10
4.2 Electronic key lock ..................................... 12
4.3 Display ........................................................ 13
4.4 Battery and SIM card ................................ 16
4.5 Battery.......................................................... 17
4.6 Charger ................................................... 21
4.7 SIM card ................................................... 23
4.8 Antenna ....................................................... 26
5 Accessories ...................................................... 27
How to get started:
6 Getting started …………………......... 31
6.1 Charging ............................................ 31
6.2 Open the battery compartment................ 31
6.3 Open the SIM card compartment........... 33
6.4 Insert the SIM card …............................. 33
6.5 Close the battery compartment................. 35
7 How to make a call:…..................................... 37
7.1 Switching on................................................ 37
3
Page 7

7.2 Entering your PIN number............................ 37
7.3 Automatic mobile phone network search..... 39
7.4 Dialling......................................................... 39
7.5 Connecting your call..................................... 41
7.6 Changing the volume of the handset........... 41
7.7 Handsfree function ................................... 43
7.8 Ending a call.......................................... 43
7.9 Switching off................................................. 45
7.10 Accepting/declining an incoming call...... 45
8 Menu structure - overview................................ 47
9 Calling stored phone numbers ……….………. 51
9.1 Direct dial .................................................... 51
9.2 Speed dial ................................................... 51
9.3 Selecting names from the phone book........ 53
9.4 Emergency group call ................................ 57
9.5 Using speed dial to call your mailbox........... 59
9.6 Repeat dialling ……………………………..... 61
9.7 Calling back number of last caller.... 63
9.8 Calling back number of last missed call ……65
10 Storing phone numbers in the memory......... 67
10.1 Storing a new entry – name ….…………. 67
10.2 Storing a new entry - number …………….. 69
10.3 Changing an entry ……............................. 71
10.4 Deleting an entry ……...…......................... 73
10.5 Assigning an entry ………....................... 75
10.6 Deleting assigned numbers …………..... 77
4
Page 8

11 Settings ….......................................................... 79
11.1 Activating vibration.................................... 79
11.2 Setting the ringtone volume………............. 81
11.3 Setting the keypad sound.......................... 83
11.4 Setting the letter style…….................... 85
11.5 Setting the date and time ….................... 87
11.6 More settings …….................................. 89
11.6.1 Selecting a language ….......................... 91
11.6.2 Setting the ringtone ………..................... 93
11.6.3 Activating emergency group call ………..95
11.6.4 Activating the SMS function .................... 97
11.6.5 Entering your own phone number.……. 99
11.6.6 Entering your mailbox number ............ 101
11.6.7 Changing the letter size ...................... 103
11.6.8 Changing the size of the time display .... 105
11.6.9 Automatic key lock …..............................107
11.6.10 Switching off the PIN query function ... 109
11.6.11 Selecting a network
(abroad/borders) 111
11.6.12 Automatic call acceptance ................. 113
12 Alarm
............................................................... 115
13 Menu structure for SMS - overview ………... 117
13.1 Message received display ....................... 119
13.2 Creating a text message = SMS ............. 121
13.3 Sending a text message = SMS............... 123
13.4 Saving a text message = SMS ................ 125
13.5 Calling up received/stored text messages 127
13.5.1 Read received/stored SMS …..... 129
13.5.2 Change received/stored SMS …. 131
13.5.3 Delete received/stored SMS ……. 133
13.6 Emergency call text ……………………….. 135
5
Page 9

14 Other functions and instructions................. 137
14.1 SOS functions......................................... 137
14.2 Using the phone without a SIM card........ 137
14.3 No network reception ..…........................ 137
14.4 Location finding ...................................... 138
14.5 Entering PIN incorrectly 3 times ............. 138
14.6 Changing your PIN ................................ 138
14.7 Torch function .......................................... 138
14.8 Saving phone book onto/from SIM card. 139
14.9 Call divert/forward programming ….......... 139
14.10 Restoring the factory settings ………….. 139
14.11 Calling up credit on top-up card ……..…. 139
14.12 Special display messages …………....… 140
15 Trouble-shooting............................................. 141
GSM codes for mobile phones ........................ 144
16 Standard documentation............................... 145
17 Technical data .................................................. 145
18 Disposing of this product ............................. 146
19 Terms of warranty ...................................... 147
20 Glossary .......................................................... 149
21 Index ……………….………………………........... 150
Quick guide to function keys …………….. 153 – 156
Warranty certificate ........................ inside back cover
Service advice ........................................... back cover
6
Page 10

3 Safety advice
Please read this safety advice before reading the
operating instructions or using the phone
Danger
Medical aids such as hearing aids or heart
pacemakers may be affected by electromagnetic
waves from the mobile phone and may malfunction as a result. You are therefore advised to keep a minimum distance of 15-20 cm between these devices and the
mobile phone and not to hold the phone directly to the ear
if you are wearing a hearing aid. Do not carry the mobile
phone in your shirt pocket if you are fitted with a pacemaker. Contact your GP for further information.
Warning
Do not hold the mobile phone to your ear while
the ringtone is still sounding or when the “hands
free” option is activated. If these sounds are
delivered close to the ear, they can cause
serious long-term hearing damage. Under no circumstances should the mobile phone be held close to the ear
when the “hands free” option is activated or while it is ringing.
7
Page 11

Warning
Observe the legislation and local regulations
when using your mobile phone. These may vary
from country to country, for example on board
aircraft, at petrol filling stations, in hospitals and
while driving.
Warning
There is a risk of explosion if the battery is not
replaced correctly or if it is exposed to a naked
flame. Do not attempt to open the battery. Only
use a charger and battery which is supplied or
approved by the manufacturer. When replacing the battery,
ensure that it fits properly and is inserted the right way
round. It is designed so that it cannot be inserted the
wrong way round without using force.
Warning
The SIM card can be removed. It is possible for
small children to swallow it, so keep your mobile
phone out of the reach of children at all
times.
Please note:
Your mobile phone should only be used for the
purpose for which it is intended and only in
places where its use is permitted. Do not
expose it to moisture, intense heat or cold and
protect it from impact. Unauthorised use of this mobile
phone may damage it and invalidate the warranty. Do not
attempt to open your phone, except to replace the battery
or SIM card. Any other modifications to the phone are not
8
Page 12

permitted and will result in the loss of your user authorisation.
Please note:
This mobile phone may interfere with television
sets, radios and electronic devices when placed
in close proximity.
Advice
Please note that the internal antenna is fitted
along the base of the mobile phone housing.
This reduces radiation exposure to the head
compared to phones where the antenna is fitted
at the top. In addition, as the antenna is built into the base
of the housing, you should - as far as possible - experience
less interference when using the phone with most types of
hearing aid.
Nevertheless, your mobile phone may cause interference
with certain hearing aids in spite of these special features.
If you experience interference, you are advised to contact
the manufacturer of your hearing aid to enquire about alternative solutions.
Make sure you do not cover the lower end of the device
with your hand when you are using it. If your hand covers
the antenna reception area, the phone will have to operate at higher than normal transmission levels, which will
reduce the length and quality of its performance. It will also
affect the quality of your connection.
However, there is no scientific evidence that covering up
the antenna reception area with the hand will result in
health problems.
9
Page 13

4 Your mobile phone and its parts
Please read these operating instructions carefully
and keep them in a safe place. No liability is accepted for losses caused by inadequate attention
being paid to these instructions or where the advice contained therein is not followed.
If technical questions or defects arise, please refer at all times to the service advice provided at
the end of this booklet.
4.1 Housing
The housing of your mobile phone is manufactured
from high-quality ABS plastic with a paint finish.
• To enjoy a long and problem-free service life,
please protect your mobile phone against extreme
temperatures (below -10°C and above +55°C).
Protect the paint finish by not allowing the phone to
come into contact with rough surfaces and strong
abrasive or cleaning agents.
• The housing is not waterproof! Should the equip-
ment come into contact with water, dry the outside
of it at once. Disconnect the phone immediately if it
is connected to the power supply. Open the battery
compartment and remove the battery fully by removing the connection leads. Stand the mobile
10
Page 14

phone upright where there is good ventilation. Do
not expose the phone to any kind of heat. Do NOT
open the housing! Should the unit still show any
traces of moisture after drying, or should there be a
malfunction after the battery is re-inserted, please
contact your mobile phone dealer.
• Please ensure that no dirt or sand enters the
openings on the phone (i.e. buzzer signal outlet,
sockets for headphones and battery charger, microphone and loudspeaker outlets)
• Please clean the outside of your phone with a soft
damp cloth.
• Do not drop, knock or shake the phone. Rough
handling can damage the internal parts. Damage
caused in this way is not covered by the warranty.
11
Page 15
4.2 Electronic key lock
To prevent the keypad from being accidentally
pressed, you can activate the electronic key lock,
which locks all the keys except for the emergency call
function on the I, II and III keys.
You activate or deactivate the electronic key lock by
pressing the
key for 3 seconds.
When the key lock is activated, you
will see the following message on
the top line of the display:
Key lock
Time
Date
Your phone no.
Incoming calls can still be taken using the call acceptance key. The lock is released for the duration of the
call and is automatically reinstated again afterwards.
The emergency call function is also available at all
times.
When the key lock is activated, you can use the
key to illuminate the display so that you can see the
time in the dark.
You also have the option of activating the key lock
automatically (when this has been deactivated by a
call, for example) after approx. 60 seconds, provided
you do not make a call or press any of the keys. The
procedure for setting up this function is described in
chapter 11.6.9 (page 107).
12
Page 16
4.3 Display
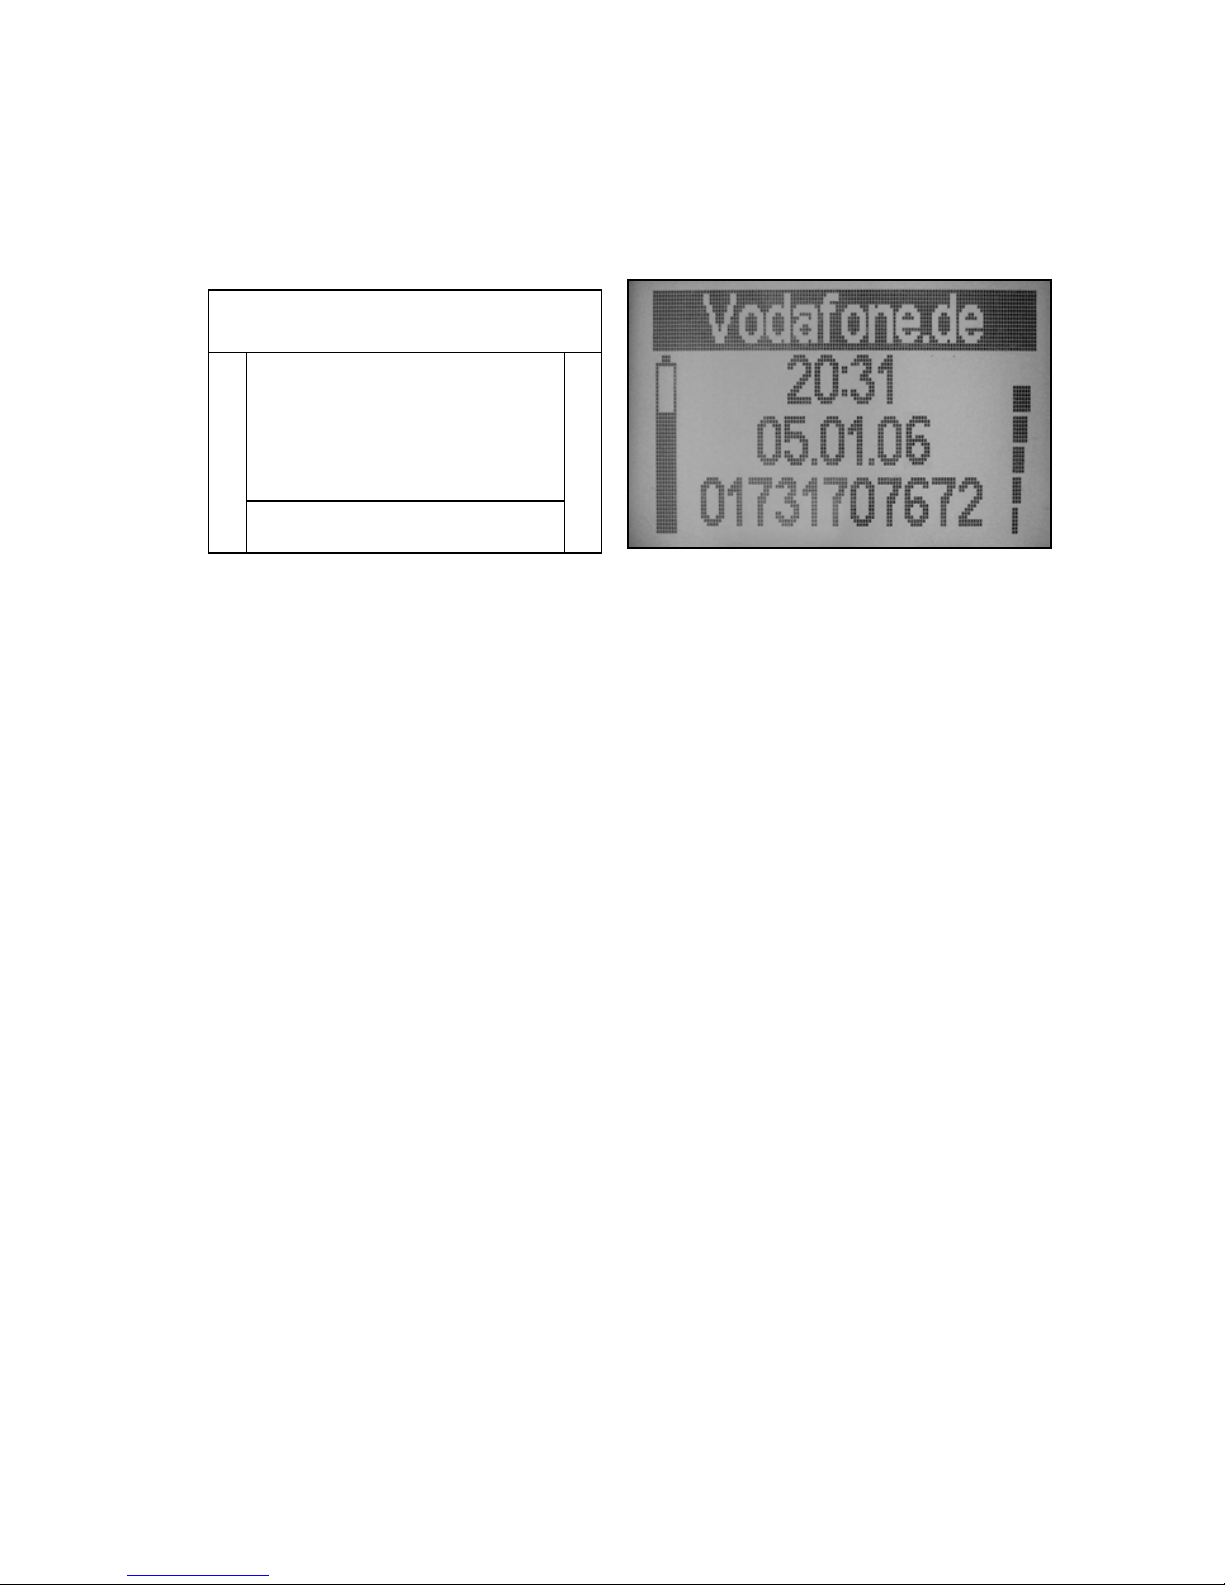
When the mobile phone is ready for use, the display
is divided into the following areas:
1
2
4
3
5
1. Headline: The network service provider you are cur-
rently using will be displayed here. On activation or
if required, the symbols and/or texts (e.g. Connecting) and information on settings (e.g. Alarm on) in
the display are reversed (i.e. displayed the other
way round).
2. Battery charge level: Indicates the level of battery
power in the form of a battery symbol which shows
the level of charge in six different stages.
3. GSM mobile phone network signal strength: The
strength of reception is indicated here - from no bar
(minimum) to six bars (maximum) - one above the
other. Where no signal corresponding to your SIM
card is available, no bar will be displayed.
4. Display: Shows the time and the call number or the
name entered for an incoming call.
5. Information line: Shows your own number (if en-
tered) or other information.
13
Page 17
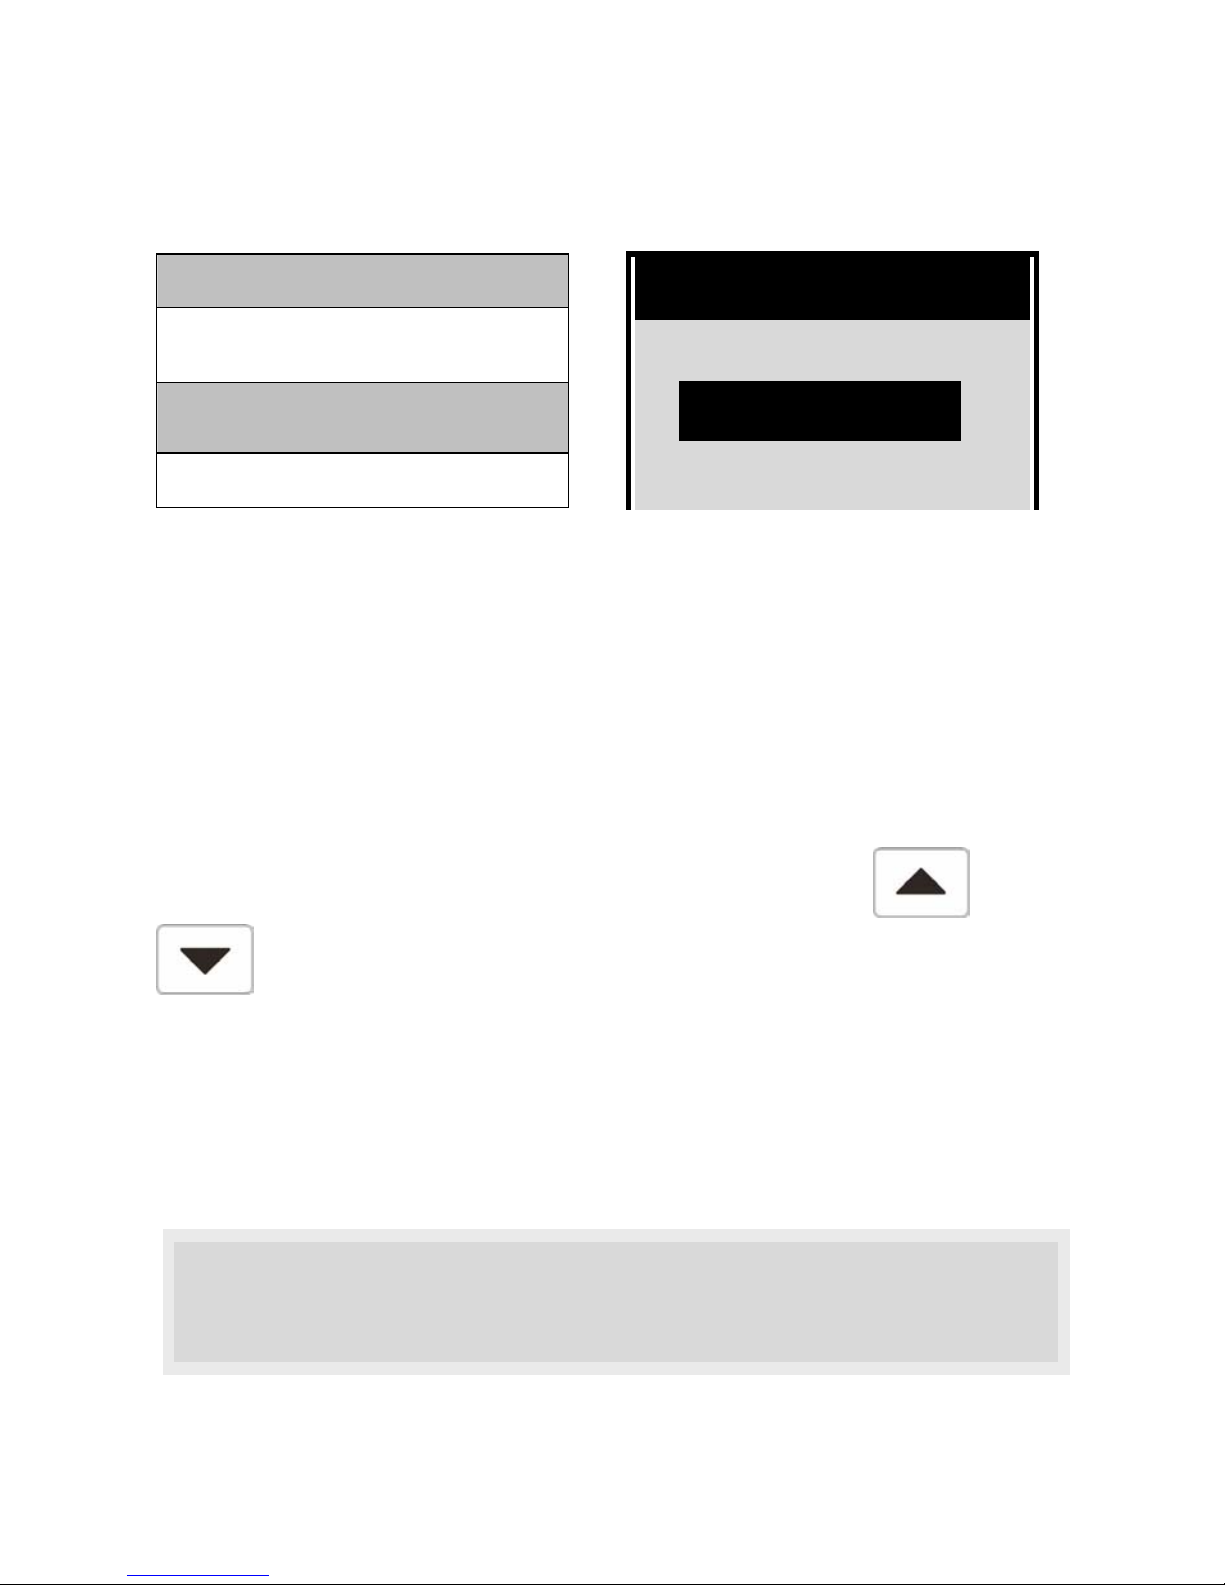
When the selection menu is on the screen, the menu
options are displayed in the following areas:
1
2
3
Menu
---------------------1 Phone book
4
2 Settings
1. Header: This line mostly contains the name of the
area of use (category) which is to be selected or
changed.
2. The function prior to the one currently selected
3. The function currently selected
4. The function after the one currently selected
Select the function you would like using the
or
keys.
A line with this symbol:
------------------- (= end of list symbol)
indicates that you have seen all the functions available
and the display shows the first function again.
In these instructions, the text simply represents the actual information which appears in the display in italics,
e.g. Time replaces 12:45.
14
Page 18
4.4 Battery and SIM card compartment
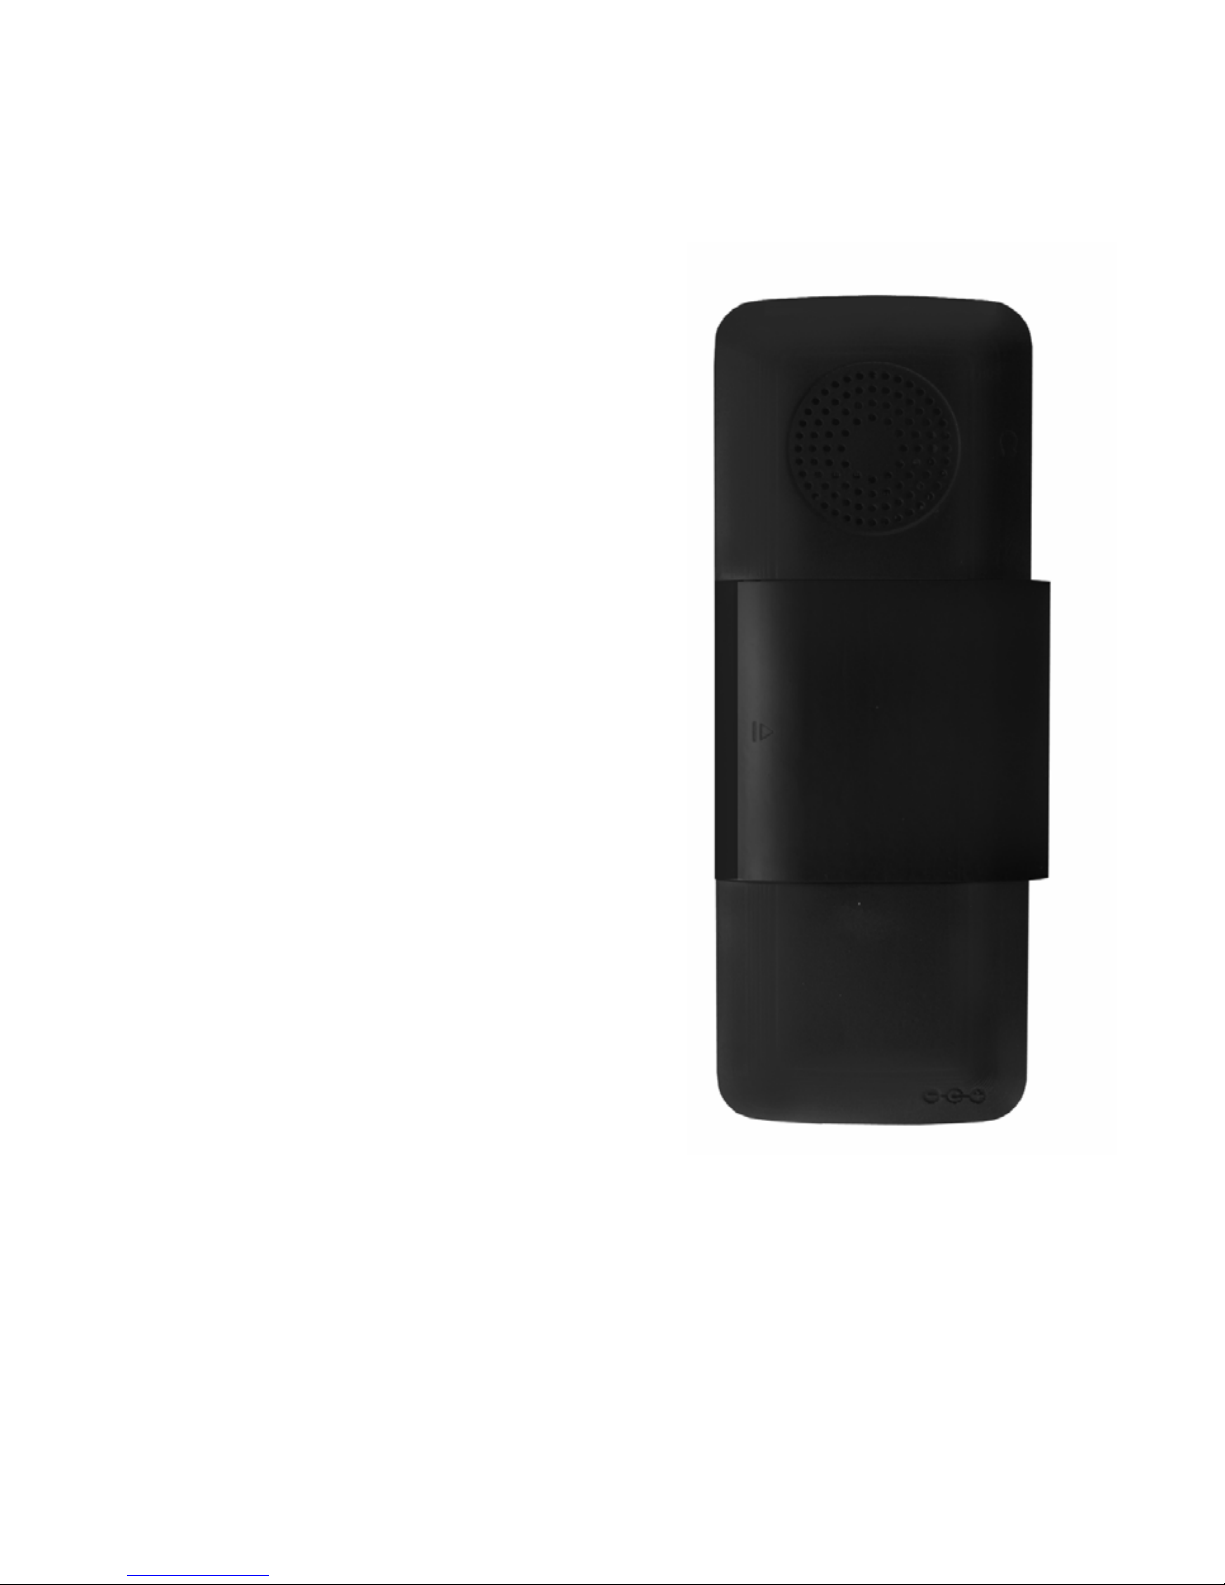
1. On the rear of the phone is a cover, under which
you will find the battery and
the SIM card.
The cover closes with a
catch to prevent it from
opening accidentally.
Push the cover to the right –
2.
it should slide across
approx. 5 mm.
3. Now remove the cover.
4. When replacing the cover,
turn it so that the symbol
on the left side at rear of
the cover points to the
right. Place the cover on
the housing approx. 5 mm
to the right and then slide it
to the left. The safety catch
will engage.
To open:
Slide cover
in this
Î Î Î
direction
15
Page 19
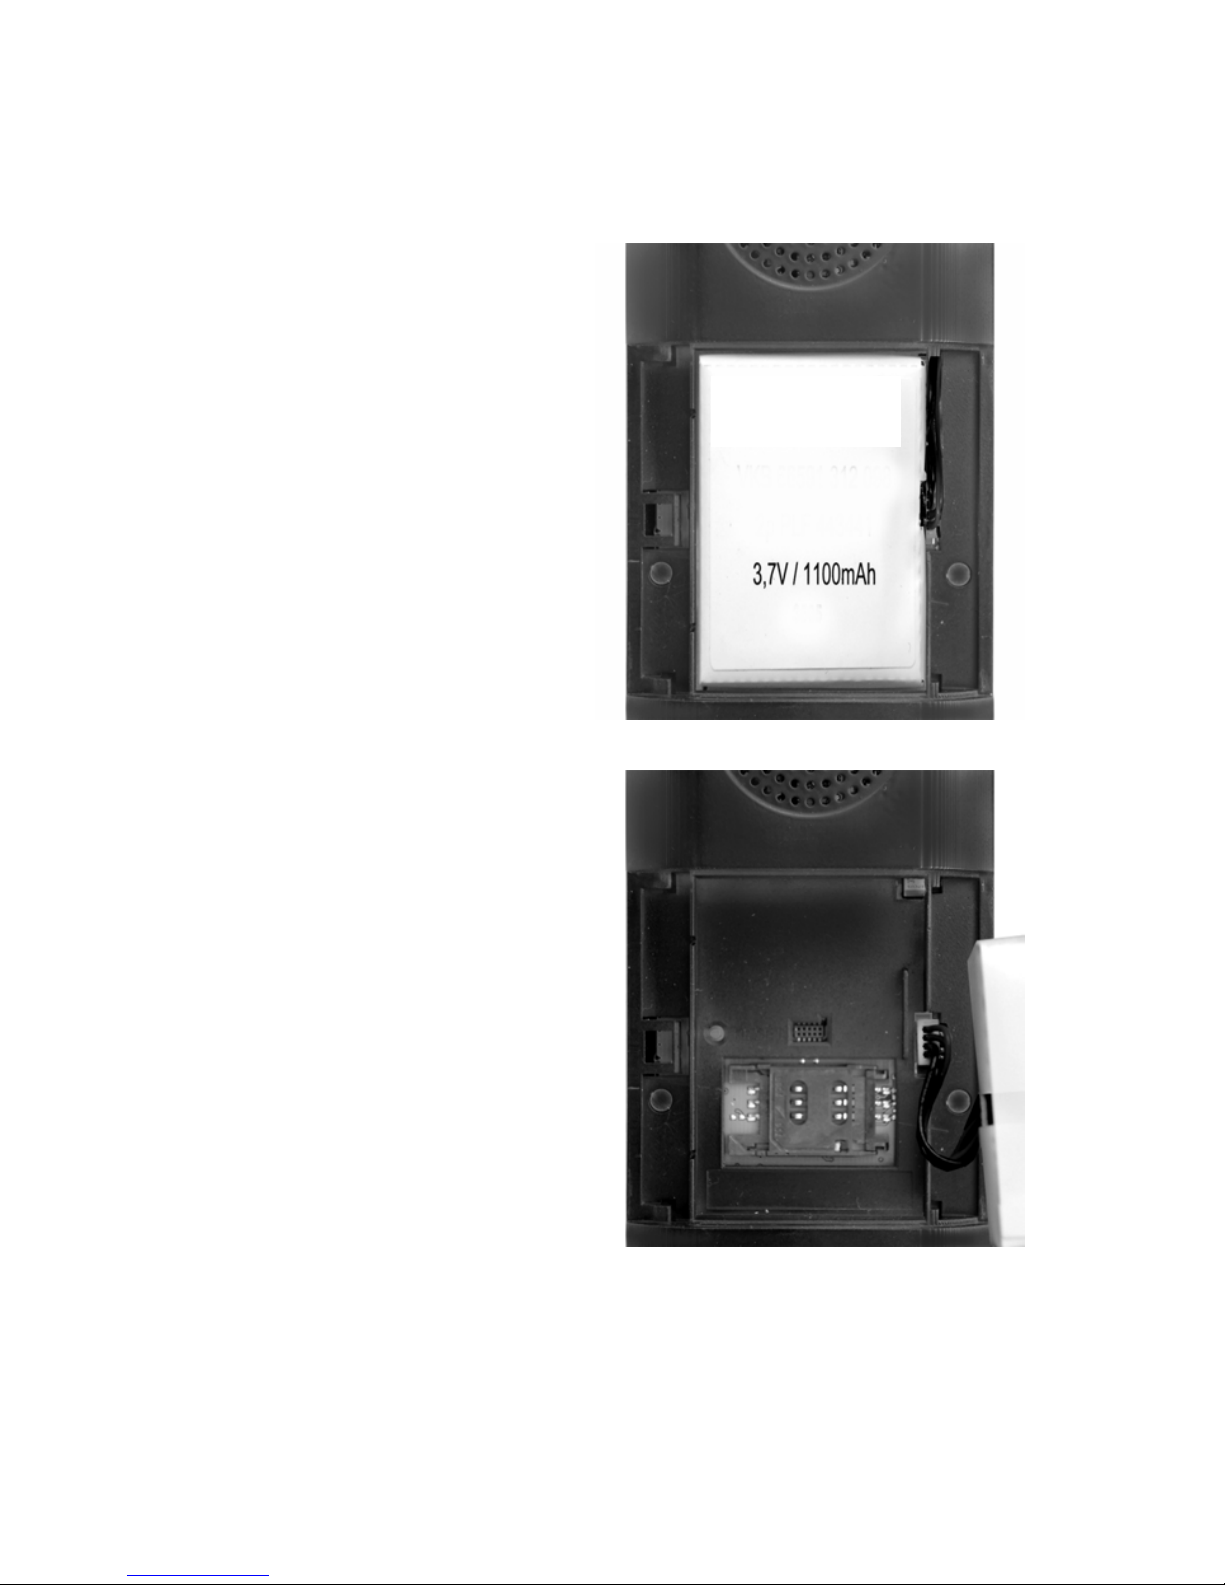
After opening the cover ...
... you will see the
battery, which you can
easily remove and place
to the right hand side
with the connection
leads still attached.
The SIM card is mounted
under the battery
compartment.
16
Page 20

4.5 Battery
Your phone is fitted with a top quality rechargeable
battery. Before a new battery is used for the first time,
it must be charged up for at least 4 hours.
On the left hand side of the display panel you will see
an elongated battery symbol. The more dark bars are
shown in the display, the higher the charge level of the
battery. When the battery is fully charged, the phone
can remain switched on and ready for use (i.e. on
standby) for up to approx. 120 hours (approx. 5 days)
or in use for up to 5 hours of continuous conversation.
When the battery has a charge of around 10% (i.e. the
equivalent of 8-12 hours on standby only) before it is
fully discharged, a red battery light will start to flash on
the top left above the display. At the same time, an
acoustic signal will sound approx. every quarter of an
hour to remind you that the mobile needs to be connected up to the charger in the near future.
To charge the mobile phone battery, insert the plug on
the charger into the jack on the left hand side of the
bottom of the mobile phone. Do not switch the mobile
phone off while it is charging. You can still receive
and make phone calls while the phone is charging.
While the phone is charging, the text “Charging” appears on the display. The bars on the battery symbol
on the left of the display flash in sequence to represent
the charging process.
17
Page 21

When the battery is fully charged (approx. 3½ to 4
hours for a fully discharged battery), the text
“Charged” will appear.
Remove the charger from the phone. All the bars in
the battery symbol on the left of the display will be
filled in.
The battery will feel warm while charging – this is absolutely normal and is not a cause for concern.
Full performance of a new battery is achieved only after several charge and discharge cycles.
When the battery is fully discharged, a text will appear in the display when charging begins and the
battery symbol will only start to flash after approx.
3 minutes.
Remaining charge indicator:
Your mobile phone can advise you of the precise
charge level of the battery. However, no phone can tell
you how many calls you can still make with the remaining charge. That’s why your mobile has no indicator to show the absolute remaining operating time. It
might seem to the user that the device is only in readyto-use (i.e. standby) mode, but the power requirement
can differ greatly: if the mobile is in the car or indoors,
it will need much more power to maintain the network
connection than when it is near to a transmission
mast. When conversations are held at a higher volume
and in an area with poor reception, more power will be
18
Page 22

required than in favourable conditions and with the
volume turned down.
For this reason the battery symbol indicator shows the
charge remaining as a percentage of the full
charge level and not the remaining operating time.
Battery care:
Your mobile contains sophisticated technology and a
top quality battery and so does not require you to take
specific care of the battery while you use it (there is no
memory effect leading to loss of capacity). You can
recharge the device even after just a short period of
use. Equally, you can use the device until the battery
is fully discharged and the mobile switches itself off
automatically. The electronic safety features ensure
that a total discharge, which would damage the battery, is not possible. Recharge a fully discharged battery for at least 15 minutes before making any further
calls, so that your next call will not be interrupted.
Please note that the battery is a consumable component of the mobile phone and is not covered by the
warranty. Even the capacity of a top quality battery,
such as the one used here, will of course diminish in
time.
19
Page 23

Storing the battery in excessively hot or cold temperatures will also gradually reduce the capacity.
Noticeably shorter times for conversation and when
ready to use (i.e. on standby) will become apparent
after approx. 1 – 2 years, depending on the extent to
which the phone is used. In this case, we recommend
that the battery is replaced. You do not have to be an
expert in order to replace the battery. You simply have
to carefully remove the battery connection leads from
the mounting and re-attach them to the new battery’s
terminals in the same way (i.e. red lead on top and
black lead underneath).
If you do not use your mobile phone for longer periods
(i.e. several weeks), loosen the connection leads and
remove the previously fully charged battery from the
housing. To use the phone again, re-connect the battery (see above).
After removing the battery or when long-term total discharge has occurred, you will need to reset the time
and date.
When replacing a battery, do not dispose
of it in your household waste. Please
hand the battery in for disposal at the
retailer where you bought the
replacement battery or take the battery to your local
waste and recycling centre. We are of course also
happy to receive batteries returned to us for disposal
free of charge.
20
Page 24

Warning
There is a risk of explosion if the battery is
not properly replaced or is exposed to a
naked flame. The battery must not be
opened. Only use suitable original chargers
and batteries. Take care when replacing the battery to
attach the connection leads properly and the correct
way round. Turn the connection leads so that the two
red wires on the connector point up and the two black
ones point down. The type of connection is designed
in such a way that it cannot be inserted the wrong way
round without using force.
4.6 Charger
Your mobile phone is specifically intended to be used
with the charger supplied. The charger connection is
polarized for compatibility.
Warning
Do not allow the phone to come into contact
with moisture and use the charger in dry
conditions only. It is designed to be
operated using a power supply of 220V~ only. Use
original chargers only.
21
Page 25
The use of other chargers may damage the phone and
invalidate the warranty.
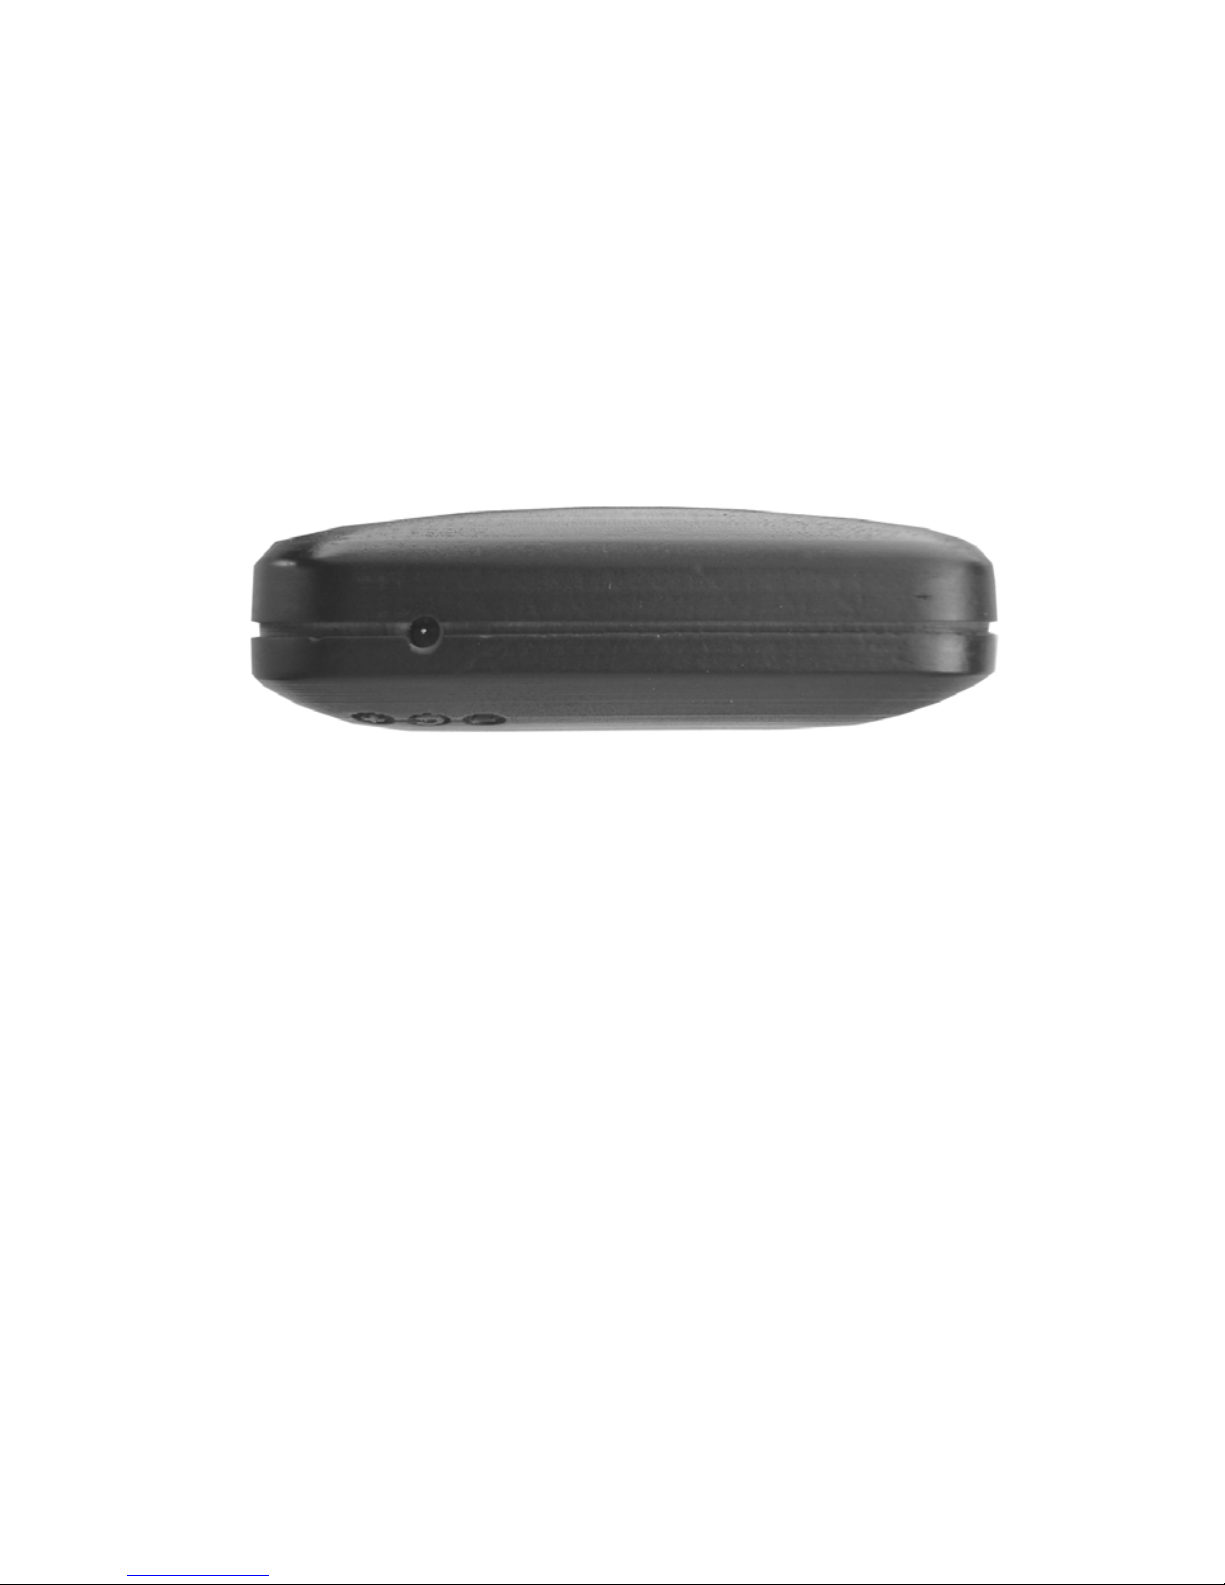
Insert the plug on the charger lead vertically into the
jack on the bottom of the phone on the left hand side,
as illustrated below, and push it all the way in.
Charger jack
Ó
When the connection has made contact, the message
“Battery charging” will appear in the display of the
mobile phone.
As long as the mobile is connected to the charger, the
red battery symbol will show on the top left of the display.
When the battery is totally discharged, the text appears at the start of the charging process in the display
and the battery symbol flashes only after approx. 3
minutes.
22
Page 26

4.7 SIM card
To be able to make calls with your phone, you need a
small electronic memory card called a SIM card.
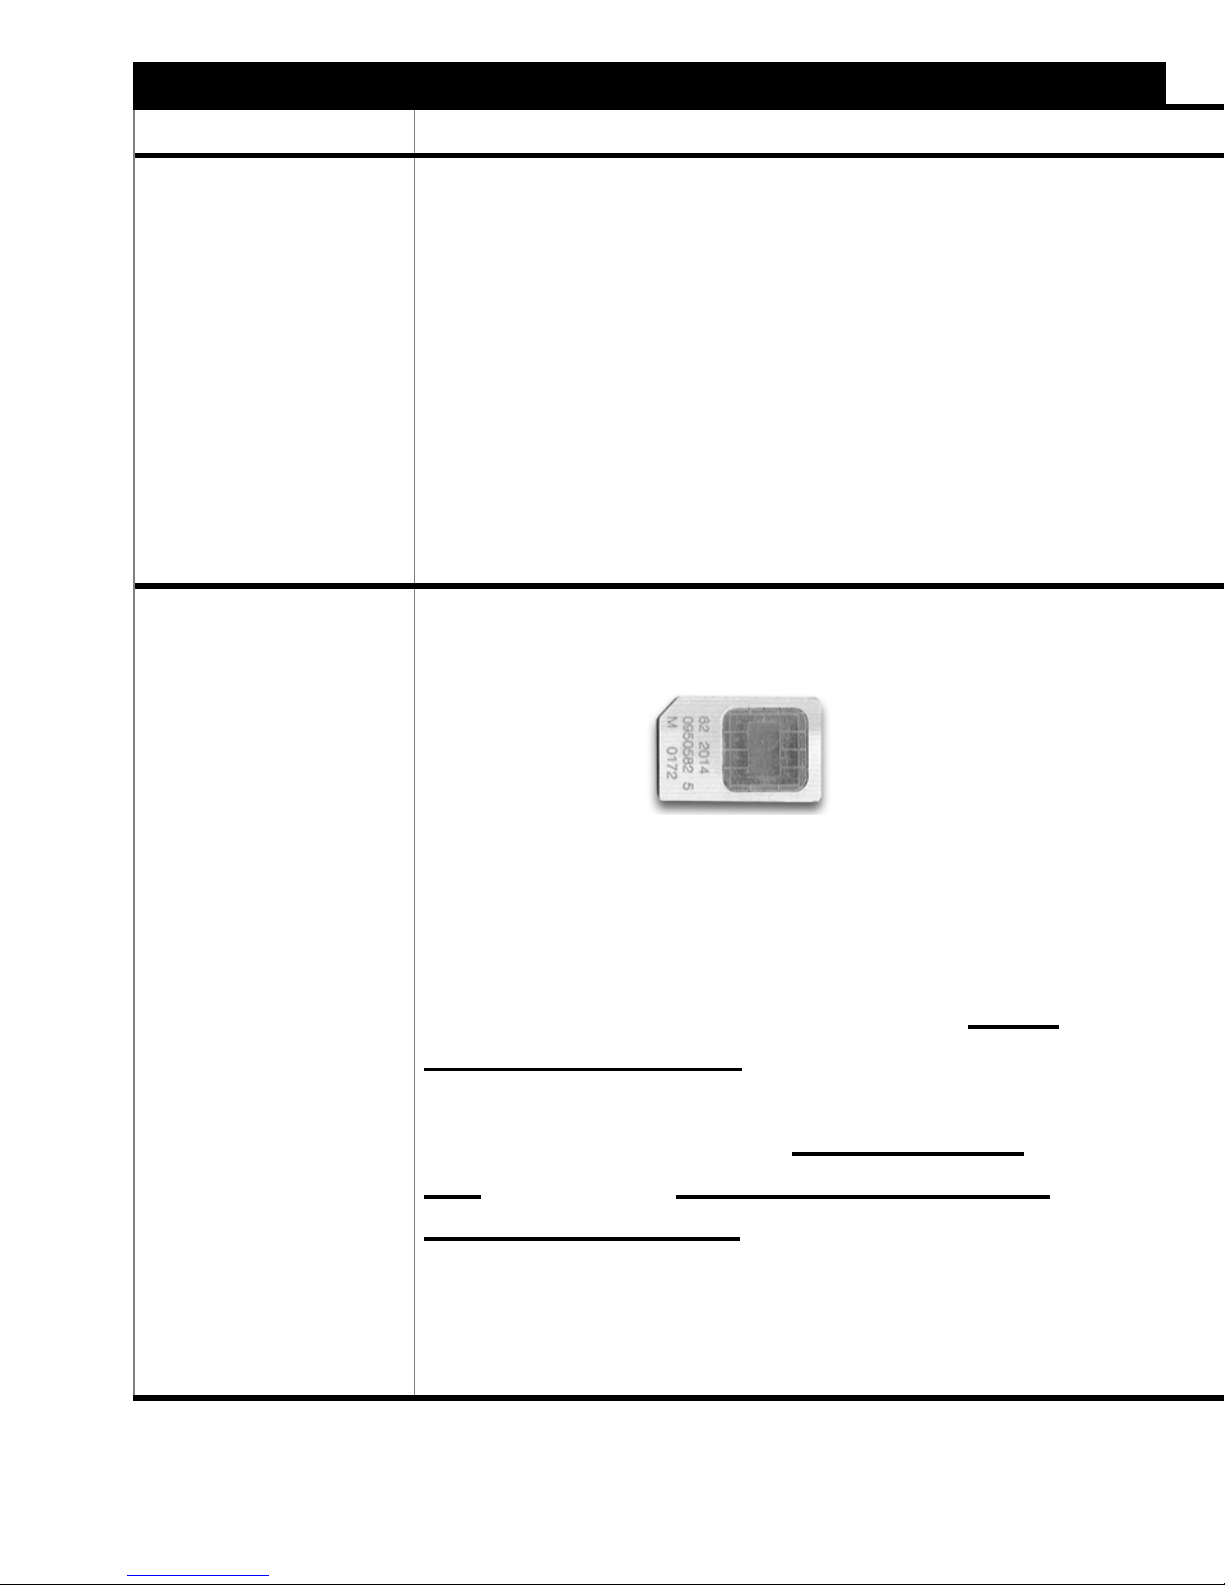
(Size as illustrated)
It receives and saves all the information required to
operate the phone:
• Security codes such as your PIN number (Personal
Identification Number)
• Phone book
• Text messages
• Information on special services
How do I obtain a SIM card?
Your mobile phone is normally supplied without a SIM
card. Please contact your mobile phone dealer or a
network operator and/or service provider. You will be
able to take out a service contract with them. There
are a number of different types of contract which might
be useful for you depending on your usage (i.e. the
type, duration and frequency of your phone use):
- Post-paid (usually with monthly fees and statements)
23
Page 27

- Top-up cards, with pre-paid units. When the
units have all been used up, the card must be
“topped up” with credit (e.g. for € 15 or € 25).
- Service contracts with a simplified charging
structure. Various store chains, discount businesses and other companies offer these types of
contract.
Your mobile phone is suitable for any type of contract
and can be used without restriction with SIM cards
from all mobile phone network operators and/or service providers throughout Europe (in some EU countries you will need a card from a local supplier). It can
also be used worldwide for other mobile phone networks (in Asia and America).
You can of course use your mobile phone with a SIM
card from an ongoing contract or from an existing
phone.
When the phone is not fitted with a SIM card
, it is only
possible to call the 112 emergency number in a few
EU-countries for a shrt time. Please see page 137.
Handle and look after your SIM card with great care in
order to avoid damaging it. If your SIM card is lost, stolen or damaged, please contact the network operator
and/or service provider you obtained it from as soon
as possible.
24
Page 28
Inserting the SIM card
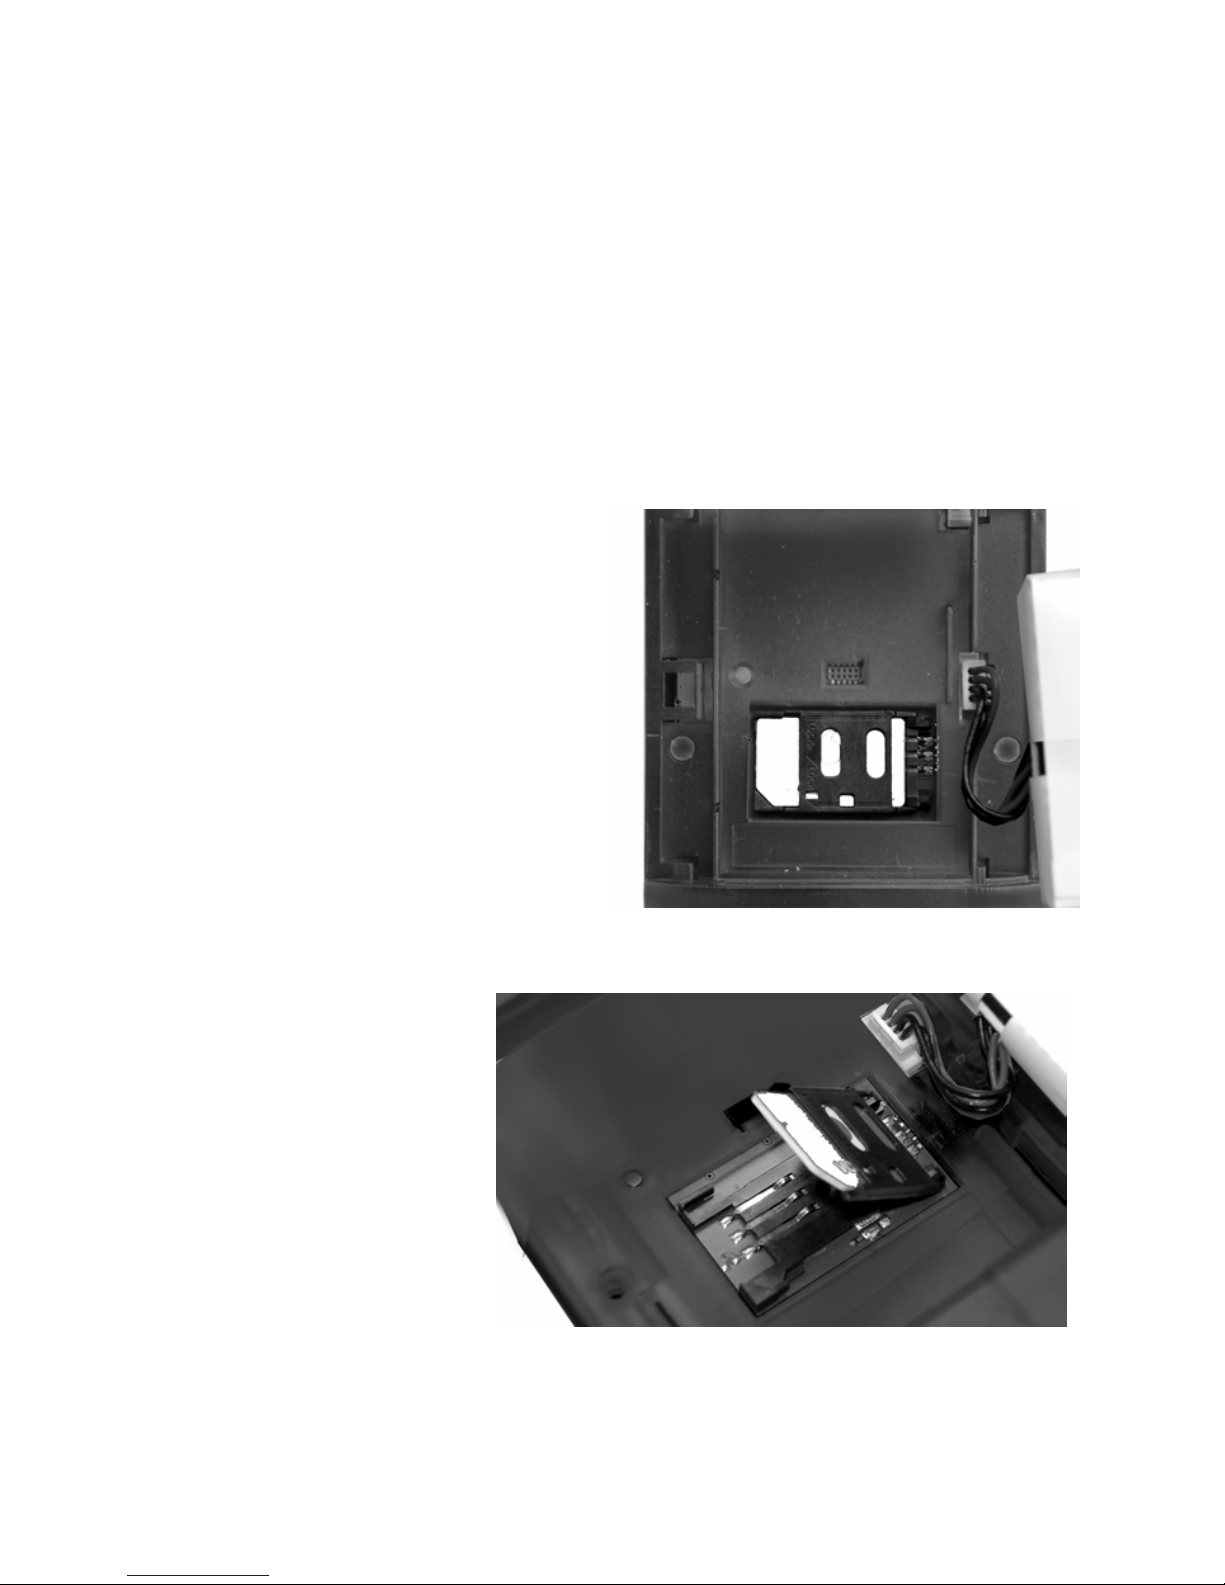
The SIM card is inserted underneath the phone battery.
Make sure that the phone is switched off and that it is
not connected to the charger. Turn the phone over and
remove the cover of the battery compartment, as previously described, and lift the battery to one side.
Leave the battery attached to the connection leads.
Using your fingernail,
slide the SIM card holder
on the black grip to the
right until it lifts up.
Insert the SIM
card into the
raised card holder
so that the gold-
coloured contacts on the SIM
card face down-
ÎÎ
wards towards
the phone and the
“cut-off” corner of the SIM card is at the bottom left
hand side.
25
Page 29
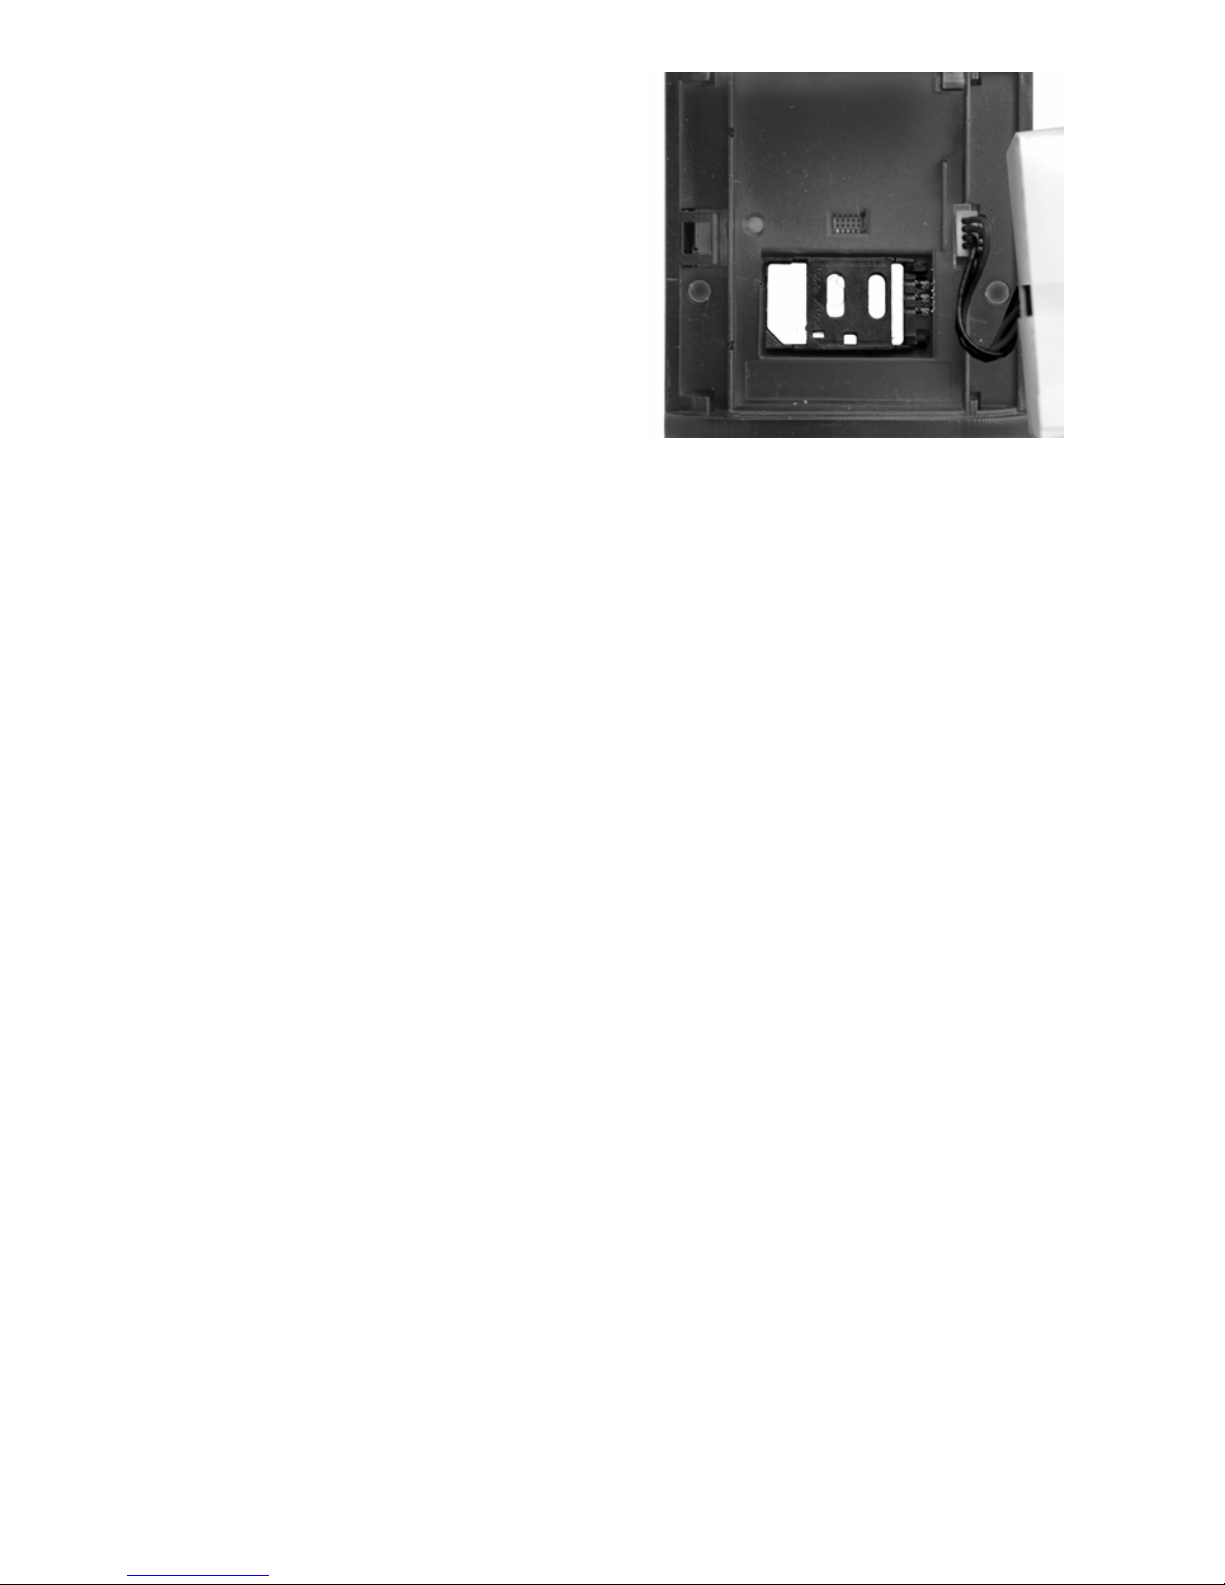
Lower the card holder,
pressing it gently down at
the same time, and slide
the grip to the left until you
feel it resist and lock into
ÍÍ
place.
Then insert the battery once again into its original position. If necessary, press the connection leads on the
battery back into their guide slots. Finally, close the
cover of the battery compartment.
4.8 Antenna
Your mobile phone has a built-in antenna. This is located internally across the base of the device. The advantage of this position is that antenna radiation is reduced in the immediate area of the head, thus also
minimising interference with hearing aids, for example.
To avoid any negative effect to the reception and
transmission qualities of the antenna, you should not
cover or shield the lower part of the phone with metallic objects (e.g. metal stands, gloves coated with
metal, or by setting it down upright on a metal plate).
26
Page 30
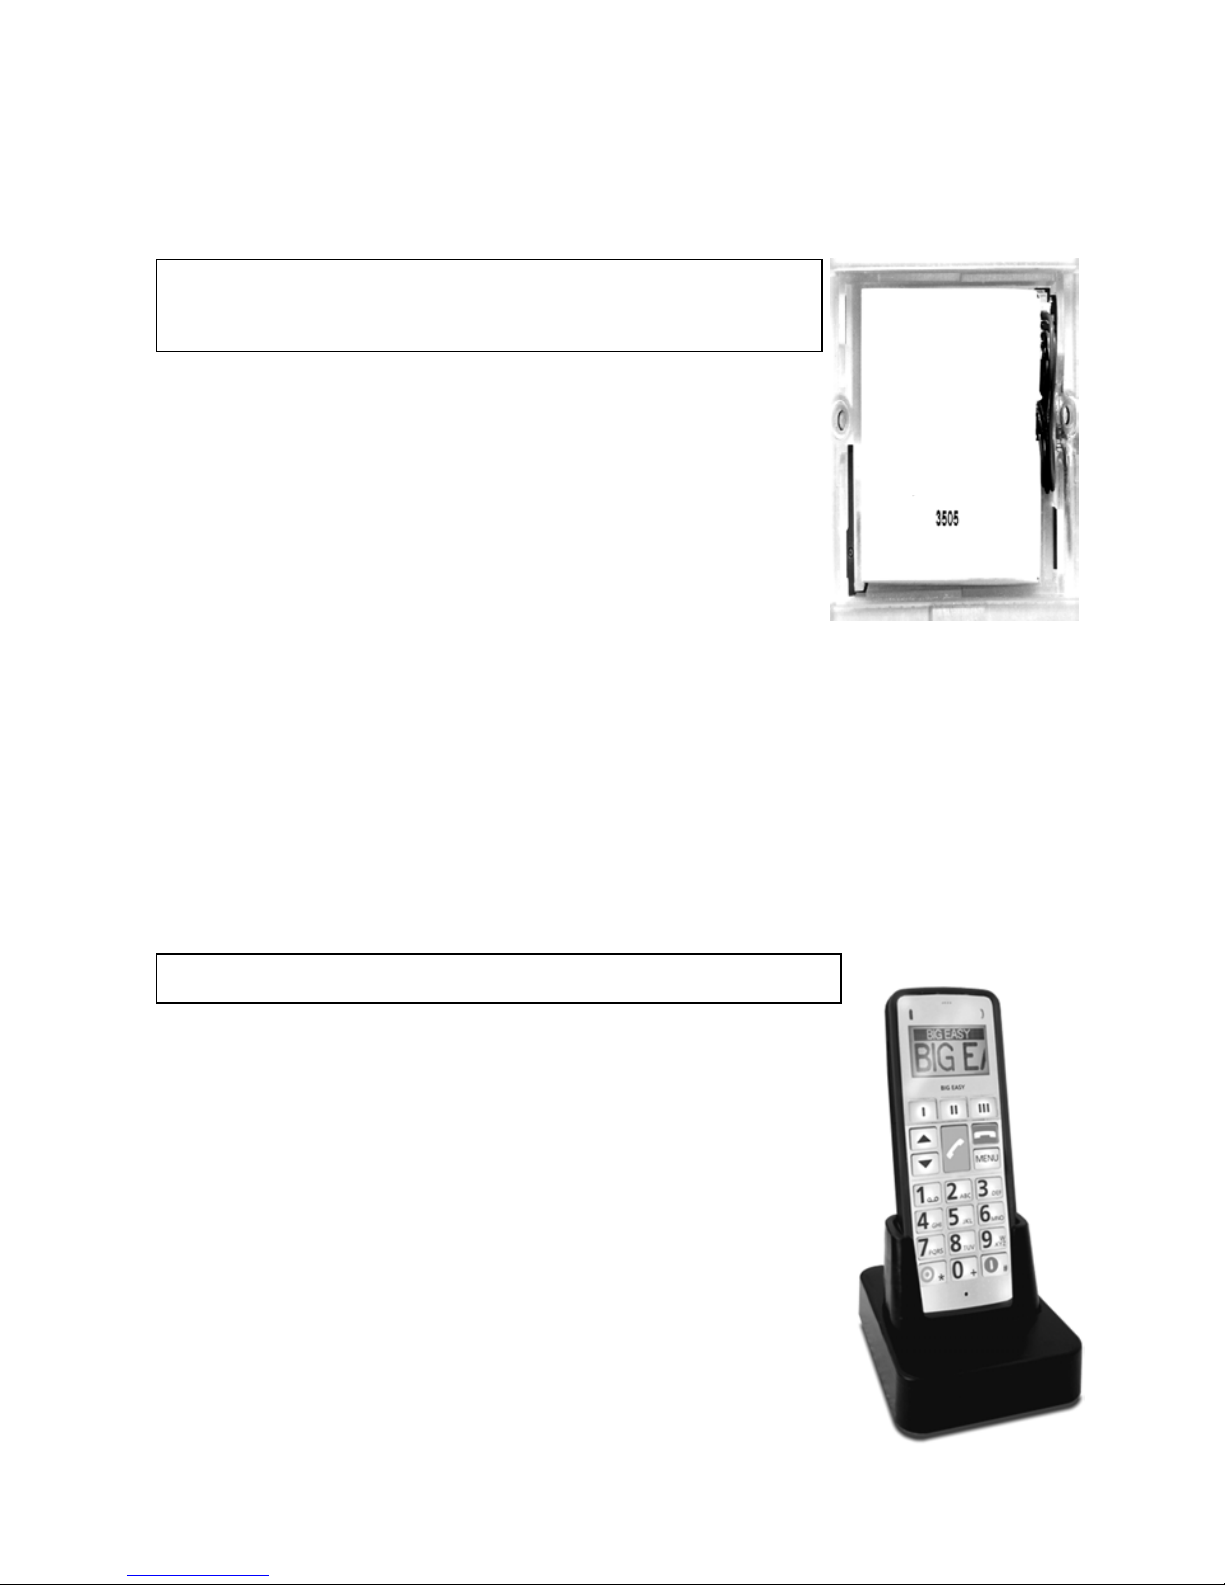
5 Accessories
Included in delivery:
Art. no. 20A1
Li Ion Battery 1100 mAh
High performance original battery
Available separately:
Your supplier or any specialist dealer will be happy to
provide more detailed information on these dedicated
accessories.
Art. no. 20B1 Charging stand
This charging stand provides a practical
and attractive means of storing your mobile phone safely and immediately to
hand while charging. The charging stand
is supplied without a mains charger – the
mains charger supplied with the mobile
phone simply plugs into the back of the
stand.
27
Page 31
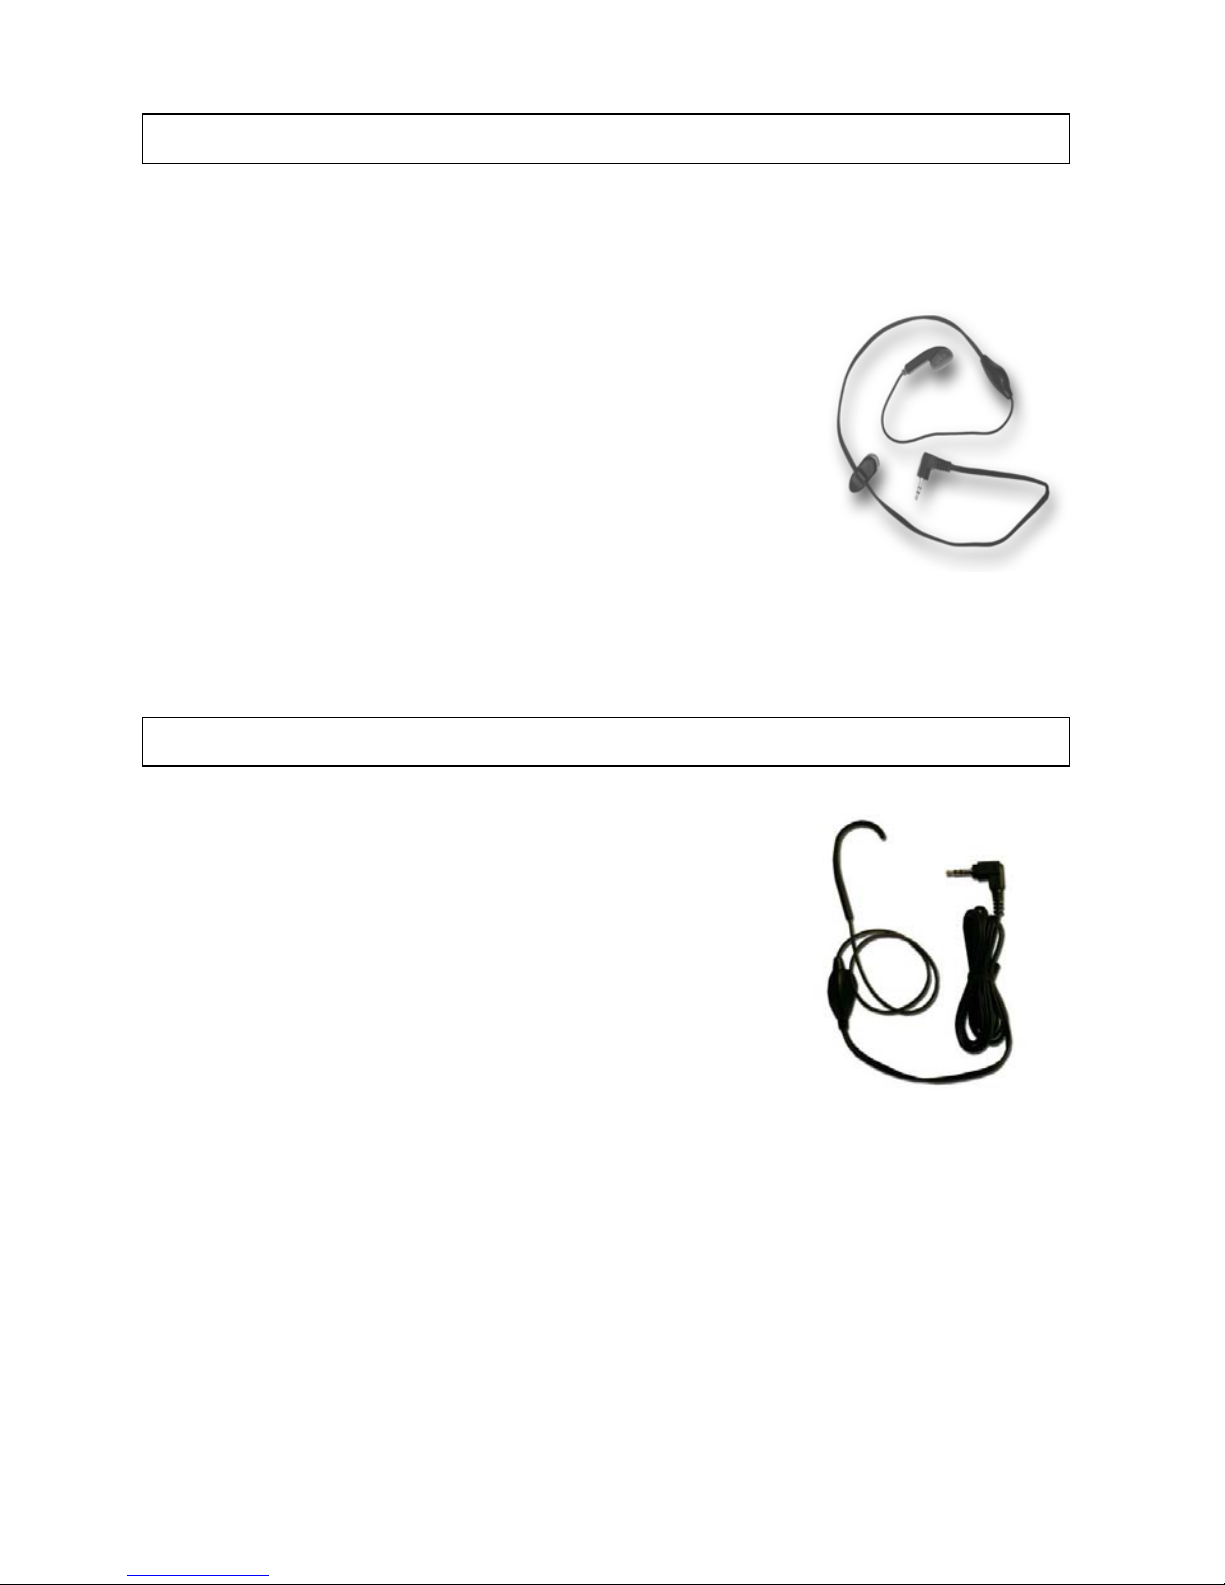
Art. no. 10K1 Headphones with microphone
The headphones plus microphone set is just the right
accessory for safely making calls, for
example in the car, so that you don't
have to hold the mobile phone directly
to your ear or for making calls
“handsfree” without using the
loudspeaker. (Comprises a 1.2m
(approx.) lead with a built-in, highly
sensitive microphone and top quality
earphones.)
Art. no. 10E1 Inductive headphones
Although this mobile performs superbly for wearers of hearing aids
(i.e. minor interference only), some
hearing-aid wearers find it more
comfortable to use an inductive
handsfree set. The handsfree set
establishes a connection between
the induction loop receiver on the
hearing aid and the mobile phone which is not acoustic
and is easy to operate. Put the hearing aid into the T
position and it’s ready to transmit. For more detailed
information about our inductive headphones, please
visit our website at www.big-easy.eu and click on
“Accessories”.
28
Page 32
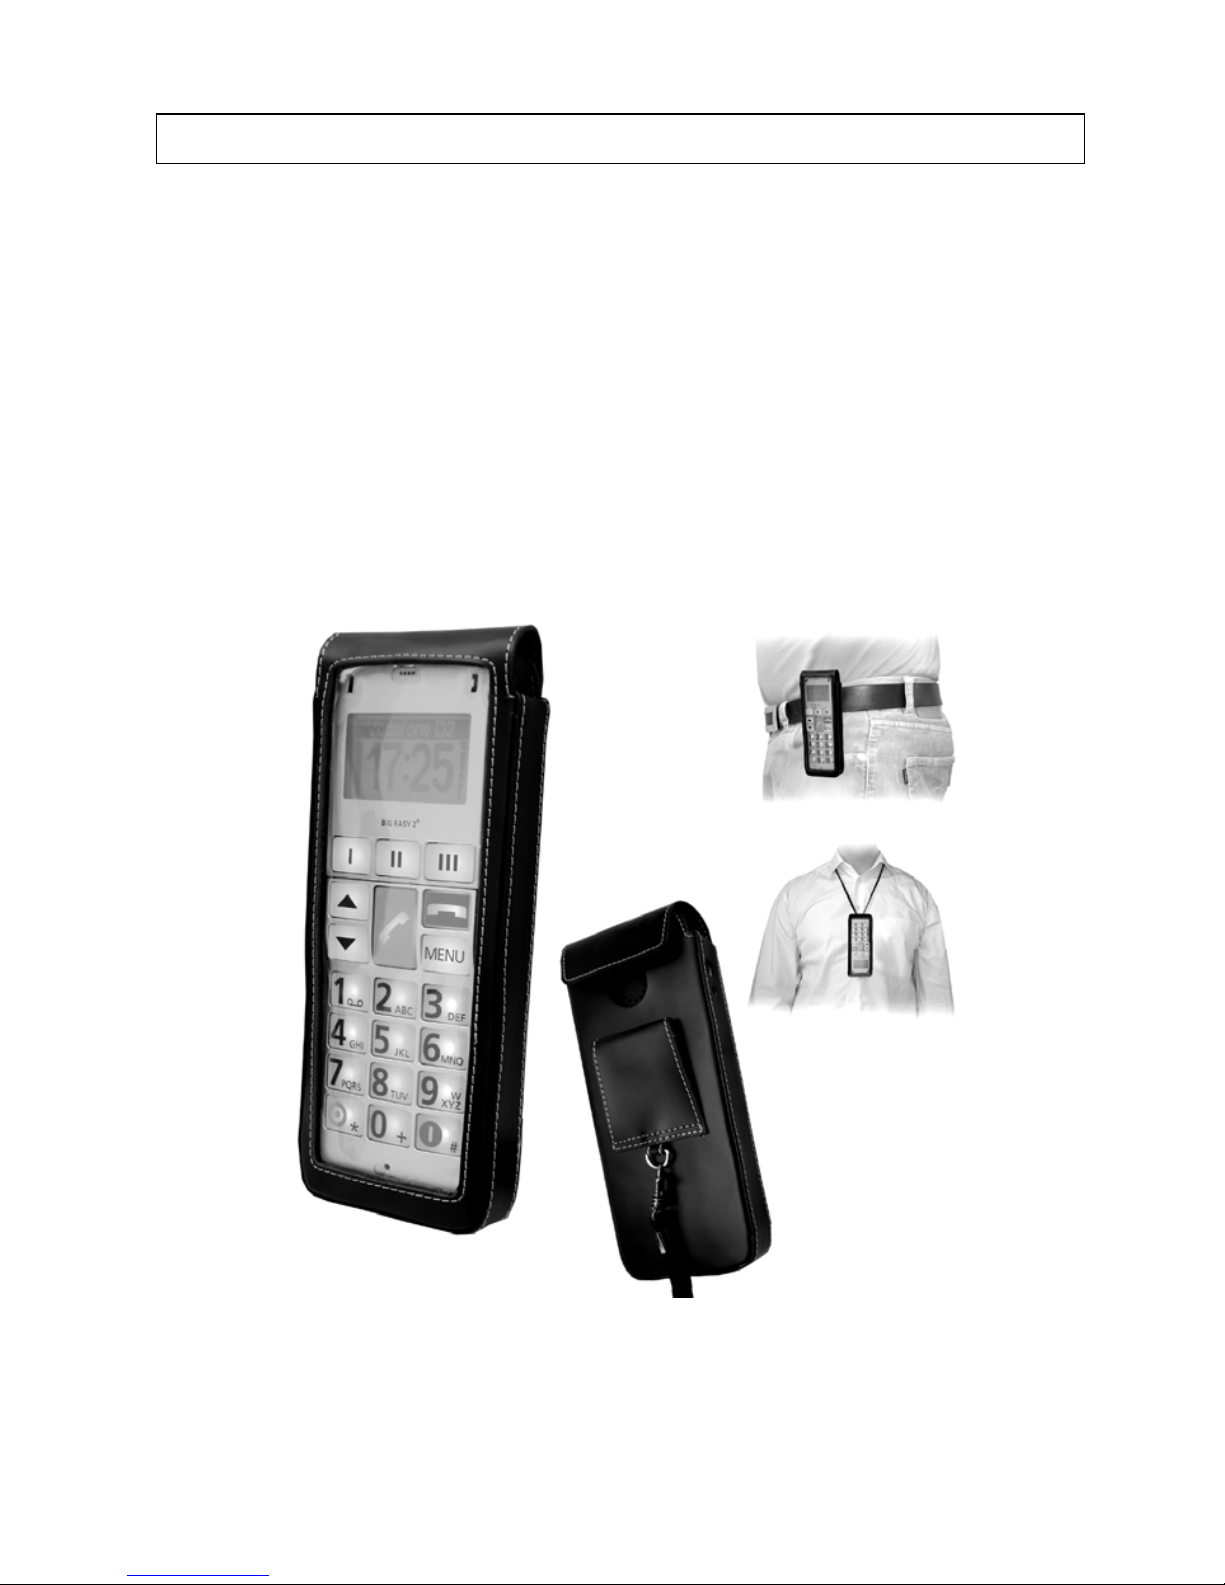
Art. no. 20H1 Mobile cases
This case has been developed specifically for this mobile phone to keep the phone safe and well-protected.
The case can be worn on a belt or around the neck
attached to a lanyard.
You will be able to make calls, select numbers from
the mobile phone book and use the emergency call
functions with the mobile still in the case.
29
Page 33
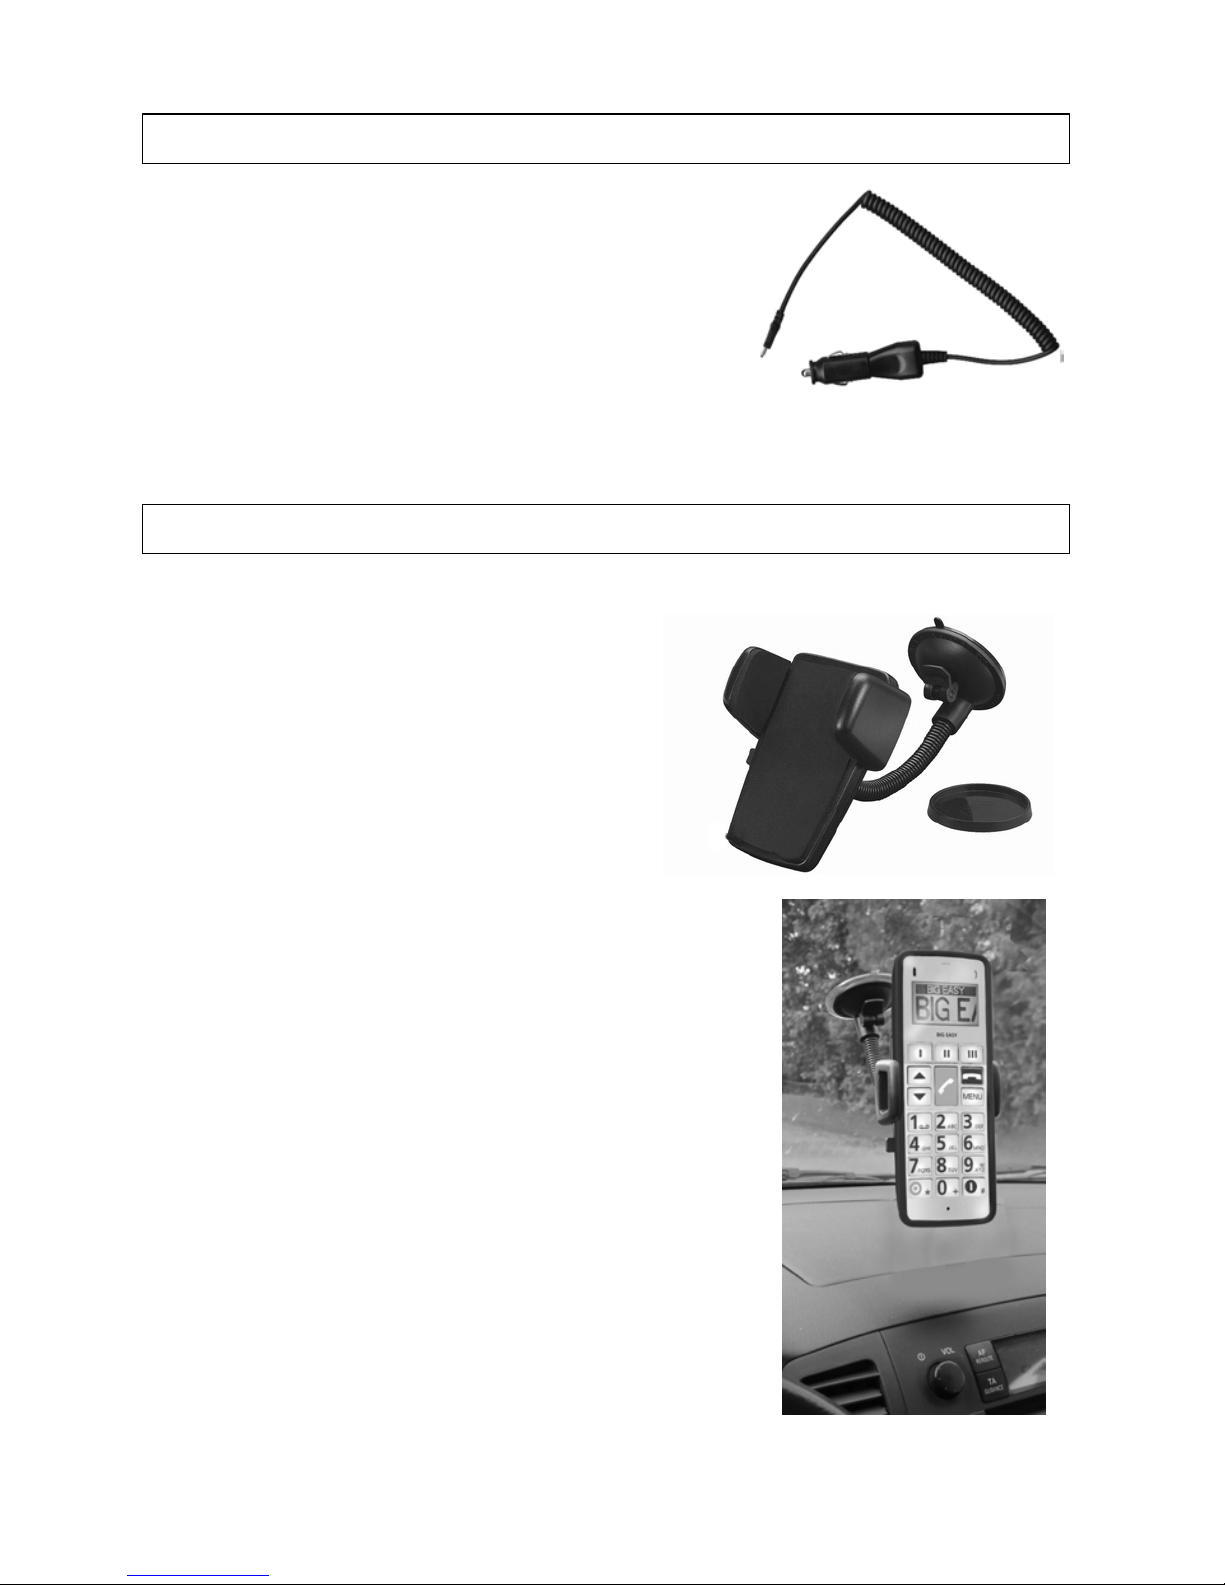
Art. no. 10Z1 In-car charge lead
The in-car charge lead provides a
direct power supply for the
charging of batteries – plugs into
the 12V cigarette lighter.
Art. no. 10G1 In-car mount
This mount has an extremely
robust suction attachment
with a vacuum clip to secure
your mobile phone to the
windscreen or dashboard for
use in the car (adhesive
mount supplied with goods).
It will always hold your phone securely even on bends or when
braking. The flexible swan’s neck
design allows the phone to be
adjusted to the perfect angle for
reading. The side clamps are
padded to protect your mobile and
to prevent noise while travelling.
You can of course still use the in-car
charge lead with the mount.
30
Page 34
Procedure What to do
Getting started
6.1
Charging
Connect the mains charger to the 220
V~ mains supply. Plug the charger
lead into the bottom of the phone on
the left hand side and push it all the
way in. When charging for the first
time, charge for 4 hours (or for at least
15 minutes thereafter).
1. Position the device in front of you
6.2
Opening the
cover of the
battery compartment to
insert the SIM
card
with the front facing
down.
2. The cover of the
battery compartment
is located on the
back of the phone.
3. Slide the cover
approx. 5 mm to the
right.
Slide the
cover in this
Î Î Î
direction
31
Page 35
Getting started
Display Outcome / Tips
Battery symbol on the
top left on the housing
stays on red.
Battery symbol on left of
display flashes.
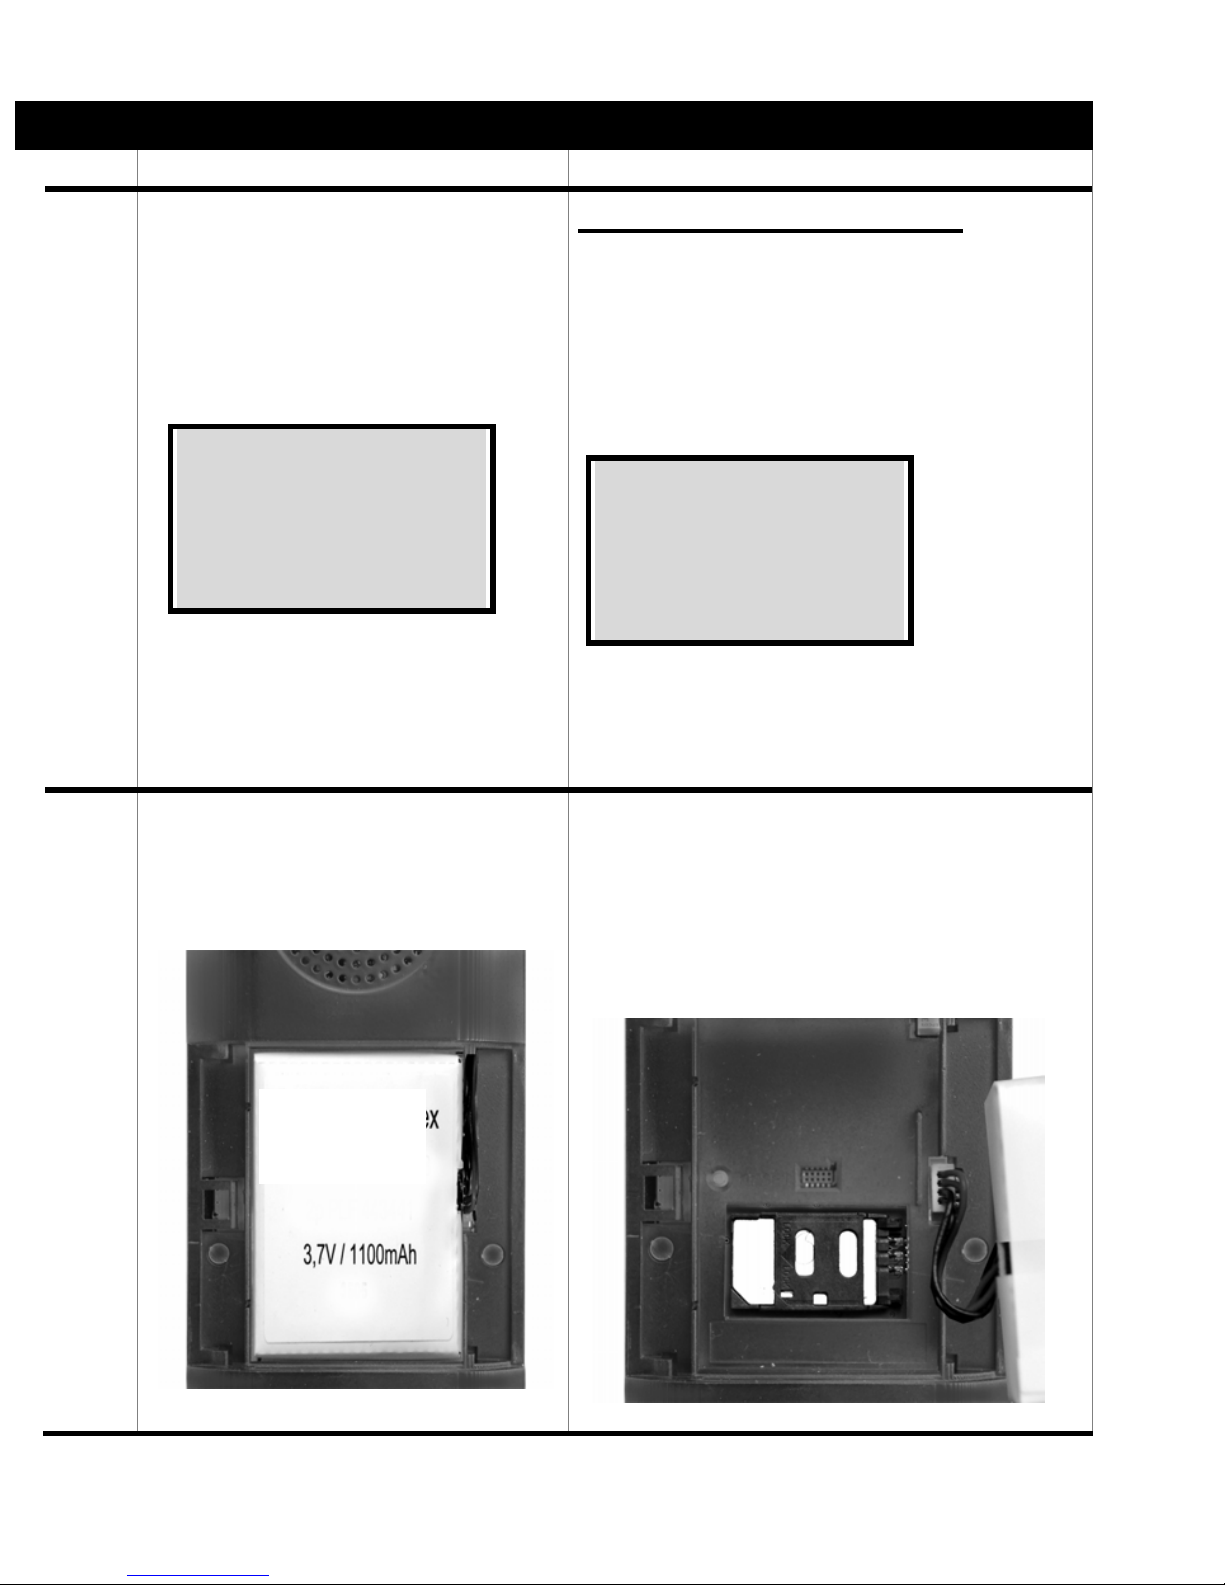
Battery
charging
When the battery is fully
discharged, the display
only appears after 2
minutes.
After approx. 3 hours:
Battery symbol on the top left
shows red while phone is connected to the power supply.
All bars shown on battery
symbol on left of display panel.
Battery
charged
Disconnect the mobile from
the charger to use the phone.
Battery is visible.
Put the battery to the right
hand side with the leads attached.
You will see the SIM card
holder underneath.
32
Page 36
Getting started
Procedure What to do
6.3
Opening the
SIM card
holder
6.4
Inserting the
SIM card
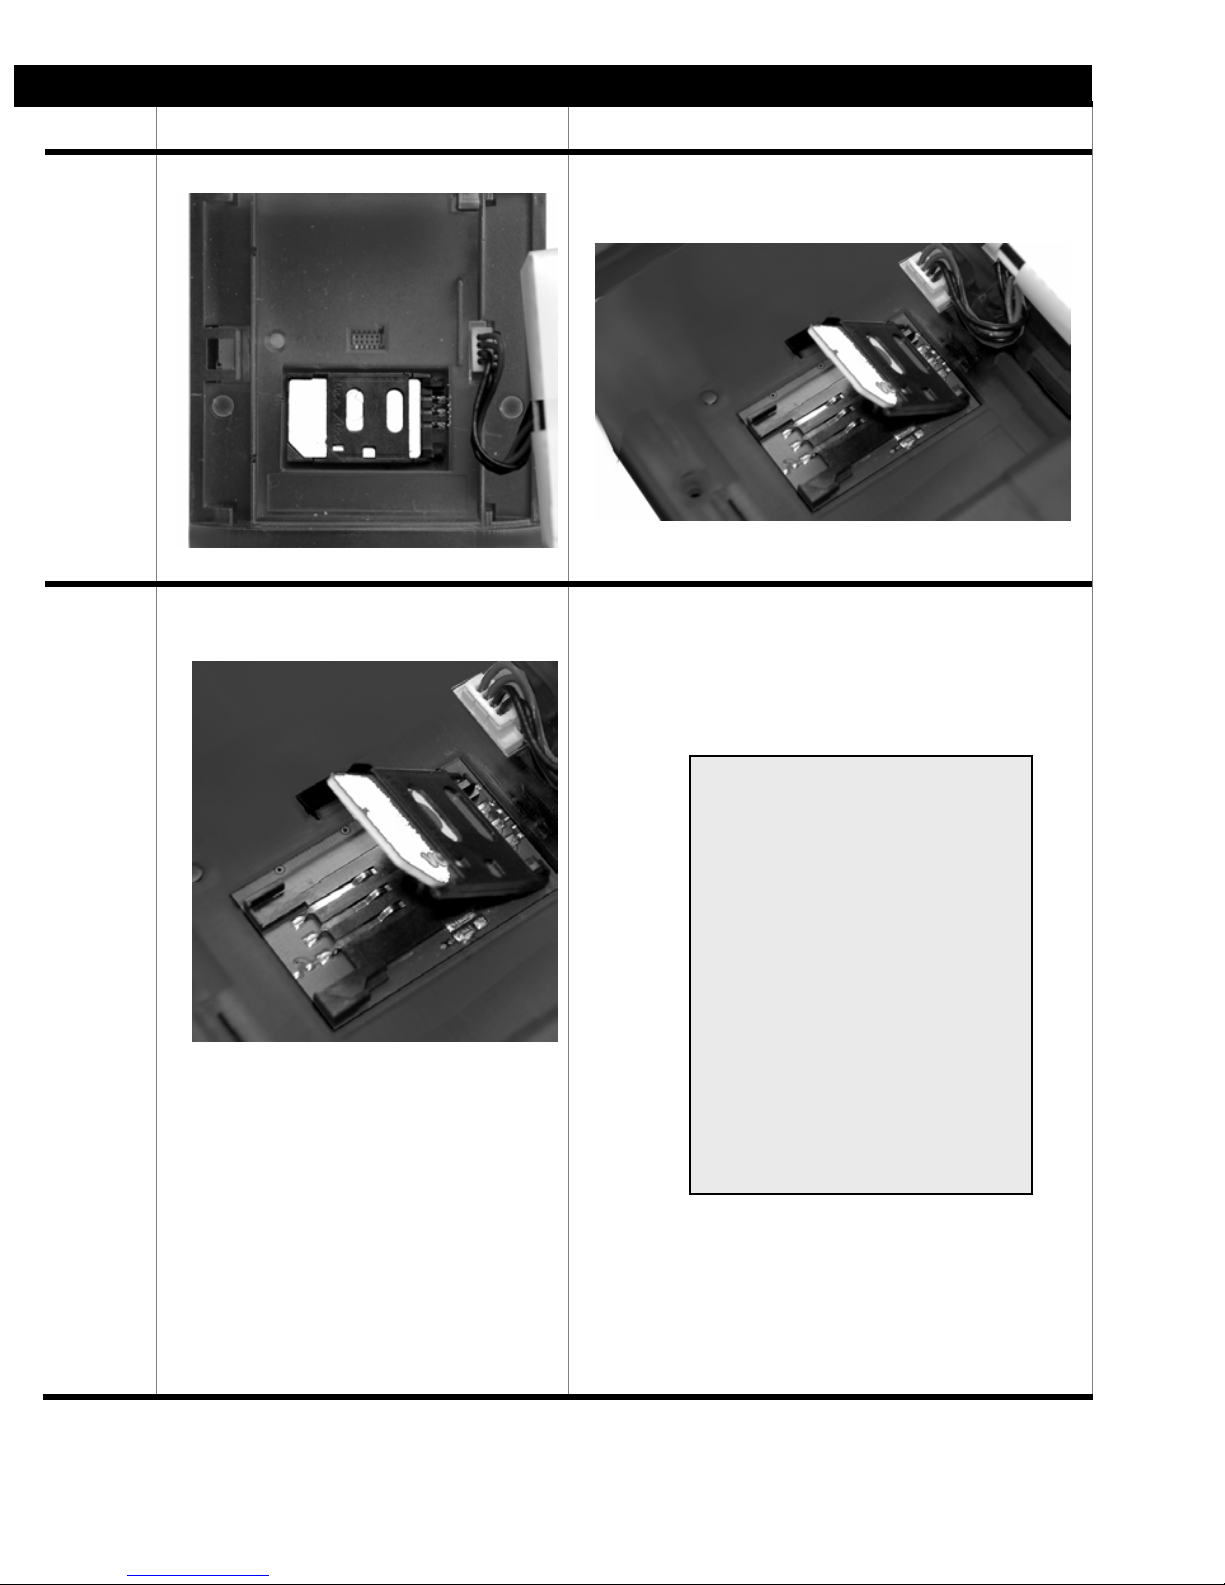
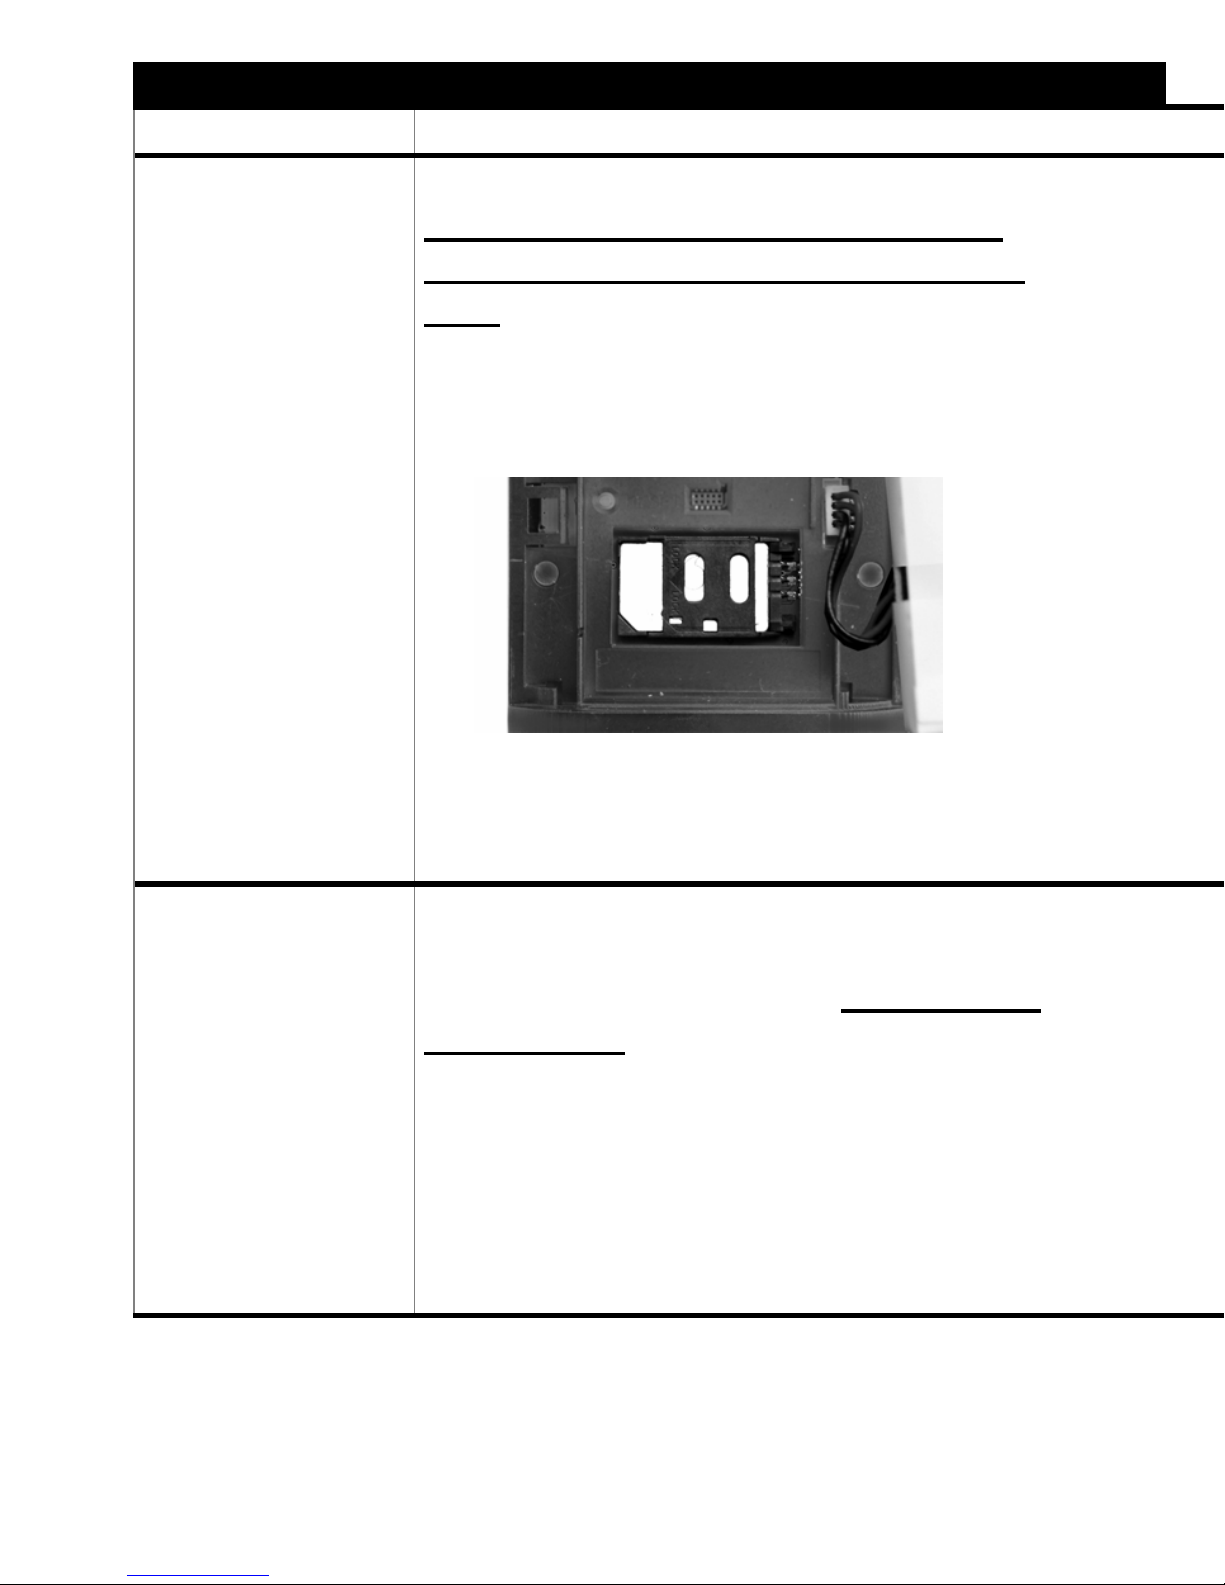
Open the device’s SIM card holder by
pushing the holder on the black grip
firmly to the right using your fingernail.
You will then be able to lift up the
holder.
You SIM card will look like this:
On purchasing a new SIM card, it must first be
removed very carefully from the credit card-sized
packaging.
Position the SIM card so that the gold-
coloured contacts are facing the
phone. Push the card into the raised
holder grip so that the “cut-off” cor-
ner of the card protrudes on the bottom left hand side. Then press the
card holder back down.
33
Page 37
Display Outcome / Tips
Getting started
ÎÎ
Ï
Ï
“Cut-off“
corner
You can obtain a
SIM card from your
mobile phone network operator, if
you do not already
have one from an
existing phone.
34
Page 38
Getting started
Procedure What to do
6.4
Inserting the
SIM card
continued
Press down the holder, now containing the card, while at the same
time sliding the black grip on the
holder with your fingernail firmly to the
left until you feel it lock into place.
.
ÍÍ
Ï
6.5
Closing the
battery compartment
cover
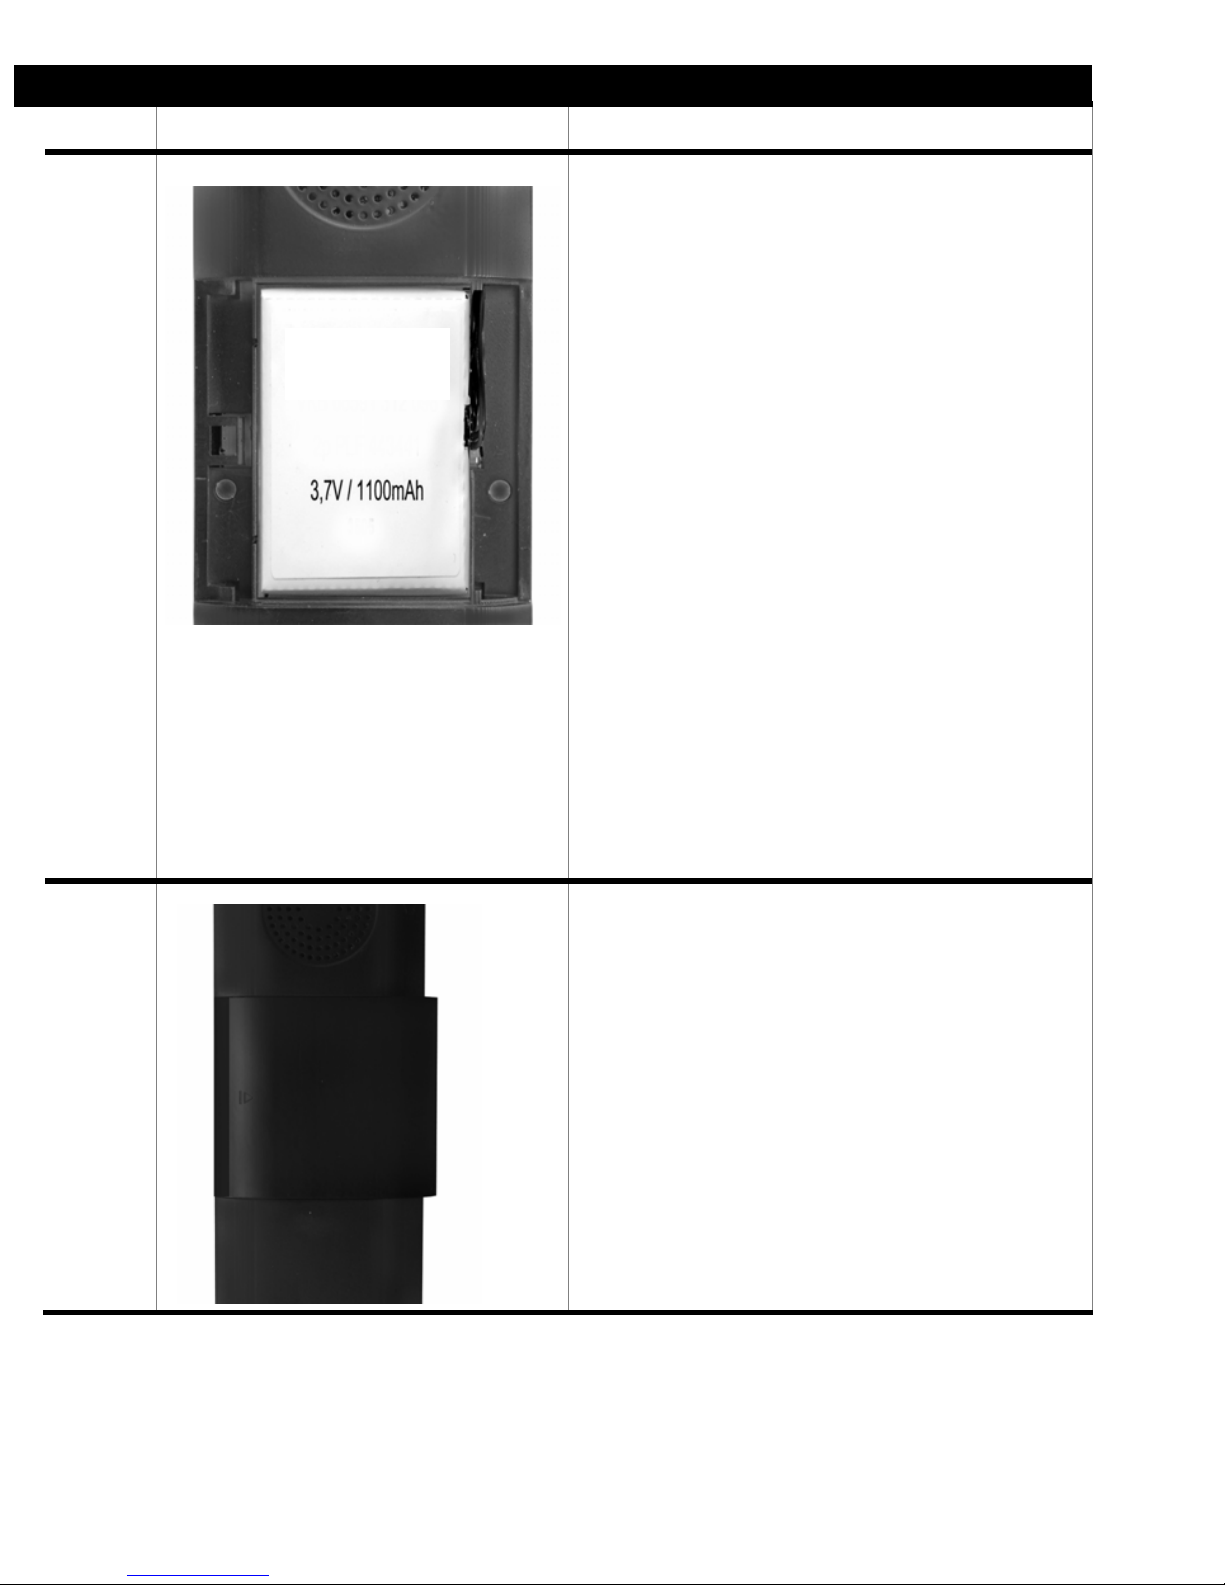
Place the battery compartment cover
on the back of the phone slightly off-
set to right. Ensure that the symbol
on the cover is on the left hand side of
the cover.
Slide the cover to the left until it locks
into place.
35
Page 39
Getting started
Display Outcome / Tips
Put the battery back
into the recess.
The SIM card is now inserted.
The battery is in place in its
compartment.
Close the
cover by
sliding it
ÍÍÍ
in this
direction
The phone is now ready to
switch on and make calls.
36
Page 40
7 How to make a call
...........................How to make a call......................................
Procedure What to do
7.1
Switching on
7.2
Entering the
PIN number
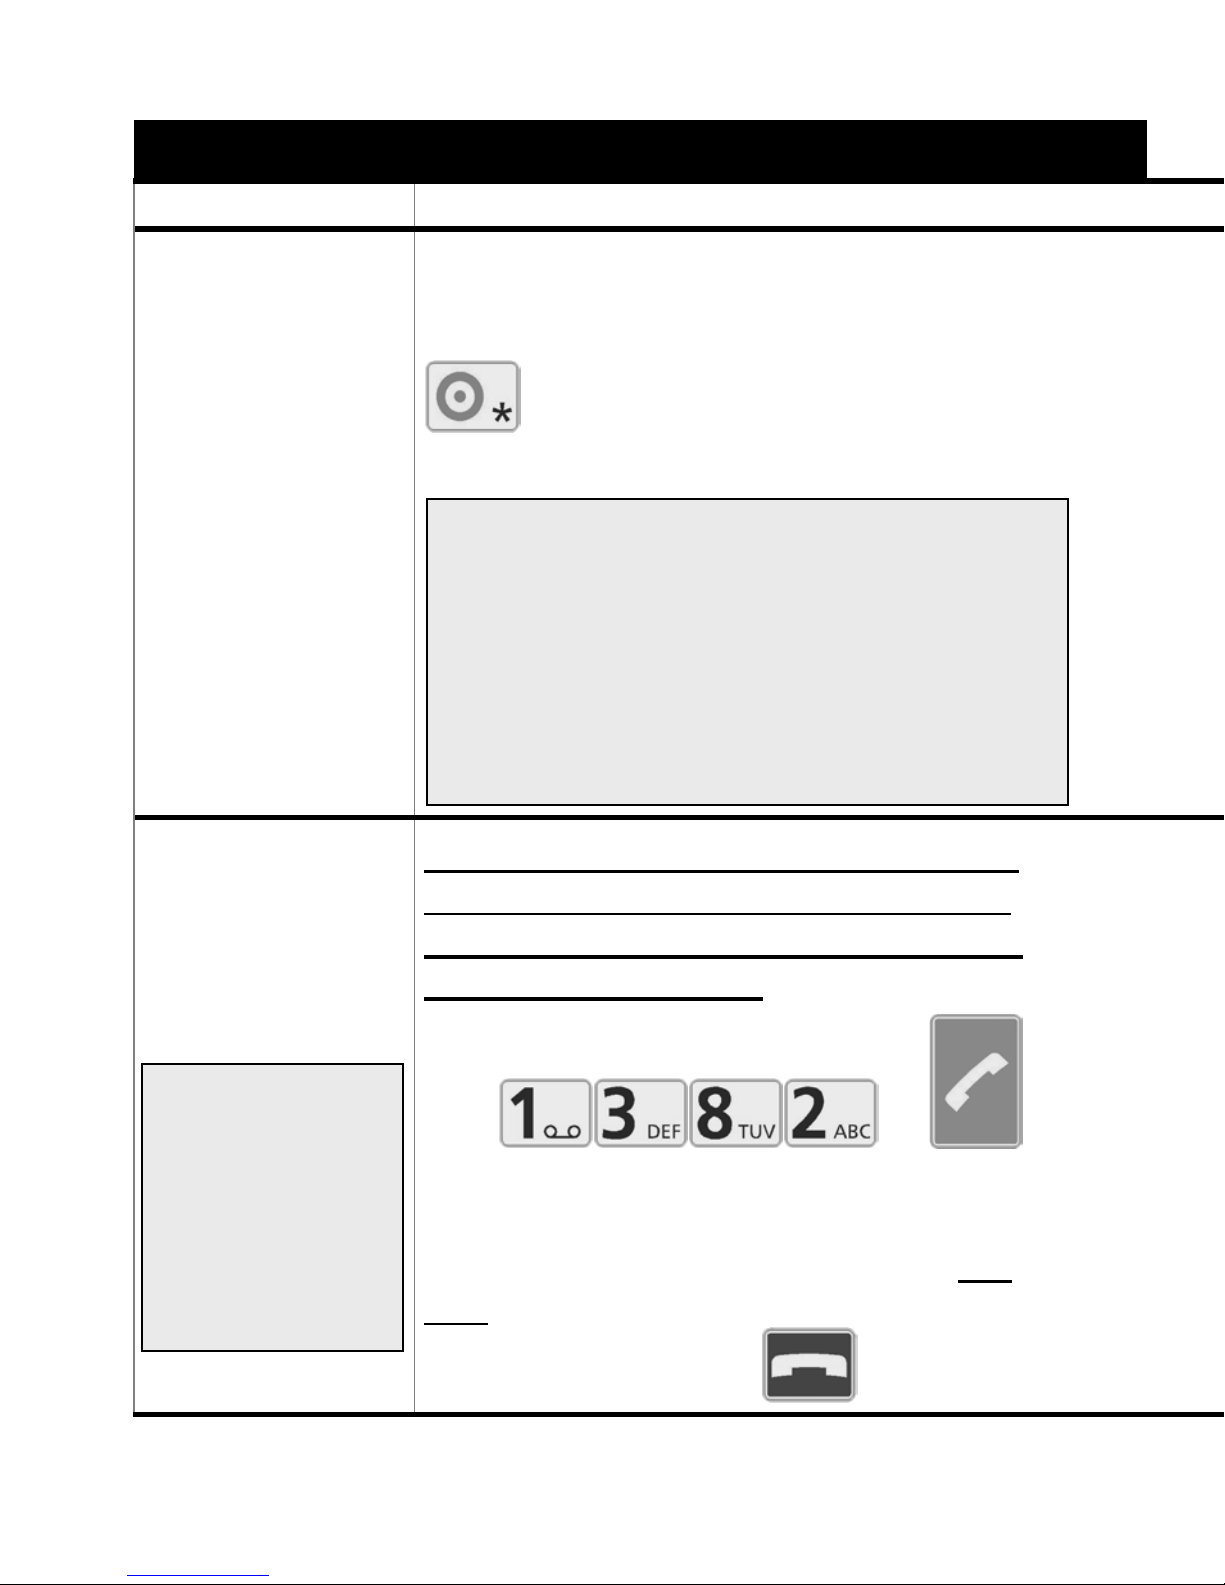
Press down the key with the green circle (bottom left)
for three seconds
Note: If you switch your mobile on using a
key other than that mentioned above, the
keys and display will light up (for use as a
torch), but no text will appear in the display.
Use the key on the bottom left hand side
with the green circle.
IMPORTANT: Enter the PIN number
which belongs to your SIM card and
NOT THE NUMBER GIVEN IN OUR
EXAMPLE BELOW!
IMPORTANT:
This phone
only accepts
4, 5 or 6-digit
PIN numbers.
37
e.g.
Enter your PIN number and confirm
by pressing the big green key.
If you enter an incorrect number before confirming, delete the incorrect
number with the red
key.
Page 41
............................How to make a call.......................................
Display Outcome / Tips
Keyboard and display
light up.
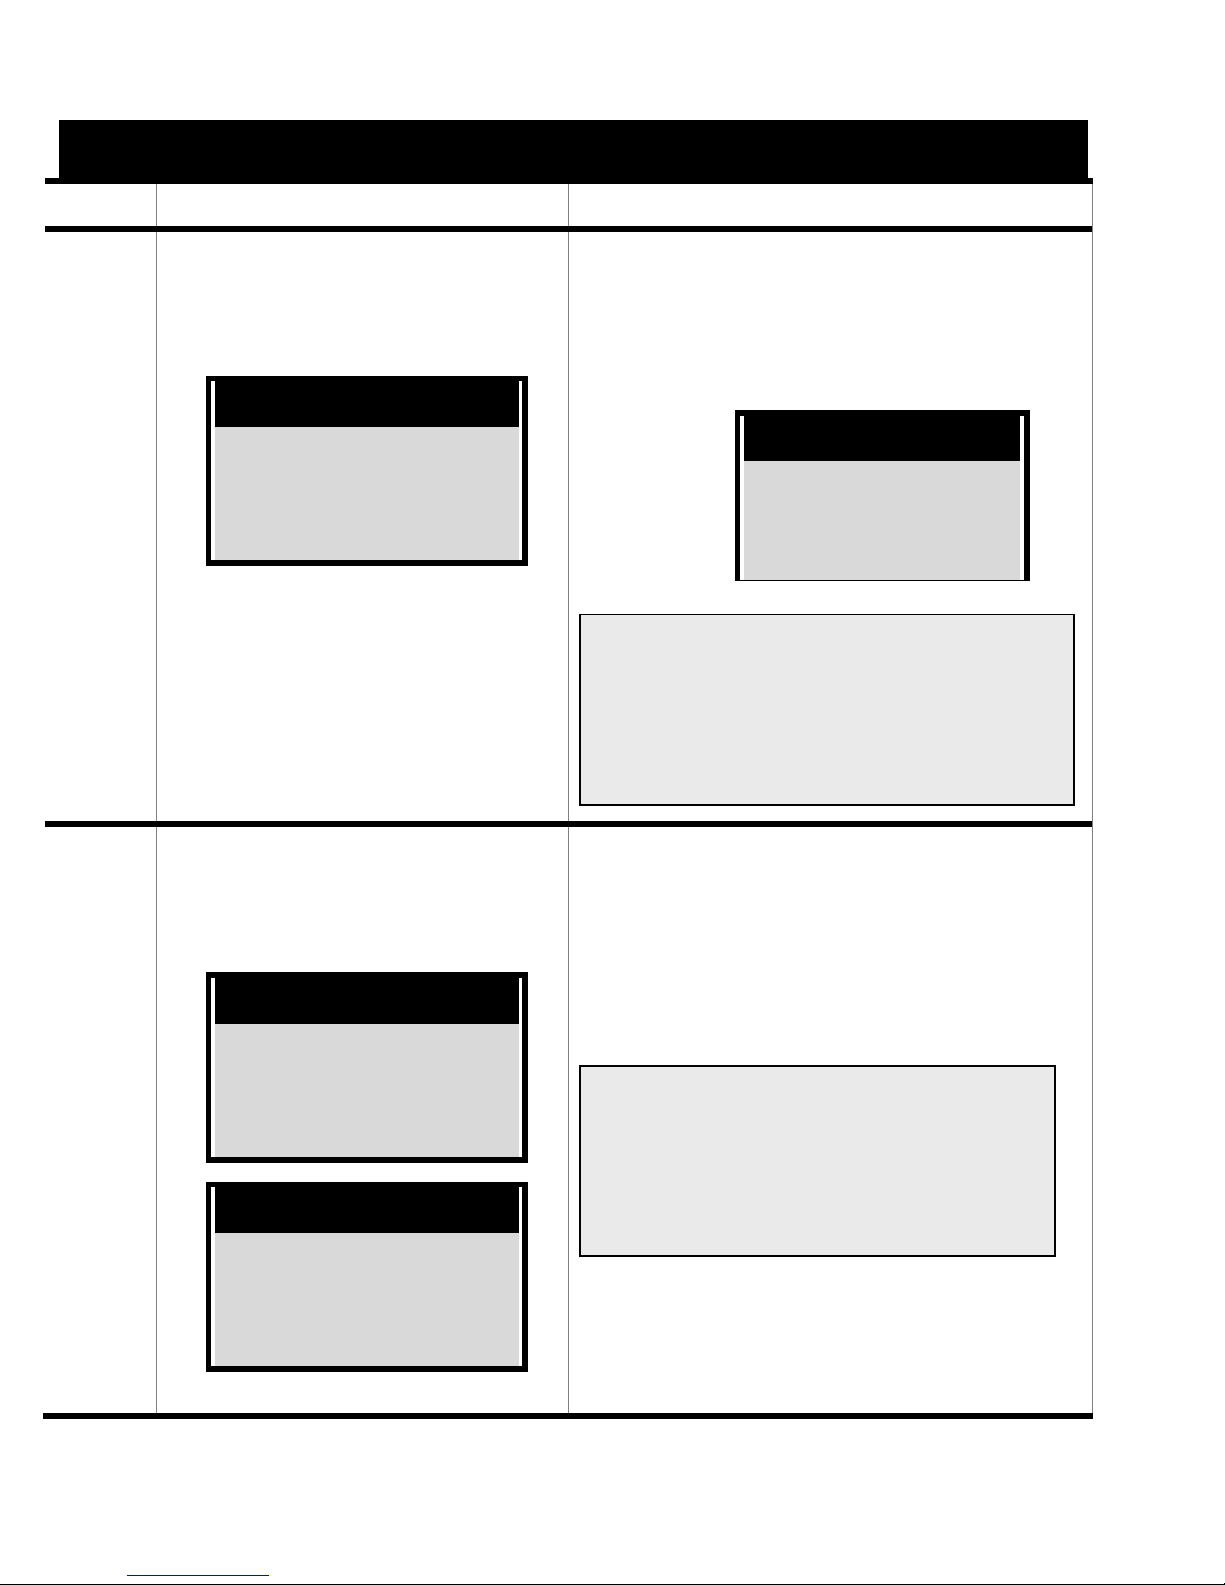
BIG EASY 2
Please wait
Phone is switched on.
You will now be asked for your
PIN number.
Enter PIN
You will have received your PIN
number – generally 4 digits –with
your SIM card in a sealed letter
from your network provider.
Each number appears
clearly in the display for
you to check
.
Enter PIN
1 3 8 2
Checking PIN
Checking PIN
(If the PIN number is entered
incorrectly three times, see
page 138.)
You only need to enter your PIN
number when the PIN Query
function is activated – see page
109
38
Page 42
...........................How to make a call.......................................
Procedure What to do
7.3
Automatic
mobile phone
network
search
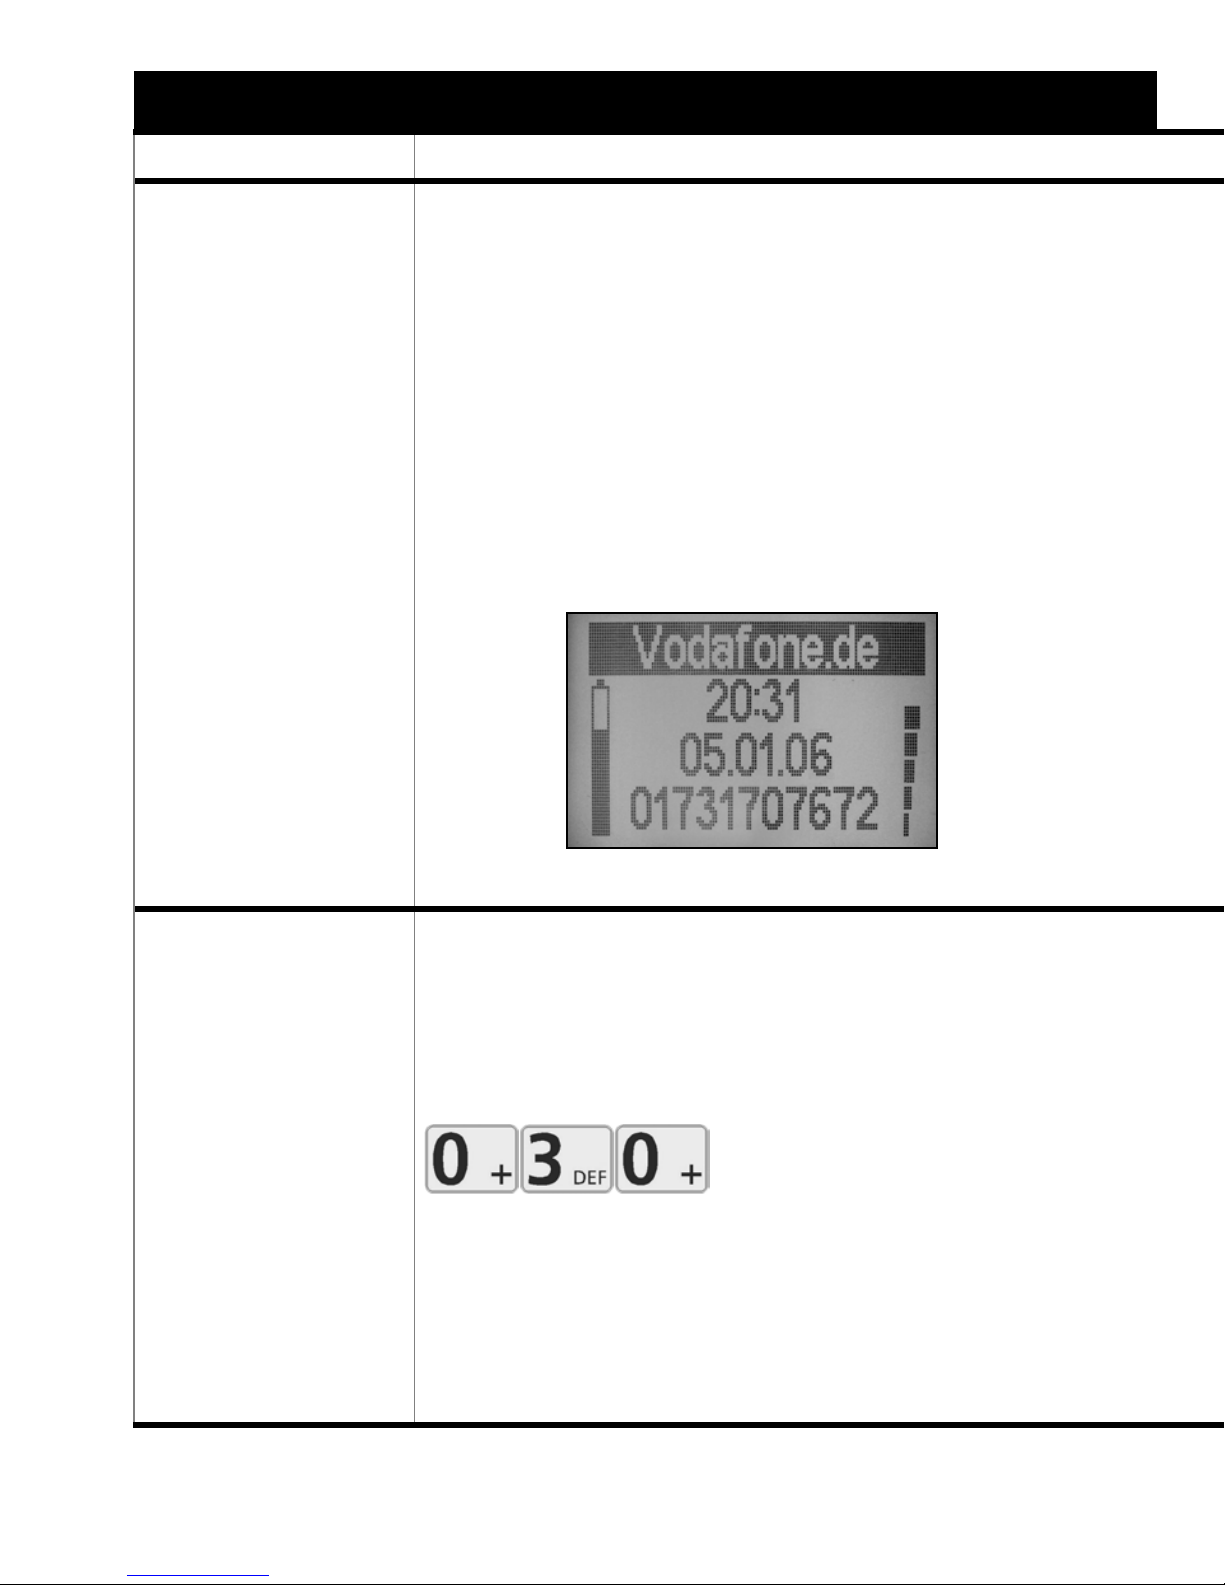
The phone automatically attempts to
connect to your mobile phone network.
Depending on the strength of network
reception, up to six bars of increasing
size will appear on the right hand edge
of the display as an indicator of the
signal strength. (6= maximum reception, 0= no reception)
Í
7.4
Dialling
using the keypad
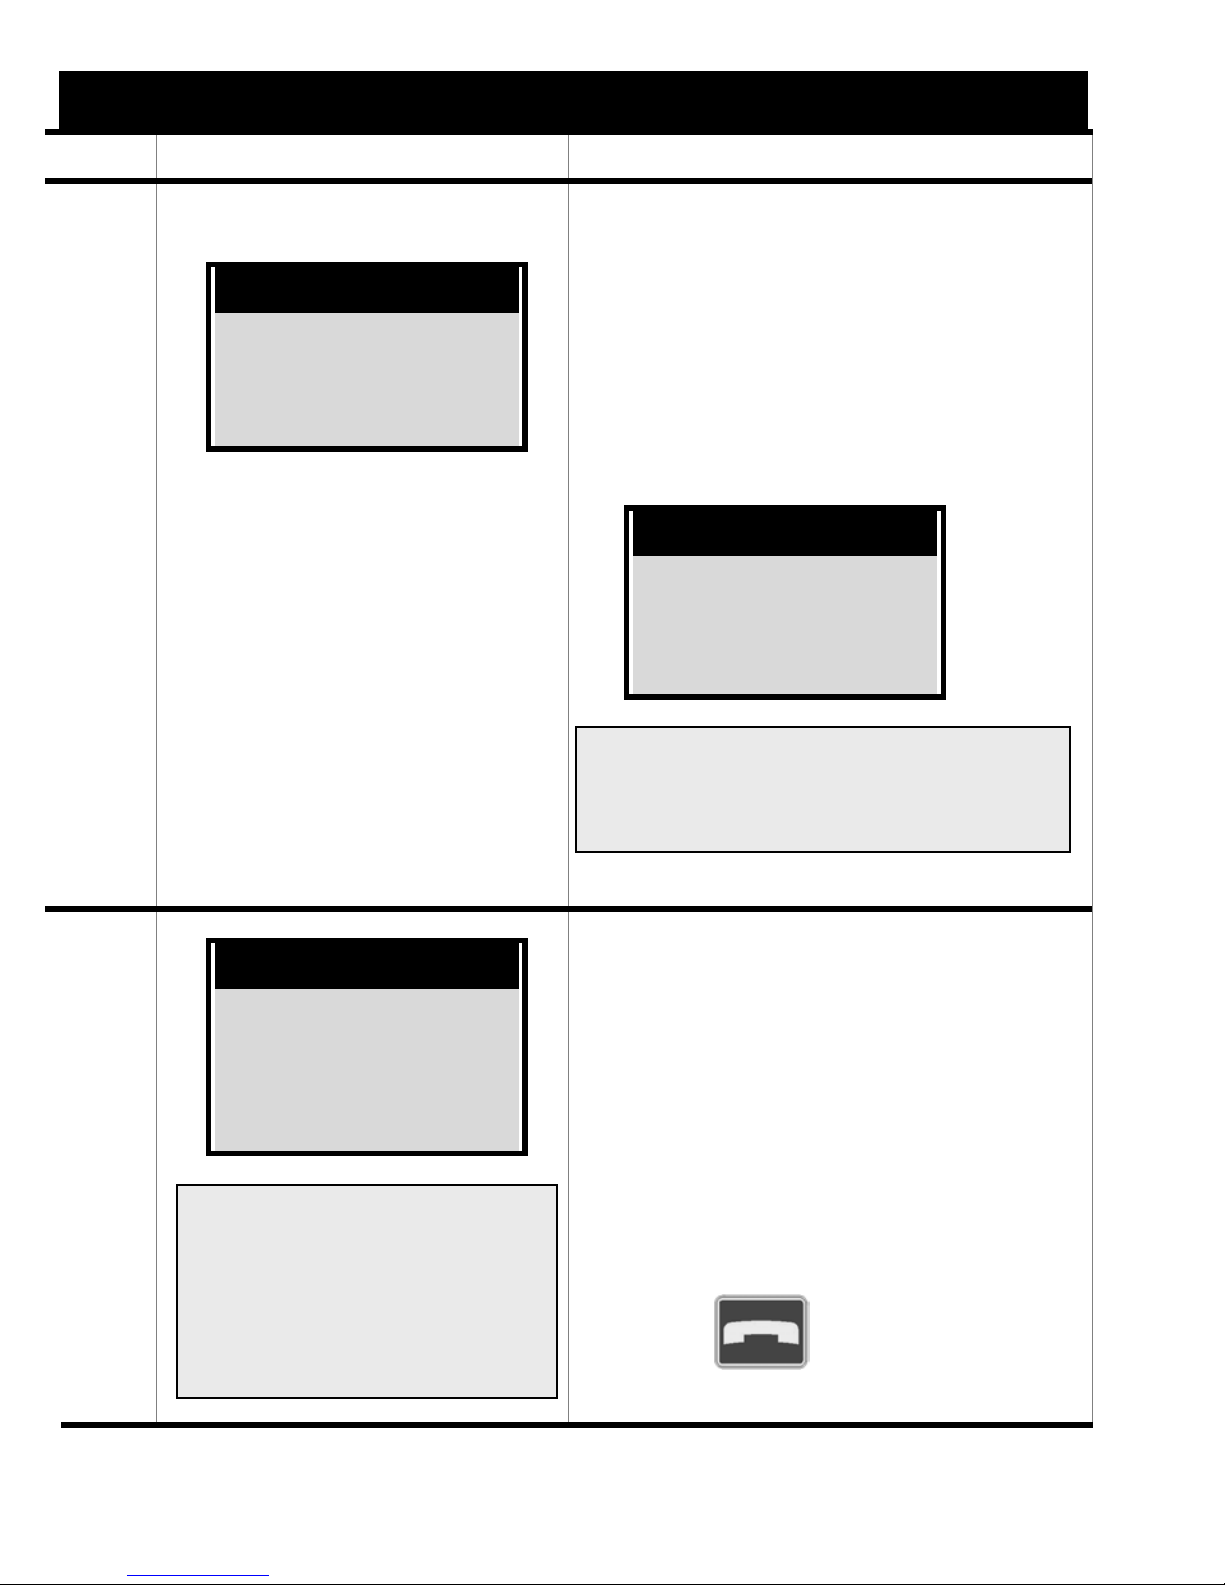
Enter the phone number you are calling using the number keys
. . .
39
Page 43
..................................How to make a call.................................
play
Display Outcome / Tips
Network search
Time
Date
Phone number
The time, date and your
phone number may still
need to be entered (see
page 87).
When the phone locates the
network compatible with your
SIM card, the handset symbol
on the top right on the housing
will flash green and your network provider will be displayed
at the top of the display.
Your provider
Time
Date
Phone number
For some network providers, the
name of the network only is dis-
ed.
030611375_
11375
The display panel can
also be configured so that
all numbers are of the
size displayed on the top
line. See page 103.
All the numbers entered appear in the inverted headline
of the display. The last five
numbers are displayed in the
main field of the display area
in large text.
If you enter an incorrect number, you can delete this using
the red
key.
40
Page 44
................... .......How to make a call.......................................
Procedure What to do
7.5
Connecting
your call
Press the green
Note: When using a new SIM card
and/or top-up card, your first call is some-
key.
times automatically forwarded to the network provider’s free advice service.
7.6
Changing the
volume of the
handset
During the call, you can set the
handset volume to your own requirements using the
and keys – 4 levels from
very low to very high are available.
(If the volume does not seem to be
high enough, you can try to add the
handsfree function carefully. See page
43)
41
Page 45
................................How to make a call..................................
Display Outcome / Tips
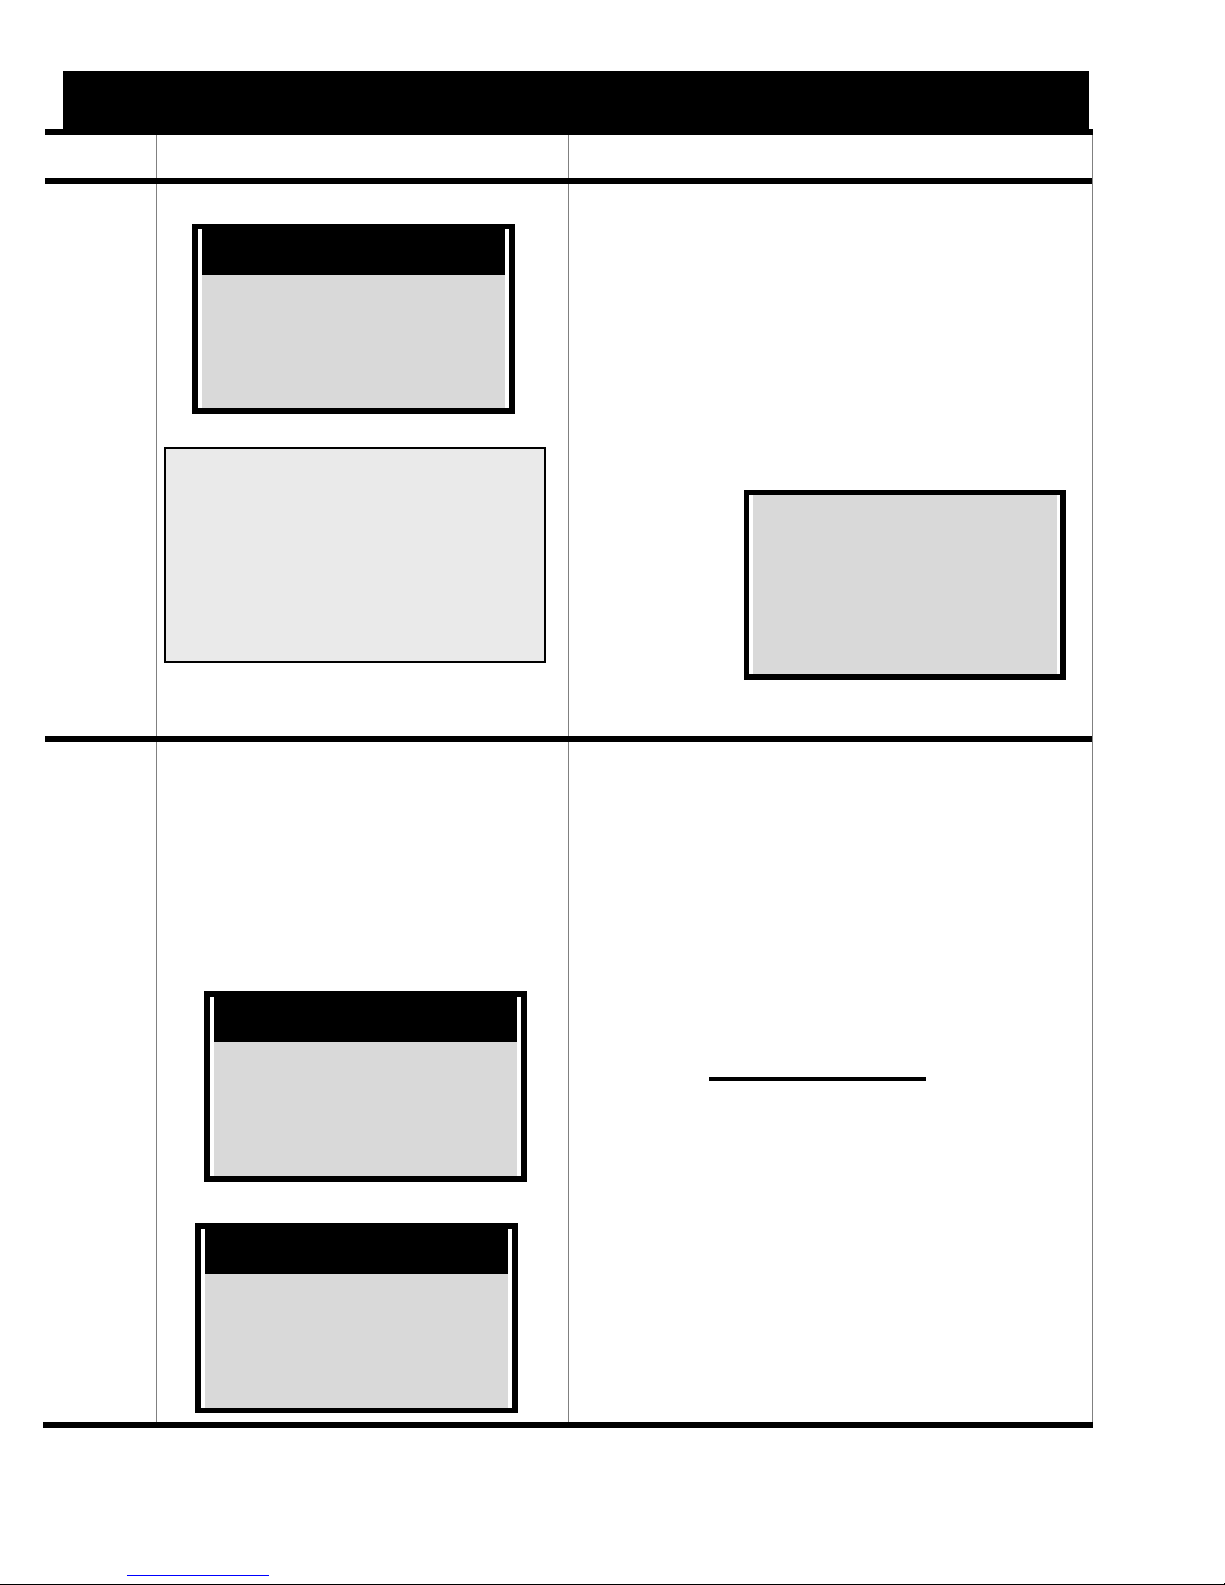
Connecting
Name
030611375
Note: If the number you
have dialled is engaged,
the message “busy” will
be displayed for approx.
10 seconds.
As soon as a connection is
made, the handset symbol on
the top right on the housing
will stay green, you will hear
the call being connected and
the call duration will be displayed.
Name
030611375
Call duration
The handset volume is
displayed for a few
seconds at the start of
the call.
Connection
Name
030611375
Volume: 3
Connection
Name
030611375
Call duration
The volume level at which the
handset was previously set will
stay the same until the next
time it is changed.
You can only change the
setting during a call
.
42
Page 46
...........................How to make a call.......................................
Procedure What to do
7.7
Handsfree
function
Warning
Under no
circumstances
should the
backside of
mobile phone
be held close to
the ear when
the “hands free”
To switch the handsfree function on
during
key
a call, press the green
2x.
While the handsfree function is on,
you can set the loudspeaker volume to
your requirements using the and
keys - 4 levels from very low to
very high are available.
To switch the handsfree function off
option is activated or while it
is ringing. This
can cause
hearing damage.
7.8
Ending a call
43
during a call, press on the green
key
1x.
Press the red
key.
Page 47
.................................How to make a call.................................
Display Outcome / Tips
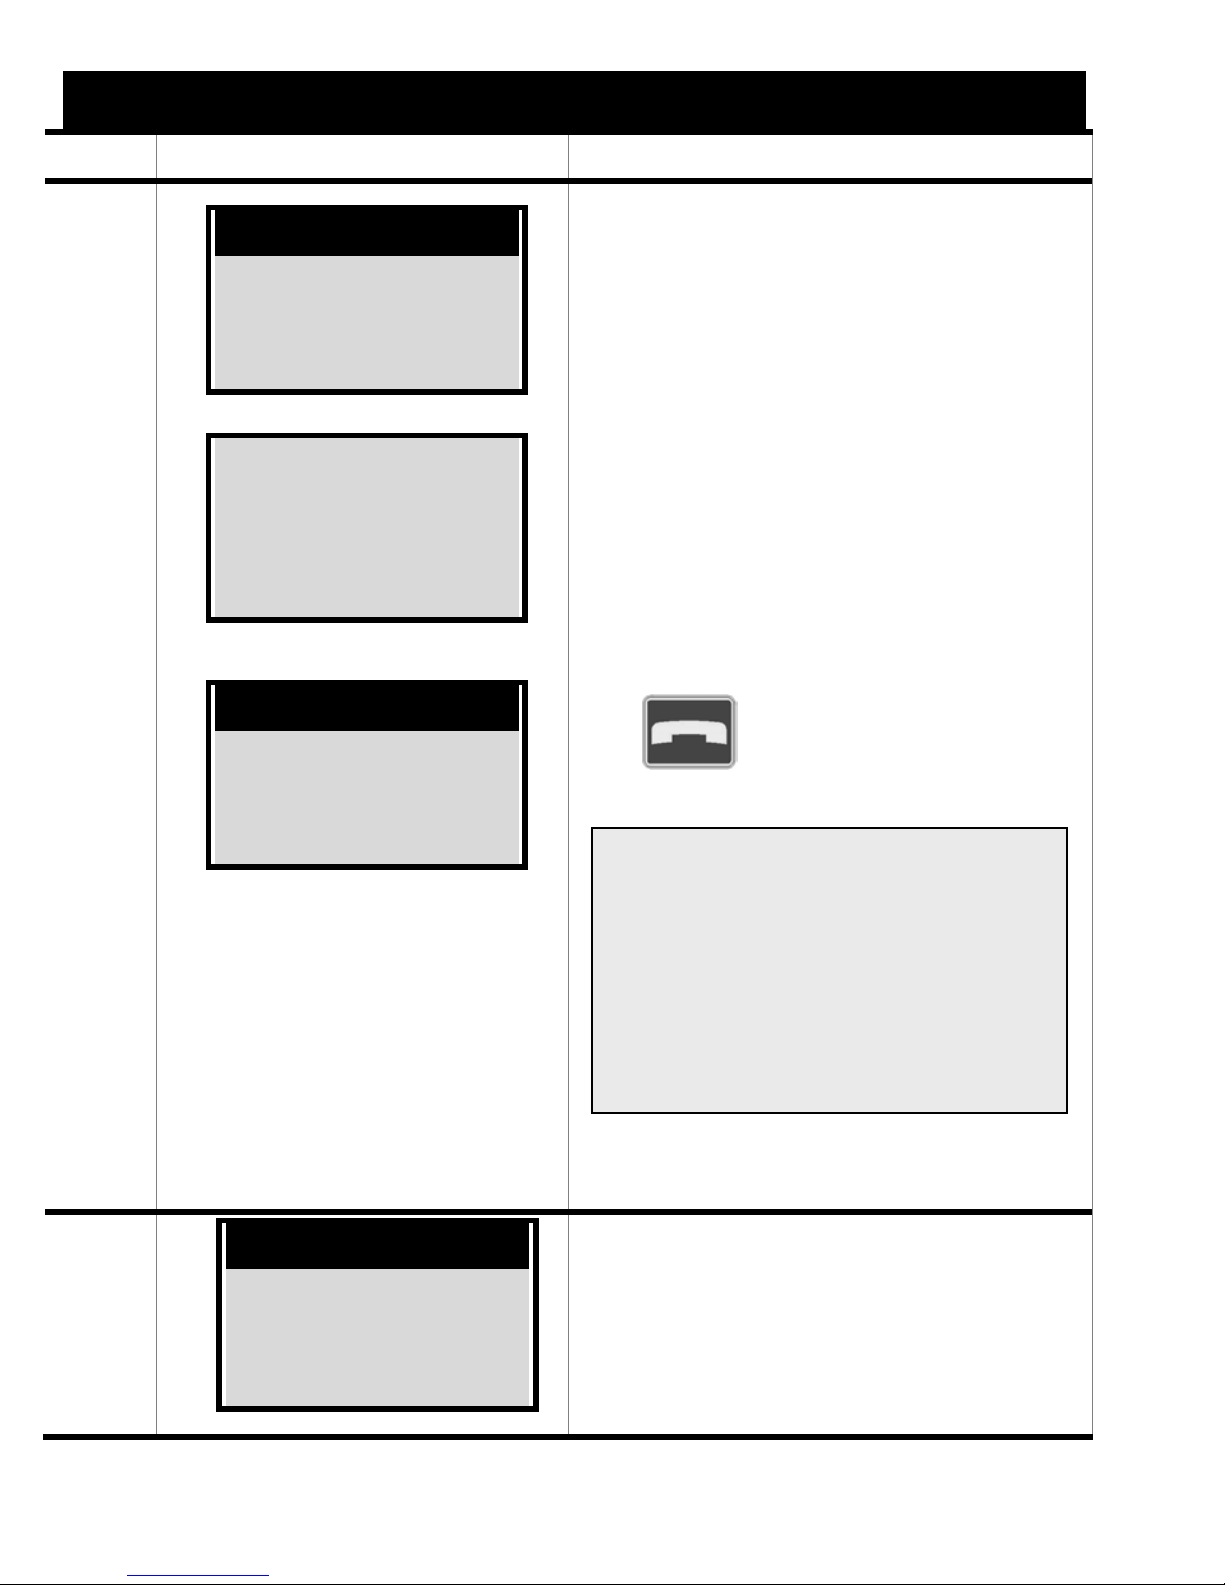
Connection
Name
030611375
Volume: 3
Handsfree
on?
Call duration
Connection
Name
To prevent this function from
being accidentally activated
and exposing your hearing to
a high volume, this function
needs to be confirmed twice
and an acoustic signal
sounds.
The call can also be switched
off handsfree by pressing the
red
key.
030611375
Volume: 3
Note: It is possible, if you use
the handsfree function on a very
high volume and in a bad and
unusual network receipt situation, background noises will be
heard. Please reduce the volume level in these cases.
Your provider
Time
Date
Phone number
This ends the call.
44
Page 48
...........................How to make a call.......................................
Procedure What to do
7.9
Switching off
1. Press the key with the red circle
(bottom right)
for three seconds.
7.10
Accepting an
incoming call
You will hear the phone ringing and
the keys and warning lights on the
phone will light up and flash.
To accept the call, press the green
key.
Declining an
To decline an incoming call without
incoming call
answering, press the red
key.
45
Page 49
.................................How to make a call.................................
Display Outcome / Tips
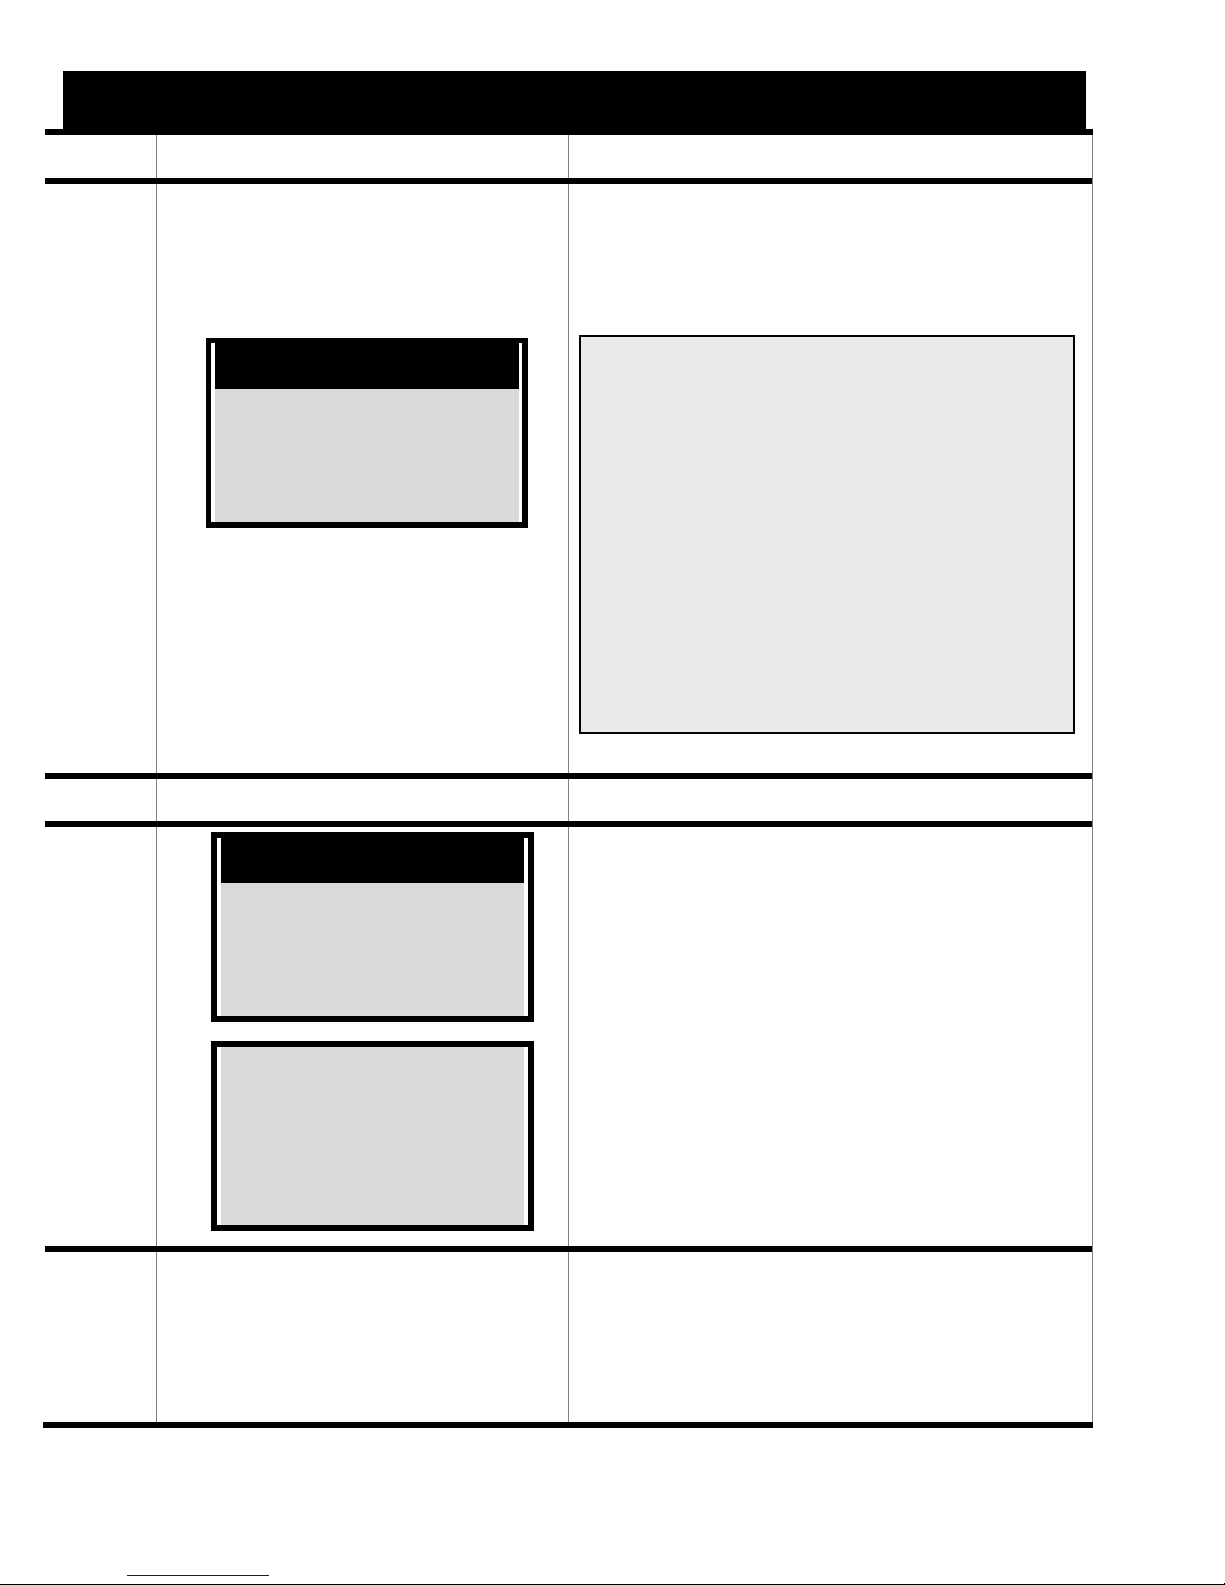
Keypad and display
light up
BIG EASY 2
Goodbye
The phone switches off after
approx. 5 seconds.
If you wish to leave the phone
switched off for several weeks,
please remove the battery by disconnecting the connection leads.
See page 20.
The data stored in the phone
book and text message memory
on the SIM card will not be lost
when you do this. Time and date
will have to be set again.
Connecting
Name
030611375
As soon as the connection is
made, the handset symbol on
the top right on the housing
stays green and the call duration is displayed.
Name
030611375
Call duration
This function is useful when
you are unable or prefer not to
take a call.
46
Page 50

8 Menu structure
The menu on your mobile phone is structured in a very
simple manner.
By pressing the
sic functions for the Level 1
key, you can obtain the four ba-
menu:
• Phone book
• Settings
• Alarm
• SMS
You have the option of refining or resetting these functions.
We describe these setting options as
• Level 2
functions
Where these functions have further setting options,
these are described as
• Level 3
functions
Functions from Level 3 onwards are usually only
required by users who wish to use all the functions available or who would like to engage further
settings in addition (e.g. emergency call functions,
switching off the Enter PIN function, etc.).
47
Page 51
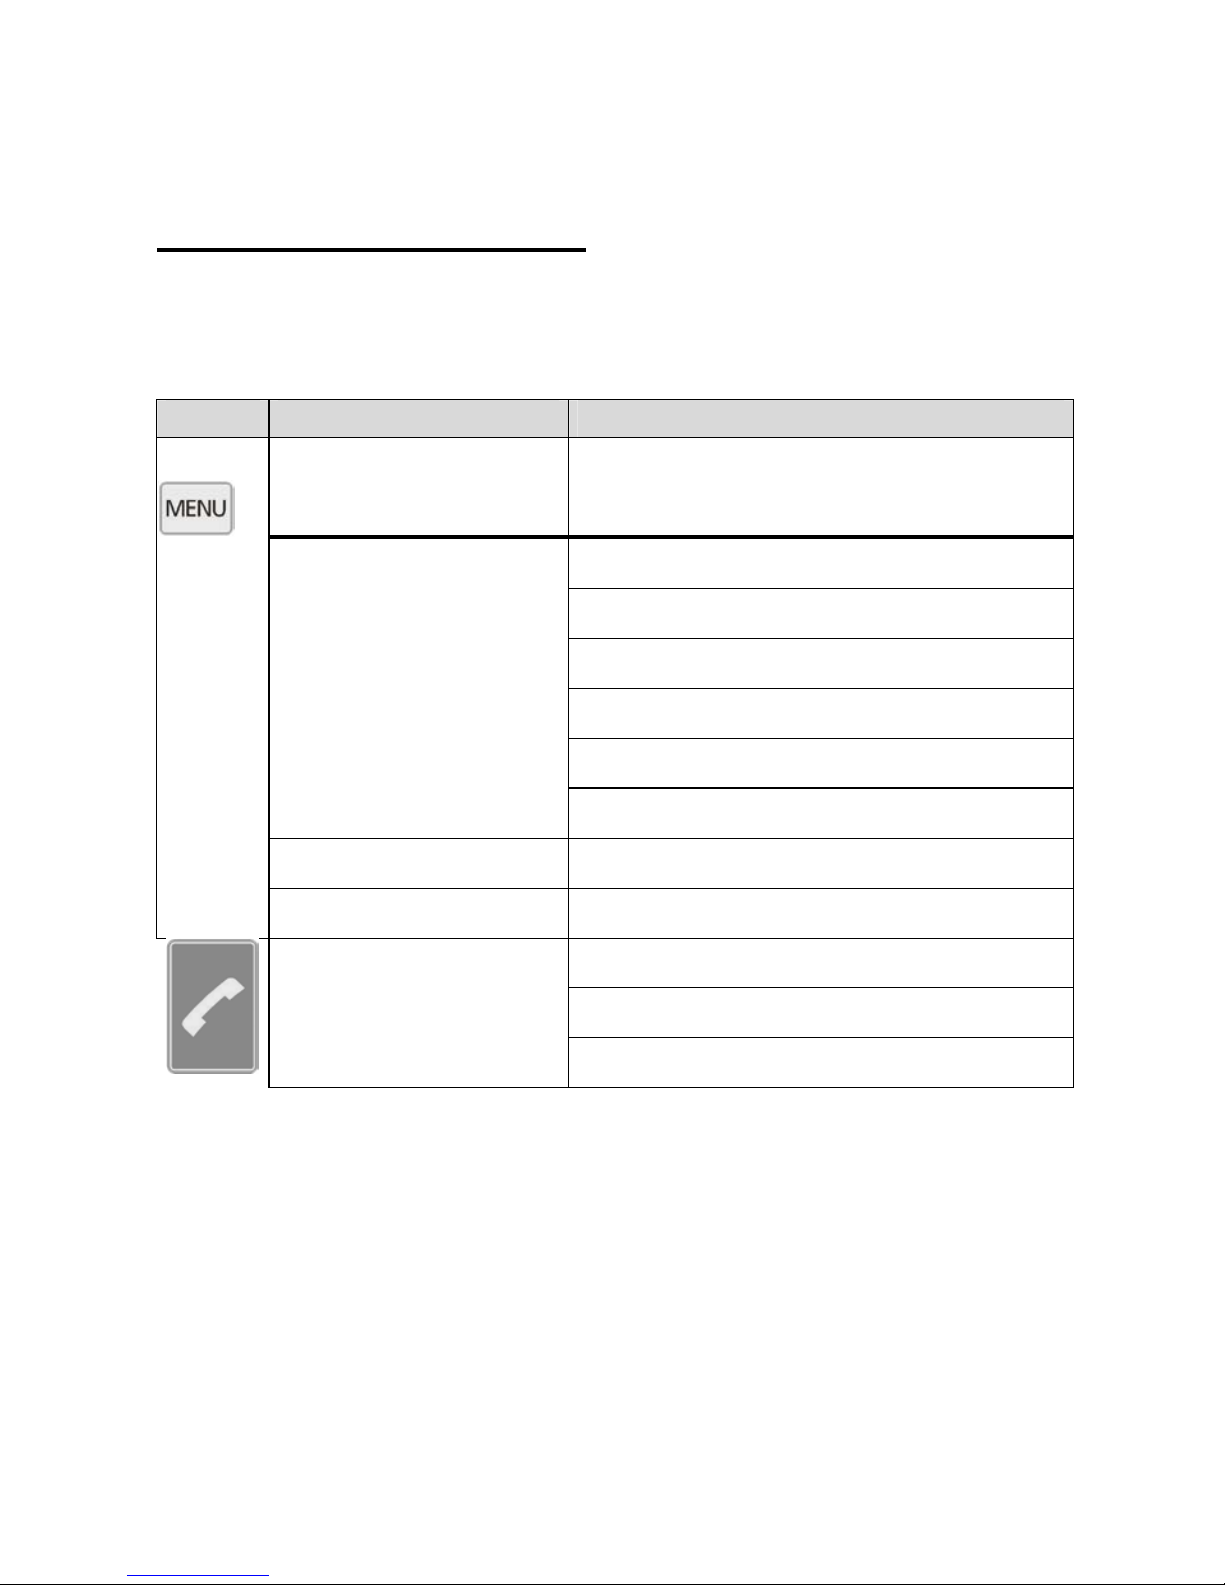
Menu structure
Simplified illustration
for using the basic functions
Level 1 Level 2
Menu
Phone book New entry (p. 67 ff )
(p. 67 ff) Entries A-Z (p. 53, p. 71)
Settings (p. 80) Vibration (p. 80)
Ringtone volume (p. 82)
Keypad sound (p. 84)
Letter style (p. 85)
Date Time (p. 87)
More (p. 89 ff)
Alarm Set alarm / off (p. 115)
SMS See Chapter 13 (p. 117ff)
Call list Missed (p. 65)
Last number (p. 61)
Received (p. 63)
48
Page 52
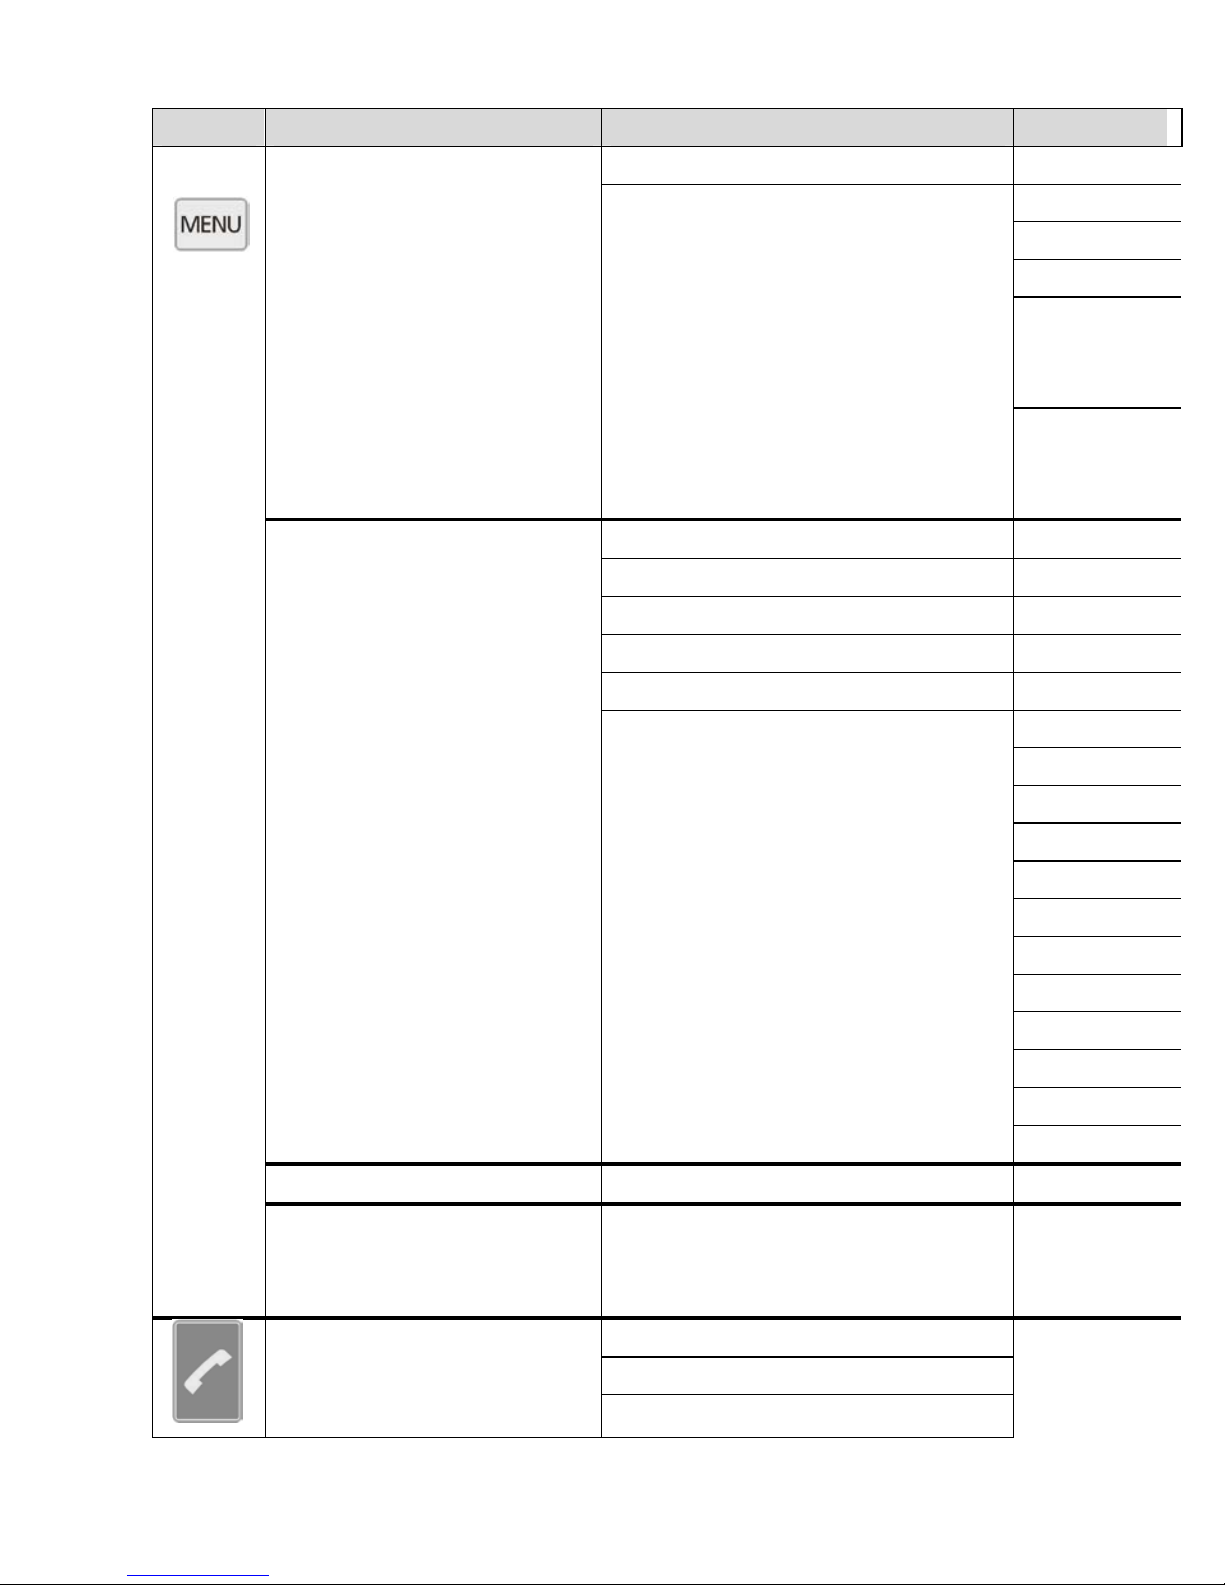
Menu structure - Overview
Level 1 Level 2
Menu Phone book (p. 67 ff) New entry (p. 67 ff)
Entries A-Z (p. 53, p. 71)
Settings (p. 80) Vibration (p. 67 ff)
Ringtone vol. (p. 82)
Keypad sound (p. 84)
Letter style (p. 85)
Date/Time (p. 87)
More (p. 89 ff)
Alarm (p. 111) Set alarm / off
SMS (=text messag-
ing) must be switched
See relevant chapter for
functions (p. 117 ff)
on (see p. 97)
Call list Missed (p. 65)
Last number (p. 61)
49
Received (p. 63)
Page 53
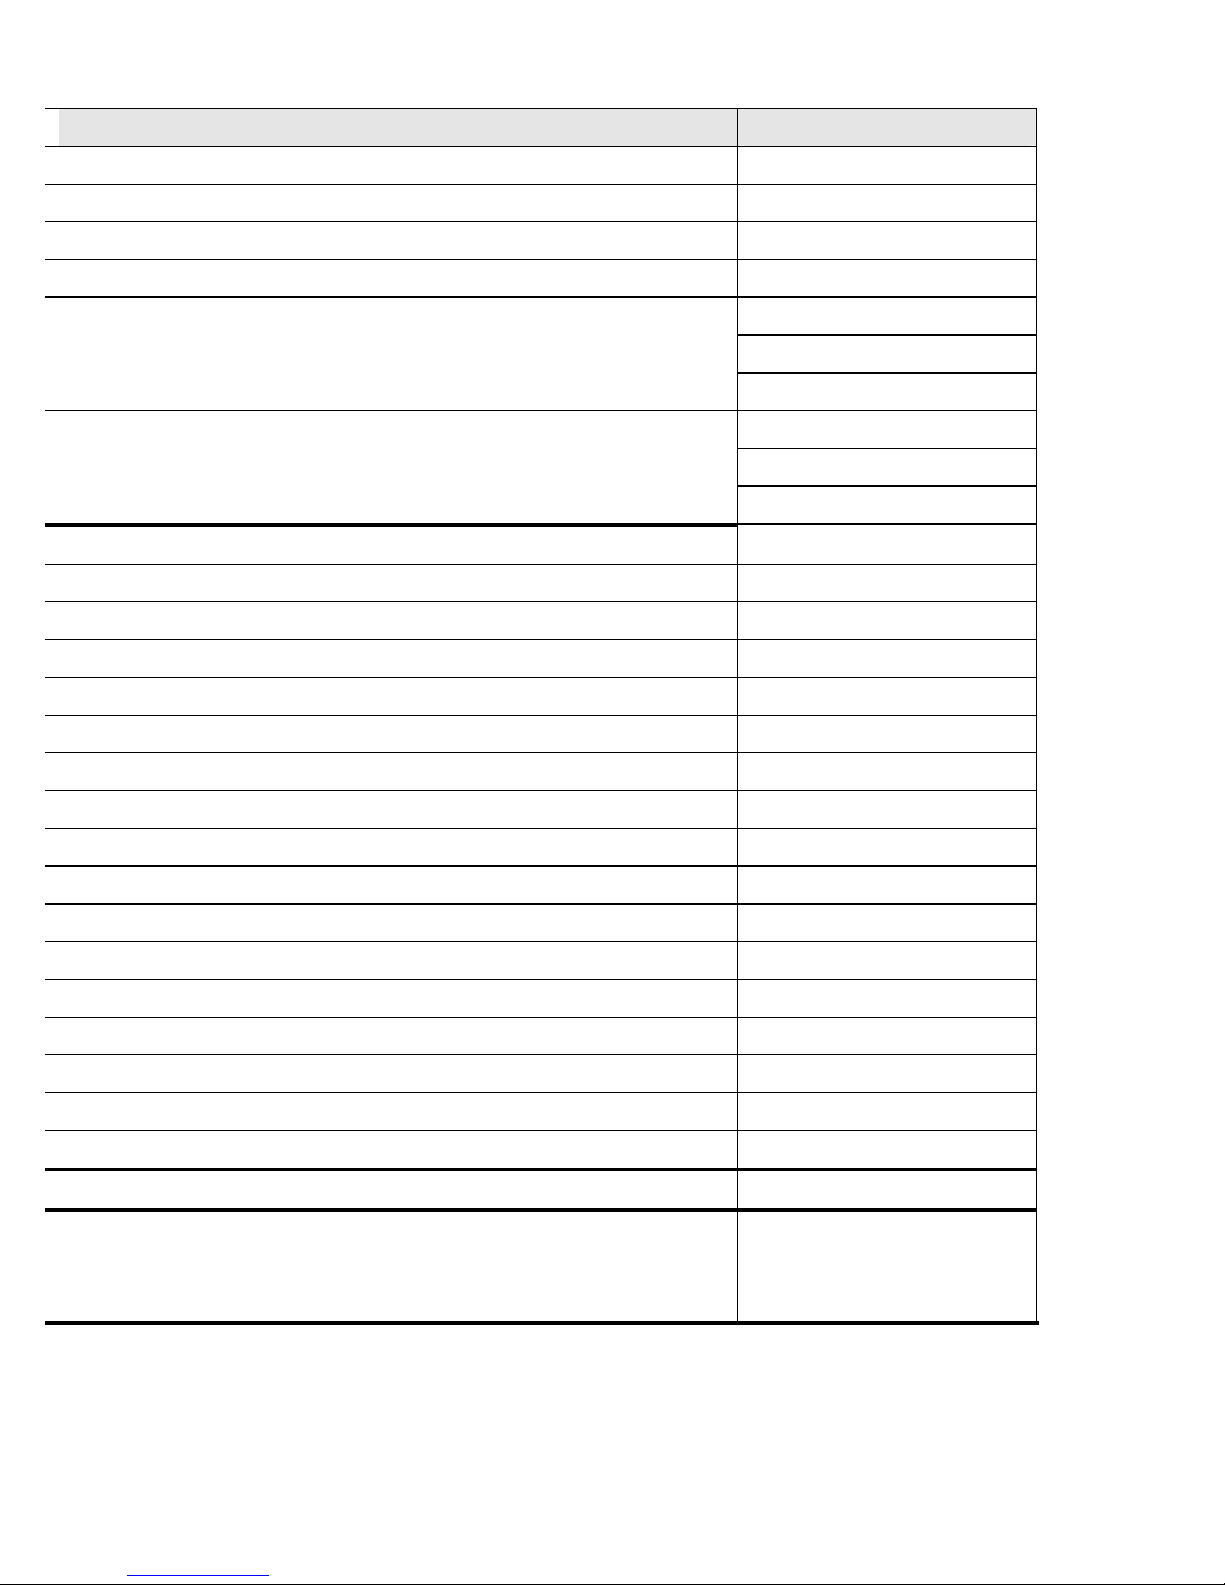
Menu structure - Overview
Level 3 Level 4
Name/Phone number (p. 67 ff)
Call (p. 67 ff)
Change (p. 71)
Delete (p. 73)
Assign number (p. 75) Keys I, II, III
Speed dial 2-9
Group call 1, 2, 3
Delete assign (p. 77) Keys I, II, III
Speed dial 2-9
Group call 1, 2, 3
On / Off
Off / Low / Normal / High
On / Off
Black on white/White on black/High contrast
15:04 31.12.07 Set
Language (p. 91) German, Eng., Fr.
Ringtone (p. 93) Tune 1, 2 or 3
Emerg. gp. call (p. 95) On / Off
SMS function (p. 97) On / Off
Own number (p. 99) Set
Mailbox (p. 101) Set
Letter size (p. 103) Small / Large
Time (p. 105) Small / Large
Auto key lock (p. 107) On / Off
PIN query (p. 105) On / Off
Select network (p. 111) Set / Automatic
Auto answer (p. 113) On / Off
50
Page 54
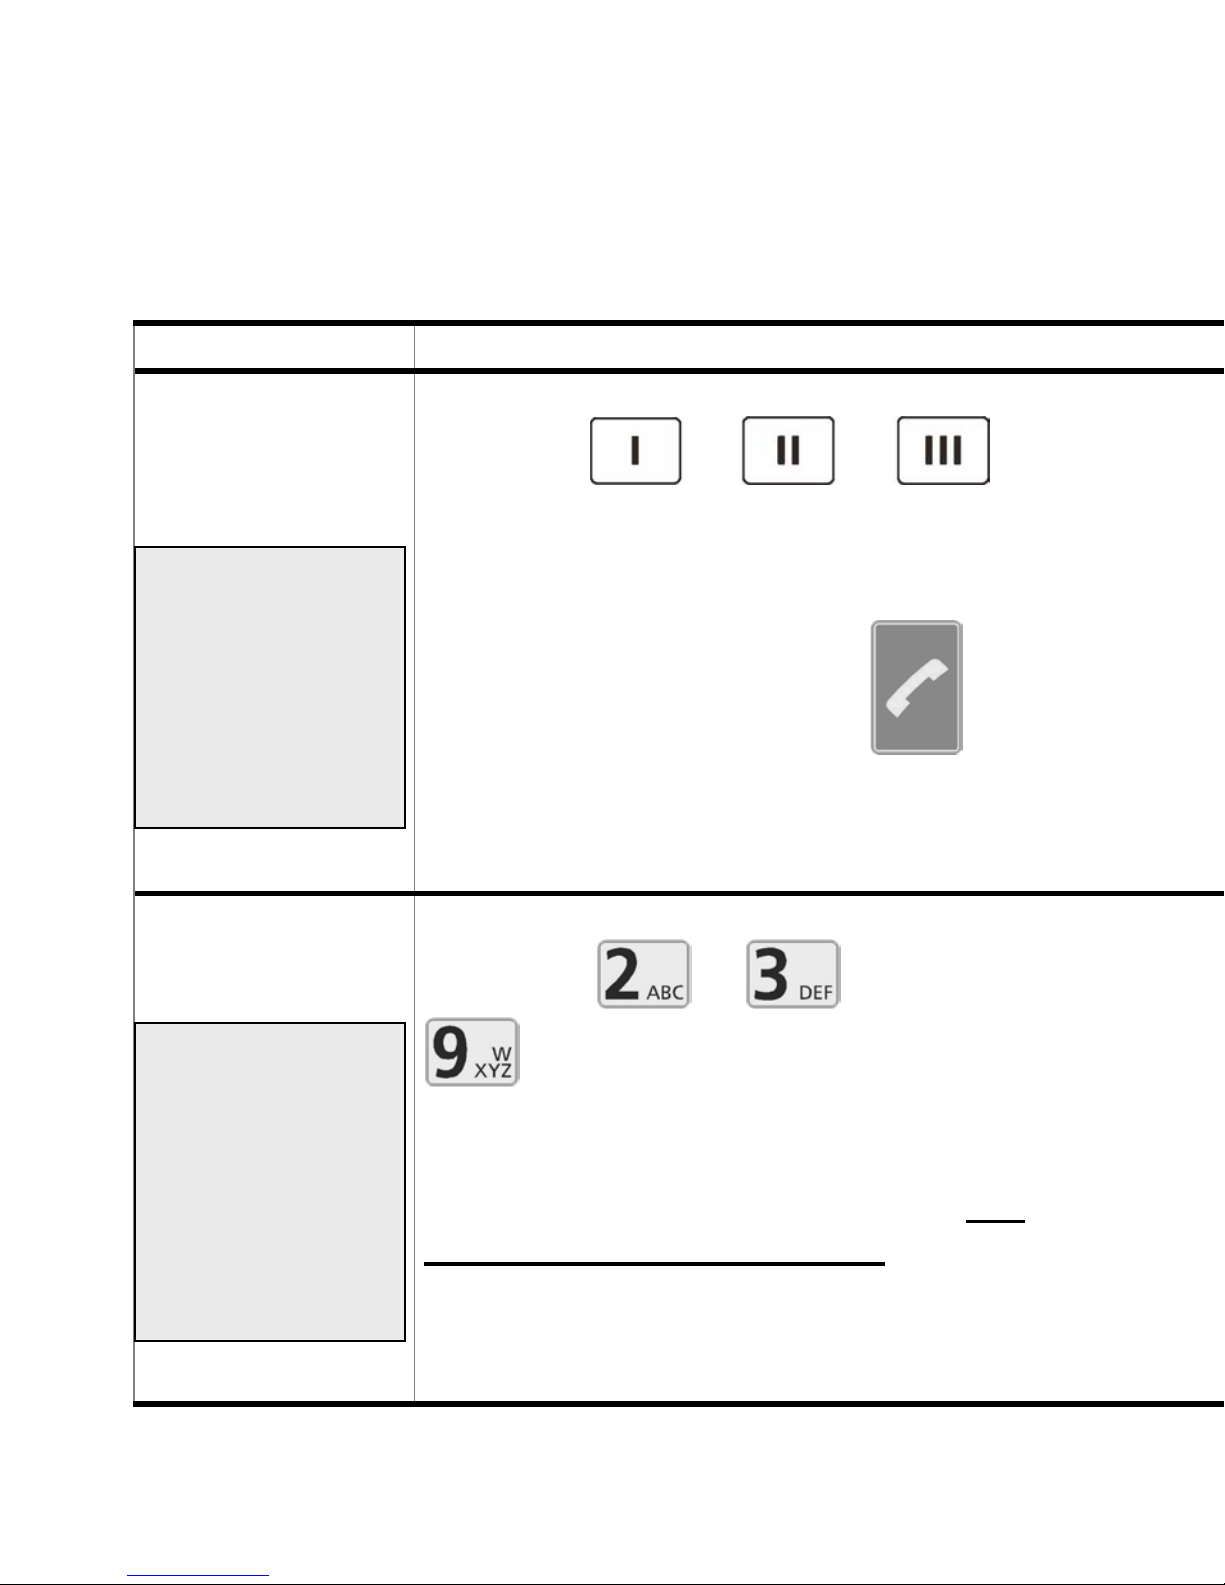
9 Calling stored phone numbers
Your mobile phone provides various options for saving
phone numbers for your convenience:
Procedure What to do
9.1
Direct dial
This function can
only be used
when phone numbers have been
assigned to the
direct dial keys.
See page 75
9.2
Speed dial
Press the
or or
key. The name and phone number of
the person you have stored for this
key is shown in the display.
If you now press the green
key,
a call will be made to this person.
This function can
only be used
when phone numbers have been
assigned to the
speed dial keys.
See page 75
51
Press key
or ... up to
and hold for two seconds.
The name and phone number of the
person you have stored for this key is
shown in the display and the call will
be connected immediately
to this
contact.
Page 55
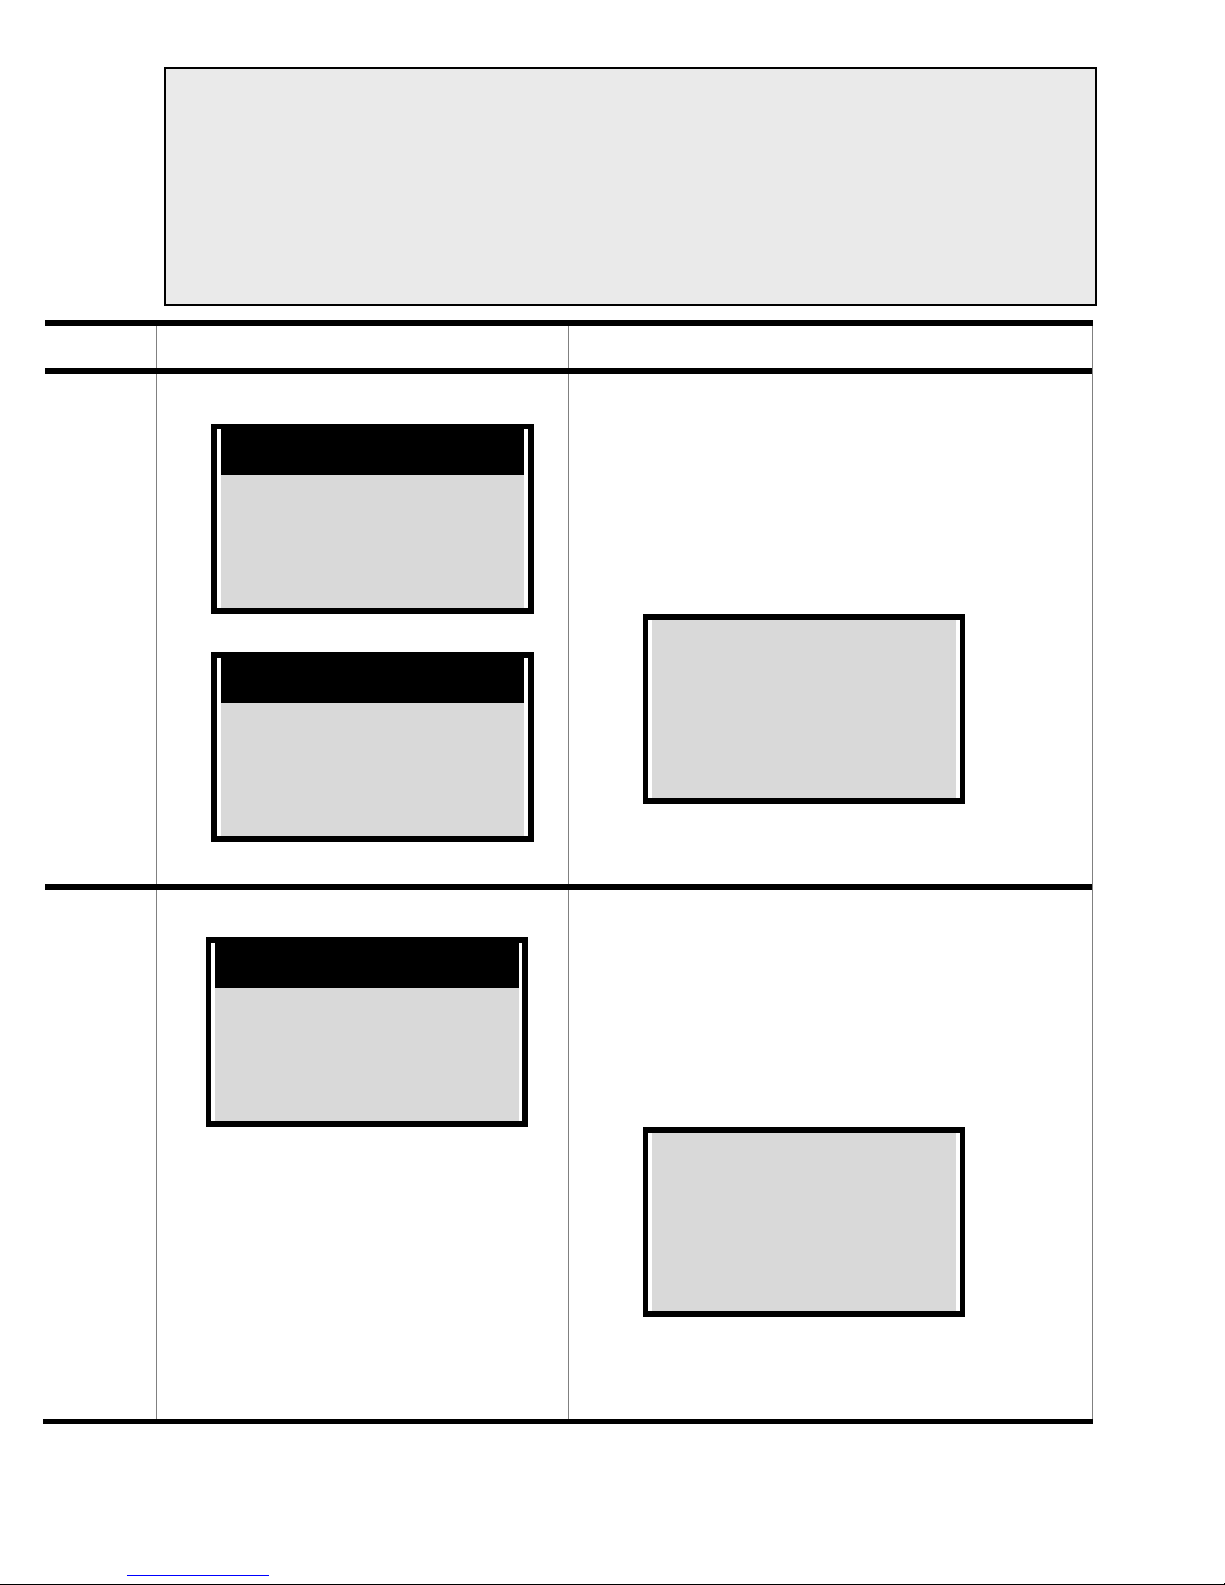
NOTE: On switching on your mobile phone, you may
have to wait approx. one minute before making a call,
depending on the number of entries in your phone
book. The message “SIM not ready. Please wait.” will
be displayed during this time.
Display Outcome / Tips
Dial ?
Name
030611375
Connecting
Name
030611375
As soon as a connection has
been made, you will hear the
call being connected and the
call duration will be displayed.
Name
030611375
Call duration
Connecting
Name
030611375
As soon as a connection has
been made, you will hear the
call being connected and the
call duration will be displayed.
030611375
Call duration
Name
52
Page 56
Procedure What to do
9.3
Selecting
names by A-Z
from the
phone book
memory
This function can
only be used
when phone numbers have been
entered into the
phone book. See
pages 67ff
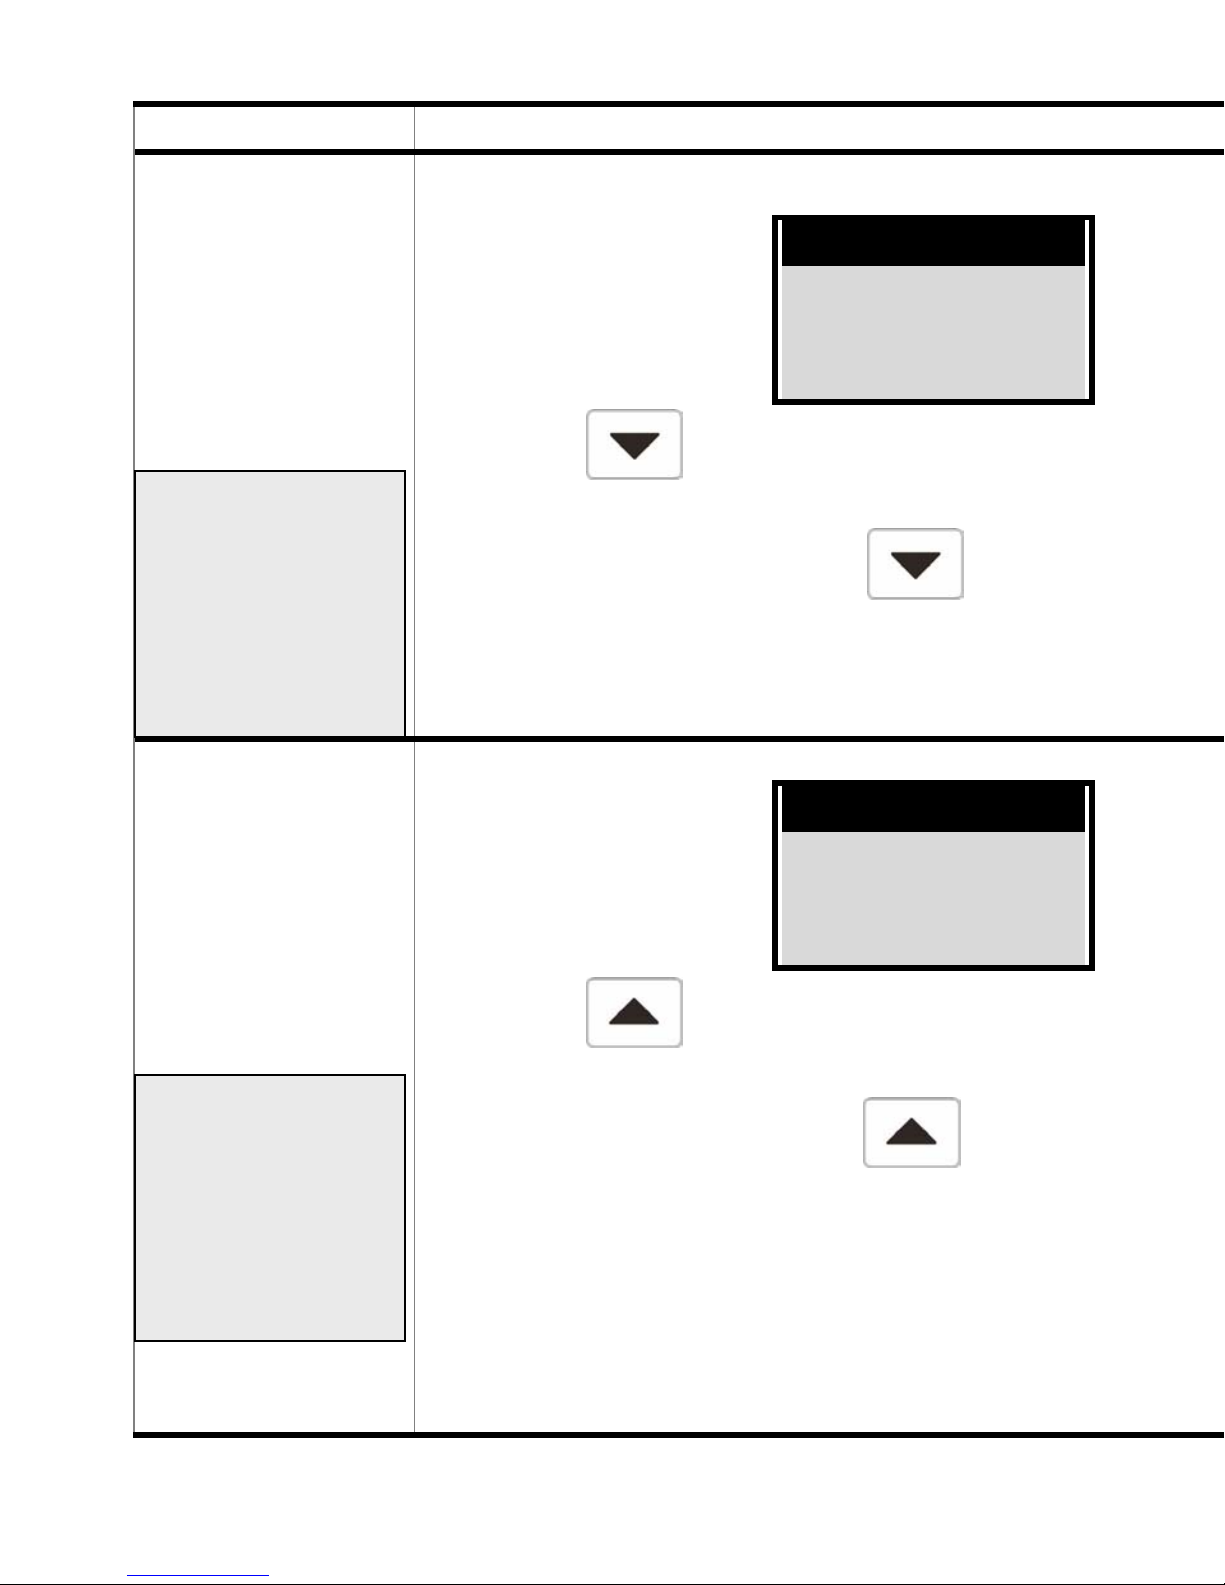
Selecting
names by Z-A
from the phone
book memory.
When your phone is
Your provider
ready to use, i.e. you
Time
see the following
Date
display:
Your tel. number
press the
key for direct access
to the mobile phone book, starting
with the letter A. Press the
key
again to call up the names, which will
be shown in alphabetical order.
When your phone is
Your provider
ready to use, i.e. you
Time
see the following
Date
display:
Your tel. number
This function can
only be used
when phone numbers have been
entered into the
phone book. See
pages 67ff
53
press the
key for direct access
to the mobile phone book, starting
with the letter Z. Press the
key
again to call up the previous names in
reverse alphabetical order.
Page 57
Display Outcome / Tips
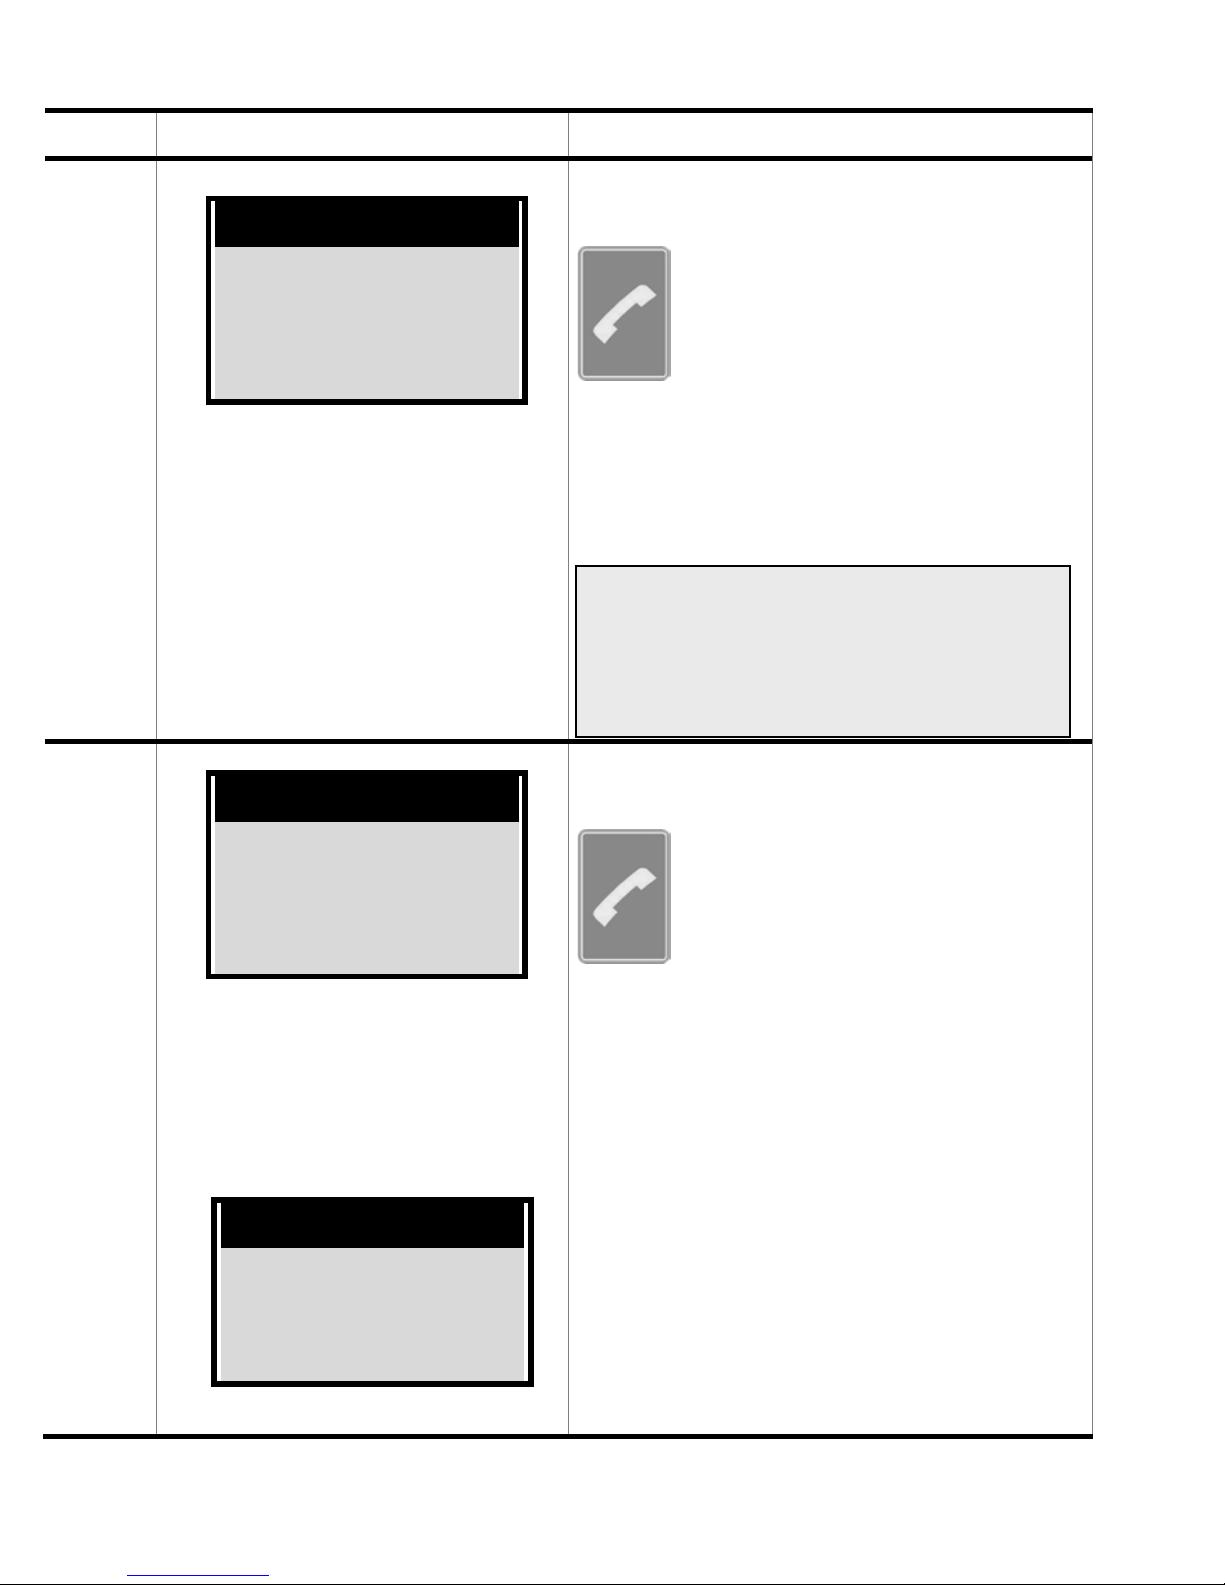
Anton Smith
Anton
It can take approx. one
minute after switching
on the mobile before it
is ready for use. Until
then, the message
“SIM not ready” will be
shown.
If you now press the green
key, a call will be made
to this person.
Names which you have entered
starting with a number will be displayed in the phone book before
the letter A.
Zacharias
Zacha
It can take approx. one
minute after switching
on the mobile before it
is ready for use. You
will see the message:
Note:
SIM not ready
If you now press the green
key, a call will be made
to this person.
54
Page 58
Procedure What to do
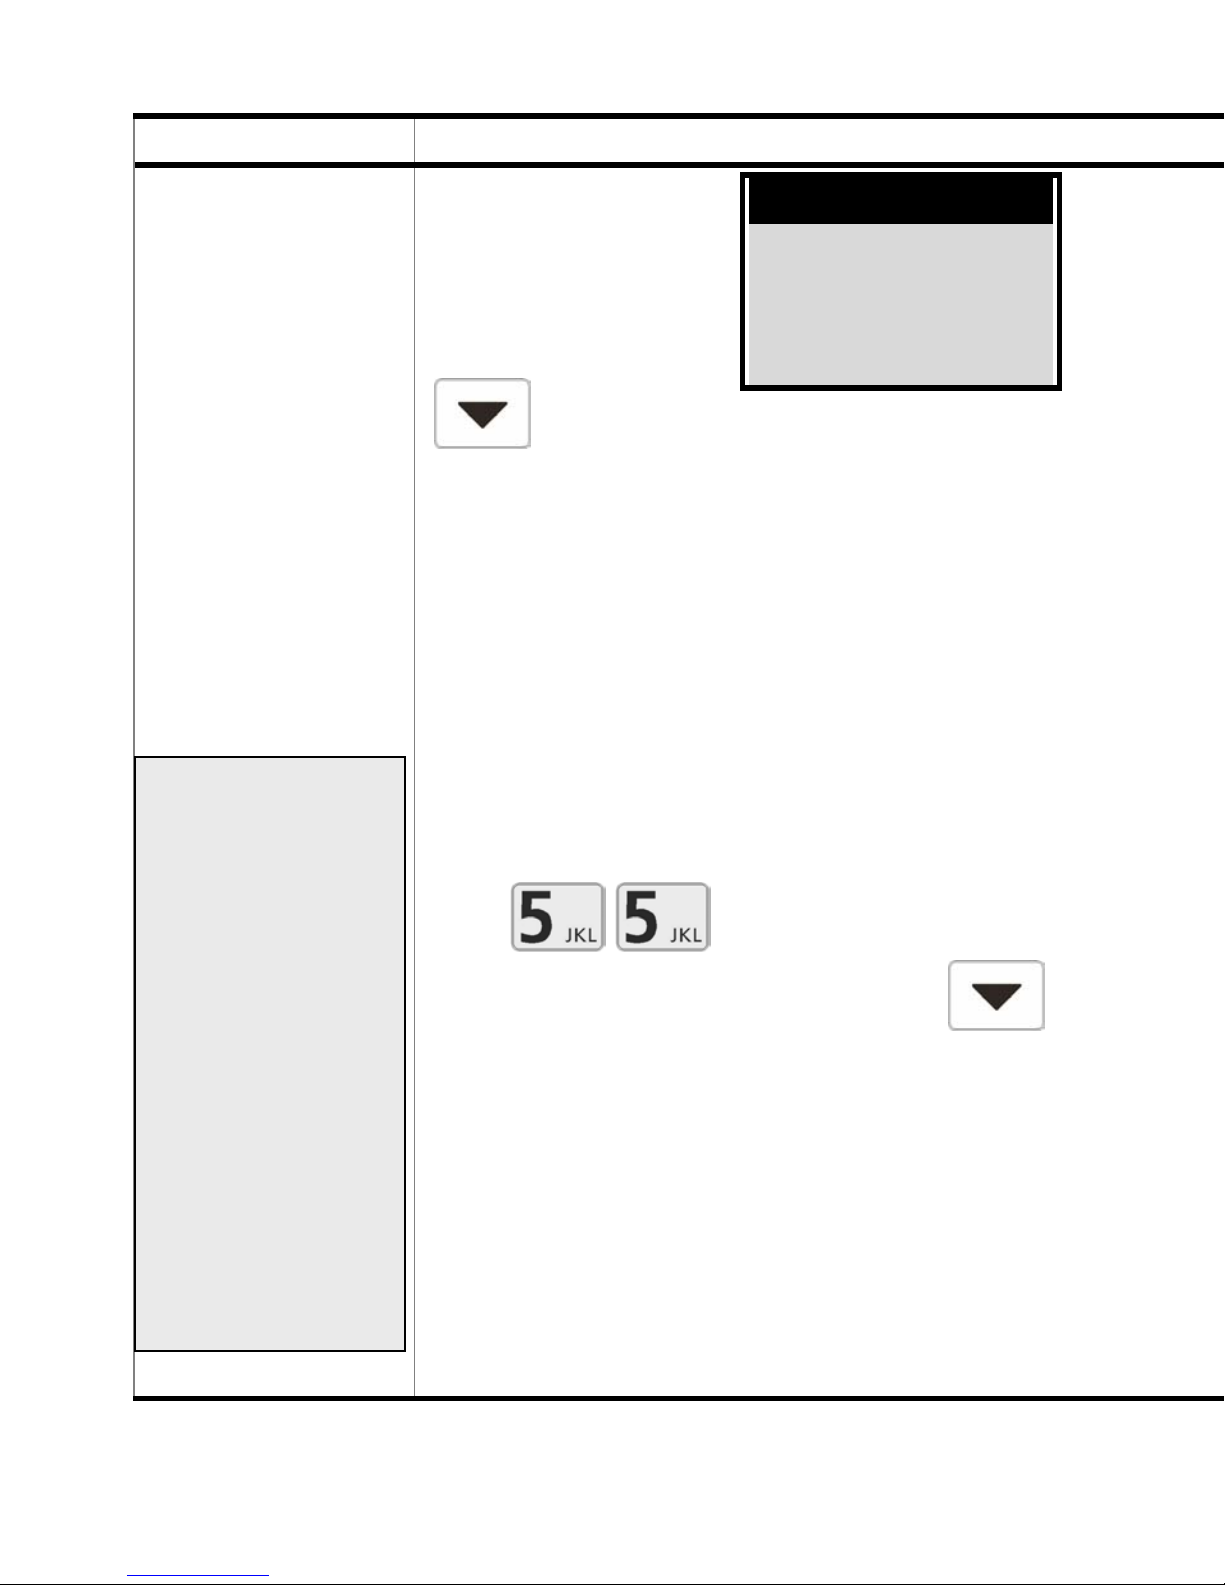
Direct dialling
contacts in the
phone book
memory
When you have
Anton Smith
called up the
phone book by
pressing the
Anton
key, you can also access a
specific entry directly.
Press the number key which has the
first letter of the name you require.
The position of the letter you require
on the key shows the number of times
you have to press this key in order to
This function can
only be used
when phone numbers have been
entered into the
phone book. See
pages 67ff
If you have a new
SIM card, you
may find your service provider has
already entered
their customer
services numbers.
call up the first of the entries starting
with this letter.
E.g.:
on the number 5 key. Press the
calls up the letter K
key to call up the names, which will be
shown in alphabetical order,
or enter the second letter of the name
you require (e.g. for King, press the
number 4 three times for the I).
55
Page 59
Display Outcome / Tips
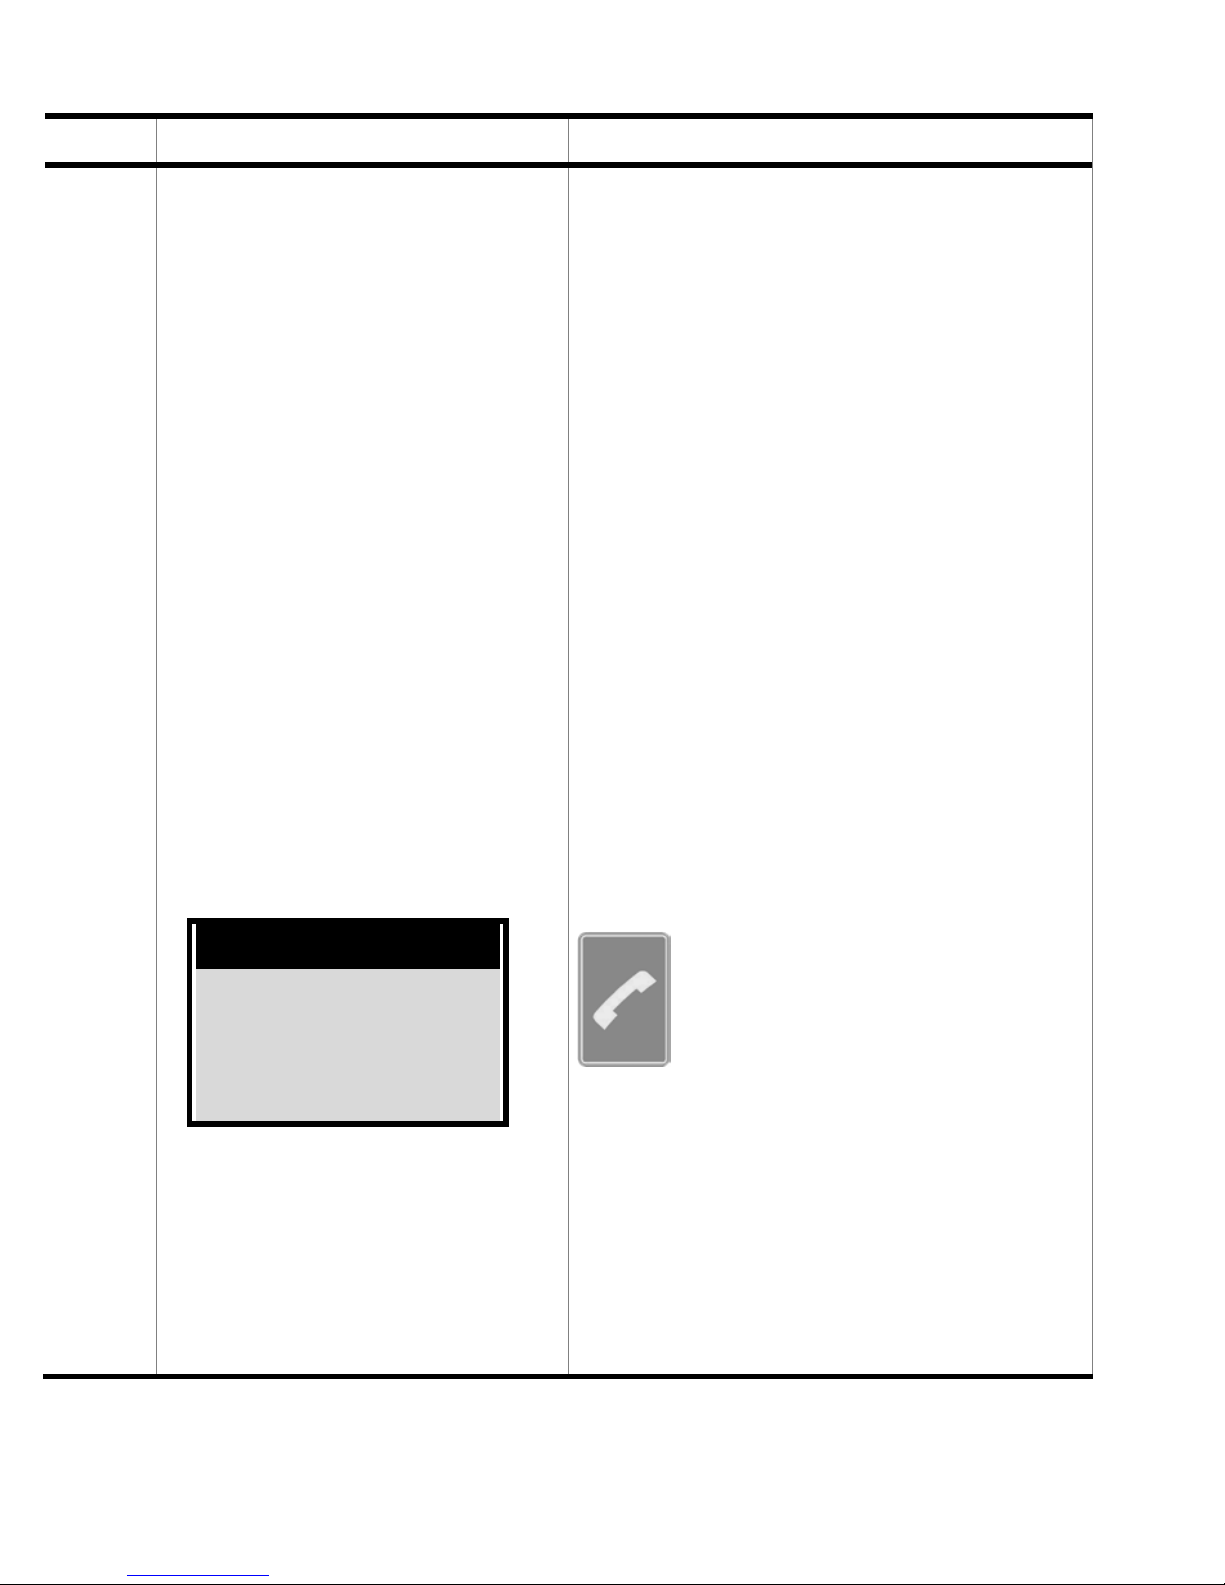
Kevin
Kevin
If you now press the green
key, a call will be made
to this person.
56
Page 60
Procedure What to do
9.4
Emergency
group call
This function
can only be
used when at
least one
emergency call
number is assigned to the
numbers. See
page 75.
In addition,
the function
must have
been previously acti-
vated in the
extended settings (i.e.
More).
See page 95
Hold the
, or key
for three seconds. It does not matter
which of the three keys you press. All
three activate an emergency group
call at the same time.
You can interrupt and end an emergency group call at any time by press-
ing the red
Note: If the emergency group call function is not working properly, please
check:
1.: whether you have switched on the
function in the More menu
2.: whether the phone numbers to be
alerted are correctly assigned to
"Group call 1-3" and not to
"Key 1-3" by mistake.
When you have switched on the emergency group call function but have not
key.
entered or assigned any Group call
numbers, an SOS alarm signal will
sound when you put out a group call but
no text message will be sent. The word
ERROR will be displayed.
57
Page 61
-
Display Outcome / Tips
For approx. 1 minute,
while an emergency
call text message is
sent, you will see:
Emergency call
Emergency call
Please wait
You will hear a loud
SOS signal as confirmation that this function has been carried
When you put out a group call,
the following text message is
sent to up to three different pre
viously stored numbers:
“<Your phone number>
The sender of this SMS has
put out an emergency call.
Please call back immediately.”
For the next 20 minutes, your
mobile will accept any incoming calls without you having to
do anything at all and switches
to handsfree.
out.
While your mobile remains in automatic call
answer mode, you will
see the following message displayed:
Emergency call
Time
Date
Phone number
You can alert up to three people by pressing just one key.
Callers who have received a
text message can speak to
you immediately when they
call back.
You can interrupt and end an
emergency group call at any
time by pressing the red
key.
58
Page 62
Procedure What to do
9.5
Using speed
dial to call
your mailbox
(i.e. network
operator’s answering service)
Press and hold the
key for
two seconds.
You will be connected to your network
operator’s computerised voicemail
service without pressing any other
keys.
You can interrupt and end the call at
any time by pressing the red
key.
This function can
only be used
when your phone
number has been
assigned to this
key.
See page 101.
Note: This mobile phone uses the mailbox settings already set by the network
operator (calls are diverted to the mailbox (answering service) when you cannot be contacted or when your phone is
switched off or engaged).
It is not possible to change these settings with this phone via the menu.
You can make changes by inserting the
SIM card into another mobile phone or
by entering the GSM code valid for all
mobile phones into this phone (see page
144).
59
Page 63
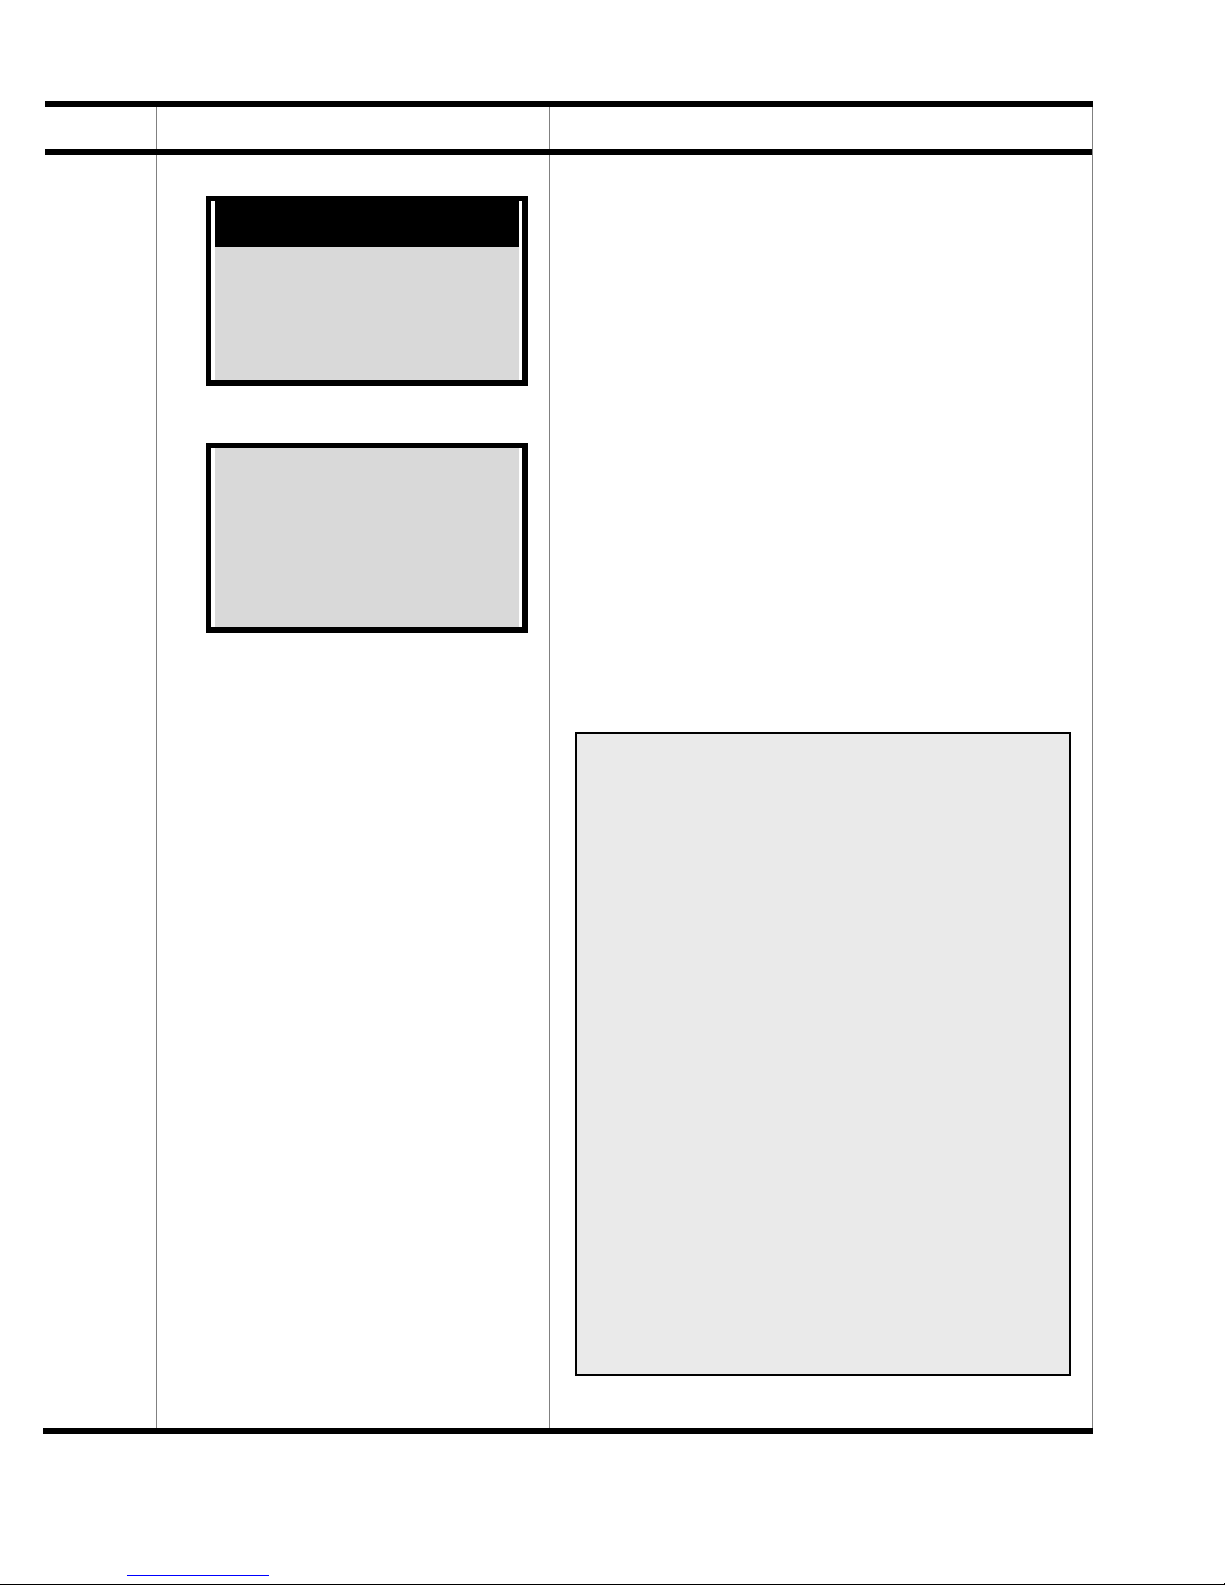
Display Outcome / Tips
Connecting
Mailbox
55001726204321
Mailbox
55001726204321
As soon as the connection is
made, you will hear the computerised voicemail announcement from your network operator. Please follow the instructions provided.
o_o This symbol on the keypad
represents the recording function of the answering service
(i.e. the mailbox).
Switching off the mailbox
function:
When you want to switch off
your mailbox and all the call
diversion functions altogether, enter the key sequence ##002#
and press the large green
key with the handset symbol.
If this is not possible or if you
would like other call diversion functions, please contact your mobile phone
dealer directly.
60
Page 64
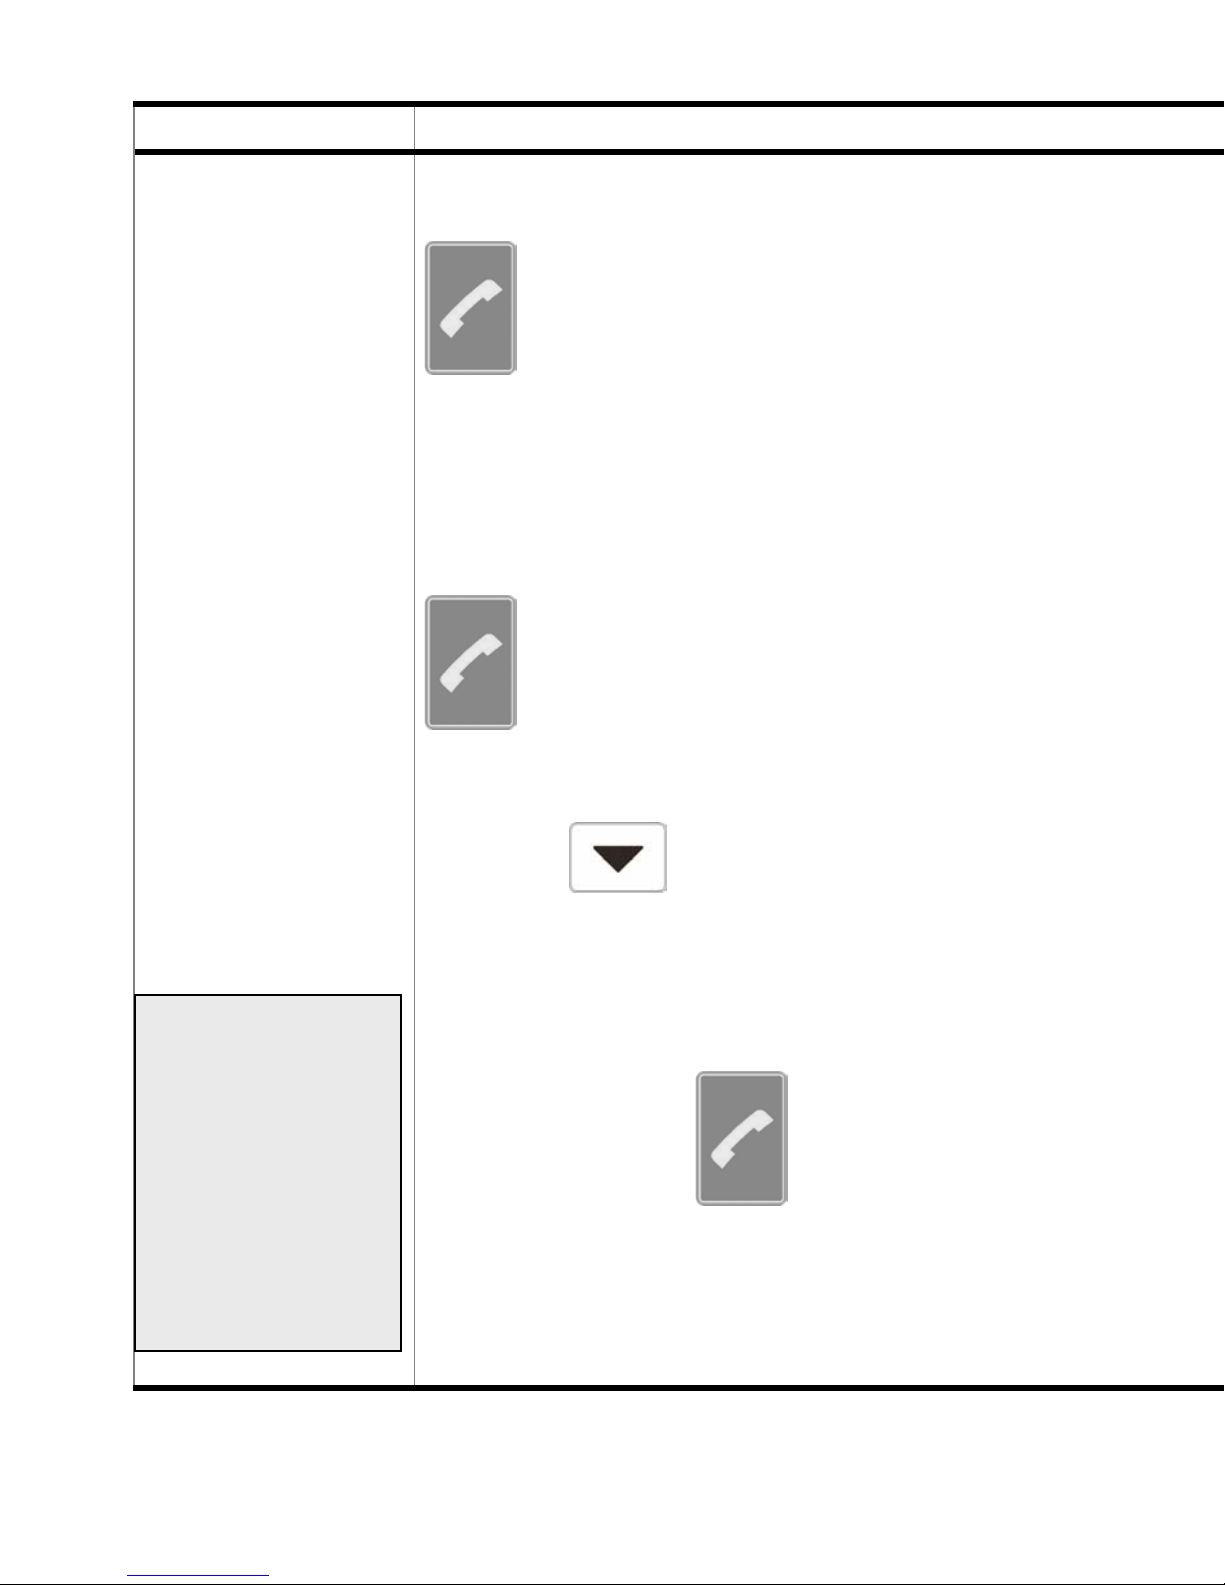
Procedure What to do
9.6
Repeat dialling
Press the green
key to call up the list of call op-
tions for redialling.
The phone offers the option of redialling the last number you called.
By pressing once again on the green
key, the last number you called
This function assumes that the
mobile is ready for
use (i.e. in
standby mode)
and is not
switched off or
that you are not
making a call.
will be displayed.
With the
key, you can call up
one of the previous numbers you
called for redialling.
Press the green
key once again
to call this number.
61
Page 65
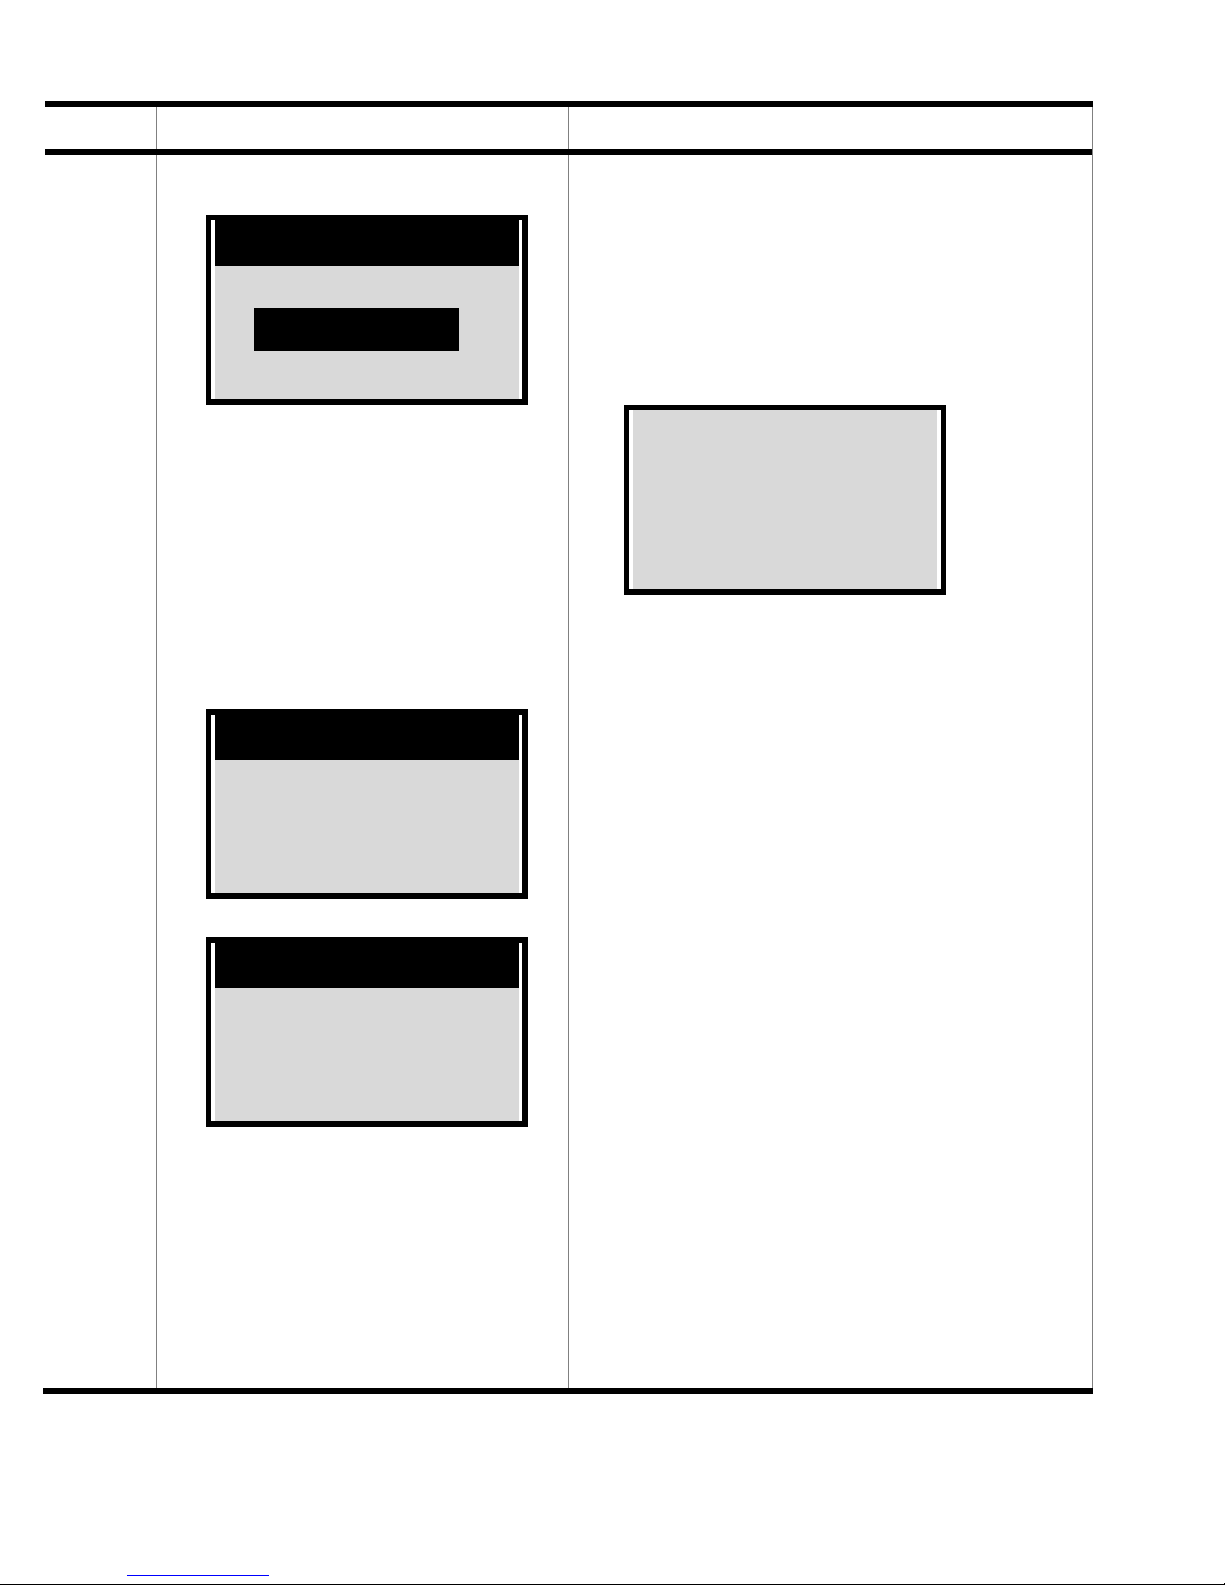
Display Outcome / Tips
Dial ?
Missed
ÎLast number
Received
Provided that the number dialled is stored as
a contact name in the
phone book, this name
will also be displayed.
Dial ?
Name
030611375
Time Date
As soon as a connection has
been made, you will hear the
call being connected and the
call duration will be displayed.
030611375
Call duration
Name
Connecting
Name
030611375
62
Page 66
y
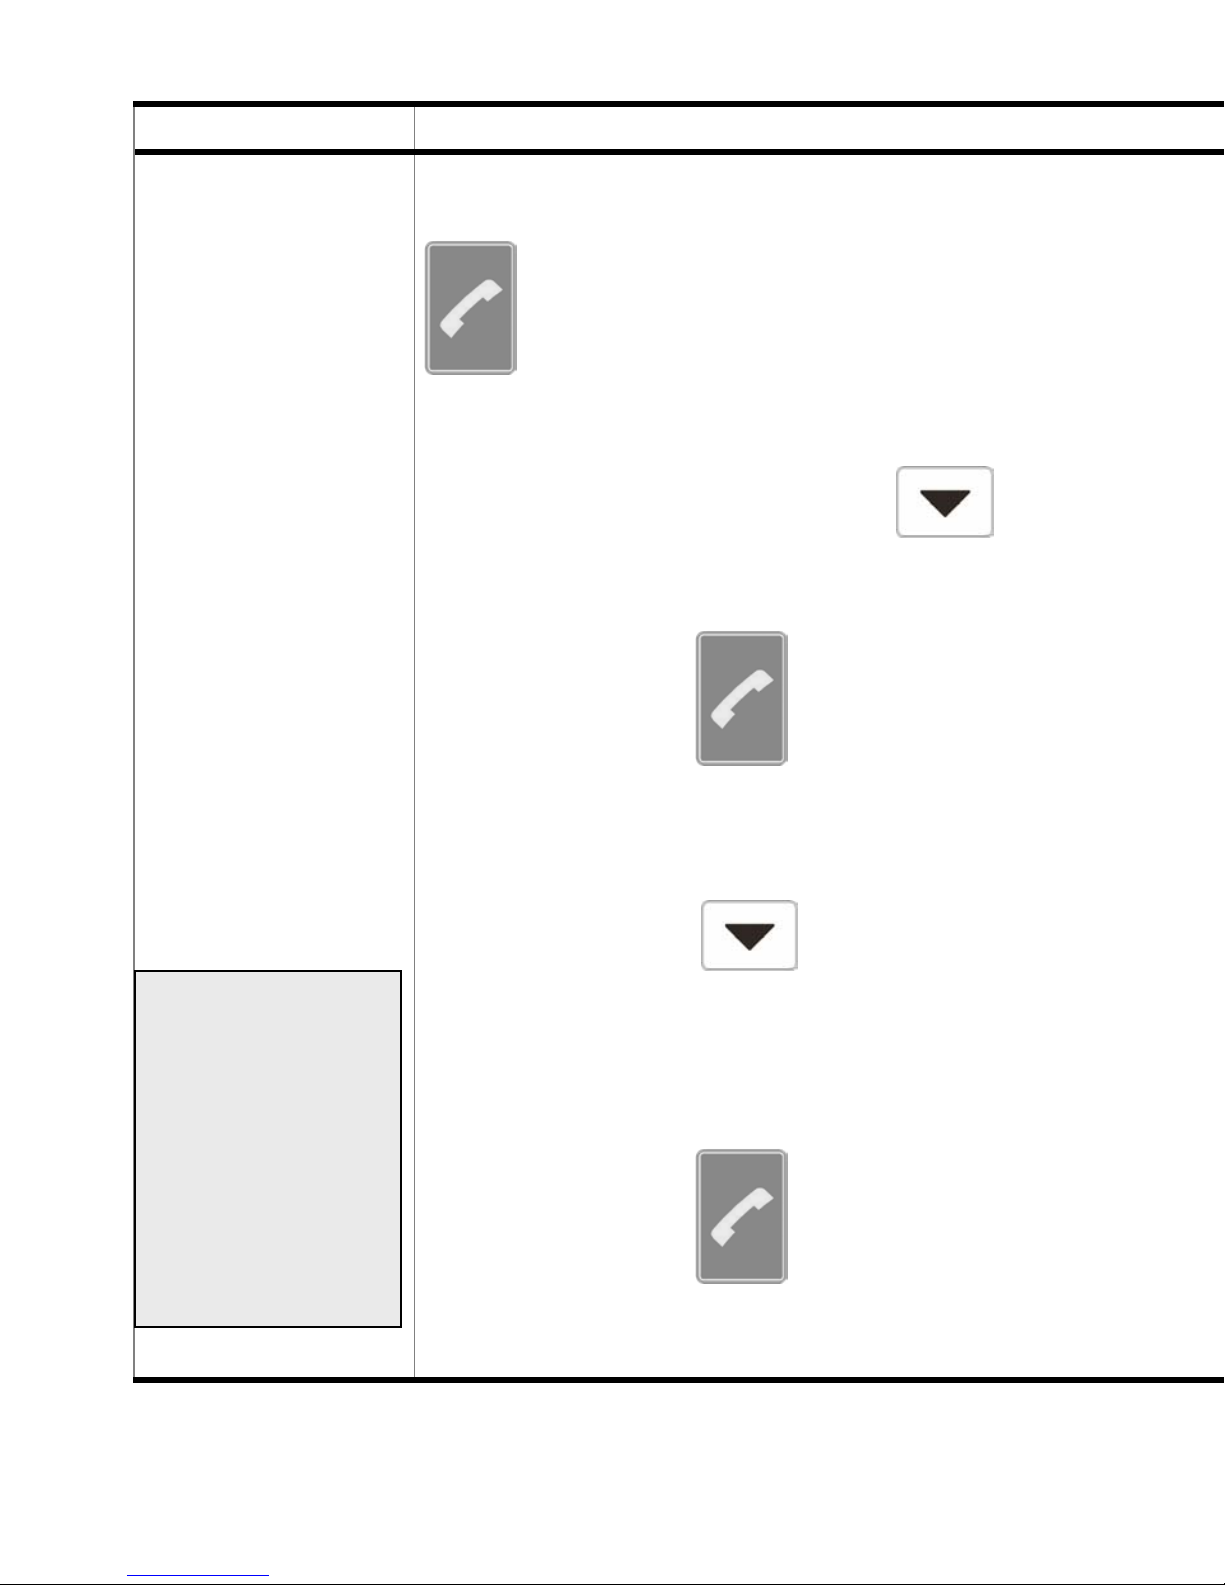
Procedure What to do
9.7
Calling back
the number of
the last caller
Press the green
key to call up the list of call op-
tions for redialling.
Select “Received” using the
key.
Press the green
key once again
This function assumes that the
mobile is read
use (i.e. in
standby mode)
and is not
switched off or
that you are not
making a call.
for
to display the phone number of the
last call to be received.
You can use the
key to call up
one of the previous numbers for redialling.
Press the green
key once again
to call this number.
63
Page 67
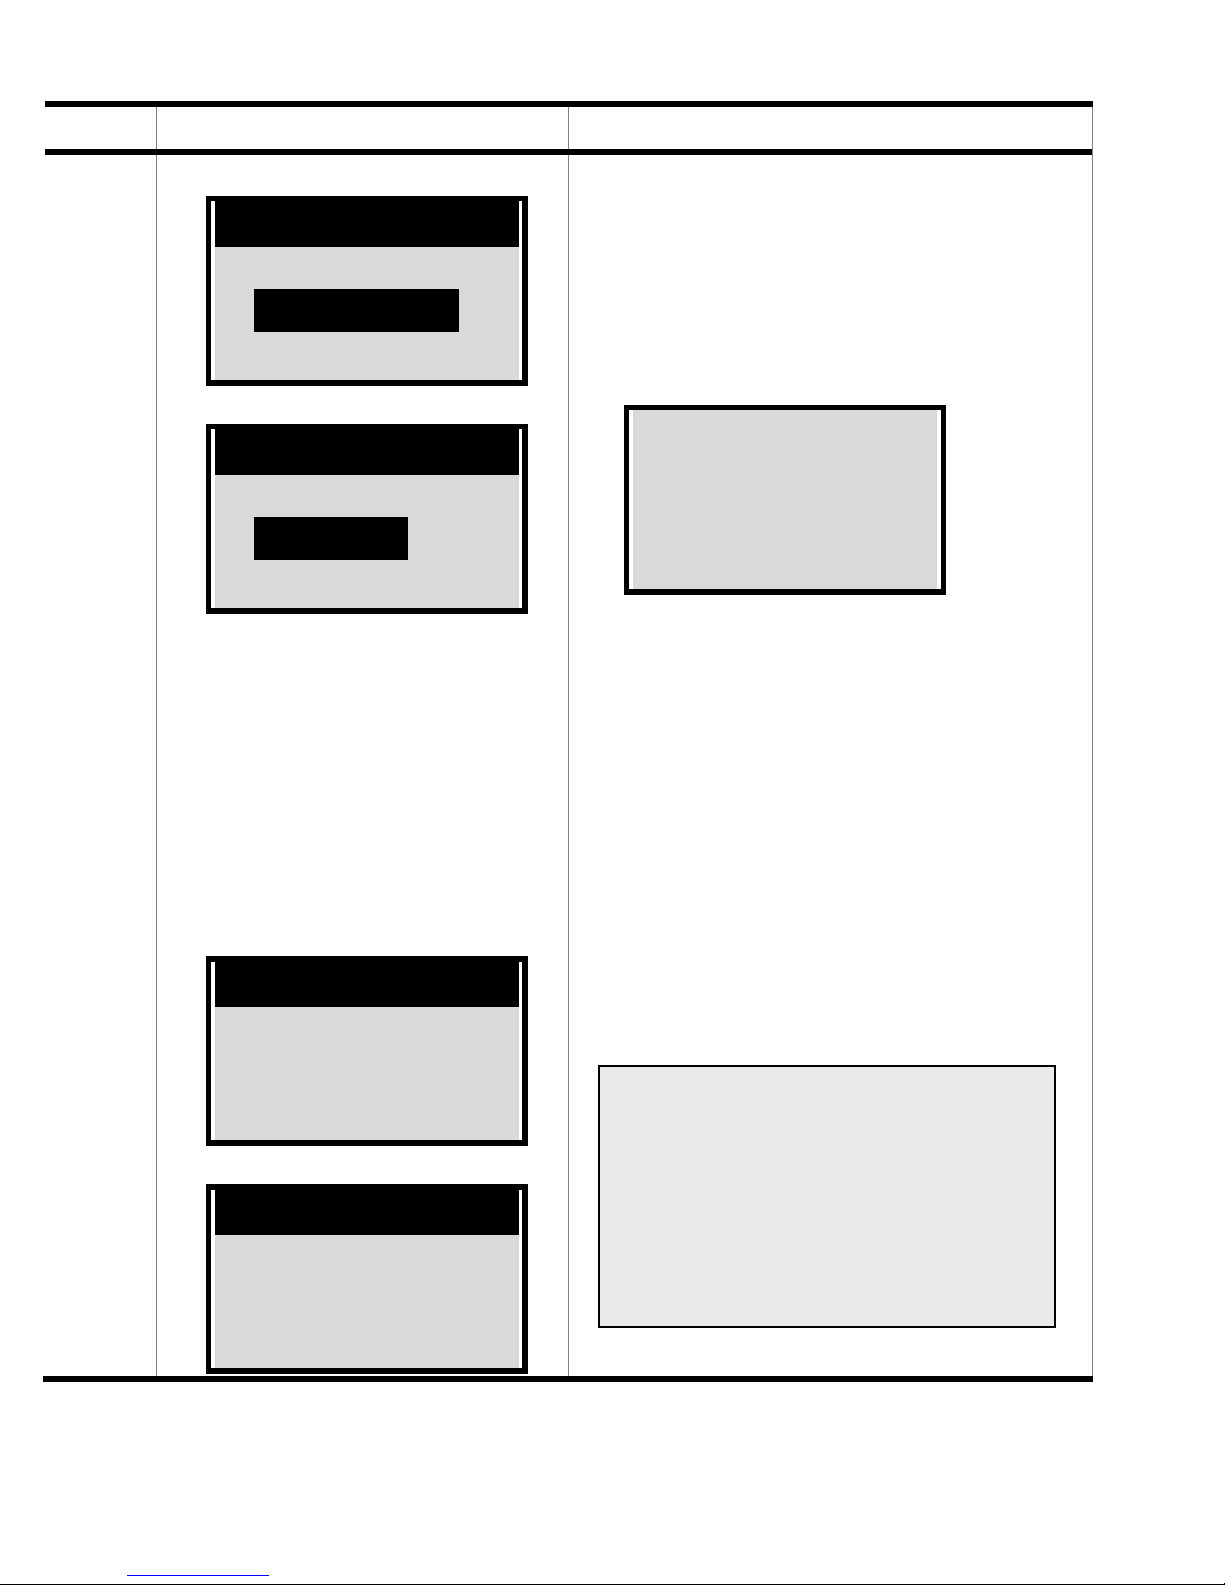
Display Outcome / Tips
Missed
ÎLast number
Received
Dial ?
Dial ?
Last number
ÎReceived
Missed
Provided that the number dialled is stored as
As soon as connection has
been made, you will hear the
call being connected and the
call duration will be displayed.
030611375
Call duration
Name
a contact name in the
phone book, this name
will also be displayed.
Dial?
Name
030611375
Time, Date
Connecting
Name
030611375
Note:
If the caller has withheld their
number, the message “Un-
known number” will appear
and you will not be able to use
this function to call back.
64
Page 68
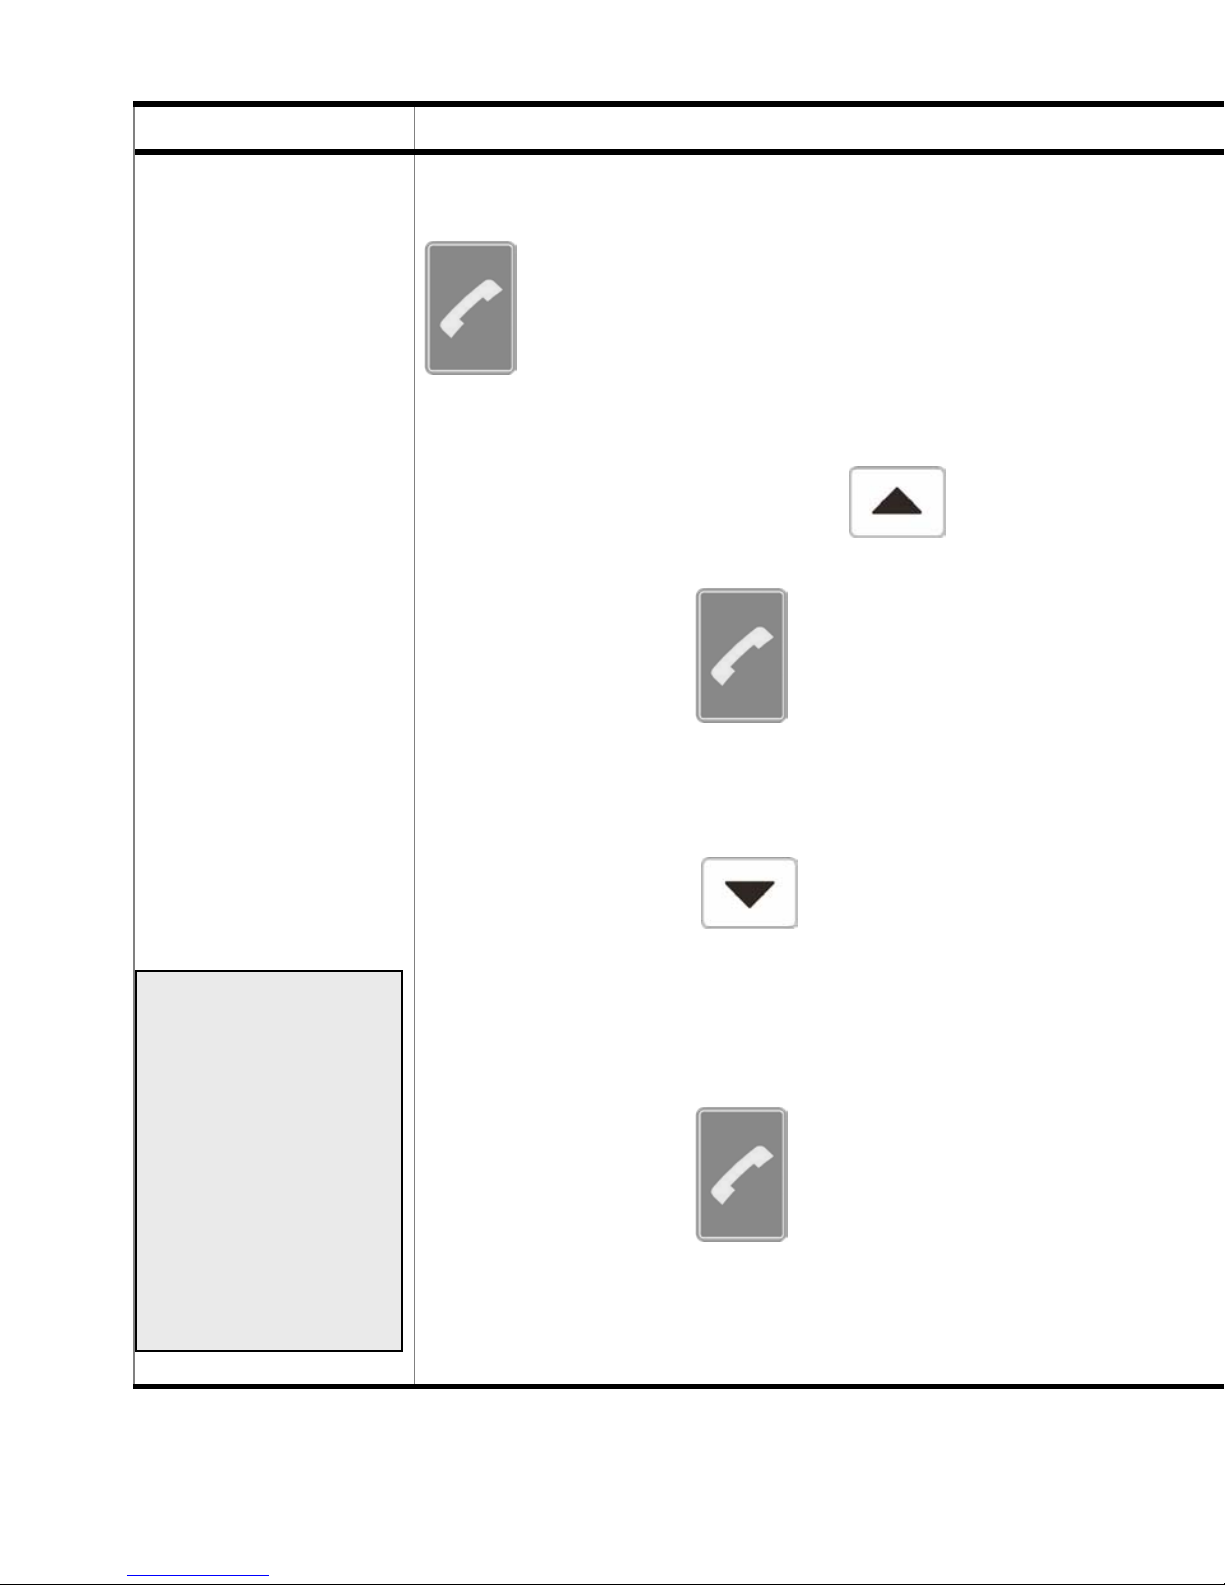
y
Procedure What to do
9.8
Calling back
the number of
the last
missed call
Press the green
key to call up the list of call op-
tions for redialling.
Select “Missed” using the
key.
Press the green
key once again
to display the phone number of the
This function assumes that the
mobile is read
use (i.e. in
standby mode)
and is not
switched off or
that you are not
making a call.
for
last missed call.
You can use the
key to call up
one of the previous numbers for redialling.
Press the green
key once again
to call this number.
65
Page 69
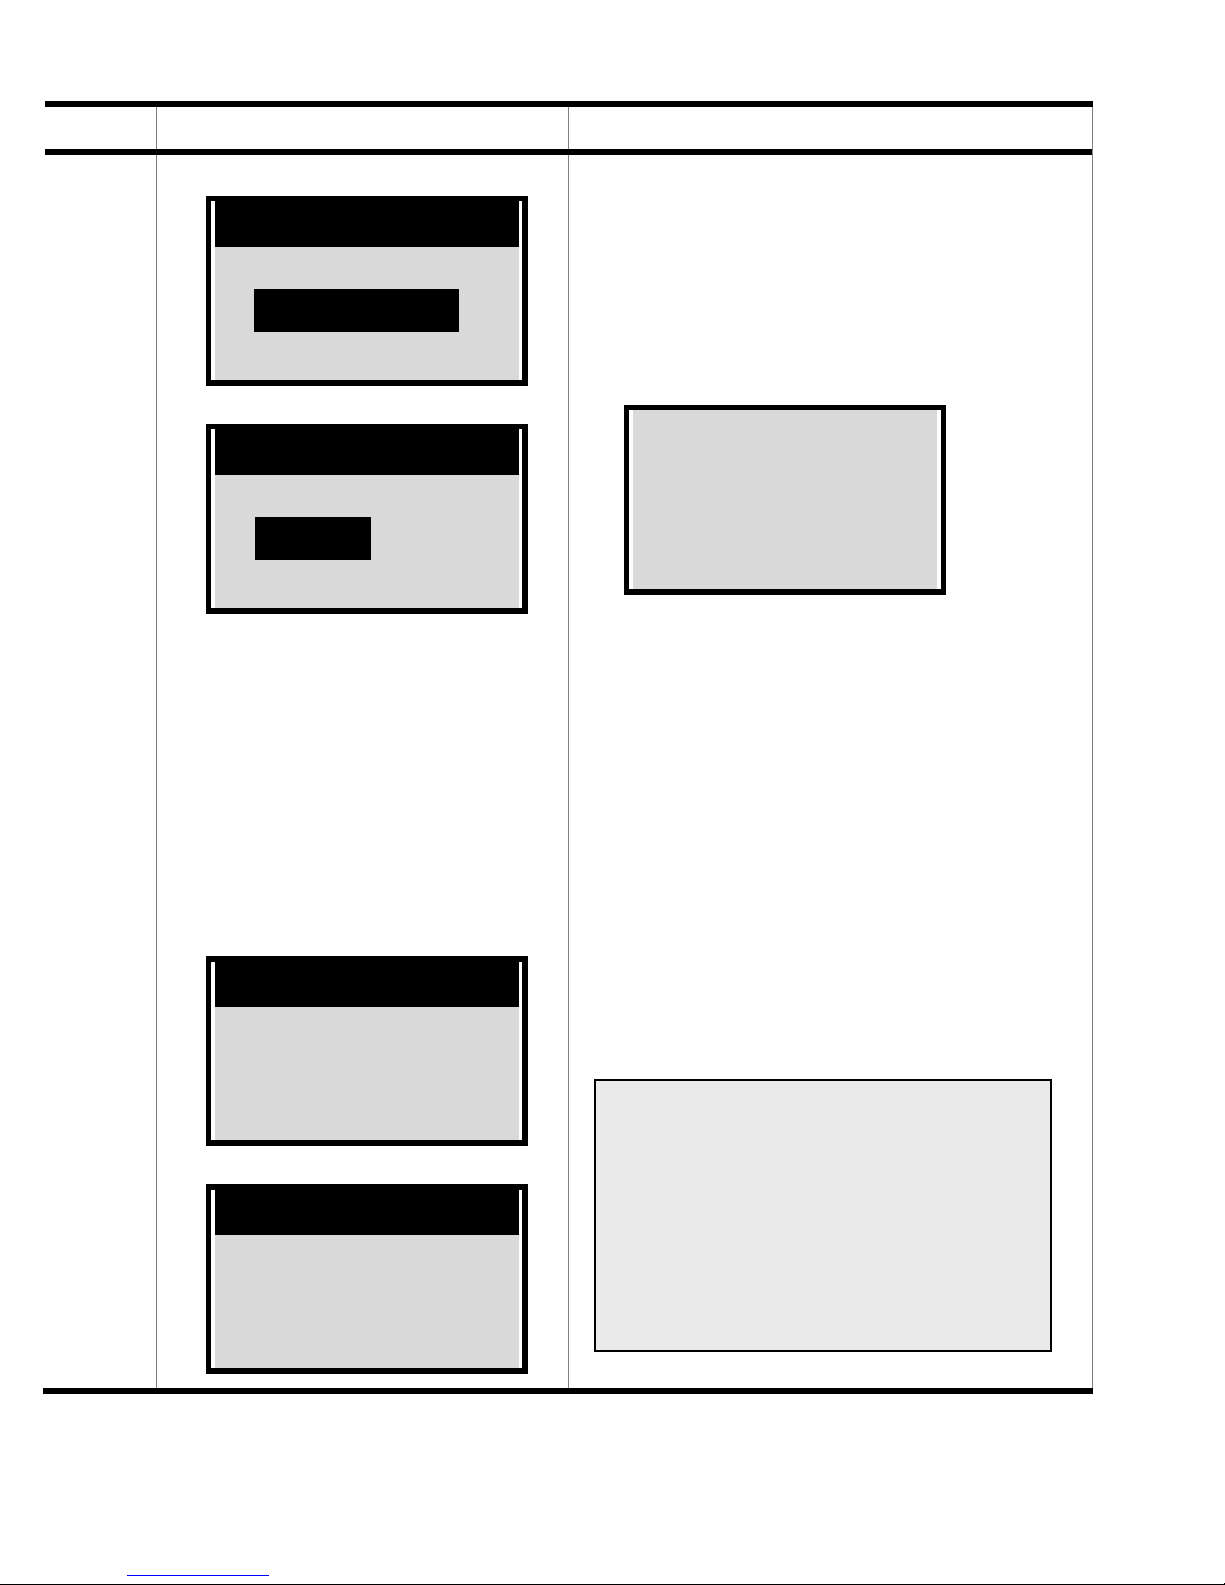
Display Outcome / Tips
Missed
ÎLast number
Received
Dial ?
Dial ?
Received
ÎMissed
Last number
Provided that the num-
As soon as a connection has
been made, you will hear the
call being connected and the
call duration will be displayed.
030611375
Call duration
Name
ber dialled is stored as
a contact name in the
phone book, this name
will also be displayed.
Dial ?
Name
030611375
Time Date
Connecting
Name
030611375
Note:
If the caller has withheld their
number, the message “Un-
known number” will appear
and you will not be able to use
this function to call back.
66
Page 70
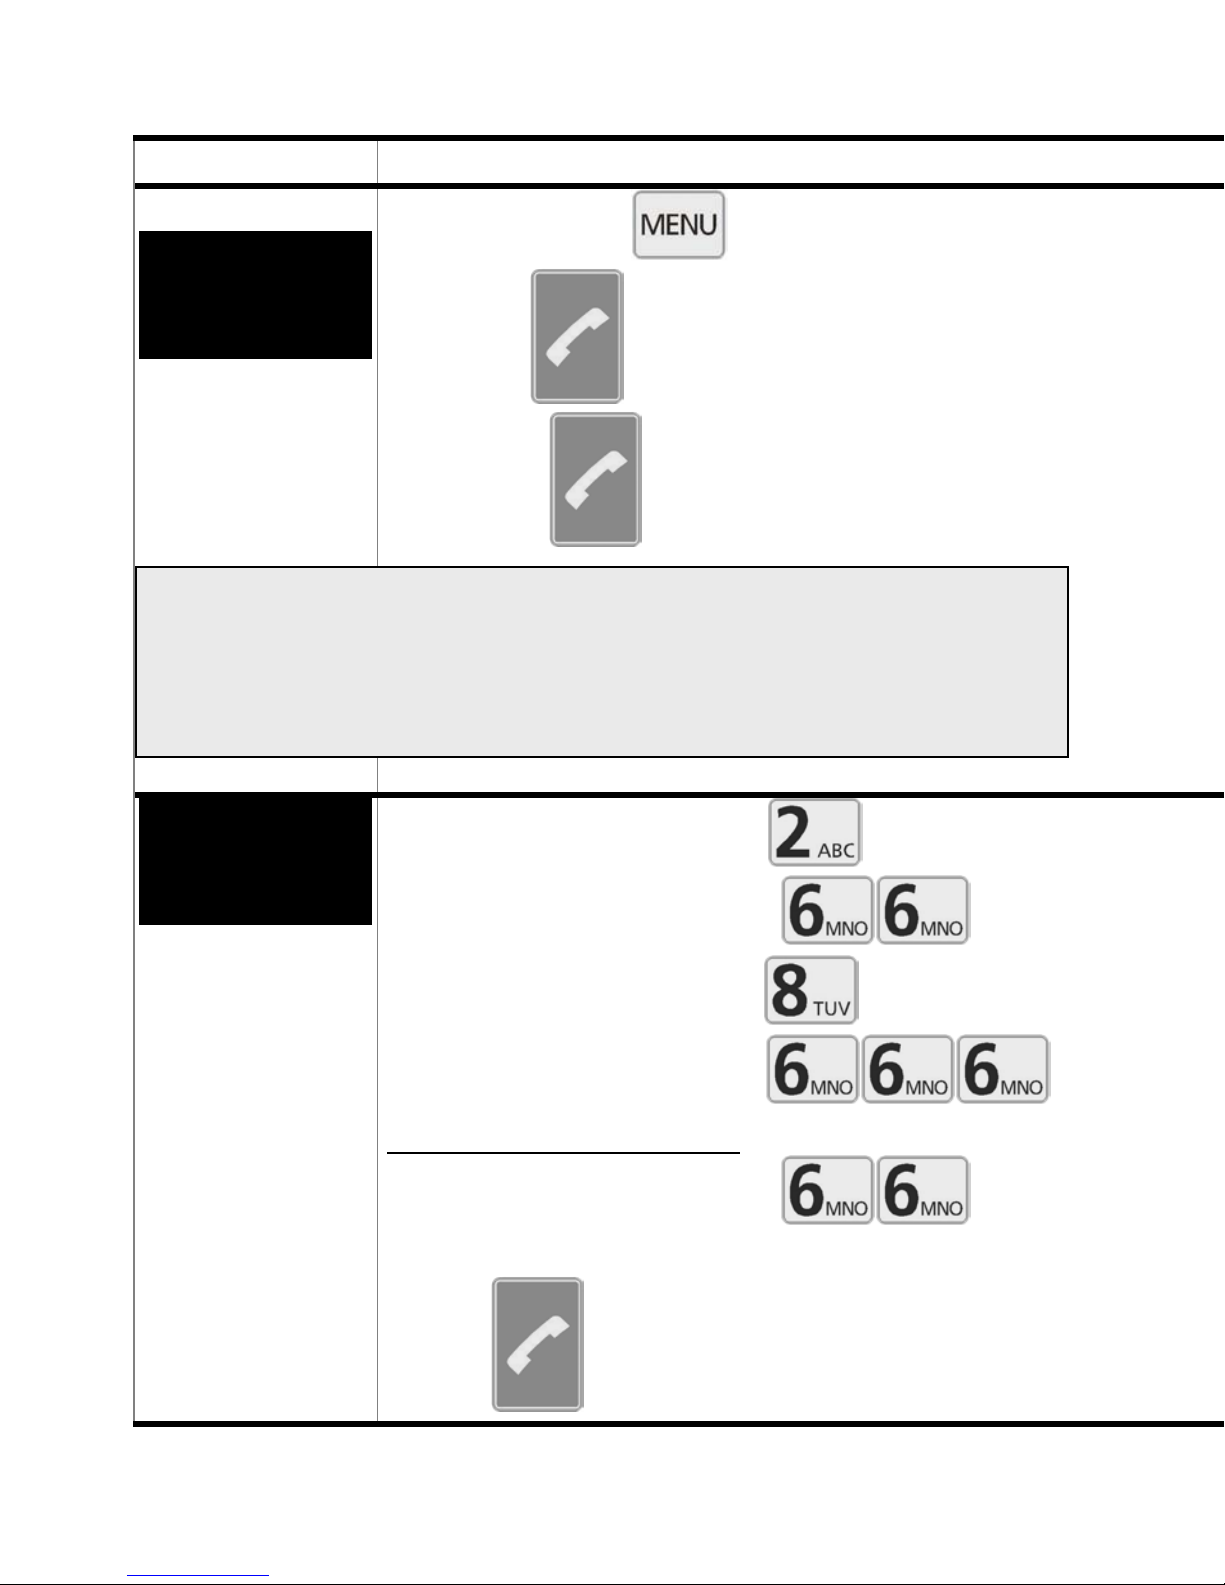
10 Storing phone numbers in the memory
Procedure What to do
10.1
First press the
key,
Phone book
Storing a
then the
key, and then
new entry
Enter name
press the
key once again.
NOTE: On switching on the mobile phone, it can take approx. one
minute - depending on the number of entries in your phone book - before you can call up or edit stored numbers or store new numbers. The
message SIM not ready. Please wait. will be displayed during this
time.
Phone book
Saving a
new entry
Enter name
E.g.: Anton
A = 1st letter, so press
N = 2nd letter, so press
T = 1st letter, so press
0 = 3rd letter, so press
Wait for two seconds.
N = 2nd letter, so press
End entering the name by pressing the
green
67
key.
Page 71
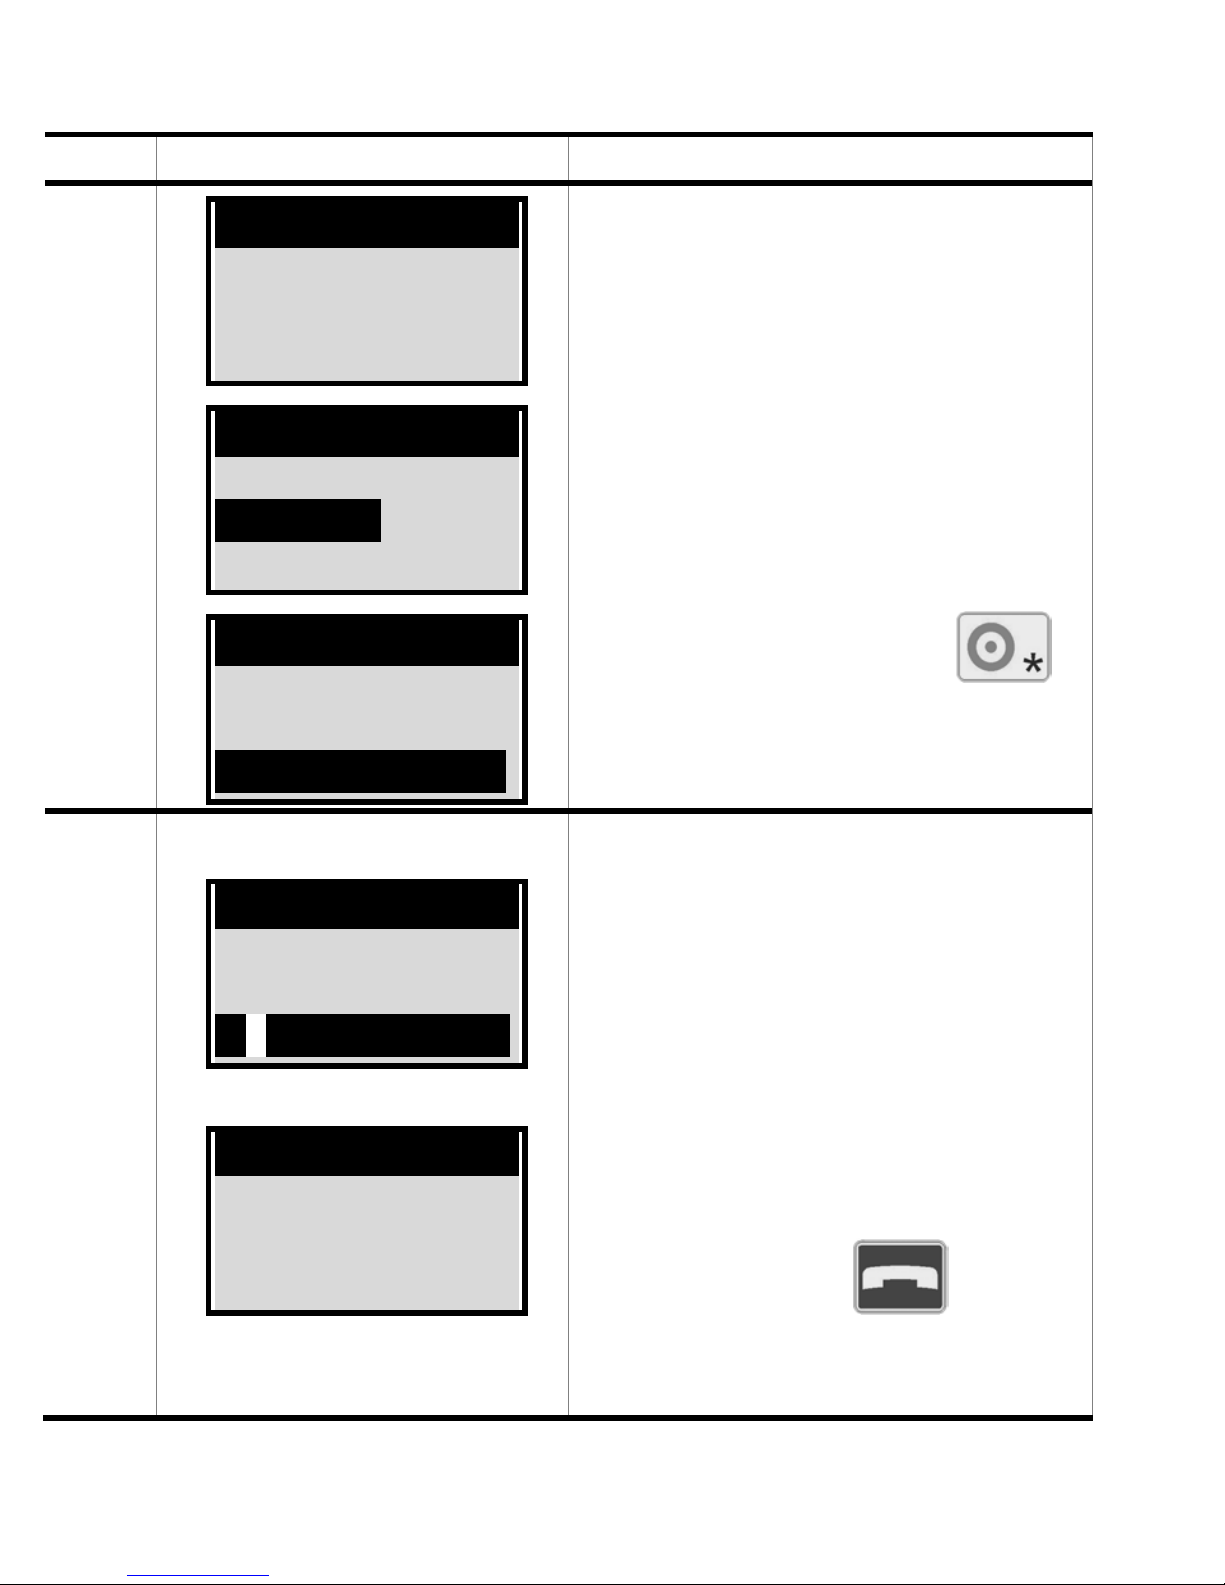
Display Outcome / Tips
Menu
----------------------- Phone book
Settings
Phone book
------------------------
New entry
Anton
Enter name
_
ABC
You enter a name using the
letters on the number keys.
Names are stored in the
phone book memory in alphabetical order. If you would like
to store a name before the letter A, put a number in front of
the name (e.g. "1Ursula")
The first letter is capitalised
automatically. To capitalise
other letters, press the
key.
Enter name
Anto_
mno6ö abc
Phone number
_
When you press a number
key, the other letters and
characters that you can use
with this number key are displayed on the bottom left.
Press the key once again to
call up the next letter or character. If you enter an incorrect
letter or character, you can
delete the previous entry by
pressing the red
key.
68
Page 72
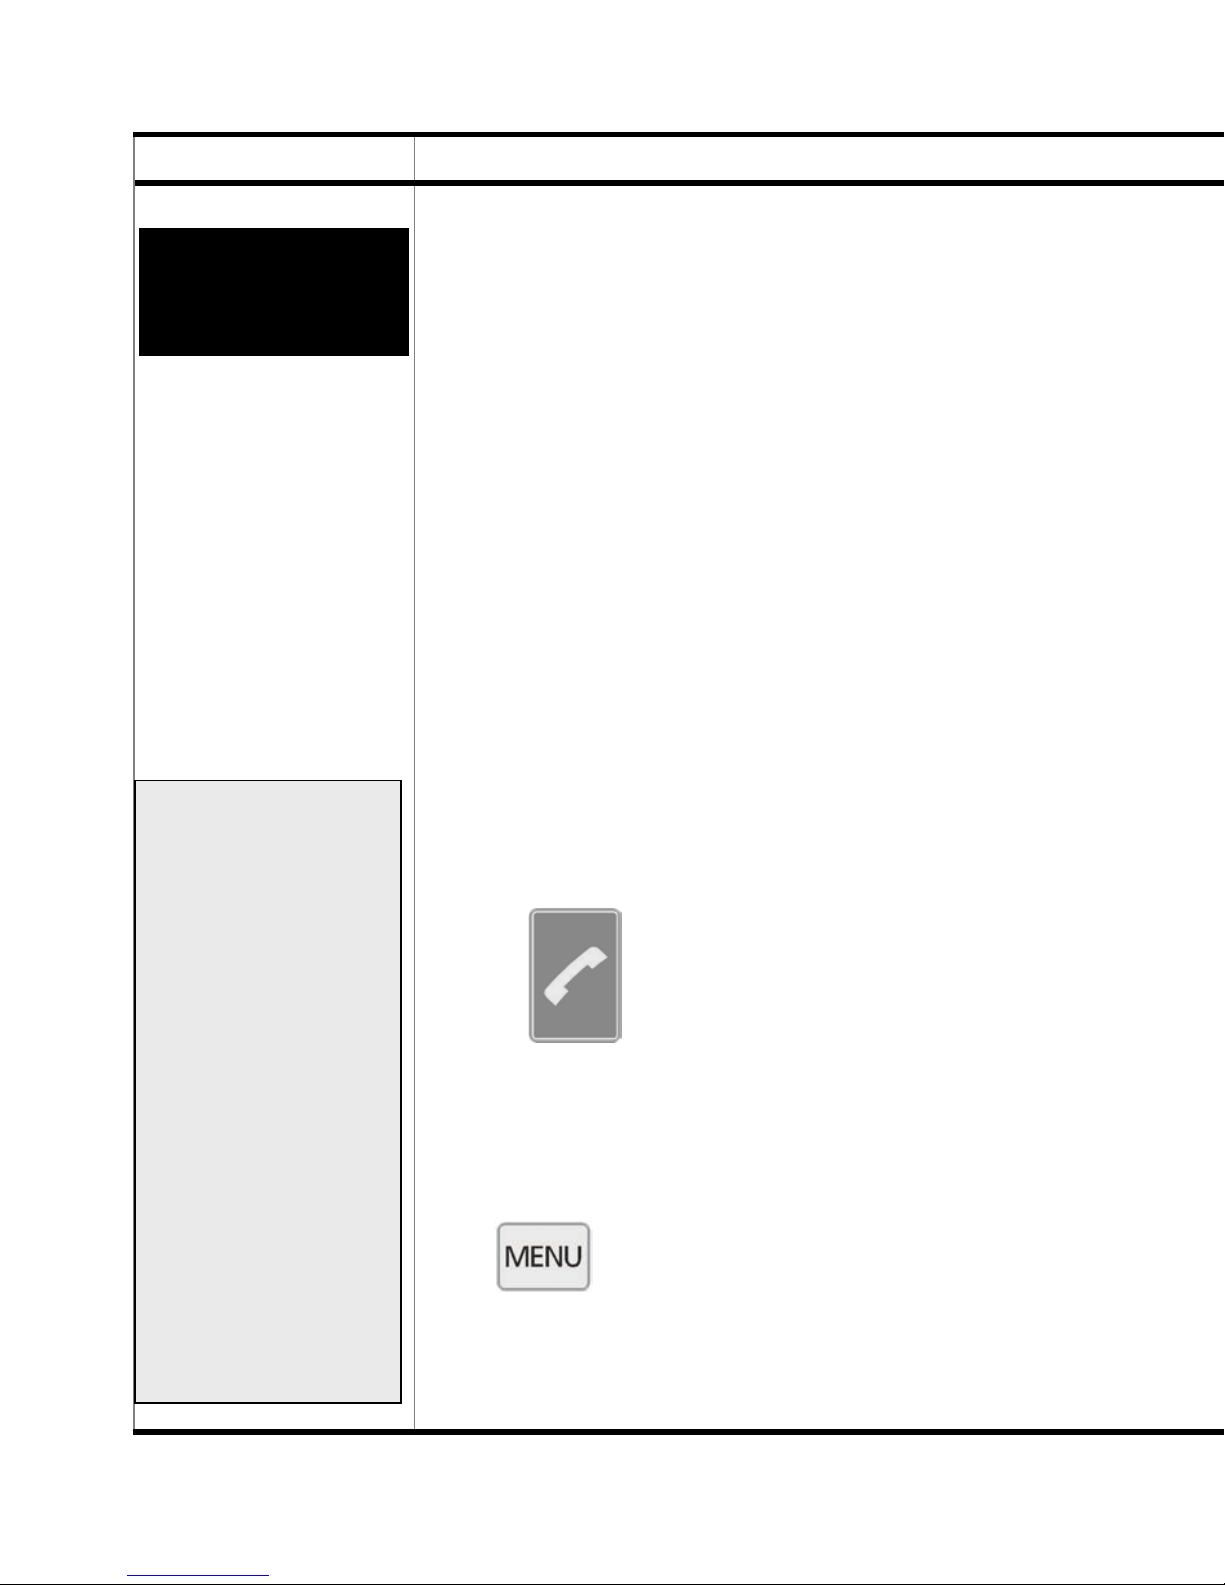
Procedure What to do
10.2
Phone book
Saving a new
entry
Enter number
You can only save a phone number to
the phone book if you have first entered a name (see Chapter 10.1
above). If you do not enter a name,
the phone number will be saved as the
name.
Enter the phone number you wish to
save using the number keys in the
usual way, e.g. 01805348243.
Always enter the area dialling code for
NOTE: On switching on the mobile
phone, it can take
approx. one minute
- depending on the
number of entries
in your phone book
- before you can
call up or edit
stored numbers or
store new numbers. The message
SIM not ready.
Please wait. will
be displayed during this time.
landline or the mobile phone network
code.
Complete your entry by pressing the
green
key. The phone number
will then be saved.
To cancel entering a number, press
the
key.
69
Page 73
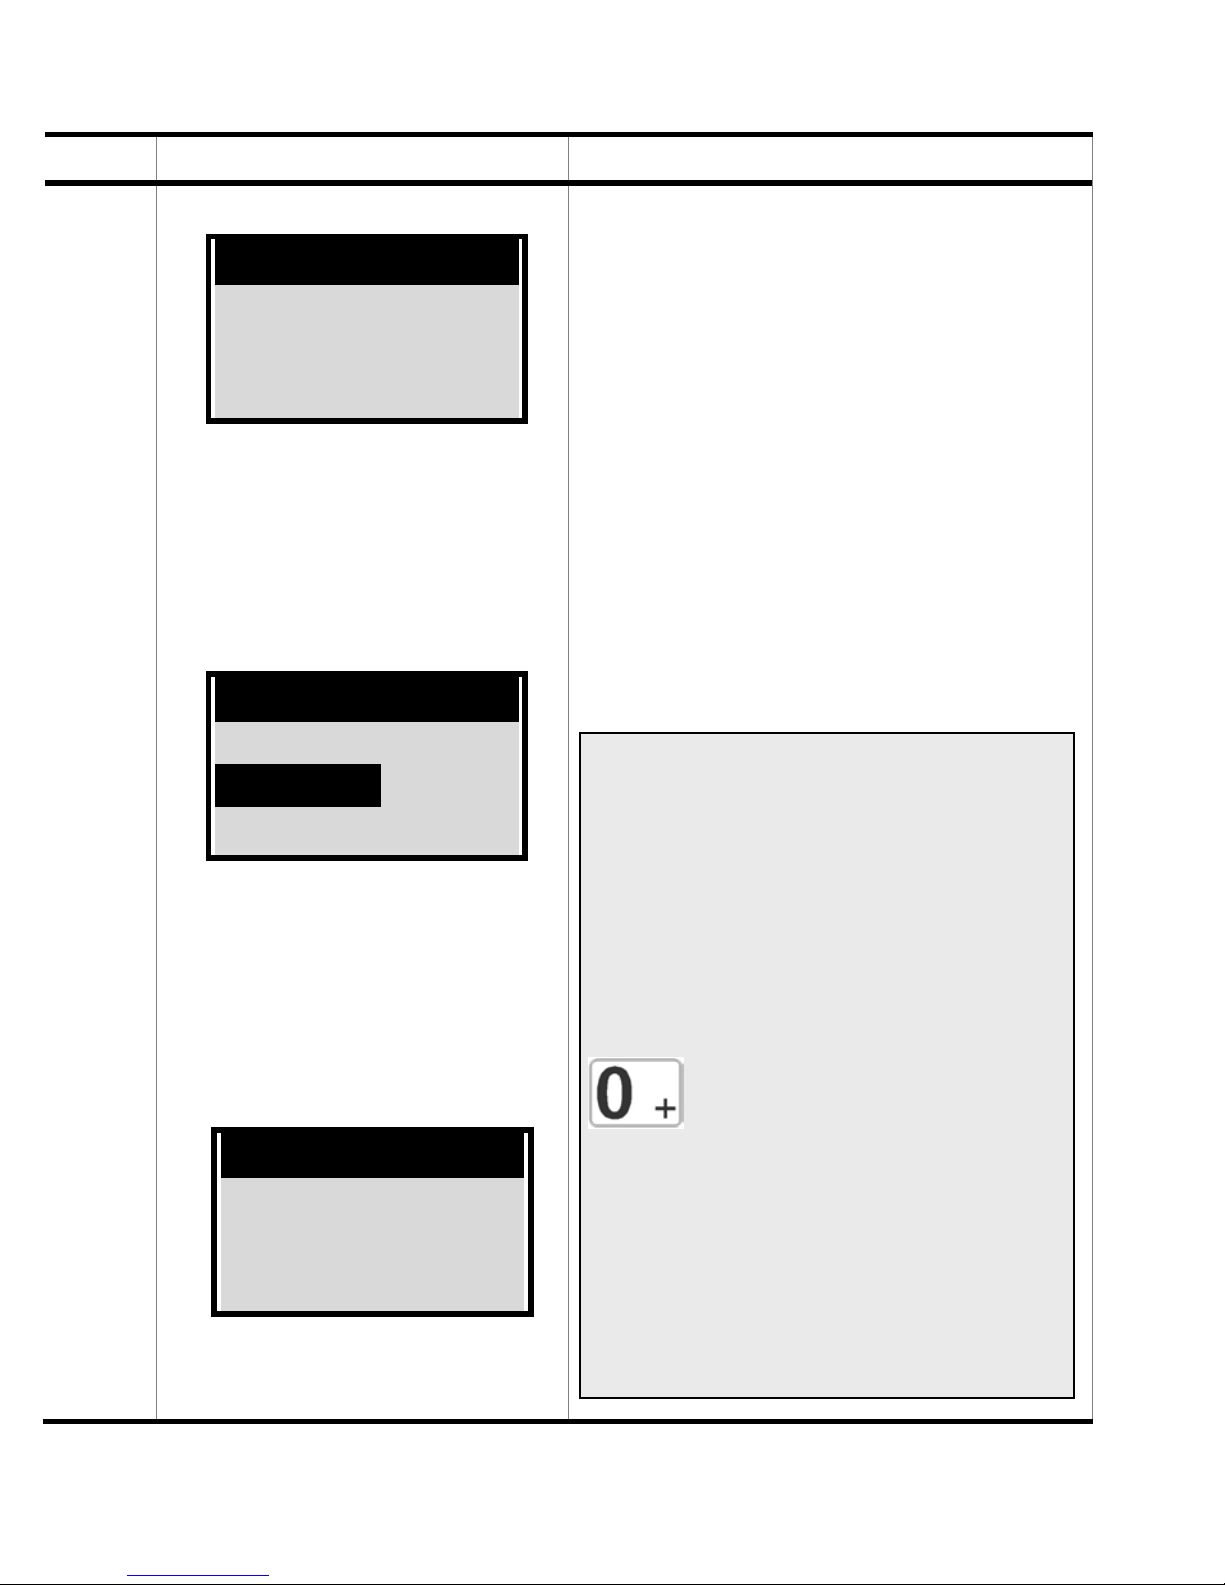
Display Outcome / Tips
Phone number
01805348243
On completing an entry,
the following is displayed:
Phone book
------------------------
New entry
Anton
After confirming the phone
number you have just entered,
the entry will be automatically
stored and you will be able to
make the next entry.
All the entries in your mobile
phone book are only stored on
your SIM card. The maximum
number of entries you can
store is 99.
It's a good idea to enter all phone
numbers with the international dialling code, so that you can dial
straight through if on holiday
abroad. The international code for
Germany is +49. Leave off the first
When the 99 phone
book spaces are taken,
the following is displayed:
Note :
Phone book
full
0 of the area dialling code or mobile network after the +49. You
enter the "+" by pressing the
key down for 2 seconds. If
it’s easier, you can enter 00 instead of the + sign. International
dialling codes must always being with a "+" sign or "00", e.g.
Germany: +49 or 0049
70
Page 74
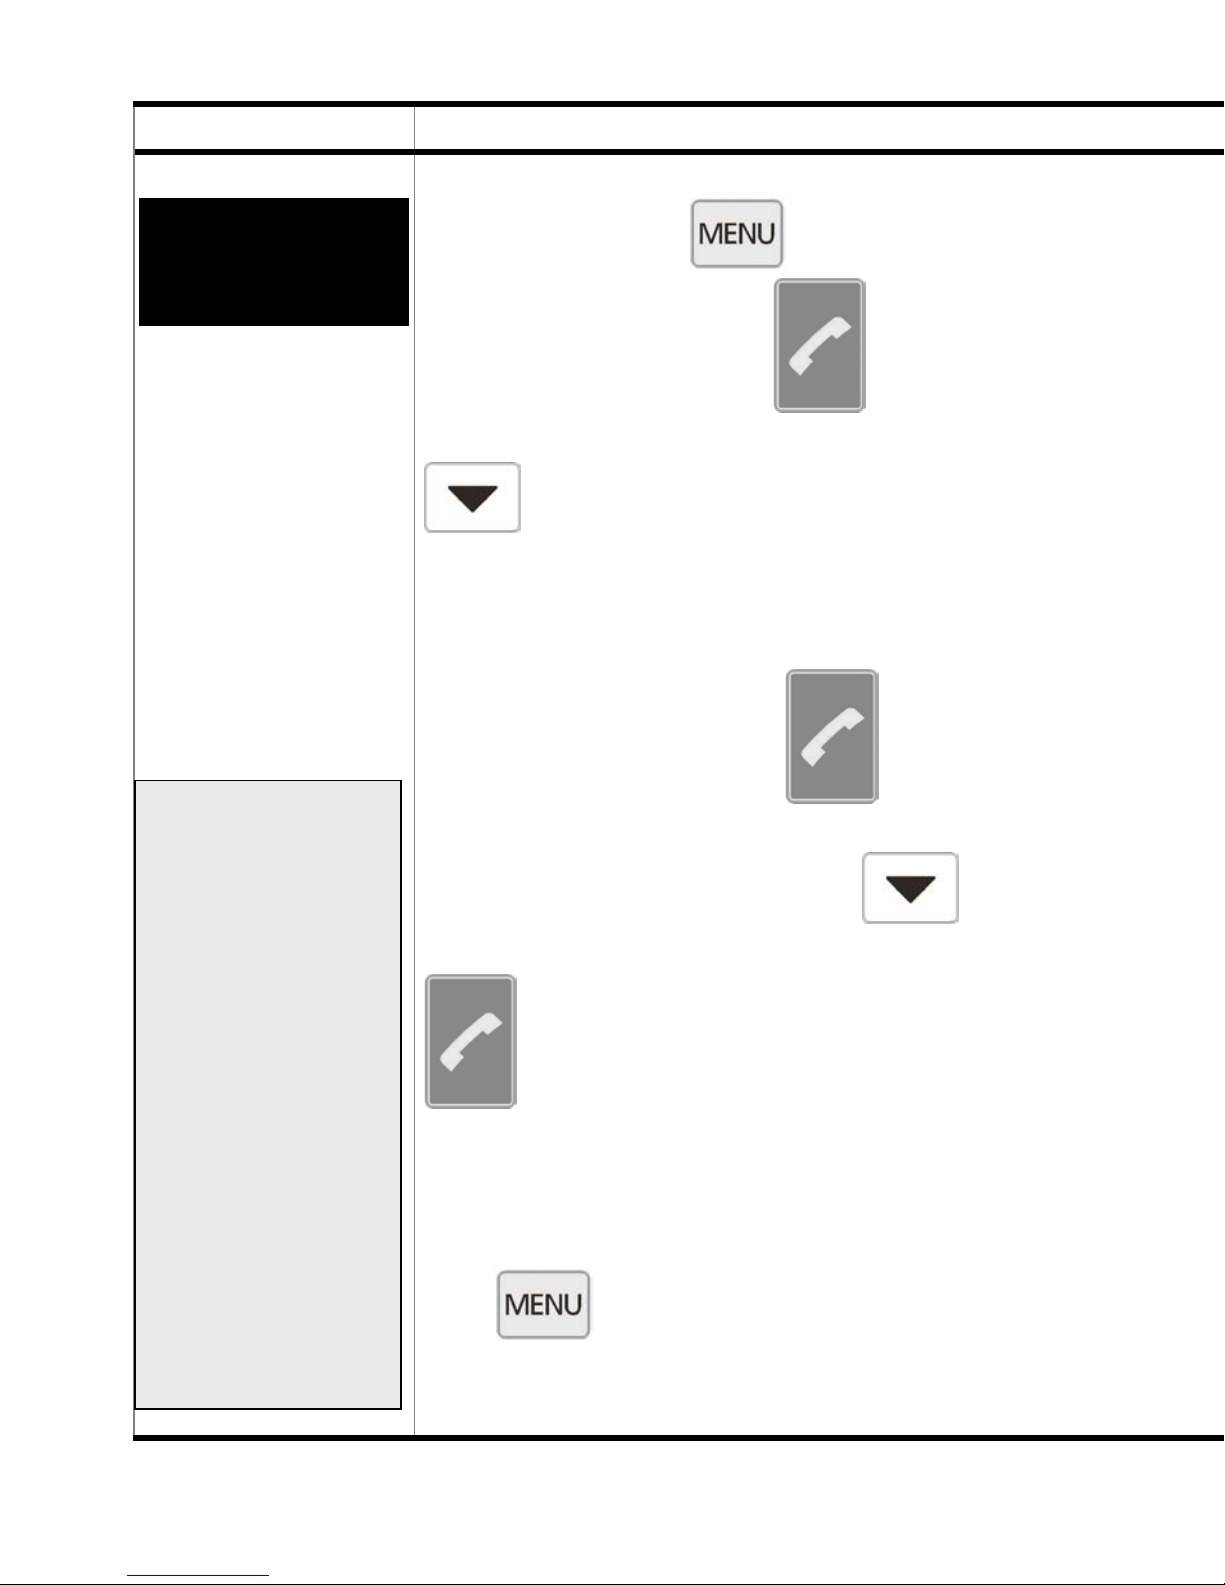
Procedure What to do
10.3
Phone book
Changing an
entry
First, press the
then press the green
key,
key.
Select the entry required using the
key
or
by pressing the number key corresponding to the first letter of the name.
NOTE: On switching on the mobile
phone, it can take
approx. one minute
- depending on the
number of entries
in your phone book
- before you can
call up or edit
stored numbers or
store new numbers. The message
SIM not ready.
Please wait. will
be displayed during this time.
Then press the green
key.
Select “Change” using the
key
and confirm by pressing the green
key.
______________________________
To cancel entering a number, press
the
key.
71
Page 75
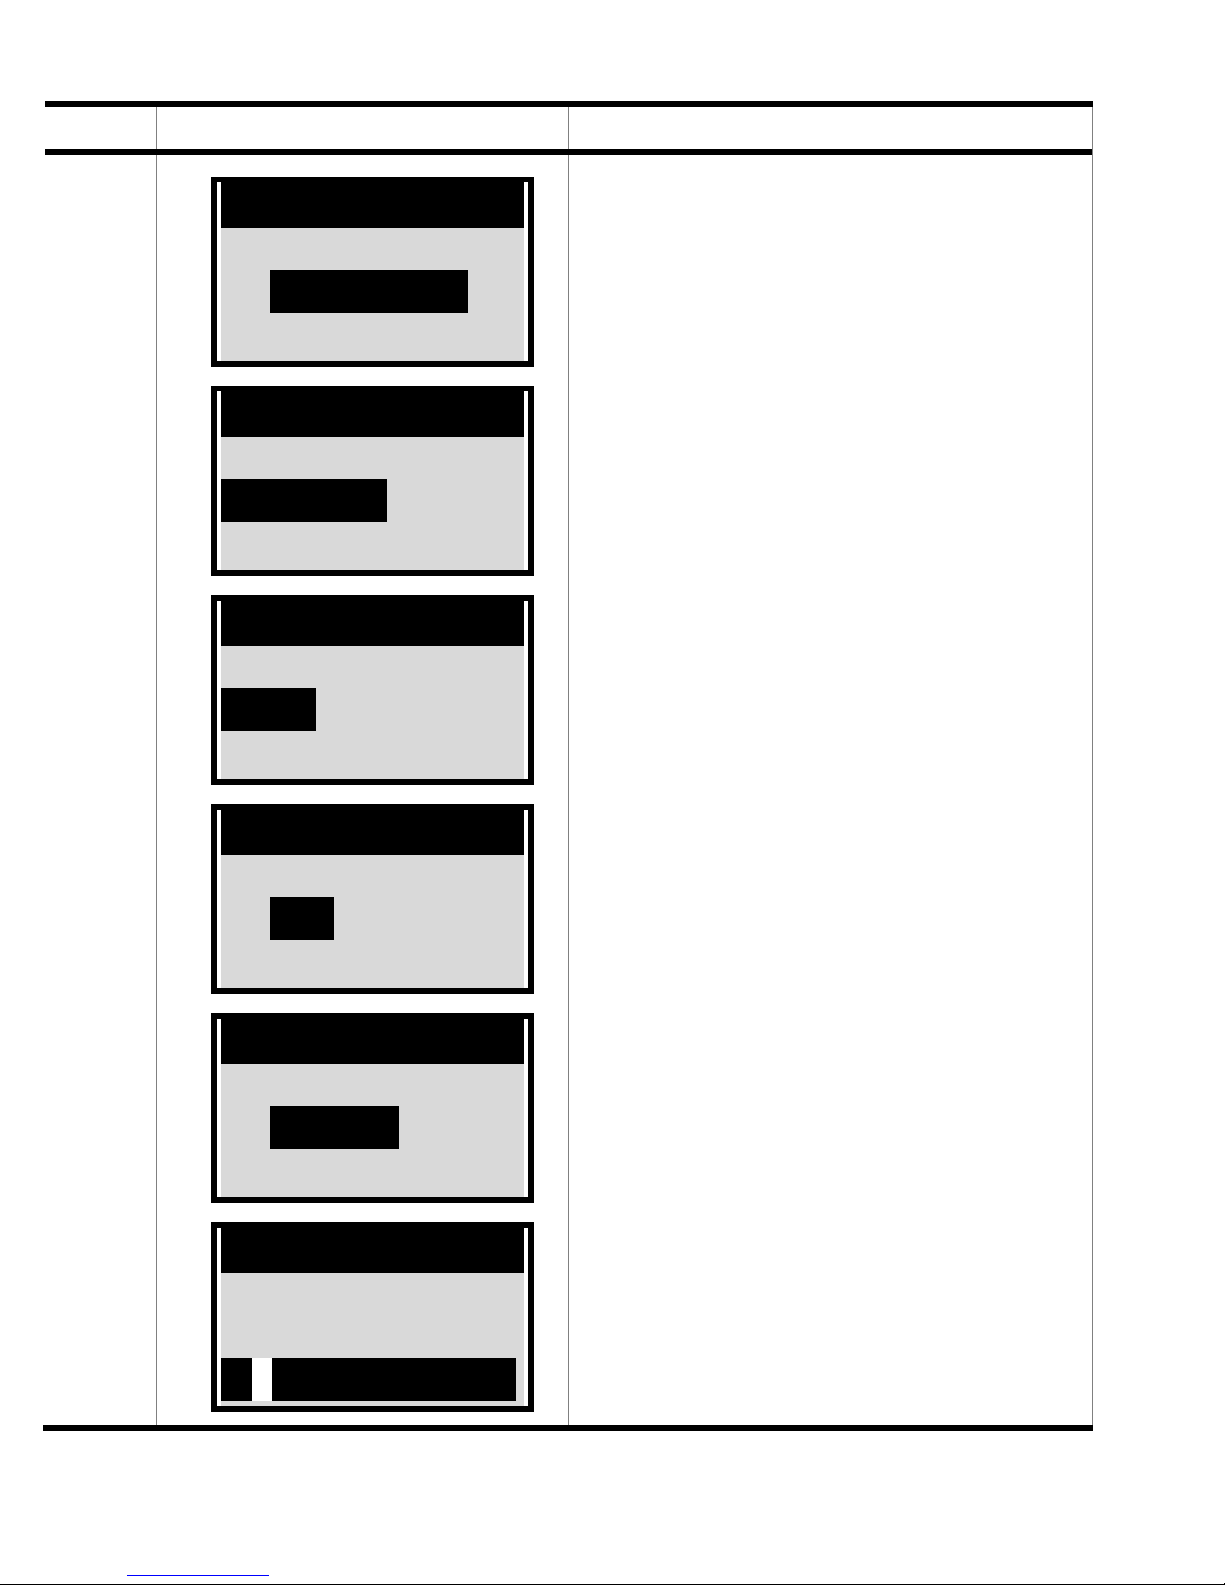
Display Outcome / Tips
-----------------------Î Phone book
Settings
Menu
Phone book
------------------------
New entry
Anton
Phone book
New entry
Anton
Berta
Changing the name and/or the
phone number is done in the
same way as entering the data
into the phone book for the
first time (see Chapter 10.1).
It is not possible to “jump”
around in the message or
numbers, for example if you
wish to make changes at the
start only. In this case, you
have to delete one space at a
time in reverse until you reach
-----------------------Î Call
Change
Anton
Call
Î Change
Delete
Anton
Enter name
Anto_
mno6ö abc
the point where the change is
to be made and then enter the
new text or number.
72
Page 76
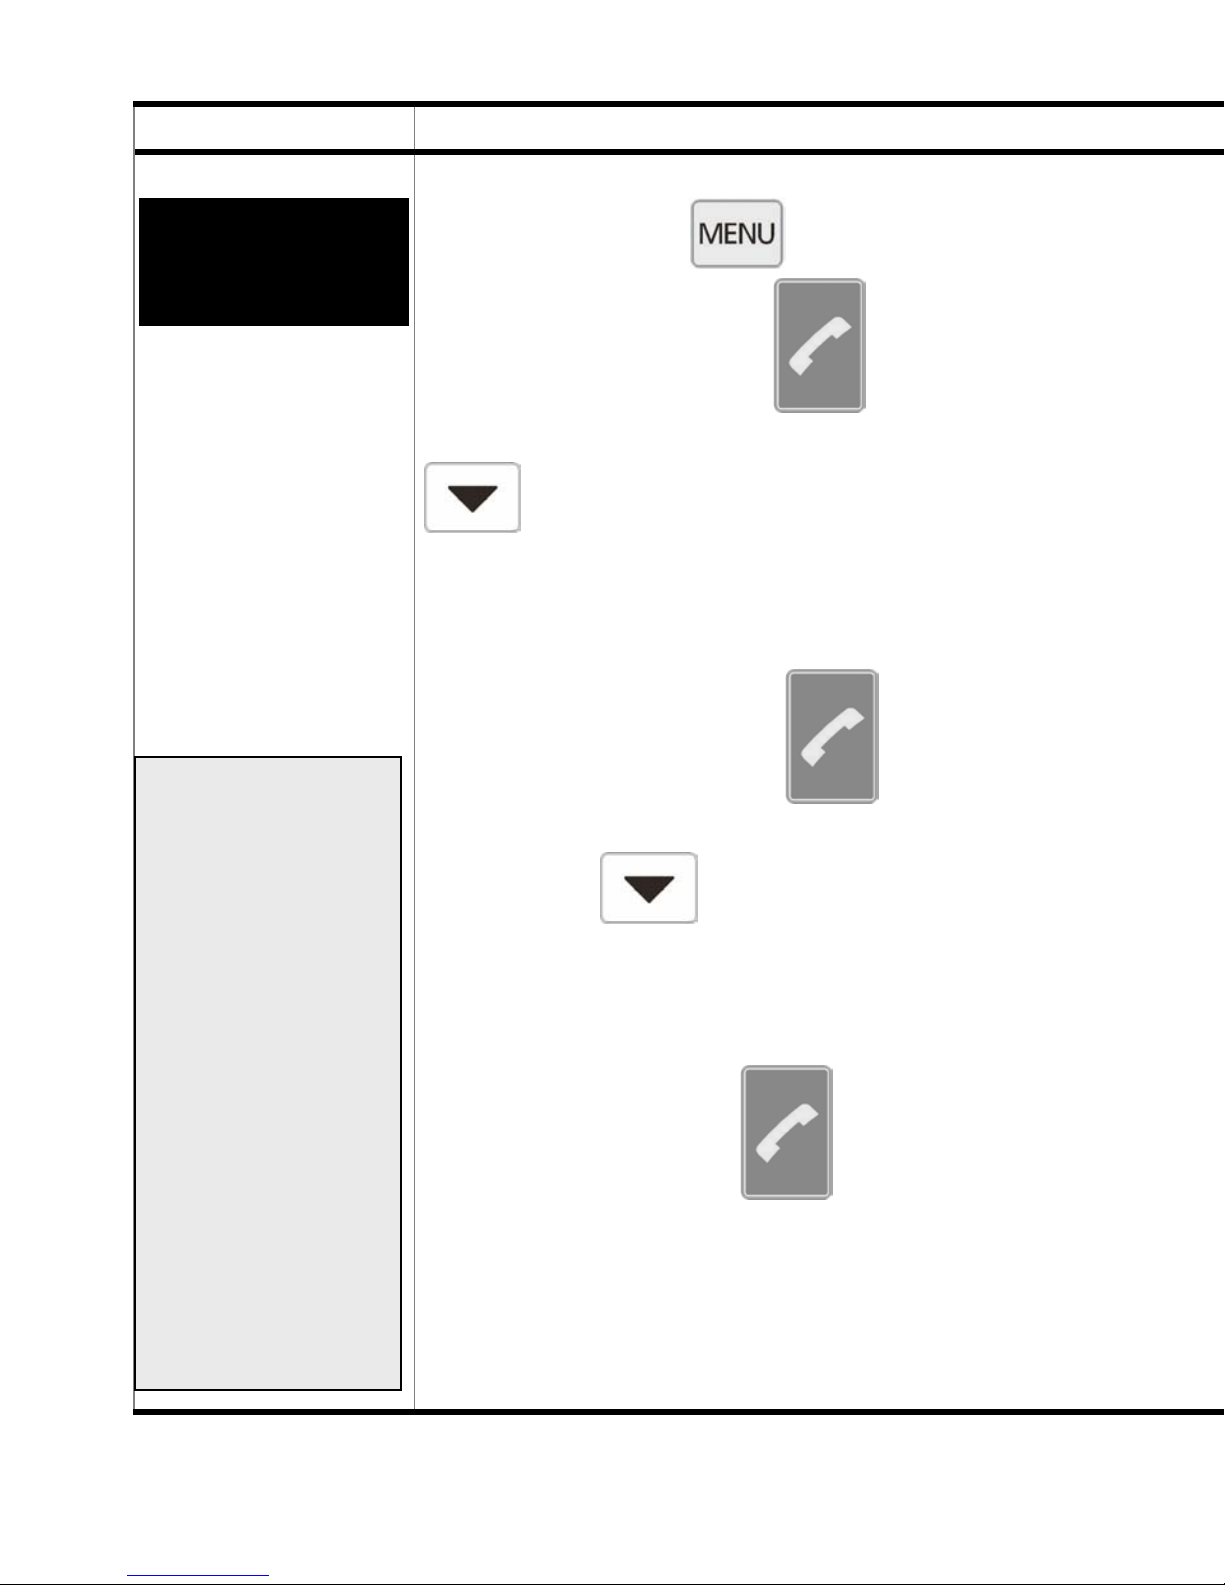
Procedure What to do
10.4
Phone book
Deleting an
entry
First, press the
then press the green
key,
key.
Select the entry required using the
key
or
by pressing the number key corresponding to the first letter of the name.
NOTE: On switching on the mobile
phone, it can take
approx. one minute
- depending on the
number of entries
in your phone book
- before you can
call up or edit
stored numbers or
store new numbers. The message
SIM not ready.
Please wait. will
be displayed during this time.
Then press the green
key.
Press the
key 2x to select
“Delete”.
When you confirm the deletion by
pressing the green
key, the entire entry will be irrevocably deleted
with immediate effect.
73
Page 77
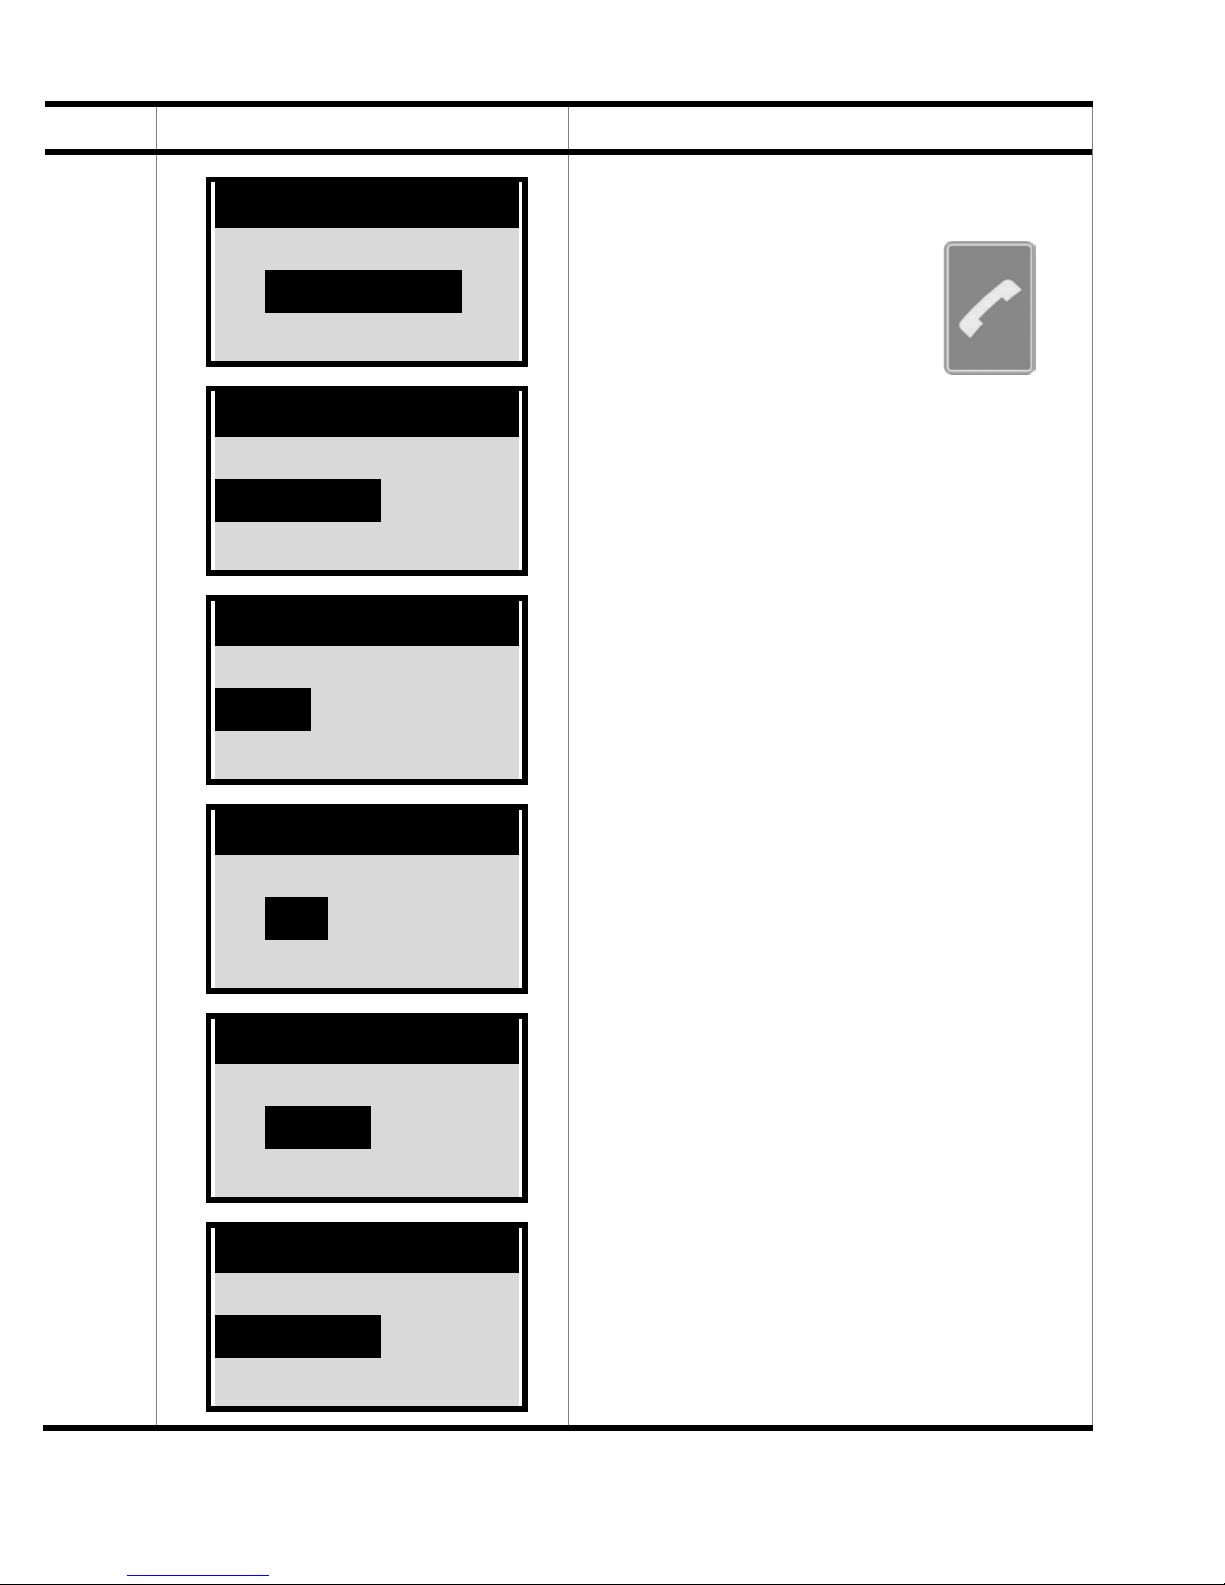
Display Outcome / Tips
-----------------------Î Phone book
Settings
Menu
Phone book
------------------------
New entry
Anton
Phone book
New entry
Anton
Berta
When you confirm the deletion
by pressing the green
key, the entire entry will be irrevocably deleted with immediate effect.
-----------------------Î Call
Change
Anton
Change
Î Delete
Assign number
Anton
Phone book
------------------------
New entry
Anton
74
Page 78
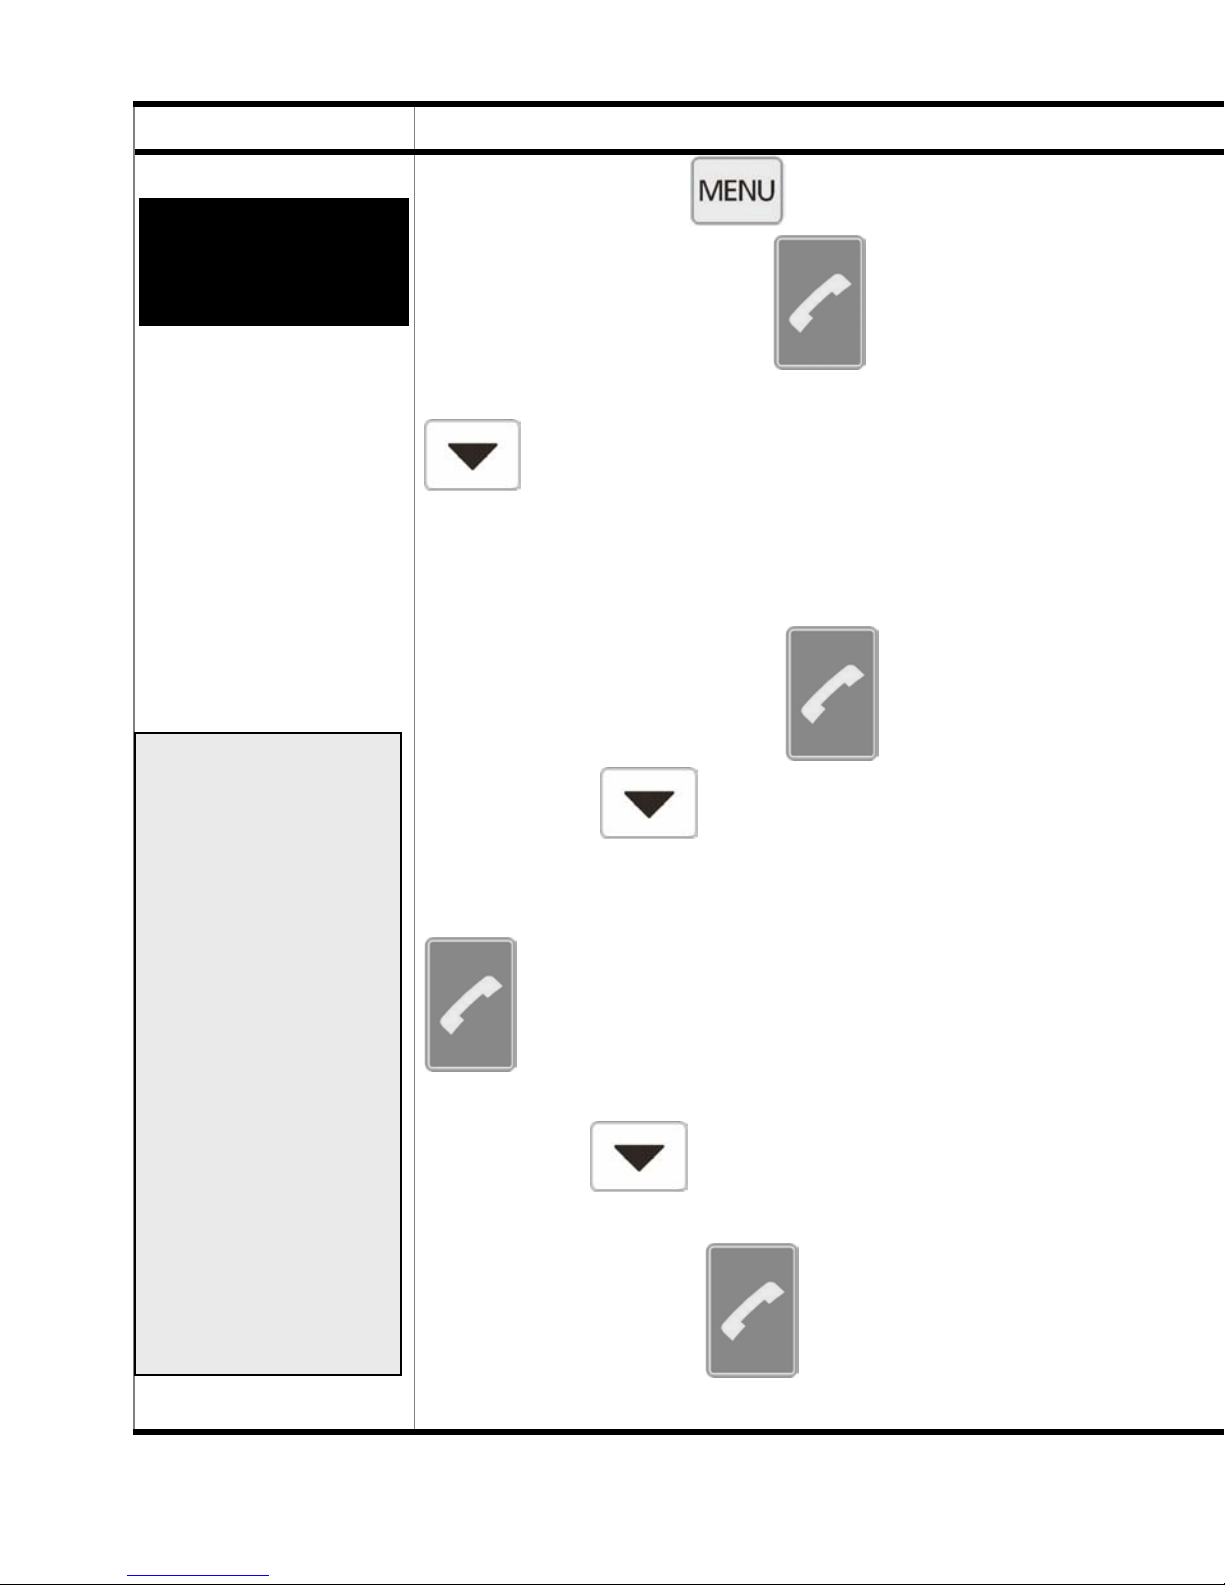
Procedure What to do
10.5
Phone book
Assigning an
entry
NOTE: On switching on the mobile
phone, it can take
approx. one minute
- depending on the
number of entries
in your phone book
- before you can
call up or edit
stored numbers or
store new numbers. The message
SIM not ready.
Please wait. will
be displayed during this time.
First, press the
then press the green
key,
key.
Select the entry required using the
key
or
by pressing the number key corresponding to the first letter of the name.
Then press the green
Press the
key 3x to select “As-
key.
sign”.
When you confirm by pressing the green
key, you will see a list of the keys
to which this number may be assigned.
Using the
key, select the key to
which you wish to assign the number.
75
Press the green
key to confirm.
Page 79
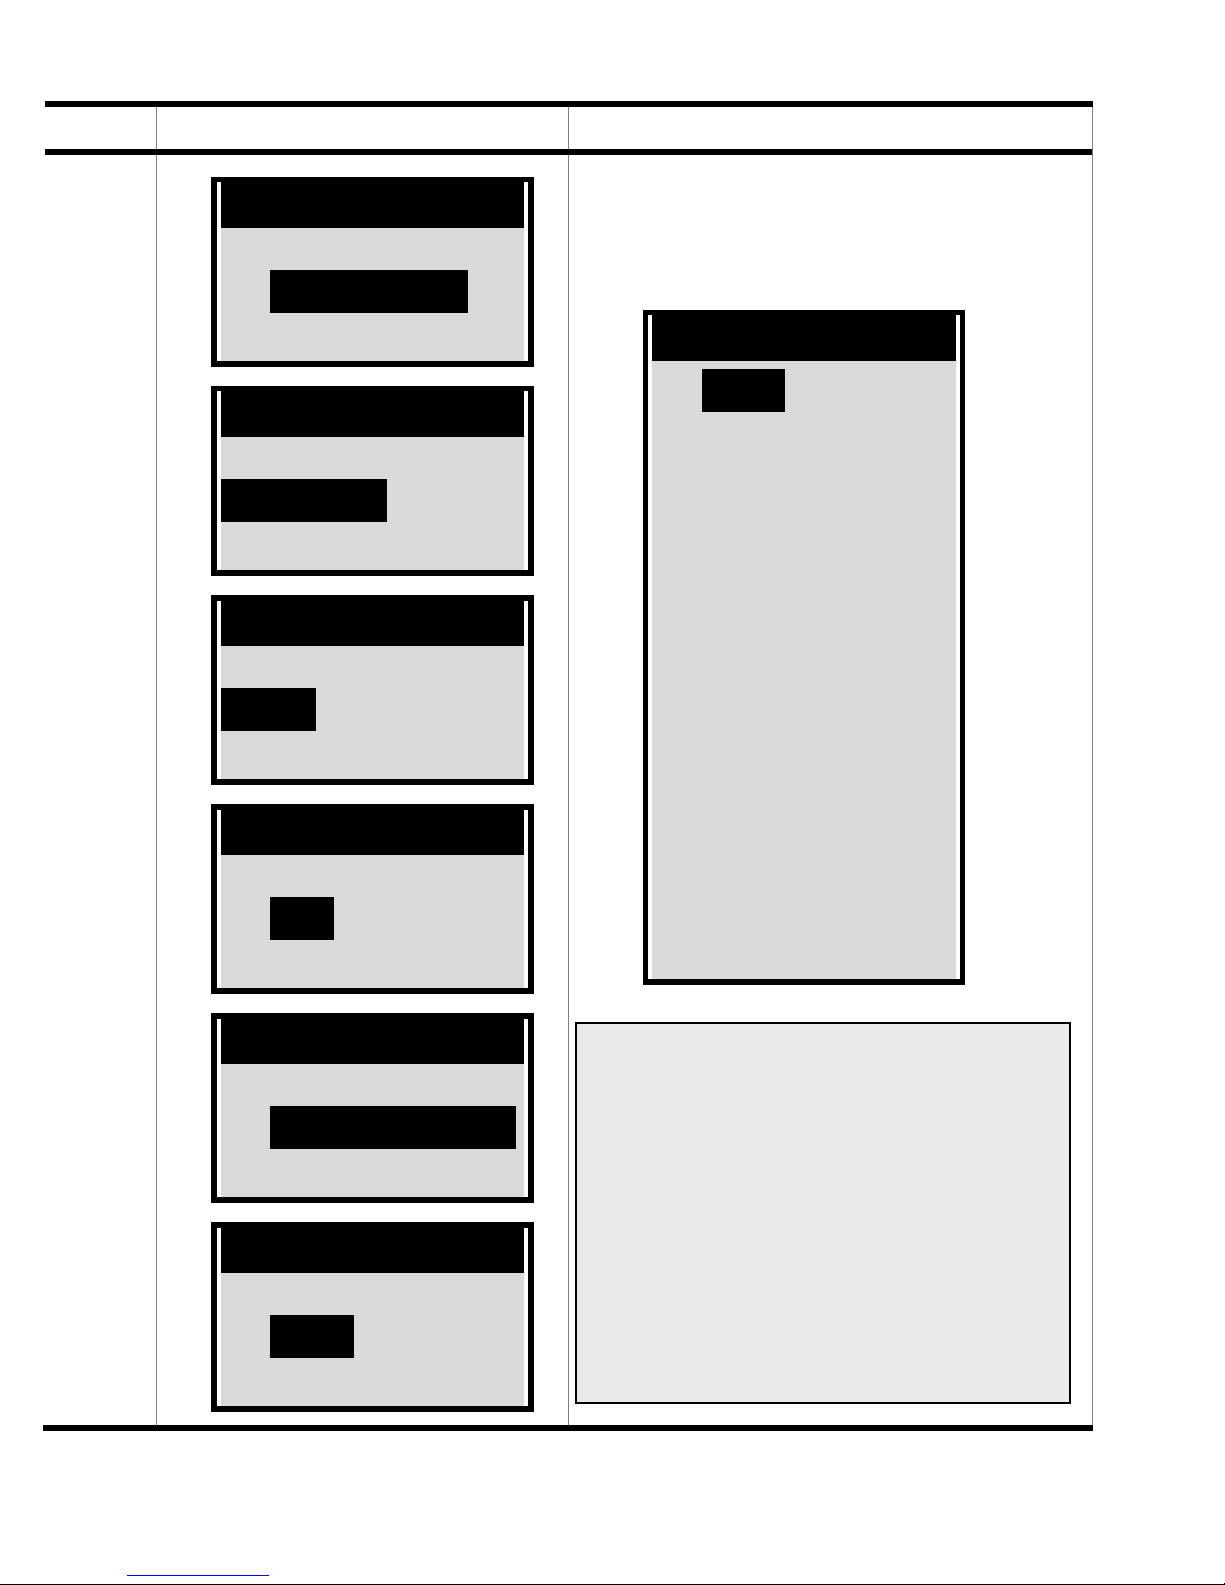
Display Outcome / Tips
-----------------------Î Phone book
Settings
Menu
Phone book
------------------------
New entry
Anton
Phone book
New entry
Anton
Berta
The following keys are available for use in assigning
phone numbers:
Anton
Î Key I
Key II
Key III
Speed dial 2
Speed dial 3
Speed dial 4
Speed dial 5
Speed dial 6
Speed dial 7
Speed dial 8
-----------------------Î Call
Change
Anton
Delete
Î Assign number
Delete assign
Anton
Group call 3
Î Key I
Anton
Key II
Speed dial 9
Group call 1
Group call 2
Group call 3
NOTE: Ensure that the phone
numbers for group calls are saved
in the selection list under “Group
call 1-3” and not under keys I-III !
Press briefly on keys I-III: the
phone no. saved will be shown and
can be called.
Press on keys I, II or III for 3 seconds to put out an emergency group
call.
76
Page 80
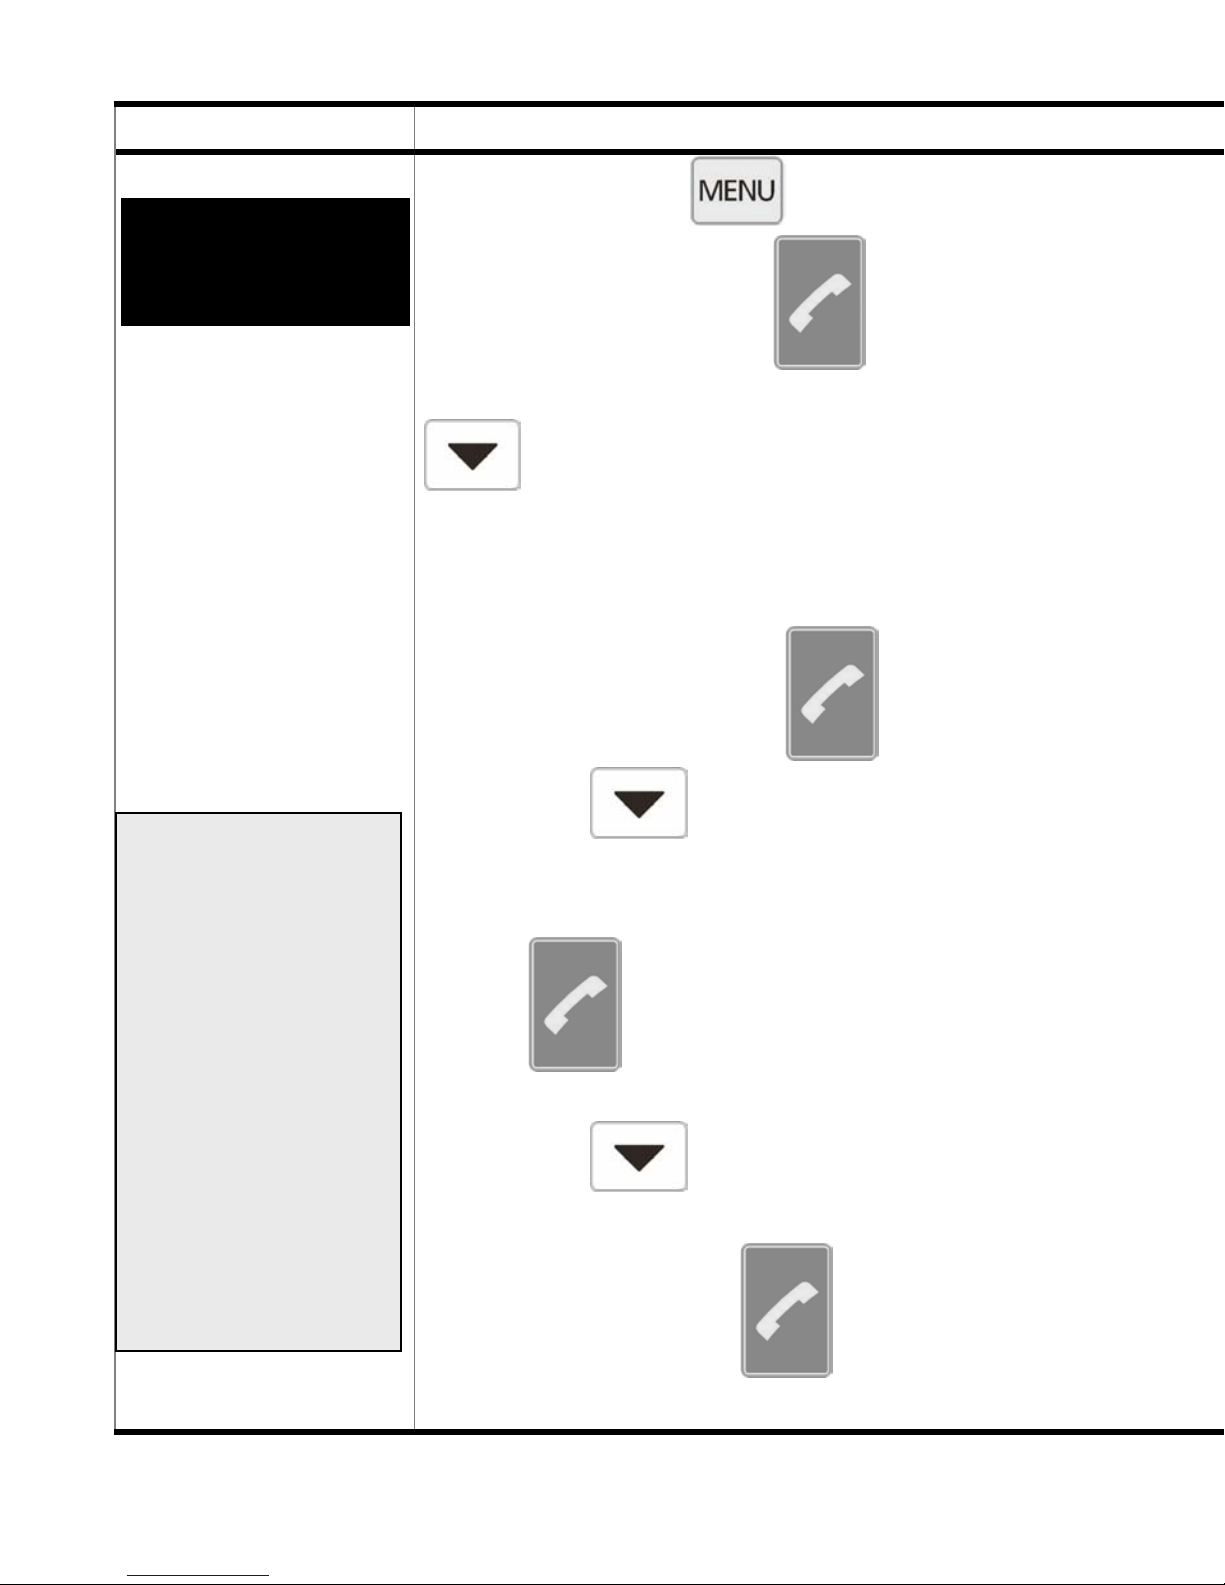
Procedure What to do
10.6
Phone book
Deleting assigned numbers
First, press the
then press the green
key,
key.
Select the entry required using the
key
or
by pressing the number key corresponding to the first letter of the name.
Then press the green
key.
NOTE: On switching
on the mobile
phone, it can take
approx. one minute depending on the
number of entries in
your phone book before you can call
up or edit stored
numbers or store
new numbers. The
message SIM not
ready. Please wait.
will be displayed
during this time.
Press the
key 4x to select
“Delete assign”.
When you confirm by pressing the
green
key, you will see a list of
the keys with numbers assigned.
Using the
key, select the key
you wish de-assign and confirm by
pressing the green
key.
77
Page 81
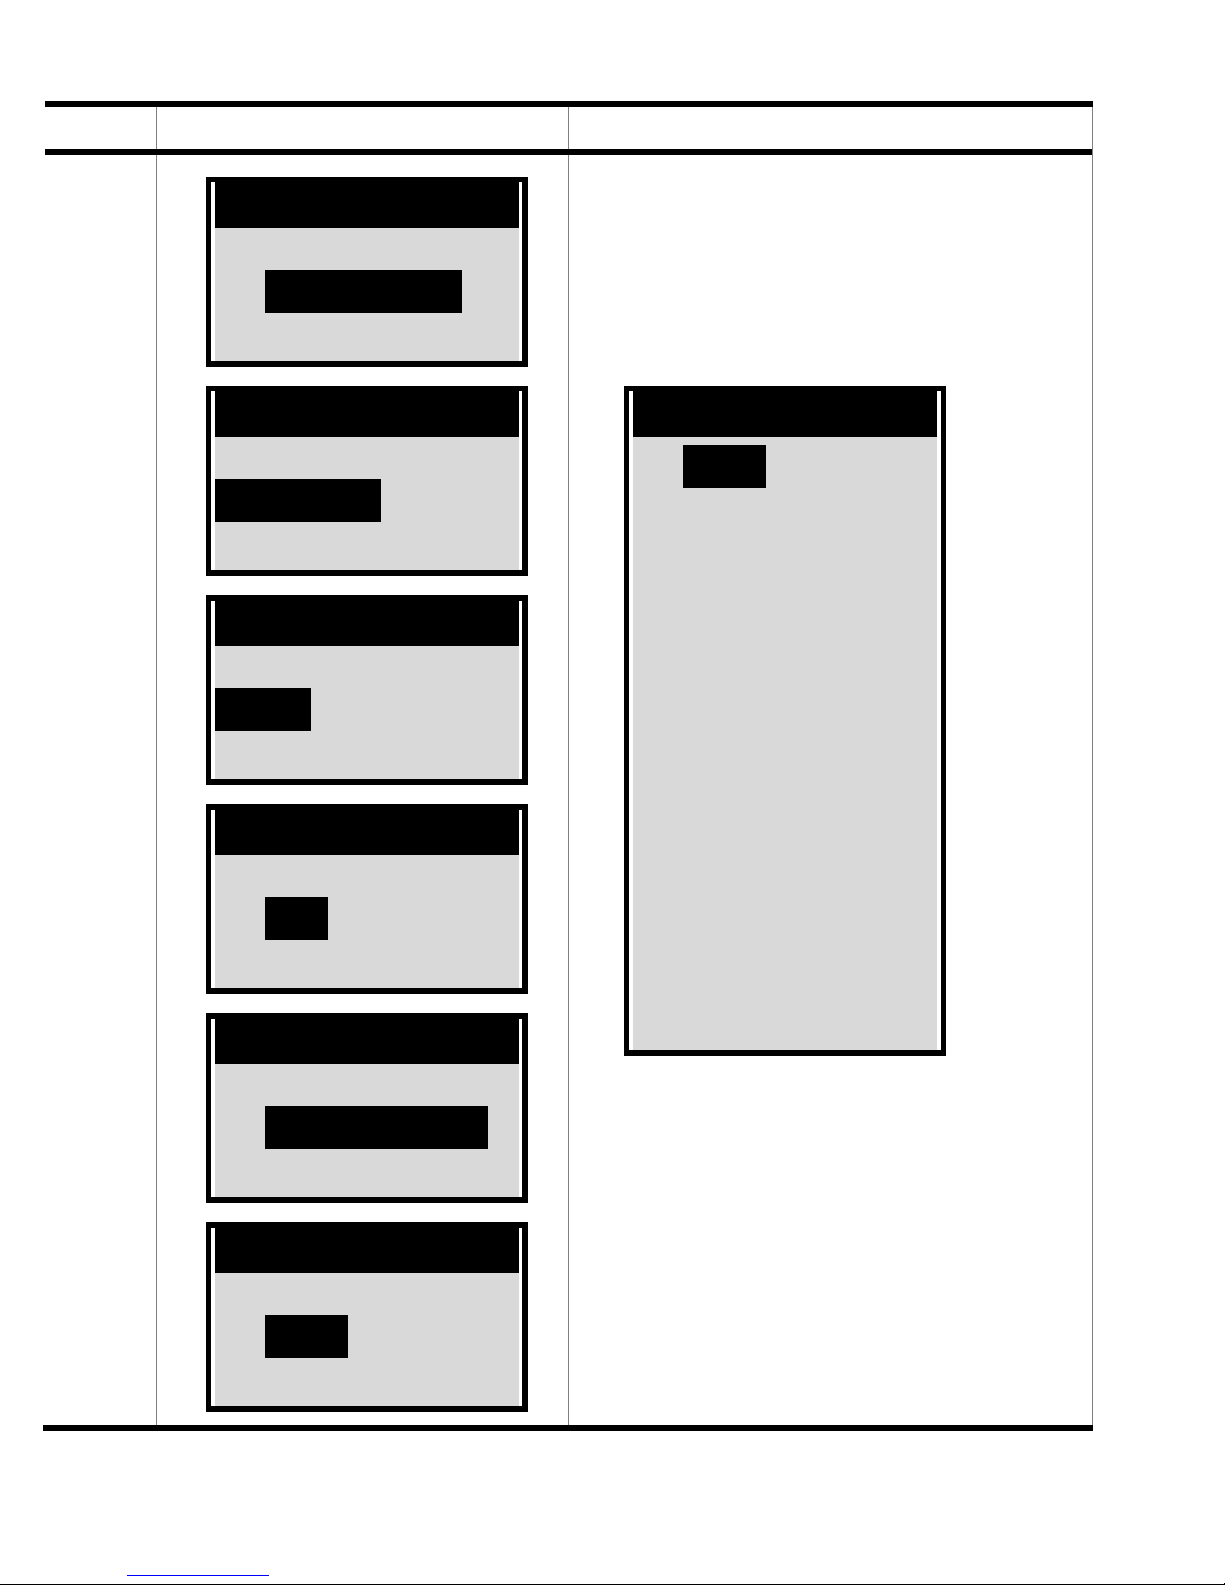
Display Outcome / Tips
-----------------------Î Phone book
Settings
Menu
Phone book
------------------------
New entry
Anton
Phone book
New entry
Anton
Berta
-----------------------Î Call
Change
Settings
Î Delete assign
------------------------
Anton
Anton
Numbers may be de-assigned
from the following keys:
Anton
Î Key I
Key II
Key III
Speed dial 2
Speed dial 3
Speed dial 4
Speed dial 5
Speed dial 6
Speed dial 7
Speed dial 8
Speed dial 9
Group call 1
Group call 2
Group call 3
The assignment of an entry to
a key may be overwritten by
assigning another entry to the
Group call 3
Î Key I
Anton
Key II
key.
78
Page 82
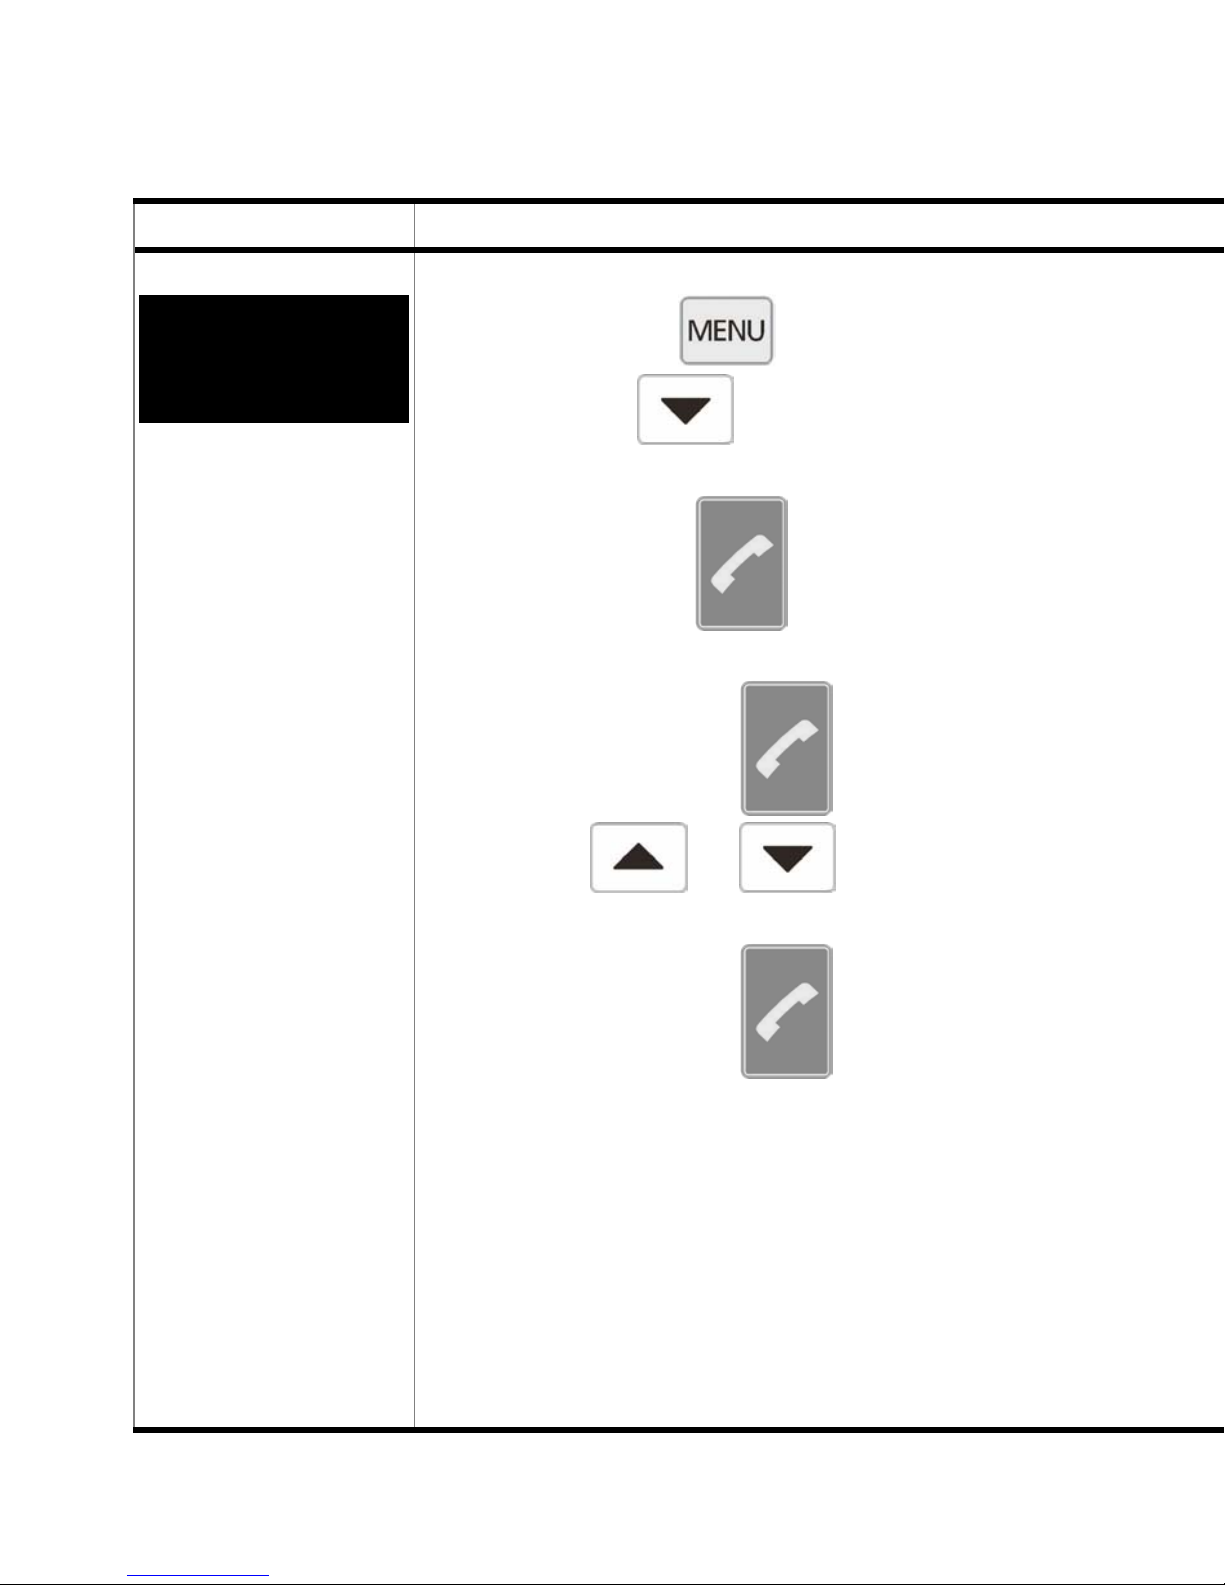
11 Settings
Procedure What to do
11.1
Settings
Activating
vibration
First, press the
then use the
key,
key to select the
“Settings” function.
Press the green
key to confirm.
Confirm the “Vibration” menu option by
pressing the green
key.
79
Using the
or key, select
the required setting and confirm by
pressing the green
key.
The function which is currently active
is shaded and indicated by an arrow.
Page 83
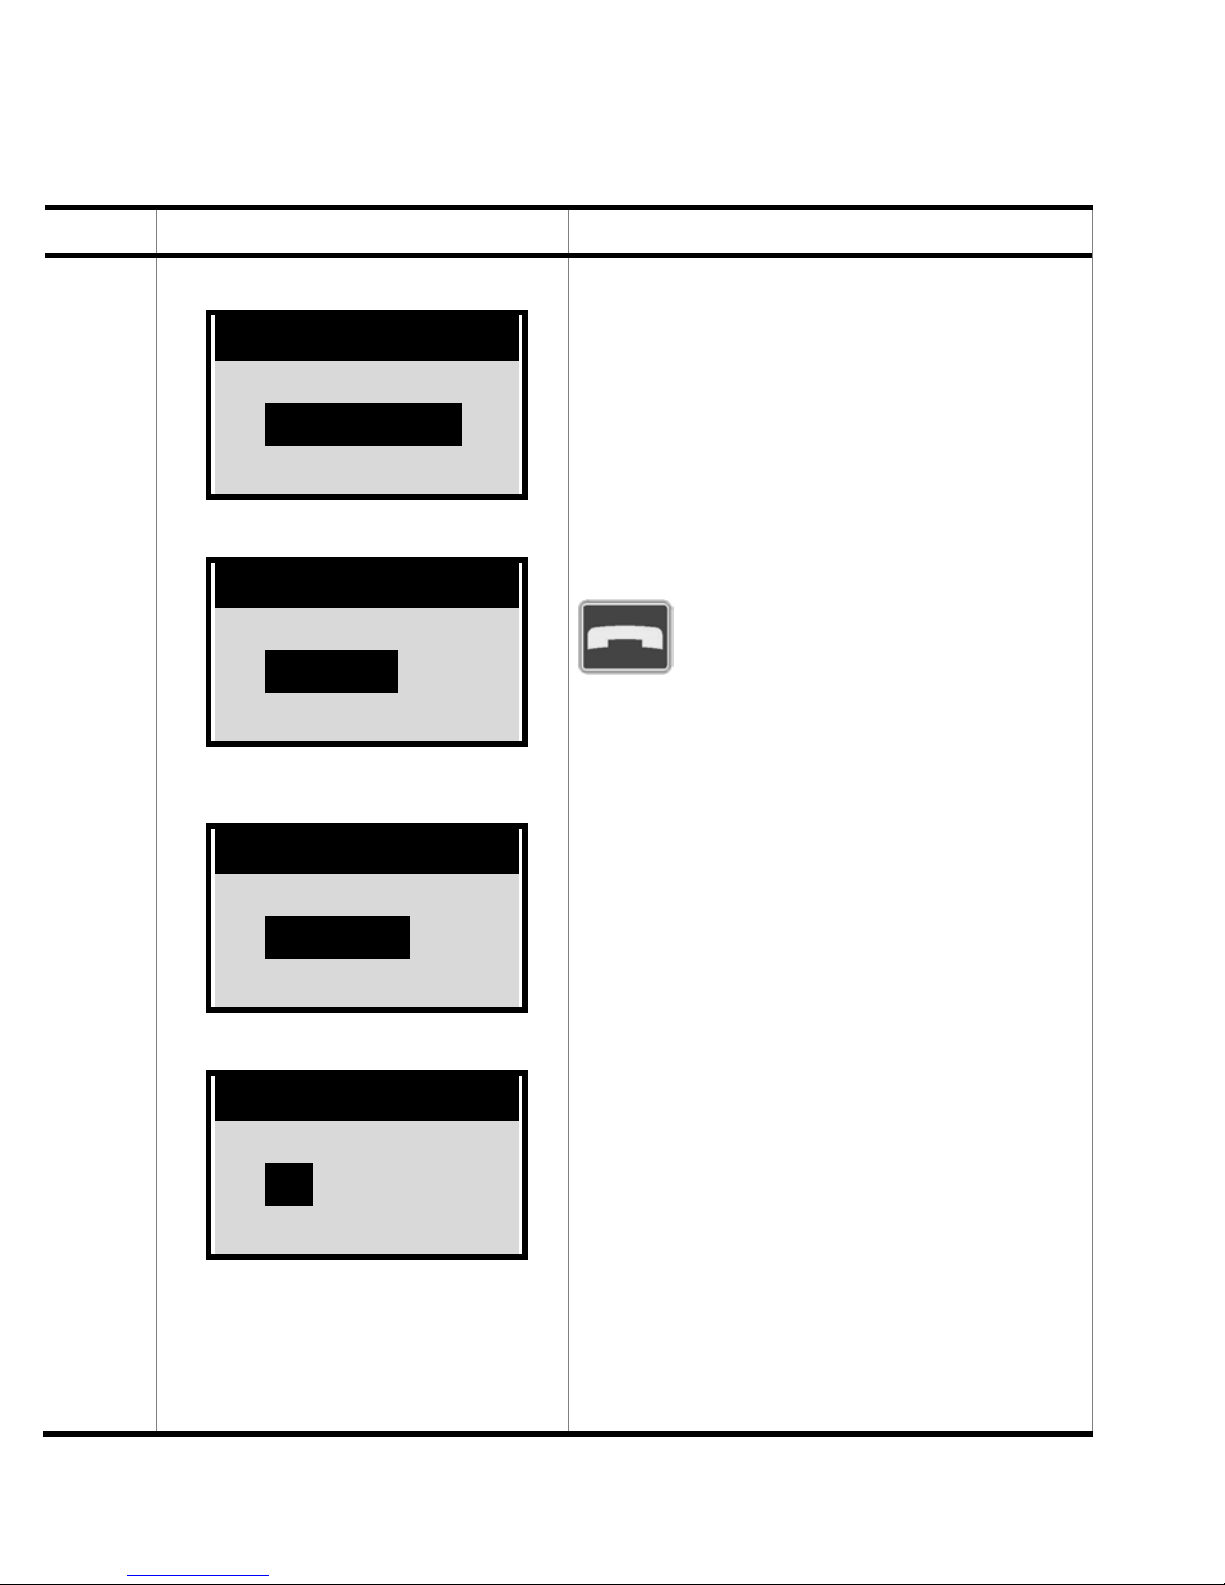
Display Outcome / Tips
Menu
-----------------------Î Phone book
Settings
Phone book
Î Settings
Alarm
Menu
Settings
-----------------------Î Vibration
Ringtone vol.
When switched on, the phone
vibrates on receiving incoming
calls.
To quit the menu level currently displayed, press the red
key.
Off
Î On
Vibration
80
Page 84
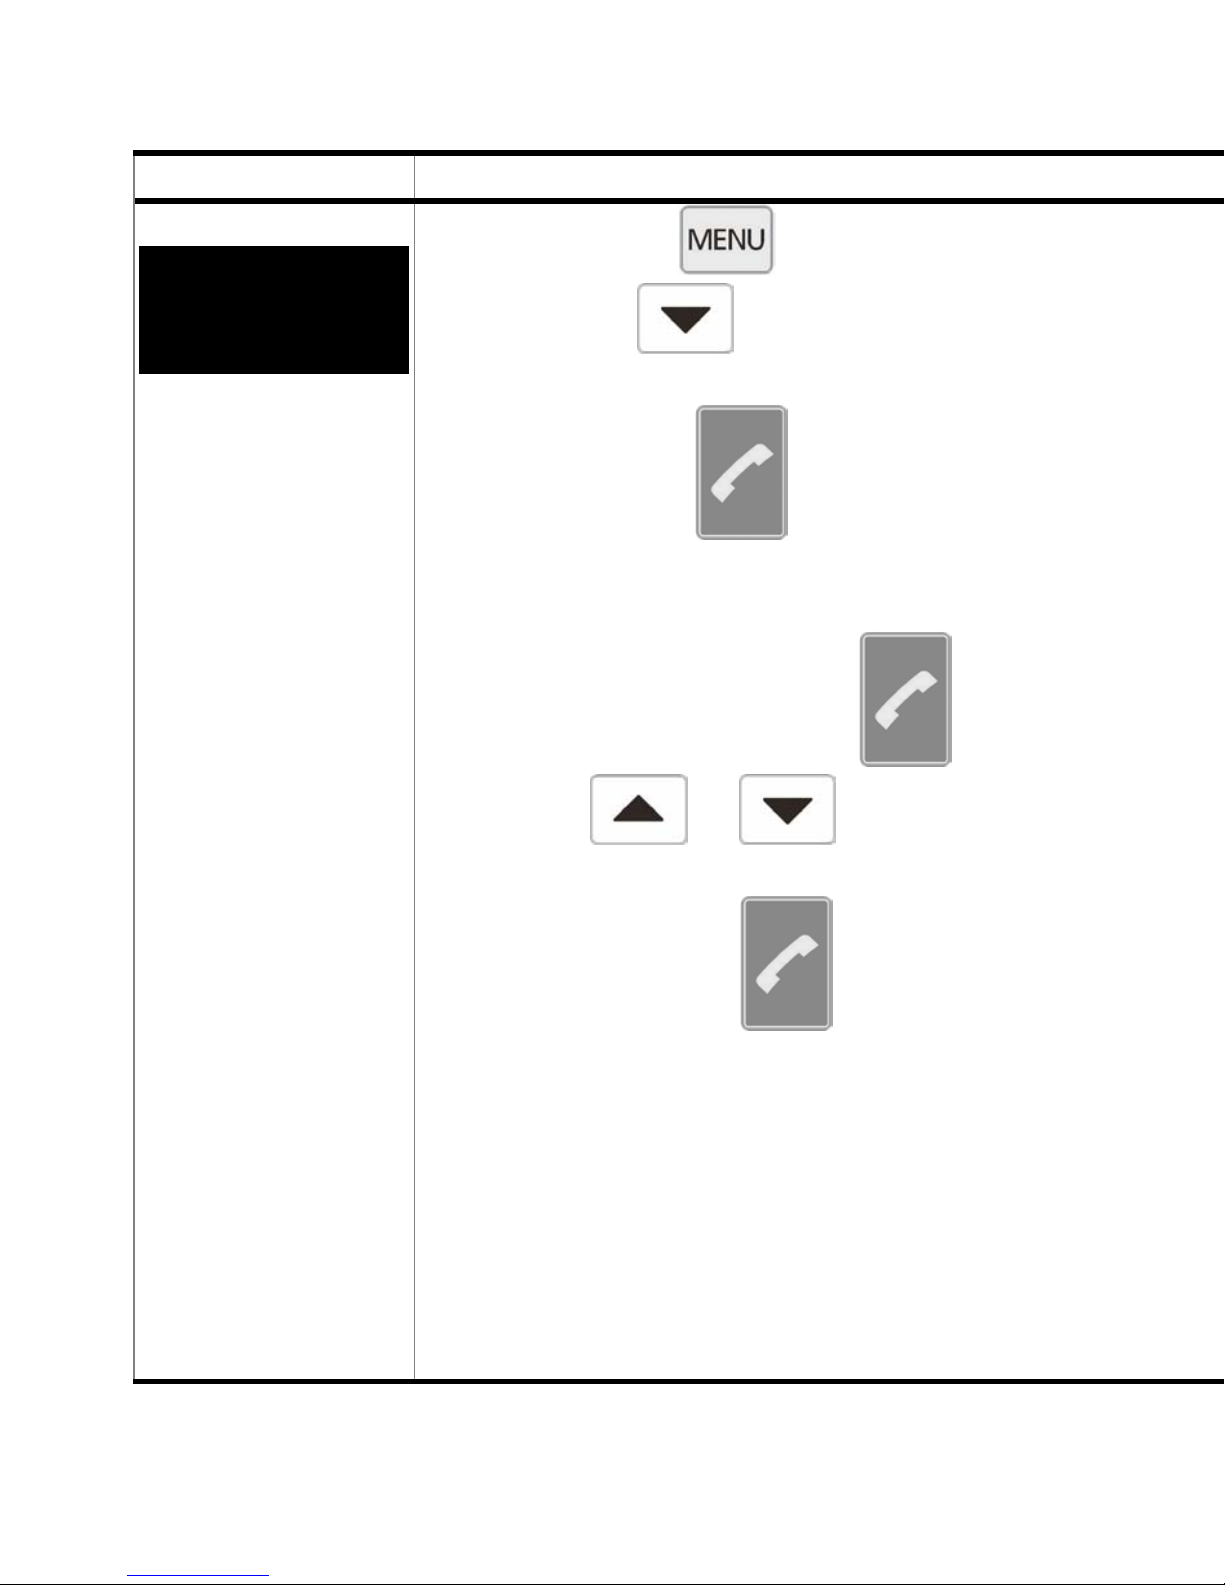
Procedure What to do
11.2
Settings
Setting the
ringtone volume
First, press the
then use the
key,
key to select the
“Settings” function.
Press the green
key to confirm.
Confirm the “Ringtone vol.” menu op-
tion by pressing the green
key.
Using the
or key, select
the required setting and confirm by
pressing the green
key.
The function which is currently active
is shaded and indicated by an arrow.
81
Page 85
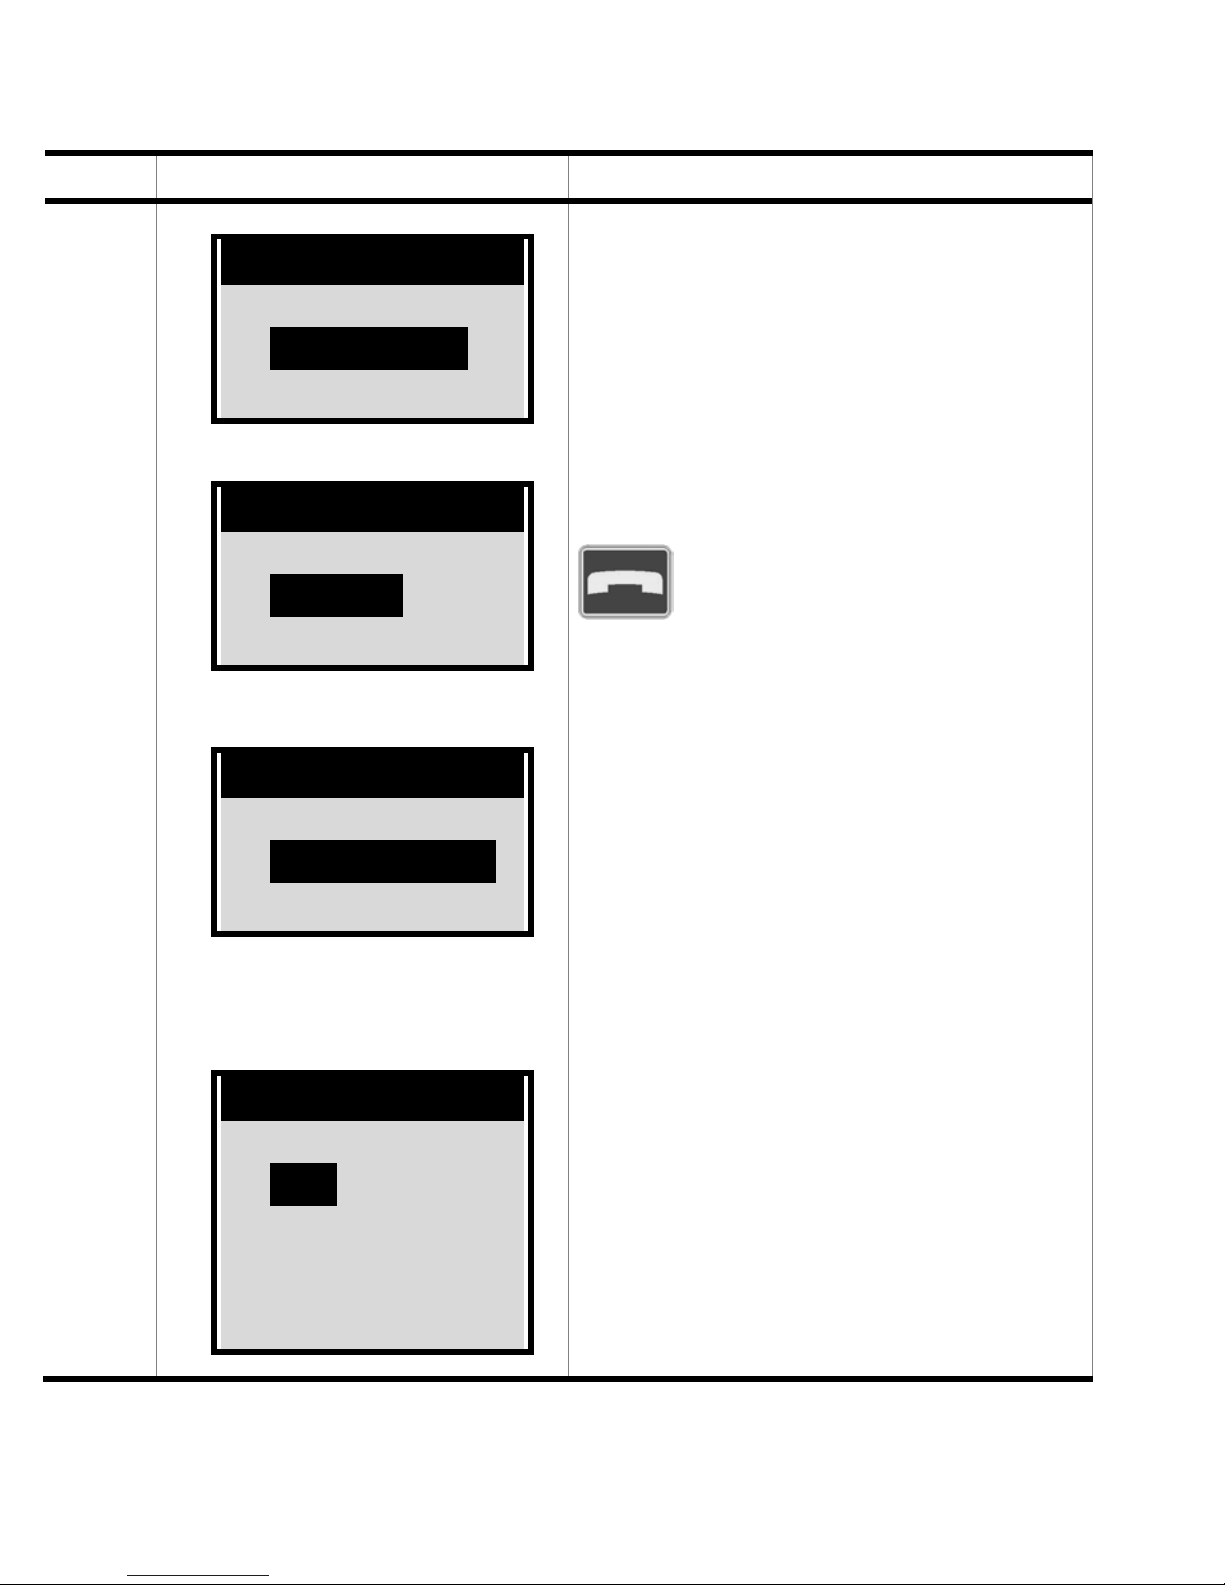
Display Outcome / Tips
-----------------------Î Phone book
Settings
Menu
Phone book
Î Settings
Alarm
Menu
Settings
While you are activating the
ringtone volume, you will hear
the volume currently selected.
To quit the menu level currently displayed, press the red
key.
Vibration
Î Ringtone vol.
Keypad sound
Setting options:
Ringtone vol.
On
Î Low
Normal
High
----------------
82
Page 86
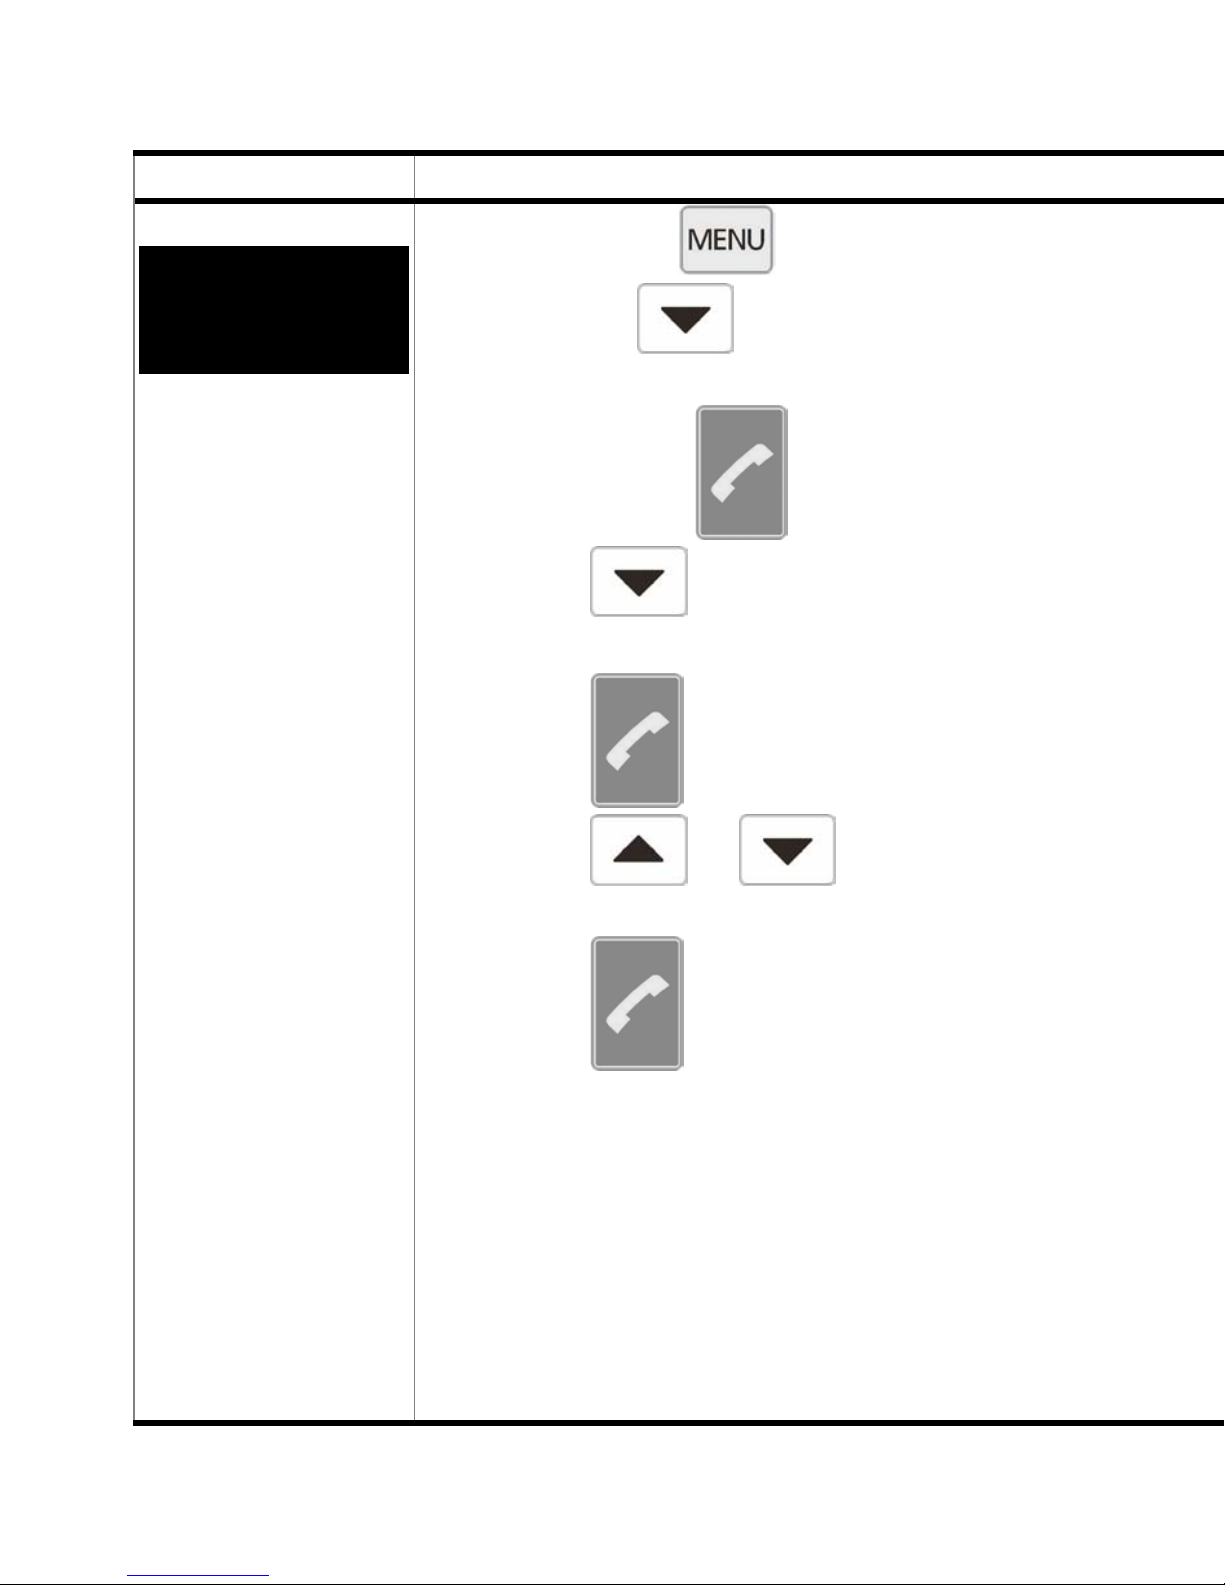
Procedure What to do
11.3
Settings
Setting the
keypad sound
First, press the
then use the
key,
key to select the
“Settings” function.
Press the green
Press the
key 2x to select the
key to confirm.
“Keypad sound” menu option and press
the green
key to confirm.
Using the
or key, select the
required setting and confirm by pressing
the green
key.
The function which is currently active is
shaded and indicated by an arrow.
83
Page 87
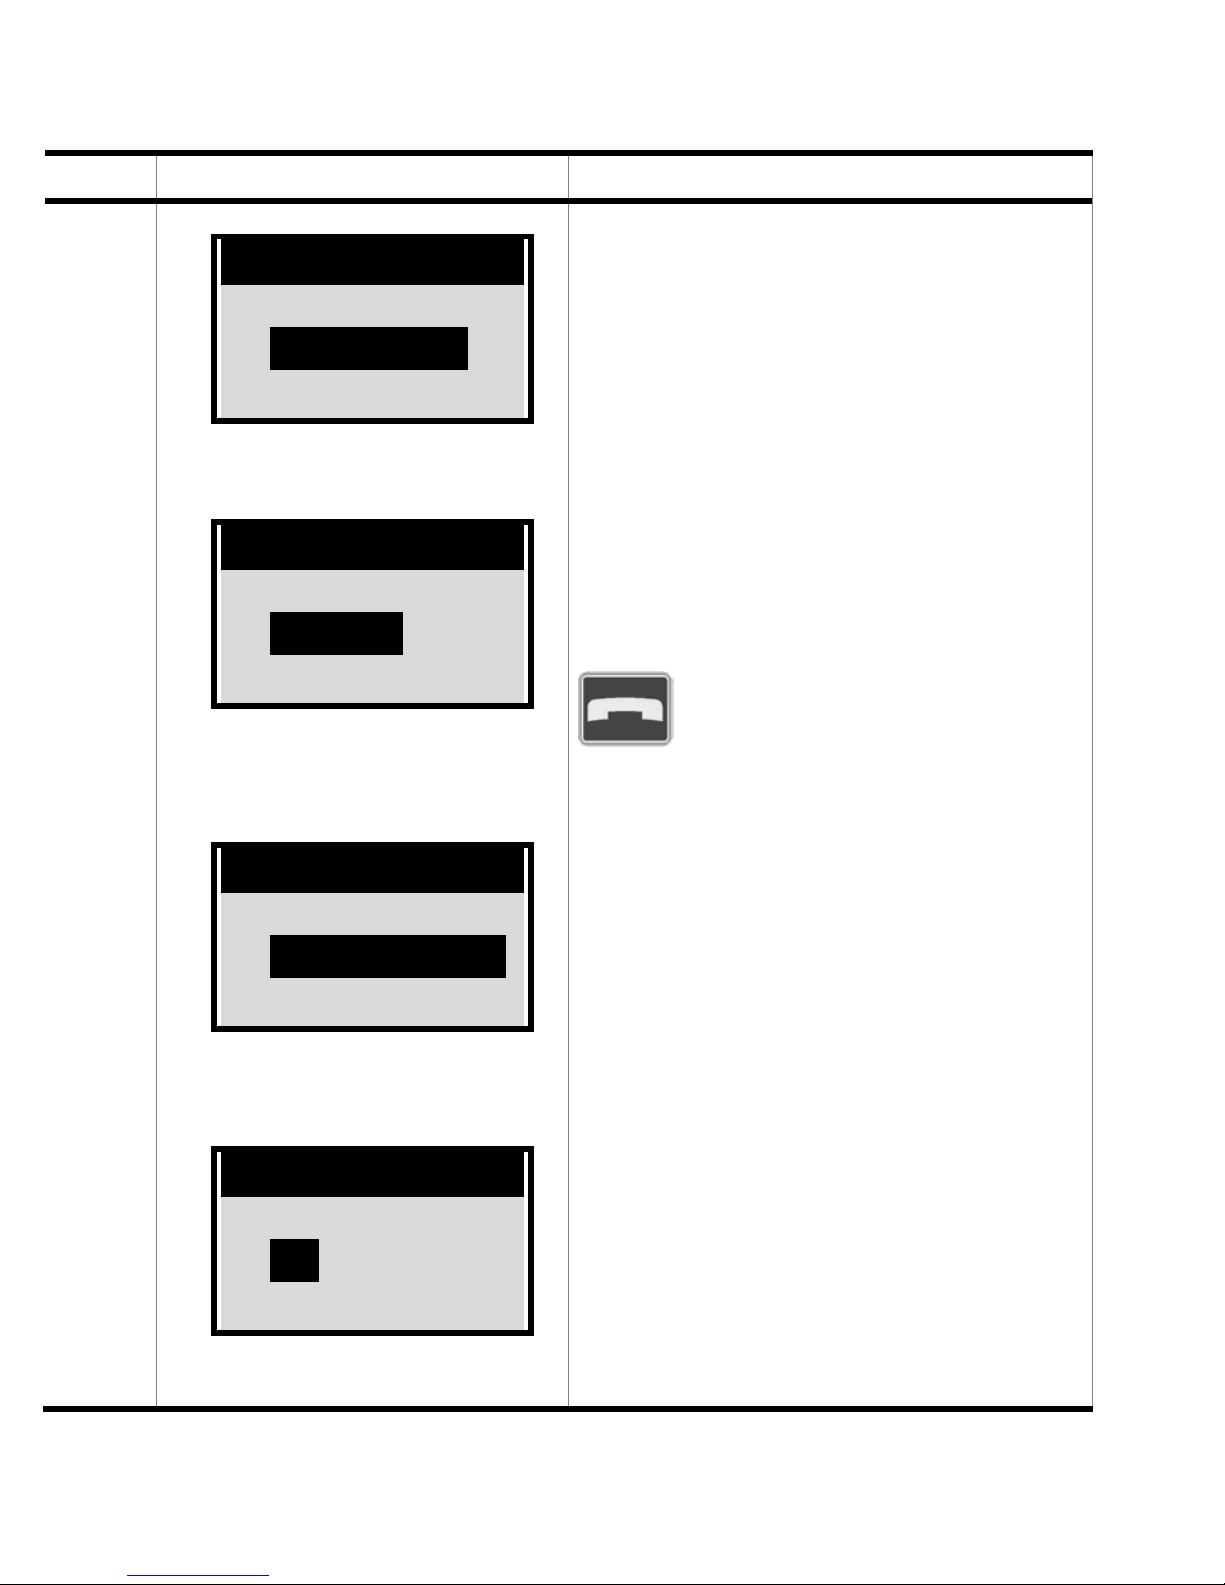
Display Outcome / Tips
-----------------------Î Phone book
Settings
Menu
Menu
Phone book
Î Settings
Alarm
When the keypad sound is activated, you will hear a clicking
sound when you press the
keys.
This function provides additional confirmation that you
have used the keys properly.
To quit the menu level currently displayed, press the red
key.
Ringtone vol.
Î Keypad sound
Letter style
Settings
Keypad sound
Off
Î On
84
Page 88
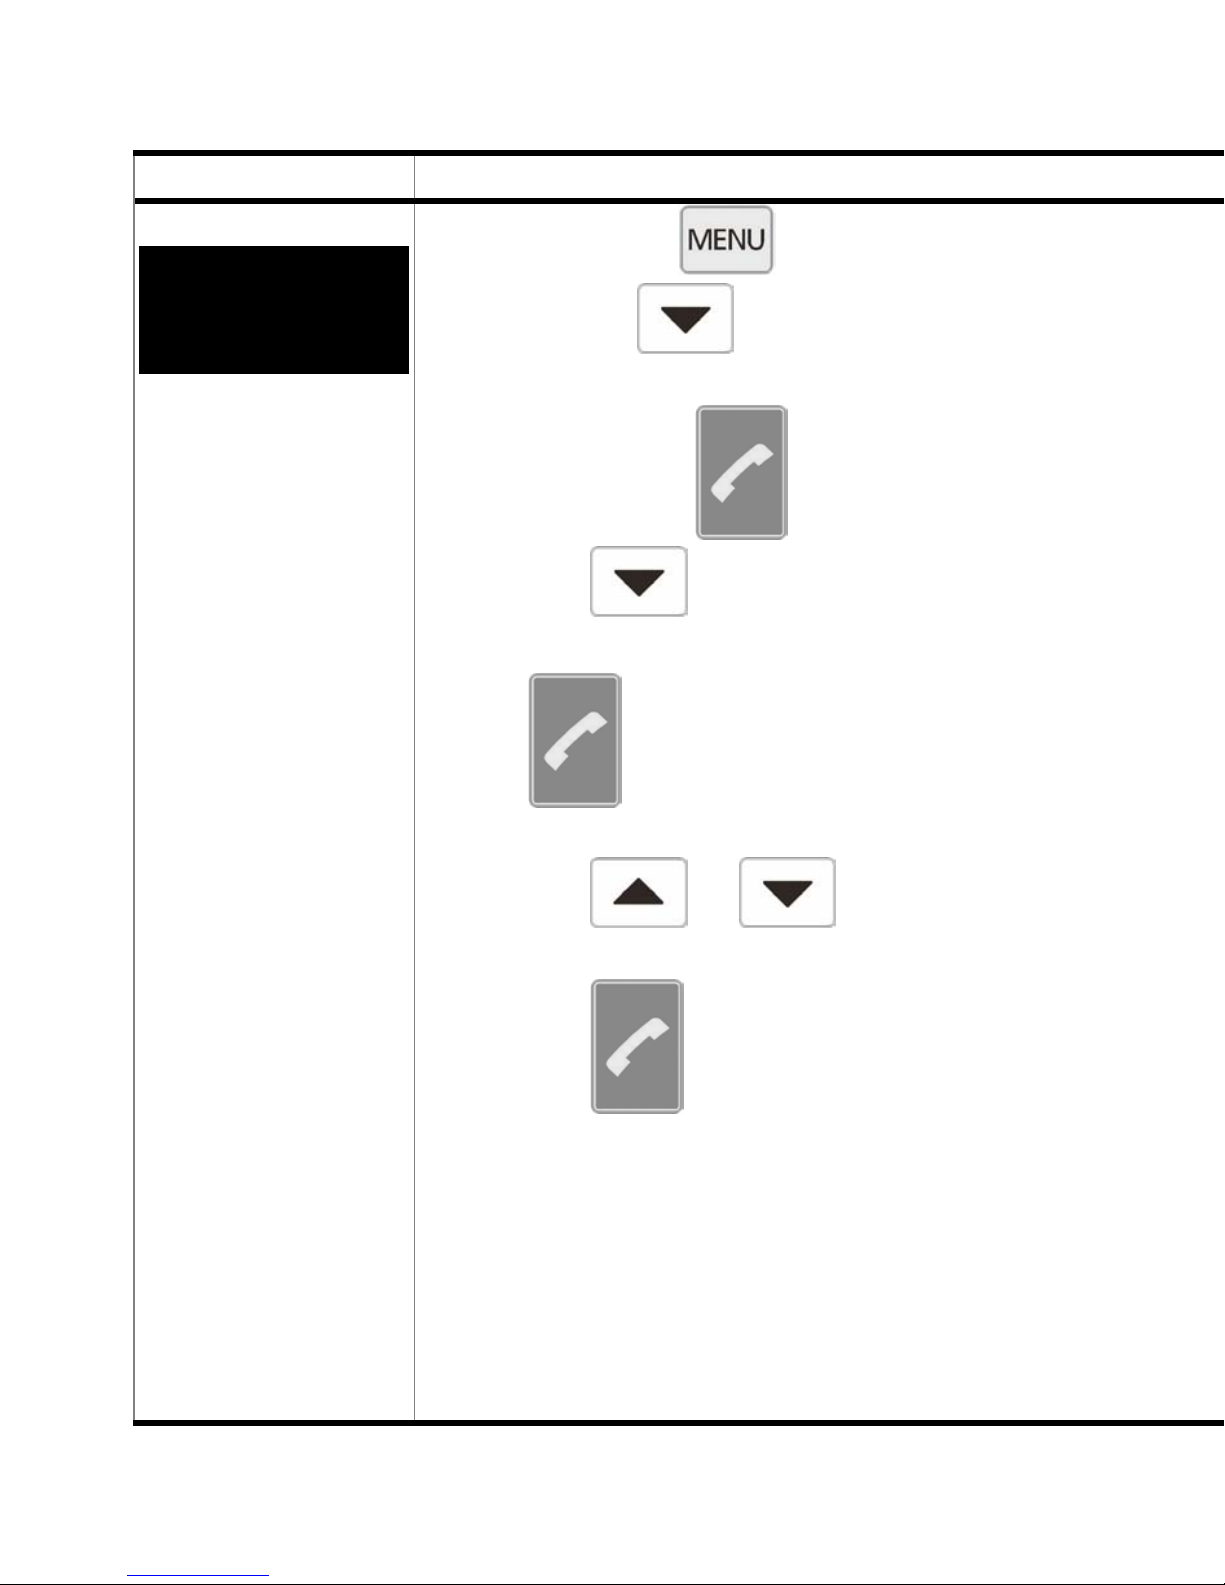
Procedure What to do
11.4
Settings
Setting the letter style
First, press the
then use the
key,
key to select the
“Settings” function.
Press the green
Press the
key 3x to select the
key to confirm.
“Letter style” menu option and press the
green
key to confirm.
Using the
or key, select the
required setting and confirm by pressing
the green
key.
The function which is currently active is
shaded and indicated by an arrow.
85
Page 89
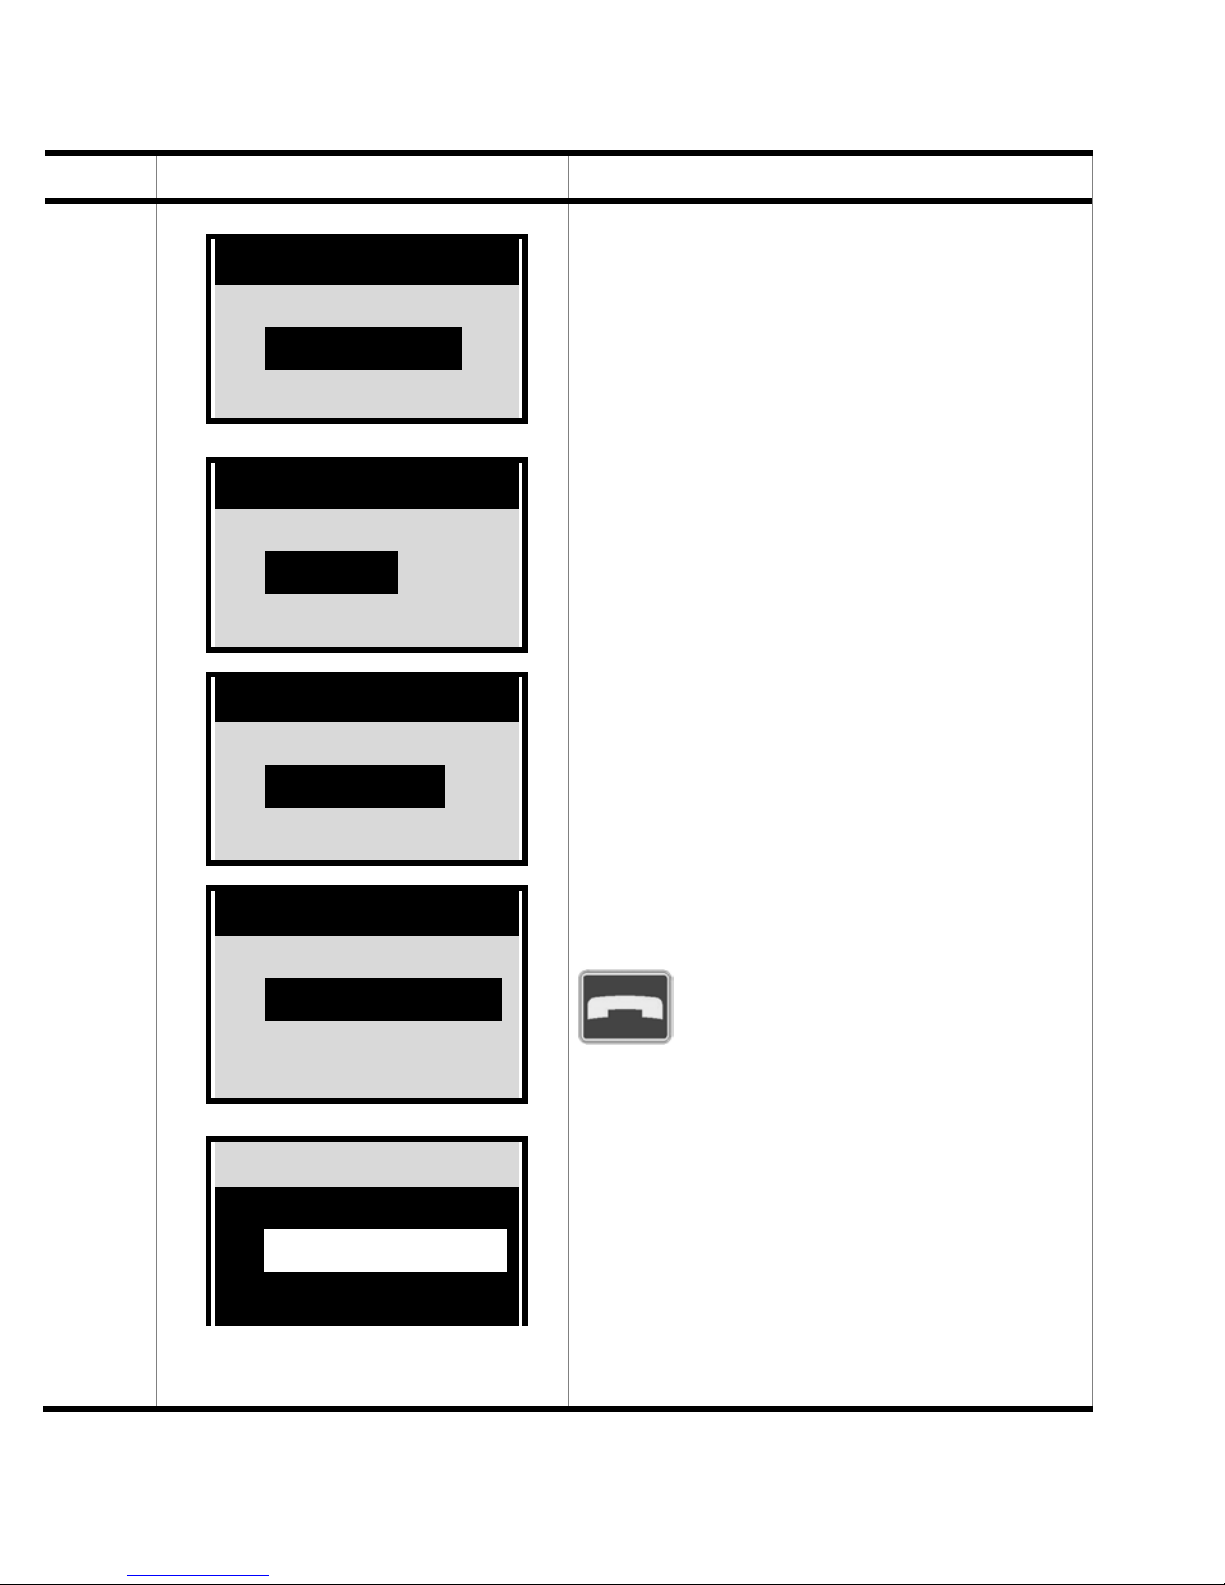
Display Outcome / Tips
-----------------------Î Phone book
Settings
Menu
Phone book
Î Settings
Alarm
Menu
Keypad sound
Î Letter style
Date, Time
Settings
You can change the letter
style by inverting, i.e. the light
and dark areas and numbers
are reversed.
This function may be particularly useful for those with impaired vision.
When “High contrast” is selected, the contrast in the display will be enhanced from the
“normal” setting.
Letter style
White on black
Î Black on white
High contrast
Letter style
Black on white
Î White on black
High contrast
To quit the menu level currently displayed, press the red
key.
86
Page 90
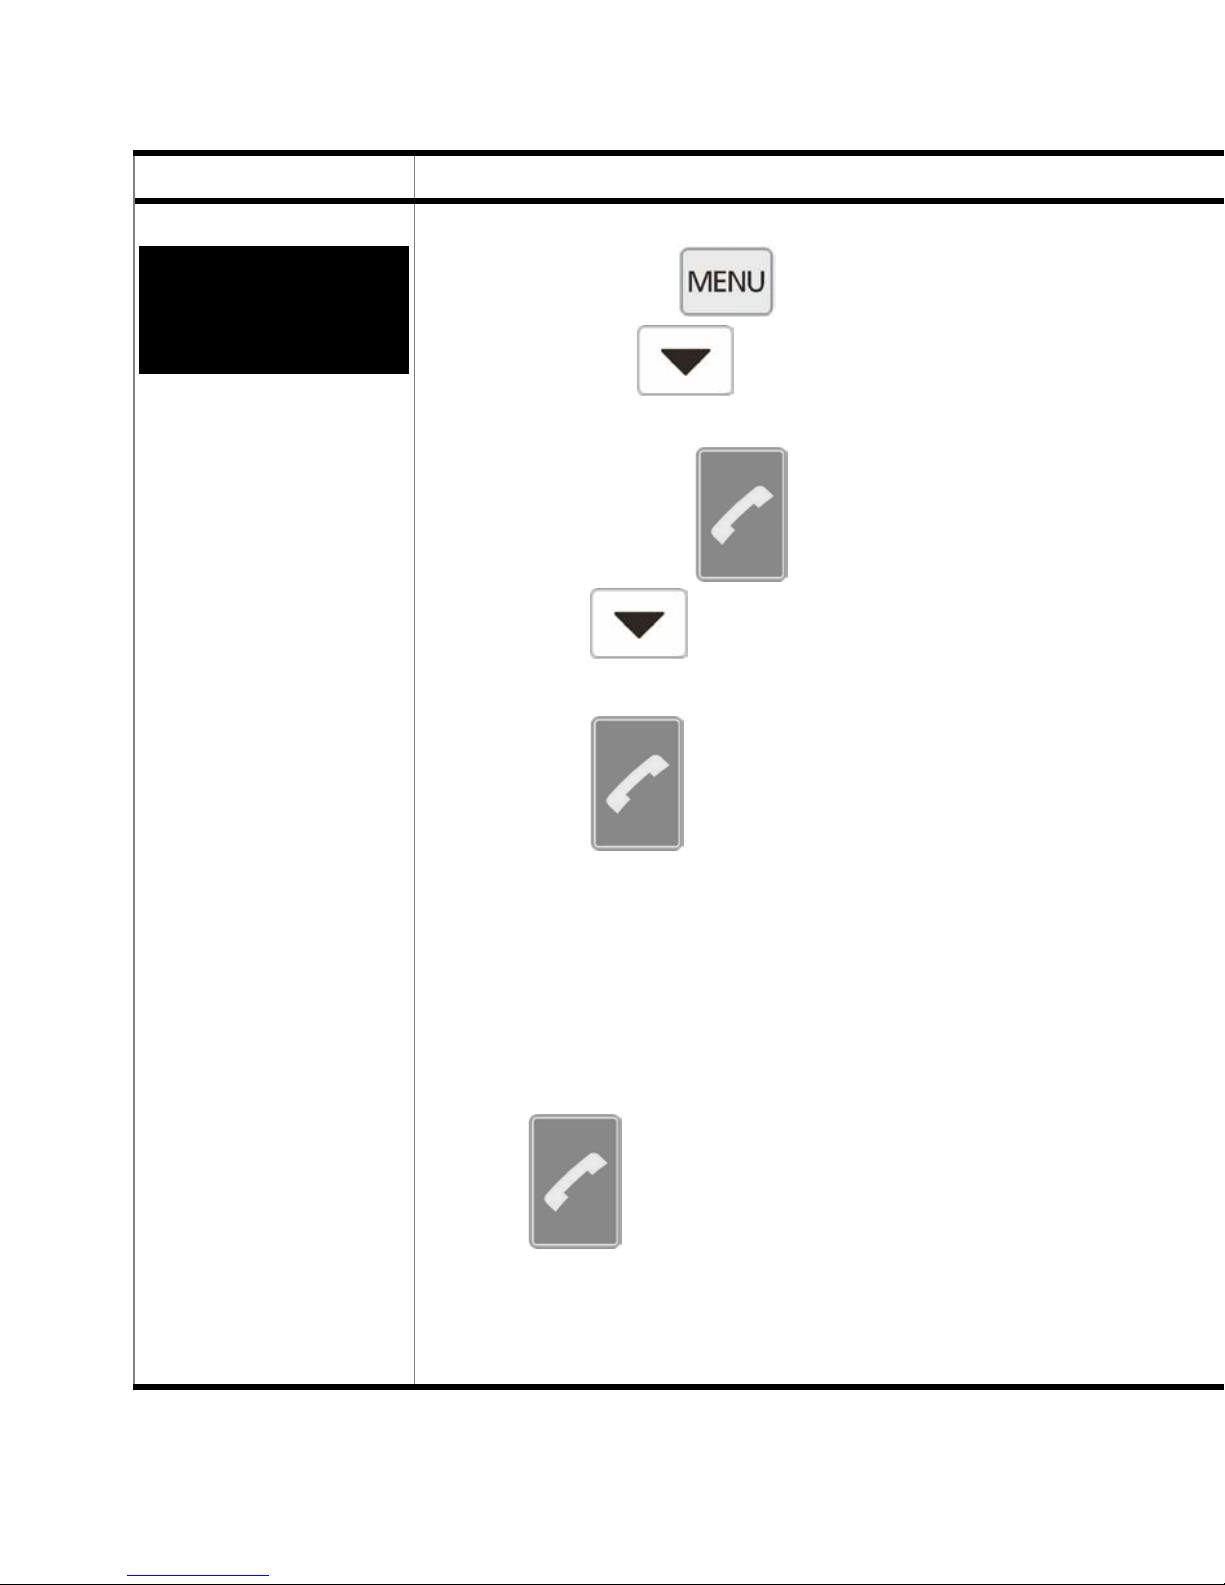
Procedure What to do
11.5
Settings
Setting the
date and the
time
First, press the
then use the
key,
key to select the
“Settings” function.
Press the green
Press the
key 4x to select the
key to confirm.
“Date Time” menu option and press
the green
key to confirm.
Enter the correct time and date using
the number keys.
Enter 12:45 hrs on 9th December
2006 as 12 45 09 12 06.
Confirm the entry by pressing the
green
key.
87
Page 91
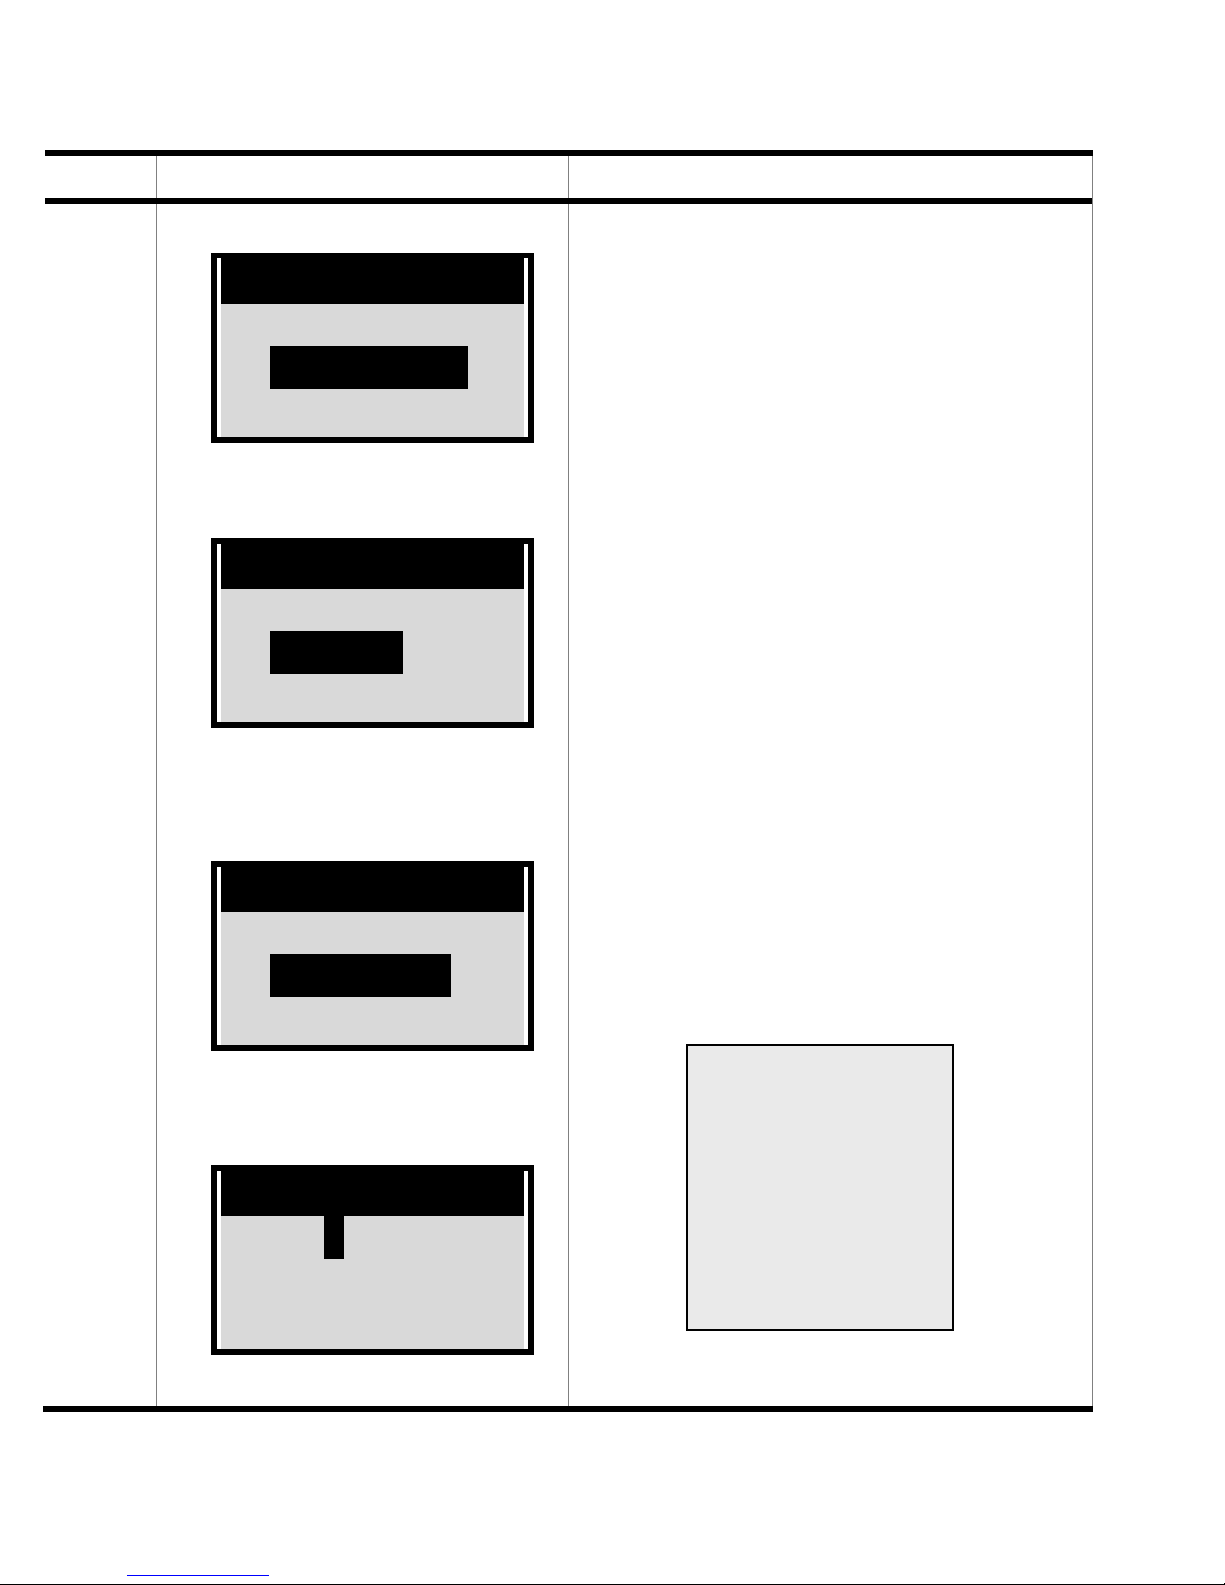
Display Outcome / Tips
-----------------------Î Phone book
Settings
Menu
Phone book
Î Settings
Alarm
Menu
When the phone is supplied to
you, the date and time will not
be correctly pre-set. The date
display could become corrupted when the battery is discharged.
The time display does not reset itself automatically when
the clocks go forward or back
for summer/winter time.
If the battery is removed for a
Letter style
Î Date Time
More
Settings
Date Time
12:45
09.12.06
long period or is fully discharged, the date and time will
need to be re-set.
NOTE: Setting
the size of the
time display is
described in
Chapter
11.6.8.
88
Page 92
Procedure What to do
11.6.
Settings
More settings
First, press the
then use the
key,
key to select the
“Settings” function.
Press the green
Press the
key 5x to select the
key to confirm.
“More” menu option and press the
green
key to confirm.
Using the
or key, select
the required option and confirm by
pressing the green
key.
The function which is currently active
is shaded and indicated by an arrow.
89
Page 93
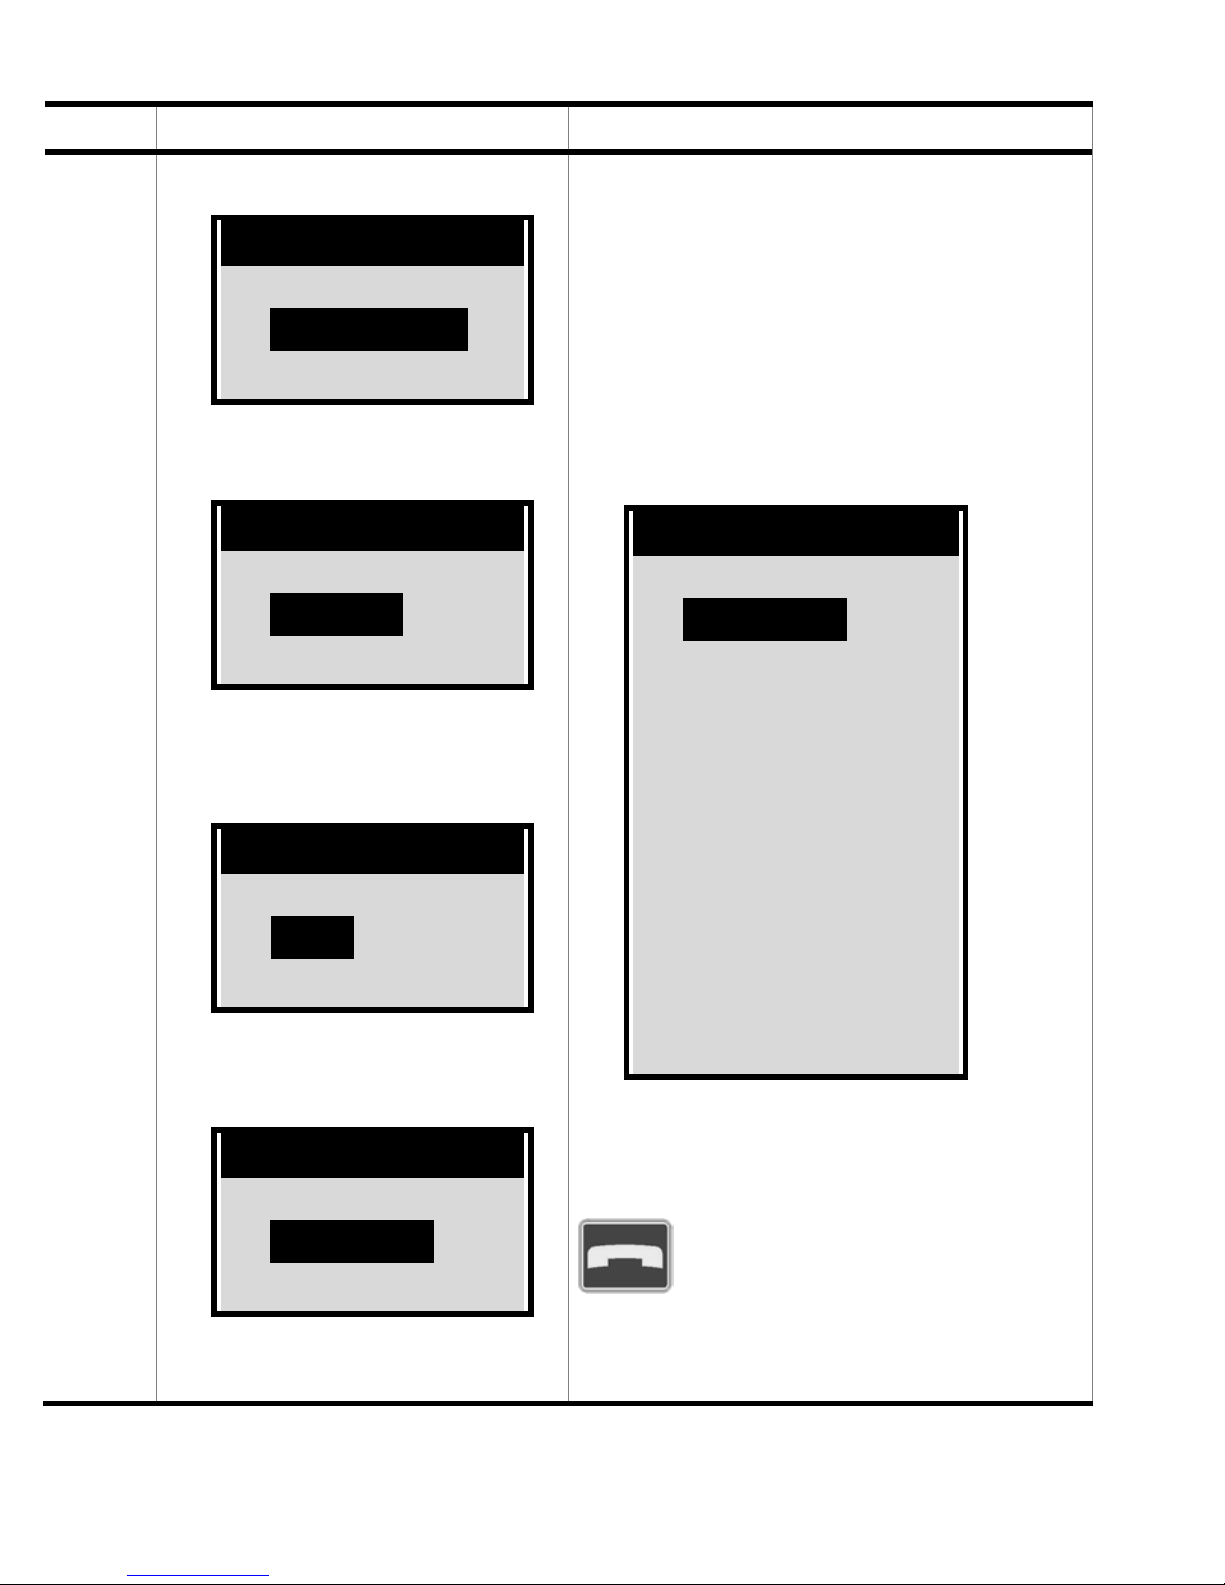
Display Outcome / Tips
Menu
-----------------------Î Phone book
Settings
Phone book
Î Settings
Alarm
Menu
Date Time
Î More
------------------------
Settings
As a rule the extended settings [More] are only rarely
used, mainly to select the
initial settings when getting
started.
The following functions are
available for you to select:
More
------------------------
Î Language
Ringtone
Emergency call
SMS function
Own number
Mailbox
Letter size
Time
Auto key lock
Enter PIN
Select network
-----------------------Î Language
Ringtone
More
To quit the menu level currently displayed, press the red
key.
90
Page 94
Procedure What to do
11.6.1
More settings
Selecting a
language
Using the
key, select the
Settings function and then the More
option (see Pages 89 ff - Item 11.6)
The "Language" menu option will already be highlighted.
Confirm by pressing the green
key.
Press the
key repeatedly until
you reach the required language and
then confirm by pressing the green
key.
The language option which is currently
active is shaded and indicated by an
arrow.
91
Page 95
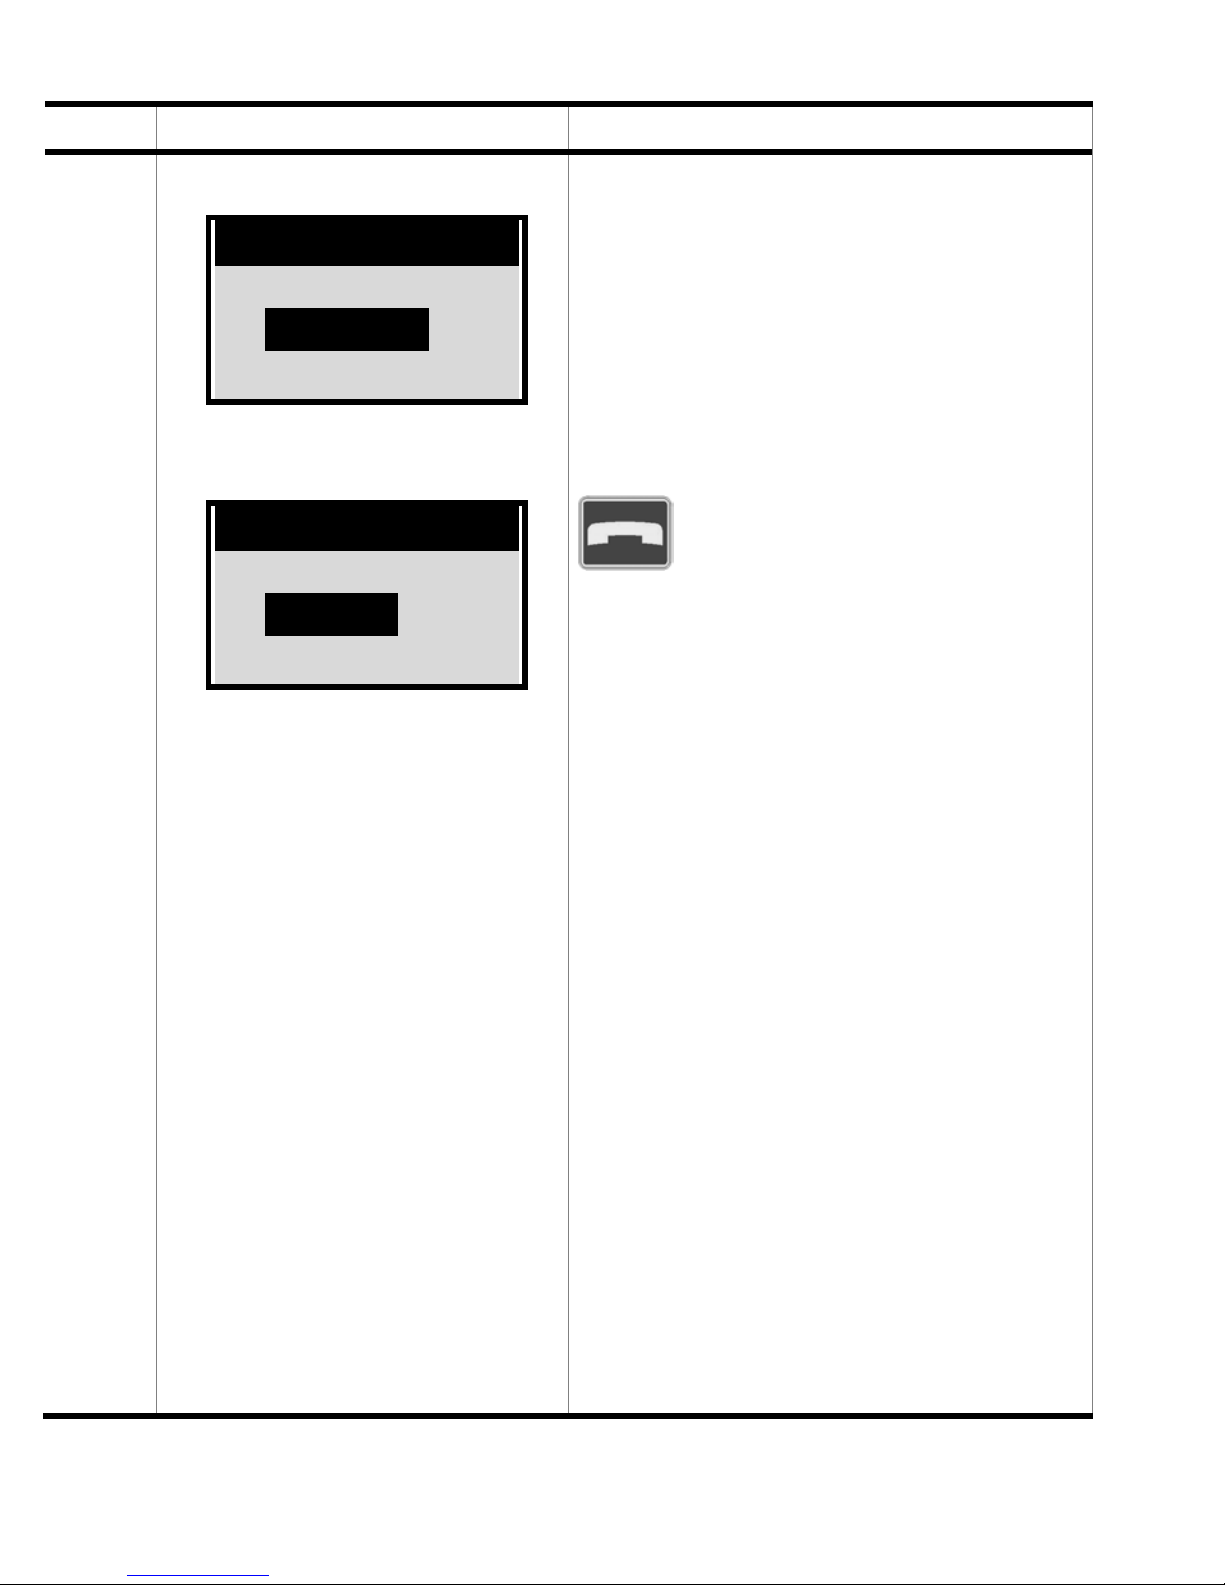
Display Outcome / Tips
More
-----------------------Î Language
Ringtone
French
Î German
English
Language
Depending on the factory configuration, a number of different languages are available.
To quit the menu level currently displayed, press the red
key.
92
Page 96
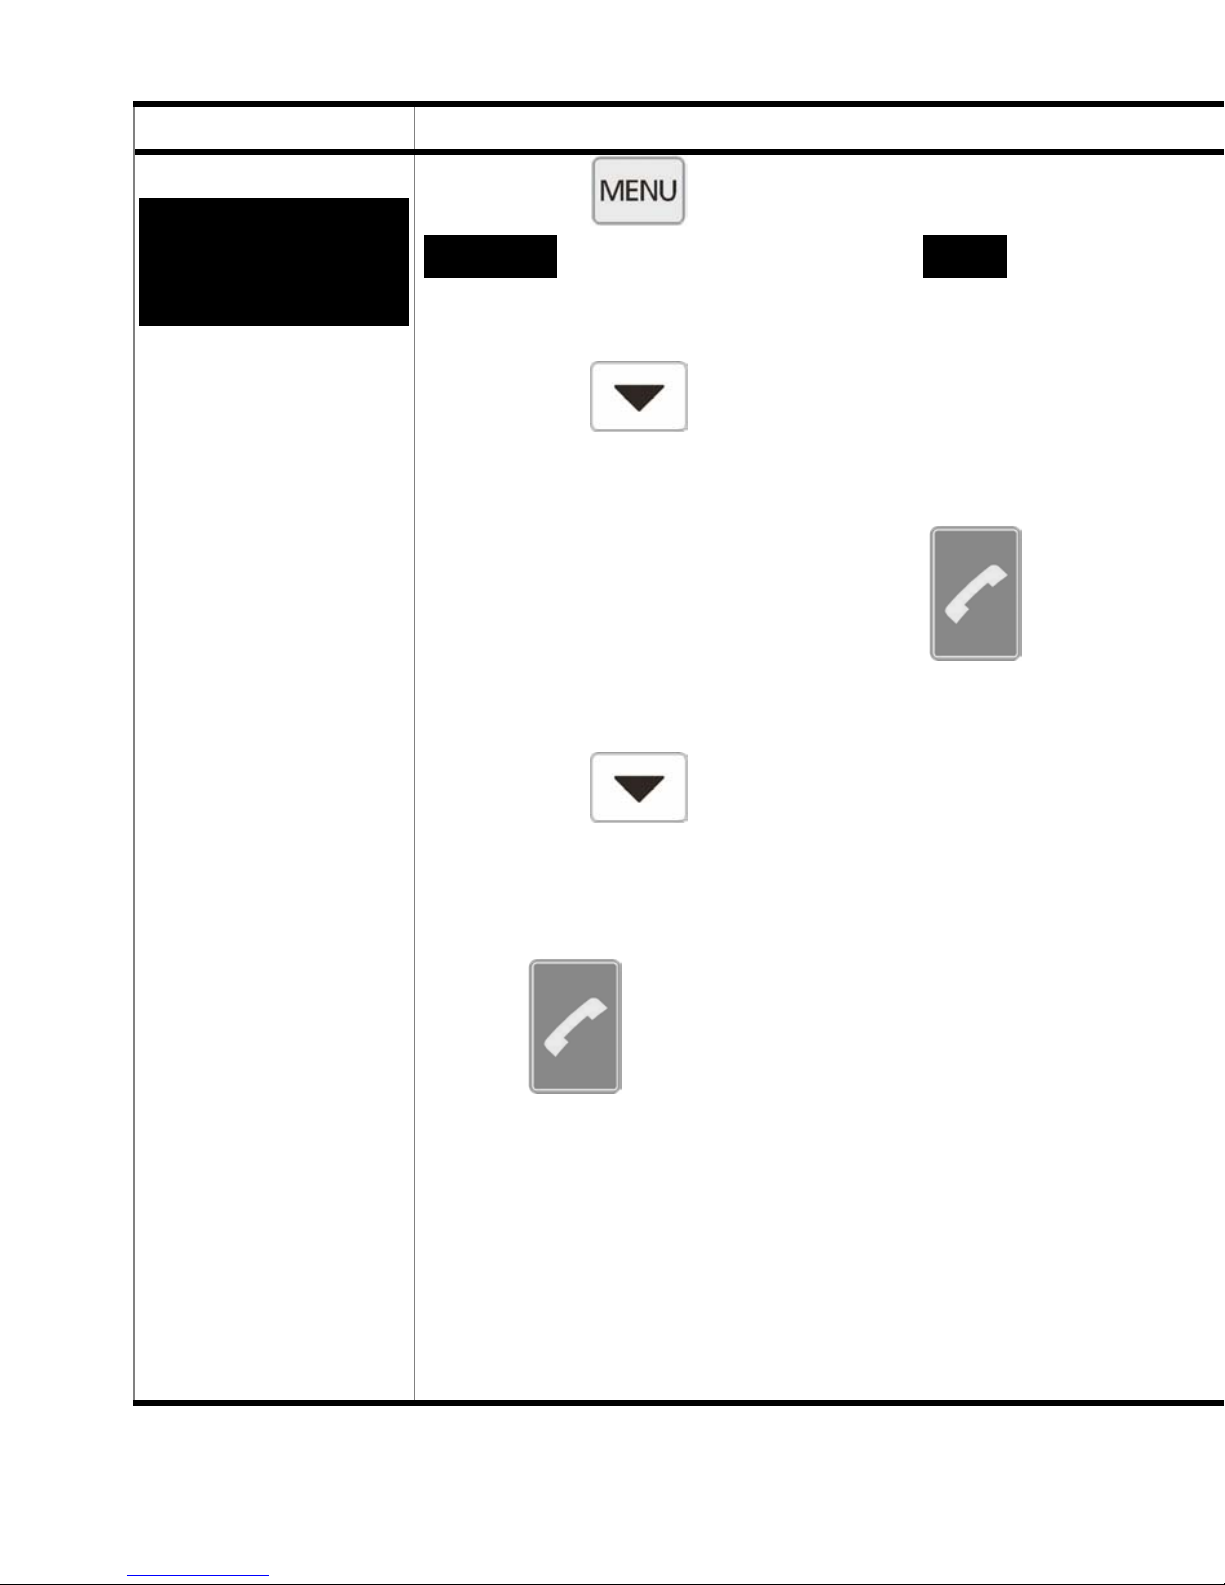
Procedure What to do
11.6.2
More settings
Setting the
ringtone
Using the
key, select the
Settings function and then the More
option (see Pages 89 ff - Item 11.6)
Press the
key once to select the
“Ringtone” option.
Confirm by pressing the green
key.
Press the
key repeatedly until
you reach the required ringtone tune.
When you select a tune, you will hear
it play once. Confirm by pressing the
green
key.
The tune which is currently active is
shaded and indicated by an arrow.
93
Page 97
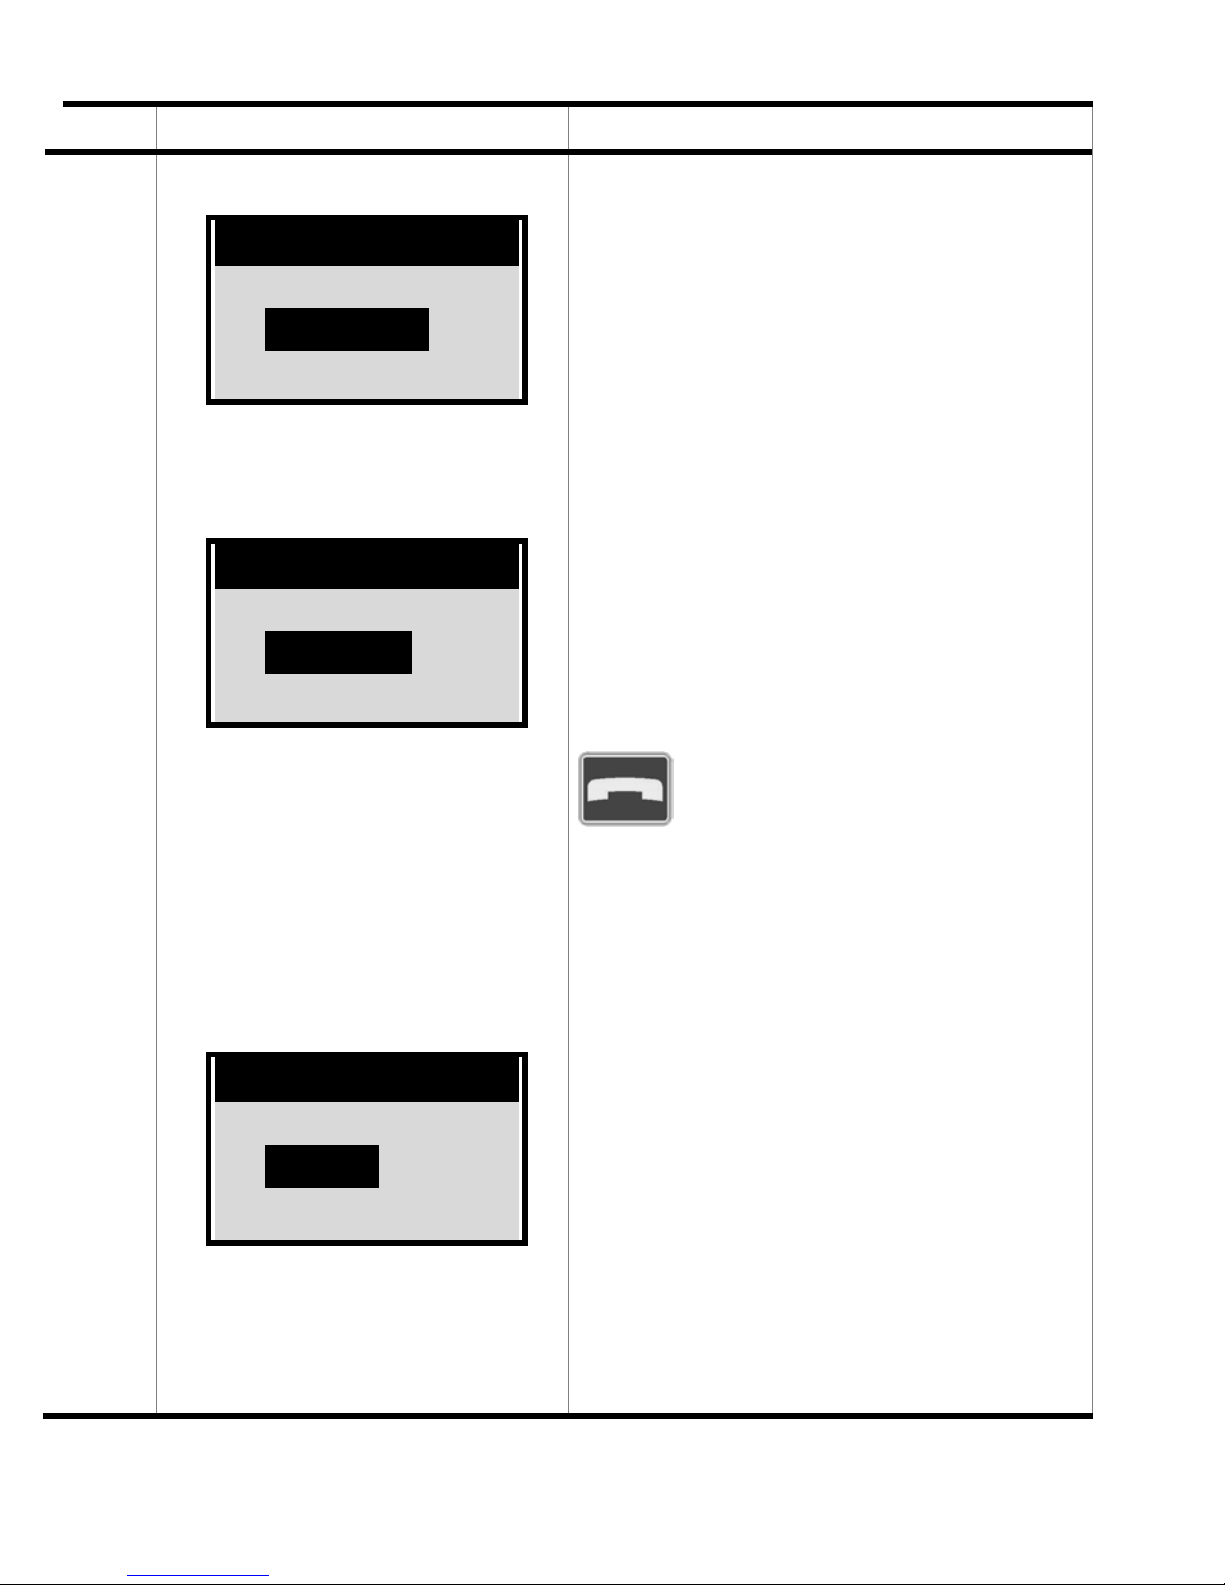
Display Outcome / Tips
More
-----------------------Î Language
Ringtone
Language
Î Ringtone
Emerg. gp. call
More
Depending on factory configuration, three ringtones are
available.
It is NOT POSSIBLE to save
further ringtones on this phone
or to download new ringtones
from the internet or by SMS.
To quit the menu level currently displayed, press the red
Tune 3
Î Tune 1
Tune 2
key.
Ringtone
94
Page 98
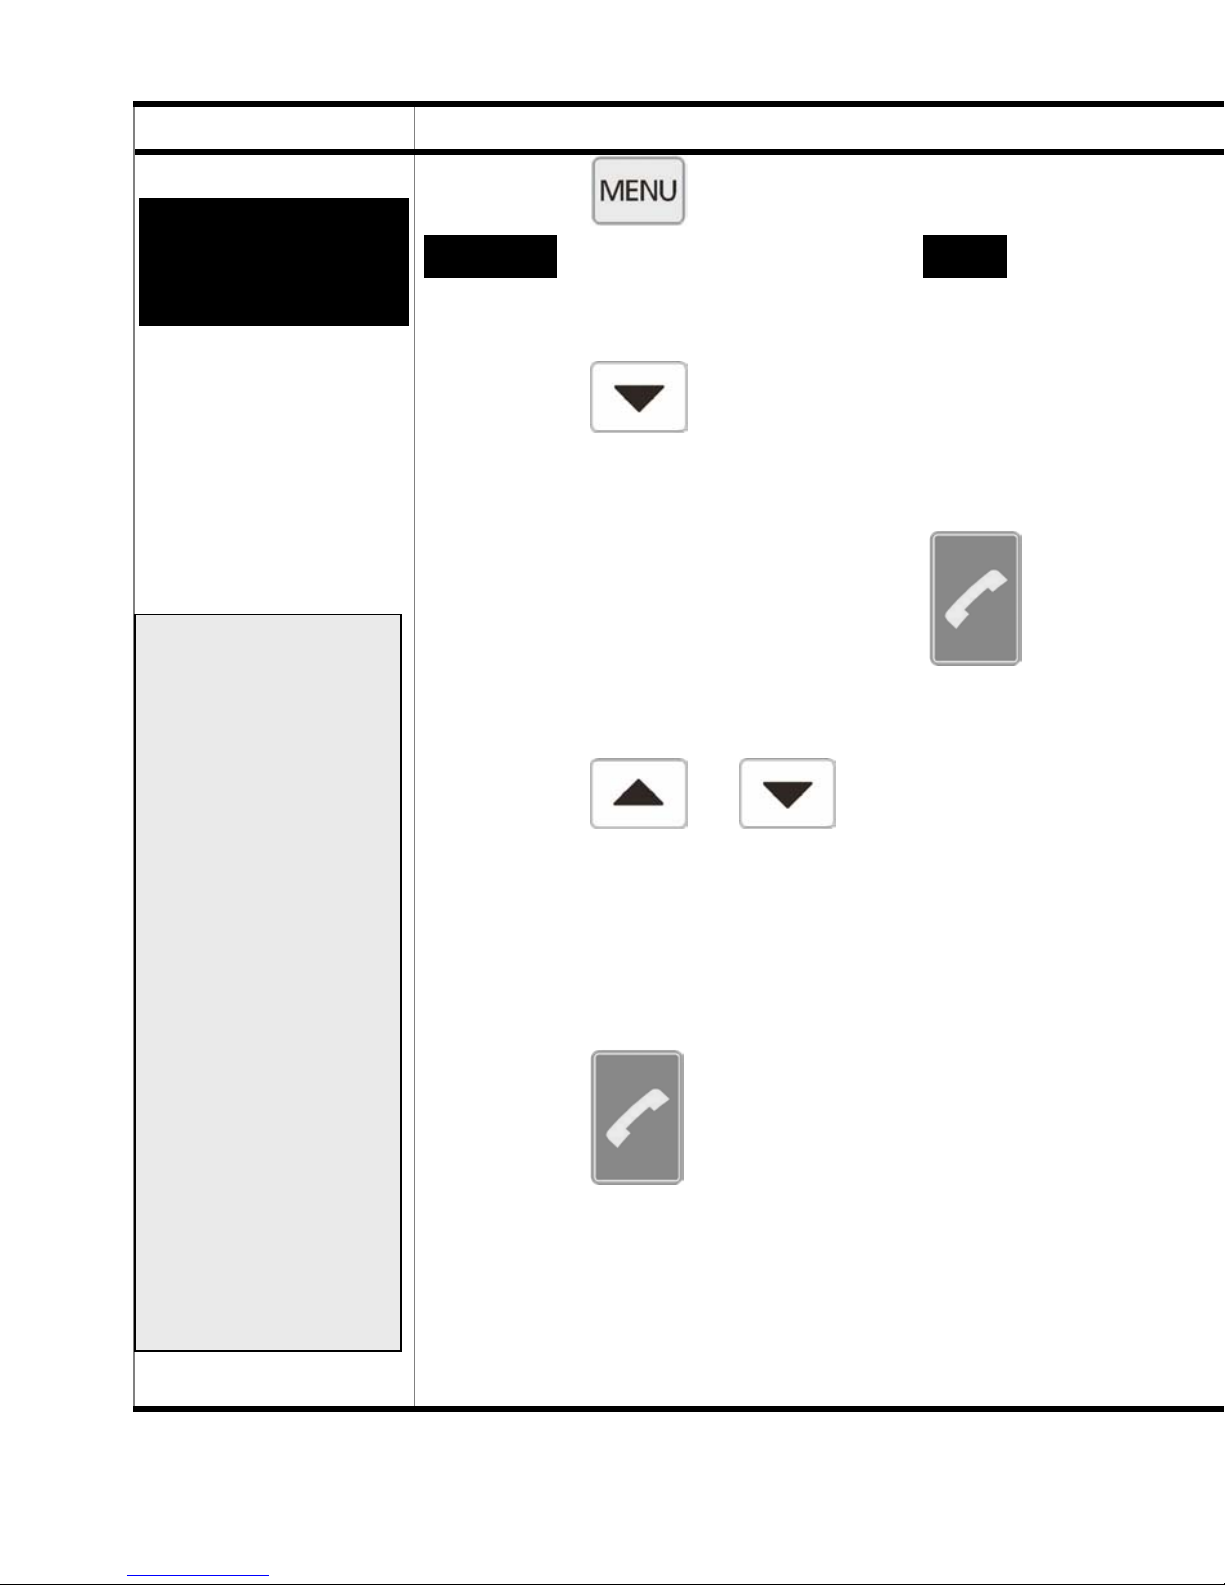
Procedure What to do
11.6.3
More settings
Activating the
emergency
group call
function
NOTE: Ensure
that the phone
numbers for
group calls are
saved in the selection list under
“Group call 1-3”
and not under
keys I-III !
Press briefly on
keys I-III: the
phone no. saved
will be shown and
can be called.
Press on keys I, II
Using the
key, select the
Settings function and then the More
option (see Pages 89 ff - Item 11.6)
Press the
key 2x to select
the “Emerg. gp. call” option.
Confirm by pressing the green
key.
Using the
or key, you
can select whether the Emergency
group call function is switched on or
off or whether all numbers assigned
to the group call are to be deleted.
Confirm your selection by pressing
or III for 3 seconds
to put out an
Emergency group
call.
75).
95
the green
key.
The function which is currently active
is shaded and indicated by an arrow.
Page 99
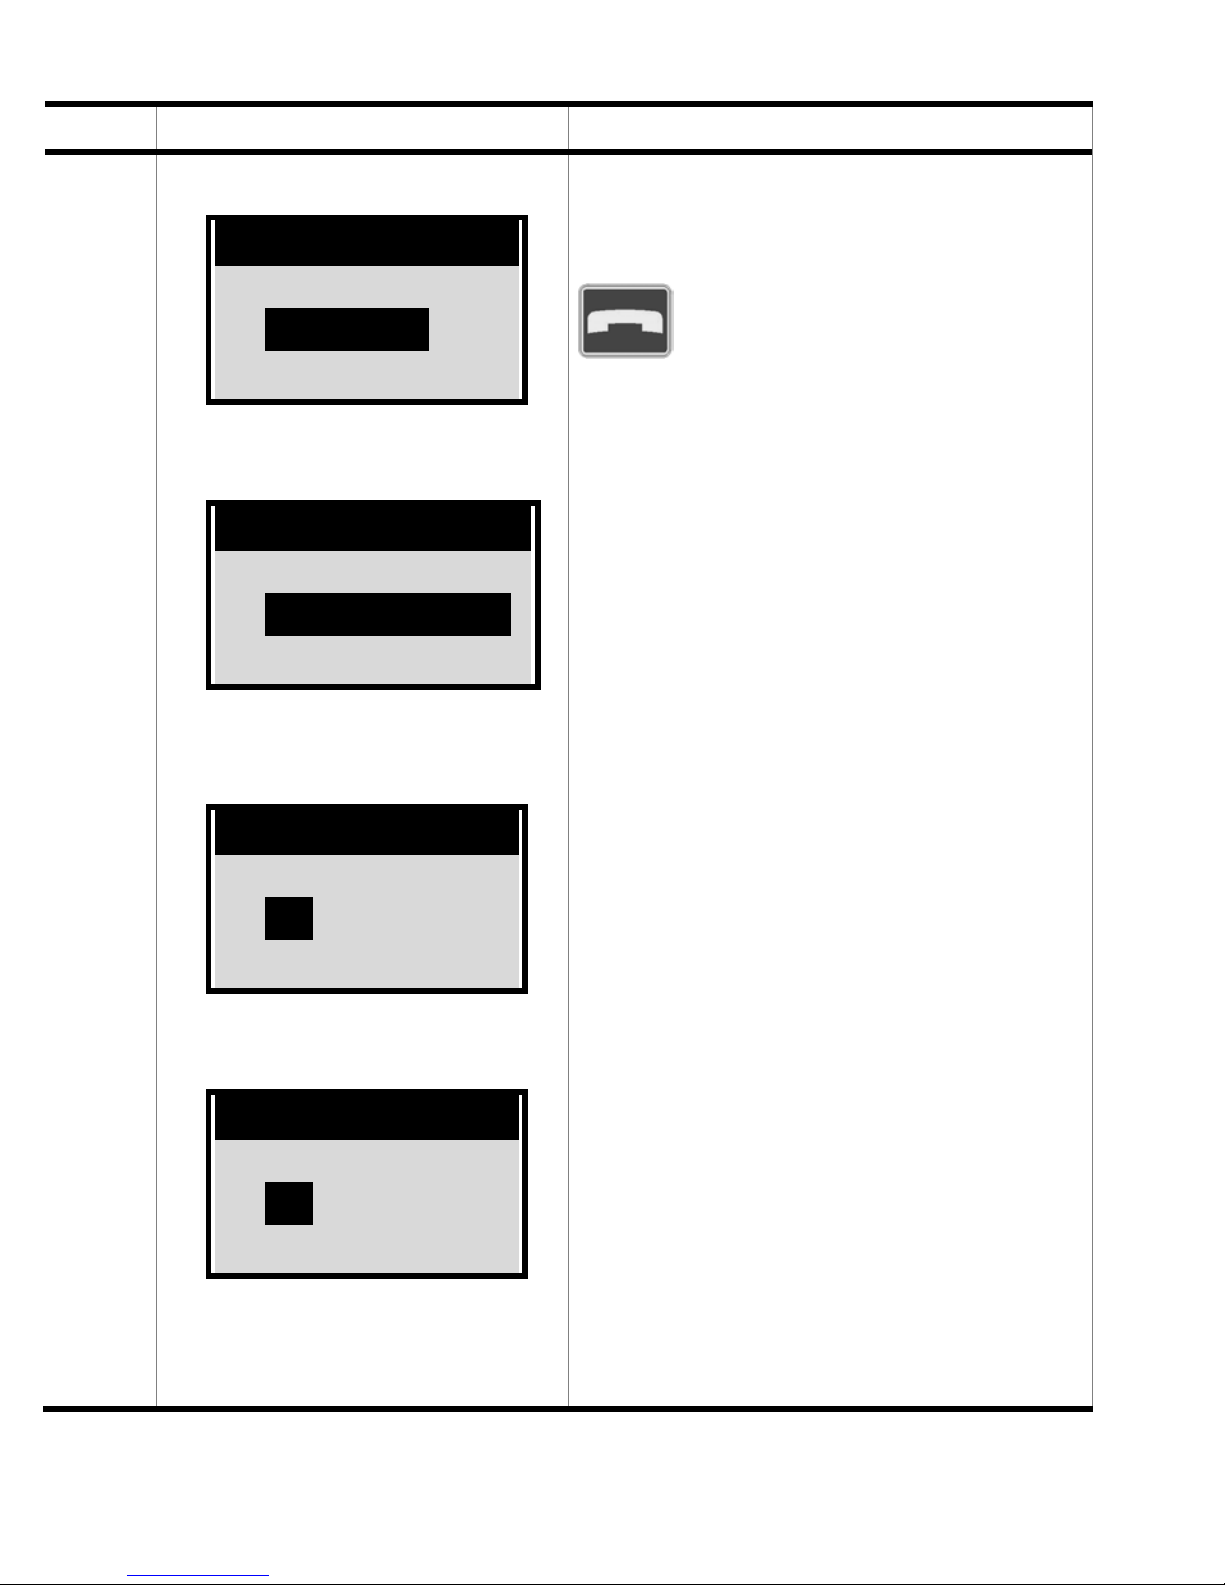
-
Display Outcome / Tips
More
-----------------------Î Language
Ringtone
Ringtone
Î Emerg. gp. call
SMS function
More
Emerg. gp. call
Delete assign
Î Off
On
Emerg. gp. call
Off
Î On
Delete assign
To quit the menu level currently displayed, press the red
key.
When you put out a group call,
the following text message is
sent to up to three different pre
viously stored numbers:
“<Your phone number>
The sender of this SMS has
put out an emergency call.
Please call back immediately.”
For the next 20 minutes, your
mobile will accept any incoming calls without you having to
do anything at all and switches
to handsfree.
You can alert up to three people by pressing just one key.
Callers who have received a
text message can speak to
you immediately when they
call back.
96
Page 100
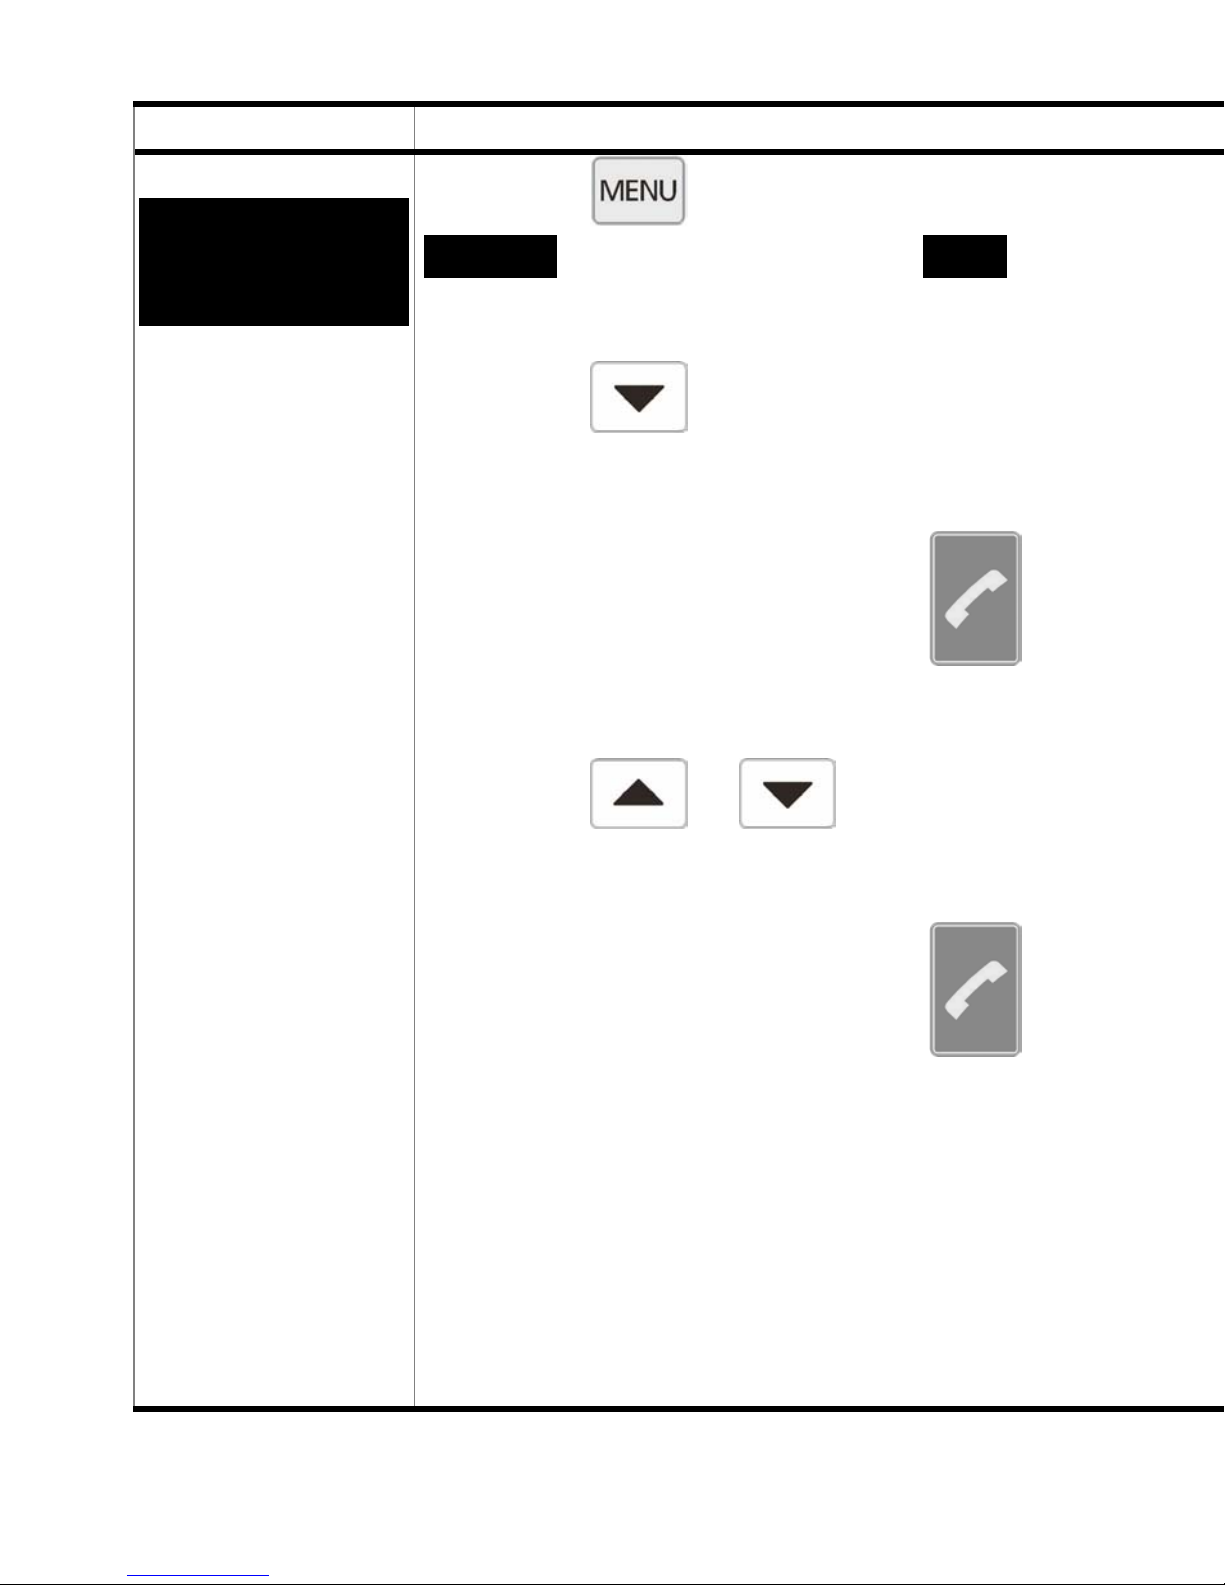
Procedure What to do
11.6.4
More settings
Activating the
SMS
(= text messaging)
function
Using the
key, select the
Settings function and then the More
option (see Pages 89 ff - Item 11.6)
Press the
key 3x to select the
“SMS function” option.
Confirm by pressing the green
key.
Using the
or key, you can
select whether the SMS function is
switched on or off
Confirm by pressing the green
key.
The function which is currently active
is shaded and indicated by an arrow.
97
 Loading...