

Page 1
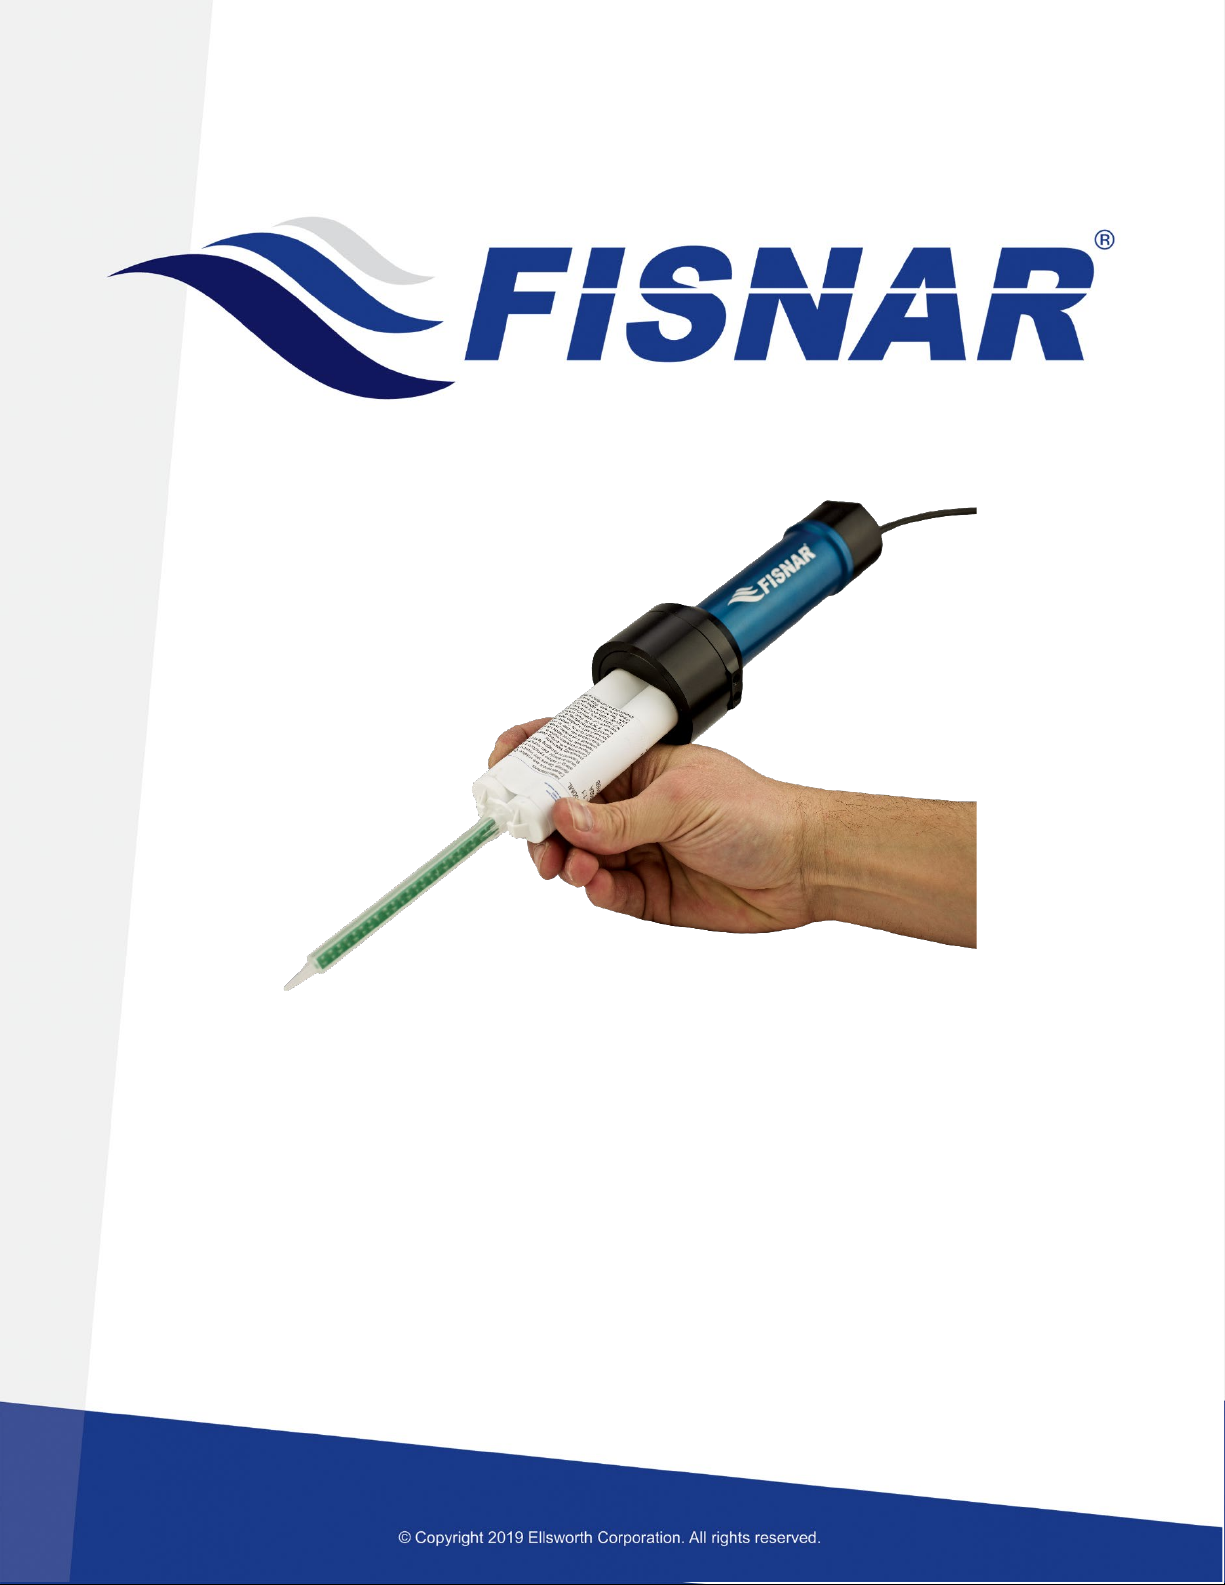
DTD50 50ML Dispenser
Operating Guide
Page 2

DTD50 Operating Guide www.fisnar.com Rev B 2019
THIS PAGE IS INTENTIONALLY LEFT BLANK
2
Page 3
DTD50 Operating Guide www.fisnar.com Rev B 2019
Changing Ratios
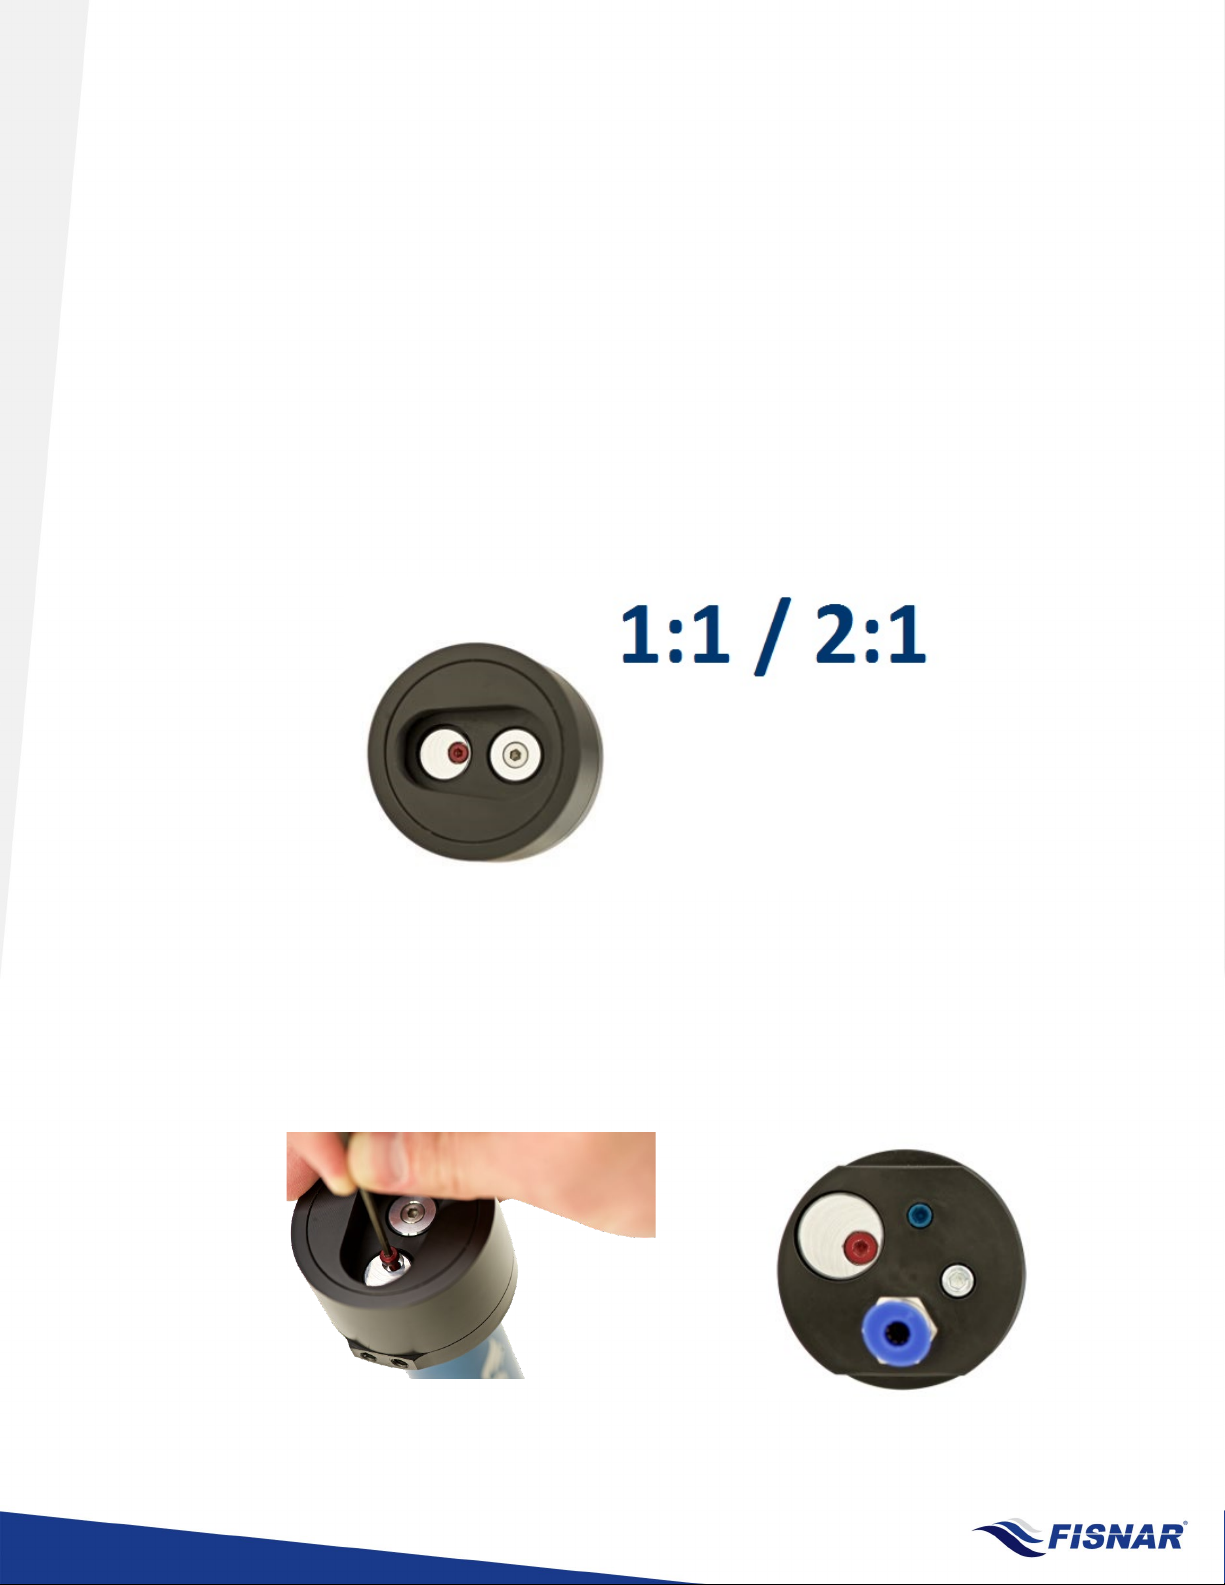
The DTD50 works with 1:1, 2:1, 4:1 and 10:1 ratio 50ml standard Astyle and B-style cartridges.
*Max operating pressure 100 psi.
• Set for use with 1:1 and 2:1 ratios right out of the box ready to
dispense.
• To change out the pistons and adjust the ratio, remove the Red
screw-set and pop out the Silver half-moon portion. The loose
pistons can be conveniently stored in the back of the unit when
not in use to prevent loss.
3
Page 4
DTD50 Operating Guide www.fisnar.com Rev B 2019
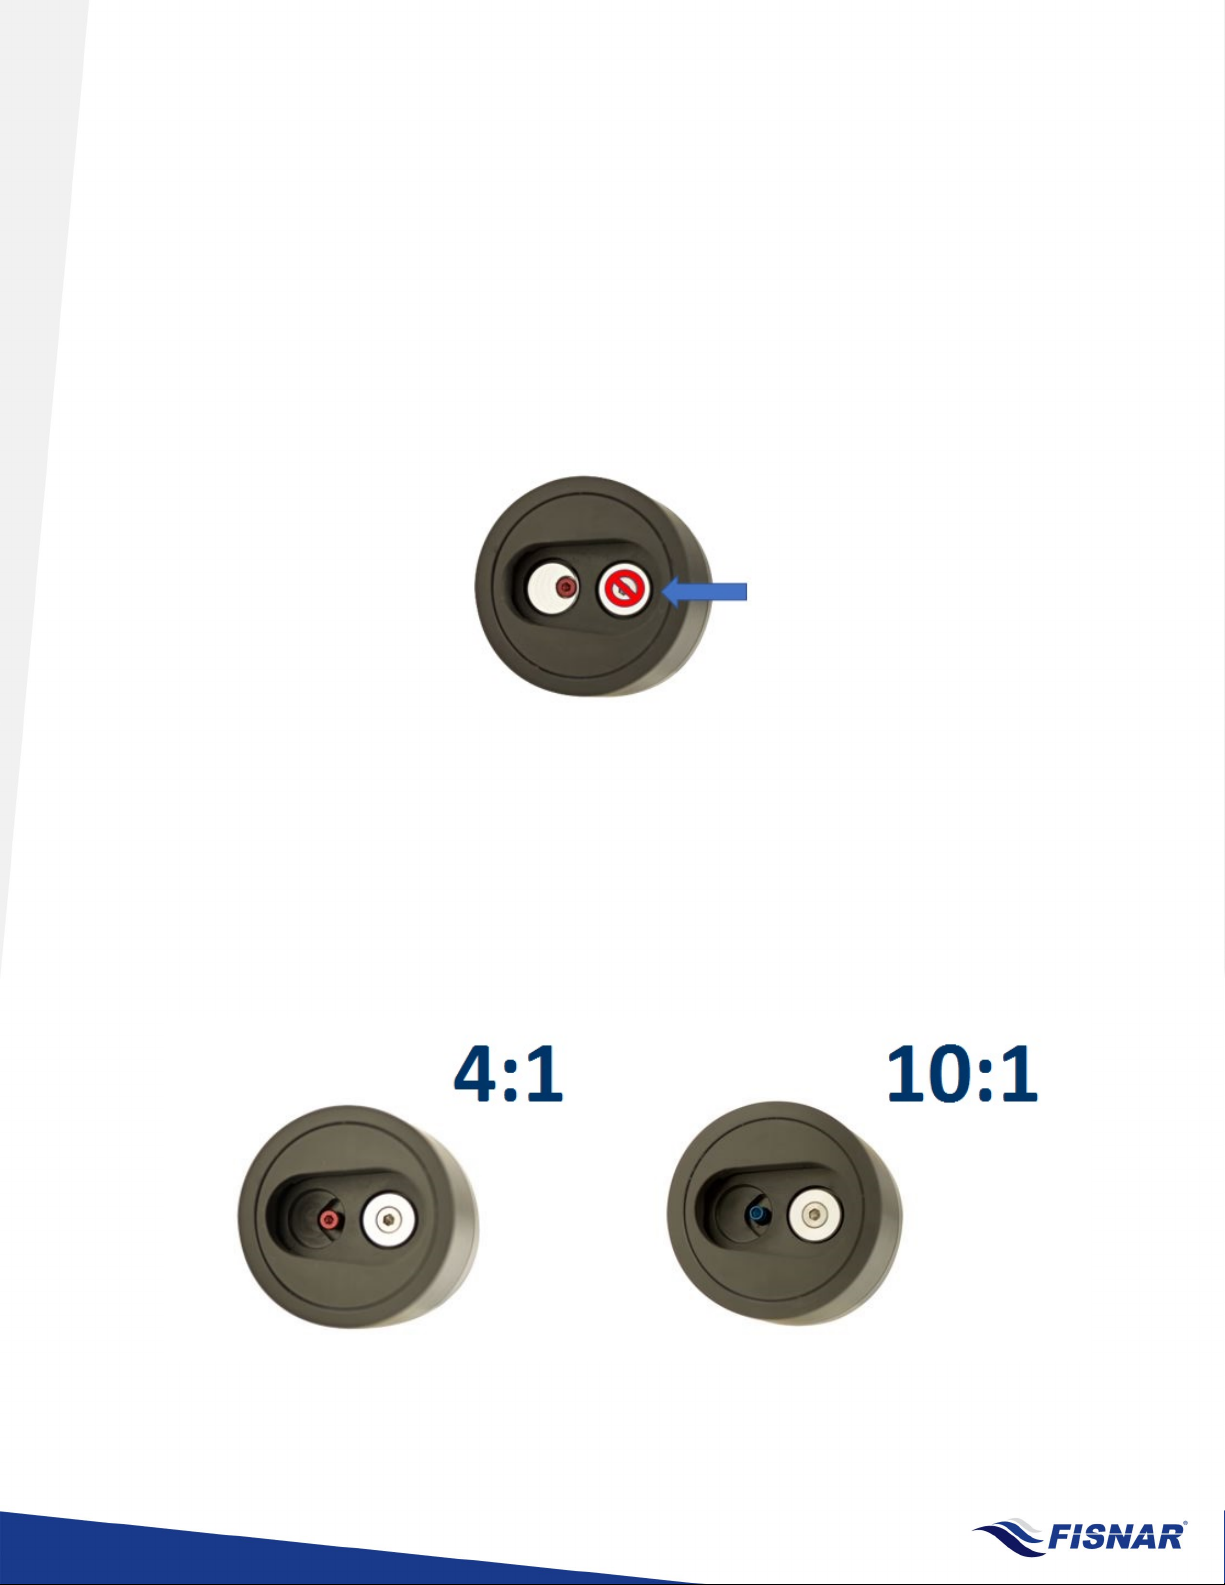
• WARNING- Do not remove or adjust the piston located on the
right side shown below at any time due to risk of breaking the
plunger. It is a stationary piston, adjustment not required.
• To change to a 4:1 ratio re-insert the Red screw on its own.
• To change to a 10:1 ratio insert the Blue screw on its own.
4
Page 5
DTD50 Operating Guide www.fisnar.com Rev B 2019
Installing the Cartridge Step 1
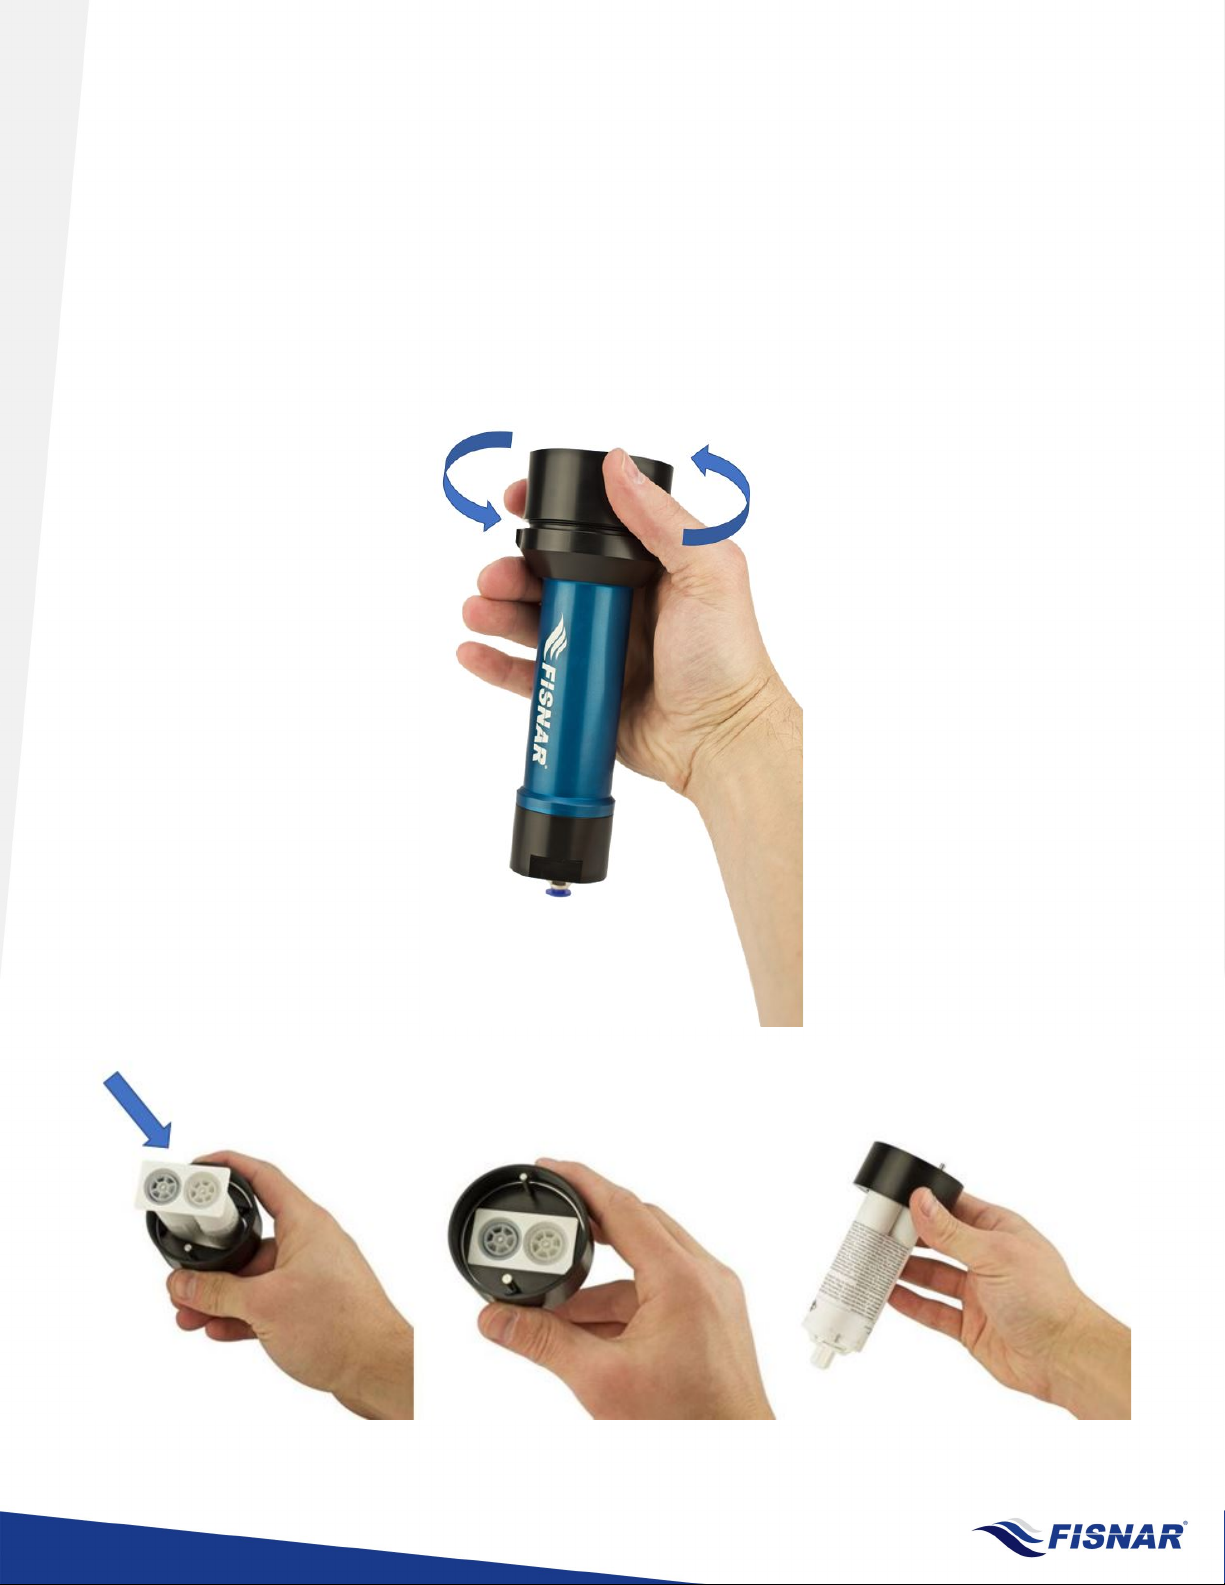
• The DTD50 works with most standard square back 50ml cartridges.
To install the cartridge, unscrew the retainer cap and remove from the
retainer body. Then insert the cartridge nose down in the cap.
5
Page 6
DTD50 Operating Guide www.fisnar.com Rev B 2019
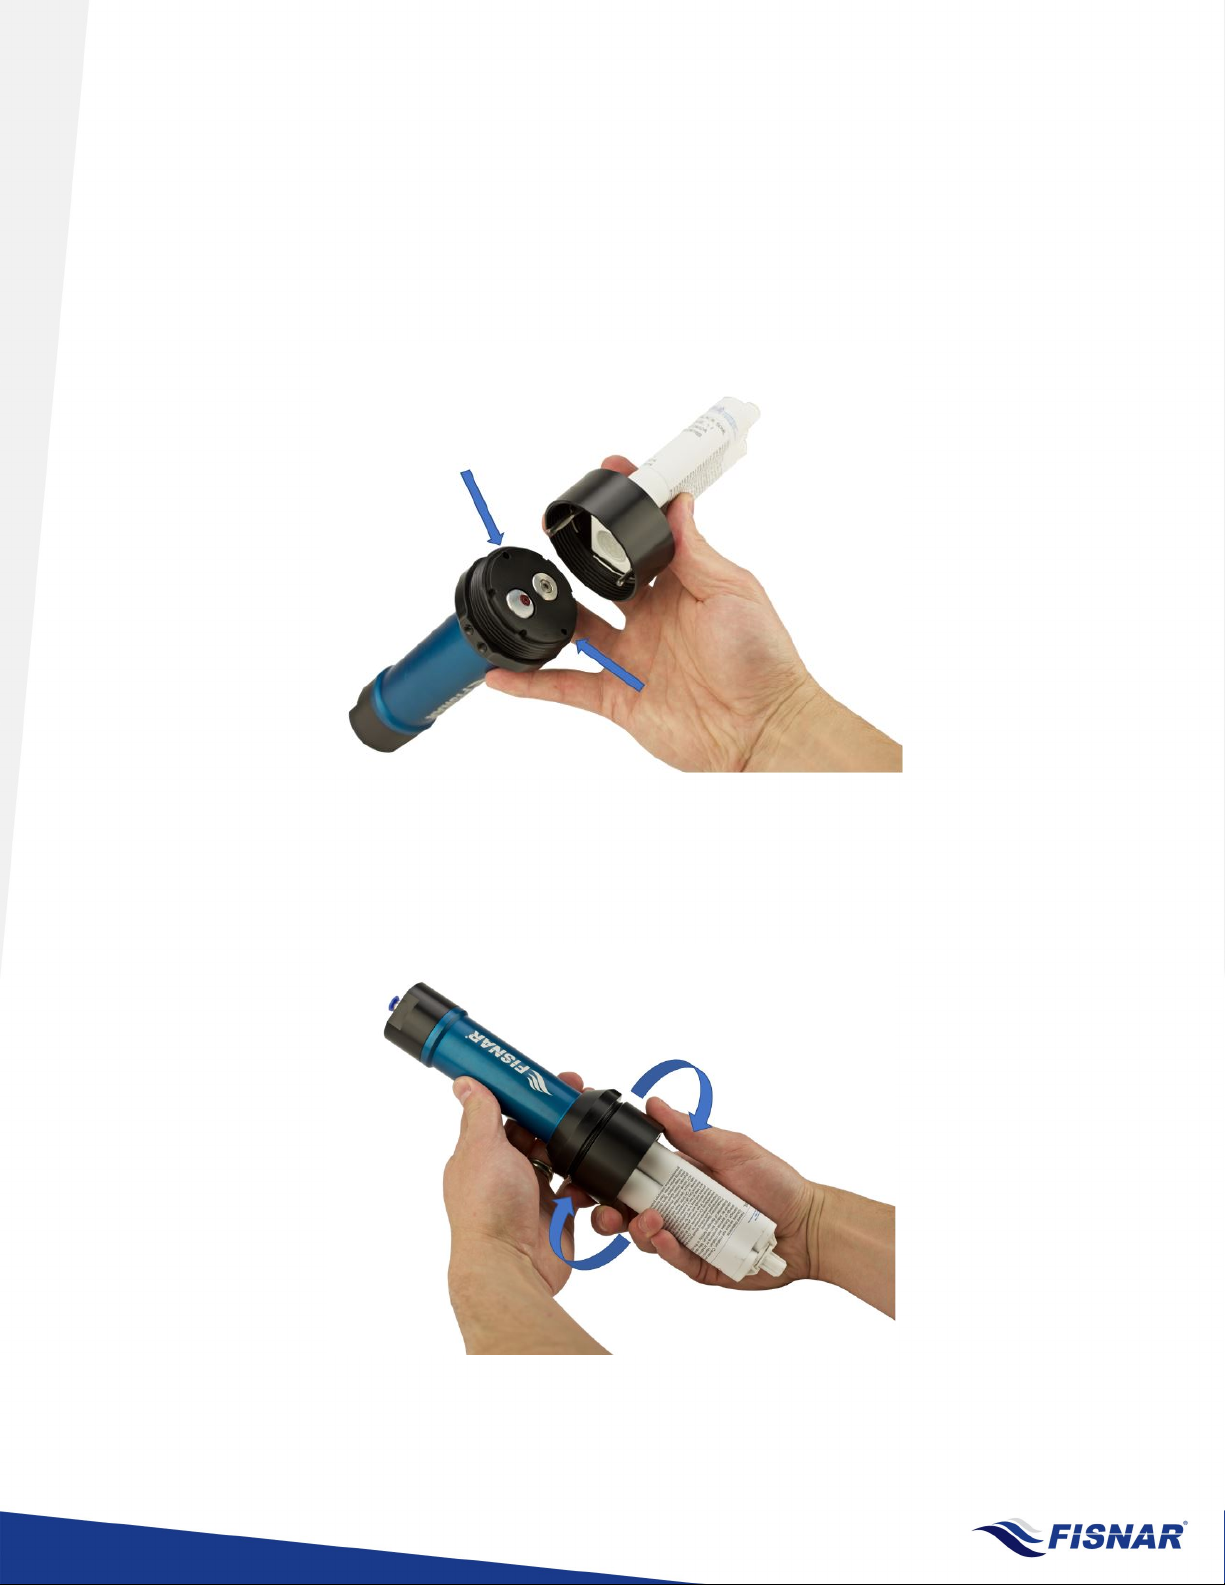
Installing the Cartridge Step 2
• While holding the cartridge tight in the retaining cap, line up the
corresponding locking pins with the cap holes to ensure a proper fit.
• Tighten the cap in place again by screwing it back on. Always make
sure the cartridge is seated properly.
6
Page 7
DTD50 Operating Guide www.fisnar.com Rev B 2019
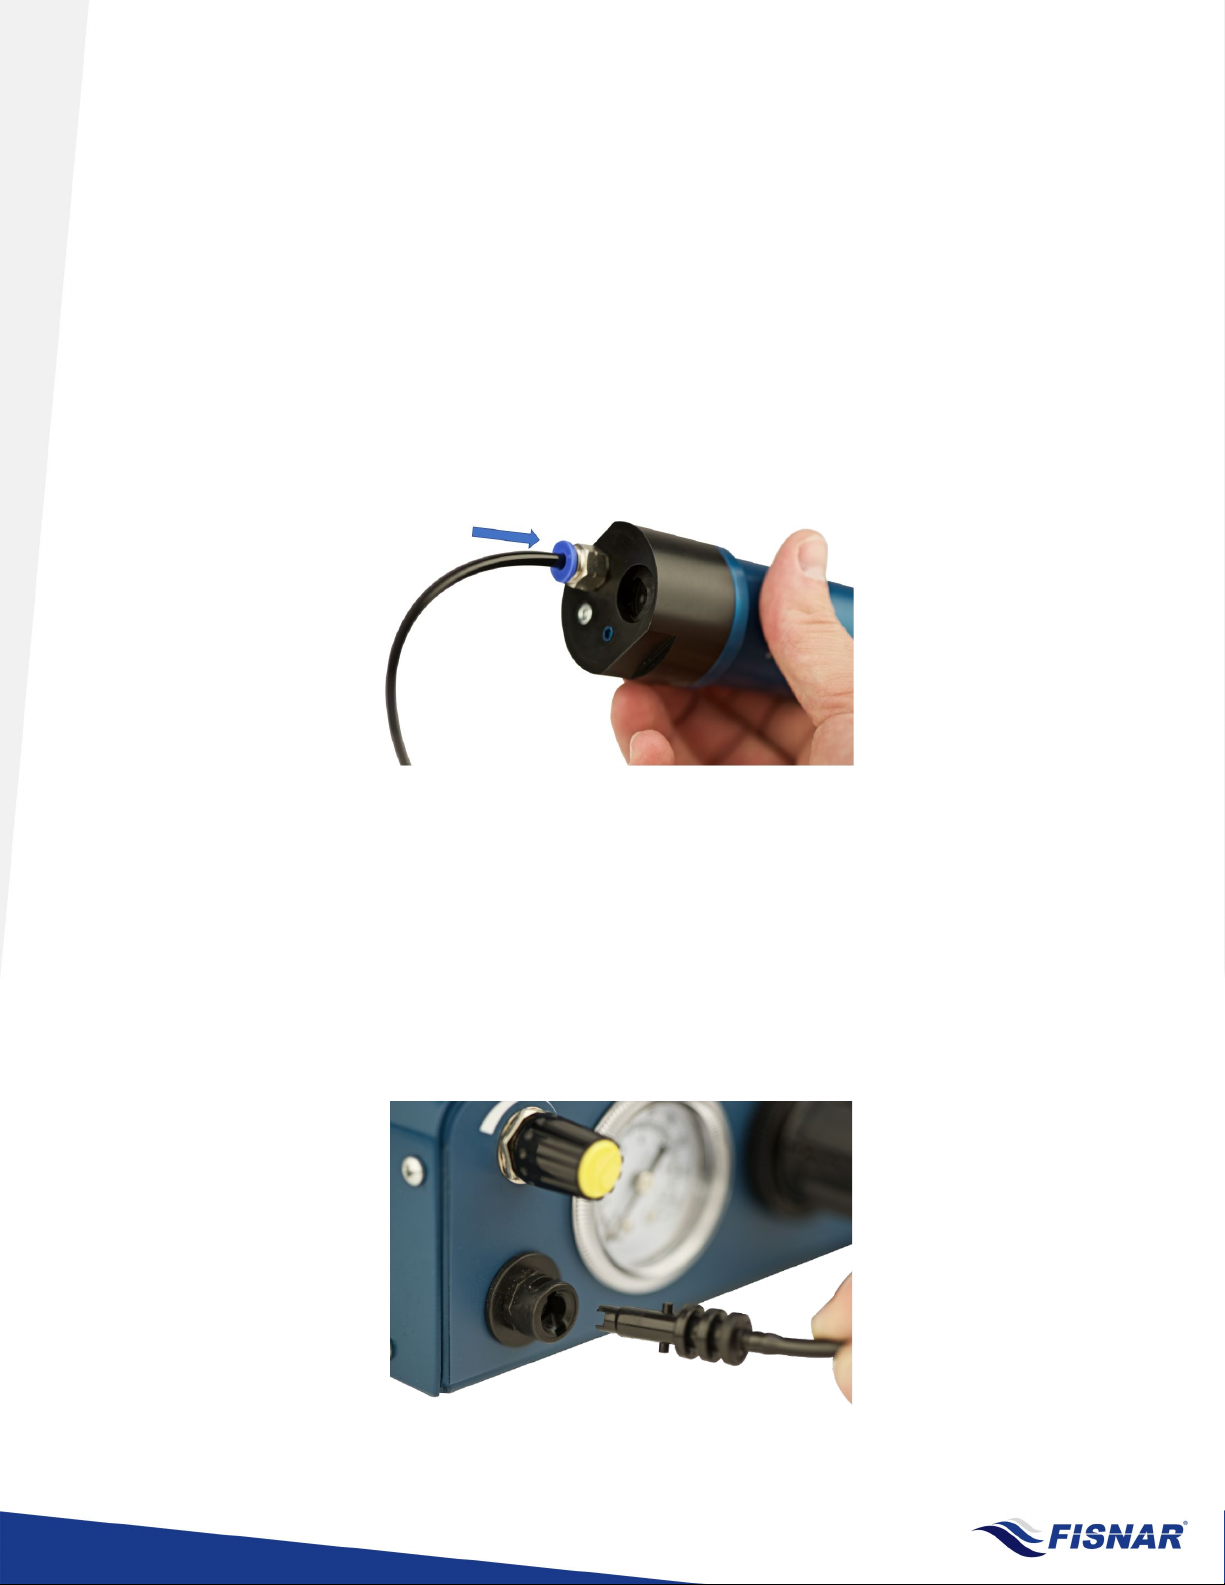
Installing the Air Line into the DTD50 applicator
• Remove the air line that comes supplied with the unit and firmly insert
the pre-cut portion into the push fitting located in the back of the
applicator.
Installing the Air Line into the Controller
• For some controllers the male quick connect fitting simply twists and
locks in place.
7
Page 8
DTD50 Operating Guide www.fisnar.com Rev B 2019
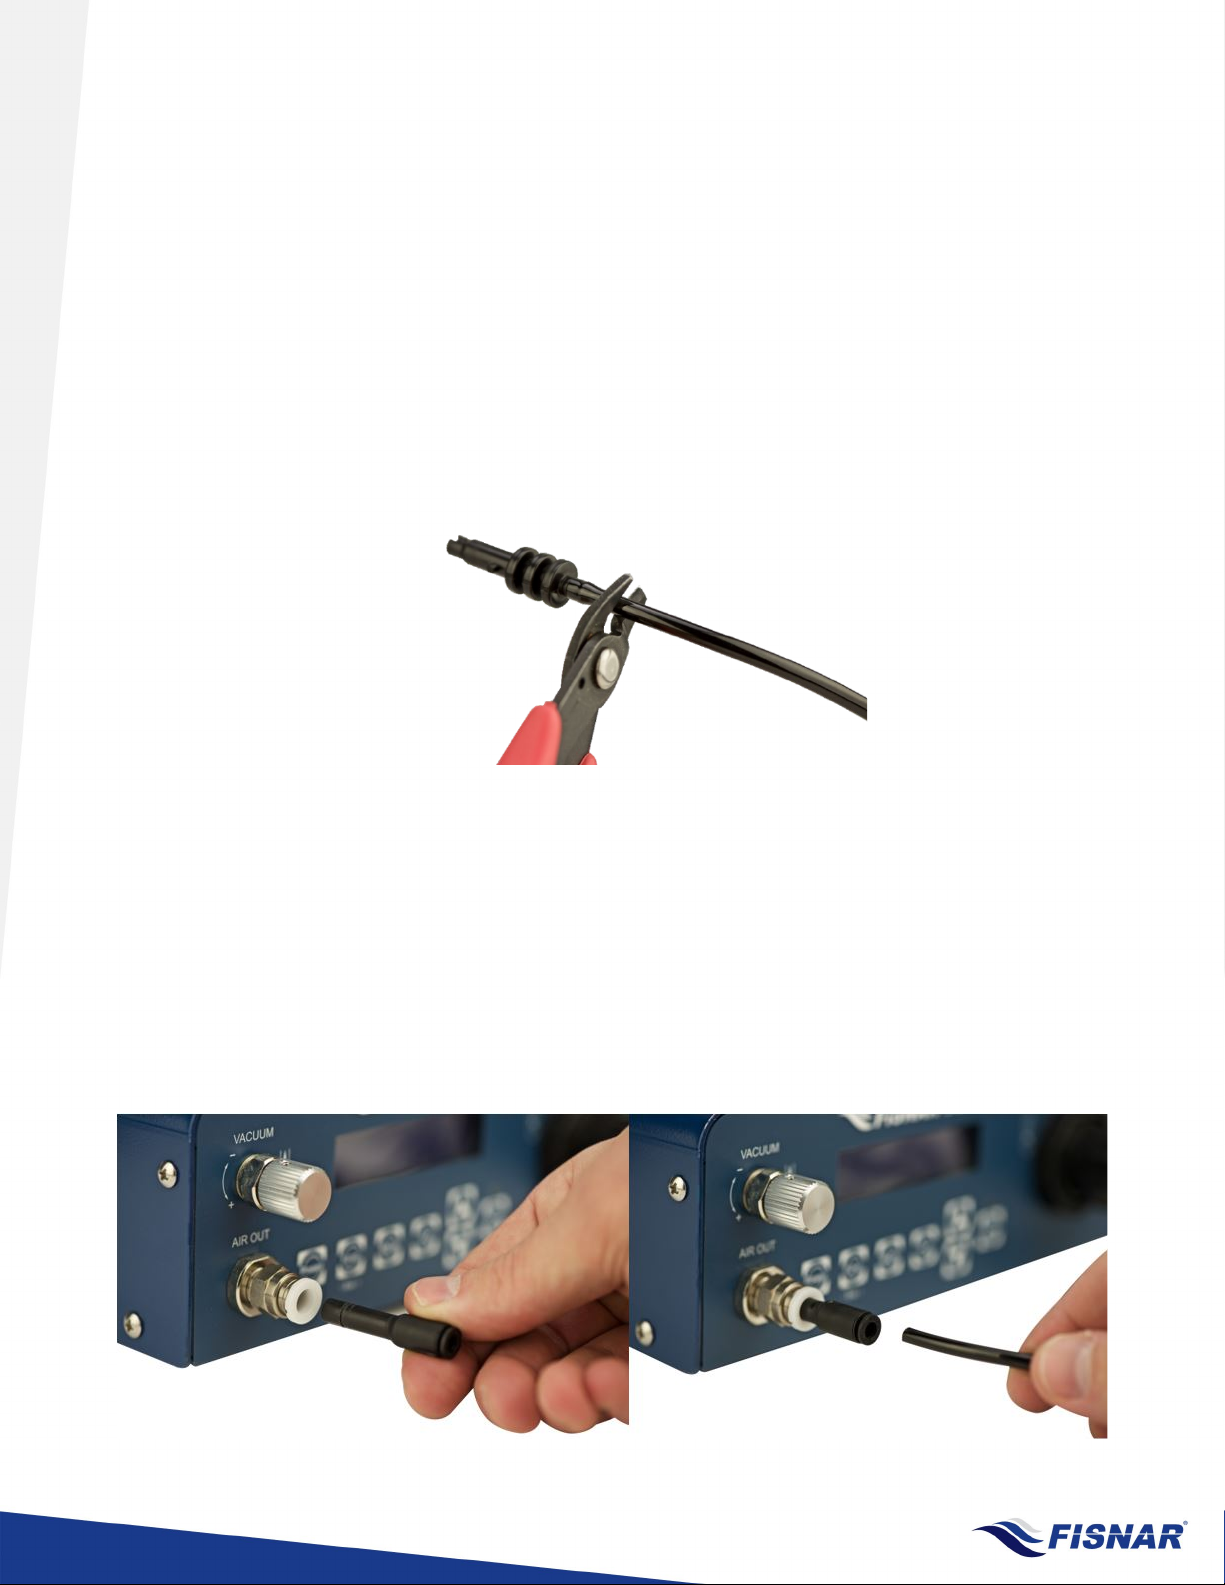
• For DC Style controllers that use a push to connect fitting you will
need to cut the male quick connect adapter off from the supplied airline.
• To install the air line into DC style controllers you will need the black
adapter (Part number 5779K712) shown below that comes supplied
with the unit. Simply install the adapter first, then firmly insert the cut
5/32” (4mm) hose to operate.
8
Page 9
DTD50 Operating Guide www.fisnar.com Rev B 2019
General Operating Instructions
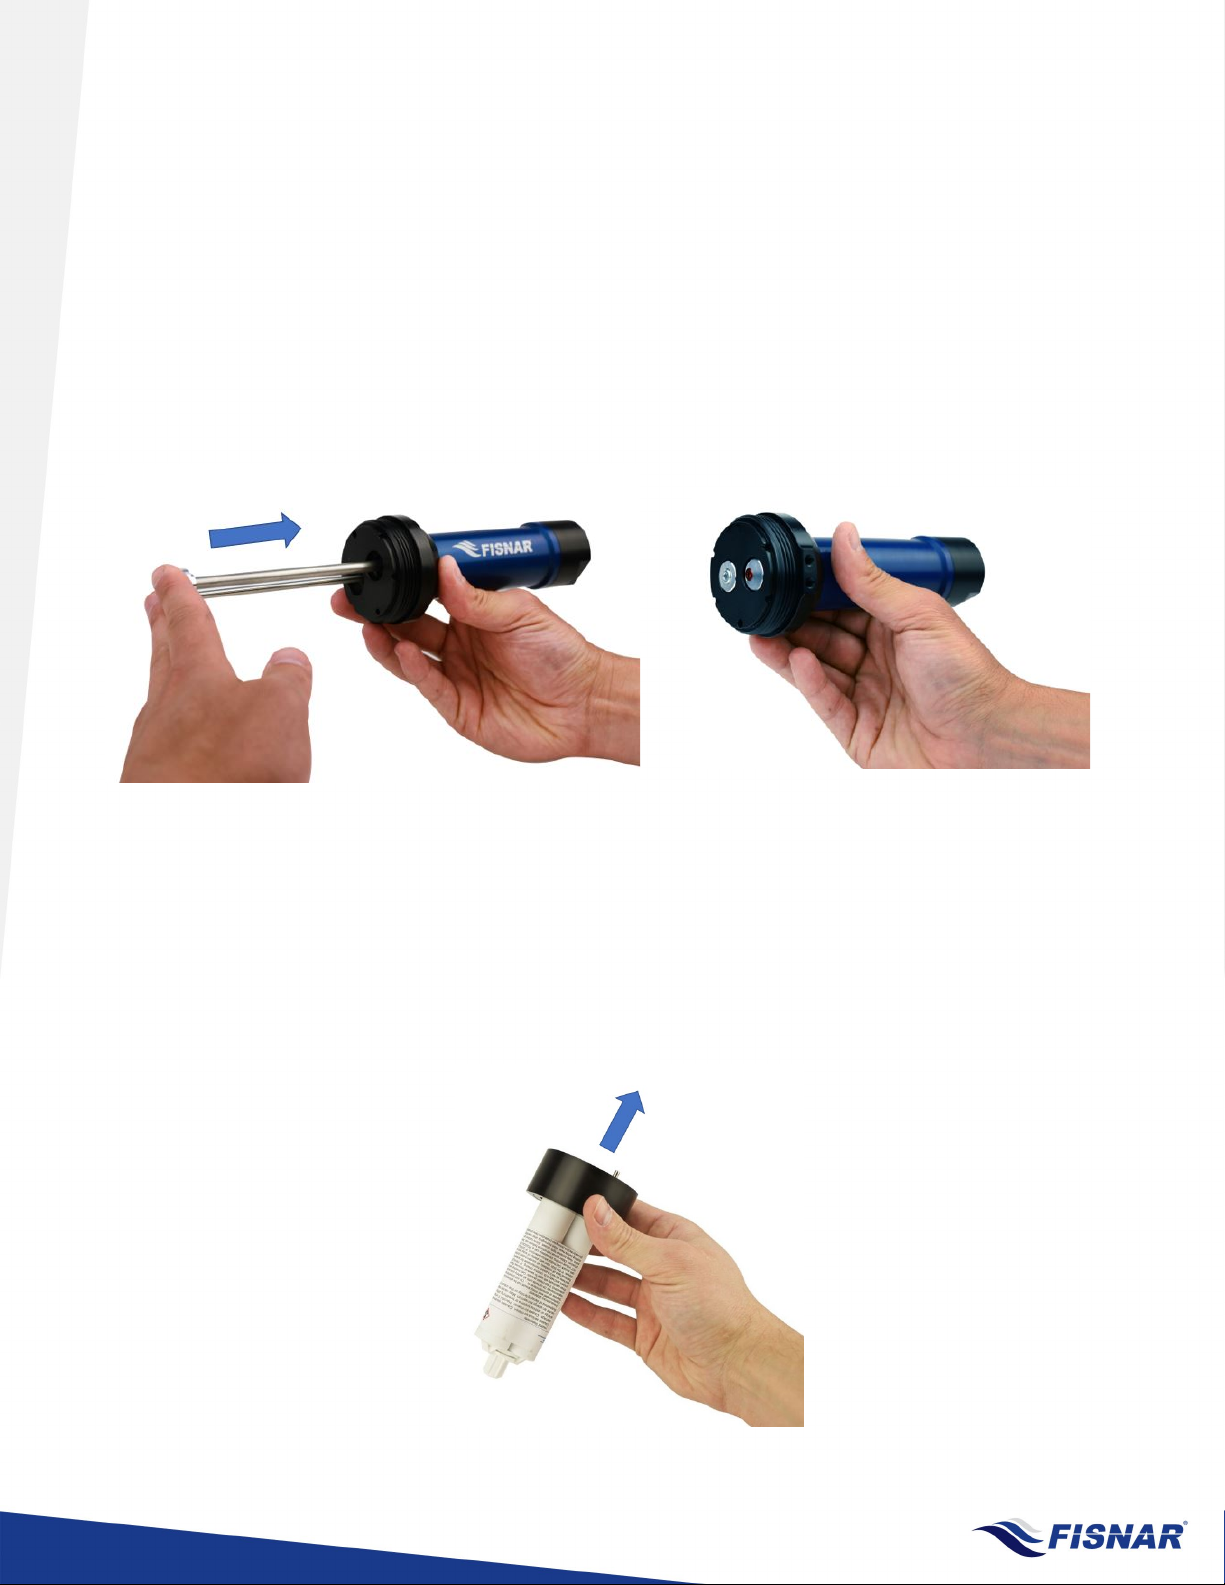
• To retract the pistons after depleting the cartridge remove the cap
and the cartridge from the retaining cap. Manually push the pistons
back into the unit to reset them. You do not need to remove the unit
from the airline prior to retracting the pistons. You will need to do this
prior to inserting a new cartridge to begin dispensing again. For best
safety practices ensure the foot pedal or purge button is not
accidentally actuated during the retract process.
• When not in use remove the cartridge from the retainer cap overnight
or between shifts to prevent any potential adhesive from dripping
back into the piston shaft and cap. While most cartridges should not
leak there is always the potential for residual adhesive that could mix
and cure causing the inability to unscrew the cap.
9
Page 10
DTD50 Operating Guide www.fisnar.com Rev B 2019
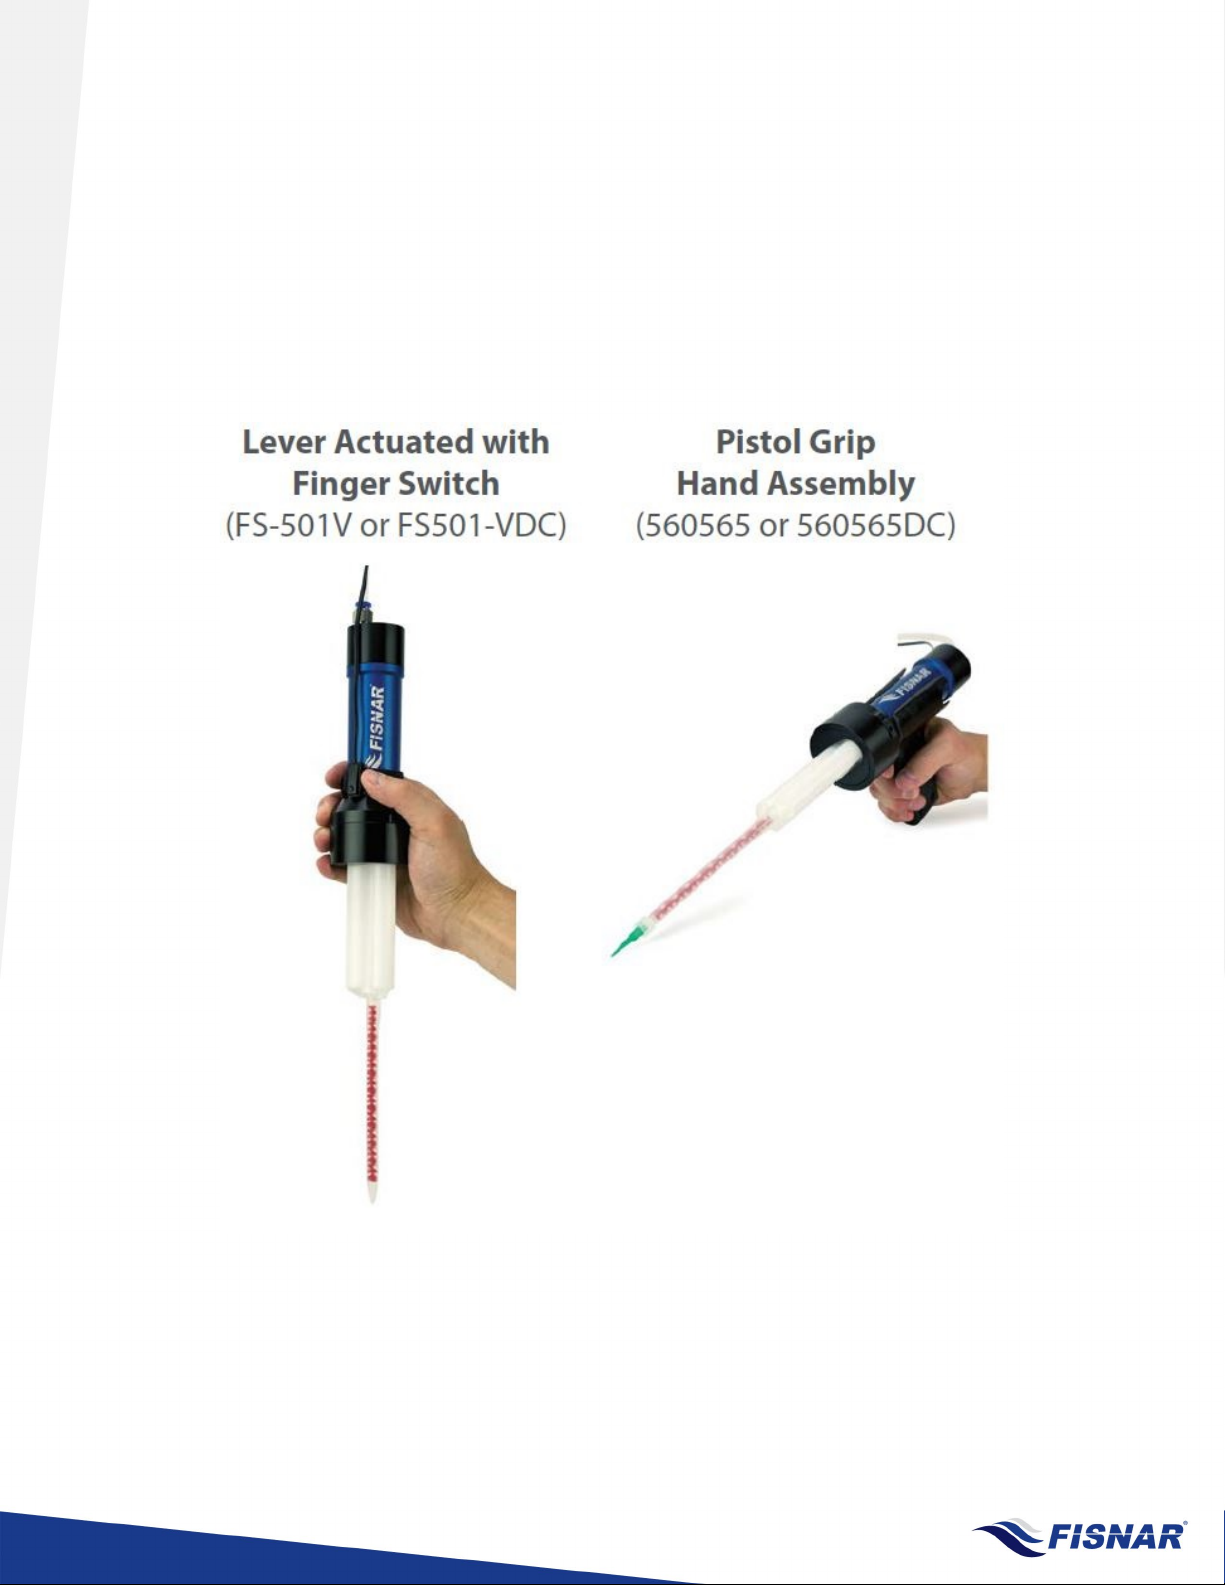
Optional Configurations
(sold separately)
10
Page 11
DTD50 Operating Guide www.fisnar.com Rev B 2019
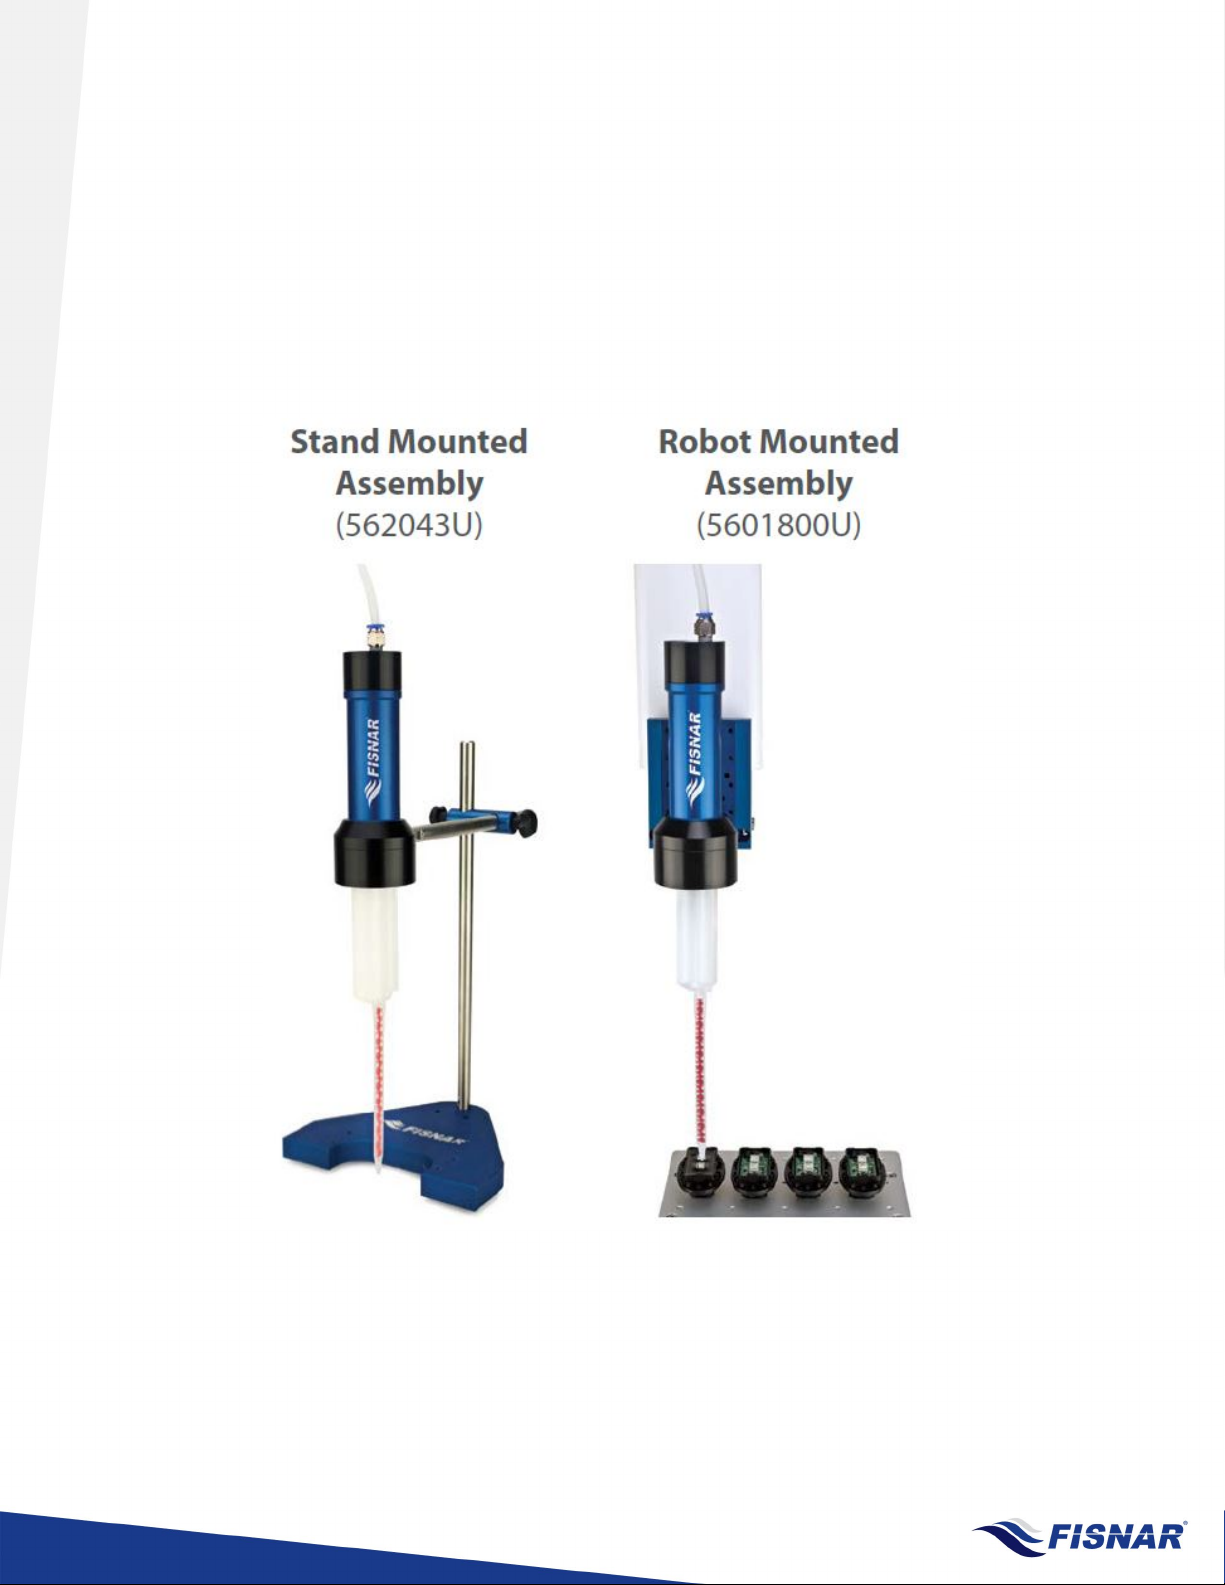
Optional Configurations
(sold separately)
11
Page 12

DTD50 Operating Guide www.fisnar.com Rev B 2019
Contact Details
Asia
[email protected]
852-2389-2827
Europe
[email protected]
+44 (0) 1355 577222
India
[email protected]
+91-11-4556 6223 to 5
USA
[email protected]
262-253-8600
12
Page 13

DTD50 Operating Guide www.fisnar.com Rev B 2019
13
 Loading...