

Page 1
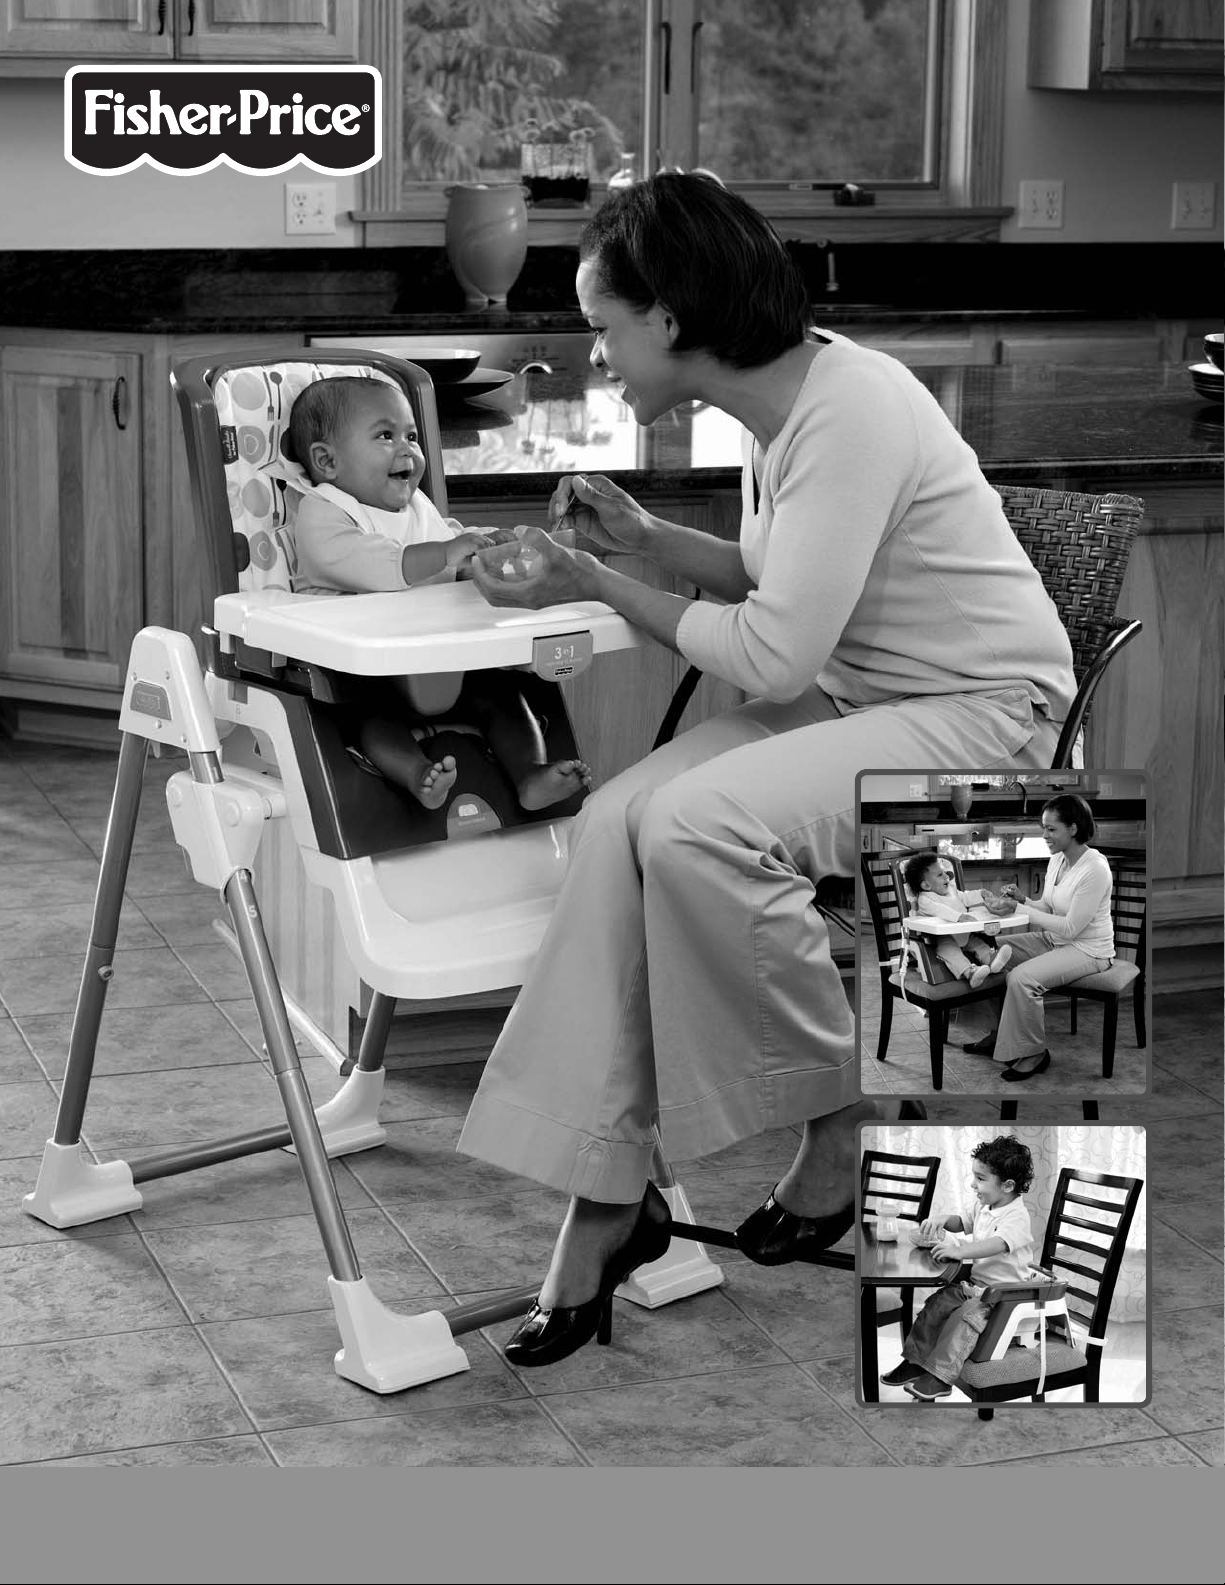
T0250
www.fi sher-price.com
Page 2
Consumer Information
WARNING
Prevent serious injury or death from
falls or sliding out:
• Only use for a child capable of sitting
upright unassisted.
• NEVER leave child unattended.
High Chair Use:
• ALWAYS secure child with restraint
belts adjusted to t your child snugly.
The tray is not designed to hold child
in the product.
When attached to adult chair:
• Use restraint belts until child is able to
get in and out of the product without
help (about 2
1
/2 years old).
IMPORTANT! PLEASE KEEP THESE INSTRUCTIONS
FOR FUTURE REFERENCE.
• Please read these instructions before assembly and use of
this product.
• Adult assembly is required.
• Tool needed for assembly: Phillips screwdriver (not included).
• When using this product on an adult chair:
- Make sure the chair seat is level and larger than the
seat base.
- DO NOT use on a folding chair.
- Check to be sure the floor surface beneath the chair is level.
• Product features and decorations may vary from photographs.
• NEVER use in motor vehicles.
• ALWAYS secure the product on
a chair using bottom and back
attachment straps. NEVER use
on a stool or bench that does not
have a seat back.
To prevent falls:
• NEVER release the seat with child
in product.
• NEVER carry child in the seat.
2
Page 3
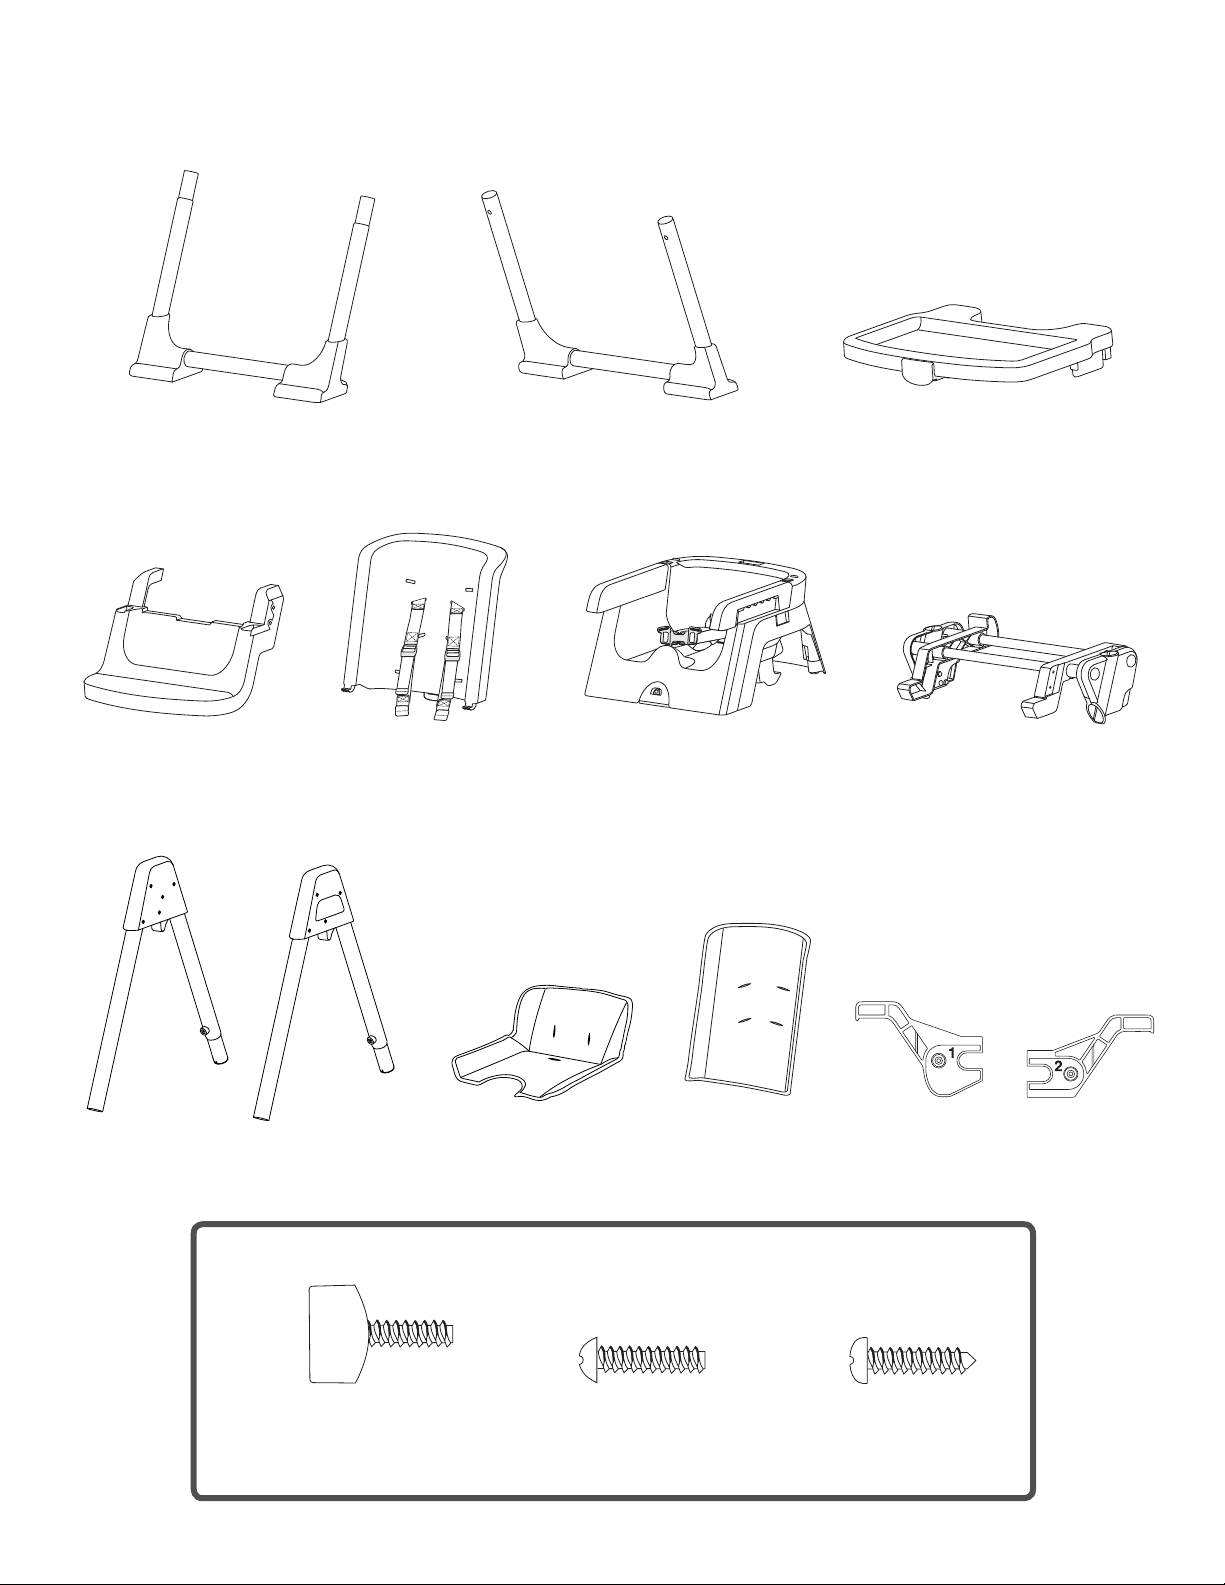
Parts
IMPORTANT! Please remove all parts from the package and identify them before assembly.
Front Base
Hint: Do not remove the plastic inserts
inside the tubes of the front base.
Footrest
Seat Back with Restraint
Rear Base
Seat with Restraint
Tray
Seat Support
2 Frames
Hint: Do not remove the plastic
insert inside the tube in each frame.
#8 x ¾" Screw with Plastic Retainer – 4
Note: Tighten and loosen all screws with a Phillips screwdriver. Do not over-tighten the screws.
Seat Pad
FASTENERS SHOWN ACTUAL SIZE
#8 x ¾" Blunt Screw – 4 #8 x ¾" Pointed Screw – 2
Seat Back Pad
3
2 Brackets (Left and Right)
Page 4
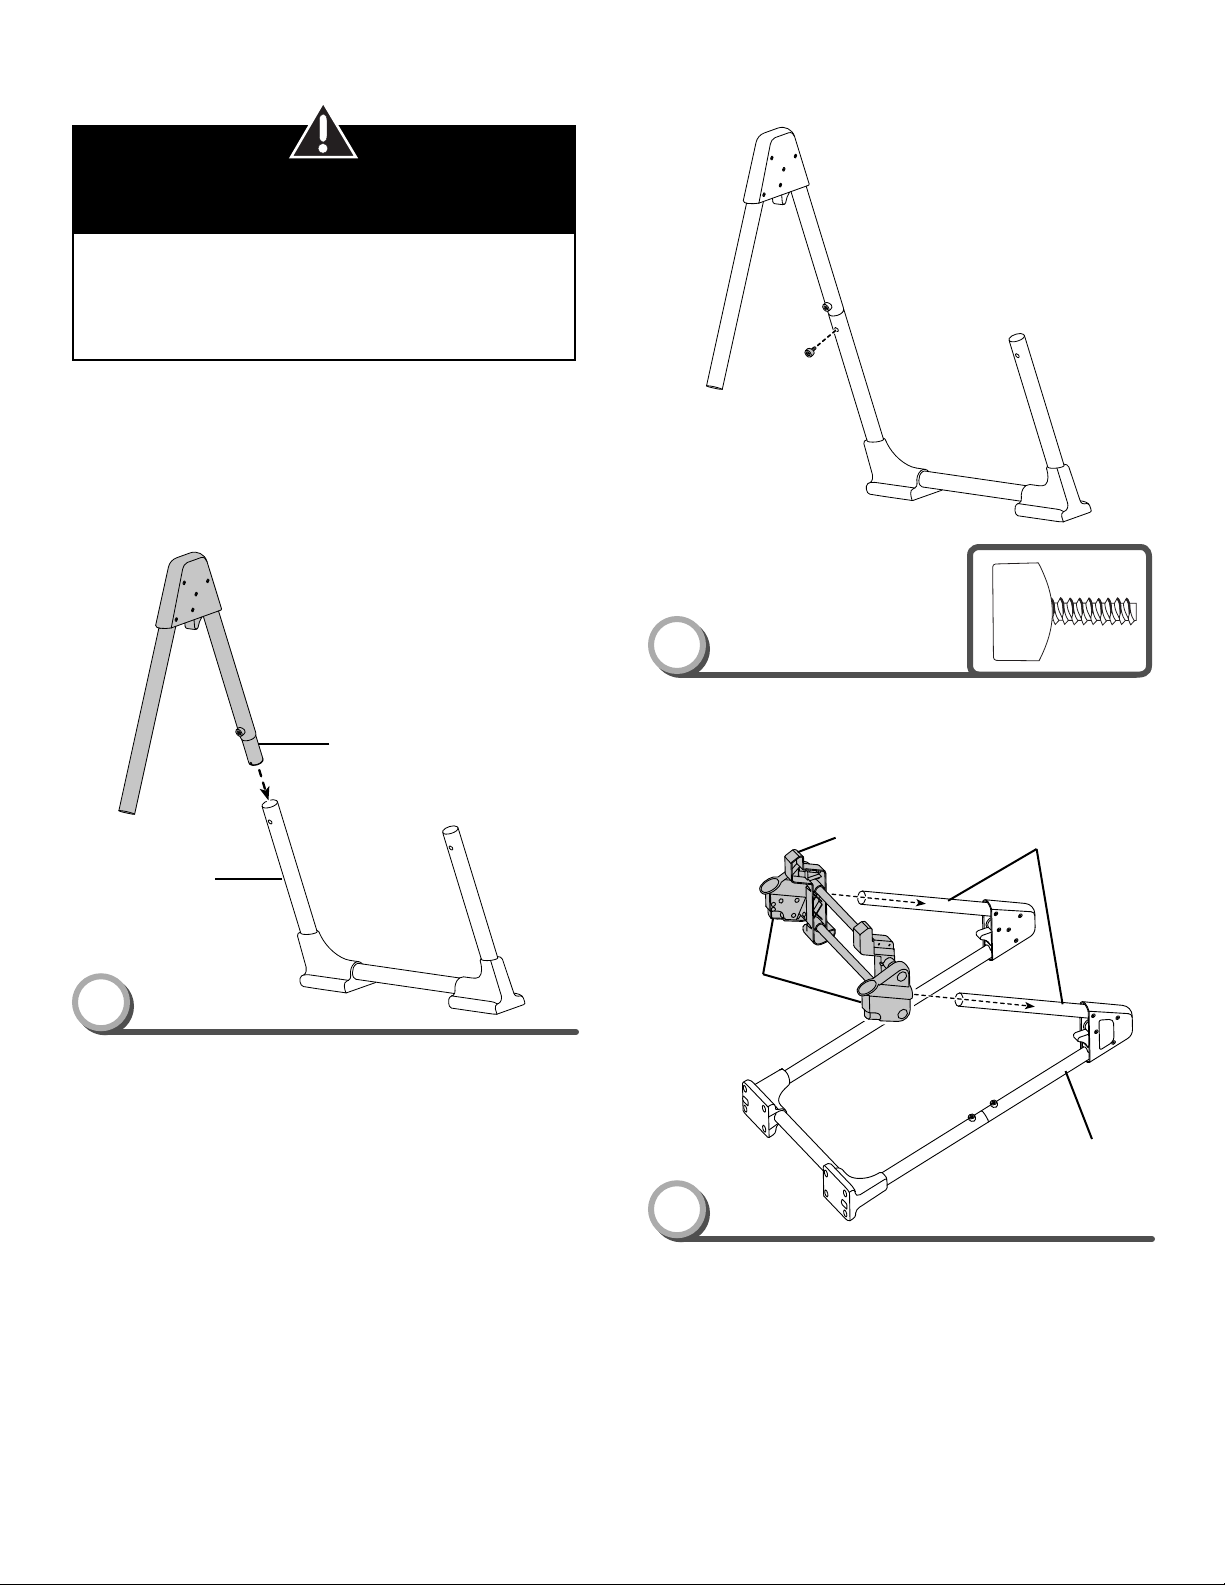
Assembly
CAUTION
This package contains small parts
in its unassembled state.
Adult assembly is required.
IMPORTANT! Before assembly and each use, inspect this
product for damaged hardware, loose joints, missing parts or
sharp edges. DO NOT use if any parts are missing or broken.
Contact Fisher-Price® for replacement parts and instructions if
needed. Never substitute parts.
Tapered Frame Tube
Rear Base
1
With the Fisher-Price® logo facing out, fit the tapered frame tube
into the rear base.
2
• Fit a #8 x ¾" screw with retainer into the rear base and tighten.
• Repeat steps 1 and 2 to assemble the other frame to the
rear base.
Seat Support
Frame Latches
Frame Tubes
Frame Assembly
3
• Lay the frame assembly down with long frame tubes up.
• Position the seat support with the frame latches down.
• Slide the seat support onto the frame tubes.
Hint: Push the seat support all the way to the top of the
assembly. You will hear several "clicks".
4
Page 5
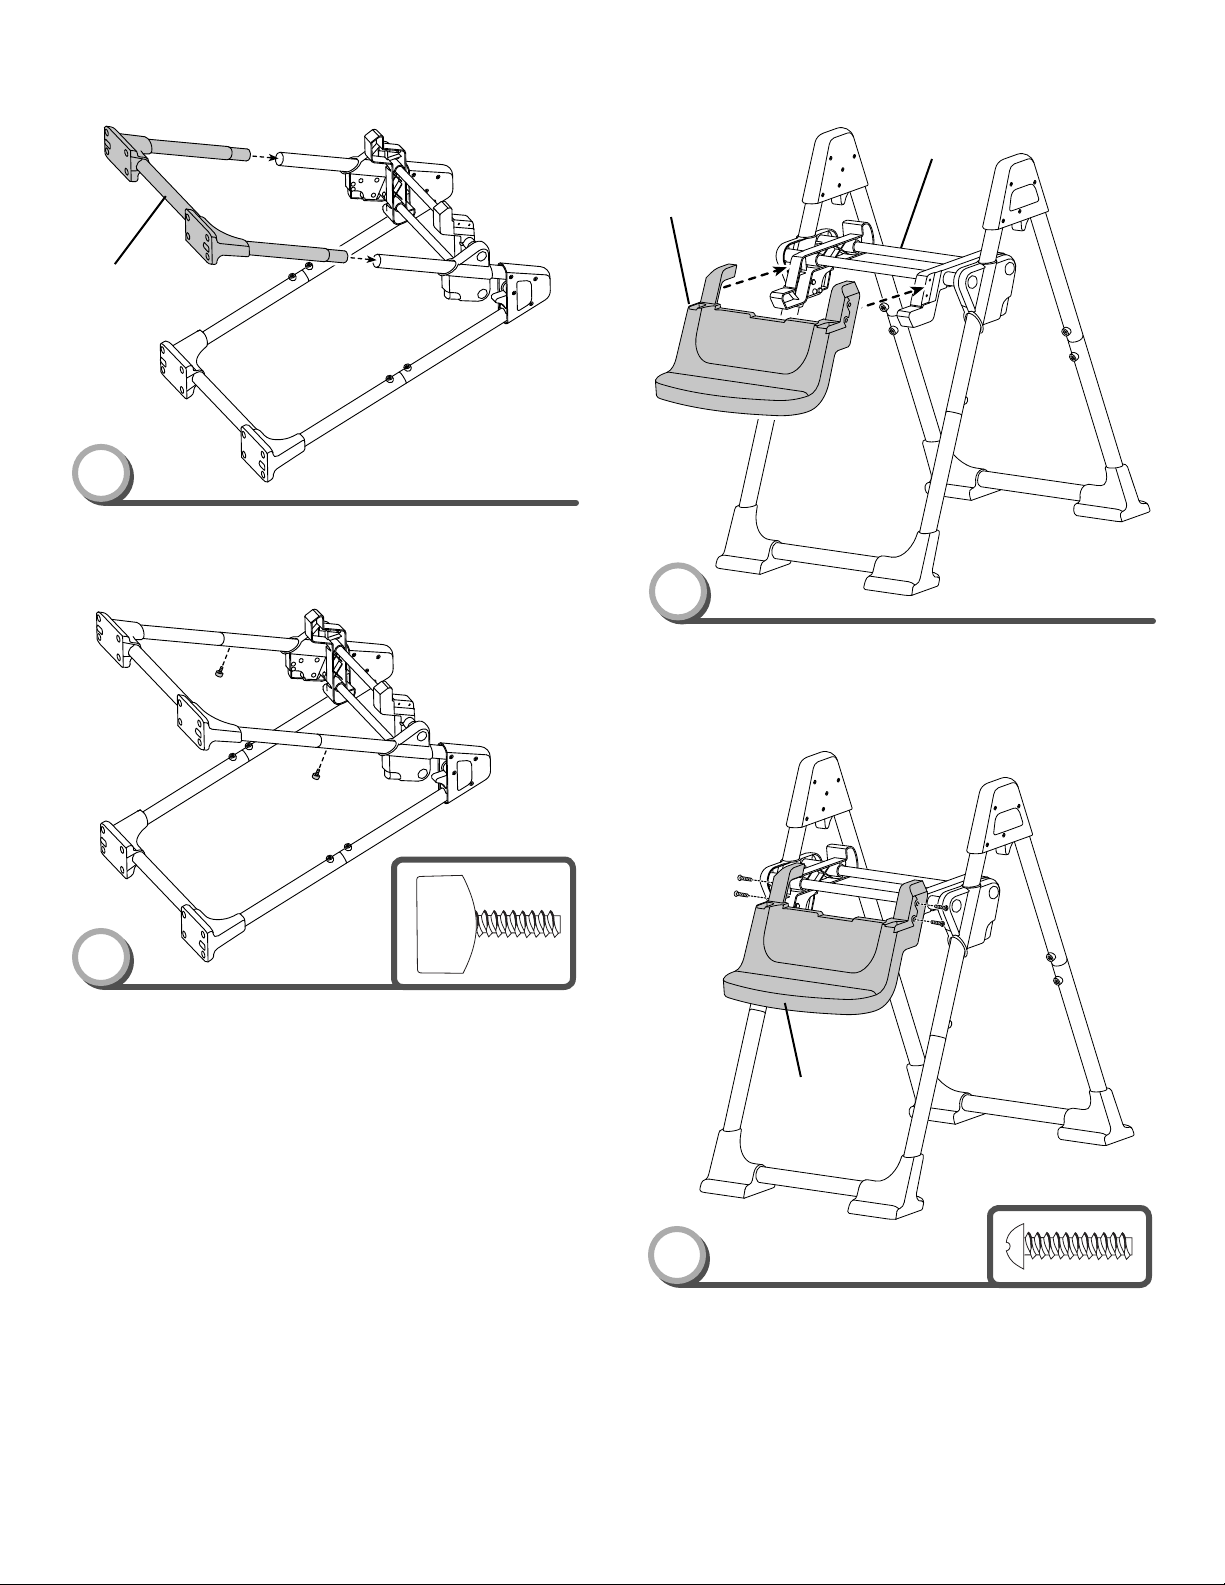
Front Base
4
• Fit the front base into the frame tubes.
Assembly
Seat Support
Footrest
6
5
• Insert two #8 x ¾" screws with retainers into the holes in
each frame tube and tighten.
Hint: If you cannot insert the screws into the frame tubes, you
have assembled the front base backwards. Remove it, turn it
around and re-assemble it to the frame tubes.
• Lift the frame assembly upright.
• Fit the footrest onto the seat support, as shown.
Footrest
7
• Insert two #8 x ¾" blunt end screws into the holes on each
side of the footrest and tighten.
5
Page 6

Assembly
Seat Support
8
• Turn the frame over with the footrest facing away from you.
• First fit the left bracket (labeled 1) onto the seat support tube
closest to you A.
• Then, slide the left bracket completely onto the seat
support B.
Hint: The brackets are designed to fit each side of the seat
support one way. If the bracket does not seem to fit, try the
other one.
Seat Support Tube
B
A
Left Bracket
Seat Support Tube
B
A
10
• First fit the right bracket (labeled 2) onto the seat support
tube closest to you A.
• Then, slide the right bracket completely onto the seat
support B.
Right Bracket
Seat Support
9
• Push to align the slot in the left bracket with the hole in the
seat support.
• Insert a #8 x 3/4" pointed end screw through the left bracket
and into the seat support and tighten.
11
• Push to align the slot in the right bracket with the hole in the
seat support.
• Insert a #8 x 3/4" pointed end screw through the right bracket
and into the seat support and tighten.
• Turn the frame upright.
6
Page 7

Slot
Assembly
Pegs
Tab
Tab
Slot
12
• At an angle, fit the tabs on the seat back into the slots in
the seat.
• Push the seat back to “snap” in place.
• Pull on the seat back to be sure it is secure to the seat bottom.
Seat Pad
Elastic Loops
14
• Pull the ends of the waist belts and crotch belt through the
slots in the seat pad.
• Fit the elastic loops on the seat pad down through the slots in
the seat.
• Turn the seat upside down.
• Pull the elastic loops through the slots in the seat and fit the
elastic loops to the pegs.
13
• Unbuckle the lower restraint.
7
Page 8

Seat Back Pad
15
Assembly
Lower Shoulder Belt Slots
Straps
Seat Back
17
Smaller Baby
• Insert the ends of the shoulder belts through the lower slots
in the pad and seat back.
• Pull the ends of the shoulder belts through the slots in the
seat pad.
• Fit the straps on the back of the seat back pad into the slots
in the seat back pad.
• Press to fasten the straps to secure the seat back pad.
Upper Shoulder Belt Slots
18
Larger Baby
• Insert the ends of the shoulder belts through the upper slots
in the pad and seat back.
16
• To adjust the restraint height for baby, push to remove the
shoulder belts from the seat back.
8
Page 9

Assembly
Securing Your Child
WARNING
Prevent serious injury or death from
falls or sliding out:
• Only use for a child capable of sitting
upright unassisted.
• NEVER leave child unattended.
High Chair Use:
• ALWAYS secure child with restraint
belts adjusted to t your child snugly.
The tray is not designed to hold child
in the product.
19
• Fit the "T" end of each shoulder belt through the slots in the
lower restraint.
Slots
Seat Assembly
Frame Assembly
When attached to adult chair:
• Use restraint belts until child is able to
get in and out of the product without
help (about 2
1
/2 years old).
20
• Place the seat assembly on the frame assembly and push to
lock in place. You should hear a "click".
Note: The seat assembly will only fit on the frame assembly if
the chair attachment strap door is closed. If the seat assembly
does not lock onto the frame assembly, check to make sure the
sliding door under the seat is completely closed.
9
Page 10

Waist/Shoulder
Belt
Crotch Belt
Securing Your Child
Adjuster Adjuster
Waist/Shoulder
Belt
1
• Place your child in the seat. Position the crotch belt between
your child’s legs.
• Fasten both waist/shoulder belts to each side of the crotch
belt. Make sure you hear a "click" on both sides.
• Check to be sure the restraint system is securely attached by
pulling it away from your child. The restraint system should
remain attached.
3
• To tighten the waist belts: Feed the anchored end of the
waist belt up through the buckle to form a loop
free end of the waist belt
• To tighten the shoulder belts: Hold the adjuster and pull the
shoulder belt down
C
TIGHTEN
.
B
.
A
. Pull the
2
• Tighten each waist belt/shoulder belt so that the restraint
system is snug against your child. Please refer to the
next section for instructions to tighten the waist belts/
shoulder belts.
.
LOOSEN
. Enlarge the loop by
A
C
4
• To loosen the waist belts: Feed the free end of the waist belt
up through the buckle to form a loop
pulling on the end of the loop toward the buckle.
• Pull the anchored end of the waist belt to shorten the free end
of the waist belt
• To loosen the shoulder belts: Lift the adjuster
Note: After adjusting the restraint system to fit your child,
make sure you pull on it to be sure it is securely fastened.
B
10
.
Page 11

WARNING
Using the Tray
Prevent serious injury or death from
falls or sliding out:
• ALWAYS secure child with restraint
belts adjusted to t your child snugly.
The tray is not designed to hold child
in the product.
Tray
Armrest
Release Bar
2
• While pushing the release bar on the front of the tray, adjust
the tray forward or backward.
1
• Fit the tray onto the seat armrests. Push down until the tray
"snaps" into place.
Hint: Before use, thoroughly wash all parts (the tray) that may
contact food. The tray is not dishwasher or microwave safe.
Release Bar
3
• While pushing the release bar on the front of the tray, pull the
tray away from the armrests.
11
Page 12

Adjusting the Seat
PRESS
Seat Height Adjuster
To adjust the seat height:
• Press the levers on both seat height adjusters and lift or
lower the seat to any of five different heights.
• Make sure both sides of the seat are adjusted to the
same height.
• Push the seat to be sure the seat is locked in place.
Attaching To An Adult Chair
WARNING
Prevent serious injury or death from
falls or sliding out:
• Only use for a child capable of sitting
upright unassisted.
• NEVER leave child unattended.
• Use restraint belts until child is able to
get in and out of the product without
help (about 2
• NEVER use in motor vehicles.
• ALWAYS secure the product on a
chair using bottom and back attachment straps. NEVER use on a stool
or bench that does not have a
seat back.
To prevent falls:
• NEVER release the seat with child
in product.
1
/2 years old).
• NEVER carry child in the seat.
12
Page 13

Attaching To An Adult Chair
A
Latch
1
• While sliding the switch
pull the latch towards you
A
B
B
Chair
Attachment
Straps
3
• Turn the seat over.
• Slide the door open and pull out the chair attachment straps.
Openings
.
Door
2
• Lift the seat off the base.
4
• Match the buckle on each strap to the matching buckle icon
near each slot in the seat. Feed each strap through the
matching slot on the seat.
Openings
13
Page 14

Attaching To An Adult Chair
5
Remove the Seat Back and
Shoulder Belts
• Turn the seat over and place the seat on a chair.
• Wrap the bottom straps around the bottom of the chair
Buckle the straps
free end of each strap to tighten on the chair
. Make sure you hear a "click". Pull the
B
C
.
6
A
.
1
• Pull the shoulder belts out of the waist restraint buckle slots.
LIFT
Seat Back
PULL TAB
2
• Wrap the back straps around the back of the chair
Buckle the straps
free end of each strap to tighten on the chair
• Pull up on the seat to be sure it is secure to the chair.
. Make sure you hear a "click". Pull the
E
F
D
.
.
• Pull the tab on the seat back. Lift to remove the seat back
from the seat.
• Store the seat back, seat back pad and shoulder belts in a
safe place for future use.
14
Page 15

Attaching the Seat To the Frame
Chair
Attachment
Straps
Storage
1
• Turn the seat over and open the door. Carefully fit the chair
attachment straps into the compartment.
Door
2
IMPORTANT! Close the door completely. If you do not close
the door, the seat will not fit on the high chair base.
• Pull the frame release latches forward and push the rear legs
toward the front legs.
Care
• The tray, pads, seat, seat attachment straps and restraint
belts may be wiped clean using a mild cleaning solution and
damp cloth. Do not use bleach. Do not use harsh or abrasive
cleansers. Rinse clean with water to remove residue.
To remove the pad:
• Push to remove the shoulder belts, waist belts and crotch
belt from the seat and pads.
• Unfasten the straps and loops on the seat back and
seat bottom.
• Remove the pads from the seat.
• To replace the pad and restraint straps, refer to the assembly
instructions in this manual.
IMPORTANT! Be sure to replace the restraint system. Never
use this product without the restraint system when used as a
high chair or when attached to an adult chair (until your child
can get in and out of the product without help).
3
• Fit the seat onto the high chair frame. Push to "snap" into
place. Pull up on the seat to be sure it is secure to the high
chair frame.
15
Page 16

CANADA
Mattel Canada Inc., 6155 Freemont Blvd.,Mississauga, Ontario L5R 3W2.
Fisher-Price, Inc., a subsidiary of Mattel, Inc., East Aurora, New York 14052, U.S.A.
©2010 Mattel, Inc. All Rights Reserved. ® and ™ designate U.S. trademarks of Mattel, Inc.
PRINTED IN MEXICO T0250pr-0920
 Loading...