

Page 1
R2157
Bins sold separately and subject to availability.
1
www.fisher-price.com
Page 2
Assembled PartsImportant Information
WARNING
CHOKING HAZARD - Small Parts
Not suitable for children under 3 years.
• Please keep this instruction sheet for future reference, as it
contains important information.
• Adult assembly is required.
• Tool required for assembly: Phillips screwdriver (not included).
• Only use the washable markers that came with this toy. Do not
use permanent markers on the easel.
• To remove markings from skin, use soap and water.
• Replace the cap on the markers after each use.
• Marker and crayon may stain fabrics and other surfaces. Avoid
contact with carpet, clothing, walls and furniture.
• Adult supervision is recommended.
CAUTION
This package contains small parts
in its unassembled state.
For adult assembly only.
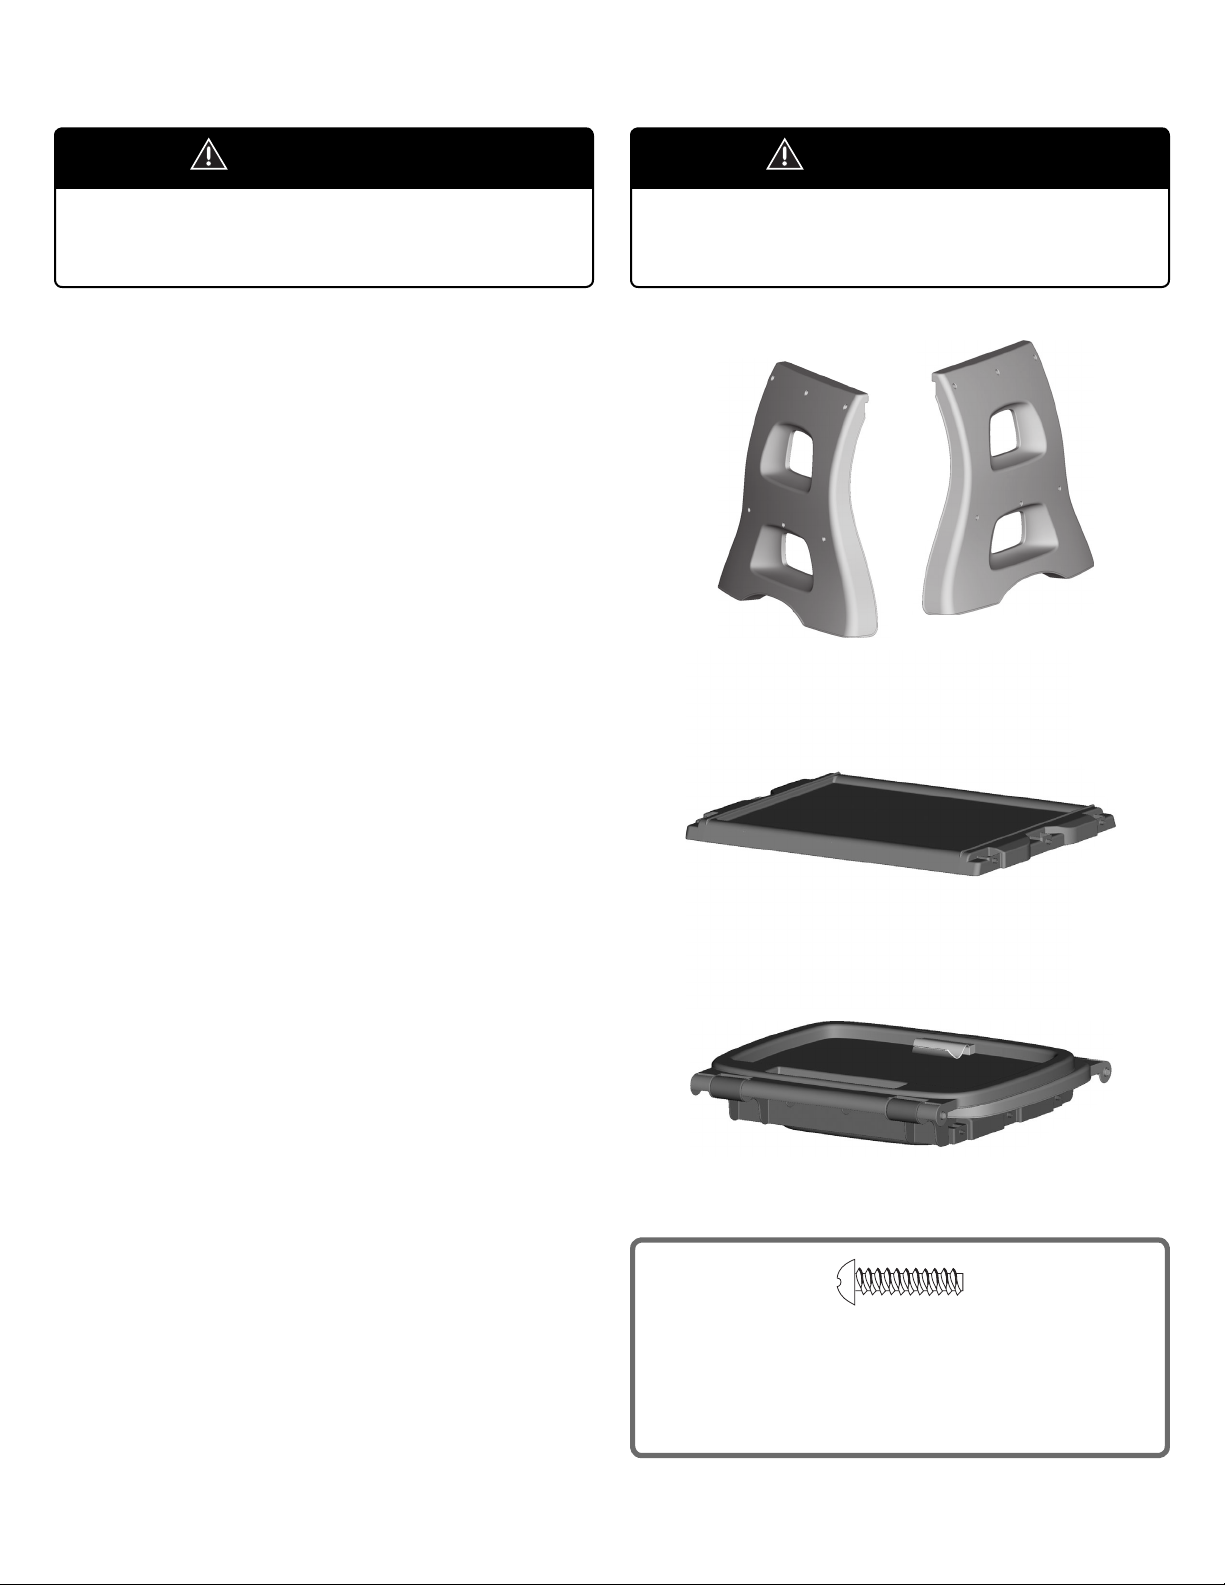
2 Legs
Shelf
Easel
#8 x 3/4" Screw – 12
Shown Actual Size
Tighten and loosen all screws with a Phillips screwdriver.
Do not over-tighten.
Fisher Price, Inc., a subsidiary of Mattel, Inc., East Aurora, NY 14052 U.S.A. R2157pr-0920
©2009 Mattel, Inc. All Rights Reserved. ® and ™ designate U.S. trademarks of Mattel, Inc. PRINTED IN MEXICO
2
Page 3

Assembly
Leg
Shelf
1
• Fit the end of the shelf into the lower groove in a leg as shown.
3 Screws
4
• Insert three screws into the holes in the leg and tighten.
2
• Insert three screws into the holes in the leg and tighten.
Easel
Paper Clip
3 Screws
3
5
• Position the remaining leg onto the opposite end of the assembly.
• Fit the easel and the shelf into the grooves in the leg.
6 Screws
Leg
6
• Position the easel with the paper clip facing up. Fit the edge of the
easel into the upper groove in the leg assembly, as shown.
• Insert six screws into the holes in the leg and tighten.
3
Page 4

Easy Conversion
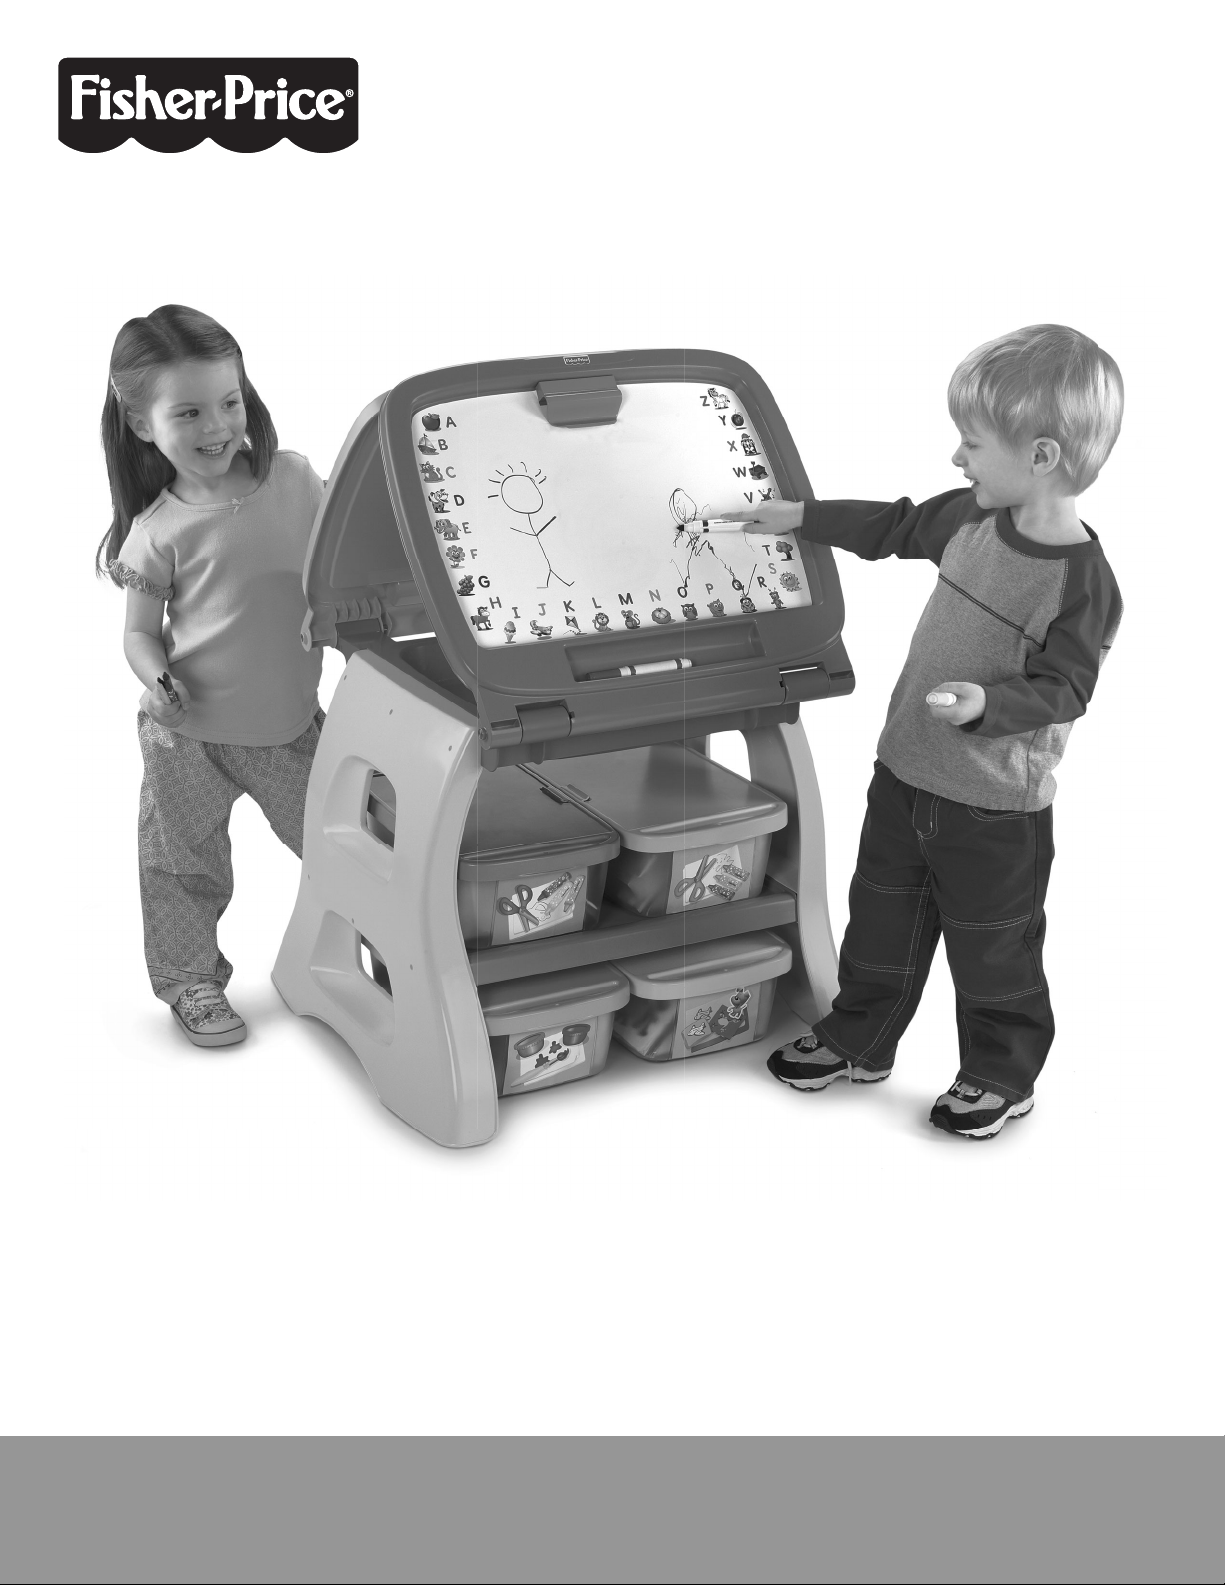
Use the activity center as an easel or as a project table!
1
• First, lift the top panel.
Art Easel
Project Table
1
• First, pull apart the panels, as shown.
2
• Next, lift the bottom panel.
3
• Then, snap the both panels together, as shown.
2
• Next, lower one of the panels.
3
• Then, lower the other panel, as shown.
4
Page 5

Customizable Activity Center
Paper Clip
Drawing Board
• Use the clip to hold up to 12 sheets of paper while you draw!
• Write on the drawing board with the included markers.
• You can purchase fun themed bins separately for more exciting art
projects. Bins sold separately and subject to availability.
5
Page 6

Storage Area
Storage
Consumer Information
Bin Storage
• Keep your art supplies organized in the large storage area under
the easel panels.
• Store the bins (sold separately and subject to availability) on and
under the shelf!
Care
• Wipe this product with a clean cloth dampened with a mild soap
and water solution. Drawing board can be wiped clean with water.
6
 Loading...