

Page 1
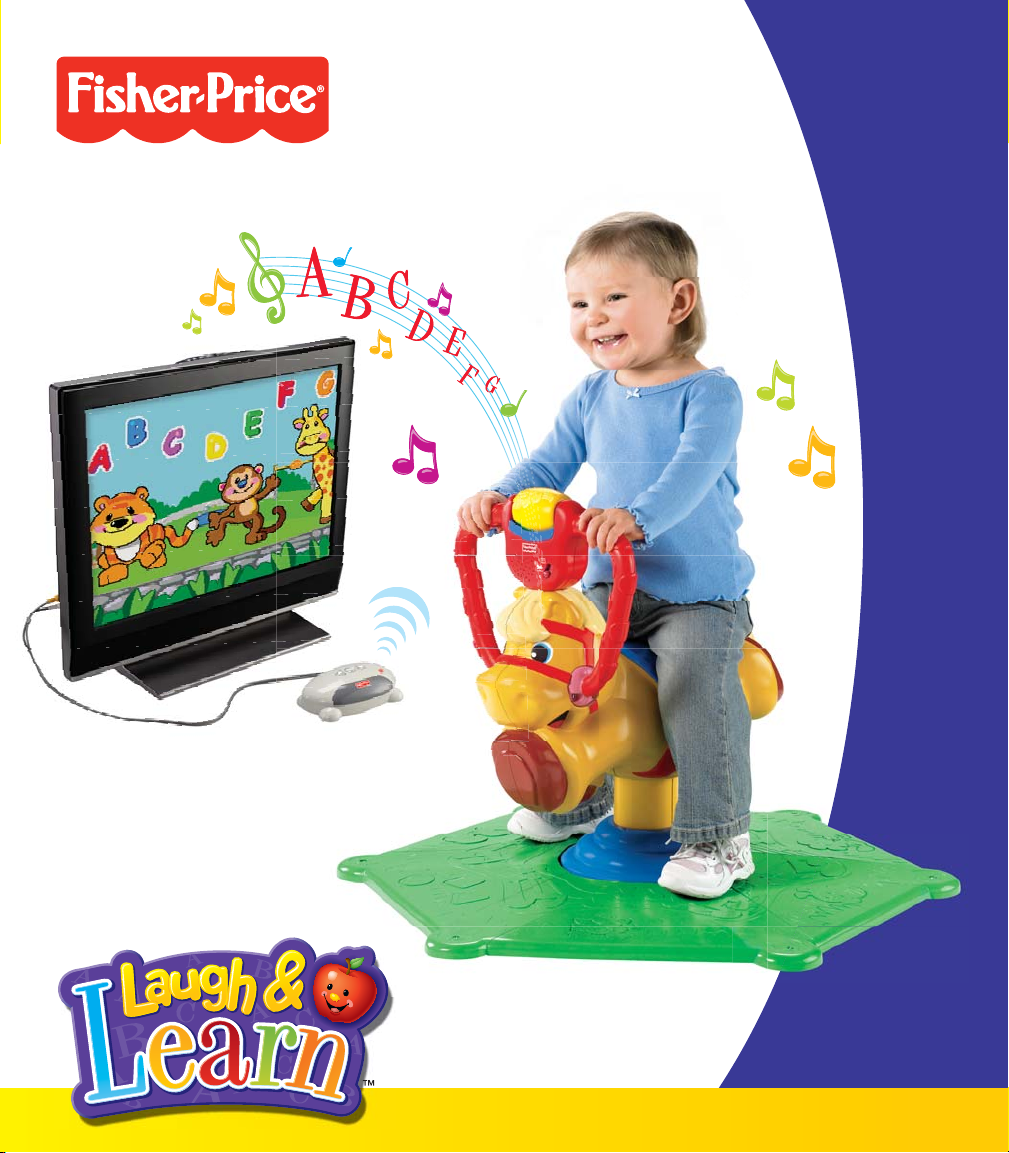
Smart Bounce &
N0446
Spin Pony
™
TV is not included.
www.fisher-price.com
Page 2

Consumer Information
Safety Tips
• Always sit on the seat.
• Only one (1) rider at a time.
• The receiver is not a toy. Adult set-up is required for TV
connect mode.
Notes
• Please keep this owner's manual for future reference, as
it contains important information.
• Requires three “AAA” (LR03) and three “C” (LR14) alkaline
batteries for operation. Batteries are not included.
• For children ages 12-36 months who are able to get on
and off the pony unassisted.
• Weight limit: 44 lbs (20 kg).
• This product is intended for use indoors on
carpeted surfaces.
• Bright sunlight or incandescent light may affect the
range between the pony and the receiver. Try dimming
the light in the room.
• Adult assembly is required. Tool required for assembly:
Phillips screwdriver (not included).
Care
• Wipe with a clean cloth dampened with a mild soap
and water solution. Do not use bleach.
Do not use harsh or abrasive cleaners. Do not immerse.
• This product has no consumer serviceable parts. Do not
take this product apart.
• Periodically check this product for wear and damage
and replace any cracked part.
ICES-003
• This Class B digital apparatus complies with Canadian
ICES-003.
• Operation is subject to the following two conditions:
(1) this device may not cause harmful interference and
(2) this device must accept any interference received,
including interference that may cause
undesired operation.
FCC Statement (United States Only)
This equipment has been tested and found to comply with
the limits for a Class B digital device, pursuant to Part 15
of the FCC Rules. These limits are designed to provide reasonable protection against harmful interference in a residential installation. This equipment generates, uses and
can radiate radio frequency energy and, if not installed
and used in accordance with the instructions, may cause
harmful interference to radio communications. However,
there is no guarantee that interference will not occur in
a particular installation. If this equipment does cause
harmful interference to radio or television reception, which
can be determined by turning the equipment off and on,
the user is encouraged to try to correct the interference by
one or more of the following measures:
• Reorient or relocate the receiving antenna.
• Increase the separation between the equipment
and receiver.
• Connect the equipment into an outlet on a
circuit different from that to which the receiver
is connected.
• Consult the dealer or an experienced radio/TV
technician for help.
Note: Changes or modifi cations not expressly
approved by the manufacturer responsible for compliance
could void the user’s authority to operate the equipment.
This device complies with Part 15 of the FCC Rules. Operation is subject to the following two conditions: (1) This
device may not cause harmful interference and (2) this
device must accept any interference received, including
interference that may cause undesired operation.
2
Page 3
3 Grow-with-Me Levels!
Give learning a whole new spin and bounce! Set up the wireless TV connection and let baby control
on-screen activities, with images responding to baby’s movements. Exciting animation, music, sounds,
friendly characters, tons of sing-along songs, and a long trail of exciting things to learn.
12M+ Level 1 - Action/Reaction
With every bounce or spin of the roller, baby makes something happen! Hear songs, learn about animals
and their sounds, fi rst words, greetings and more.
18M+ Level 2 - Learn & Play
As baby grows, so does the learning! Discover letters, numbers, shapes and colors in a fun and
engaging way.
24M+ Level 3 - Active Learning
Lots of games, lots of active learning! For example, make the pony “jump fences” as you count along and
collect rewards.
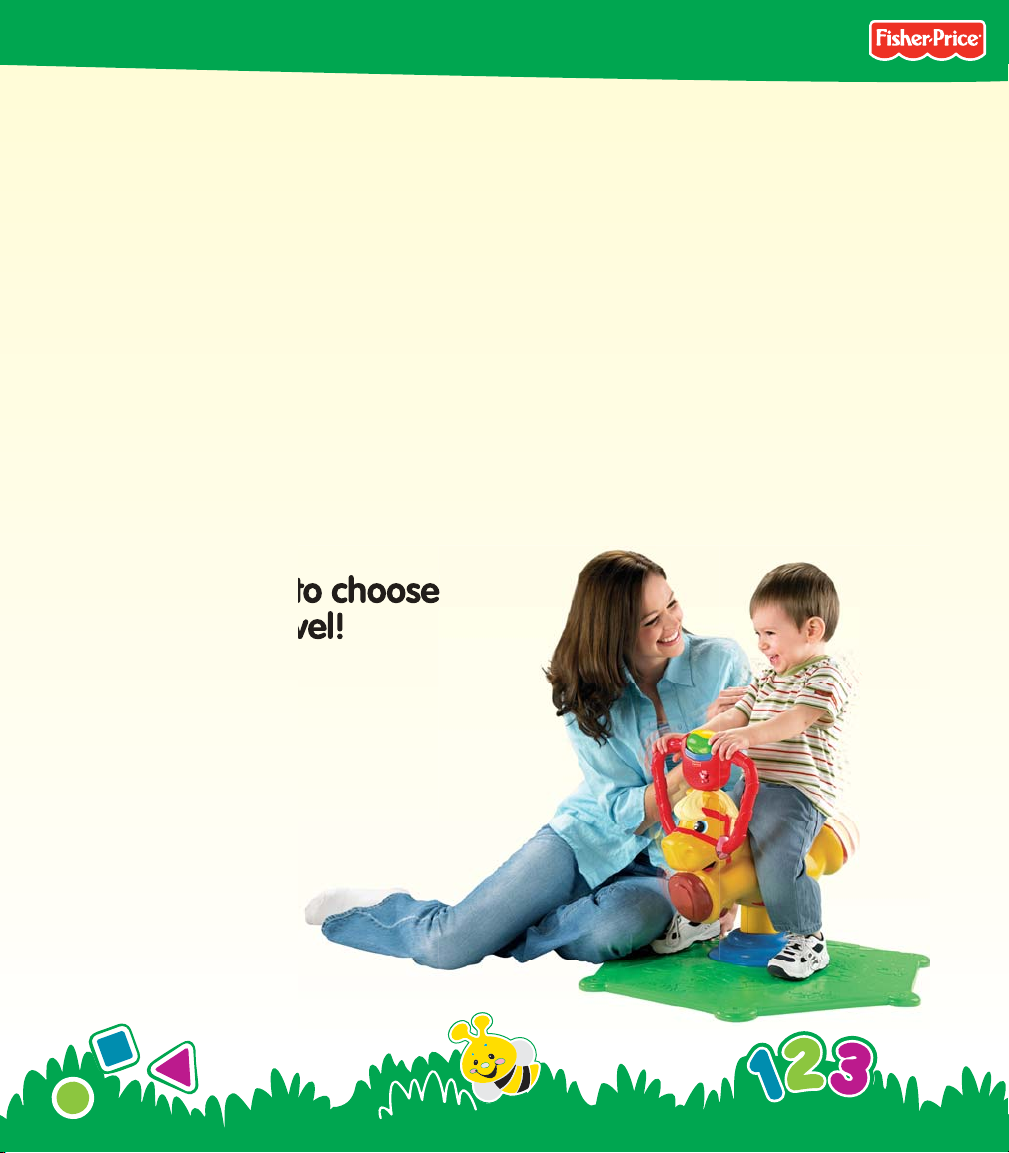
5 learning sites to choose
from on each level!
• A to Z Zoo
• Count & Grow Farm
• Colorful Home
• Shapes at Shore
• Opposites Playground
3
Page 4
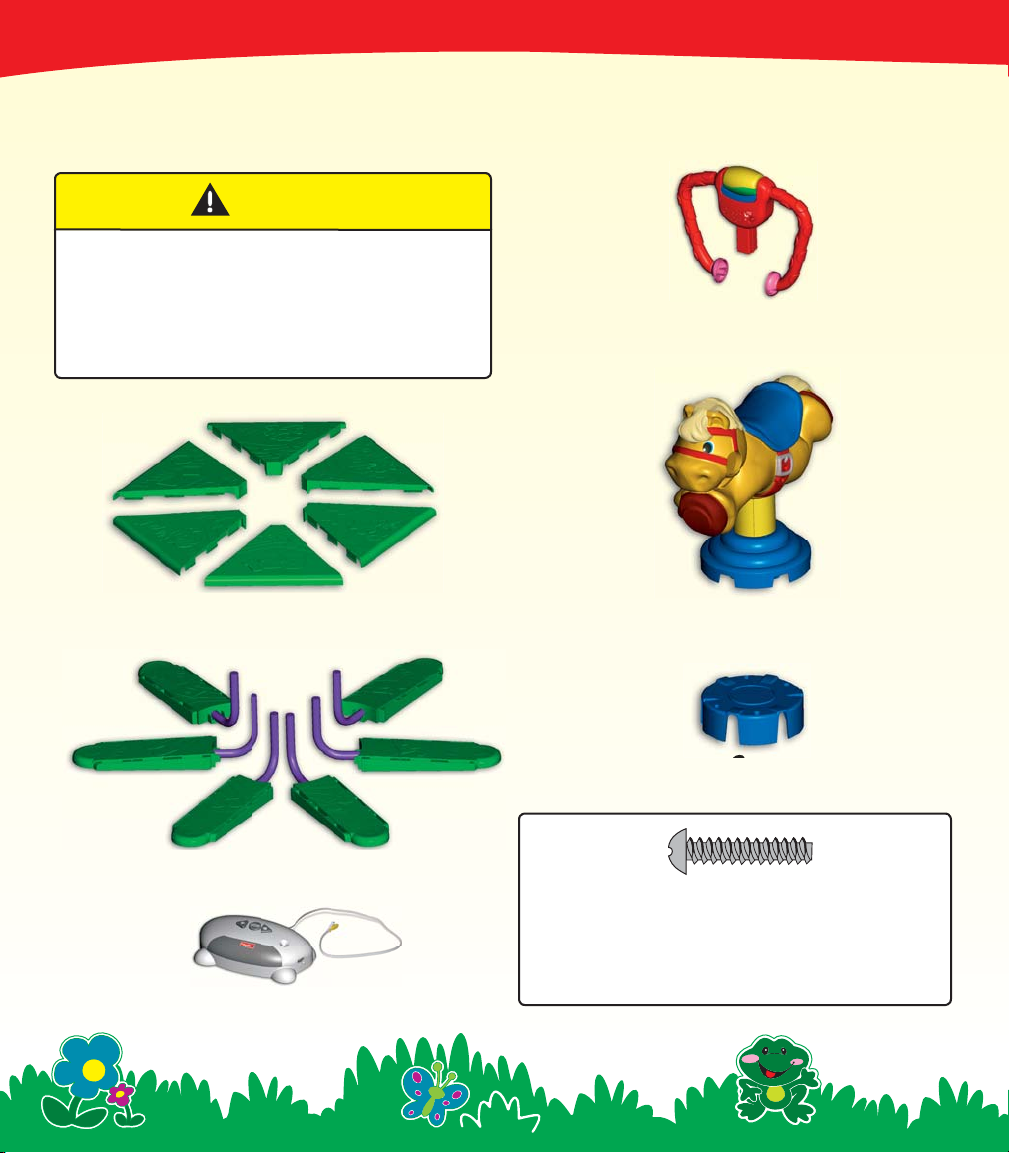
CAUTION
This product contains small parts in its
unassembled state. Adult assembly
is required. Take extra care during
unpacking and assembly.
Parts
Handlebar
6 Base Pieces
6 Feet
Receiver
(Not a Toy)
Pony
Cap
#8 x 7/8” (2.2 cm) Screw - 8
Note: Tighten or loosen all screws with
a Phillips screwdriver.
Do not over-tighten the screws.
4
Page 5
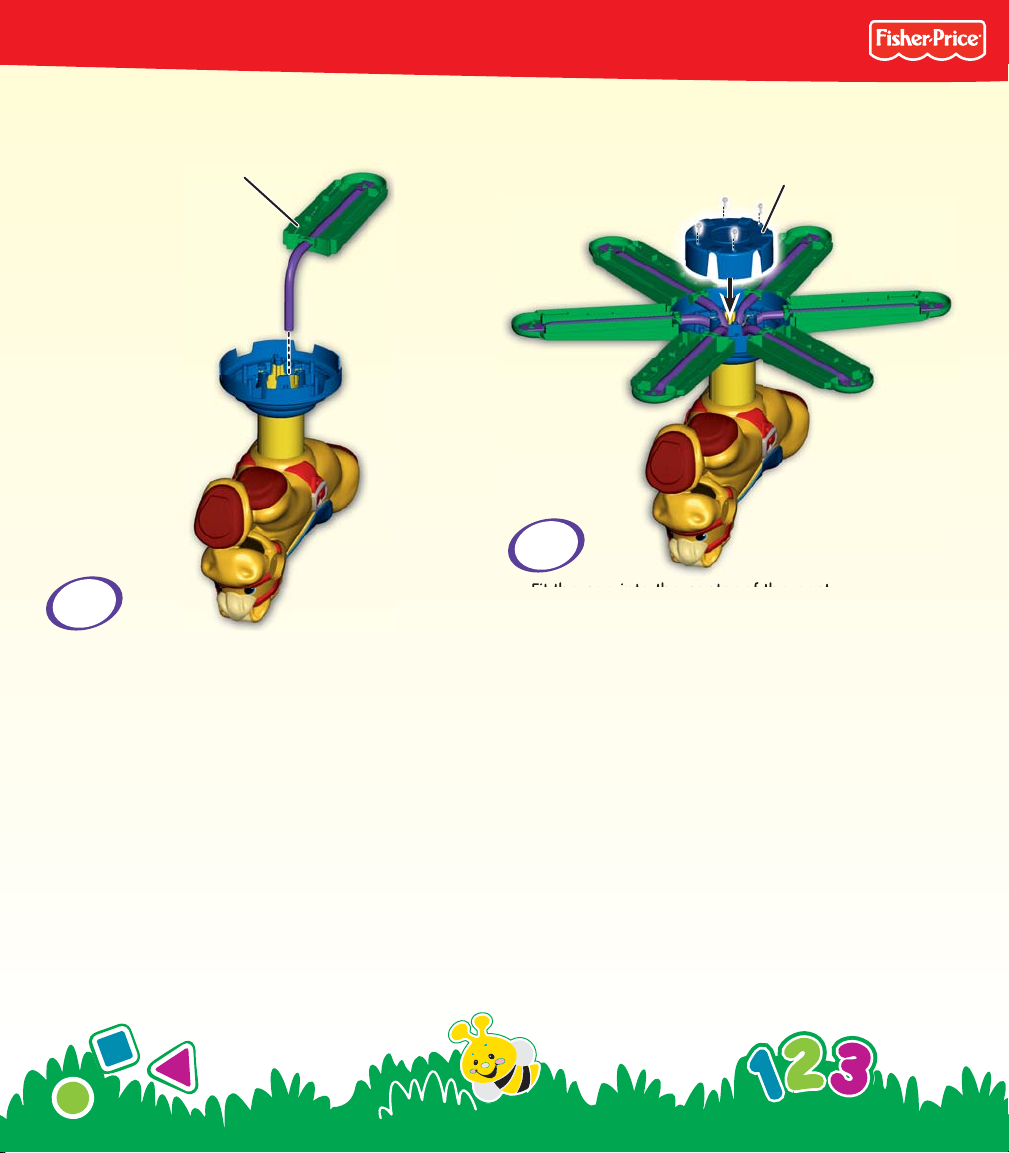
Assembly
Foot
1
• Position the pony upside-down.
• Fit the tube end of a foot into one of the holes
inside the post.
• Assemble the other five feet into the post.
Cap
2
• Fit the cap into the center of the post.
• Insert four screws into the cap and tighten.
5
Page 6
Assembly
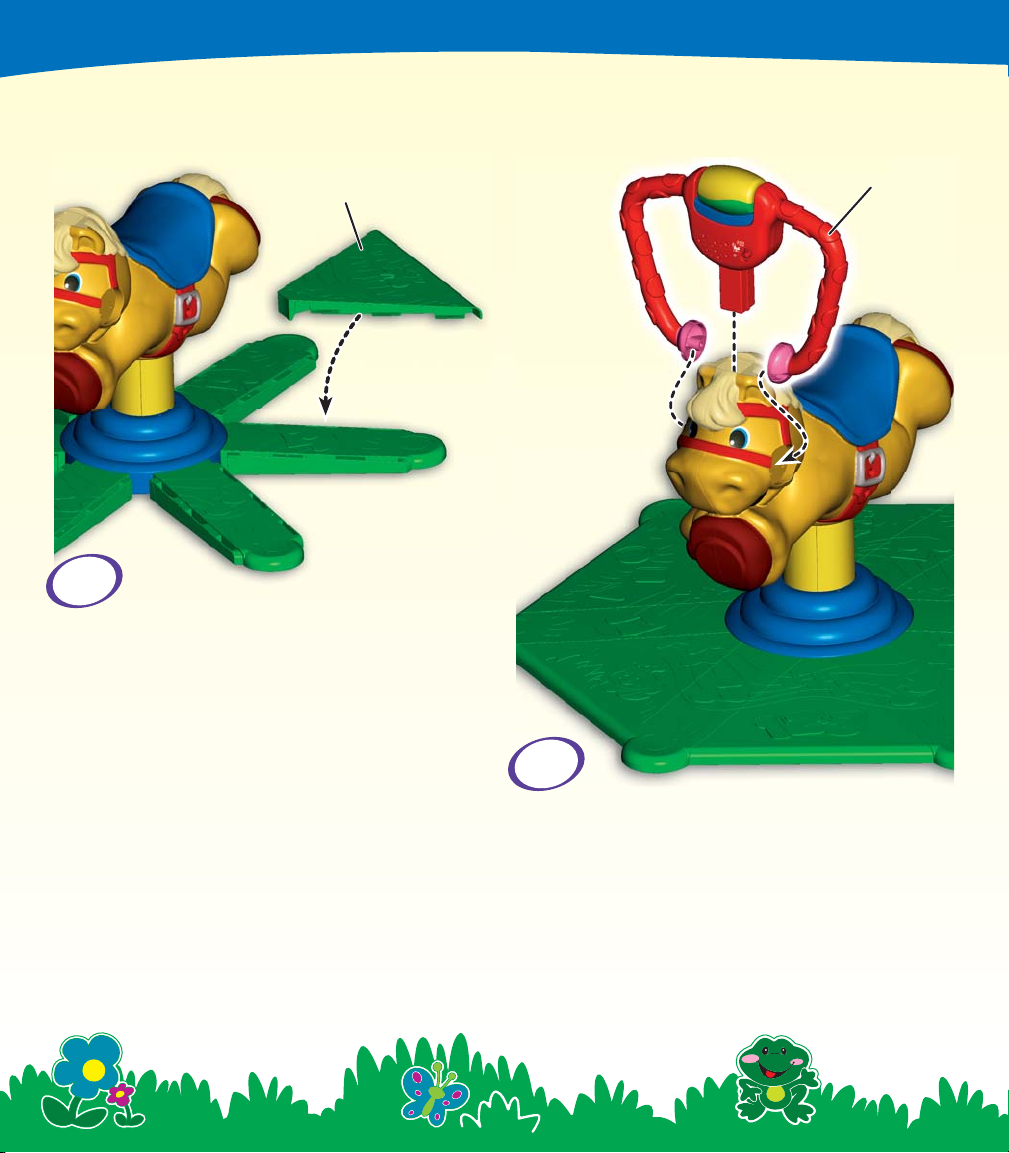
Base Piece
3
• Turn the assembly upright.
• Fit and “snap” each base piece between the
spaces in the feet.
Hint: The base pieces are designed to be
assembled to any of the openings between
the feet and is a one-time assembly.
Handlebar
4
• While sliding the ends of the handlebar into the
indents on each side of the pony’s head, fit the
handlebar post into the slot in the top of the
pony’s head.
6
Page 7

Assembly
5
• Insert two screws into each end of the handlebar
and tighten.
Battery Safety Information
In exceptional circumstances, batteries may leak
fl uids that can cause a chemical burn injury or ruin
your product. To avoid battery leakage:
• Do not mix old and new batteries or batteries of
different types: alkaline, standard (carbon-zinc)
or rechargeable (nickel-cadmium).
• Insert batteries as indicated inside the
battery compartment.
• Remove batteries during long periods of non-use.
Always remove exhausted batteries from the
product. Dispose of batteries safely. Do not dispose of this product in a fi re. The batteries inside
may explode or leak.
• Never short-circuit the battery terminals.
• Use only batteries of the same or equivalent type,
as recommended.
• Do not charge non-rechargeable batteries.
• Remove rechargeable batteries from the product
before charging.
• If removable, rechargeable batteries are
used, they are only to be charged under
adult supervision.
7
Page 8

Battery Installation
1.5V x 3
"AAA" (LR03)
1.5V x 3
"C" (LR14)
When function is erratic or stops, it’s time for an adult to change the batteries!
We recommend using alkaline batteries for longer battery life.
1.5V x 3
"C" (LR14)
1.5V x 3
"AAA" (LR03)
• Locate the battery compartment door on the back
of the handlebar.
• Loosen the screws in the battery compartment
door. Remove the battery compartment door.
• Insert three “AAA” (LR03) alkaline batteries.
• Replace the battery compartment door and
tighten the screws.
Protect the environment by not disposing
of this product with household waste
(2002/96/EC). Check your local authority
for recycling advice and facilities.
• Locate the battery compartment door on the
bottom of the receiver.
• Loosen the screw in the battery compartment
door. Remove the battery compartment door.
• Insert three “C” (LR14) alkaline batteries.
• Replace the battery compartment door and
tighten the screw.
Hint: When receiver battery power is weak, you will
see a low battery symbol on your TV screen.
8
Page 9

Adult Set-Up
(TV Connect Mode)
White
Yellow
INPUT
AUDIO IN
LEFT
VIDEO IN
TV
OR
VCR/DVD
TV
IMPORTANT! Your TV or VCR/DVD must have audio
and video input jacks.
• Plug the audio-video pins on the receiver into the
matching colored input jacks on your TV or VCR/DVD
(yellow for “Video In” and white for “Left Audio In”).
• Place the pony in front of the receiver.
- The pony should be at least 3 but no more than
15 feet from the receiver.
- Make sure the receiver is placed fl at, either
on ground level or no more than 7 feet off of
the ground.
- Make sure the receiver is centered in front of
the pony.
- Make sure there is a clear path between the
pony and the receiver.
• Turn your TV or VCR/DVD power On.
• Slide the power switch on the receiver to On .
Slide the power/mode switch on the pony to
TV Connect
.
Hint: The L.E.D. on the receiver should always be on
and will fl ash when there is a wireless connection to
the pony. When baby spins on the pony, there will be
a 160° range of wireless connection.
• To fi nd the picture on your TV screen, set your TV’s or
VCR’s/DVD’s mode selector to INPUT or VIDEO IN.
• To adjust sound in TV Connect Mode, use your TV or
VCR/DVD volume control.
7 Feet
3–15 Feet
9
Page 10

Adult Set-up
(TV Connect Mode)
PonyReceiver
Backward
Button
• Power Switch – Slide the switch to On or Off .
• Backward Button – Press to scroll backward
on screen.
• Forward Button – Press to scroll forward
on screen.
• Select Button – Press to make a selection
on screen.
Select
Button
Forward
Button
L.E.D.
Power
Switch
Volume
Switch
• Power/Mode Switch – Slide this switch to
TV Connect , Stand Alone or Off .
Backward Button
Front View
Power/Mode
Switch
Forward Button
Back View
• Backward Button – Press to scroll backward
on screen.
• Forward Button – Press to scroll forward
on screen.
10
Page 11

Adult Set-Up
(TV Connect Mode)
Levels
• Use the backward and forward
buttons on the receiver to scroll
through levels. Levels can only be
changed by an adult.
Level 1 (12M+) – Action Reaction
Level 2 (18M+) – Learn and Play
Level 3 (24M+) – Active Learning
• Press the select button on the receiver
to choose a level.
Background Music
• Use the backward and forward buttons
on the receiver to toggle background
music on or off. Press the select button
to make a choice.
Count &
Shapes at Shore
Opposites Playground A to Z Zoo
Locations
• Use the backward and forward
buttons on the receiver to scroll
through locations. When you find one
that you like, press the select button.
Note: Baby can also change locations
using the backward and forward
buttons on the pony.
• The pony will turn off (sleep mode) if
it is not used for three minutes. Bounce
or spin the roller drum on the pony to
turn on again.
Grow Farm Colorful Home
11
Page 12

Count & Grow Farm
Level 1
• Different farm animals appear on the
screen when baby bounces on the pony.
• Spin the roller drum for fun animal songs.
Level 2
• Bounce on the pony to see how many
animals you can count on the farm.
Count to 10 and celebrate with a song!
• Spin the roller drum to watch
the weather change as you learn
about opposites.
Level 3
• Bounce on the pony to help the farm
animals jump over all 10 hurdles.
Celebrate with a song at the end.
• Spin the roller drum to change animals.
12
12
Page 13

Colorful Home
or
send the mouse back into the wall.
Level 1
• Bounce on the pony to learn about
different objects found in a house.
• Spin the roller drum to listen to songs
about opposites and manners.
Level 2
• When baby bounces on the pony,
household objects appear on the
screen. Keep bouncing to hear opposites
of the object.
• Spin the roller drum and a friendly mouse
will come out to visit. Spin the roller drum
again to change the color of the walls
send the mouse back into the wall.
or
Level 3
• Bounce on the pony to learn about
opposites. Keep bouncing to learn
about colors.
• Spin the roller drum to move objects in
the house or listen to a song.
13
Page 14

A to Z Zoo
Level 1
• Different zoo animals appear on the
screen when baby bounces on the
pony. Listen to the name of the animal
and the sound it makes.
• Spin the roller drum for songs about
zoo animals and the ABC’s.
Level 2
• Bounce on the pony to hear the letters in
the alphabet. When you complete the whole
alphabet you will be rewarded with a song.
• Spin the roller drum and watch birds or
butterflies flutter across the screen.
Level 3
• Bounce on the pony to learn about
colors and opposites. Keep bouncing
for ABC and animal songs.
• Spin the roller drum to watch different
objects float across the screen. Listen to
the musical tunes!
14
Page 15

Opposites Playground
Level 1
• Bounce on the pony and watch the
puppy play. Listen for fun phrases,
kisses and clapping.
• Spin the roller drum for a song.
Level 2
• Bounce on the pony to watch the
puppy play on the playground. Listen
to all the action words!
• Spin the roller drum to watch the
weather change.
Level 3
• Bounce on the pony to count with
the puppy playing in the playground.
Count a sequence of numbers and
listen to a song.
• Spin the roller drum to watch different
objects and animals scurry across
the screen.
15
Page 16

Shapes at Shore
onto the shore.
Level 1
• Bounce on the pony for a different
object or sea creature found at the
beach. Listen for the name when it
appears on the screen.
• Spin the roller drum for a song.
Level 2
• Bounce on the pony to randomly select
an object or sea creature. Bounce again
to hear what color it is. After selecting all
the items, listen to the music.
• Spin the roller drum to watch the
seagulls fly by or the waves splash
onto the shore.
Level 3
• Bounce on the pony and an item
appears on the screen. Bounce again
to see it in action and hear its color
or shape.
• Spin the roller drum to watch the
seagulls fly by or the waves splash
onto the shore.
16
Page 17

Stand Alone Mode
Roller Drum
Volume
Switch
• Slide the power/mode switch on the pony to
Stand Alone .
• Slide the volume switch to low volume or
high volume .
Hint: This volume control switch does not control
sound when using this toy in TV connect mode.
• Bounce/spin on the pony or spin the roller
drum on the handlebar to play songs and
sounds without the TV.
• If the pony begins to operate erratically, you
may need to reset the electronics. Slide the
power/mode switch Off and then back to
Stand Alone .
• When you are finished playing, slide the
power/mode switch Off .
Power/Mode
Switch
17
Page 18

Play Tips
Children learn so much just by playing—and you
can make the experience even better! Try some of
the following ideas to extend the learning and enjoy
playtime fun together.
Level 1
Talk to your baby about what you see on the
screen, pointing to objects, naming them, and
describing them. “See the ball? The round ball is
blue!” Describe the actions, and enjoy the silly
surprises. They help develop your baby’s sense
of humor! A few more ideas:
• Take turns spinning the roller drum.
• Encourage baby to bounce on the pony to see
what happens next on the screen.
• Clap your hands to the music.
• Add words to the music and sing
them to your baby.
Level 2
Encourage your toddler to point to what appears
on the screen as you identify and name the objects.
Seeing objects and hearing their names, or seeing and hearing letters together helps your toddler
make associations. Extend the learning to colors
and shapes as you point to objects on the screen.
You can also count along as animals and objects
appear, or describe the action on screen. “The ball
bounced high!” Enjoy all the rich music together, too.
• Tap to the beat of the music with your toddler.
• Sing along with the songs and encourage your
child to sing too!
• Repeat what is spoken to reinforce those words.
• Ask your child to imitate the sounds the animals
make. “What does the monkey say?”
• Talk about what you and your child
see on the screen, describing objects
and actions.
Level 3
At this point your child may be interested in learning
things that are more complex, such as comparisons
in size, shape, or speed (fast vs. slow). Sing along
with the music to encourage rhythm and language
development. Laugh and giggle at the silly surprises, drawing out your toddler’s sense of humor.
Make the most of learning opportunities while
encouraging physical activity. Most of all, have fun!
• Encourage your child to keep bouncing to get to
a fun response. “Whee! You made the pony jump
the fence!”
• Ask your child to explain what the characters
are doing.
• Help your child make comparisons. “The penguin
is small; what about the elephant?”
• Encourage your child to count objects on the
screen to foster understanding of numbers.
• Ask your child to choose which learning location to
go to next and encourage your child to press the
arrow buttons on the pony.
18
Page 19

Troubleshooting Guide
Problem Cause Solution
No image on the TV TV or VCR/DVD is not set to
Low battery symbol
appears on TV screen
Response on TV from bouncing
on pony or spinning roller drum
is intermittent
Image is stretched or distorted
on a wide screen TV
proper input
Batteries in the pony/receiver
are weak or dead
Pony battery compartment
door is loose
No wireless connection (L.E.D.
on receiver is off)
No wireless connection (L.E.D.
on receiver is on but
not fl ashing)
Batteries in the receiver
are weak
Interference from another
infrared device
(ie.: remote control)
TV aspect ratio set incorrectly This product is designed for use with a 4:3 aspect ratio (display setting)
Press the channel down button on the VCR/DVD or TV and check for
an INPUT channel below channel 2.
Use the menu system on your TV or VCR/DVD to fi nd INPUT or SOURCE.
Change to INPUT or SOURCE.
Refer to your TV's or VCR/DVD’s instruction manual.
Replace the batteries in the pony with three, new “AAA” (LR03) alkaline
batteries and the receiver with three new “C” (LR14) alkaline batteries.
Fully tighten both screws in the battery compartment door.
Distance between pony and receiver must be 3-15 feet.
Receiver must be placed fl at on ground level or no more than
7 feet off the ground.
Make sure receiver is centered in front of pony. When baby spins on
pony, there will be a 160° range of wireless connection.
Make sure you have a clear path between the pony and the receiver.
Do not place the receiver in a closed cabinet.
Make sure receiver power is on. Slide the power switch On
Receiver is in sleep mode (after 1 hour of non-use). Press any button on
the receiver to wake it up.
Receiver audio-video pins not connected to TV or VCR/DVD input jacks.
Pony power is off or it is in Stand Alone mode. Slide the power/mode
switch to TV Connect
Pony is in sleep mode (after 3 minutes of non-use). Bounce/spin on the
pony to wake it up.
Replace the batteries in the receiver with three new “C” (LR14) alkaline
batteries.
Do not use a remote control in the same room when using
this toy.
and you should see black bars on the sides of the image. For best
picture, do not use a 16:9 aspect ratio (stretched) wide screen setting.
For more information on changing this setting, refer to your TV
owner’s manual.
.
.
19
Page 20

Fisher-Price, Inc., a subsidiary of Mattel, Inc. East Aurora, New York 14052, U.S.A.
©2008 Mattel, Inc. All Rights Reserved. ® and ™ designate U.S. trademarks of Mattel, Inc.
PRINTED IN CHINA N0446a-0920
 Loading...