

Page 1
V I D E O
Instructions
Owner’s Manual
Page 2

Before inserting a software cartridge, turn power off! Insert the
software cartridge into the software port. Turn power back on.
Software Cartridge
Software Port
• Some of the tools on the tool menu may not be available for use
in an activity. If a tool is not available for use, you will hear a tone.
• Please keep this manual for future reference, as it contains
important information.
2
Page 3
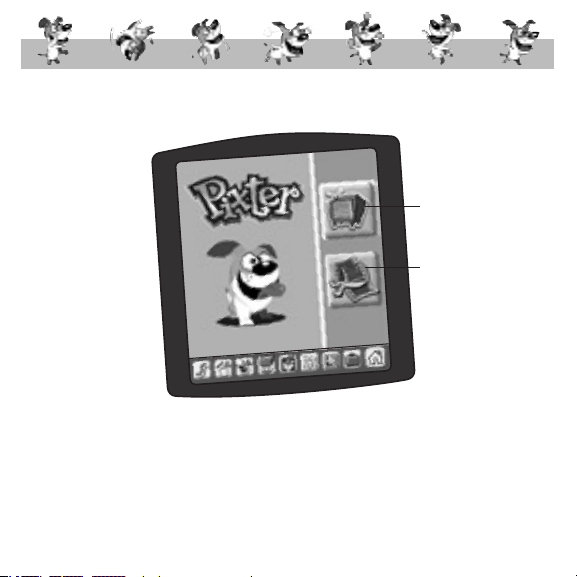
Play a Video or Create a Video
Play a Video
Create a Video
or Cartoon
• Touch your choice on the screen with the stylus.
IMPORTANT! If the tip of the stylus and the image on screen
do not align, it's time to calibrate them! Please refer to page 12,
Calibrating the Stylus.
3
Page 4
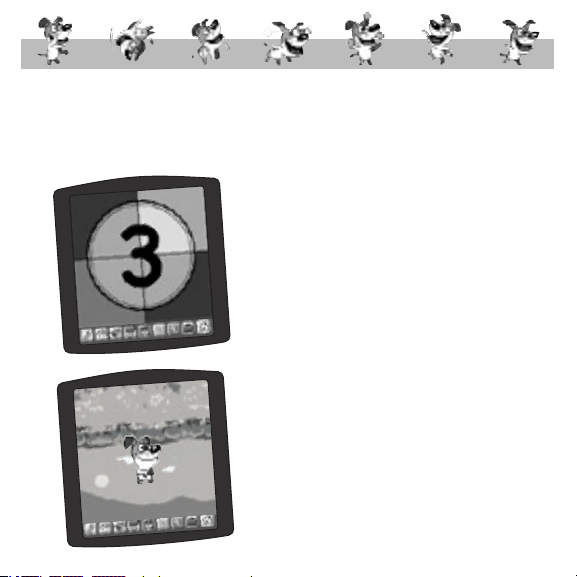
Play a Video
Hint: Each software cartridge is different. You will either play a
full video, or you will have the option of playing a scene of a video.
Full Video
• Watch the countdown.
• Enjoy the show!
4
Page 5
Play a Scene
• Touch the arrows on the screen with the
stylus to scroll through scene choices.
• When you find one that you like, touch
your choice on the screen with the stylus.
Hint: You can also select full video. Simply
touch the full video choice on the screen
with the stylus.
5
Page 6

• Watch the countdown.
• Enjoy the show!
6
Page 7

Create a Video or Cartoon
Hint: Each software cartridge is different.
You will either create a video or a cartoon.
• The blinking arrow on the bottom of
the screen encourages you to use the
Stamp It tool.
• Touch the Stamp It tool on the
toolbar with the stylus.
• Touch the arrows on the screen with the
stylus to scroll through stamper choices.
• When you find one that you like, touch
your choice on the screen with the stylus.
7
Page 8

• You can add text to your opening screen!
• First, touch the utilities tool on the
toolbar. Then touch the Typewriter box
on the screen with the stylus.
• Touch each letter of each word with
the stylus.
• Touch on the screen with the
stylus to save your text.
8
Page 9

• Now, touch the screen with the stylus
to place the text.
• Touch on the screen with the stylus
to save your opening scene.
• It's time to create the next scene.
• The blinking arrow on the bottom of the
screen encourages you to touch the Stamp
It tool on the toolbar with the stylus.
• Touch the Stamp It tool on the toolbar
with the stylus.
9
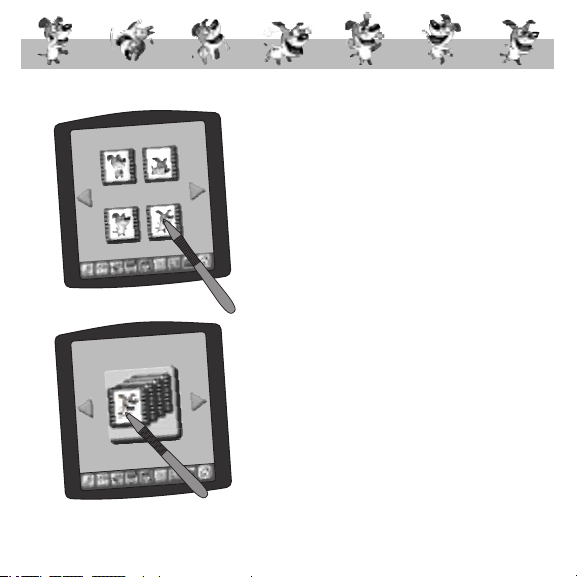
Page 10

• Touch the arrows on the screen
with the stylus to scroll through
scene choices.
• When you find one that you like,
touch and drag it to a frame using
the stylus.
10
Page 11

• Continue to choose and place
different scenes.
• When you are finished with your video
or cartoon, touch on the screen with
the stylus.
• To play your creation, touch the play
button on the screen with the stylus.
11
Page 12

Mark on Screen
Calibrating the Stylus
Tip of Stylus
IMPORTANT!
from the stylus and the location of the tip of the stylus may not
align. When this happens, you must calibrate the stylus.
From time to time, the mark made on your screen
12
Page 13

Calibration Hole
• Turn Pixter® over and locate the calibration hole.
• Insert, push and hold the stylus in the calibration hole. Turn Pixter over
so that you can see the screen. When you see two , you can remove
the stylus from the calibration hole.
• First touch the upper left corner with the tip of the stylus.
• Then, touch the lower right corner with the tip of the stylus.
13
Page 14

Care
• Keep water, sand and dirt off of this cartridge.
• Keep this cartridge away from direct sunlight and excessive heat.
• Do not immerse the cartridge. Simply wipe the outside of the cartridge
with a cloth to clean.
• This cartridge has no consumer serviceable parts. Please do not take this
cartridge apart.
14
Page 15

One (1) Year Limited Warranty
Fisher-Price, Inc., 636 Girard Avenue, East Aurora, New York 14052 warrants
Pixter® Video is free from all defects in material and workmanship when
used under normal conditions for a period of one (1) year from the date
of purchase.
Should the product fail to perform properly, we will repair or replace it at
our option, free of charge. Purchaser is responsible for shipping the product
to Consumer Relations at the address indicated above and for all associated
freight and insurance cost. Fisher-Price, Inc. will bear the cost of shipping the
repaired or replaced item to you.
This warranty is void if the owner repairs or modifies the product. This
warranty excludes any liability other than that expressly stated above
including but not limited to any incidental or consequential damages.
SOME STATES DO NOT ALLOW THE EXCLUSION OR LIMITATION OF
INCIDENTAL OR CONSEQUENTIAL DAMAGES, SO THE ABOVE LIMITATION
OR EXCLUSION MAY NOT APPLY TO YOU.
THIS WARRANTY GIVES YOU SPECIFIC LEGAL RIGHTS, AND YOU MAY ALSO
HAVE OTHER RIGHTS WHICH MAY VARY FROM STATE TO STATE.
15
Page 16

Consumer Information
Visit us on-line at www.service.fisher-price.com.
Call Fisher-Price® Consumer Relations, toll-free at 1-800-432-5437,
8 AM- 6 PM EST Monday through Friday. Hearing-impaired consumers
using TTY/TDD equipment, please call 1-800-382-7470. Or write to:
Fisher-Price® Consumer Relations, 636 Girard Avenue, East Aurora,
New York 14052.
For countries outside the United States:
CANADA
Questions? 1-800-432-5437, Mattel Canada Inc., 6155 Freemont Blvd., Mississauga, Ontario, L5R 3W2.
GREAT BRITAIN
Mattel UK Ltd, Vanwall Business Park, Maidenhead SL6 4UB. Helpline: 01628 500303.
www.service.mattel.com/uk.
AUSTRALIA
Mattel Australia Pty. Ltd., 658 Church Street, Locked Bag #870, Richmond, Victoria 3121 Australia.
Consumer Advisory Service 1300 135 312.
NEW ZEALAND
16-18 William Pickering Drive, Albany 1331, Auckland.
ASIA
Mattel East Asia Ltd, Room 1106, South Tower, World Finance Centre, Harbour City, Tsimshatsui,
HK, China.
PRINTED IN CHINA
Fisher-Price, Inc., a subsidiary of Mattel, Inc., East Aurora, NY 14052 U.S.A.
©2005 Mattel, Inc. All Right Reserved. ® and ™ designate
H9422pr-0920
U.S. trademarks of Mattel, Inc.
 Loading...