

Fisher-Price H5556, 72408 User Manual
© 2004 Mattel, Inc. All Rights Reserved. ® and ™ designate U.S. trademarks of Mattel, Inc.
Fisher-Price, Inc., a subsidiary of Mattel, Inc., East Aurora, NY 14052 U.S.A.
PRINTED IN MEXICO 72408e-0920
Consumer Information
®
Grow to Pro Basketball
Grow to Pro Basketball
Product features and decoration may vary from the photograph above.
w
w
w
.
f
i
s
h
e
r
-
p
r
i
c
e
.
c
o
m
Please keep this instruction sheet for future reference, as it contains important information.
Adult assembly is required.
Tool required for assembly: Phillips Screwdriver (not included).
Water or sand to fill base (not included).
IMPORTANT! Rim height should be adjusted only by an adult.
Model Numbers: 72408, H5556
Questions? We’d like to hear from you!
Call Fisher-Price®Consumer Relations, toll-free at 1-800-432-KIDS (5437), 8 AM - 6 PM EST Monday through Friday.
Hearing-impaired consumers using TTY/TDD equipment, please call 1-800-382-7470.
Or, write to:
Fisher-Price®Consumer Relations
636 Girard Avenue
East Aurora, New York 14052, U.S.A.
For countries outside the United States:
CANADA
Questions? 1-800-567-7724, Mattel Canada Inc., 6155 Freemont Blvd., Mississauga, Ontario L5R 3W2.
GREAT BRITAIN
Mattel UK Ltd, Vanwall Business Park, Maidenhead SL6 4UB. Helpline: 01628 500302.
AUSTRALIA
Mattel Australia Pty. Ltd., 658 Church Street, Locked Bag #870, Richmond, Victoria 3121 Australia.
Consumer Advisory Service 1300 135 312.
NEW ZEALAND
16-18 William Pickering Drive, Albany 1331, Auckland.
ASIA
Mattel East Asia Ltd, Room 1106, South Tower, World Finance Centre, Harbour City, Tsimshatsui, HK, China.
4
5
6
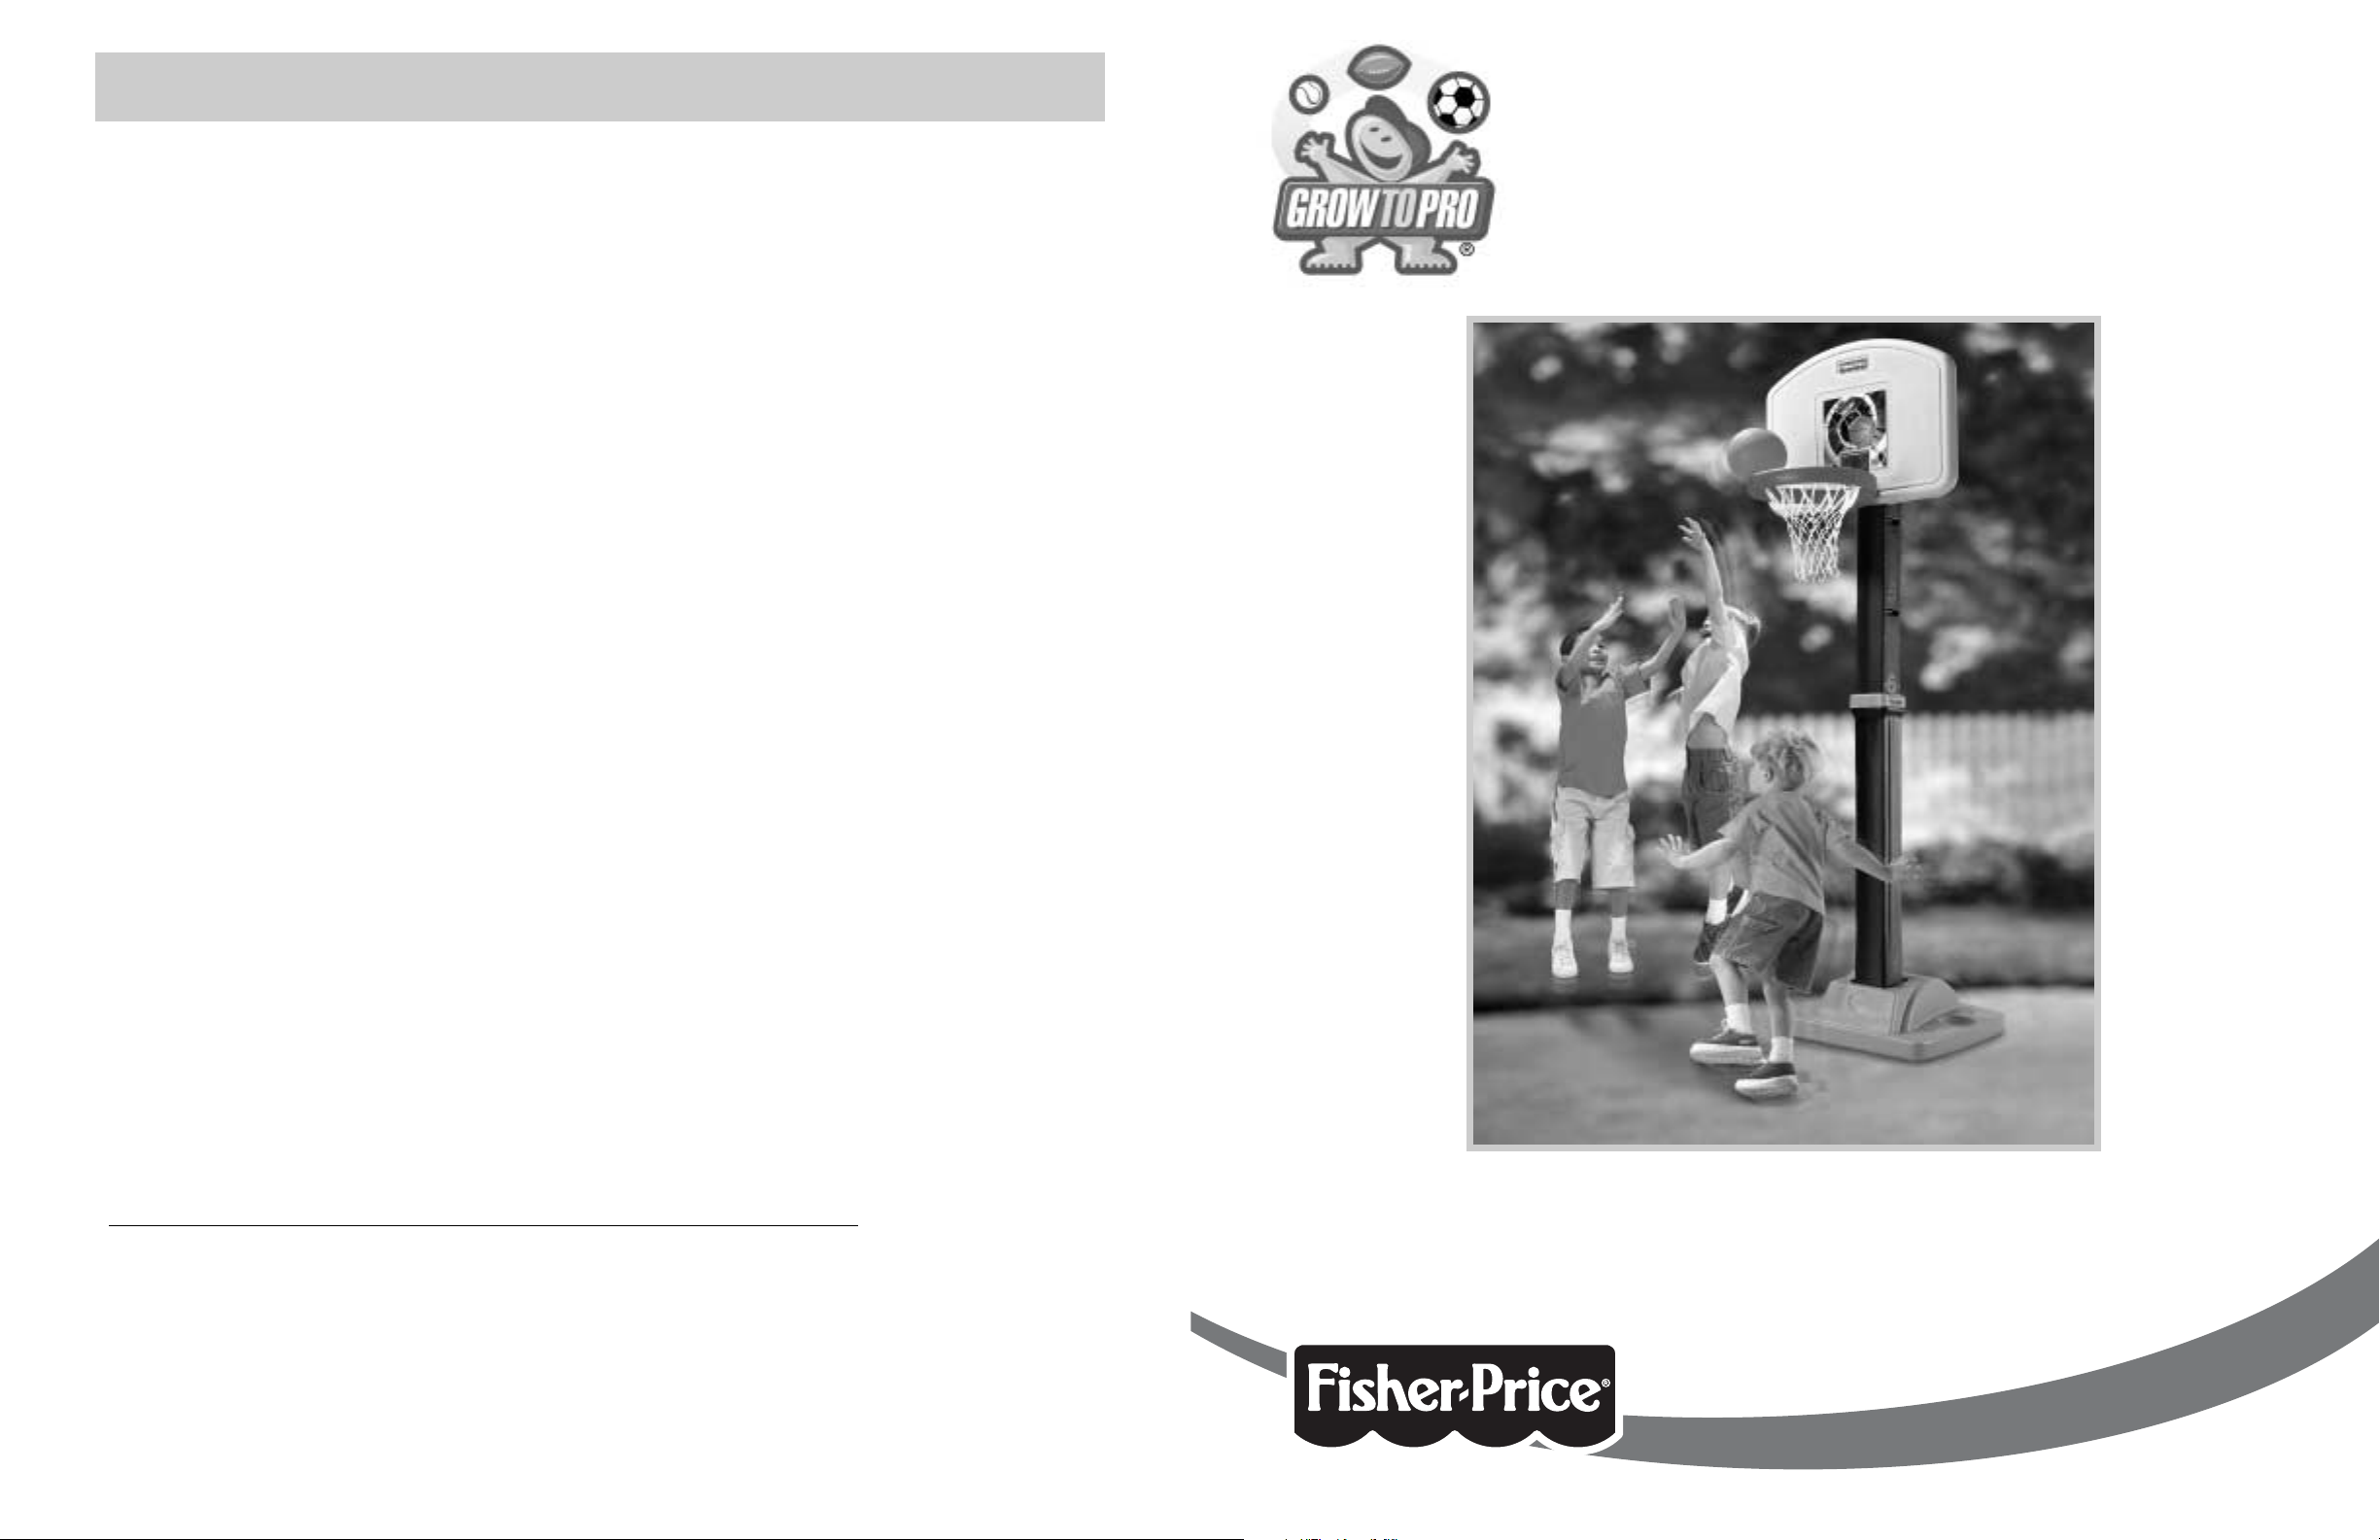
Collar
Backboard
Ball
Rim
Lower Post
Upper Post
Note: Label not shown.
Plug
Base
Net/Ring
Assembly
#6 x 5/8" Screw - 4
SHOWN ACTUAL SIZE
Hint: Some parts were placed inside the lower post for shipping.
Parts
2
Side Edge
• Bend the “T” end of the plug and insert it into the hole
in the base.
Note: After assembly is complete, fill the base with
water or approximately 50 lbs. of sand (water and sand
not included) to keep this product stationary. Simply lift
the plug, fill the base, and replace the plug.
Proper label application will help to keep the label
looking its best!
•Wash your hands before applying the label.
• Make sure the area where the label will be applied is
clean and dry. Wipe the backboard with a clean, soft,
dry cloth to remove any dust or oils.
•For best results, avoid applying the label more
than once.
•Peel the backing from one half of the label. Do not
remove all of the backing!
• Align the side edge of the label (where backing is
removed) with the side edge of the label area on
the backboard.
• Carefully apply the side edge of the label to the side
edge of the label area on the backboard.
•While rubbing the label in place, continue to peel the
backing from the other half of the label.
• After applying the label, rub the label firmly with a cloth
to make sure the label is adhered to the backboard.
• Dispose of the label backing properly.
Backboard
Assembly
3
1
2
Side Edge
Plug
“T” End
Base
• Place the loops at the top of the net into the grooves
on the ring.
• Pull each loop through a ring tab, as shown.
Hole
Hole
Rectangular
Tabs
Hole
Rim
Hole
Net Assembly
4
• Place the rim on a flat surface with the rectangular
tabs facing up.
• Locate the four screw holes on the underside of the
net assembly.
• Align the four screw holes on the underside of the net
assembly with the four holes in the rim.
• Place the net assembly onto the rim.
Groove
Ring
Ring Tab
Groove
Ring
Ta b
3
This product contains small parts
in its unassembled state.
Adult assembly is required.
CAUTION
 Loading...