

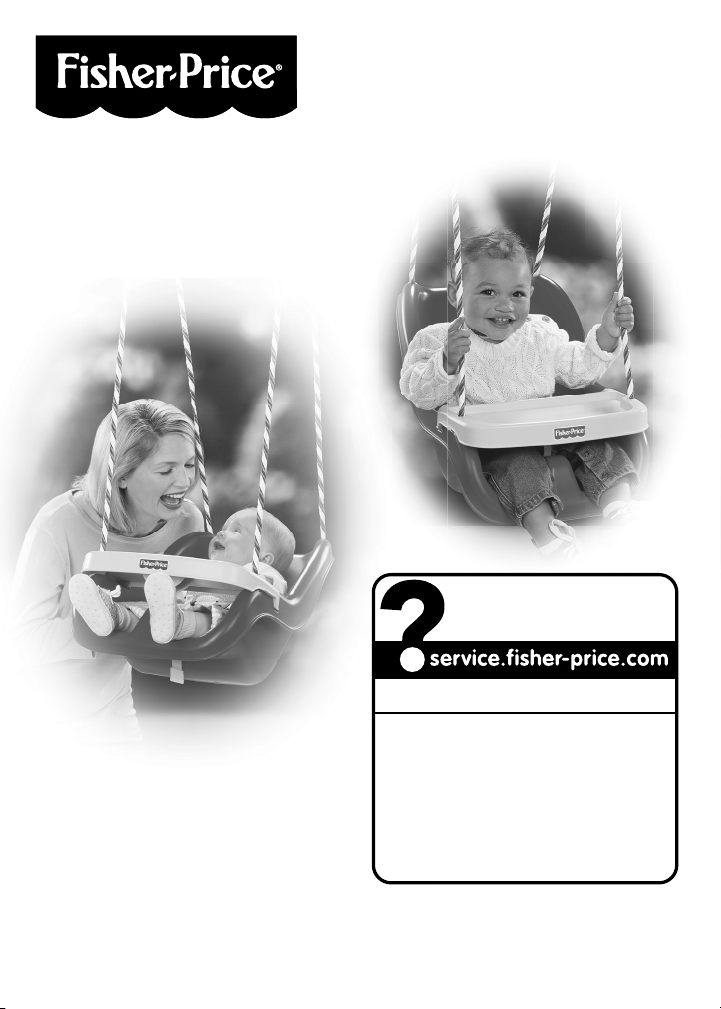
Page 1
Please keep for future reference.
CONS
ASSISTANC
No adult assembly is required.
Actual product may appear different
than the photos shown.
75986
BLR99
CDG30
Fisher-Price, Inc., 636 Girard Avenue, East Aurora, NY 14052.
Hearing-impaired consumers: 1-800-382-7470.
Outside the United States:
Canada: Mattel Canada Inc., 6155 Freemont Blvd.,
Mississauga, Ontario L5R 3W2; www.service.mattel.com.
Great Britain: Mattel UK Ltd, Vanwall Business Park,
Maidenhead SL6 4UB. Helpline: 01628 500303.
www.service.mattel.com/uk
Mattel Europa B.V., Gondel 1, 1186 MJ Amstelveen, Nederland.
Australia: Mattel Australia Pty. Ltd., 658 Church Street,
Locked Bag #870, Richmond, Victoria 3121 Australia.
New Zealand: 16-18 William Pickering Drive,
Albany 1331, Auckland.
fisher-price.com
UMER
1-800-432-5437 (US & Canada)
1300 135 312 (Australia)
E
Page 2
WARNING
Falls onto hard surfaces could result in head or other
serious injuries:
• Never place over concrete, asphalt, wood, packed earth,
grass, carpet, or other hard surfaces.
• Always use the restraint system.
• Adult supervision required.
• Only for domestic use.
• Use only outdoors.
• For children 6 to 36 months. Maximum weight 20 kg (44 lb).
To prevent injury, make sure your child is dressed appropriately
to avoid potential hazards while using the swing:
• Your child should not wear loose clothing such as ponchos
or scarves.
• Your child should wear well-fitting shoes.
To prevent injury, instruct children:
• Do not walk close to, in front of, behind, or between moving items.
• Do not twist swing chains or ropes or loop them over the top
support bar since this may reduce the strength of the chain
or rope.
• Avoid swinging empty seats.
• Do not use the swing in a manner other than intended.
• Do not stand in the swing.
• Do not get out of the swing while it is in motion.
• Always sit in the center of the swing so that the child’s full
weight is on the seat.
To prevent serious injury:
• Do not allow use of this swing until it has been properly
installed by an adult, according to these instructions.
PRINTED IN MEXICO 75986b-0921
©2013 Mattel. All Rights Reserved.
2
Page 3

Placement and Play Area Surfacing
Before installing the swing, select and prepare a play area.
Select Protective Surfacing
One of the most important things you can do to reduce the likelihood of serious
head injuries is to install shock-absorbing protective surfacing under and around
your play equipment. The protective surfacing should be applied to a depth that
is suitable for the equipment height in accordance with ASTM F1292. There are
different types of surfacing to choose from; whichever product you select, follow
these guidelines:
NOTE: Do not install home playground equipment over concrete, asphalt, or any
other hard surface. A fall onto a hard surface can result in serious injury to the
equipment user. Grass and dirt are not considered protective surfacing because
wear and environmental factors can reduce their shock absorbing effectiveness.
Carpeting and thin mats are generally not adequate protective surfacing. Ground
level equipment - such as a sandbox, activity wall, playhouse or other equipment
that has no elevated play surface - does not need any protective surfacing.
Loose-Fill Materials
Maintain a minimum depth of 9 inches (22,86 cm) of loose-fill materials such as
wood mulch/chips, engineered wood fiber (EWF), or shredded/recycled rubber
mulch for equipment up to 8 feet (2,44 m) high; and 9 inches (22,86 cm) of
sand or pea gravel for equipment up to 5 feet (1,52 m) high. NOTE: An initial fill
level of 12 inches (30,48 cm) will compress to about a 9-inch (22,86-cm) depth
of surfacing over time. The surfacing will also compact, displace, and settle, and
should be periodically refilled to maintain at least a 9-inch (22,86-cm) depth.
Use a minimum of 6 inches (15,24 cm) of protective surfacing for play
equipment less than 4 feet (1,22 m) in height. If maintained properly, this should
be adequate. (At depths less than 6 inches (15,24 cm), the protective material is
too easily displaced or compacted.)
Use containment, such as digging out around the perimeter and/or lining the
perimeter with landscape edging. Don’t forget to account for water drainage.
Check and maintain the depth of the loose-fill surfacing material. To maintain the
right amount of loose-fill materials, mark the correct level on play equipment
support posts. That way you can easily see when to replenish and/or redistribute
the surfacing.
3
Page 4

Placement and Play Area Surfacing
Do not install loose fill surfacing over hard surfaces such as concrete or asphalt.
Poured-In-Place Surfaces or Pre-Manufactured Rubber Tiles
You may be interested in using surfacing other than loose-fill materials-like
rubber tiles or poured-in-place surfaces.
Installations of these surfaces generally require a professional and are not
“do-it-yourself” projects.
Review surface specifications before purchasing this type of surfacing. Ask the
installer/manufacturer for a report showing that the product has been tested to
the following safety standard: ASTM F1292 Standard Specification for Impact
Attenuation of Surfacing Materials within the Use Zone of Playground Equipment.
This report should show the specific height for which the surface is intended to
protect against serious head injury. This height should be equal to or greater than
the fall height-vertical distance between a designated play surface (elevated
surface for standing, sitting, or climbing) and the protective surfacing below-of
your play equipment.
Check the protective surfacing frequently for wear.
Placement
Proper placement and maintenance of protective surfacing is essential. Be sure to:
Extend surfacing at least 6 feet (1,83 m) from the equipment in all directions.
For to-fro swings, extend protective surfacing in front of and behind the swing
to a distance equal to twice the height of the top bar from which the swing
is suspended.
Pivot Point Distance
(maximum fall height
8 feet/2,44 m)
Pivot Point
6 ft
6 ft
(1,83 m)
(1,83 m)
Pivot Point Distance
Pivot Point Distance
x
x
2
2
6 ft
6 ft
(1,83 m)
(1,83 m)
Use Zone
4
Page 5

Installation
ks
IMPORTANT! When installing this swing, be sure it is at least 6 feet 7 inches
(2 meters) from any structure or obstruction such as a fence, garage, house,
overhanging branches, laundry lines or electrical wires.
CAUTION
Periodically inspect S-hooks for wear. Metal to metal contact
between hooks may cause premature wear. If your swing set
does not have a bushing, you may want to replace the existing
hook with a hook and bushing assembly available at toy stores
and home centers.
Swing Set Hooks
(not included)
Bushing
(not included)
S-Hook
(included)
• Fasten the swing S-hooks (included) onto the hooks (not included) on your
swing set.
Cleaning
• Wash the swing with a mild soap and water solution. Rinse with clean water to
remove soap residue.
5
Page 6

Push
Squeeze
Squeeze
Tab
Squeeze
Tab
Squeeze
Tab
Squeeze
Tab
Tab
Recline for Infant
Push
Squeeze
Tab
Groove
Groove
Back View Side View
• From the back of the swing, grasp the top edge of the swing. Squeeze the tabs
and push the top edge of the swing down.
• Make sure the tabs are completely in the upper grooves in the track, as shown.
Upright for Toddler
Lift
Groove
Squeeze
Tab
Groove
Squeeze
Tab
Back View Side View
• From the back of the swing, grasp the top edge of the swing. Squeeze the tabs
while lifting the top edge of the swing.
• Make sure the tabs are completely in the lower grooves in the track, as shown.
6
Page 7

Securing Your Child
Pull
Waist
st
Pull
Pull
Hint: If the swing appears to be crooked, simply pull either back rope up to
straighten the swing.
• Locate the tray tabs under the armrests of the swing.
• Pull the tray tabs out and lift the tray slightly.
• Rotate the tray out of the way.
• Unbuckle the waist belts from the crotch belt.
• Place your child in the swing.
• Pull the crotch belt up between your child’s legs and fasten both waist belts
to the crotch belt. Make sure you hear a “snap” on both ends.
• Check to be sure the restraint system is securely attached by pulling it away
from your child. The restraint should remain attached.
• Tighten each waist belt so that the restraint system is snug against your
child. Please refer to the next section for instructions to tighten the
waist belts.
• Rotate the tray back into place and push down on it to “snap” it into place.
Pull up on the tray to be sure it is securely latched.
Belt
Tray
Tab
Crotch
Belt
Tray
Tab
7
Page 8

Securing Your Child
A
B
Free End
Anchored End
B
A
Free End
Anchored End
To Tighten To Loosen
To tighten the waist belts:
• Feed the anchored end of the waist belt up through the buckle to form
a loop A. Pull the free end of the waist belt B.
• Repeat this procedure to tighten the other waist belt.
To loosen the waist belts:
• Feed the free end of the waist belt up through the buckle to form a loop A.
Enlarge the loop by pulling on the end of the loop toward the buckle.
• Pull the anchored end of the waist belt to shorten the free end of the waist
belt B.
• Repeat this procedure to loosen the other waist belt.
Note: After adjusting the belts to fit your child, make sure you pull on them to
be sure they are securely fastened.
Care
At the beginning of each play season and every two weeks during play season:
• Check all hardware.
• Check all moving parts including swing seat, ropes, cables, and chains for
wear, rust, or other deterioration. Replace product as needed.
• Rake and check depth of loose fill protective surfacing materials to prevent
compaction and to maintain appropriate depth. Replace as necessary.
At the end of each play season or when the temperature drops below 32 °F.
• Remove swing and take indoors and do not use.
• Rake and check depth of loose fill protective surfacing materials to prevent
compaction and to maintain appropriate depth. Replace as necessary.
8
 Loading...