

Page 1
BHL59
IMPORTANT! Please keep this instruction
sheet for future reference, as it contains
important information.
• Please read these instructions before
assembly and use of this product.
• Adult assembly is required. Tool needed
for assembly: Phillips Screwdriver
(not included). Assembly instructions on
back side of this sheet.
• Requires one D (LR20) alkaline battery
(not included) for soothing unit operation.
• Use from birth until child is able to sit
up unassisted.
• Product features and decorations may
vary from photographs.
fisher-price.com
¡IMPORTANTE! Guardar estas instrucciones
para futura referencia, ya que contienen
información de importancia acerca de este
producto. LEA LAS INSTRUCCIONES ANTES
DE USAR ESTE PRODUCTO.
• Leer estas instrucciones antes de
ensamblar y usar este producto.
• Requiere montaje por un adulto.
Herramienta necesaria para el montaje:
desatornillador de cruz (no incluido).
Ver el dorso de esta hoja para las
instrucciones de montaje.
• La unidad relajante funciona con 1 pila
alcalina D (LR20) x 1,5V (no incluida).
• Usar a partir del nacimiento y hasta que el
bebé pueda incorporarse por sí solo.
• Las características y decoración del
producto pueden variar de las mostradas.
1
Page 2
CONSU
ASSISTANCE
AYUDA AL CONSU
OR
Care Mantenimiento
• The pad is machine washable. Wash it
separately in cold water on the gentle cycle.
Do not use bleach. Tumble dry separately on
low heat and remove promptly.
• The frame, toy bar and toys may be wiped
clean using a mild cleaning solution and
damp cloth. Do not immerse the toy bar.
Do not use bleach. Do not use harsh or
abrasive cleaners. Rinse clean with water
to remove residue.
• La almohadilla es lavable a máquina. Lavarla
por separado en agua fría, en ciclo para ropa
delicada. No usar blanqueador. Meter a la
secadora por separado a temperatura baja
y sacar inmediatamente después de
finalizado el ciclo.
• Pasarles un paño humedecido en una
solución limpiadora neutra al armazón,
barra de juguetes y juguetes. No sumergir
1-800-432-5437 (US)
la barra de juguetes. No usar blanqueador.
No usar limpiadores fuertes o abrasivos.
Enjuagar con agua para eliminar el residuo.
C
Fisher-Price, Inc., 636 Girard Avenue, East Aurora, NY 14052.
Hearing-impaired consumers/Clientes con problemas auditivos
1-800-382-7470.
Centro de Servicio en México:
59-05-51-00 Ext. 5206 ó 01-800-463-59-89
B
A
A
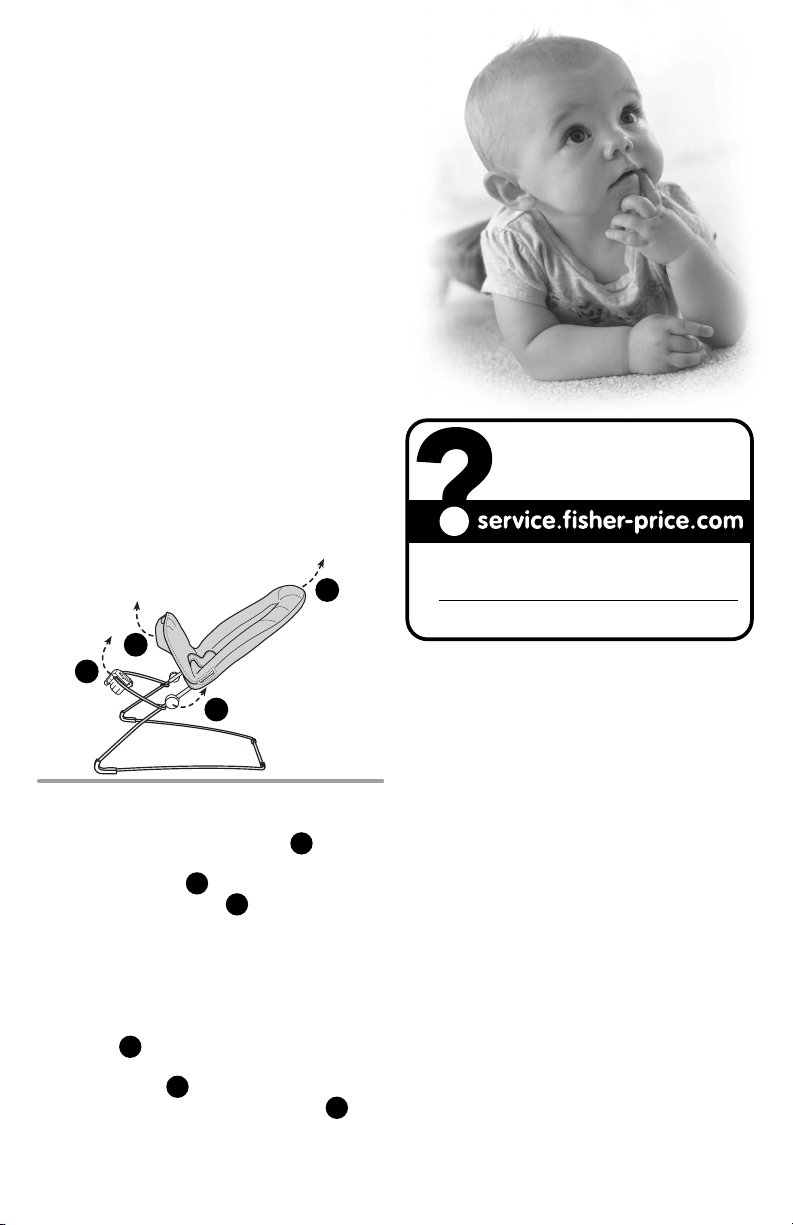
To remove the pad:
• Pull to remove the pad from around the
retainers and the soothing unit A.
• Remove the bottom pocket of the pad
from the footrest B.
• Lift to remove the pad C.
• To replace the pad, refer to Assembly
steps 7 - 9.
Para quitar la almohadilla:
• Jalar para desprender la almohadilla
alrededor de los retenedores y la unidad
relajante A.
• Retirar la funda inferior de la almohadilla
del reposapiés B.
• Levantar para retirar la almohadilla C.
MÉXICO
Importado y distribuido por Mattel de México, S.A. de
C.V., Miguel de Cervantes Saavedra No. 193, Pisos 10
y 11, Col. Granada, Delegación Miguel Hidalgo, C.P.
11520, México, D.F. R.F.C. MME-920701-NB3. Tels.:
59-05-51-00 Ext. 5206 ó 01-800-463-59-89.
CHILE
Mattel Chile, S.A., Avenida Américo Vespucio 501-B,
Quilicura, Santiago. Tel.: 1230-020-6213.
VENEZUELA
Servicio al consumidor Venezuela: Tel.: 0-800-100-9123.
ARGENTINA
Mattel Argentina, S.A., Curupaytí 1186, (1607) – Villa
Adelina, Buenos Aires. Tel.: 0800-666-3373.
COLOMBIA
Mattel Colombia, S.A., Calle 123#7-07 P.5, Bogotá.
Tel.: 01800-710-2069.
PERÚ
Mattel Perú, S.A., Av. Juan de Arona # 151, Centro
Empresarial Juan de Arona, Torre C, Piso 7, Oficina
704, San Isidro, Lima 27, Perú. RUC: 20425853865.
Reg. Importador: 02350-12-JUE-DIGESA.
Tel.: 0800-54744. Resto de Latinoamérica:
Servicio.Clientes@Mattel.com.
• Para poner la almohadilla en su lugar,
consultar los pasos de montaje 7 - 9.
©2013 Mattel. All Rights Reserved.
PRINTED IN CHINA BHL59a-0821
2
MER
MID
Page 3
Consumer Information
Información al consumidor
WARNING
To prevent serious injury or death:
• Fall Hazard - Never use on any elevated surface, since child’s movement may
cause product to slide or tip over. Use only on a floor.
• Suffocation Hazard - Never use on a soft surface (bed, sofa, cushion) since
product can tip over and cause suffocation in soft surfaces.
• Never use as a carrier or lift while child is seated. Never use the toy bar as
a handle.
• Always use the restraint system.
• This product is not intended to replace a crib or bassinet for prolonged
periods of sleep.
• Never leave child unattended.
• Never use for a child able to sit up unassisted.
ADVERTENCIA
Para evitar lesiones graves o la muerte:
• Peligro de caídas: No usar en superficies elevadas, ya que el movimiento
del niño puede causar que el producto se resbale o voltee. Usar únicamente
sobre el piso.
• Peligro de asfixia: No usar en superficies suaves (cama, sofá, cojín), ya que el
producto puede voltearse y causar asfixia en superficies suaves.
• No usar como cargador o levantarla mientras el niño esté sentado en ella.
No usar la barra de juguetes como asa.
• Siempre usar el sistema de sujeción.
• Este producto no está diseñado para reemplazar una cuna o moisés por
periodos prolongados de sueño.
• No dejar al niño fuera de su alcance.
• No usar con niños que pueden incorporarse por sí solos.
3
Page 4

Setup and Use Preparación y uso
Restraint Pad
Sistema de sujeción
1
Securing Your Infant
• Place your child in the seat. Position the
restraint pad between your child’s legs.
• Fasten the restraint belts to the restraint
pad. Make sure you hear a “click” on
both sides.
• Check to be sure the restraint system is
securely attached by pulling it away from
your child. The restraint system should
remain attached.
Sistema de sujeción
• Sentar al niño en la silla. Colocar la
almohadilla de sujeción entre las piernas
del niño.
• Ajustar los cinturones de seguridad en la
almohadilla de sujeción. Asegurarse de
oír un clic en ambos lados.
• Asegurarse de que el sistema de sujeción
esté bien asegurado, jalándolo en
dirección opuesta al niño. El sistema de
sujeción debe permanecer conectado.
Restraint System
Sistema de sujeción
Restraint Belts
Cinturones de seguridad
• Apretar cada cinturón de modo que el
sistema de sujeción quede bien ajustado al
niño/a. Consultar la siguiente sección para
mayores detalles sobre cómo apretar
los cinturones.
Anchored End
Extremo fijo
A
B
Free End
Extremo libre
TIGHTEN
3
APRETAR
To tighten the restraint belts:
• Feed the anchored end of the restraint belt
up through the buckle to form a loop A.
Pull the free end of the restraint belt B.
To loosen the restraint belts:
• Feed the free end of the restraint belt up
through the buckle to form a loop A.
Enlarge the loop by pulling on the end
of the loop toward the buckle. Pull the
anchored end of the restraint belt to shorten
the free end of the restraint belt B.
Para apretar los cinturones de seguridad:
• Introducir el extremo fijo del cinturón
de seguridad en la hebilla para formar
A
un espacio
cinturón de seguridad B.
Para aflojar los cinturones de seguridad:
• Introducir el extremo libre del cinturón
de seguridad en la hebilla para formar un
espacio
extremo del cinturón hacia la hebilla. Jalar
el extremo fijo del cinturón de seguridad
para acortar el extremo libre del cinturón de
seguridad B.
. Jalar el extremo libre del
A
. Agrandar el espacio jalando el
Anchored End
Extremo fijo
B
A
Free End
Extremo libre
LOOSEN
AFLOJAR
2
• Tighten each waist belt so that the restraint
system is snug against your child. Please
refer to the next section for instructions to
tighten the waist belts.
4
Page 5

Soothing Unit
Unidad relajante
Power Switch
Interruptor de encendido
• Make sure your child is properly secured
in the seat.
• Slide the power switch to:
Off.
or
IMPORTANT! Low battery power causes
this product to operate erratically: no
vibrations and the product may not turn off.
Remove and discard the battery and replace
with a new D (LR20) alkaline battery.
• Asegurarse de que el niño esté bien
asegurado en la silla.
• Poner el interruptor de encendido en:
Vibraciones o Apagado.
¡IMPORTANTE! Si la pila está gastada, el
producto no funcionará correctamente (sin
vibraciones ni función de apagado). Sacar
y desechar la pila y sustituirla por 1 pila nueva
alcalina D (LR20) x 1,5V.
Vibrations
Battery Safety Information
In exceptional circumstances, batteries may
leak fluids that can cause a chemical burn
injury or ruin your product. To avoid
battery leakage:
• Do not mix old and new batteries or
batteries of different types: alkaline,
standard (carbon-zinc) or rechargeable
(nickel-cadmium).
• Insert batteries as indicated inside the
battery compartment.
• Remove batteries during long periods
of non-use. Always remove exhausted
batteries from the product. Dispose of
batteries safely. Do not dispose of this
product in a fire. The batteries inside may
explode or leak.
• Never short-circuit the battery terminals.
• Use only batteries of the same or
equivalent type, as recommended.
• Do not charge non-rechargeable batteries.
• Remove rechargeable batteries from the
product before charging.
• If removable, rechargeable batteries are
used, they are only to be charged under
adult supervision.
Información de seguridad acerca de
las pilas
En circunstancias excepcionales, las pilas
pueden derramar líquido que puede causar
quemaduras o dañar el producto.
Para evitar derrames:
• No mezclar pilas nuevas con gastadas ni
mezclar pilas alcalinas, estándar (carbonocinc) o recargables (níquel-cadmio).
• Cerciorarse de que la polaridad de las pilas
sea la correcta.
• Sacar las pilas gastadas del producto
y desecharlas apropiadamente. Sacar las
pilas si el producto no va a ser usado
durante un periodo prolongado. No
quemar las pilas ya que podrían explotar
o derramar el líquido incorporado en ellas.
• No provocar un cortocircuito con
las terminales.
• Usar sólo el tipo de pilas recomendadas
(o su equivalente).
• No cargar pilas no recargables.
• Sacar las pilas recargables antes de cargarlas.
• La carga de las pilas recargables sólo debe
realizarse con la supervisión de un adulto.
5
Page 6

Parts Piezas
IMPORTANT! Please remove all parts from the package and identify them before assembly.
Some parts may be packed in the pad.
¡IMPORTANTE! Sacar todas las piezas del empaque e identificarlas previo al montaje.
Algunas piezas pueden venir embaladas en el colchón.
Pad
Almohadilla
Left Base Wire
Tubo de base izquierdo
Base Tube
Tubo de la base
2 Feet
2 patas
Toy Bar
Barra de juguetes
Seat Back Tube
Tubo del respaldo
Footrest
Reposapiés
Right Base Wire
Tubo de base derecho
M5 x 20 mm Screw – 4
Tornillo M5 x 20 mm – 4
Note: Screw shown actual size. Tighten or loosen all screws with a Phillips screwdriver. Do not over-tighten
the screws.
Atención: El tornillo se muestra a tamaño real. Apretar y aflojar todos los tornillos con un desatornillador
de cruz. No apretar en exceso.
6
Page 7

Assembly Montaje
IMPORTANT! Before assembly and each
use, inspect this product for damaged
hardware, loose joints, missing parts or
sharp edges. DO NOT use if any parts are
missing or broken. Contact Fisher-Price®
for replacement parts and instructions if
needed. Never substitute parts.
¡IMPORTANTE! Antes del montaje y de
cada uso, revisar que el producto no tenga
piezas dañadas, conexiones sueltas, piezas
faltantes o bordes filosos. NO usar el
producto si falta o está rota alguna pieza.
Póngase en contacto con la oficina Mattel
más próxima a su localidad para obtener
piezas de repuesto e instrucciones,
en caso de ser necesarias. Visite
http://service.mattel.com/intl/es.asp para un
listado completo. No usar piezas de terceros.
Base Tube
Tubo de base
Non-skid Surface
Superficie antiderrapante
2
• Position the feet so the non-skid surface
is down.
• Fit the feet on the base tube, as shown.
• Colocar las patas de modo que la superficie
antiderrapante esté hacia abajo.
• Ajustar las patas en el tubo de la base,
tal como se muestra.
Left Base Wire
Tubo de base izquierdo
Right Base Wire
1
• Place the base tube on a flat surface.
• Position the left and right base wires
as shown.
• Fit the left base wire and right base wire
into the base tube.
• Poner el tubo de la base sobre una
superficie plana.
• Colocar los tubos de base izquierdo
y derecho tal como se muestra.
• Introducir los tubos de base izquierdo
y derecho en el tubo de la base.
Tubo de base derecho
3
• Insert an M5 x 20 mm screw through each
foot and tighten.
• Introducir un tornillo M5 x 20 mm en cada
pata y apretarlos.
7
Page 8

Assembly Montaje
Footrest
Reposapiés
Base Wires
4
• Position the footrest so that the soothing
unit is upright.
• Fit the footrest onto the ends of the
base wires.
• Colocar el reposapiés de modo que la
unidad relajante esté en posición vertical.
• Ajustar el reposapiés en los extremos de
los tubos de la base.
Seat Back Tube
Tubo del respaldo
Tubos de base
• Introducir el tubo del respaldo totalmente
en los extremos del tubo de la base.
• Empujar el tubo del respaldo para
asegurarse de que está totalmente ajustado
en los tubos de la base.
6
• Insert a screw in each hole in the seat
back tube, base wire and into the inside
of the retainer. Tighten the screw.
• Pull the seat back tube up to be sure
it is secure.
• Insertar el tornillo en cada orificio del
tubo del respaldo, tubo de la base y en el
interior del retenedor. Apretar los tornillos.
• Jalar hacia arriba el tubo del respaldo para
asegurarse que está seguro.
5
• Fit the seat back tube onto the ends of the
base wire.
• Push the seat back tube to be sure it is
completely on the base wires.
8
Page 9

Assembly Montaje
Retainers
Retenedores
Pad Seat Back Pocket
Funda del respaldo de
la almohadilla
7
• Position the pad above the frame.
• Fit the upper pocket on the back of the pad
onto the seat back tube.
• Colocar la almohadilla sobre el armazón.
• Ajustar la funda superior del dorso de la
almohadilla sobre el tubo del respaldo.
Pad Lower Pocket
Funda inferior de
la almohadilla
8
• Fit the lower pocket on the back of the pad
onto the footrest.
• Ajustar la funda inferior del dorso de la
almohadilla sobre el reposapiés.
9
• Fit the retainers through the side openings
in the pad.
• Fit the edges of the soothing unit through
the large opening in the front of the pad.
• Introducir los retenedores en los orificios
laterales de la almohadilla.
• Ajustar los bordes de la unidad relajante en el
orificio grande del frente de la almohadilla.
Toy Bar Plugs
Enchufes de la
barra de juguetes
10
• Insert and “snap” the toy bar plugs into
each retainer socket.
Hint: The toy bar is removable. Press the
ends of the latches and lift the toy bar.
Soothing Unit
Unidad relajante
Sockets
Conexiones
• Insertar y ajustar los enchufes de la barra de
juguetes en cada conexión del retenedor.
Atención: La barra de juguetes es
desprendible. Jalar los extremos de los
seguros y levantar la barra de juguetes.
9
Page 10

Battery Installation Colocación de la pila
Hint: We recommend using an alkaline
battery for longer battery life.
Atención: Se recomienda usar una pila
alcalina para una mayor duración.
• Protect the environment by not disposing
of this product with household waste
(2002/96/EC). Check your local authority
for recycling advice and facilities.
• Proteger el medio ambiente no
desechando este producto en la basura
del hogar (2002/96/EC). Consultar con la
agencia local pertinente en cuanto
a información y centros de reciclaje.
B
A
A
1
• Pull to remove the pad from around the
retainers and the soothing unit A.
• Remove the pad bottom pocket from
the footrest B.
–
1,5V
D (LR20)
+
2
• Loosen the screw in the battery
compartment door. Remove the battery
compartment door.
• Insert one D (LR20) alkaline battery into the
battery compartment.
• Replace the battery compartment door and
tighten the screw.
• Pull and fit the pad seat bottom pocket
around the soothing unit and footrest.
• If this product begins to operate erratically,
you may need to reset the electronics.
Slide the power switch off and then
back on.
• Aflojar el tornillo de la tapa del
compartimento de la pila. Retirar la tapa.
• Insertar 1 pila alcalina D (LR20) x 1,5V en
el compartimento.
• Cerrar la tapa del compartimento de la pila
y apretar el tornillo.
• Jalar y ajustar la funda de la parte de abajo
de la almohadilla alrededor de la unidad
relajante y el reposapiés.
• Si este producto no funciona
correctamente, restablecer el circuito
electrónico. Poner el interruptor de
encendido en apagado y nuevamente
en encendido.
• Jalar para desprender la almohadilla
alrededor de los retenedores y la unidad
relajante A.
• Retirar la funda de la parte de abajo de la
almohadilla del reposapiés B.
10
 Loading...