

Page 1
BFV00
Please keep this instruction sheet for future reference,
as it contains important information.
Adult assembly is required. No tools required.
fisher-price.com
1
Page 2
Information
CONSU
ASSISTANC
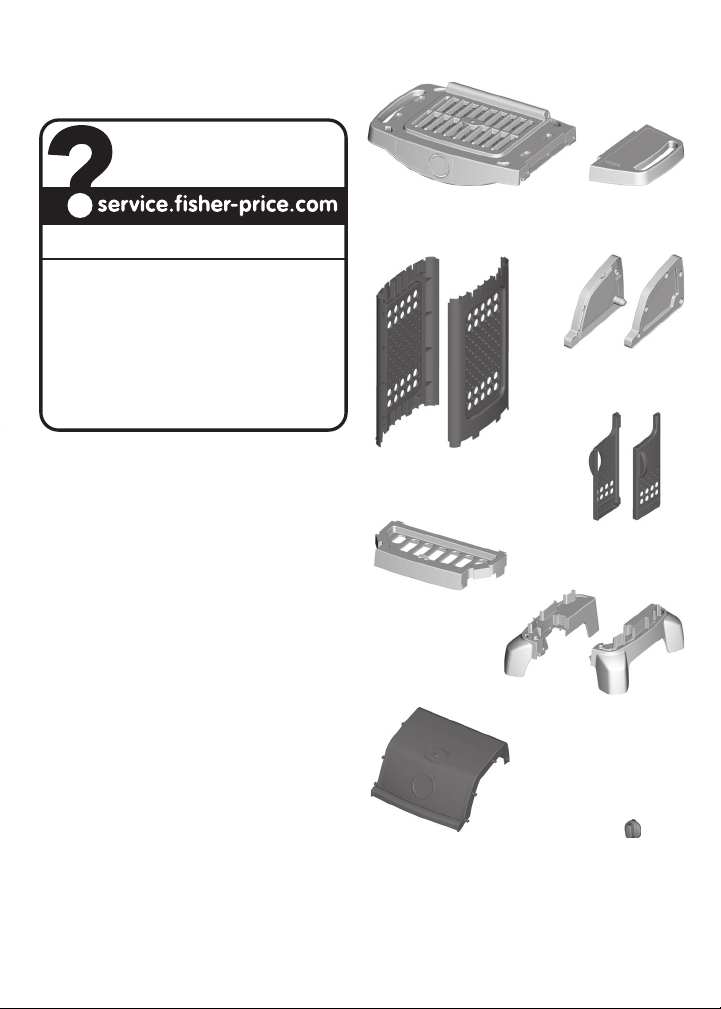
Assembled PartsConsumer
1-800-432-5437 (US & Canada)
1300 135 312 (Australia)
Fisher-Price, Inc., 636 Girard Avenue, East Aurora, NY 14052.
Hearing-impaired consumers: 1-800-382-7470.
Outside the United States:
Canada: Mattel Canada Inc., 6155 Freemont Blvd.,
Mississauga, Ontario L5R 3W2; www.service.mattel.com.
Great Britain: Mattel UK Ltd, Vanwall Business Park,
Maidenhead SL6 4UB. Helpline: 01628 500303.
www.service.mattel.com/uk
Mattel Europa B.V., Gondel 1, 1186 MJ Amstelveen, Nederland.
Australia: Mattel Australia Pty. Ltd., 658 Church Street,
Locked Bag #870, Richmond, Victoria 3121 Australia.
New Zealand: 16-18 William Pickering Drive,
Albany 1331, Auckland.
MER
E
Grill Top
2 Side Panels
Cross Brace
Shelf
2 Lid Sides
2 Doors
2 Bases
Lid
PRINTED IN MEXICO BFV00pr-0920
©2013 Mattel. All Rights Reserved.
2
Knob
Page 3

Assembly
Cross Brace
1
• “Snap” the cross brace to the bases.
Hint: The cross brace is designed to fit on the bases one way. If it does not seem to fit, turn
it around and try again.
Bases
Side Panels
2
• “Snap” the side panels into the base assembly.
Hint: Each side panel is designed to fit into the base assembly one way. If a side panel does not
seem to fit, turn the side panel around or try the other side of the base assembly.
3
Page 4

Assembly
Assembl
y
Grill Top
3
• “Snap” the grill top to the side panels.
Hint: The grill top is designed to fit one way. If it does not seem to fit, turn it around and
try again.
Doors
4
• At an angle, fit the peg on the top of each door into the opening underneath the grill top.
• Then, push the bottom of each door to “snap” in place.
4
Page 5

Assembly
5
• “Snap” the shelf onto the side of the grill top.
Shelf
Lid Side
6
• “Snap” the lid sides to the lid.
Lid
Lid Side
5
Page 6

Assembly
Pegs
Openings
7
• Fit the lid pegs into the openings in the grill top. Lower the lid.
Knob
8
• “Snap” the knob onto the front of the grill.
6
 Loading...