

Fisher-Price B1836 Instruction Sheet

Tracktown Railway
Tracktown Railway
B1836
™
www.fisher-price.com
www.fisher-price.com
A
B
x2
x2
F
K
P
VT
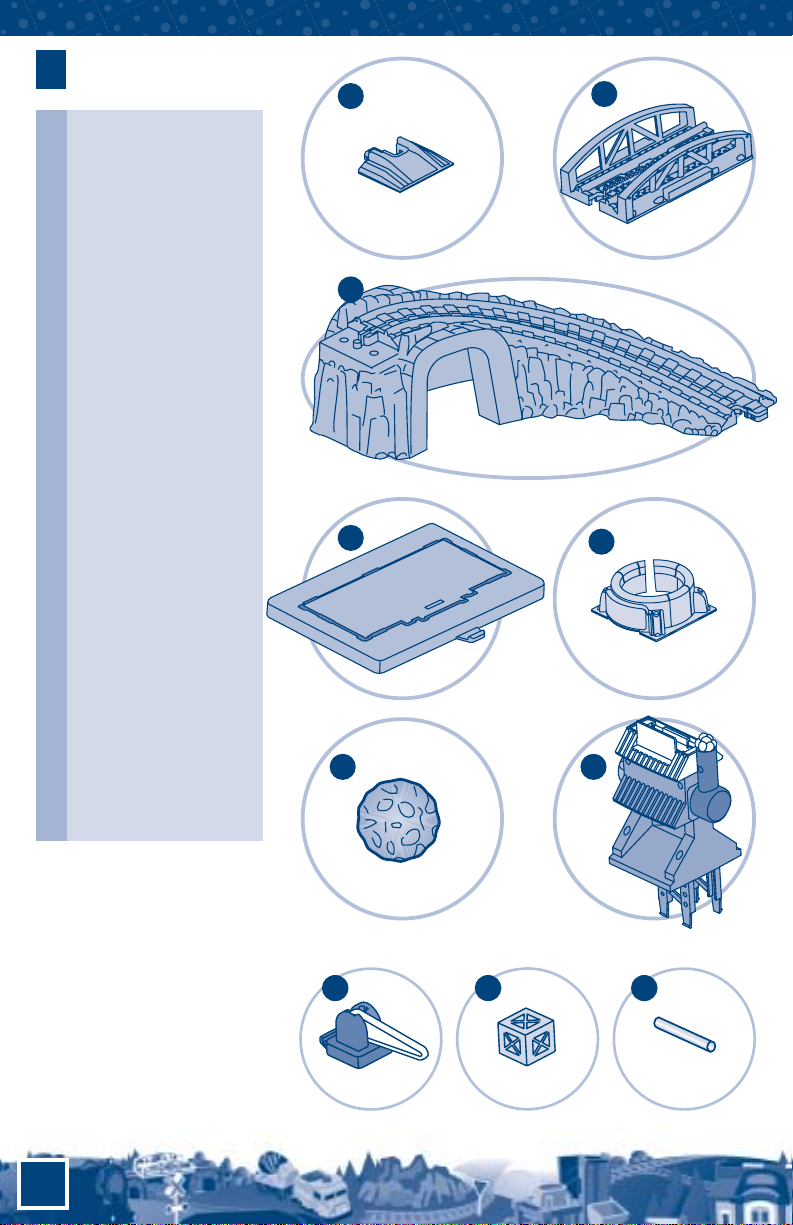
Parts
A.2 Small Ramps
B.Bridge
C.6 Curved Tracks
D.5 Straight Tracks
E.2 Cross Tracks
F.2 Bridge Ramps
G.2 Turn Off Tracks
H. Gantry
I. Depot
J. Depot Base
K. Coal Chute
L. Coal Chute Frame
M. Coal Mine Building
N. Coal Mine Arch
O.2 Boulders
P. Pipe Works
Q. Pipe Works Base
R. Remote Controller
S.6 Signs
T.2 Crossing Gates
U.2 Crates
V.3 Pipes
W.Train Engine
X. Coal Car
Y.Pipe Car
Z. Caboose
Not shown: Label sheet
Please keep this instruction
sheet for future reference, as it
contains important information.
Requires six “AAA” (LR03)
alkaline batteries (not included).
Adult assembly is required.
Tool required for battery
installation: Phillips screwdriver
(not included).
J
O
x2 x2
2
x2
x3
U

C
x6 x5 x2
E
x2
G H I
L
M
S
X
Y Z
W
D
x2
N
Q
3
R
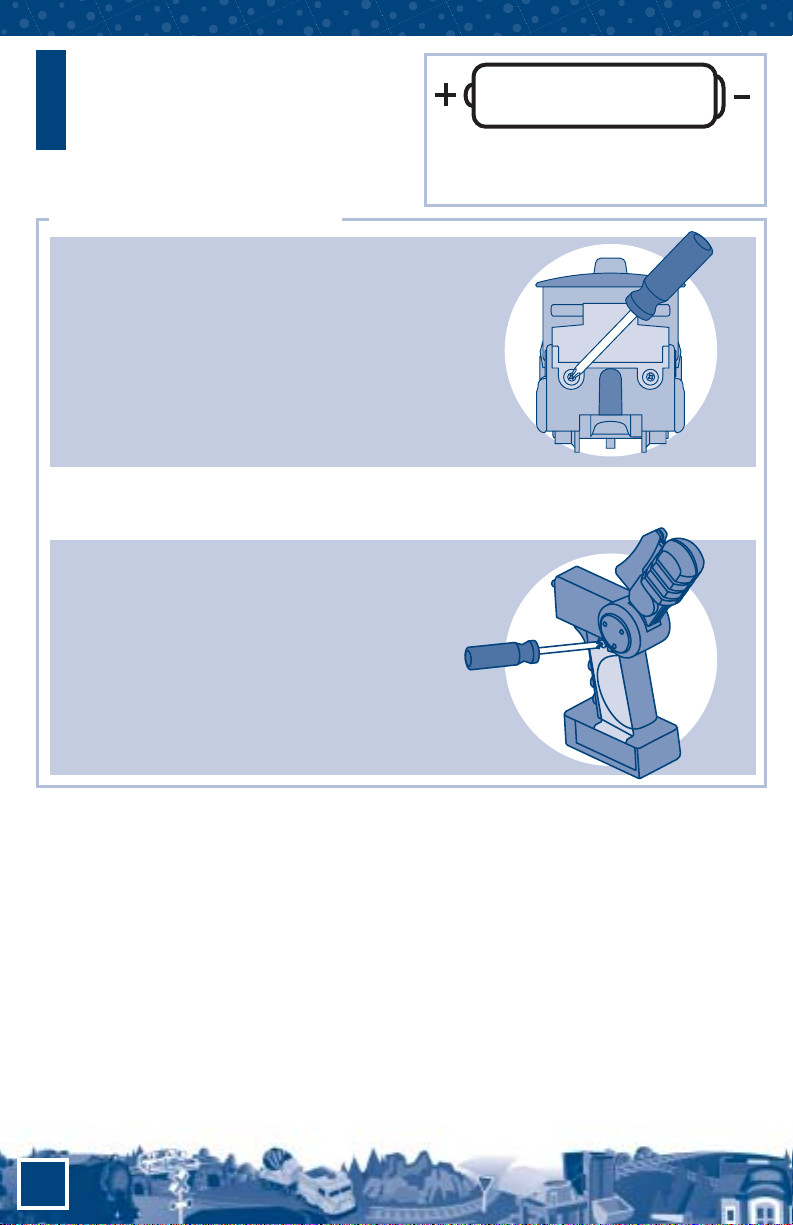
Battery Installation
Train Engine
• Locate the battery compartment on the back of
the train engine
• Loosen the screws in the battery compartment
door with a Phillips screwdriver. Lift the battery
compartment door and insert three “AAA” (LR03)
alkaline batteries.
• Close the battery compartment door and tighten
the screws with a Phillips screwdriver. Do not
over-tighten.
• Do not mix old and new batteries or
batteries of different types: alkaline,
standard (carbon-zinc) or rechargeable
(nickel-cadmium).
• Insert batteries as indicated inside the
battery compartment.
• Remove batteries during long periods of
non-use. Always remove exhausted
batteries from the toy. Dispose of
batteries safely. Do not dispose of
batteries in a fire. The batteries may
explode or leak.
• Never short-circuit the battery terminals.
• Use only batteries of the same or
equivalent type, as recommended.
• Do not charge non-rechargeable
batteries.
• Remove rechargeable batteries from the
toy before charging.
• If removable, rechargeable batteries are
used, they are only to be charged under
adult supervision.
Battery
Information
Remote Controller
• Locate the battery compartment on the side of
the remote controller.
• Loosen the screw in the battery compartment
door with a Phillips screwdriver. Remove the
battery compartment door and insert three
“AAA” (LR03) alkaline batteries.
• Replace the battery compartment door and
tighten the screw with a Phillips screwdriver.
Do not over-tighten.
1.5V x 6
“AAA” (LR03)
SHOWN ACTUAL SIZE
We recommend the use of alkaline batteries
for longer battery life
.
Battery Safety Information
Batteries may leak fluids that can cause a chemical burn injury or ruin your toy. To avoid
battery leakage:
IMPORTANT! Under normal use conditions, the batteries in the engine will require
replacement more often than the batteries in the remote controller. For additional
information, see the troubleshooting section on page 15.
4
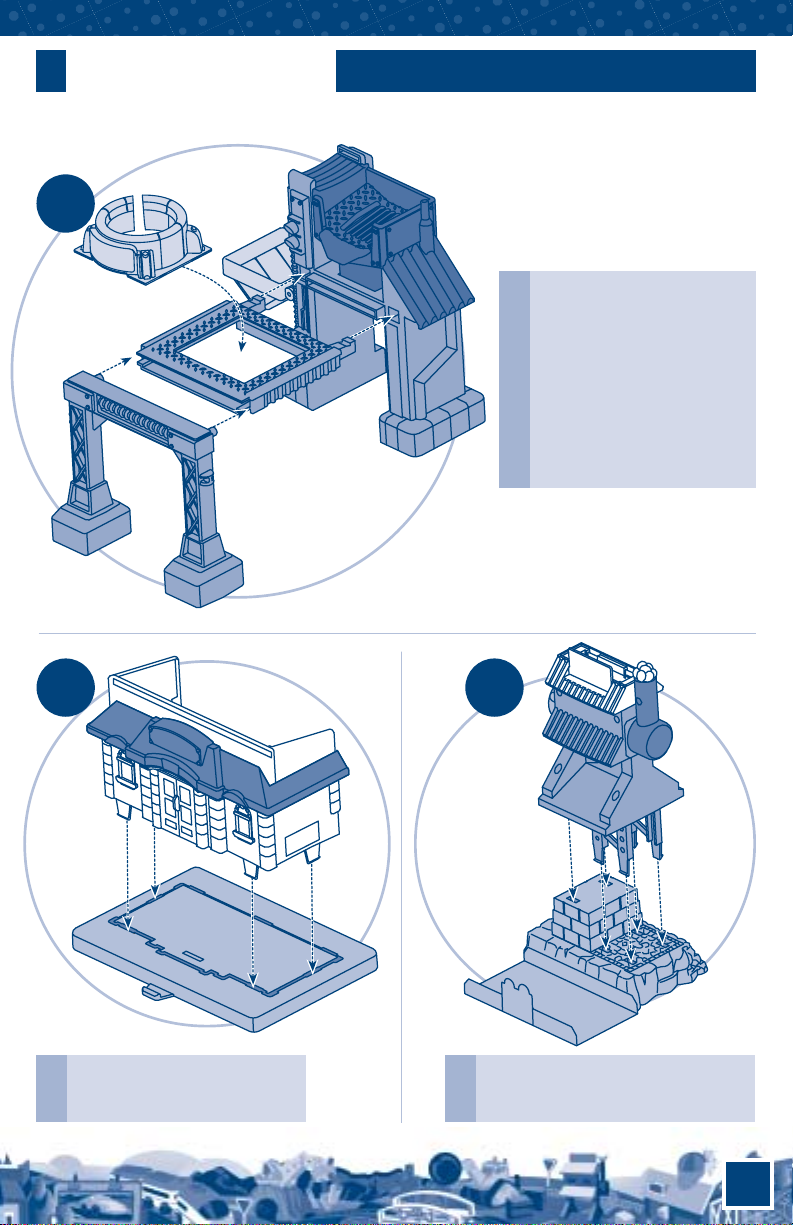
Assembly
1
COAL MINE
BUILDING
COAL CHUTE
FRAME
DEPOT
DEPOT
BASE
“Snap” the tabs on the depot
into the slots in the depot base.
“Snap” the tabs on the pipe works
into the slots in the pipe works base.
• “Snap” the posts on the
coal chute frame into
the holes in the coal
mine building.
• “Snap” the pegs on the
coal mine arch onto
the coal chute frame.
• Fit the coal chute into
the coal chute frame.
COAL CHUTE
COAL MINE
ARCH
2 3
PIPE
WORKS
PIPE WORKS
BASE
5
 Loading...