

Page 1
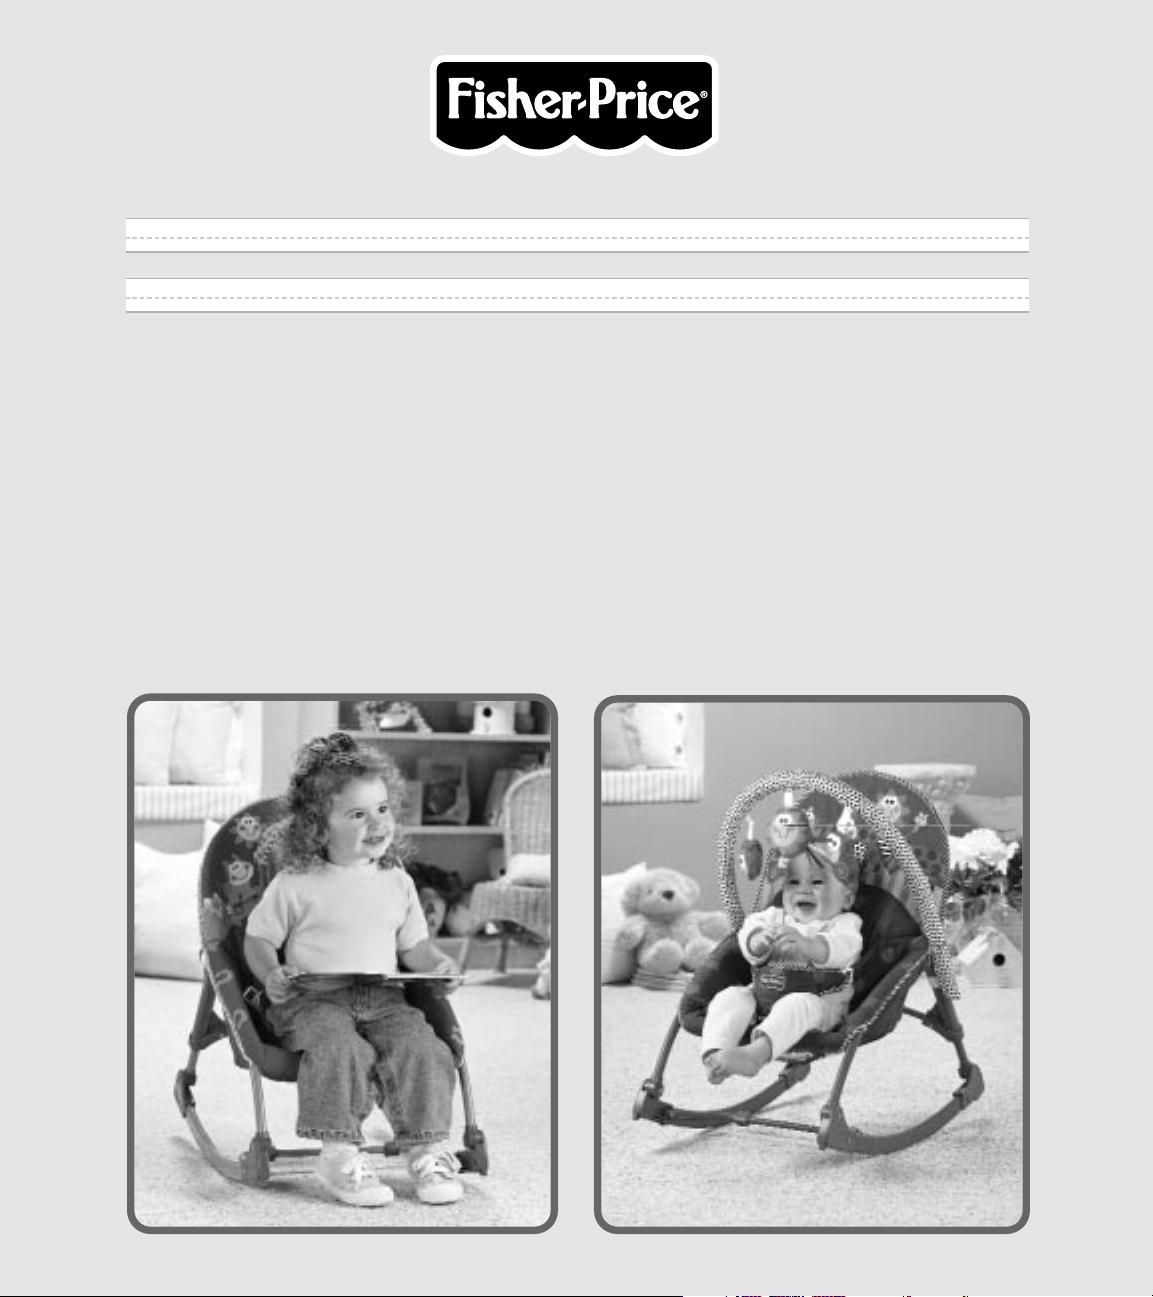
INFANT-TO-TODDLER
SOOTHING ROCKER
Model Numbers: 79414, 79614
Please keep this instruction sheet for future reference, as it contains important information.
Use the upright position only when your child has developed enough
upper body control to sit without leaning forward.
Always use the restraint until your child is able to climb
in and out of the chair unassisted.
Designed for use with children from birth to 40 lbs.
Adult assembly is required. No tools necessary.
Requires one “D” (LR20) alkaline battery (not included).
Page 2

Occasionally a consumer may experience a problem
with one of our products. If this should happen,
please call us toll-free, rather than return this
product to the store.
Usually, we can solve the problem during a conversation
or by sending you replacement parts.
Call 1-800-432-KIDS,
8 AM - 6 PM EST Monday through Friday.
Hearing-impaired consumers using TTY/TDD equipment,
please call 1-800-382-7470.
Or, write to: Fisher-Price® Consumer Relations,
636 Girard Avenue, East Aurora,
New York 14052.
CCOONNSSUUMMEERR
IINNFFOORRMMAATTIIOONN
WWAARR NN IINN GGSS
To prevent serious injury
and/or falls:
• Never use on any elevated surface.
• Always use the restraint until child
is able to climb in and out of the
chair unassisted.
• Never leave child unattended.
• Use the upright position only
when child has developed enough
upper body control to sit without
leaning forward.
WARNING
PPAARR TTSS
IMPORTANT! Please remove all parts from the package
and identify them before assembly. The seat back tube
may have been packaged within the pad at the factory.
Before beginning assembly, please remove the seat back
tube from the pad.
22
Back Frame
Seat Back
Tube
Seat Pad
2 Joints
Kickstand
Rail
Rail
Front
Frame
Page 3
33
AASS SS EEMMBBLL YY
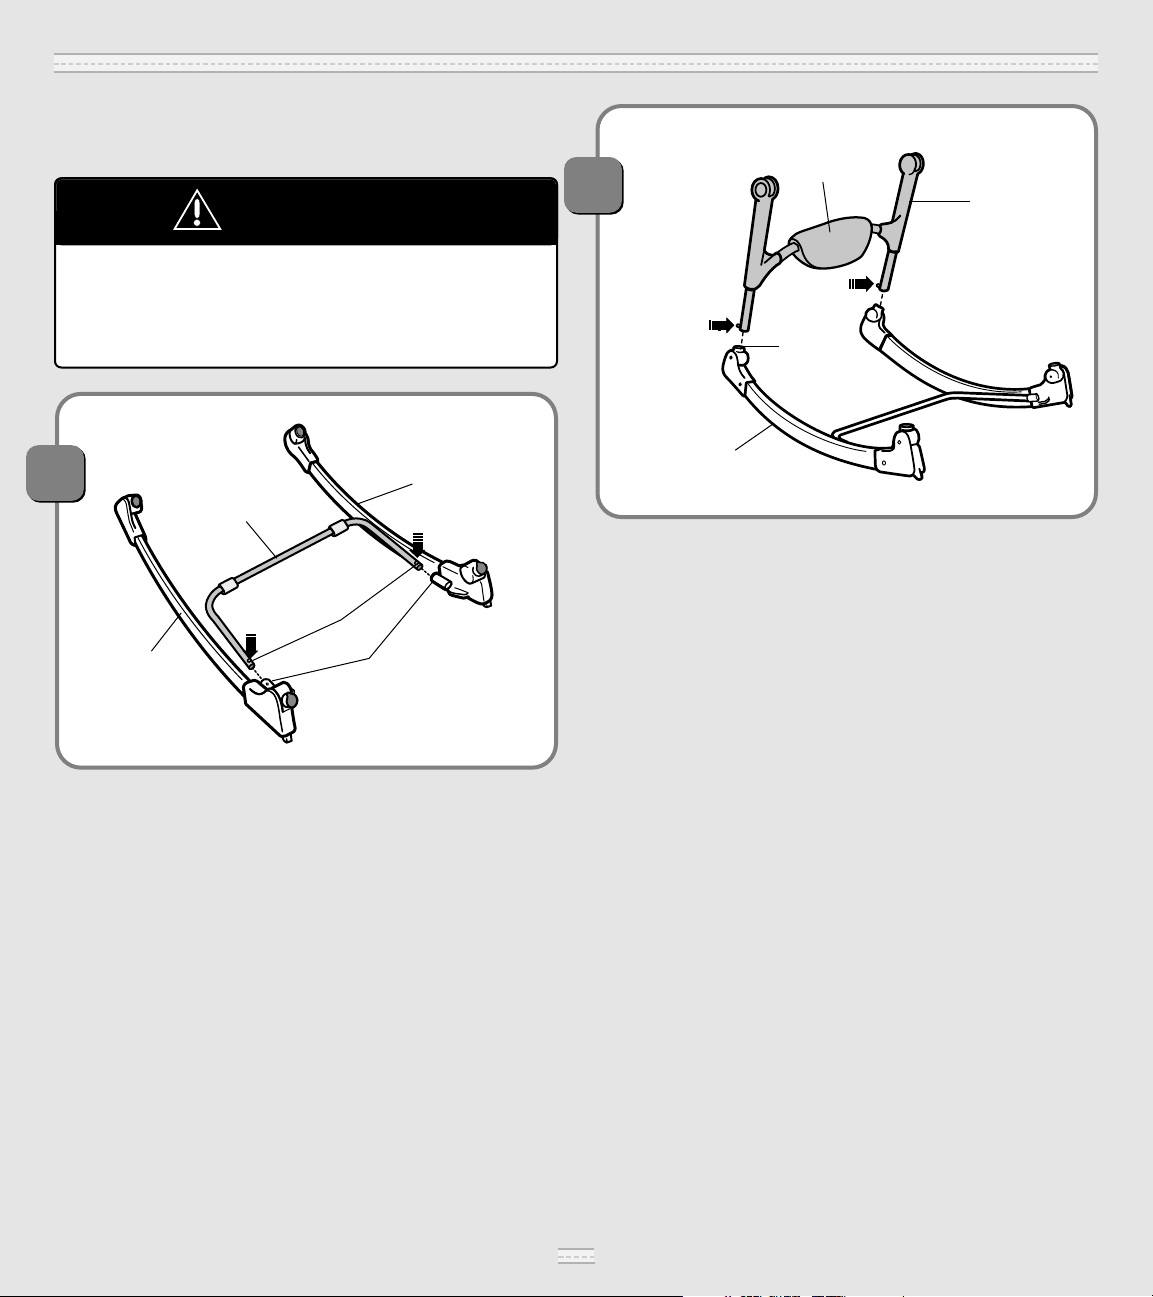
11
This package contains small parts
in its unassembled state.
Adult assembly is required.
CAUTION
• Position each rail so that the inner receptacles are facing
each other.
• Position the kickstand so the buttons face up.
• While pressing the button on each end of the kickstand, insert
and “snap” the kickstand into the inner receptacle on each rail.
Make sure you hear a “snap” on each end of the kickstand
and the buttons are visible in the inner receptacles.
IMPORTANT! Before assembly or each usage, inspect this product
for damaged hardware, loose joints, missing parts or sharp edges.
Kick Stand
Rail
Rail
Buttons Face Up
Inner
Receptacles
Press Button
Press
Button
22
Back Frame
Soothing
Vibrations Unit
Rail
Top
Receptacle
• Position the back frame so that the soothing vibrations unit
power switch faces out.
• Make sure the top receptacle on each rail is upright.
• While pressing the button on each end of the back frame, insert
and “snap” the back frame into the top receptacle on each rail.
Make sure you hear a “snap” on each side of the back frame
and the buttons are visible in the top receptacles.
Press
Button
Press Button
Page 4
33
Rail
Press Button
Top Receptacle
Notched End
Back Frame
• Position the front frame so that it bends back towards the back
frame and the notched end is down.
• Make sure the top receptacle on each rail is upright.
• While pressing the button on each end of the front frame, insert
and “snap” the front frame into the top receptacle on each rail.
Make sure you hear a “snap” on each side of the front
frame and the buttons are visible in the top receptacles.
Front Frame
AASS SS EEMMBBLL YY
44
• Lift the front frame up slightly.
• Position one of the joints so the push
button is outward and the ribbed
opening is upright. Fit the joint onto
one of the ends of the front frame.
• Press the front frame button on the inside
of the front frame. Slide the joint down
until the button “snaps” into place.
Make sure you hear a “snap”.
• Repeat this procedure to attach the other
joint to the other end of the front frame.
Ribbed
Opening
Upright
Press
Front Frame
Button
Joint
Push
Button
Outward
Ribbed
Opening
Joint
44
Page 5

55
55
• Position the seat back tube so that the open ends are forward.
• Press the front frame button on each end of the seat back tube
and insert the ends of the seat back tube into the joints on
the frame.
• Push the seat back tube into the joints until the buttons “snap”
into place. Make sure you hear a “snap” on each side.
• Pull up on the seat back tube to be sure it is secure.
Seat Back Tube
Press
Buttons
Joints
Tapered
Ends
Backward
Open Ends
Forward
AASS SS EEMMBBLL YY
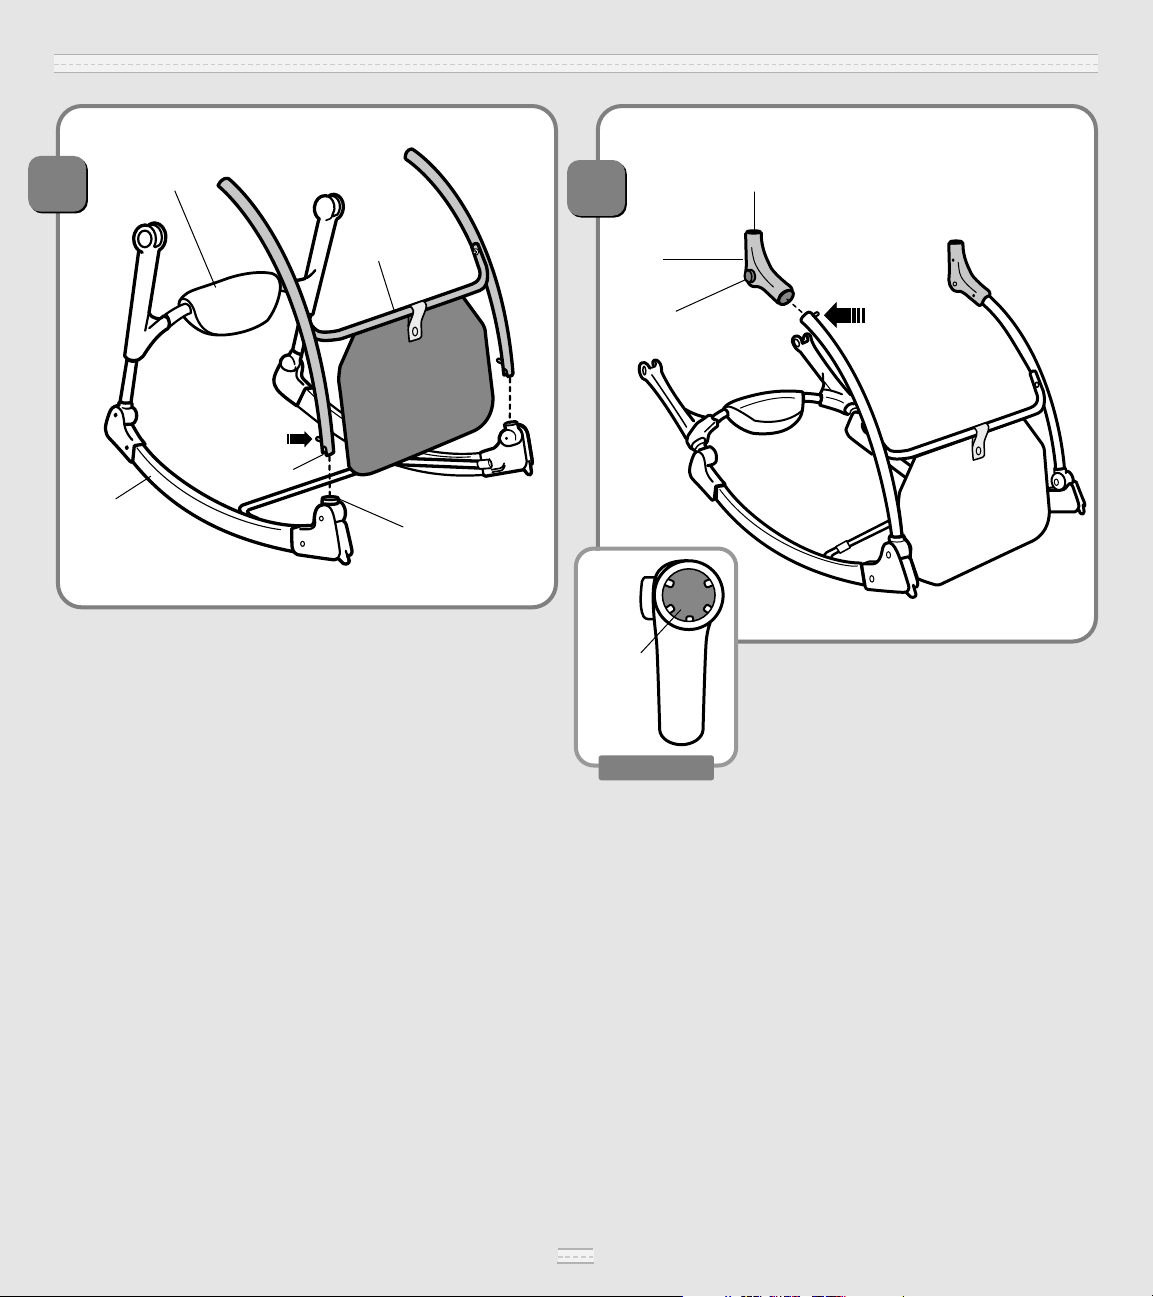
• Slide the pad over the seat back tube.
• Pull the pad down over the frame.
66
Pad
Page 6

66
77
• Push the front frame and rear frame toward each other.
• Press the push button on each joint and fit each joint into the
groove in each end of the rear frame. Make sure both push
buttons “snap” into the hole in each end of the rear frame.
• Check to be sure the front and rear frames are assembled
correctly, by pulling them away from each other. The frames
should remain attached to each other.
Push Button
Rear Frame
Groove
Hole
Front Leg
(Underneath Pad)
AASS SS EEMMBBLL YY
88
• Turn the hardboard over and
insert it into the pocket in the
bottom of the pad.
• Turn the seat face down.
• Fasten both pad buckles
together. Make sure you hear
a “snap” on both sides
Pocket
Hardboard
Buckles
Page 7

BB AA TTTT EE RR YY
IINN SSTTAA LLLLAA TTIIOONN
• Locate the battery compartment on the back of the soothing
vibrations unit.
• Insert a coin into the slot in the battery compartment door.
Pry the battery compartment door open.
• Insert one “D” alkaline battery as shown inside the
battery compartment.
Hint: Use only an alkaline battery for longest battery life.
• Replace the battery compartment door and be sure it snaps
securely closed.
1.5V
“D” (LR20)
SHOWN ACTUAL SIZE
Battery Compartment
Soothing Vibrations Unit
BB AATTTT EE RR YY TTIIPP SS
• Remove the battery during long periods of non-use. Always
remove an exhausted battery from the product. Battery leakage
and corrosion can damage this product. Dispose of the
battery safely.
• Never short circuit the battery terminals.
• A non-rechargeable battery is not to be recharged.
• Only a battery of the same or equivalent type as recommended
in the Battery Installation instructions is to be used.
• If a removable rechargeable battery is used, it is only to be
charged under adult supervision.
• A rechargeable battery is to be removed from the product before
it is charged.
• If you use a battery charger, it should be examined regularly for
damage to the cord, plug, enclosure and other parts. Do not use
a damaged battery charger until it has been properly repaired.
77
Page 8
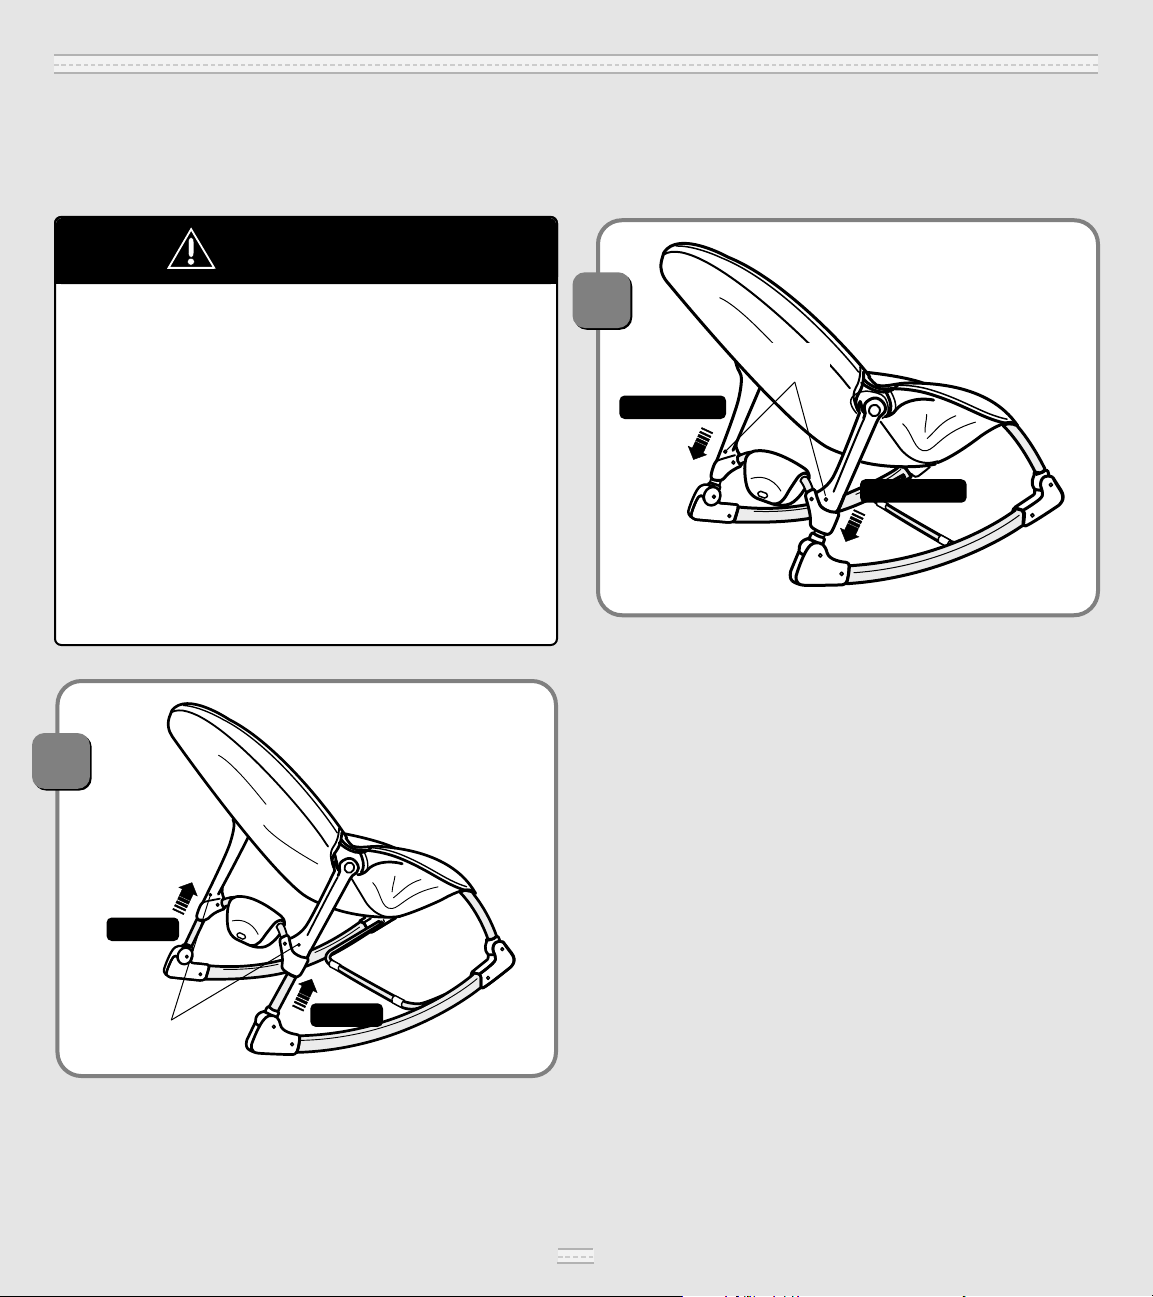
SS EETT--UUPP && UUSSEE
11
To prevent serious injury
and/or falls:
• Never use on any elevated surface.
• Always use the restraint until child
is able to climb in and out of the
chair unassisted.
• Never leave child unattended.
• Use the upright position only
when child has developed enough
upper body control to sit without
leaning forward.
WARNING
IMPORTANT! Before each usage or assembly, inspect this product for damaged hardware, loose joints, missing parts or sharp edges. Do
not use if any parts are missing or broken. Contact Fisher-Price® for replacement parts and instructions if needed. Never substitute parts.
Upright Position
• Pull both rear legs up until the small buttons “snap” into place.
Make sure you hear a “snap” on both sides.
Buttons
PULL UP
PULL UP
88
22
Semi-Recline Position
PUSH DOWN
• Press the small button on each rear leg and push the rear frame
down completely.
PUSH DOWN
Press
Buttons
Page 9

Securing Your Infant
33
• Place your child in the seat. Position the restraint pad between
your child’s legs.
• Fasten the restraint straps to the restraint pad. Make sure you
hear a “click” on both sides.
• Make sure the restraint is securely attached by pulling it away
from your child.The restraint should remain buckled.
Restraint
Strap
Restraint
Strap
Restraint Pad
SS EETT--UUPP && UUSSEE
To prevent serious injury
and/or falls:
• Never use on any elevated surface.
• Always use the restraint until child
is able to climb in and out of the
chair unassisted.
• Never leave child unattended.
WARNING
99
To tighten the restraint straps:
• Feed the anchored end of the restraint strap up through the
buckle to form a loop .
• Pull the free end of the restraint strap .
• Repeat this procedure to tighten the other restraint strap.
To loosen the restraint straps:
• Feed the free end of the restraint strap up through the buckle
to form a loop .
• Enlarge the loop by pulling on the end of the loop toward
the buckle.
• Pull the anchored end of the restraint strap to shorten the
free end of the restraint strap .
• Repeat this procedure to loosen the other restraint strap .
Note: After adjusting the restraint straps to fit your child, make
sure you pull on them to be sure they are securely fastened.
Anchored End
44
Free End
Buckle
Tighten Restraint Loosen Restraint
Anchored End
Free End
Buckle
B
B
B
B
Page 10

55
• Fit the ends of the toy bar
through the loops in each side
of the pad.
• From the back of the seat, insert
the straps on the ends of the toy
bar through the slots on each
rear leg.
• Fasten the straps together.
• Fasten the toys to the straps on
the middle of the toy bar.
Toy Bar
Toys
Loop
Loop
Straps
Toy Bar
Slot
Slot
Strap
Strap
Back View
SS EETT--UUPP && UUSSEE
ON
OFF
66
Soothing Vibrations
• Make sure your child is properly secured in the seat.
• Slide the ON/OFF switch on the soothing unit to the ON position.
The seat will vibrate.
• Slide the ON/OFF switch on the soothing unit to the OFF position.
The seat will not vibrate.
Soothing Unit
IMPORTANT! When soothing vibrations become slow or
vibrations stop, it’s time to replace the battery. Please refer
to the “Battery Installation” section on page 7.
1100
Page 11

77
Stationary Feeding Seat
• Position the seat in the upright or semi-recline position.
• Rotate the kickstand out.
• Push down on the seat bottom to be sure the kickstand is
in position.
Kickstand
SS EETT--UUPP && UUSSEE
To prevent serious injury
and/or falls:
• Never use on any elevated surface.
• Always use the restraint until child
is able to climb in and out of the
chair unassisted.
• Never leave child unattended.
WARNING
SS TTOO RR IINN GG
RR EE SS TTRRAAIINNTT SSYYSSTTEE MM
FFOORR TT OODDDDLLEE RR
• Insert the restraint straps through the small slots in the pad.
• Insert the restraint pad down through the large slot in the pad.
Restraint Strap
Restraint Strap
Restraint Pad
SS TTOO RR II NN GG TT HHEE
TT OO YY BBAA RR
Back View
Toy Bar
Straps
Straps
• Turn the seat so that the back is facing you.
• Fasten the straps around the ends of the toybar.
1111
Page 12

CCAARREE
The pad is machine washable. Wash the pad separately in cold
water on the gentle cycle. Do not use bleach. Tumble dry separately on low heat and remove promptly. Surface wash the frame, with
mild detergent and water. Do not use bleach. Do not use harsh or
abrasive cleaners. Rinse clean with water to remove residue.
To remove the pad:
• Unfasten the buckles on the bottom of the pad.
• Remove the hardboard from the pocket in the pad
• Press the push buttons on each joint to disassemble the front
and rear frames.
• Remove the pad.
• After washing, re-assemble the pad to the frame with hardboard
(see Assembly steps 6-9).
OO NNEE ((11 )) YY EE AARR
Fisher-Price, Inc., 636 Girard Avenue, East Aurora, New York 14052
warrants that the Infant-to-Toddler Soothing Rocker is free from
all defects in material and workmanship when used under normal
conditions for a period of one (1) year from the date of purchase.
Should the product fail to perform properly, we will repair or
replace it at our option, free of charge. Purchaser is responsible
for shipping the product to Consumer Relations at the address
indicated above and for all associated freight and insurance cost.
Fisher-Price, Inc. will bear the cost of shipping the repaired or
replaced item to you.This warranty is void if the owner repairs or
modifies the product.This warranty excludes any liability other
than that expressly stated above including but not limited to any
incidental or consequential damages.
SOME STATES DO NOT ALLOW THE EXCLUSION OR LIMITATION OF INCIDENTAL OR CONSEQUENTIAL DAMAGES, SO THE
ABOVE LIMITATION OR EXCLUSION MAY NOT APPLY TO YOU.
THIS WARRANTY GIVES YOU SPECIFIC LEGAL RIGHTS, AND
YOU MAY ALSO HAVE OTHER RIGHTS WHICH MAY VARY
FROM STATE TO STATE.
LLIIMMII TT EE DD WW AARRRR AANNTTYY
Fisher-Price, Inc., a subsidiary of Mattel, Inc., East Aurora, NY 14052 U.S.A.
©2001 Mattel, Inc. All Rights Reserved. ® and ™ designate U.S. trademarks of Mattel, Inc.
Printed in China 79414a-0920
For other countries, outside the United States:
Canada: call 1-800-567-7724, or write to: Mattel Canada Inc, 6155 Freemont
Blvd., Mississauga, Ontario L5R 3W2.
Great Britain
: telephone 01628 500303.
Australia: Mattel Australia Pty. Ltd., 658 Church Street, Locked Bag #870,
Richmond, Victoria 3121 Australia. Consumer Advisory Service 1300 135 312.
New Zealand: 16-18 William Pickering Drive, Albany 1331, Auckland.
 Loading...