

Fisher-Price 74839 Instruction Sheet

Model Number: 74839
Please save these instructions for future reference.
Adult assembly is required.
Requires three “C” (LR14) alkaline batteries (not included).
Tool required for assembly: Phillips screwdriver (not included).
Talking Chef
Magic Kitchen
Talking Chef
Magic Kitchen
TM
Ring!
Ring!
Ring!
Ring!
Ring!
Ring!
®
Fisher-Price
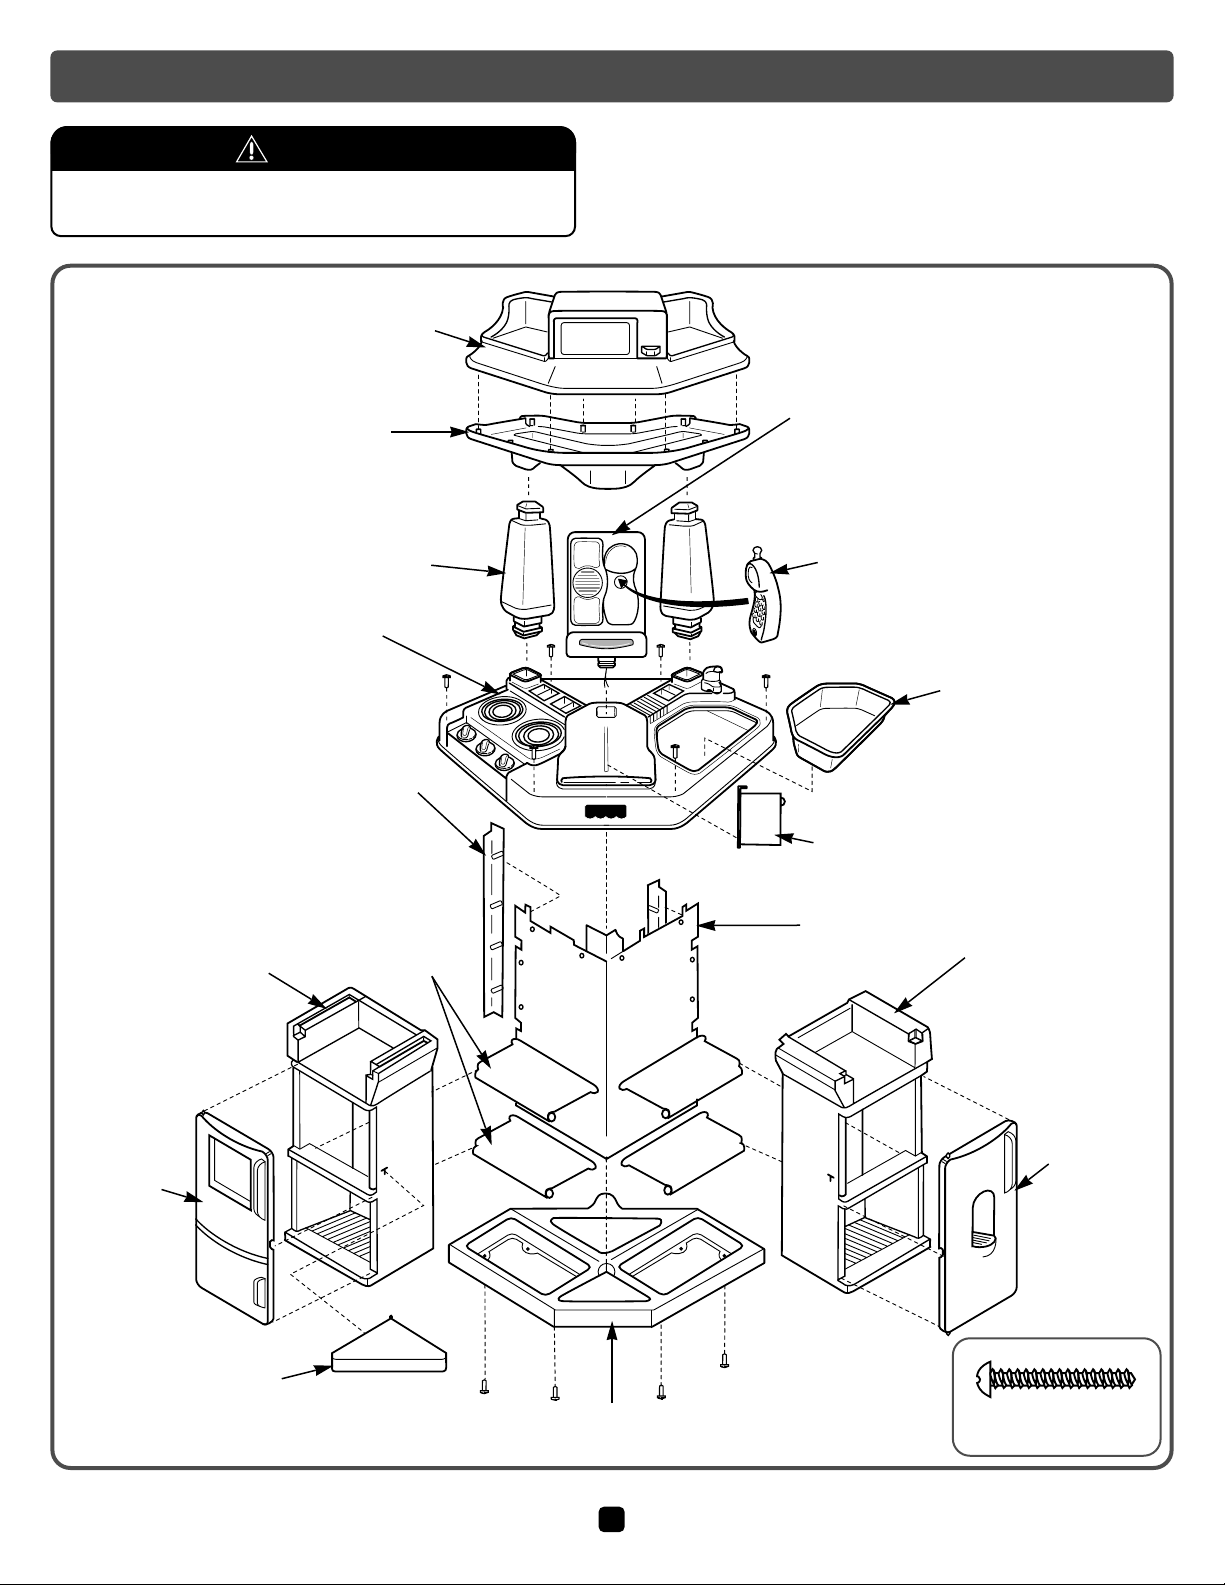
This package contains small parts in its
unassembled state. Adult assembly is required.
Upper
Canopy
Lower
Canopy
2 Canopy
Supports
Console
2 Retainers
Cook Top
Oven
Oven Door
Sink
Backboard
Cookbook Page
Base
Refrigerator
Door
Refrigerator
4 Shelves
Triangular Shelf
Telephone
Parts Not Shown:
Label Sheet
Pan
Spatula
2 Plates
2 Forks
2 Knives
2 Spoons
2 Cups
Milk Carton
Spaghetti Box
2 Bacon
Egg
Pancake
Banana
Apple
Green Beans
Egg shell
Spaghetti with Meatballs
Meatballs
Sauce
Spaghetti
Cookie Sheet
Cookie
• Before assembly, wipe each plastic part with a damp cloth to
remove any debris.
• Save all packaging material until assembly is complete to
ensure that parts are not discarded.
#6 x 1" Screw - 20
Shown Actual Size
CAUTION
2
Par
Partsts

Assembly
Assembly
3
Refrigerator
Triangular Shelf
FRONT VIEW
Oven
Slot Slot
Plug
Plug
Tabs
Ta b
• Stand the base assembly upright.
• Insert the plugs on the triangular shelf into the slots in the
oven and refrigerator.
• Make sure the tab on the refrigerator is flat against the oven
and the tabs on the oven are flat against the refrigerator.
6
6
A
B
• Place the base on a flat surface so that the triangular shelf
faces you.
• Locate the A and B marking next to each rectangular opening on the base.
Triangular Shelf
Refrigerator
A
B
FRONT VIEW
Base
Oven
BACK VIEW
Oven
• The oven and refrigerator are marked A (oven) and B
(refrigerator). Locate the A or B marking on the back of each.
• Fit the oven (marked A) into the rectangular opening in
the base (marked A).
A
1
1
B
FRONT VIEW
Base
Refrigerator
Oven
Tabs
Ta b
• Fit the refrigerator (marked B) into the rectangular opening
in the base (marked B).
• Position the refrigerator and the oven so that the tab on the
refrigerator is flat against the oven and the tabs on the oven
are flat against the refrigerator.
4
4
• Turn the base assembly face down.
• Insert four screws through the base and into the oven and
refrigerator.Tighten the screws with a Phillips screwdriver.
Do not over-tighten.
Base
BOTTOM VIEW
5
5
2
2
3
3
 Loading...