

Page 1

Warming Drawer
WB60SD models
User guide
NZ AU GB IE
Page 2

Page 3

Contents
1
Safety and warnings
Introduction
Using your warming drawer
Care and cleaning
14
Troubleshooting
Warranty and service
2
9
10
15
16
Important!
SAVE THESE INSTRUCTIONS
The models shown in this user guide may not be available in all markets and are
subject to change at any time. For current details about model and specification
availability in your country, please visit our website listed on the back cover
or contact your local Fisher & Paykel dealer.
Page 4
2
Safety and warnings
Operation
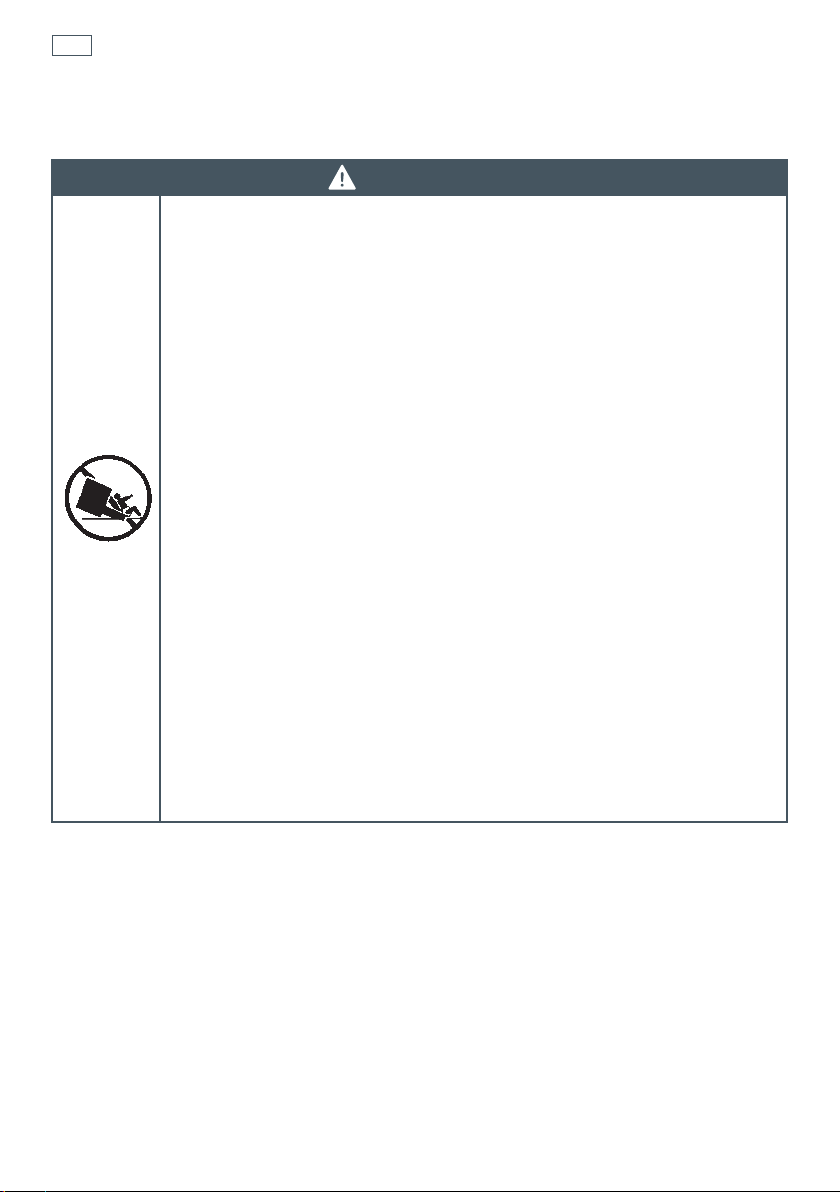
Tipping Hazard
This product may tip. Keep children
away and take care.
The supplied anti-tip bracket must be
fitted:
- if the warming drawer is installed
under a F&P coffee maker.
- if the warming drawer is not installed
directly under another product whereby
its weight is sitting directly ontop of the
warming drawer.
WARNING!
- if there is no fixed shelf directly above
the warming drawer acting as an antitip obstacle.
Failure to follow this advice may result
in injury.
Page 5
Safety and warnings
WARNING!
3
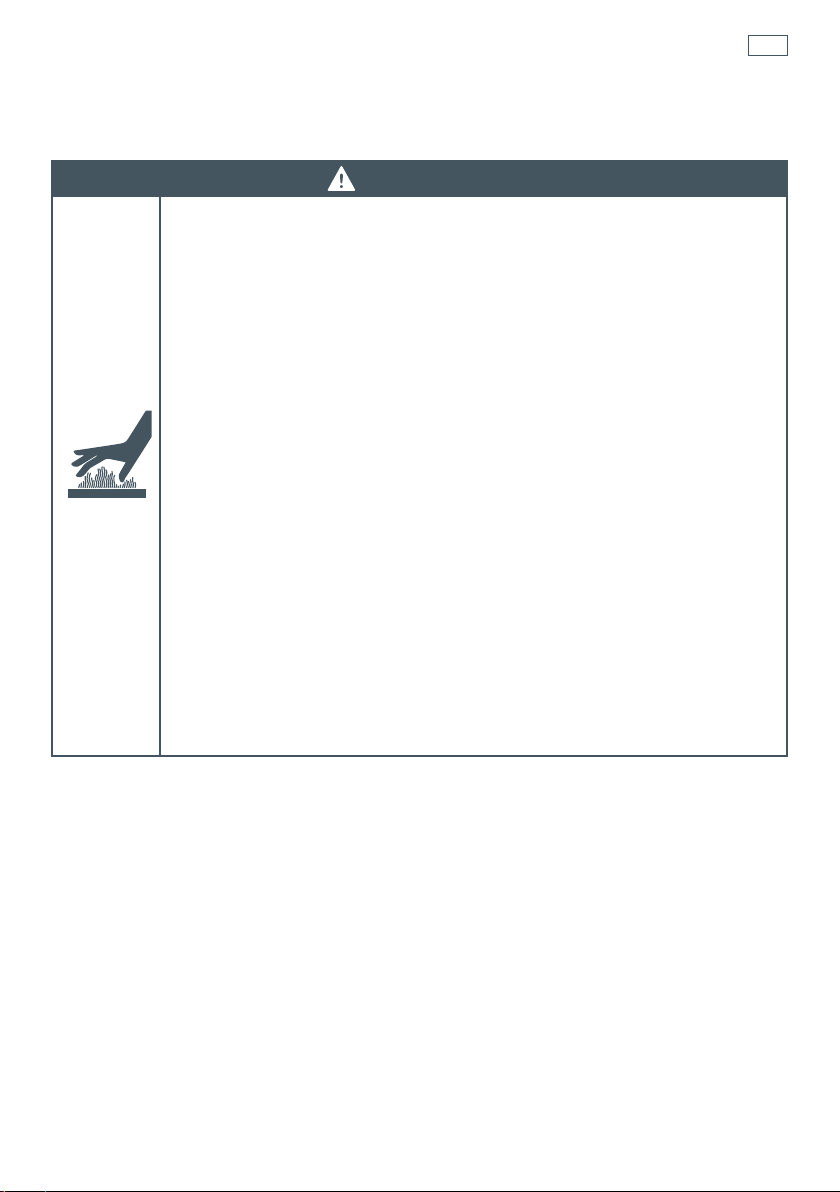
Hot Surface Hazard
Take care to avoid touching hot surfaces
inside the warming drawer.
During and after use, do not touch
or let clothing or other flammable
materials touch the interior surfaces
of the warming drawer until it has had
sufficient time to cool.
Use oven mitts or other protection
when handling hot dishes.
Supervise children and keep them safely
away until warming draw is cool.
Failure to follow this advice could result
in burns and scalds.
Page 6

4
Safety and warnings
Operation
IMPORTANT SAFETY INSTRUCTIONS
To reduce the risk of fire, electrical shock, injury
to person, or damage when using the warming
drawer, please read these instructions carefully
before using this product.
Read all instructions before using the warming
drawer. Use the warming drawer only for
its intended purpose as described in these
instructions.
Your warming drawer is intended for standard
household use. Do not use it for commercial or
industrial purposes or for any other purpose
than that for which it was designed.
Children of less than 8 years old must be kept
away from the appliance unless continuously
supervised.
This appliance can be used by children aged
from 8 years and above, and persons with
reduced physical, sensory or mental capabilities
or lack of experience and knowledge, if they
have been given supervision or instruction
concerning the use of the appliance in a safe
way and they understand the hazards involved.
Cleaning and user maintenance shall not be
done by children without supervision.
Page 7

Safety and warnings
IMPORTANT SAFETY INSTRUCTIONS
WARNING: accessible parts may become hot
when the warming drawer is used. It is advisable
to keep children away from it when in use.
This product is NOT designed for cooking food,
or keeping foodstuffs warm. Do not use this
warming drawer to reheat, cook or keep food or
drinks warm. Condensation from food or drinks
could cause damage to the product.
Do not lean, step or sit on the opened warming
drawer as this may result serious injury or
damage to the warming drawer. Do not allow
children to climb on or play around the warming
5
drawer.
Do not overload the warming drawer. The
drawer itself can hold a maximum weight of
30 kg.
Do not use the warming drawer for storage.
Forgotten goods may melt or catch fire when the
warming drawer is switched on.
Do not use the warming drawer to heat up the
room. Objects near to the warming drawer could
catch fire. The life of the warming drawer could
also be reduced.
Page 8

6
Safety and warnings
IMPORTANT SAFETY INSTRUCTIONS
Only place dry dishes in the warming drawer.
Damp dishes may cause condensation that may
damage the warming drawer or create steam
which may cause burns to the user.
Do not modify or attempt to modify any of the
characteristics of the warming drawer. This
would be dangerous to your safety and will void
the warranty.
For your safety the warming drawer is equipped
with an AUTOMATIC STOP. After 12 hours of
continuous use it will automatically switch off.
During use the warming drawer becomes hot.
Care should be taken to avoid touching heating
elements inside the warming drawer.
To minimise risk of burning yourself on the
inside of the drawer, always pull the drawer out
as far as it can go before removing the crockery.
Do not insert any object into the fan element
vents. Doing so may result in serious injury to
yourself and damage to the warming drawer.
If installed under a self-cleaning (pyrolytic)
oven, do not use your warming drawer during
the oven self-cleaning cycle.
Page 9

Safety and warnings
IMPORTANT SAFETY INSTRUCTIONS
If the electrical supply cord is damaged, it must
only be replaced by the manufacturer, its service
agent or similarly qualified trades person in
order to avoid a hazard.
Caution: Do not operate your warming drawer
by means of an external timer or separate
remote-control system. Do not connect to a
circuit that is regularly on and off the utility.
7
Page 10

Page 11
Introduction
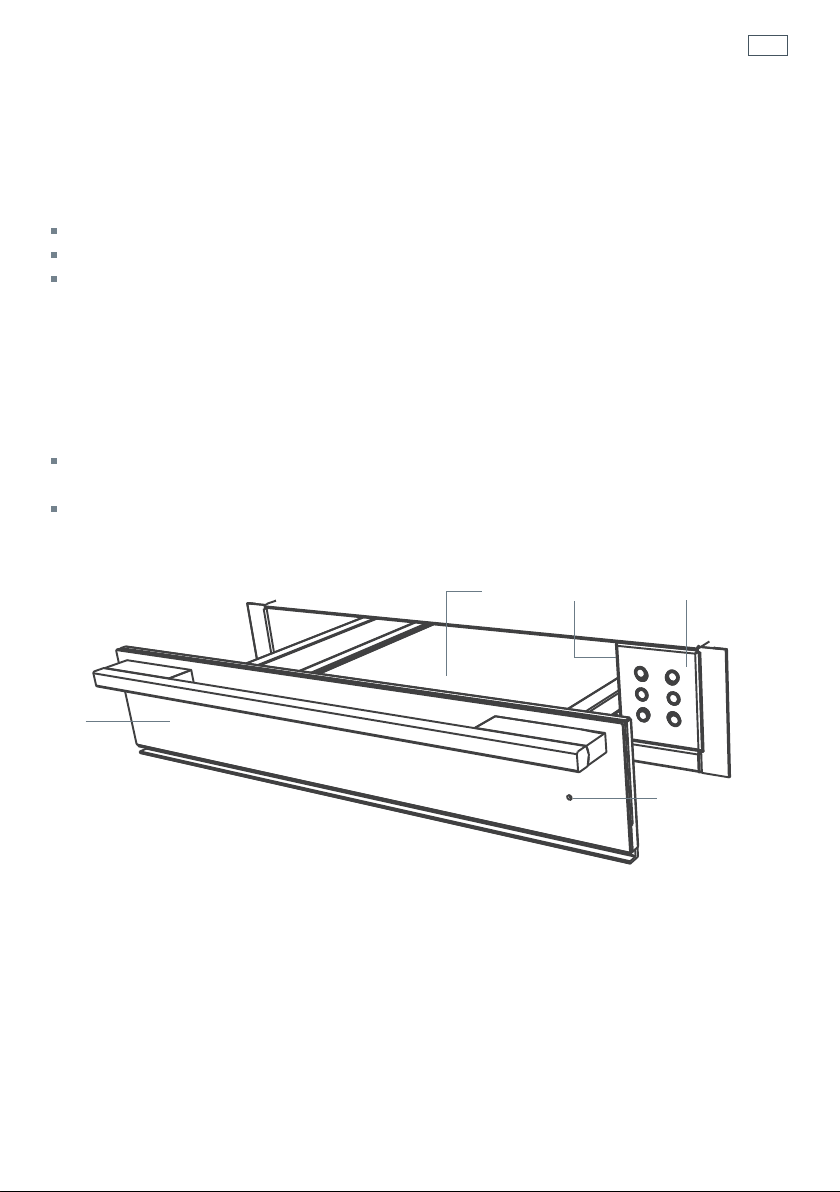
Introducing your warming drawer
Congratulations on your new purchase. Yo ur Fisher & Paykel warming drawer has a number of
features to help ensure that your dishes are always warmed in time for use. Featur
warming drawer include:
Three temperature settings
Two Automatic Timers
Auto stop function
Important!
Do not use the warming drawer to re-heat, cook or keep food or drinks warm.
Before using your warming drawer
Make sure the installer has completed the installation checklist in the installation instructions
and removed all pack aging and disposed of it responsibly.
Read this guide, taking special note of the ‘Safety and warnings’ section.
es of your
9
3
2
1
Control panel
2
Drawer front
3
Glass Base
4
Fan element (hidden)
5
On/Off indicator light
4
Fig.1 WB60SDEX only illustrated
1
5
Page 12
10
Using your warming drawer
1h
2h
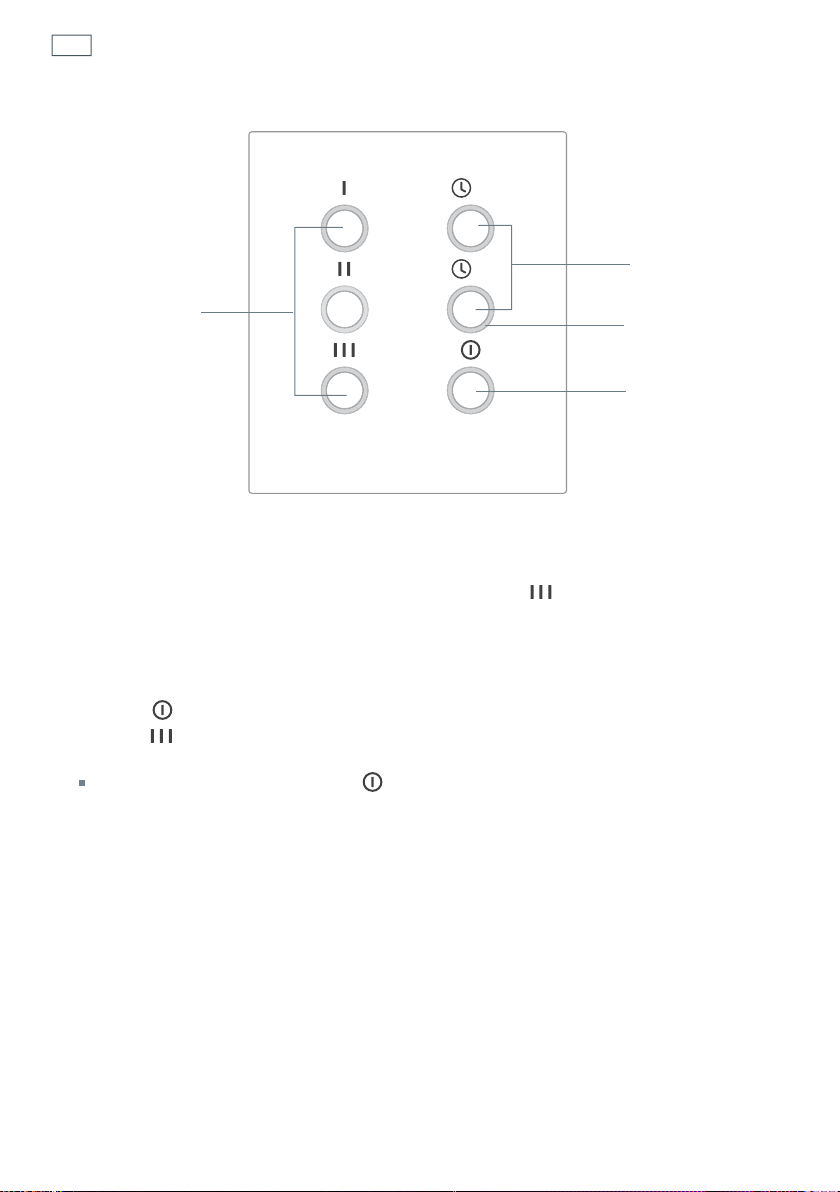
Tem perature
control buttons
Timer buttons
Halo
On/Off button
Before first use
Heat the empty drawer for 2 hours on temperature setting 3 ( ). Some warming drawer
components have a protective coating which may give off a slight smell when heated for the first
time. This is normal and does not indicate a fault. Make sure the room
1
Open the drawer.
2
Press the button to turn the warming drawer on.
3
Press the button to set the drawer temperature to setting 3.
4
Close the drawer.
5
Wait 2 hours and then press the
Once cooled, wipe the drawer with a damp cloth, and dry thoroughly.
button to turn the warming drawer off.
is well ventilated.
Page 13
Using your warming drawer
To warm your crockery
1
Load your crockery carefully into the drawer.
(see ‘Loading’ for suggestions on positioning of crockery)
Turn the warming drawer on
2
Press the button to turn the warming drawer on.
The halo will glow red while the drawer is on.
Select a temperature
3
Select a temperature by pressing one of the temperature control buttons.
The halo will glow red while the drawer is on.
(which are approximate depending on the load):
1 (
Note: You may change the temperature setting during use.
4
The halo will glow red while the timer is on.
Note: You may turn a timer on, or change the timer selection, at any stage during use.
However, for safety reasons, after 12 hours of continuous use the warming drawer will
The warming drawer has three temperature settings
) = 45°C 2 ( ) =55°C 3 ( ) = 65°C
Only one temperature can be selected at a time.
If no temperature setting is selected the warming drawer will default to setting 2 (
Set the timer (optional)
The warming drawer has two pre-programmed timers (1 hour (
To s tart the timer press one of the timer buttons.
Only one timer can be selected at a time.
At the end of the timer period the warming drawer will switch off and both the on/off and
timer halos will go out.
To turn the timer off during use, press the timer button again. The drawer will continue to
operate until switched off.
If no timer is selected the warming drawer will remain on until switched off.
automatically turn off.
1h
) and 2 hours (
2h
).
).
11
Close the drawer
5
Close the drawer fully. This ensures the most efficient heating.
5
Yo ur warming drawer has a ‘so ft closing’ mechanism.
When the drawer is closed, the on/off light i s visible through the drawer front.
Removing warm crockery
Crockery can be removed at any time. Please refer to the following table for suggested heating
times.
Important!
Always use oven mitts to remove heated crockery from the warming drawer.
Page 14
12
Using your warming drawer
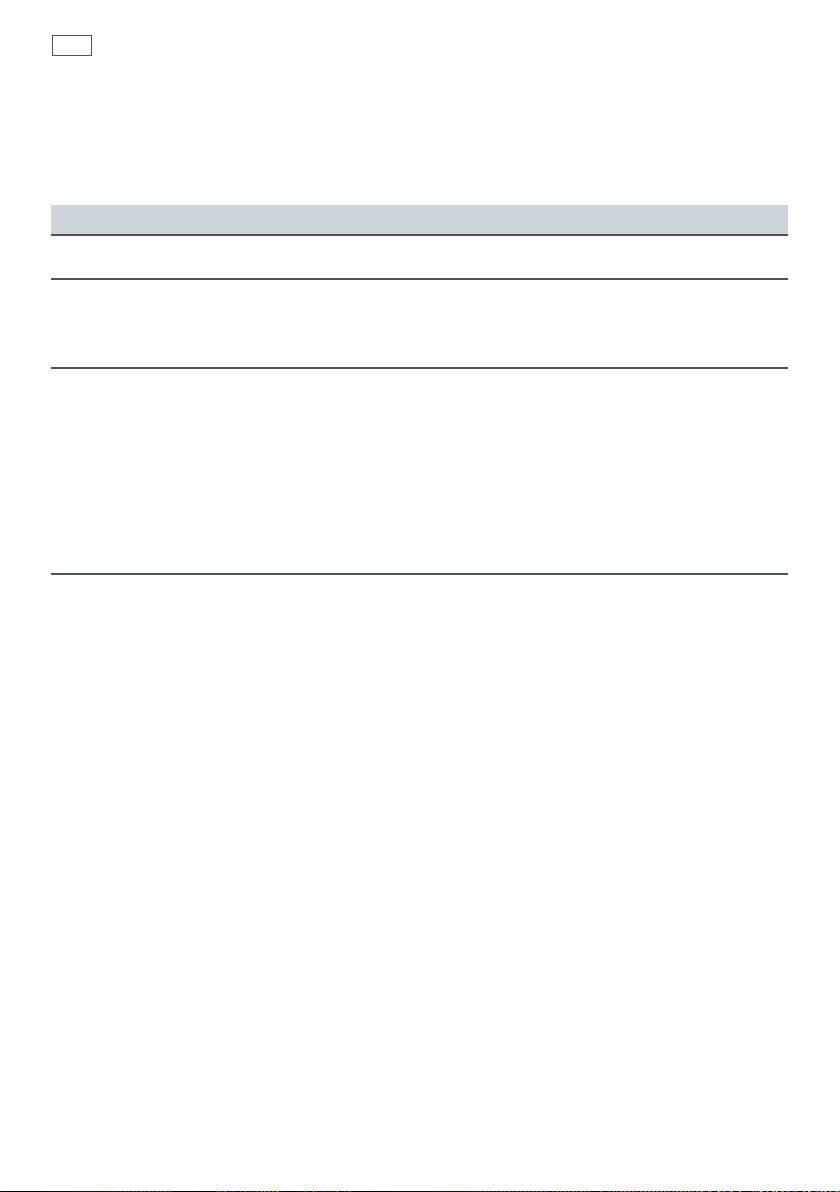
Approximate heating times
Please see the following table for suggested heating times for an average crockery load*.
Setting
Temperature
Approximate time to
heat crockery to selected
temperature
Suggested uses
*Times are approximate only. Times will vary according to the thickness and material of crockery used, and the
layout of the crockery in the warming drawer. Full capacity loads will take longer.
Low Medium High
40 minutes 40 minutes 40 minutes
Warming coffee cups.
The cup is still cool
enough to touch, but
will keep drinks hot for
longer.
I II III
Warming plates and
serving dishes.
This is the default
setting.
For extra hot plates
or heating serving
platters
For occasions when it
will take time to ‘plate
up’. Crockery will be
hot - use oven mitts to
avoid burns.
Important!
Heated crockery cools quickly.
Do not remove items from the drawer until just before you need them.
Page 15
Using your warming drawer
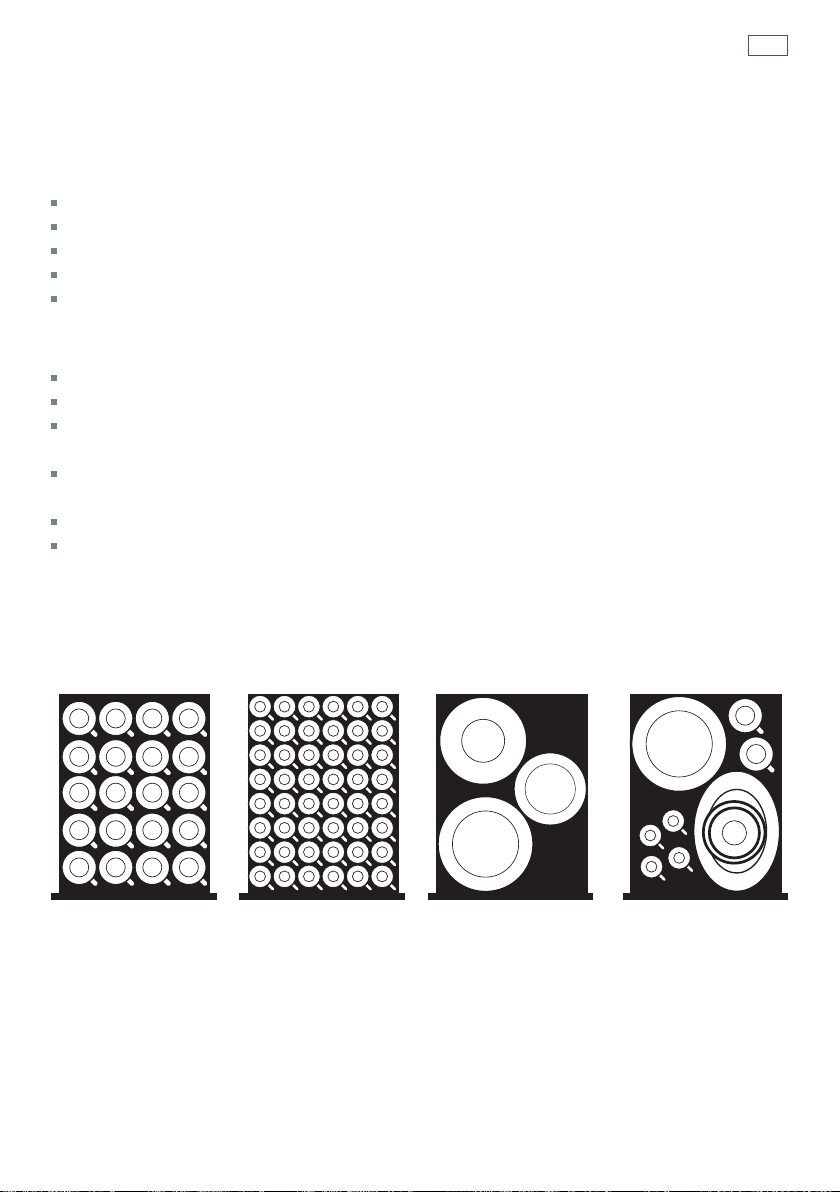
Suggested loading scenerios
Important!
Do not overload your warming drawer.
The maximum allowable weight is 30kg.
Distribute the load evenly.
Only place heat resistant crockery in the drawer
Never place plastic or aluminium foil items in the drawer as these may melt and may catch fire.
General guidelines
Place cups upside down on the drawer base.
Maximum stack height of items is 80 mm.
Ensure only dry dishes are loaded into the war ming drawer to avoid problems with condensation
or the possibility of steam burns.
As much as possible always distribute dishes over the surface of the drawer. Stacks of dishes take
longer to heat through.
The number of plates or cups that can be loaded depends on the size of your dishes.
Avoid placing large serving dishes next to the fan element vents as they will cover the warm air
outlet and the crockery will not heat up evenly.
13
Suggested loading (maximum capacity)
20 Cappuccino cups
Diameter guide
20x Ø92 mm
Cappuccino Cups
48 Espresso cups 6 Std Place Settings Mixed load
Diameter guide
48x Ø58mm
Espresso Cups
6
Soup Bowls
6
Saucers
6
Dinner
Plates
Diameter guide
6x Ø230 mm Bowls
6x Ø190 mm Saucers
6x Ø250 mm Plates
Page 16
14
Care and cleaning
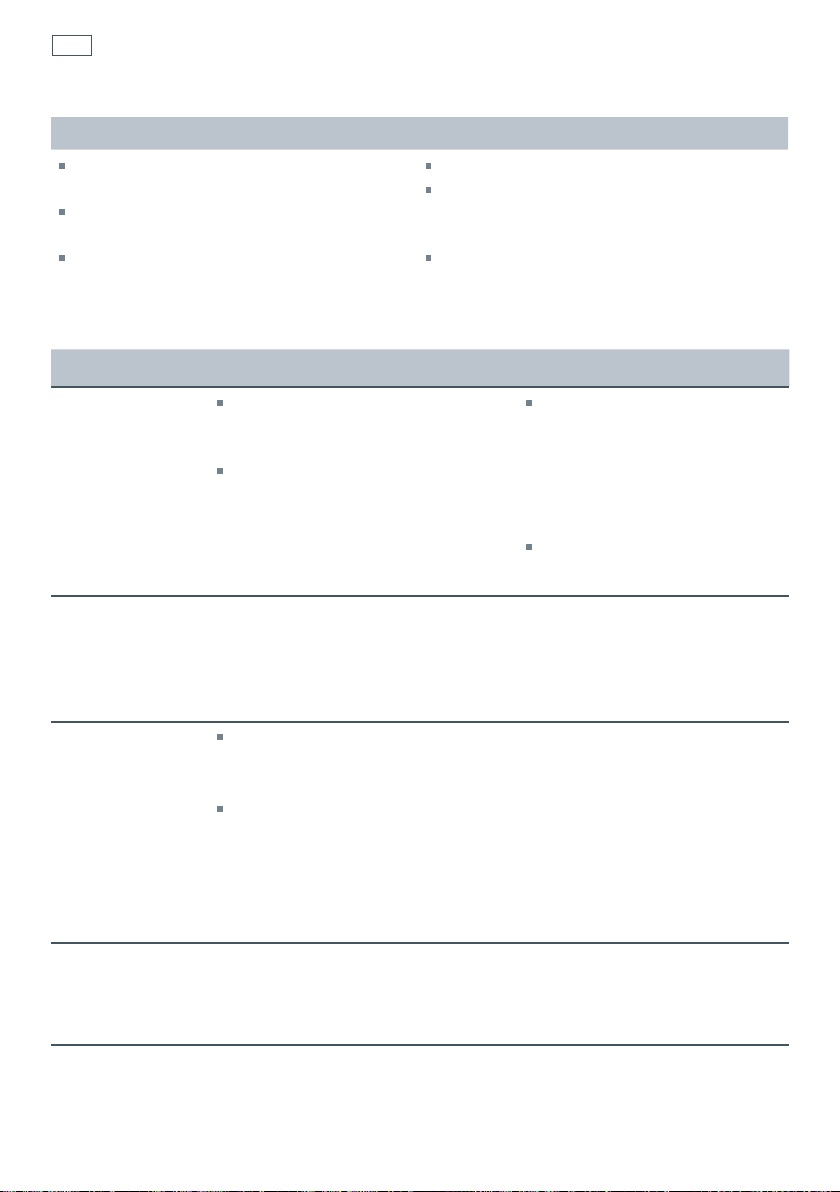
DOs DON’Ts
Allow the warming drawer to cool before
cleaning.
Disconnect from power supply prior to
cleaning.
Read these cleaning instructions and
the ‘safety and warnings’ section before
cleaning.
What? How? Important!
Stainless steel
drawer front
(some models
only)
Clean with a solution of mild
detergent and hot water, then wipe
dry with a microfibre cloth.
If necessary, use a suitable stainless
steel cleaner and polish.
Don’t use a steam cleaner.
Don’t use abrasive or harsh cleaners,
scouring pads or steel wool. Some nylon
scourers may also scratch. Check the label.
Don’t use oven cleaner on any part of the
warming drawer.
Always read the label to make
sure that your stainless steel
cleaner does not contain
chlorine compounds as these
are corrosive and may damage
the appearance of your oven.
Always rub the stainless steel
in the direction of the grain.
Control panel
Glass drawer
front (some
models only)
Glass base of
drawer
Aluminium
drawer sides
Wipe with a damp cloth. Never spray detergent or liquid
onto the buttons on the control
panel. Liquid may seep behind
the button and damage the
electronics.
Clean with a solution of mild
detergent and hot water, then wipe
dry with a microfiber cloth.
If necessary use a suitable ceramic
glass cooktop cleaner. From time
to time use the ceramic glass
cooktop cleaner for a streak
free look, following the cleaner
manufacturer’s instructions.
Clean with a solution of mild detergent
and hot water, then wipe dry with a
microfiber cloth.
Do not use abrasive cleaners,
cloths, or pads to clean the glass.
Some nylon products may also
scratch, check the label first.
Do not use abrasive cleaners,
cloths, or pads to clean the sides.
Some nylon products may also
scratch, check the label first.
Page 17
Troubleshooting
Troubleshooting chart
Problem Possible causes What to do
The warming drawer is
cold & the ‘On/Off’ light
does not work.
The power supply is off. Check the warming drawer is
plugged in and switched on.
Check the circuit breakers have
not tripped.
Note: if there is an interruption
to the power supp
power cut) the warming drawer
will turn off. You will need to
turn the warming drawer on
again.
ly (i.e. a
15
The halo does not come
on when I press the
button, but the warming
drawer is still working
The crockery is not warm
enough
The on/off halo is
flashing
The warming drawer
makes a ‘clicking’ sound
when the drawer is open.
The light is faulty. Call your Authorised Repairer or
Customer Ca re.
The wrong
selected.
The crockery has not been
warmed for long enough.
Cookware is covering the fan
element vents and preventing the
flow of warm air.
Drawer has overheated. Press the button to turn the
This is normal. The heating fan is on a
heat setting has been
Various factors affect how
long
the crockery will take to
heat, including: the material
and thickness of the crockery;
the temperature setting; how
the crockery is arranged; how
much crockery is being heated.
Q
uoted times are guidelines
only.
drawer off, wait 30 minutes to
allow the drawer to cool down
and switch on again. If the light
begins to flash
drawer off at the mains and call
your Authorised Repairer or
Customer Ca re.
thermostat. This will switch
off and on to m
temperature at the correct
setting. The ‘click’ is the sound
of the fan turning on or off.
again, turn the
aintain the
Page 18

16
Warranty and service
Before you call for service or assistance ...
Check the things you can do yourself. Refer to the installation instructions and your user guide
and check that:
1
Your product is correctly installed.
2
You are familiar with its normal operation.
If after checking these points you still need assistance or par ts, please refer to the Service &
Warranty book for warranty details and your
contact us through our local website listed on the back cover.
nearest Authorised Repairers, Customer Care, or
Page 19
Warranty and service
This warming drawer has been designed and constructed in accordance with the following
codes and specifications:
In New Zealand and Australia:
AS/NZS 60335-1 General Requirements for Domestic electrical appliances
AS/NZS 60335-2-6 Particular Requirements for Stationar y cooking ranges, hobs, ovens and
similar appliances (2008).
AS/NZS CISPR 14.1:2010 Electromagnetic Compatibility Requirements
In Europe:
Safety
requirements of EEC Directive “Low voltage” 2006/95:
- EN 60335-1 General Requirements for Domestic electrical appliances
- EN 60335-2-6 Particular Requirements for Domestic electrical cooking appliances
Safety req
- EN 55014-2, EN 61000-3-2, EN 61000-3-3, EN 61000-4-2, EN 61000-4-3,EN 61000-4-4,
EN 61000-4-5, EN 61000-4-6, EN 61000-4-11, EN61000-4-13 & EN 62233
Requirements of EEC Directive 93/68.
uirements of EEC Directive “EMC” 89/336:
17
European dir
(for European Union countries only)
GB This appliance is marked according to the European directive 2002/96/EC on Waste Electric
and Electronic Equipment (WEEE). By ensuring this appliance is disposed of correctly, you will
help prevent potential negative consequences for the environment and human health,
could otherwise be caused by inappropriate waste handling of this appliance.
The symbol
that this appliance may not be treated as household waste. Instead it shall be handed over to
the applicable collectio
must be carried out in accordance with local environmental regulations for waste disposal. For
mor
e detailed information about treatment, recovery and recycling of this appliance, please
contact your local city office, your hou sehold waste disposal service or the shop where y
purchased the appliance.
Fisher & Paykel Products
ective 2002/96/EC on Waste Electrical and Electronic Equipment (WEEE)
al
which
on the appliance, or on the document s accompanying the appliance, indicates
n point for the recycling of electrical and electronic equipment. Disposal
ou
Model no Serial no.
Copy these from the serial label on the left hand wall
inside the warming drawer
Date of purchase
Contact details Dealer name
Page 20

Page 21

Page 22

Page 23

Page 24
www. sherpaykel.com
Copyright © Fisher & Paykel 2013. All rights reserved.
The product specifications in this booklet apply to the specific products
and models described at the date of issue. Under our policy of continuous
product improvement, these specifications may change at any time. You
should therefore check with your Dealer to ensure this booklet correctly
describes the product currently available.
NZ AU GB IE 03.2013F&P PN - 590451 B
 Loading...