

Fisher Fisher DMA, DMA/AF, and DMA/AF-HTC Mechanically Atomized Desuperheaters Manuals & Guides
Page 1
Instruction Manual
D101617X012
DMA Desuperheater
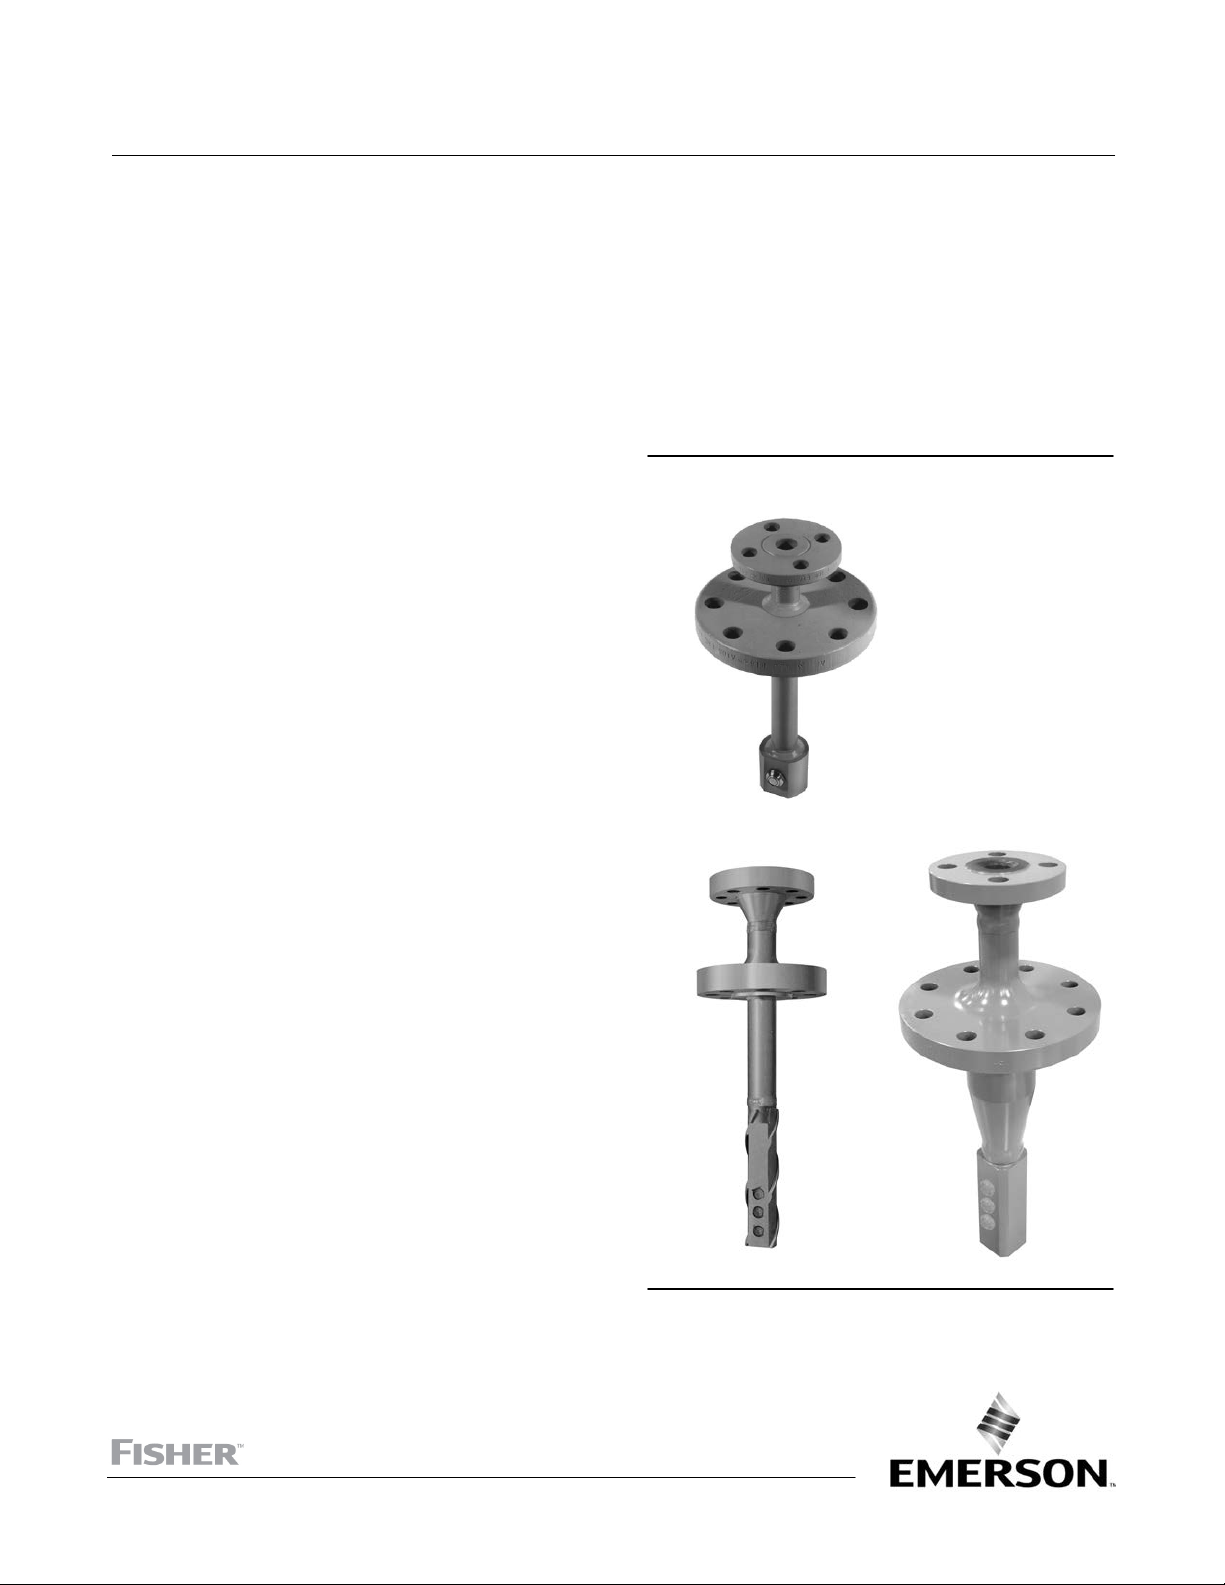
Fisher™ DMA, DMA/AF, and DMA/AF‐HTC
Mechanically Atomized Desuperheaters
Contents
Introduction 2.................................
Scope of Manual 2.............................
Description 2.................................
Specifications 2...............................
Principle of Operation 3.........................
Installation 5..................................
Nozzle Maintenance and Replacement 6...........
DMA/AF and DMA/AF-HTC Desuperheater
Variable Geometry Nozzles 7.................
DMA Desuperheater Fixed Geometry Nozzles 8....
Troubleshooting 9.............................
Parts Ordering 14...............................
Parts List 14...................................
Figure 1. Fisher DMA, DMA/AF, and DMA/AF‐HTC
Desuperheaters
July 2017
W6298
DMA and DMA/AF
X0260
NPS 3 DMA/AF‐HTC
W8909‐1
NPS 4 DMA/AF‐HTC
www.Fisher.com
Page 2

DMA Desuperheater
July 2017
Instruction Manual
D101617X012
Introduction
Scope of Manual
This instruction manual includes installation, maintenance, and operation information for the Fisher DMA, DMA/AF,
and DMA/AF‐HTC mechanically atomized desuperheaters.
Do not install, operate, or maintain these desuperheaters without being fully trained and qualified in valve, actuator,
and accessory installation, operation, and maintenance. To avoid personal injury or property damage, it is important
to carefully read, understand, and follow all the contents of this manual, including all safety cautions and warnings. If
you have any questions about these instructions, contact your local Emerson sales office
before proceeding.
Description
DMA, DMA/AF, and DMA/AF‐HTC desuperheaters (figure 1) can be used in many applications to effectively reduce the
temperature of superheated steam to the desired set point. Available variations are mechanically atomized (both fixed
geometry and variable geometry styles). Desuperheaters are available for installation in steam lines from DN 150
through DN 1500 (NPS 6 through 60) in diameter and are capable of maintaining steam temperatures to within 6_C
(10_F) of saturation temperatures.
or Local Business Partner
D DMA—A simple mechanically atomized desuperheater with single or multiple, fixed‐geometry spray nozzles is
intended for applications with nearly constant load. The DMA is installed through a flanged connection on the side
of a DN 150 (NPS 6) or larger pipeline. Maximum unit C
D DMA/AF—A variable‐geometry, mechanically atomized, back‐pressure‐activated desuperheater with one, two, or
three spray nozzles is designed for applications requiring control over moderate load fluctuations. The DMA/AF
desuperheater (figure 2) is installed through a flanged connection on the side of a DN 200 (NPS 8) or larger pipeline.
Maximum unit C
D DMA/AF‐HTC— The DMA/AF‐HTC is functionally equivalent to the DMA/AF, however it is structurally suited for more
severe applications. The most common applications include boiler interstage attemperation, where the
desuperheater is exposed to high thermal cycling and stress, high steam velocities and flow induced vibration. In
addition to this specific application, the DMA/AF‐HTC is suitable for other severe desuperheating application
environments. The DMA/AF‐HTC uses a construction optimized to move weld joints away from high stress regions.
The desuperheater design incorporates an integral thermal liner inside the desuperheater body pipe. This minimizes
the potential for thermal shock when cool water is introduced to the unit which has been heated to the operating
steam temperature.
The nozzle mount for the DMA/AF‐HTC is engineered to minimize the potential for excitation due to vortex shedding
and flow induced vibration. The DMA/AF‐HTC desuperheater (figure 3) is installed through a flanged connection on a
DN 200 (NPS 8) or larger pipeline. Maximum unit C
is 15.0.
V
V
V
is 15.0.
is 3.8.
Specifications
Specifications for the DMA, DMA/AF, and DMA/AF‐HTC desuperheaters are shown in table 1 and table 2.
2
Page 3
Instruction Manual
D101617X012
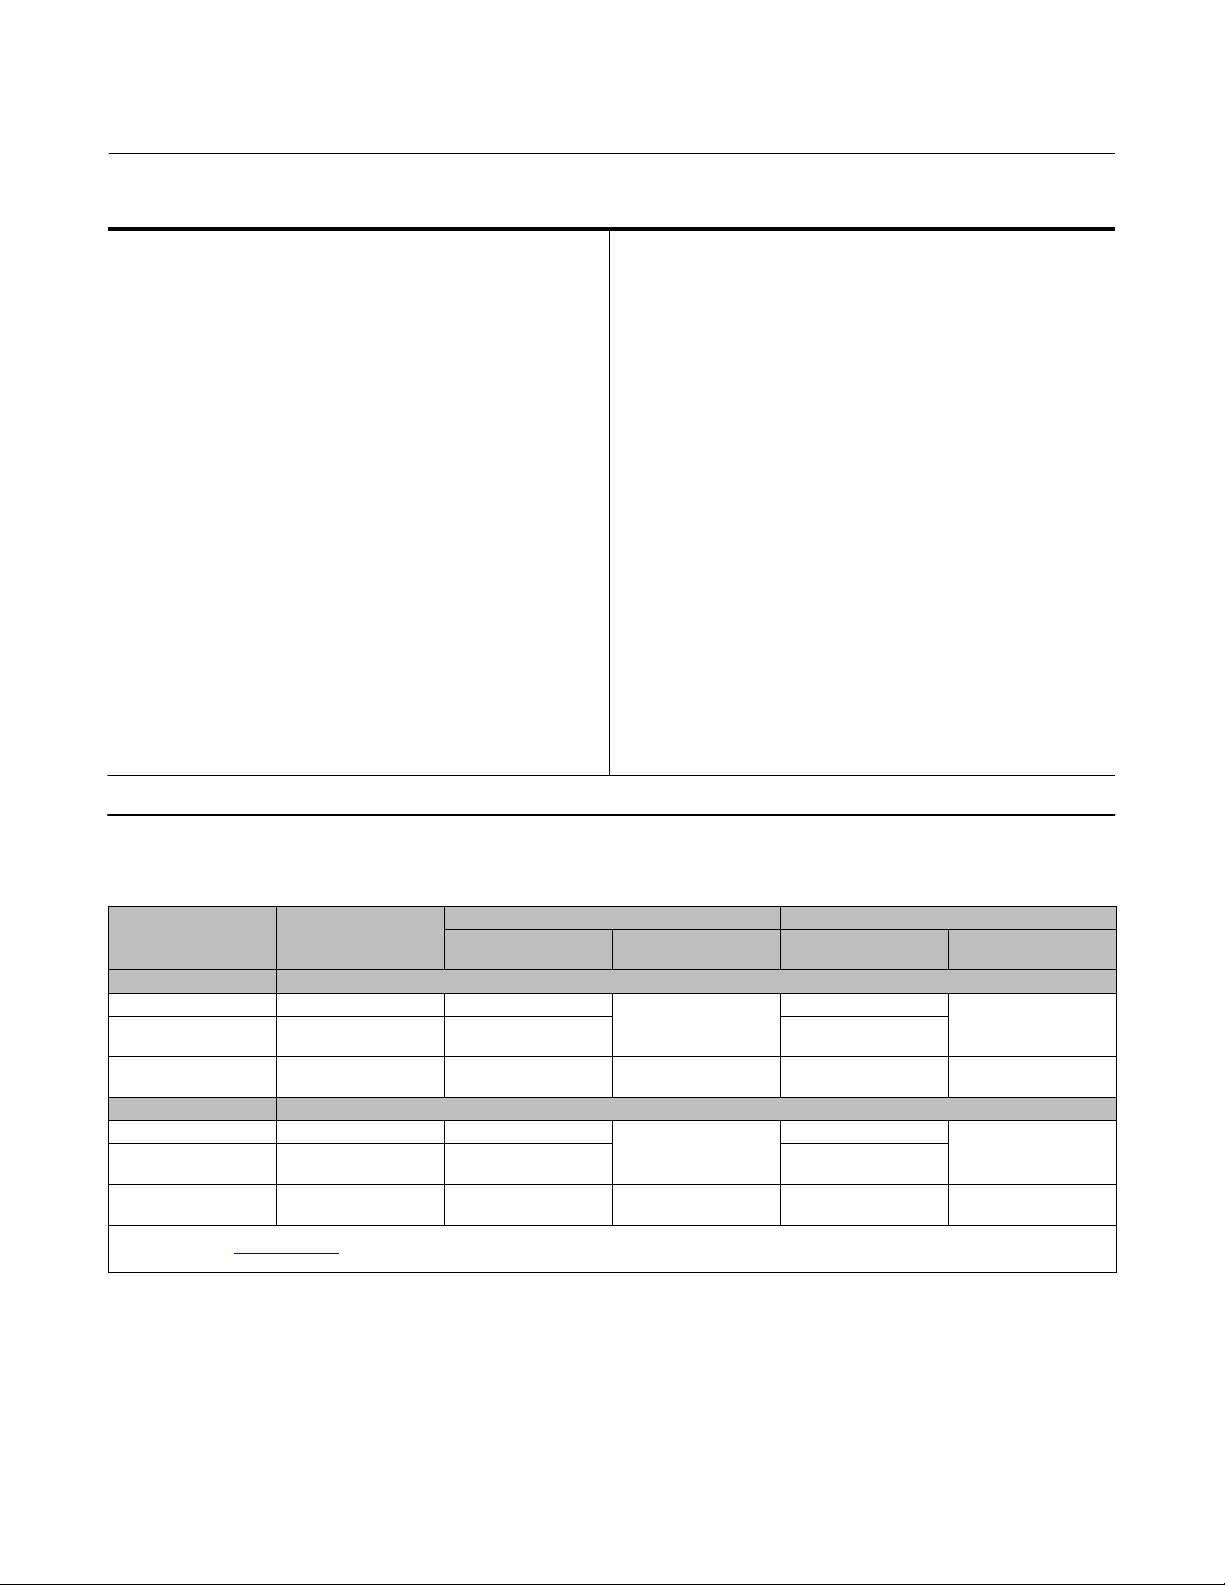
Table 1. Specifications
DMA Desuperheater
July 2017
Steam Line Sizes
See table 2
Minimum Steam Velocity
DMA: 9.1 m/s (30 feet per second)
DMA/AF: 7.6 m/s (25 feet per second)
Steam Line Connection Sizes
DMA/AF‐HTC: 7.6 m/s (25 feet per second)
See table 2
Spraywater Connection Sizes
See table 2
Maximum Unit C
DMA: 3.8
DMA/AF: 15.0
Maximum Inlet Pressures
(1)
DMA/AF‐HTC: 15.0
Consistent with applicable CL150, 300, 600, 900,
1500, or 2500 pressure‐temperature ratings per
Construction Materials
ASME B16.34
Desuperheater Body (all designs except
Inherent Rangeability
(2)
DMA: Up to 3:1
DMA/AF: Up to 10:1
DMA/AF‐HTC: Up to 10:1
Spraywater Pressure Required
3.5 to 35 bar (50 to 500 psi) greater than steam line
pressure
1. Do not exceed the pressure or temperature limits in this instruction manual, nor any applicable code or standard limitations.
2. Ratio of maximum to minimum controllable C
.
v
DMA/AF‐HTC):
alloy steel (F22), or
Desuperheater Body (DMA/AF‐HTC):
(SA105) or
Note: NPS 3 will have body-matched cast equivalent
material for nozzle mount
Nozzle Material
DMA:
J 303 orJ 316, stainless steel
DMA/AF, DMA/AF‐HTC:
(for Spraywater Flow)
v
J Carbon steel, J Chrome‐moly
J 300 series stainless steel
J Carbon Steel
J Chrome‐moly alloy steel (F22, F91)
J 410 stainless steel
Table 2. Connection Sizes
DESIGN STEAM LINE SIZE
DMA DN 150 - DN 1500 DN 80, 100, or 150
DMA/AF DN 200 - DN 1500
DMA/AF‐HTC DN 200 - DN 1500 DN 80 or 100
DMA NPS 6 - NPS 60 NPS 3, 4, or 6
DMA/AF NPS 8 - NPS 60 NPS 3
DMA/AF‐HTC NPS 8 - NPS 60 NPS 3 or 4
1. Other standard flanges and connections are also available.7
2. Consult your local Emerson sales office
3. NPS 1‐1/2 spraywater connection is only available for CL150 - 900.
or Local Business Partner for acceptability of NPS 3 mounting connection for size and pressure class specified.
DN 80
Size, NPS
(2)
(2)
STEAM LINE CONNECTION SPRAYWATER CONNECTION
Raised‐Face Flange
Rating
metric
, 100, 150, or
200
, 4, 6, or 8
PN 20, 50, 100
PN 20, 50, 100, 150,
250, or 420
ASME
CL150, 300, 600
CL150, 300, 600, 900,
1500, or 2500
(1)
DN 25, 40, or 50
DN 25, 40, 50, 65, or
DN 40
NPS 1, 1‐1/2, or 2
NPS 1, 1‐1/2, 2, 2‐1/2,
NPS 1‐1/2
Size
80
(3)
or 3
, or 50
(3)
, or 2
Raised‐Face Flange
Rating
PN 20, 50, 100, 150,
250, or 420
PN 20, 50, 100, 150,
250, or 420
CL150, 300, 600, 900,
1500, or 2500
CL150, 300, 600, 900,
1500, or 2500
(1)
Principle of Operation
The DMA, DMA/AF, and DMA/AF‐HTC desuperheaters reduce steam temperatures through the introduction of cooling
water directly into the hot steam flow stream. By regulating the quantity of water that is injected, accurate
downstream steam temperature can be both controlled and maintained.
3
Page 4
DMA Desuperheater
July 2017
Instruction Manual
D101617X012
The rate of vaporization, and/or cooling, is a function of droplet size, distribution, mass flow, and temperature. Steam
velocity is critical and should be maintained at 6.1 to 9.1 meters per second (20 to 30 feet per second) as the
minimum. Actual minimum steam velocity requirements will vary by application. As steam velocity increases, a longer
distance is required to achieve homogeneous mixing and to complete vaporization.
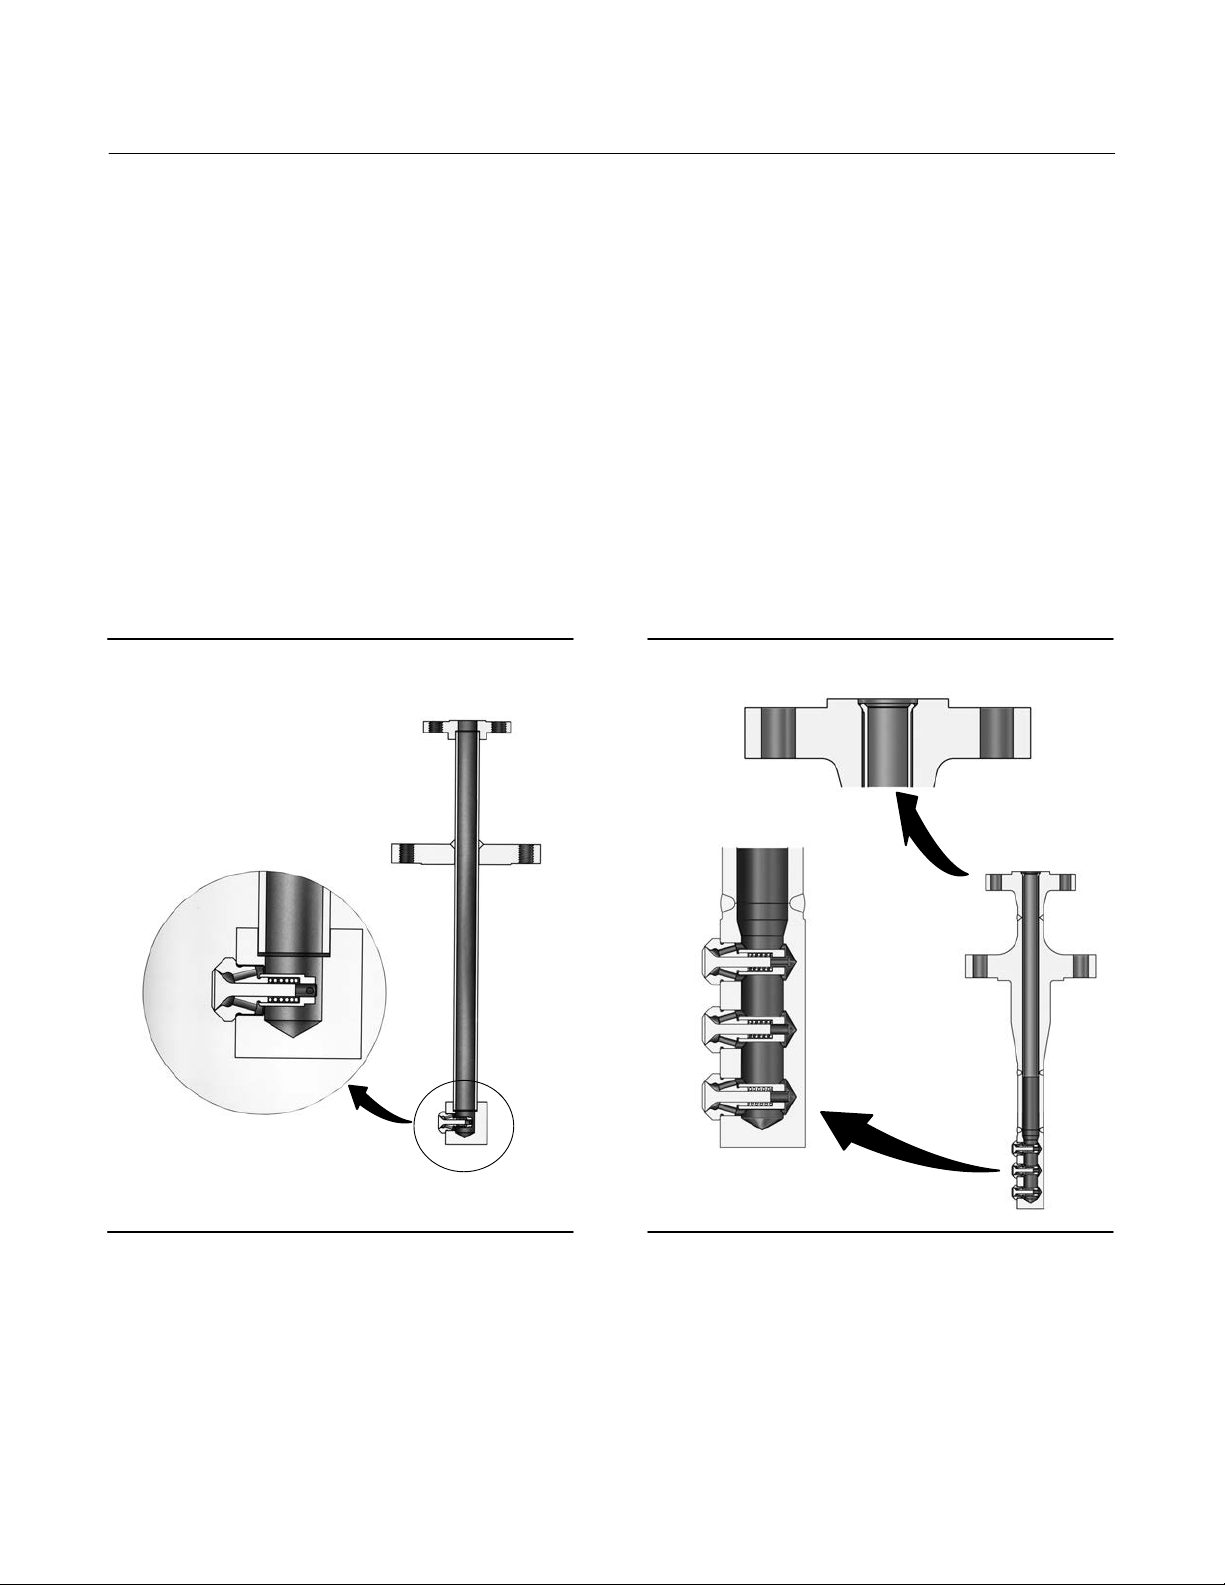
In both DMA desuperheater nozzle styles, the spraywater quantity is controlled by an external control valve which
responds to signals received from the temperature control system. The water enters the main tube of the
desuperheater, passes through the spray nozzle, and discharges into the steam line as a fine, atomized spray (see
figure 2).
Each particular nozzle, or set of nozzles, in the sprayhead is tailored to meet a specific set of operating conditions. The
nozzle design optimizes the spraywater droplet size promoting rapid atomization and complete vaporization of water
in the steam flow stream to obtain precise temperature control. The DMA desuperheater uses a fixed geometry
nozzle, while the DMA/AF desuperheater uses a variable geometry AF nozzle. In the AF nozzle design (see figure 5),
water enters the swirl chamber via compound angled orifices, thus creating a rotational flow stream. This flow stream
is further accelerated as it is forced up and out through the spray annulus. The cone‐shaped plug varies the geometry
of the spray annulus using a force balance principle between water pressure and the preload exerted by a helical
spring. This variable geometry design sprays a thin hollow cone over a wide range of flow rates, resulting in excellent
temperature control over a wide range of operating conditions.
Figure 2. Detail of Fisher DMA/AF Desuperheater Figure 3. Detail of Fisher DMA/AF‐HTC
Desuperheater
W6310‐1
4
W8908‐1
Page 5

Instruction Manual
D101617X012
Figure 4. Typical Fisher DMA, DMA/AF, or DMA/AF‐HTC Desuperheater Installation
FISHER
SPRAYWATER
CONTROL VALVE
Note 1
TC
SPRAYWATER
DMA DESUPERHEATER
STEAMFLOW
DMA Desuperheater
July 2017
Note 2
B2317
Notes:
1. TC - Temperature-Indicating Controller
2. TE - Temperature Sensor Element
Installation
WARNING
Always wear protective gloves, clothing, and eyewear when performing any installation operations to avoid personal
injury.
Personal injury or equipment damage caused by sudden release of pressure may result if the desuperheater is installed
where service conditions could exceed the limits given in table 1 or on the nameplate. To avoid such injury or damage,
provide a relief valve for over‐pressure protection as required by government or accepted industry codes and good
engineering practices.
Check with your process or safety engineer for any additional measures that must be taken to protect against process
media.
If installing into an existing application, also refer to the WARNING at the beginning of the Maintenance section in this
instruction manual.
CAUTION
When ordered, the desuperheater configuration and construction materials were selected to meet particular pressure,
temperature, pressure drop, and fluid conditions. Do not apply any other conditions to the desuperheater without first
contacting your local Emerson Automation Solutions sales office representative.
1. Mount the DMA, DMA/AF, or DMA/AF‐HTC desuperheater in a “Tee” piece at the desired location in the pipe, in
accordance with standard piping practice. The nozzle should be positioned in the top quadrant of the pipe (see
figure 6 or 7 for the proper “T” length dimension).
5
Page 6

DMA Desuperheater
July 2017
Instruction Manual
D101617X012
2. Clean and flush out the cooling water line before connecting to the desuperheater. Use only clean sources of
cooling water. Use of clean water decreases wear and prevents clogging of the nozzle by solid particles.
WARNING
Personal injury or property damage could result from clogging of the desuperheater. Installation of a strainer and an
isolating valve on the water line between the desuperheater and the water control valve is recommended. Failure to do so
may result in clogging of the desuperheater by solid particles, thus hampering temperature control of the steam.
3. A minimum straight run of pipe is required downstream of the desuperheater to ensure complete vaporization of
cooling water. Consult the desuperheater certified drawing for the required distance of straight pipe.
4. The temperature sensor should be mounted according to the manufacturer's instructions. Typical distance to the
sensor is at least 9.1 meters (30 feet) downstream of the desuperheater. This distance changes with higher velocity
steam flow and the percentage of spraywater required. Consult the desuperheater certified drawing for this
distance.
5. There should be no branching out from or into the steam line to divide the steam flow between the temperature
sensor and the desuperheater.
6. A typical installation is illustrated in figure 4. A temperature sensor element (TE) measures changes in temperature
and transmits a signal to a remote temperature‐indicating controller (TC) or distributed control system (DCS). The
output signal from the controller is sent to the positioner on the spraywater control valve. The positioner output
signal is piped to the actuator. The actuator strokes the stem/plug of the spraywater control valve, as required, to
supply the required cooling water to the desuperheater to maintain temperature setpoint.
Nozzle Maintenance and Replacement
If it is necessary to remove the DMA, DMA/AF, or DMA/AF‐HTC desuperheater from service, take note of the following
warning.
WARNING
Avoid personal injury or damage to property from sudden release of pressure or uncontrolled process fluid. Before starting
disassembly:
D Always wear protective gloves, clothing, and eyewear when performing any maintenance operations to avoid personal
injury.
D Isolate the desuperheater from process pressure. Relieve process pressure on both sides of the desuperheater. Drain the
process media from both sides of the desuperheater.
D Use lock‐out procedures to be sure that the above measures stay in effect while you work on the equipment.
D Check with your process or safety engineer for any additional measures that must be taken to protect against process
media.
When subjected to normal operating conditions, it is possible that wear, blockage, and/or weld fatigue will occur to
the desuperheater body or nozzle assembly. During regularly scheduled maintenance, visually inspect the
desuperheater welds for cracks and inspect nozzles for wear and blockage. Your local Emerson sales office
Business Partner can help to determine the extent of weld fatigue and the correct course of action. Poor performing
nozzles or nozzle failure is typically caused by wear, corrosion, erosion, and/or blockage. The following instruction will
help to determine if any of these problems are present and provide a recommended course of action for each.
or Local
Note
For optimal performance, nozzles should be inspected every 18-24 months and replaced every 24-36 months.
6
Page 7

Instruction Manual
D101617X012
Figure 5. Fisher AF Nozzle (DMA/AF and DMA/AF-HTC)
SPRAY HEAD
SWIRL CHAMBER
WATER INJECTION HOLES
(COMPOUND ANGLED ORIFICES)
SPRAY PATTERN
SPRAY ANNULUS
TRAVEL MEASUREMENT
A7191-2D
DMA Desuperheater
July 2017
SPRING
PLUG STEM
SPRING CASING
PIN
DMA/AF and DMA/AFHTC Desuperheater Variable Geometry Nozzles
1. Inspect the spray annulus surface, the area between the plug stem and spray head, for excessive wear,
erosion/corrosion, and/or blockage due to particulate. Wear is defined as any nicks, cuts, or gouges on or
immediately around the spray annulus. Erosion/corrosion is defined as any form of rust or erosion of the metal on
the plug stem or spray head. Blockages are defined when small particulate becomes trapped between the plug
stem and spray head or spring casing and spray head. Replacement of the nozzle is recommended if any of the
preceding problems are present.
2. OPTIONAL: Figure 5 shows the spray pattern that will need to be present during operation of the AF nozzles. Testing
can be performed by attaching the existing or an alternate, similar pressure, water line to the unit. If this spray
pattern is not present, replacement is recommended.
3. Grind off the tack welds holding the nozzle in place. Apply a penetrant type thread lubricant and allow to soak prior
to unscrewing the nozzle. Using the provided flats on the side of the spray head, unscrew the nozzle.
4. Grind excess tack weld material off of both the nozzle and desuperheater body.
5. In the absence of external forces, the nozzle must be fully closed. If the nozzle is not fully closed, it will need to be
replaced.
6. Inspect the water injection holes for reduced or non-circular shape due to erosion. Every hole must be the same size
and shape. If any are oversized or non-circular in shape, the nozzle will need to be replaced.
7. Inspect the interior of the water injection holes for buildup of particulate and/or magnetite. Nozzle replacement will
be needed if any buildup is present.
Note
Complete disassembly of the nozzle is strongly discouraged, due to individual spare parts not being available.
8. OPTIONAL: The internal spring may relax over time and not provide the tensile force required to shut off and control
flow. If the nozzle spring is suspected of being too relaxed, then the nozzle should be replaced.
7
Page 8

DMA Desuperheater
July 2017
Instruction Manual
D101617X012
Table 3. AF Nozzle Specifications
NOZZLE TYPE PLUG TRAVEL, INCHES
AF7 0.014
AF10 0.028
AF14 0.029
AF17 0.034
AF20 0.036
AF24 0.042
AF28 0.048
AF32 0.056
AF35 0.065
AF40 0.063
AF44 0.069
To further check the spring, the spring can be removed by first removing the pin, using a small drill bit as a punch and
unscrewing the spring casing from the plug stem. The nozzle can be reassembled by following a reverse order of
disassembly, taking care to line the hole in the plug stem up with the hole in the spring casing, then pressing the pin
back into place through the two parts.
9. The travel can be determined by using a feeler gauge to measure the distance between the nozzle body near the
water injection ports to the side of the spring casing as outlined in figure 5. This measurement must match the
factory set plug travel for the corresponding nozzle type as shown in table 3.
10. Inspect nozzle threads for damage and clean if needed; if damage is present, nozzle replacement will be
necessary.
11. Rinse both the desuperheater body and nozzle to remove particulate.
12. Screw nozzle into the desuperheater body and tighten just until the spray head is flat and tight against the
desuperheater body.
13. Tackweld a small piece of welding wire onto the nozzle mount next to either of the spray head flats to prevent
rotation during service (refer to figure 8). Maintain low heat to prevent distortion of the nozzle.
14. Reinstall the desuperheater into the line, using a reverse order of assembly; refer to the installation instructions to
complete this step. Make sure the mounting flange gasket (customer supplied) is replaced with a new one.
DMA Desuperheater Fixed Geometry Nozzles
1. Inspect the nozzle orifice for excessive wear, erosion/corrosion, and/or blockage due to particulate. Wear is defined
as any nicks, cuts, or gouges on or immediately around the orifice. Erosion/corrosion is defined as any form of rust
or erosion of the metal on the nozzle. Blockages are defined when small particulate becomes trapped between the
plug stem and spray head. Replacement of the nozzle is recommended if any of the preceding problems are
present.
Proceed to steps 2-5 only if nozzle replacement is required.
2. Grind off the tack welds holding the nozzle in place. Apply a penetrant type thread lubricant and allow to soak prior
to unscrewing the nozzle. Using the provided flats on the side of the spray head, unscrew the nozzle.
3. Rinse both the desuperheater body and new nozzle to remove particulate.
4. Screw the new nozzle into place just until it is tight in the nozzle mount.
5. Tack-weld the nozzle in place to prevent rotation during service (refer to figure 8). Maintain low heat to prevent
distortion of the nozzle.
6. Reinstall the desuperheater into the line, using a reverse order of assembly; refer to the installation instructions to
complete this step. Make sure the mounting flange gasket (customer supplied) is replaced with a new one.
8
Page 9

Instruction Manual
D101617X012
DMA Desuperheater
July 2017
Troubleshooting
Table 4 is intended as a basic first line troubleshooting guide. Contact your Emerson sales office or Local Business
Partner for assistance if you are unable to resolve your field operation problem.
Table 4. Troubleshooting Guide
Problem Corrective Action
Temperature setpoint is not reached Check water source availability and pressure
Temperature setpoint is not reached Check nozzle(s) for plugging
Temperature setpoint is not reached Make sure that steam saturation pressure is not above setpoint
Temperature setpoint is not reached Check to ensure full actuator stroke is reached on the spraywater control valve
Temperature setpoint is not reached Check for proper orientation of nozzle in steam flow
Temperature is below setpoint Check temperature control loop ‐ reset
Temperature is below setpoint Check nozzle for fouling/poor spray pattern ‐ clean/replace
Temperature is below setpoint Check temperature sensor location ‐ relocate per guidelines
Temperature is below setpoint Check for proper orientation of nozzle in steam flow
Water in steam line Check that steam traps are functioning properly
Water in steam line when steam line isolated Check for proper spraywater control valve actuator installation
Water in steam line when steam line isolated Replace spraywater control valve seat and plug assembly
9
Page 10

DMA Desuperheater
July 2017
Figure 6. Fisher DMA and DMA/AF Dimensions (also see table 5)
WATER FLANGE
203
(8.0)
ASME
BODY
FLANGE
T
A
MOUNTING FLANGE
MUST BE SAME SIZE AND
PRESSURE RATING AS BODY
FLANGE)
Instruction Manual
D101617X012
D
FLOW
mm
INSTALLATION CONFIGURATION
(ONE GASKET REQUIRED)
A5094‐1
NOTE: ALL FLANGE BOLT HOLES STRADDLE STEAM PIPE CENTERLINE
(INCH)
Table 5. Fisher DMA and DMA/AF Dimensions
DIMENSION
A D T
mm Inches NPS mm Inches
360
360
360
448
448
448
448
524
524
524
524
1. DMA only.
Note: For DN 150 and 200 (NPS 6 and 8) (DMA/AF only) mounting flange, add 69.6 mm (2.75 inches) to the A and T dimensions. For CL2500 mounting, consult your local Emerson Automation
Solutions sales office representative. Refer to the certified drawing to verify the inside‐diameter requirements of mounting for DMA/AF.
14.19
14.19
14.19
17.63
17.63
17.63
17.63
20.63
20.63
20.63
20.63
(1)
6
8
10
12
14
16
18
20
22
24
>24
273
248
216
279
267
241
216
267
241
216
216
10.75
9.75
8.50
11.00
10.50
9.50
8.50
10.50
9.50
8.50
8.50
10
Page 11

Instruction Manual
D101617X012
Figure 7. Fisher DMA/AF‐HTC Dimensions
NOZZLE APPLICATION
MOUNTING FLANGE
(SAME SIZE & PRESSURE
RATING AS BODY FLANGE)
E
T
B
DMA Desuperheater
July 2017
REFER TO TABLE 9 FOR
MINIMUM MOUNTING I.D.
FLOW
D
DIRECTION
AVAILABLE NOZZLE CONFIGURATIONS
GA32864‐C
FLOW
DIRECTION
Table 6. Fisher DMA/AF‐HTC Dimensions
WATER FLANGE DESUPERHEATER BODY FLANGE
Size, NPS Pressure Rating Size, NPS Pressure Rating
CL150 3 or 4 CL150 203 8
1‐1/2
2
1. The NPS 4 DMA/AF‐HTC requires a 4.00 inch minimum mounting I.D. Contact your Emerson sales office or Local Business Partner for NPS 3 DMA/AF-HTC minimum mounting I.D.`
CL300 3 or 4 CL300 203 8
CL600 3 or 4 CL600 203 8
CL900 3 or 4 CL900 203 8
CL150 3 or 4 CL150 203 8
CL300 3 or 4 CL300 203 8
CL600 3 or 4 CL600 203 8
CL900 3 or 4 CL900 254 10
CL1500 3 or 4 CL1500 254 10
CL2500 3 or 4 CL2500 292 11.5
(1)
DIMENSION
E
(Standard)
mm Inches
Table 7. Fisher DMA/AF‐HTC Dimensions
DIMENSION
D
(Nominal Pipe Size)
mm NPS mm Inches mm Inches
200 8 3 or 4 356 14.00 248 9.75
250 10 3 or 4 356 14.00 216 8.5
300 12 3 or 4 444 17.50 279 11.0
350 14 3 or 4 444 17.50 267 10.5
400 16 3 or 4 444 17.50 241 9.5
450 18 3 or 4 444 17.50 216 8.5
500 20 3 or 4 444 17.50 216 8.5
550 22 3 or 4 444 17.50 216 8.5
600‐900 24‐36 3 or 4 444 17.50 216 8.5
Desuperheater
Body Flange Size,
NPS
B
(Insertion Length)
(Height)
T
11
Page 12

DMA Desuperheater
Instruction Manual
July 2017
Table 8. Fisher DMA/AF Minimum Mounting I.D.
NOZZLE MODEL
DMA - M Spray Nozzle
DMA -A through
DMA - U Spray Nozzle
DMA/AF-A, B, C
DMA/AF-D, E 73.66 2.9
DMA/AF-A, B, C, D
DMA/AF-E 80.06 3.152
DMA/AF-F 87.33 3.438
DMA/AF-G 92.05 3.624
DMA/AF-H 97.18 3.826
DMA/AF-J 6 1, 1-1/2, or 2 129.5 5.1
VALVE BODY PIPE
Size, NPS Size, NPS Size, NPS mm Inches
1 3
1-1/2
MINIMUM VALVE
BODY FLANGE
4 1, 1-1/2, or 2
WATER FLANGE MINIMUM MOUNTING I.D.
73.66 2.9
1, 1-1/2, or 2
1
58.42 2.3
66.65 2.624
77.98 3.07
Table 9. Fisher DMA/AF-HTC Minimum Mounting I.D.
MINIMUM VALVE BODY
NOZZLE MODEL
DMA/AF-A, B, C
DMA/AF-D, E 72.66 2.9
DMA/AF-A through H 4 1-1/2 or 2 101.6 4
FLANGE
Size, NPS Size, NPS mm Inches
3 1-1/2 or 2
WATER FLANGE MINIMUM MOUNTING I.D.
66.65 2.624
D101617X012
12
Page 13

Instruction Manual
D101617X012
Figure 8. Spray Nozzle Tack Weld Locations
AF STYLE NOZZLE
ORIENTATION OF FLATS NOT CRITICAL
BX STYLE NOZZLES
DMA Desuperheater
July 2017
WIRE, TACK
WELD ON BOTH ENDS
TACK WELD
GA26453‐B
OTHER NOZZLE TYPES
TACK WELD
13
Page 14

DMA Desuperheater
July 2017
Instruction Manual
D101617X012
Parts Ordering
When corresponding with your Emerson sales office or Local Business Partner about this equipment, mention the
serial number of the desuperheater. Each DMA, DMA/AF, and DMA/AF-HTC desuperheater assembly is assigned a
serial number which can be found on the mounting flange. The only available replacement part for this desuperheater
is the complete nozzle assembly. Whenever ordering replacement nozzles, state the complete eleven-digit part
number of each nozzle required as found in the following parts list.
WARNING
Use only genuine Fisher replacement parts. Components that are not supplied by Emerson Automation Solutions should
not, under any circumstances, be used in any Fisher equipment, because they may void your warranty, might adversely
affect the performance of the equipment, and could cause personal injury and property damage.
Parts List
Note
Part numbers are shown for recommended spares only. For part
numbers not shown, contact your Emerson sales office
Partner.
NOZZLE TYPE PART NUMBER
AF7 GA07205X012
AF10 GA12476X012
AF14 GA03907X012
AF17 GA11805X012
AF20 GA03901X012
AF24 GA11435X012
AF28 GA03877X012
AF32 GA12196X012
AF35 GA11788X032
AF40 GA05300X012
AF44 GA11944X012
or Local Business
14
Page 15

Instruction Manual
D101617X012
DMA Desuperheater
July 2017
15
Page 16

DMA Desuperheater
July 2017
Instruction Manual
D101617X012
Neither Emerson, Emerson Automation Solutions, nor any of their affiliated entities assumes responsibility for the selection, use or maintenance
of any product. Responsibility for proper selection, use, and maintenance of any product remains solely with the purchaser and end user.
Fisher is a mark owned by one of the companies in the Emerson Automation Solutions business unit of Emerson Electric Co. Emerson Automation Solutions,
Emerson, and the Emerson logo are trademarks and service marks of Emerson Electric Co. All other marks are the property of their respective owners.
The contents of this publication are presented for informational purposes only, and while every effort has been made to ensure their accuracy, they are not
to be construed as warranties or guarantees, express or implied, regarding the products or services described herein or their use or applicability. All sales are
governed by our terms and conditions, which are available upon request. We reserve the right to modify or improve the designs or specifications of such
products at any time without notice.
Emerson Automation Solutions
Marshalltown, Iowa 50158 USA
Sorocaba, 18087 Brazil
Cernay 68700 France
Dubai, United Arab Emirates
Singapore 128461 Singapore
www.Fisher.com
16
E 1990, 2017 Fisher Controls International LLC. All rights reserved.
 Loading...