

Page 1
Page 2

Federal Communications Commission (FCC) Statement
Reorient or relocate the receiving antenna.
Increase the separation between the equipment and receiver.
Connect the equipment into an outlet on a circuit different from that to which the receiver is connected.
Consult the dealer or an experienced radio/TV technician for help.
This device complies with part 15 of the FCC Rules. Operation is subject to the following two conditions: (1) This device
may not cause harmful interference, and (2) this device must accept any interference received, including interference that
may cause undesired operation.
Note: This equipment has been tested and found to comply with the limits for a Class B digital device, pursuant to part 15
of the FCC Rules. These limits are designed to provide reasonable protection against harmful interference in a residential
installation. This equipment generates, uses and can radiate radio frequency energy and, if not installed and used in
accordance with the instructions, may cause harmful interference to radio communications. However, there is no
guarantee that interference will not occur in a particular installation. If this equipment does cause harmful interference to
radio or television reception, which can be determined by turning the equipment off and on, the user is encouraged to try
to correct the interference by one or more of the following measures:
Warning: Changes or modifications made to this device not expressly approved by Shenzhen Firstview Electronic Co.
Ltd. may void the FCC authorization to operate this device.
Note: The manufacturer is not responsible for any radio or tv interference caused by unauthorized modifications to this
equipment. Such modifications could void the user’s authority to operate the equipment.
Page 3

Note:
●
Don’t put the product in high temperature ,humid amd dusty environment
● Don’t put the product in the vehicles,whose windows are closed.
● Don’t throw and crash the product strongly.Don’t vibrate the TFT screen, or it will be broken down or displays
● Choose the suitable volume,turn down the volume or power off if you feel syrigmus arised from the high volume.
● Charge in the following case:
●A、
The icon shows no charge.
●B、
The operation system self-closing,shutdown after restarting-up.
●C、
No response of the operation icon.
●D、
Show red in the top right corner.
● Don’t stop abruptly during the player formatting、uploading and downloading,or lead to the error of software.
● As for the losses of internal storage leads by the damage、maintainance and other reasons, no responsibility this
●
Don’t remove the package without permission.Don’t clean the products by alcohol、thinningagent and Benzene
●
Don’t use the products in the non-electronics areas(like the aeroplane)
●
Don’t use the products when you are driving and walking ,or traffic accident will be arised.
●
The USB only can be used to transfer data.
【
Note】:All the pictures in this manual is for your reference! no notice will be released when
This manual includes some important safety method and some information about how to use the
product correctly to avoid the unnecessary troubles.Before you use the product,please refer to the
manual carefully.
abnormally.
company will bear,so please use according to the manual.
scrubbing stuff.
This company retain the right to improve products,no notice will be released when specification or design is
※
changed
( No waterproof )
※
specification or appearance is changed!
Page 4

1.Illustartion of appearance and button
2.First usage
2.1 battery management and charge
2.2 Connect the PC
3.Operation Model
3.1 Main Model description
3.2 Status bar describe
3.3 The usage of touch screen
3.4 basic setting
3.5 sound and realistic setting ring,inform and screen brightness
3.6 application
3.7 privacy
3.8 device memory
3.9 language and keyboard
3.10 the date and time
3.11 USB mode choice
3.12 APK installer(application installation tools)
3.13 settings
4.Installation
4.1 basic function
4.2 internet synchronization
4.3 buttons
4.4 labels
4.5 file path
4.6 progress bar
5.Firmware upgrade
5.1 steps
5.2 internet synchronization
6.Help
7.Appendix:USB Device Install
N
1.Illustartion of appearance and button
Page 5
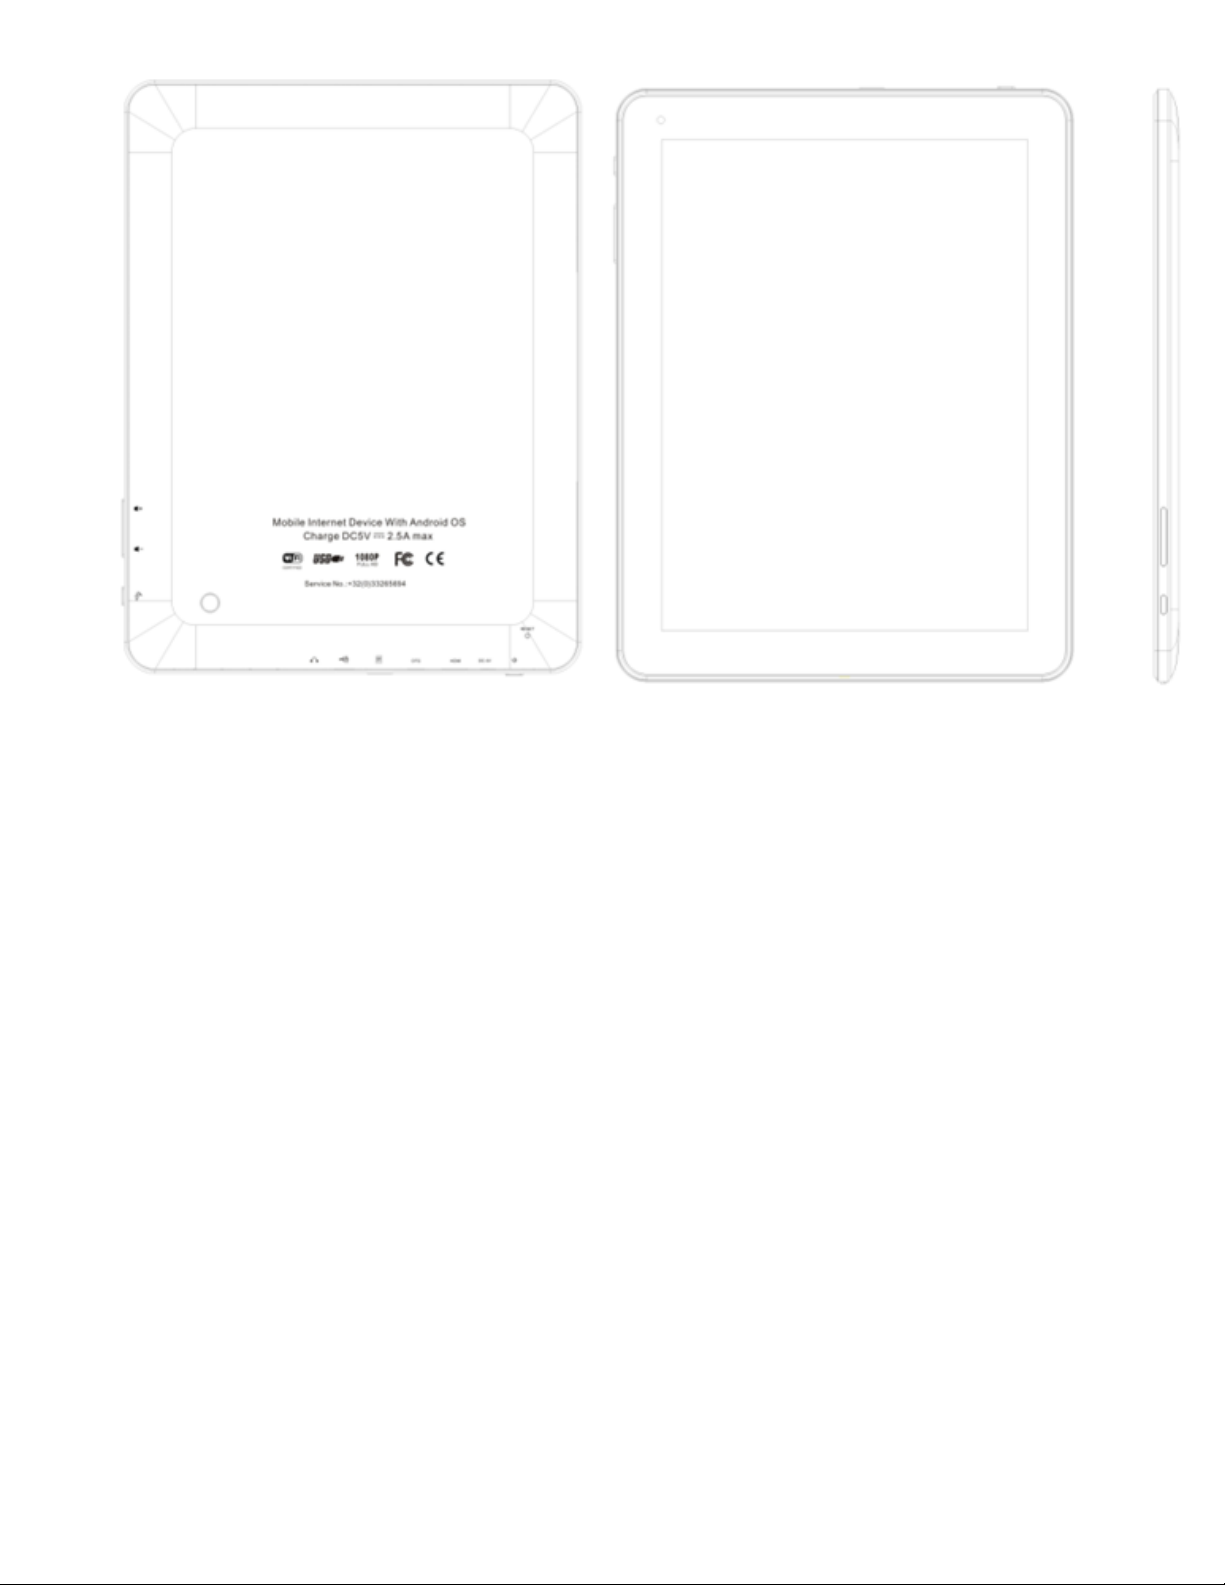
1.1 Touch screen
7Inch touch screen:to click、drag and other operation within the touch area
1.2 POWER
Power on : Press the button and the player show the start-uping picture then the machine show the menu:
Power off:Press the button MENU for 5 seconds,the system shows “Power off”,click the “Power Off”to end
system operation.
Screen lock :Press the button to lock or unlock the screen
【Note】: 1.In the case of low battery,the system will end automatically
2: After improperly shutdown,if you want to restart-up,the machine will scan and repair disk ,in the case of this
the screen will show the progress strip.
1.3 Return button
Press ESC to return the former operation for short time ,the menu to for a long time
1.4 Menu
Press the button”M”to popup the relevant “Menu”.
1.5 Volume
Press “+、 - ”to adjust the volume.
1.6 Headphone interface
Standard 3.5mm Headphone interface
1.7 Videos output interface
HDMI output interface;
1.8 TF-CARD
TF-CARD SLOT:CONNECT T-FLASHT STORAGE CARD
1.9 MiniUSB
MiniUSB Interface:to connect computer to transfer the data,charge or connect U disk
1.10 Reset Key
In the case of software crash,by thin article to press RESET key,the machine will shutdown
;
【Note】:It isn’t recommended that use the RESET key often,or the machine system will be
damaged.
Page 6
2、First usage
2.1 battery management and charge
When you use the machine for the first time ,please secure that the battery is full-charged:
Insert the charge or adapter to the USB interface.
The first and second time must hold on 2 hours,later you can hold
On for about 4 hours.
Note
【
During the charge,the battery icon is running.
When charge end,the battery icon will be green and stop running.
In order to extend lifetime,it is suggested that recharge when low battery ;
Standard charge(input: AC110~240V 50/60Hz Max:180MA output: DC5.0~5.5V/1.5A)needed,no
】:
DC charge offered,by USB interface to charge .
【Note】:1、If no usage for a long time,please recharge within a month to avoid damage to the machine
resulted from the exhaustion of battery.
2、After Power off,insert the charge,if the machine showes low battery、charging,a short time
needed before the battery can support the machine to start up.
3、If the machine need to be charged in a standard time , it must be in sleep mode.
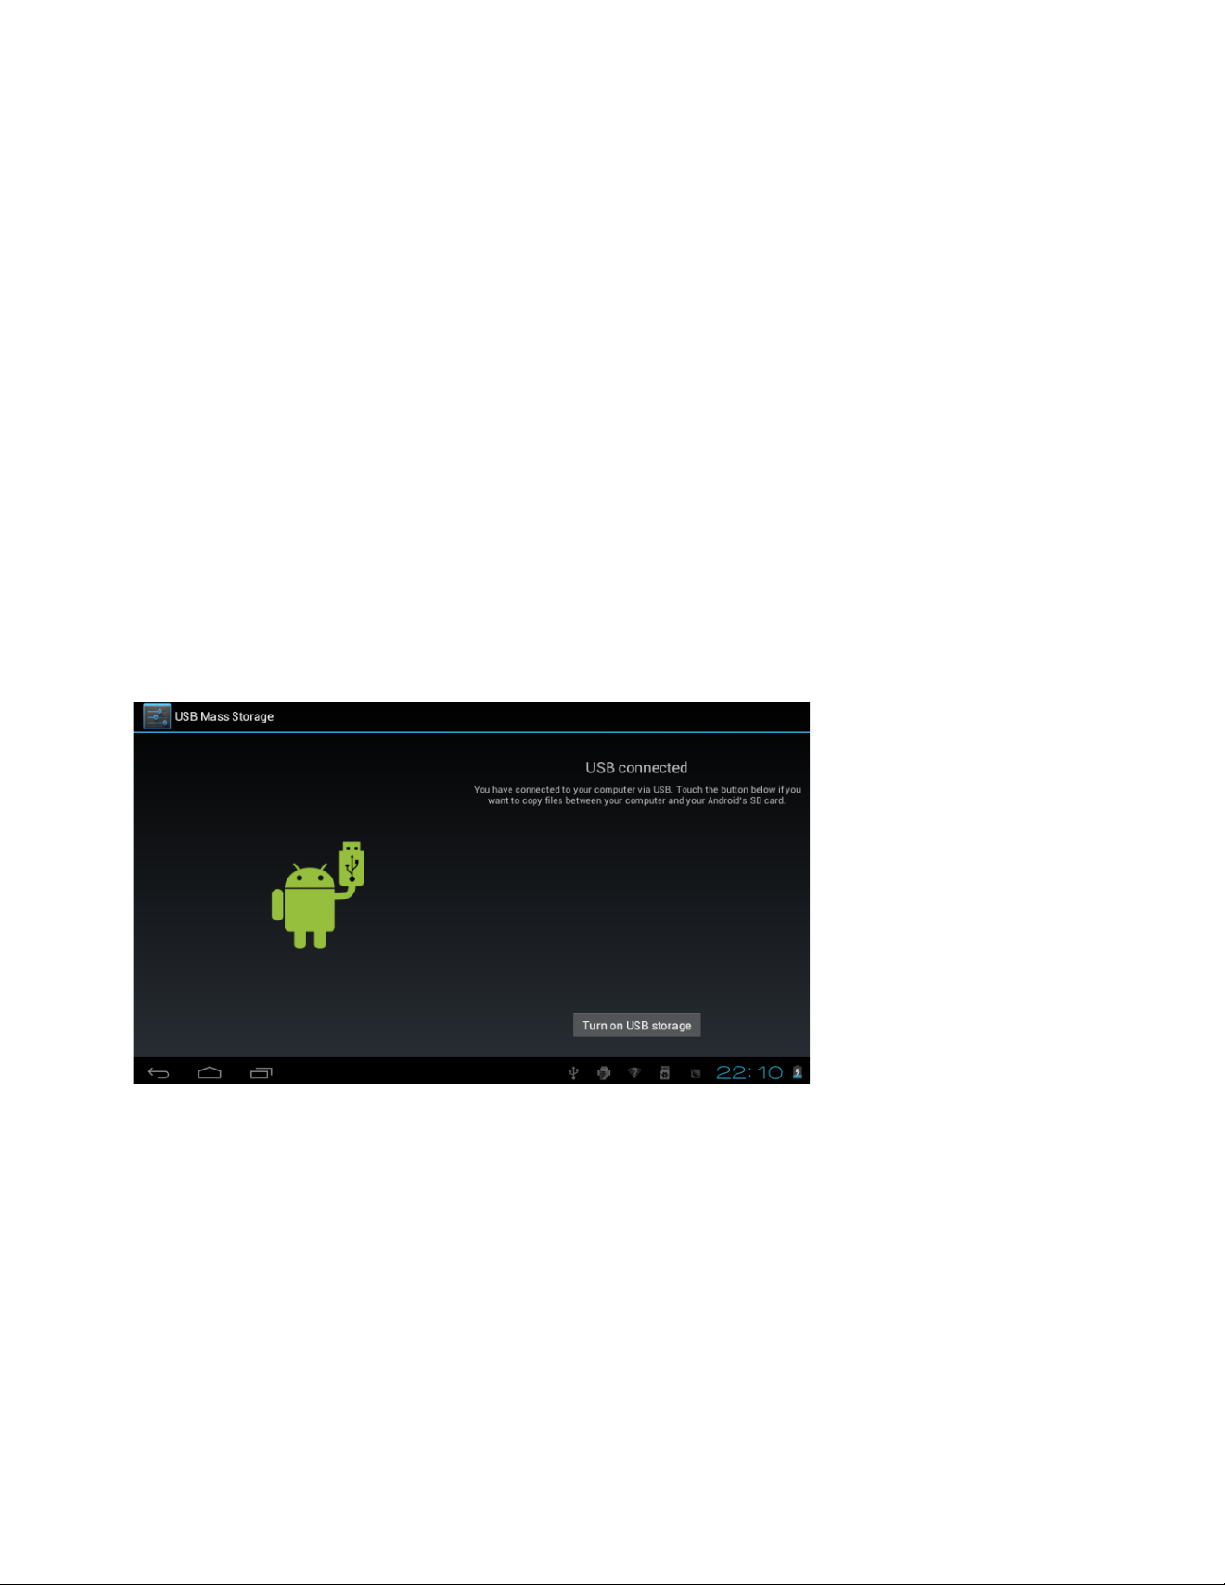
2.2 Connect PC
Connect the PC and this machine by USB cable,then the machine shows USB has been connecting,choose
loading to transfer data,if not ,it is charging.
Enter the loading Model ,you can send、delete the file in the player or the storage card.
3.Operation Model
3.1 Main Model description
The model after turn on the machine:
Page 7
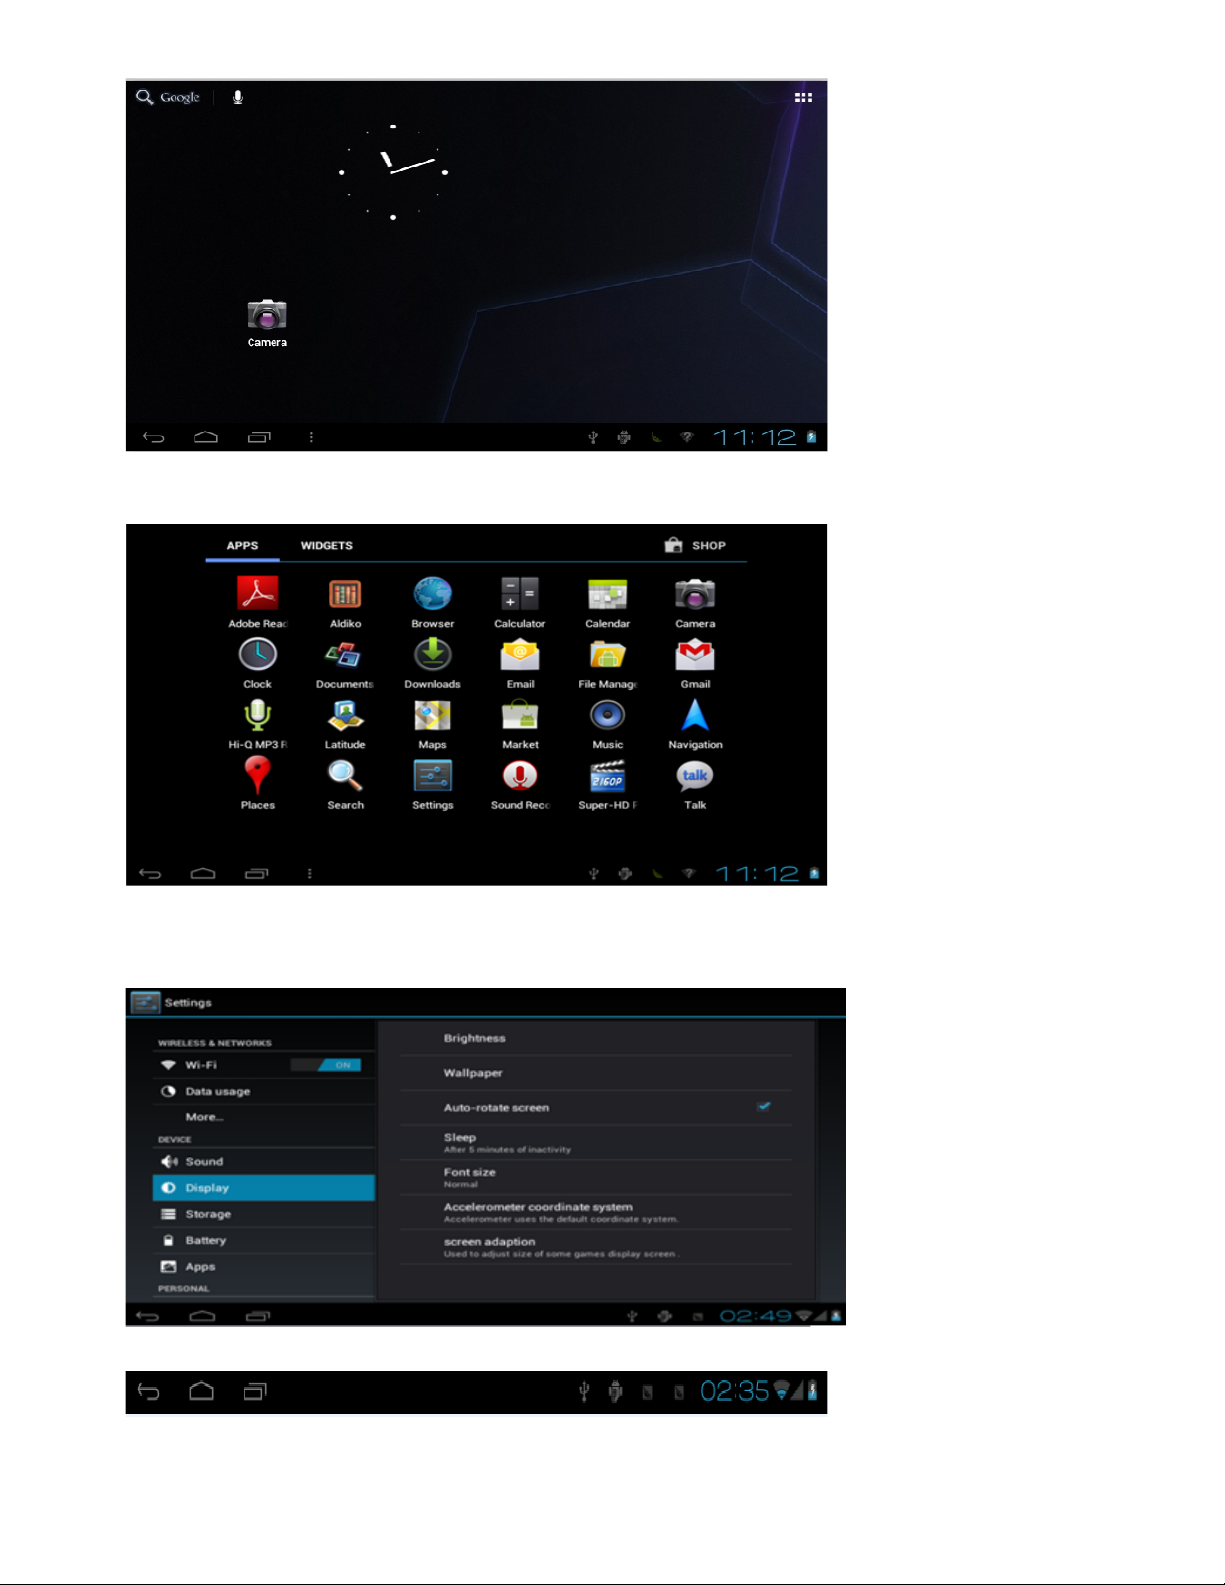
On the main screen, you can :
● statue column is on the top of the screen
Manage the software icon on the main screen:the icon becomes bigger after press ing the software icon for 3
seconds ,you can move it to anywhere you want
Delete icon:drag the icon to bin then the icon becomes red after press ing the software icon for 3 seconds
Press the touch screen then popup:add to “main page”window
Widgets;Wallpapers
:
3.2 Status bar describe
the top of left corner shows main screen software、T-Flash card、the statue of connection statue of USB,etc.
the top of right corner shows the capacity of battery 、the statue of charge、current time 、setting time 、
setting menu、return key,etc.
Page 8

3.3 The usage of touch screen
4.3inch touch screen The machine was allocated for the machine,Description for main touch screen,some
introduction about how to use the touch screen has included.
You can touch at the left corner to return the previous menu, to the main menu
In different application program,by touching return key the top of right corner,you can return the former
operation.
Note
【
In different browser(file、music、media、picture browser,etc),you can drag the roll to make the file list can be draged
smoothly.
3. 4.basic settings
Setting :Click the settimg icon on the menu to setting;
3.5 sound and realistic Settings ring, inform and screen brightness
Set up voice: adjust the media volume. Also can press and key to adjust the volume
Animation: open and close window display animations
Brightness: adjustment screen brightness, in stripes around the northeast high click to adjust brightness Settings
Screen standby: in the screen off automatically adjust delay before. 15 seconds, 30 seconds, 1 minute, 2 minutes, 10
minutes, never standby six time options can choose.
software menu are equal to the menu of the machine
】:
3.6 application
File Management
Page 9

Choose the file and than the software or file ,if you want to delete the icon or the file,please long press to delete
Management application: management and delete the installation of applications
Development: set the application's development options
【 note 】 : when the firmware upgrade please close USB debug mode
3.7 Personal setting
3.8 device memory
Remove TF card, view of the available storage space
Page 10

【 note 】 : please through the option of the "delete SD card" to remove security SD card, avoid hot plug pulled by
the equipment damage.
3.9 language and keyboard
Set up regional (language and regional), text input and automatic correction option;
Choose regional: 54 species of national languages are available
Note: android system support of 54 species of language, the menu interface support and kind of language.
Android keyboard: Android keyboard Settings
The voice of the button
Automatic capital
Show Suggestions: automatic shows suggested word and input
Auto-complete: automatically Spaces and punctuation automatic insert emphasis on words
Google pinyin input method: Google pinyin input method Settings
Key voice/lenovo input
Note: the installation of software can install your own I/o, installation input method in this after setting for normal use
Equipment keyboard: built-in keyboard Settings
Automatic substitution: correct mistakes key input words
Automatic capital: the first of the sentence uppercase
Automatic punctuation: according to two times the blank space key to insert "."
The user dictionary: to users add words in the dictionary from the user in the dictionary and delete words
3.10 the date and time
Page 11

Set the date, time, time zone and format
Set the date: into the date set interface set the date
Set time zone: in the select time zone interface set time zone
Set a time: in the time of show format
Choose date format: choose different date format to display the date
3.11 USB mode choice
Choose the USB work mode: OTG/HOST/SLAVE...... ...
USB: choose USB host mode in work, this mode can be mounted U plate and peripheral equipment
3.12 APK installer (application installation tools)
This machine is the third party support based on android platform application, the majority of applications from the
network can access, kao into the machine flash or SD card.
Click, pop-up Apk installer options: installation, management, quit three options.
Installation: click on the installation, into the Apk installation interface.
Corresponding Internal Memory dish and SD Card storage control.
Choose the inside of the APK format the installer, click on the installation, operation after the completion of the return
to the main interface, namely the corresponding software menu.
Page 12

3.13 Settings
Tap application icon.
4.Installation
Steps:
1. Obtain LiveSuitPack100_ex.exe file first. Then locate it to direction “D:\test”. As followed picture.
2 Double click LiveSuitPack100_ex.exe, which will install LiveSuit software automatically at the current directory,
please see the picture followed:
Page 13

3 You can see a file named “LiveSuit.exe”. It is just “LiveSuit”, the software we need.
4.Double click LiveSuit.exe, it will run, please see the picture as below:
Note: You’d better install “LiveSuit” in the hard disk of your PC than in memory disk.eg :U disk.
4.1. Basic function
1 backup and query device information
2 Firmware upgrade
3 Upgrade LiveSuit itself (depends on network and server)
4.2. Software interface
Page 14

Picture1: Software interface
4.4. Lables
4.3. Buttons
Select IMG:Click the button to select the firmware used for upgrade.
Update:Click the button to start upgrade after identifying U disk once you insert.
NetSync:After the device has been inserted to PC, and recognized as U disk. Click the button to start upgrade,
Help:Click the button for help.
Exit:Click the button to end and exit. Don't click the button when you are upgrading or inquiring the information.
Minimize:click the button, LiveSuit will enter into the minimize window.
x:click the button to enter system tray mode
Img:on the right side is the file path of firmware.
Progress:on the right side is the upgrading progress bar.
Welcome to LiveSuit:display the system state and result. The content will change in time.
4.5. File path
Display the firmware path information you selected.
4.6. Progress bar
Indicating the current upgrade progress
5. Firmware Upgrade
5.1. Steps
1 open the LiveSuit software.
2 select the firmware. (*.img)
3 the machine must be closed, press any key for a long time (except the power button, volume button and HOME
button),then connect the machine to PC, press the power button several times constantly for a long time until the
computer indicate that it find new equipment(the first time) or appear the window of clear machine internal documents ,
then loosen any keys, according to the tips of the PC operation
Note: before connect the MID to the computer,press any keys(except the power button, volume button and HOME
button),you need press it for a long time until the PC machine have tips that find new equipment or appear the window of
clear machine internal documents,you can loosen the keys.
Page 15

4 During upgrade, you will be asked to install the USB Driver twice. The driver file is “usbdrv.inf” in the folder
“usbDriver”,which is located at the installation path of “LiveSuit”( for more detail information please refer the to
“Appendix:USB Device Install”)
5 If you upgrade successfully, please pull out the device, then reset it.
6 if failed, please pull out the device, reset it. And do the upgrade again.
7 if upgrade failed so many times, please contact with the franchiser.
Notes:
Please do not click the “ NetSync” or “ exit” button during upgrade.
5.2. Internet Synchronization
1 open the LiveSuit software
2 click “ Internet Synchronization” button to start the LiveSuit for upgrade. ( Notes: users must can visit the internet)
Notes:
During internet synchronization, please do not click “system upgrading” or “exit”.
6. Help
User Guide
1 click “ Help” to open the help file.
FAQ
1. warning: “ cann’t find the device”,
The problem maybe that device is not inserted to PC, or you should wait for a while.
2. You’d better backup the data in your device to a reliable memory device before upgrade.
3. The upgrade process may destroy the data in your device, please backup them first.
4. You should obtain our firmware from official web of the manufacturer rather than lawless webs.
5. Please contact with the distributor for other problems.
7.Appendix
If your PC has never been installed such USB Device, you need to do this. Please see the following
steps:
:
USB Device Install
Page 16

Select “ No, not this time”, click” next”
Select “Install from a list or specific location(Advanced), then click “ next”:
Page 17

Click”brouse” to select location to search drivers , then Click “ next” :
Click :”Continue Anyway”:
Page 18

Then
Click”Finish”
About 2 second later, Install Driver again
Page 19

Click “Next”:
Select “Install from a list or specific location(Advanced), then click “ next”:
Page 20

Click”brouse” to select location to search drivers , then Click “ next” :
Click “Continue Anyway”:
Page 21

Click “Finish”
Page 22

After startup screen flash or the picture has been on first appear just cut off the electricity
1 power is not enough, please charge
Headset can't hear the voice
1 please check whether the volume set to 0
2 check the music file is damaged. Try playing other music to determine. If the file is damaged may lead to serious
noise or hop sounds
Can't copy files or can't play music files, etc
1 confirm whether it is right between computer and player connection
2 confirm whether the storage space of memory is full
3 hard recognize USB cable for damage
4 USB connection is disconnected
Seven. , basic function
Hardware configuration
Size: (long x width thick)
CPU processor speed: 1.2 GHz Cotex A8 processor with 3D accelerator
This machine capacity: 8GB
Memory: 1GB
Storage card: TF128M-16 G
Screen: 9.7’’ capacitive multi-touch screen
Resolution: 1024*768 pixels
Battery type and capacity: rechargeable polymer battery: 6300MA
USB: high speed USB2.0 mini OG connecting peripherals
Gravity sensor: 3 D
The tape: built-in microphones head
Software configuration
Operating system: Andriod4.0
Video: MKV (h. 264 HP). AVI. RM/BMVB. FLV. MPEG-1/2
Music: MP3, WMA. APE, FLAC. AAC. AC3. WAV
Pictures: JPEG. BMP, GIF, PNG. TIF
244x 192x 107 mm
×
 Loading...