

Page 1
Manual # M08-0271-000
Operation & Installation Guide
2070AF
www.FirstAlert.com
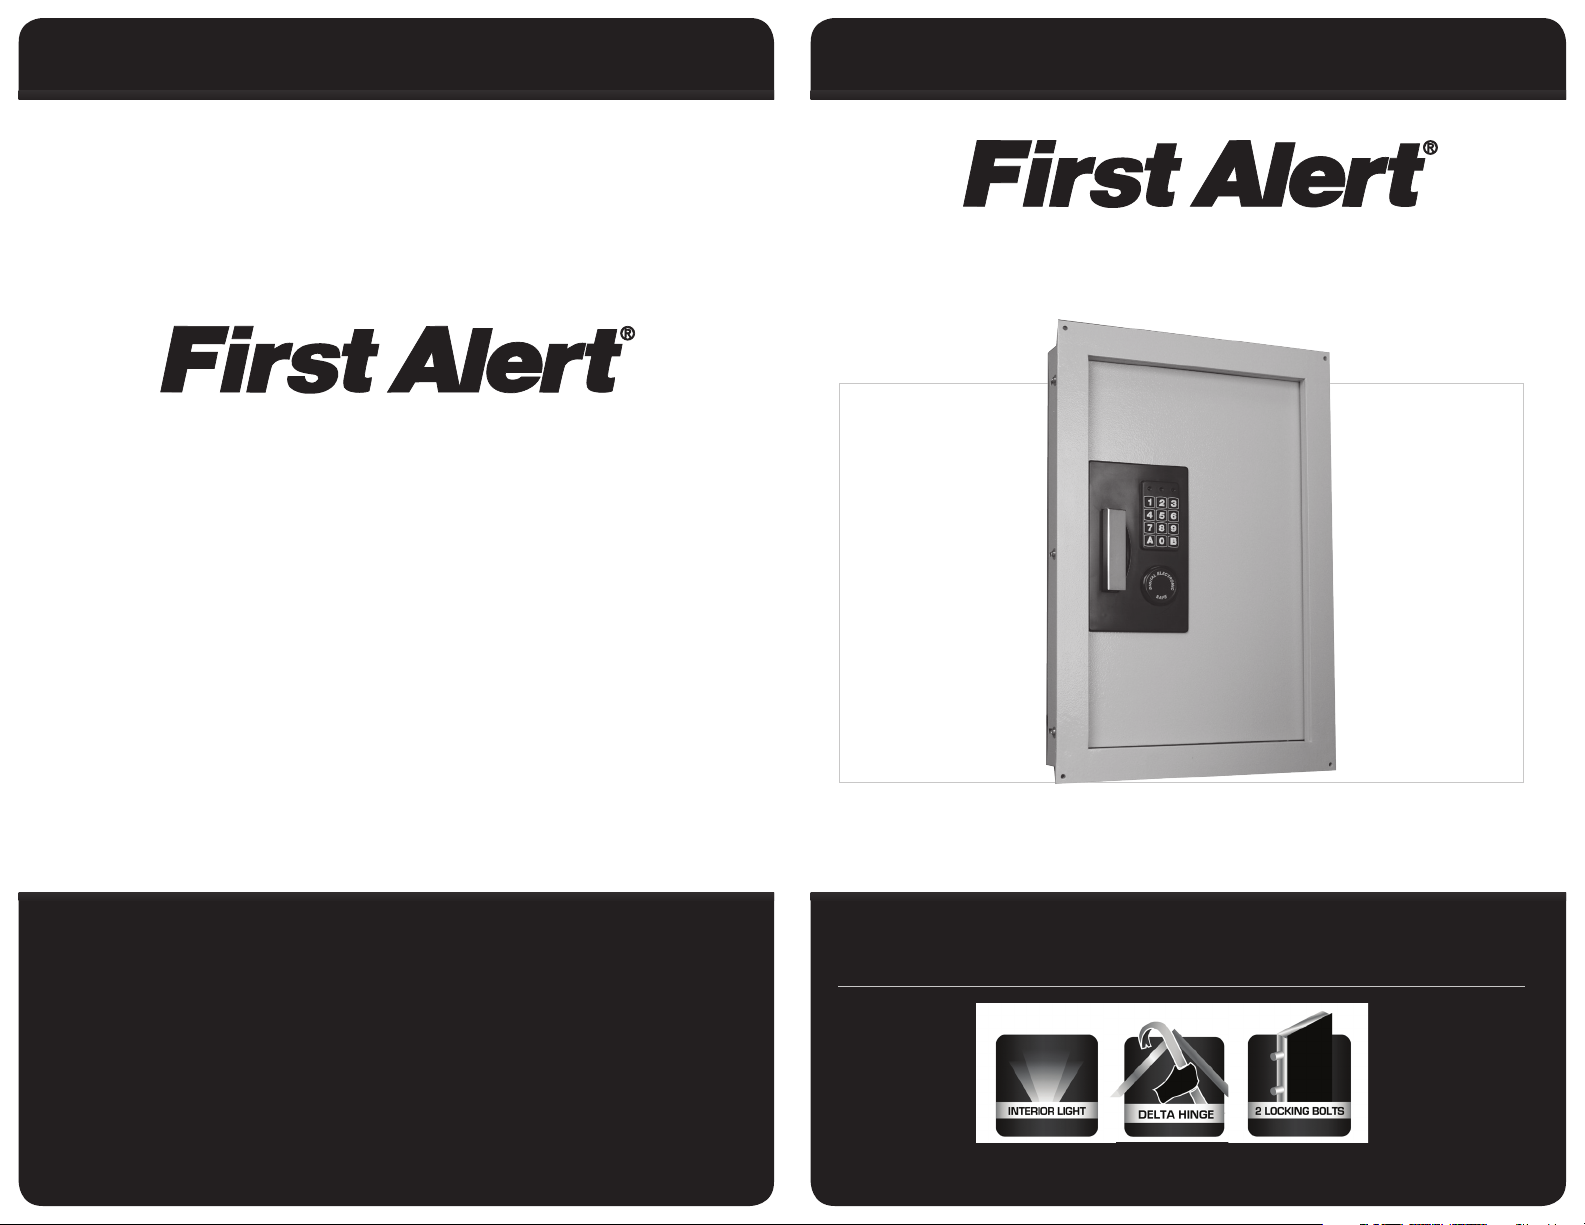
DIGITAL ANTITHEFT WALL SAFE
Manual # M08-0271-000
Page 2
Index / Overview of Your Safe Overview of Your Safe
MANUAL
D
I
G
I
T
A
L
E
L
E
C
T
R
O
N
I
C
S
A
F
E
1
2
3
4
5
6
7
8
9
A
0
B
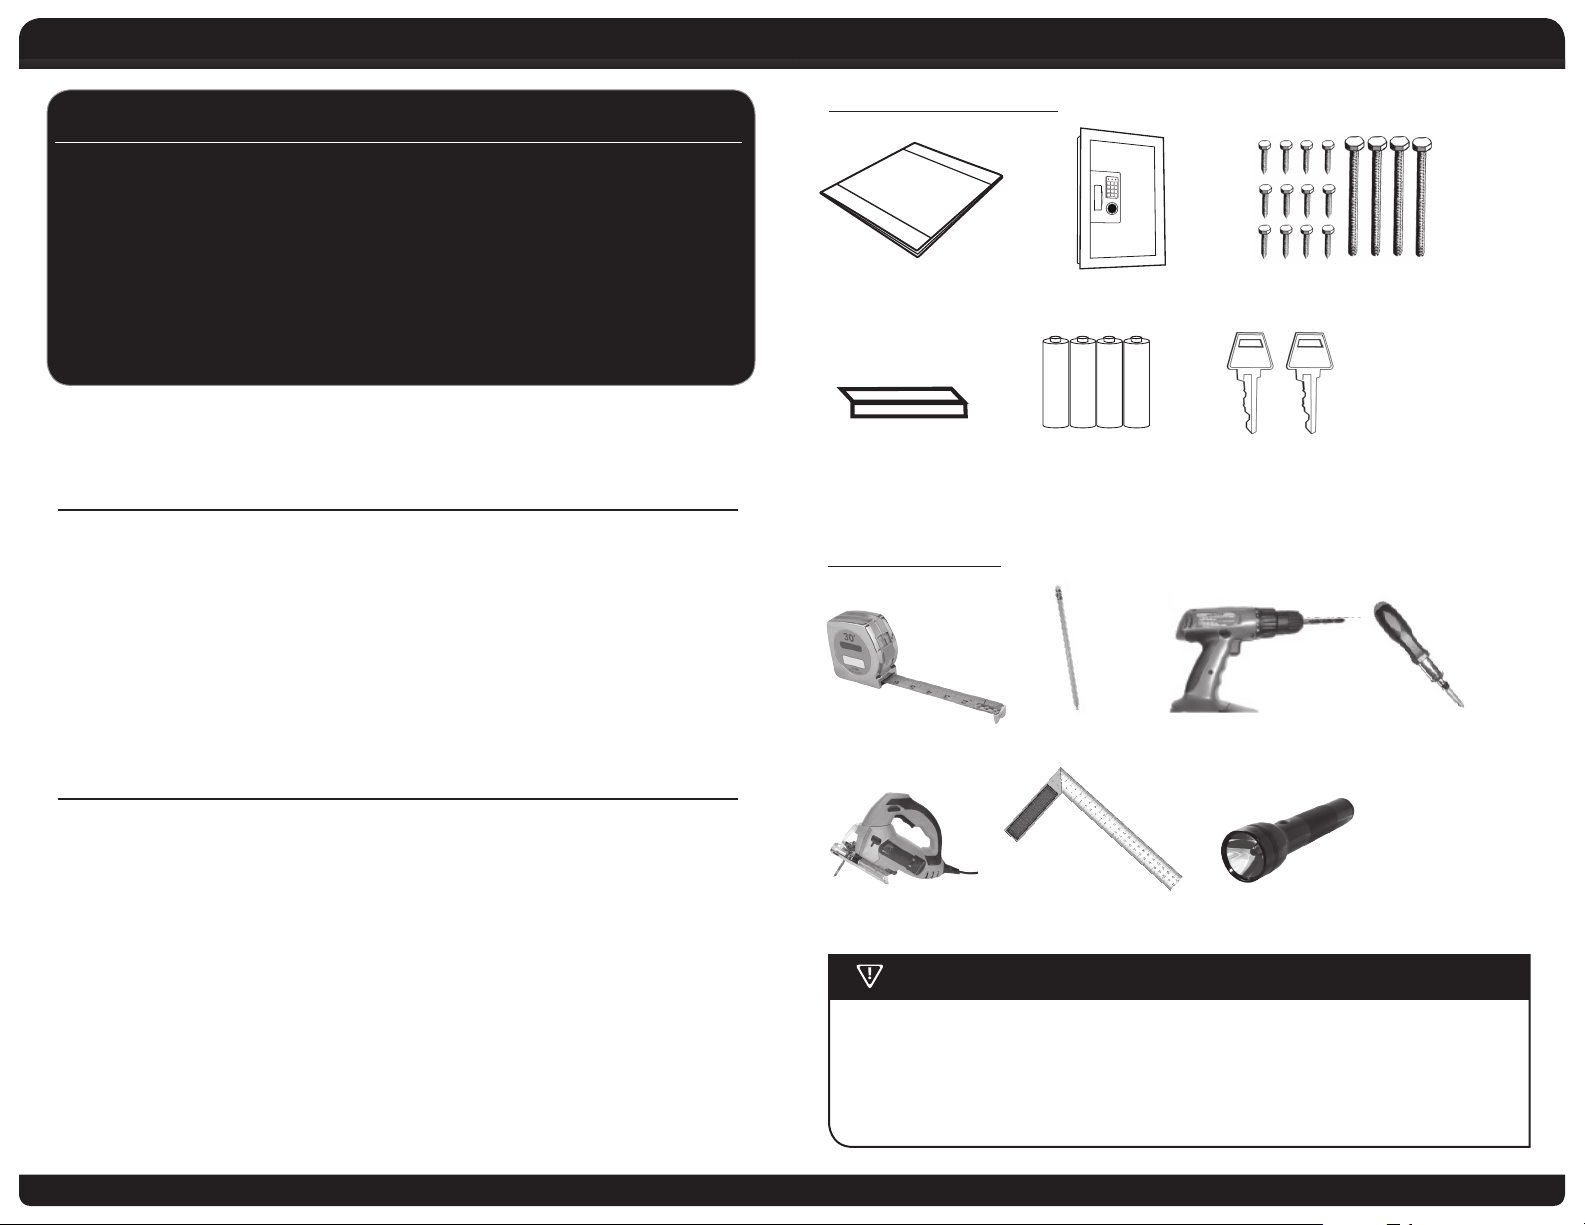
PACKAGE CONTENTS
Index
Overview of Your Safe .................................................................................................1
Initial Set Up ................................................................................................................. 3
Programming a Personal Passcode .......................................................................... 4
Mounting Instructions ................................................................................................ 6
Use, Care and Maintenance .......................................................................................8
Consumer Aairs .........................................................................................................9
Limited Warranty .......................................................................................................11
Installation Guide
2070AFOperation &
+
Mounting
Hardware Kit
For Your ProtectIon
a Do not remove the serial number tag from the safe.
a Store emergency override keys away from safe, NEVER INSIDE.
a Record all safe identication numbers on Safe Identication Record (page 11).
a Save this manual and NEVER keep it inside the safe.
oVerVIeW oF Your SAFe
Congratulations!
Your new First Alert® Anti-Theft Safe™ will provide secure protection for your
valuables, important documents and other personal items. All First Alert® safes
are designed and built using the highest manufacturing standards to ensure
maximum user satisfaction under a variety of conditions. With proper care,
your First Alert® safe will provide peace of mind for many years to come.
1
AAAAAA
AA
-+-+-+-
7 Removable
Shelf Extentions
4 AA Batteries
2 Emergency
Override Keys
YOU WILL NEED
Tape Measure 1 Pencil
Building SquareJigsaw or Equivalent Flashlight
1 Drill with
3/16 in. Bit
Phillips Head
Screwdriver
ImPortAnt: do not return SAFe to Store
If you are missing parts, have diculty programming your safe or have any other questions
pertaining to its proper use and care, DO NOT RETURN your safe to the store. Please contact
Consumer Aairs at 1-800-323-9005, 7:30 a.m. – 5 p.m. Central Standard Time, Monday
through Friday. To assist us in serving you, please have the model number and date of
purchase available when calling.
2
Page 3
Initial Setup Programming Personal Passcode
3
5
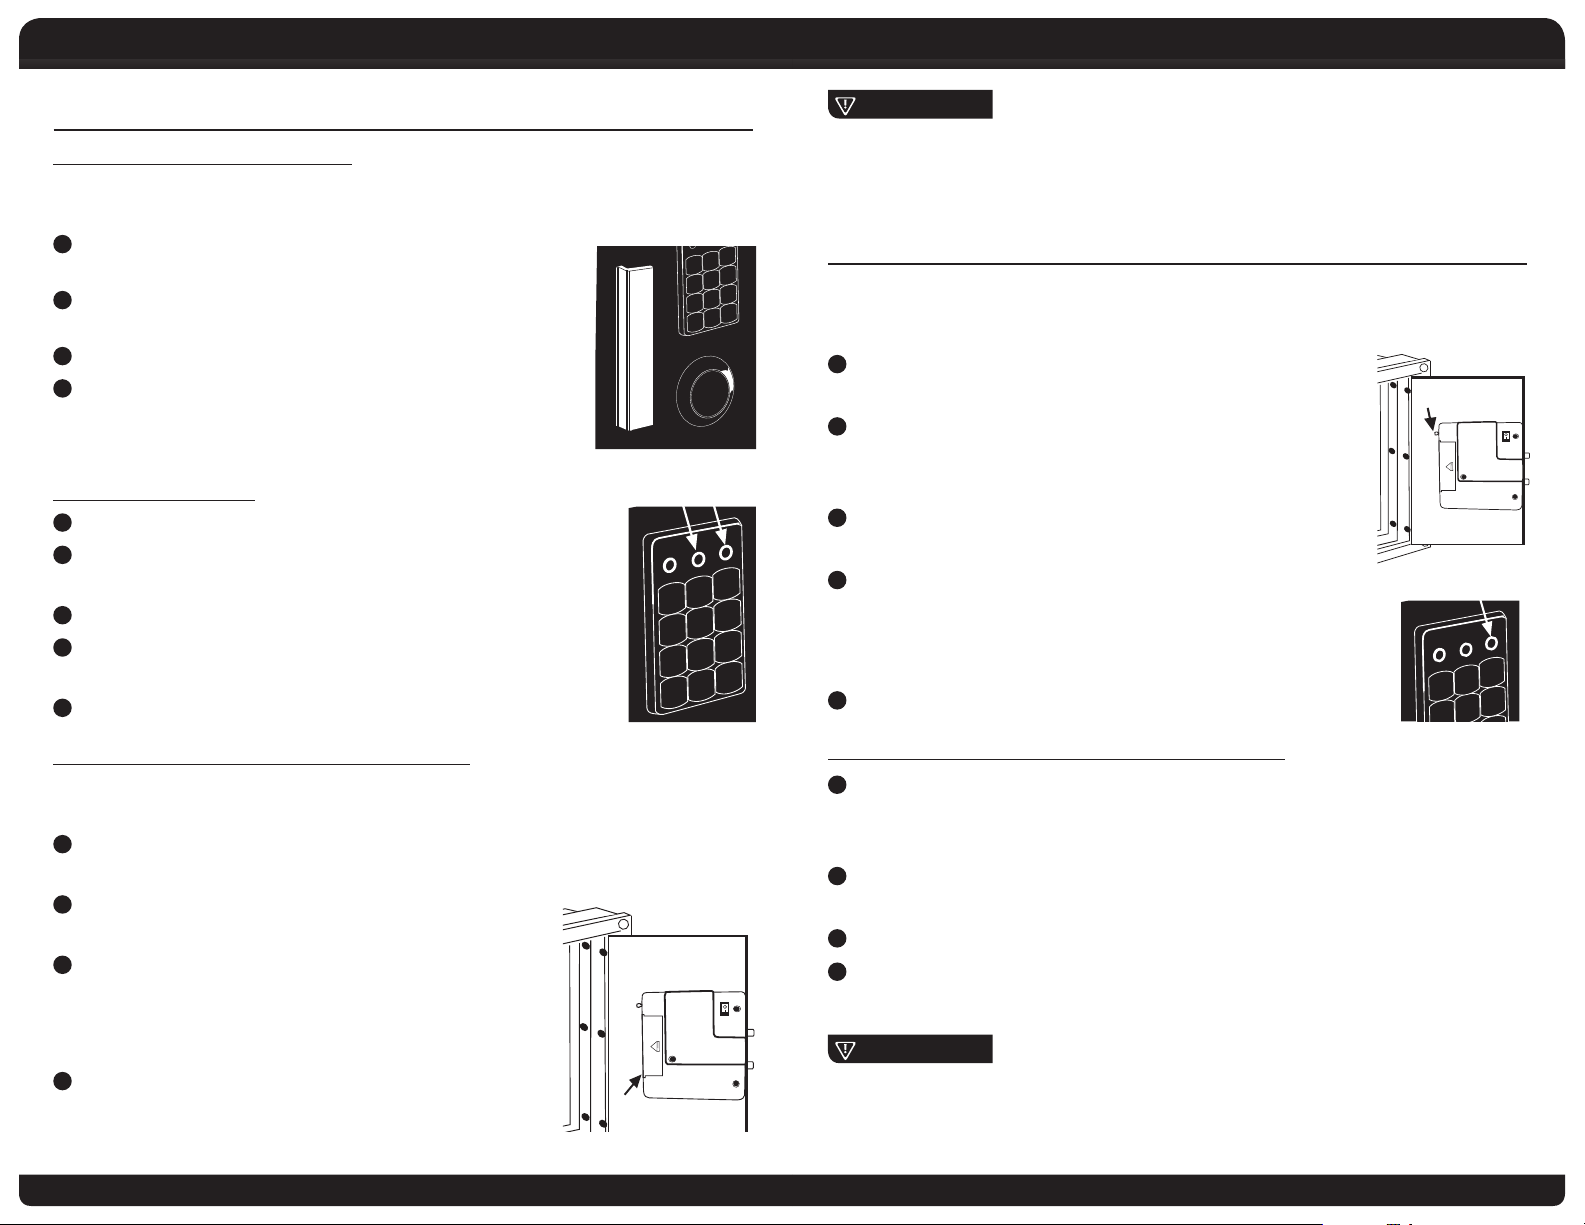
InItIAl SetuP
EMERGENCY OVERRIDE KEY USE
Your safe is equipped with an Emergency Override Key which allows immediate
access in case you forget your Passcode or the batteries need replacing.
1
Remove override key lock cover located
Red
Light
1
4
7
A
1
4
7
A
2
5
8
0
E
L
A
T
I
G
I
D
beneath the digital keypad.
2
Insert one of the Emergency Override keys (2 included)
into the bypass lock and turn to the left.
3
Pull the handle up and pull open the safe door.
4
After re-programming (See page 4) or changing
batteries (See Below), replace the key lock cover and
store keys in a safe and secure location away from the safe.
CHECKING BATTERIES
1
Locate the B key on the keypad and press.
2
If the yellow LED ashes and you hear a beep,
the batteries are good.
3
If the red LED ashes, change the batteries within two months.
4
If the LED does not light, then you must
replace the batteries immediately.
5
Proceed to Changing and Installing New Batteries.
2
5
8
0
T
C
R
E
O
L
E
F
S
A
Yellow
Light
3
6
6
9
B
N
I
C
9
B
ImPortAnt
Replacing the batteries will not erase your personal Passcode from memory.
However, weak or dead batteries will prevent the use of the digital keypad. Access
to the safe will have to be made using the Emergency Override Key. (See page 3).
ProgrAmmIng A PerSonAl PASScode
For security reasons, it is very important that you program your own personal Passcode
into the digital lock. The factory Passcode 159A should be changed immediately.
1
Using the factory assigned Passcode (159A),
open the safe. (See page 5).
2
Locate and then press and release the small red memory
button located inside the safe on the edge of the lock cover.
The keypad will beep twice and the yellow LED will light.
3
Select a Passcode using 3 to 8 numbers (no letters)
and enter it on the keypad.
4
After entering the numbers, press the B key. The keypad
will again beep twice and the yellow LED will light. This will
complete the programming of your personal Passcode. Leave
the door open and proceed to Testing Your New Passcode.
5
The light will once again ash and you will hear a beep.
Memory
Button
1
2
Yellow
Light
3
6
CHANGING AND INSTALLING NEW BATTERIES
Your new safe arrived with 4-AA batteries pre-installed at the factory. It is important
to periodically check the batteries and, if necessary, replace with a new set.
1
Using your personal Passcode or Emergency Override Key, open the safe
door and locate the battery compartment on the back of the door.
2
Press rmly in on the right side of the battery
compartment cover and slide to the left to open.
3
Remove the 4 old batteries and replace with 4 new
Alkaline “AA” batteries. Make sure that they are
installed in the proper direction as illustrated on
the battery compartment interior.
4
Replace the cover and, prior to closing, test your
Passcode as instructed on page 4.
Battery
Cover
NOTE: Proper disposal of discharged batteries is encouraged!
3
OPENING YOUR SAFE WITH YOUR NEW PASSCODE
1
With the door in the open position, push the lock
handle into the closed position. In about 3 seconds,
the safe will automatically lock.
2
Enter your new personal Passcode onto the keypad followed
by the letter 'A' and the digital lock should click open.
3
Pull the handle and open the safe.
4
If the new Passcode does not unlock the safe, then repeat the steps
to program your personal Passcode and retest.
ImPortAnt
Your new Passcode will always consist of your selected number code followed
by the letter 'A'. Once programming is completed, write your personal Passcode
down and store it in a safe and secure place away from the safe. The factory
pre-set Passcode will no longer open your safe.
4
Page 4

Programming Personal Passcode Mounting Instructions
OPENING WITH THE PRESET FACTORY CODE
Batteries have been pre- installed at the factory. Using the factory pre-set
Passcode 159A, open the safe as follows:
1
Enter the three digit number 159 on the keypad
Green
Light
Red
Light
followed by the letter 'A'. If entered correctly,
the green LED will light and the lock will click.
2
Pull the handle open within 5 seconds
and open the door.
2
ImPortAnt
1
If no action is taken, the safe will automatically relock in
5 seconds and the code will need to be re-entered.
3
A red LED indicates that the Passcode was entered
incorrectly. Re-enter the code and try again.
SECURITY LOCKOUT PERIODS
For added security, the safe will automatically lockout entry if the wrong
passcode is entered multiple times.
Yellow
Light
3
mountIng InStructIonS
LOCATION
Your First Alert® Wall Safe should be mounted in an obscure location such as a
bedroom or hall closet and must be installed in a 2’ x 4’ or thicker framed wall.
Be sure that no plumbing pipes or electrical wires run through the wall cutout area
where your wall safe is to be located and that there is room to swing the safe door
open without obstruction. The Wall Safe is 14 inches wide and designed to t
between standard 16 inch center-to-center wall framing.
NOTE: Most homes have wall framing construction of 2 x 4’s and/or 2 x 6’s that are located
on 16-inch centers. Instructions shown are for wood framed wall installation. Installation for
aluminum or steel stud walls may require pre-drilling and/or alternative mounting screws.
INSTALLATION
•Afterthe3rderror:20secondlock-out.(waitingperiod)
•4-6errors:5minutelock-out.
•7+errors:1hourlock-out.
If you have forgotten the Passcode, entry can be made using the
Emergency Override Key. (See page 3).
CLOSING SAFE
1
Make sure nothing inside the safe is obstructing
the door from completely closing.
2
Close the safe door and press the handle into the locked position.
ImPortAnt
This safe is equipped with an interior light. The control switch is located on
the inside door panel. When closing the safe it is important that the light
switch be turned to the o position. Failure to do so will drain the batteries
of power and the safe will not open when the digital key pad is used.
5
STEP 1 - Wall Cutout
1
Determine the approximate location of the stud for the right hand side of
your Wall Safe (hinge side). Drill or cut a large enough pilot hole to determine
where the inside edge of this stud is located.
cAutIon
With a ashlight, look through the pilot hole and make sure there are no
electrical wires or plumbing in the cutout area before you start cutting.
2
Using a building square, draw a vertical pencil line 21 1/8 inches long along the
inside edge of the stud. This will locate the right hand (hinged) side of the safe.
3 From the top of your scribed line, measure 14 inches to the left and make
a pencil mark. Repeat this measurement at the bottom of the vertical line.
With the building square, draw a vertical line between the pencil marks
locating the left side of the safe.
6
Page 5

Mounting Instructions Use, Care and Maintenance
4
With the square, draw a horizontal line at the
top of the 21 1/8 inch measurement joining the
two vertical lines. Repeat this action at the bottom.
You should now have a 14 inch x 21 1/8 inch rectangle
scribed on the wall between studs.
5
Using a jig saw or equivalent tool and starting at
uSe, cAre And mAIntenAnce
When properly maintained, your safe will continue to operate and accurately read
the authorized passcode for many years. In order to ensure optimum performance
of your safe, please follow these simple precautions:
the pilot hole, cut along the pencil lines and remove
the wall section.
Battery Maintenance
1
Always purchase and use the batteries as specied by this User’s manual.
2
Always replace all batteries at the same time. It is recommended to replace all
batteries at least once a year or sooner depending on amount of use.
3
STEP 2 - Install Safe
1
Install your wall safe into the wall cutout so that the
hinge side of the safe is ush against the right hand
stud and the front ange is at against the wall.
With the safe door open, extend the telescoping
back by pushing it from the inside until maximum
possible depth is achieved. Once the back is extended,
Always clean the battery contacts in the battery compartment and on the
batteries before installing new batteries.
4
Alwaysmakesureallbatteriesmatchthepolarity(+and-)signsintheopen
battery compartment.
5
If your safe will not be used for an extended period of time, it is recommended
that you remove the batteries.
6
Always promptly remove and properly discard of all used batteries.
install six wood screws (included) through the pre-drilled
holes in right hand side of safe and into stud. Tighten safe
ush to stud. Do not over tighten screws.
2
Now install six screws (included) through the
pre-drilled holes in left hand side of safe and
into stud. Do not over tighten.
Replace Batteries – For best results and performance, we recommend that the
batteries be replaced at least once a year or sooner depending on amount of use.
Clean Hand – Never attempt to operate the digital keypad if your hands have
excessive dirt, debris or liquids on them.
NOTE: There may be a slight amount of space
between the safe side wall and the left hand stud, this
is normal. The right hand hinged side of your wall safe
must be tightened ush to the right hand stud.
3
Once safe has been placed into position in the wall cutout,
secure into place by screwing 4 wood screws (included)
through the four recessed holes in the front ange of
Safe and into studs. Tighten screws ush with ange.
4
Select the expandable shelf extensions that will work
best with the depthof the installed safe and using small
screws and nuts, secure into place.
7
Clean Safe – To clean the surface of your safe, it is recommended that you use a
mild cleaner (e.g., window cleaner) to avoid scratching or discoloring the surface.
Always wipe dry and NEVER use abrasive cleansers on the safe or digital keypad.
Moisture – We recommend that you place delicate items such as pictures or
intricate jewelry into an air-tight container before storing them in your safe. Avoid
placing your safe in areas of high humidity. For optimum performance, the safe
should be opened and aired out for at least 20 minutes every two weeks.
For future reference, store this Operation and Installation Guide
in a secure area away from the safe. DO NOT DISCARD!
8
Page 6

D
I
G
I
T
A
L
E
L
E
C
T
R
O
N
I
C
S
A
F
E
1
2
3
4
5
6
7
8
9
A
0
B
Consumer Aairs Consumer Aairs
3 4
5
3 4
5
4
5
Safe Identification Record
Digital Passcode Record -
Model 2060, 2060E, 2062, 2062E,
2064, 2064E
Your Passcode must be at least 3 digits and no more than 8 digits followed
by the letter A.
Model Number
Serial Number
Key Number
A
3 4
5
4
5
3 4
5
conSumer AFFAIrS
YOUR SAFE’S UNIQUE IDENTIFICATION NUMBERS
When contacting Consumer Aairs, you should be prepared to supply some
important information that specically identies your safe. This information is
extremely important to assuring prompt and accurate customer assistance.
MODEL NUMBER SERIAL NUMBER KEY NUMBER
1 2 3
It is strongly recommended that you identify and record the following information
in the Safe Identication Record form located on page 11.
221
2070AF
221
Digital Passcode Record - Model 2070AF
Digital Passcode Record - Model 2060F, 2060EF, 2062F, 2062EF, 2064F, 2064EF
2
3
1234
3
HOW TO OBTAIN WARRANTY SERVICE
If service is required, do not return the product to your retailer. In order to obtain
warranty service, contact Consumer Aairs at 1-800-323-9005, 7:30 a.m. – 5 p.m.
Central Standard Time, Monday through Friday. To assist us in serving you, please
have the model number, serial number and date of purchase available when calling.
For Warranty Service return to:
First Alert, Inc.
Attn: Warranty Safe Returns
23610 S Banning Blvd
Carson, CA 90745
PleASe cAll uS At 1-800-323-9005 to
eStAblISh A WArrAntY return Set-uP
ORDERING REPLACEMENT KEYS
If you lose the safe entry or Emergency Override keys or would like additional
keys, you can purchase them from First Alert, Inc. You must supply the following
information to assure accurate processing:
1
Name / Address / Telephone Number
ImPortAnt
DO NOT REMOVE TAGS
In case your safe becomes inoperable or you lose your keys, these identication
numbers will be needed to correct the problem. It is recommended that the
number tags remain in place on the safe. If removal is necessary, then they
should be attached to the inside back cover of this manual. Store in a safe and
secure place for future reference.
9
2
Safe Model Number / Serial Number
3
2
Key Number (located on the key and on the Emergency Override Key Lock)
4
Notarized statement of ownership (a notary letter form can be printed o
at www.rstalert.com)
5
Indicate number of keys requested
Please send all the information via fax at 630-851-7995 or mail First Alert, Inc.,
3901 Liberty Street Road, Aurora, IL 60504-8122.
Checks or Money Orders are required for orders received by mail and should
be made payable to First Alert. Contact our Consumer Aairs Department for
costing information prior to ordering.
Mail To: First Alert, Inc.
Attn: Consumer Aairs
3901 Liberty Street Road
Aurora, IL 60504-8122
10
Page 7

Safe Identication Record and Limited Warranty
!
SAFe IdentIFIcAtIon record
Model Number _________________________________________________________
Serial Number __________________________________________________________
Key Number ___________________________________________________________
Digital Passcode Record __________________________________________________
Your passcode must be at least three (3) digits and no more than eight (8) digits
followed by the letter ‘A’.
lImIted WArrAntY
BRK Brands, Inc., (“BRK”) warrants that for a period of ve (5) years from the date of
purchase, this product will be free from defects in material and workmanship. BRK, at its
sole option, will repair or replace this product or any component of the product found
to be defective during the warranty period. Replacement or repair will be made with
a new or remanufactured product or component. If the product is no longer available,
replacement may be made with a similar product of equal or greater value. This is your
exclusive warranty.
This warranty is only valid for the original retail purchaser from the date of initial retail
purchase and is not transferable. You must keep the original sales receipt. Proof of
purchase is required to obtain warranty performance. BRK dealers, service centers, or
retail stores selling this product do not have the right to alter, modify or in any way
change the terms and conditions of this warranty.
This warranty does not apply to the nish on the product. This warranty does not cover
normal wear and tear of parts or damage resulting from any of the following: negligent
use or misuse of the product, use contrary to the operating instructions, disassembly,
repair or alteration by anyone other than BRK or an authorized service center, improper
installation, or exposure to extremes of heat or humidity. Further, the warranty does not
cover Acts of God, such as re, ood, hurricanes and tornadoes.
BRK shall not be liable for any incidental or consequential damages caused by the breach
of any express or implied warranty. BRK is also not responsible for: costs associated with
removing or installing the product; damage or loss of the contents of the product; nor
for the unauthorized removal of the contents; or damages incurred during shipment.
Except to the extent prohibited by applicable law, any implied warranty of
merchantability or tness for a particular purpose is limited in duration to the duration
of the above Warranty Period. Some states, provinces or jurisdictions do not allow the
exclusion or limitation of incidental or consequential damages or limitations on how
long an implied warranty lasts, so the above limitations or exclusion may not apply to
you. This warranty gives you specic legal rights, and you may also have other rights that
vary from state to state, or province to province, or jurisdiction to jurisdiction.
If you have any questions that cannot be answered by reading this manual, call
Consumer Aairs at 1-800-323-9005
© 2012 BRK Brands, Inc., a Jarden Corporation company (NYSE: JAH)
3901 Liberty Street Road, Aurora, IL 60504-8122
All rights reserved.
www.FirstAlert.com
US PATENT NO. D557,875, 7,350,470
OTHER PATENTS PENDING
11
12
 Loading...