

Page 1
1037290
M08-156376-159193
www.FirstAlert.com
Operation & Installation Guide
M08-156376-159193
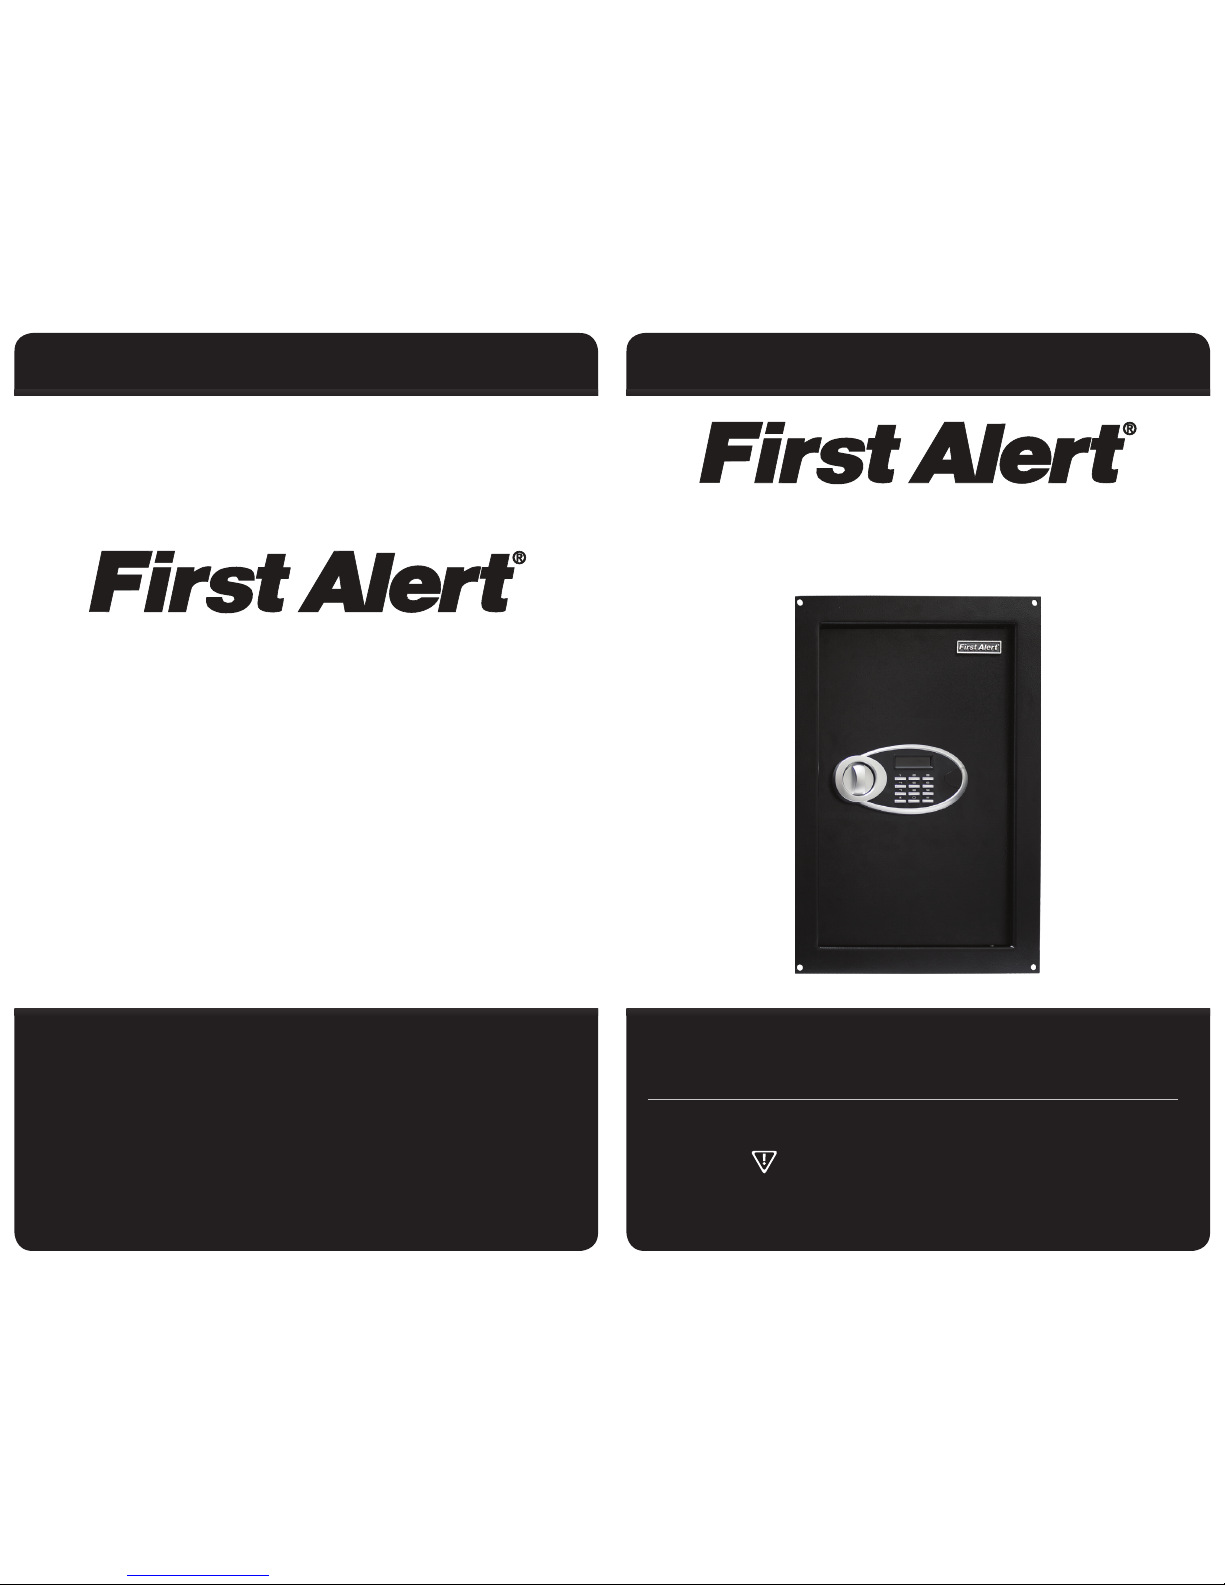
Intelligent Electronic Wall Safe
Please do not keep emergency keys in your safe!
Page 2
21
INDEX
Proper Use of Your Safe ...............................................................................................2
Product Overview..........................................................................................................3
Opening Your Safe for the First Time ..............................................................4 - 5
Setting The User Code .................................................................................................6
Mounting Method ...................................................................................................7 - 8
Safe Care & Maintenance / Consumer Aairs ......................................................9
Safe Identication Record ....................................................................................... 10
Ordering Replacement Entry Keys ........................................................................11
Limited Warranty ........................................................................................................12
Notes ...................................................................................................................... 13 - 14
Thank You!
Thank you for choosing our products! You’ve taken an important step in
organizing and protecting your most valued possessions. Every series of our safes
is professionally made and designed to provide safety. Please take time to read
and familiarize yourself with the proper operating procedures of your new safe
presented on the following pages. Again, thank you for choosing our products!
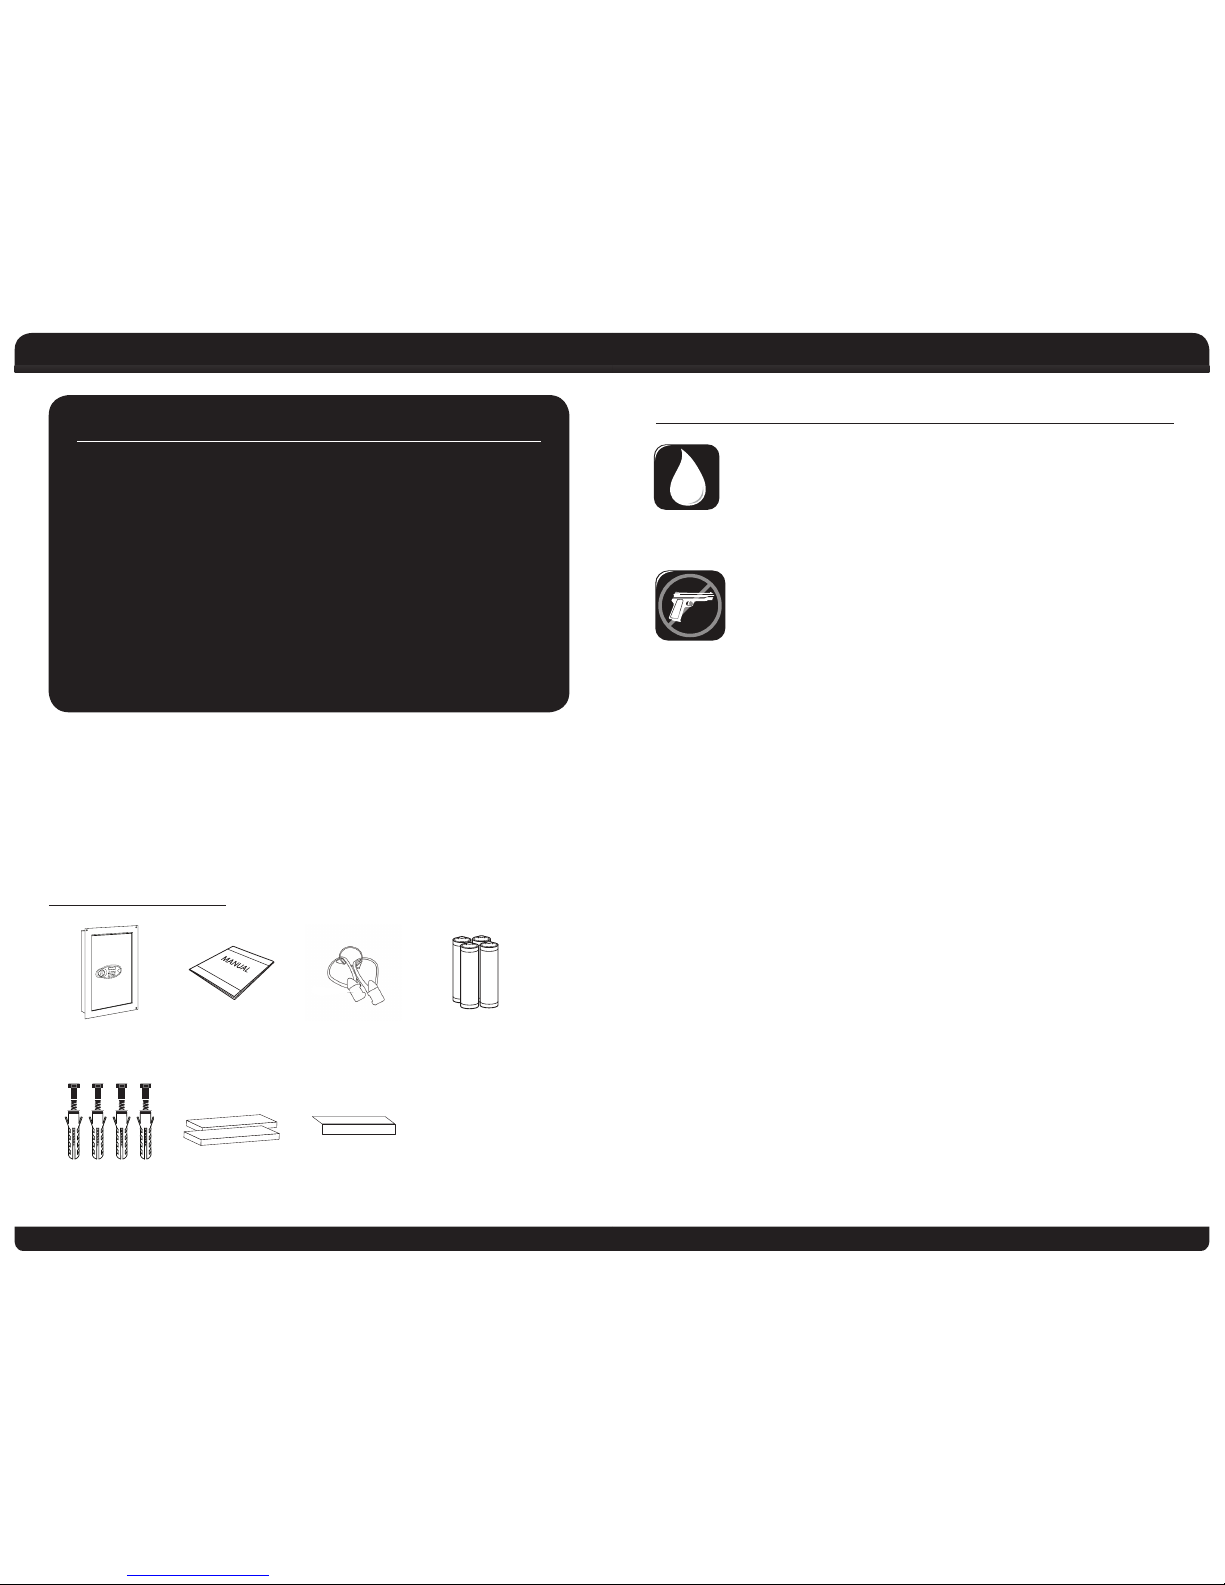
PACKAGE CONTENTS
1 First Alert®
Intelligent Safe
1 Operation &
Installation Guide
2 Emergency
Keys
4 AA
Batteries
4 Clamping
Screws
2 Interior
Shelves
Shelf
Extenders
Index / Proper Use of Your Safe Proper Use of Your Safe
PROPER USE OF YOUR SAFE
Moisture Warning
We recommend that you place delicate items such as pictures or
intricate jewelry into an air-tight container before storing them in
your safe. Avoid placing your safe in areas of high humidity. For
optimum performance, the safe should be opened and aired out for
at least 20 minutes every two (2) weeks.
Firearms Warning
This safe is not designed to store medication, items with
combustible content, guns or other weapons.
To clean your safe, wash o with a damp cloth and dry. Never use paint thinners
or chemical solvents, as they can permanently damage the nish.
FOR YOUR PROTECTION
a Always store keys away from safe, NEVER INSIDE.
a Record all safe identication numbers on Safe Identication Record on page 8.
a Save this manual and NEVER keep it inside the safe. DO NOT DISCARD!
Page 3
43
Product Overview Opening Your Safe for the First Time
OPENING YOUR SAFE FOR THE FIRST TIME
Upon rst opening, users should open the safe with the emergency key.
1
Remove emergency lock cover, then insert the emergency key, and turn it
counter clockwise.
2
Turn the knob clockwise to open the door.
CAUTION
Finish operation, pull out the emergency key and keep it in a safe place.
INSERTING THE BATTERIES
1
Open the door.
2
Insert 4 non-rechargeable, Alkaline AA batteries into the battery
compartment.
3
Under normal condition, if both red and the green lights are on at the same
time, it means the voltage is low and you should insert new batteries.
CAUTION
Replace 4 fresh non-rechargeable, Alkaline AA batteries by lining them up in a
manner as indicated by the “+ “ and “ - ” signs. If the batteries die, the user and
master code is lost. Use the keys and the user preset code to open the safe.
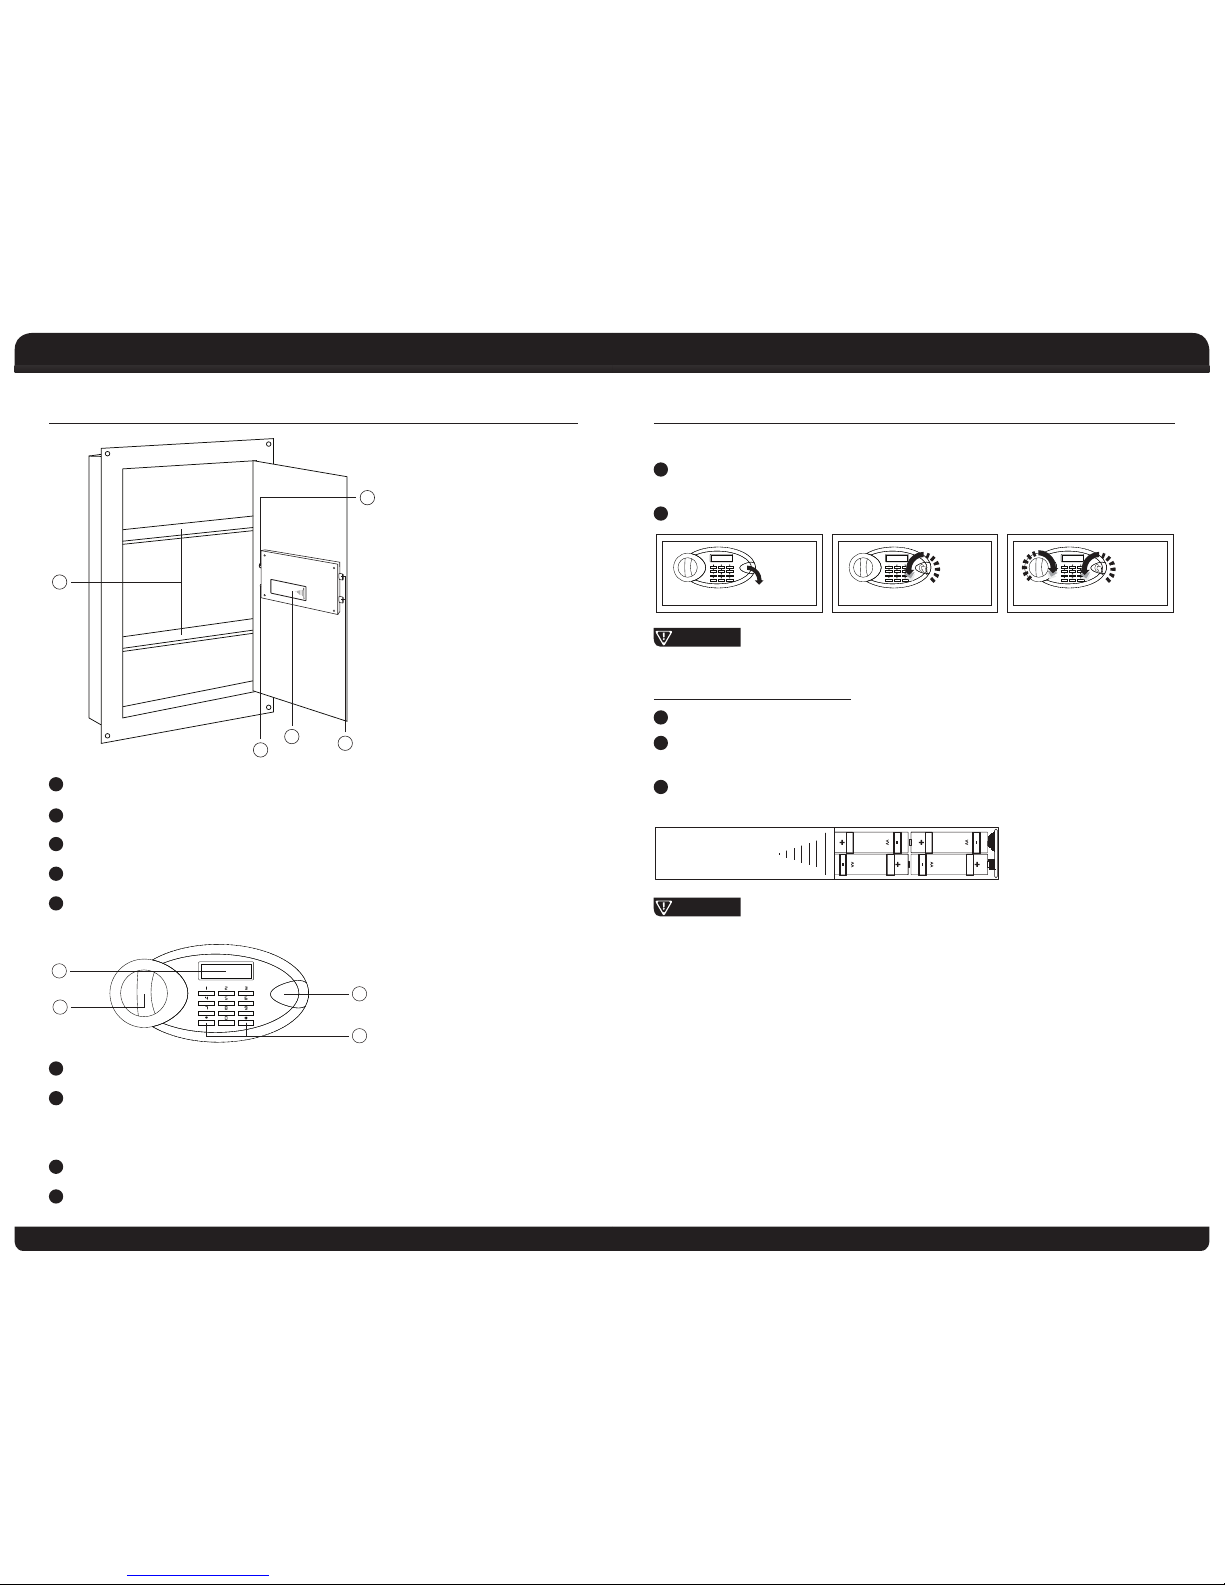
PRODUCT OVERVIEW
3
4
2
1
5
1
Locking Bolts
2
Red Reset Button
3
Battery Compartent
4
Interior LED Light
5
Shelves
7
6
9
8
6
Knob
7
LED Indicator Image
– Yellow Smiley Face appears when code is entered
– Green Ok appears when safe is unlocked
8
Emergency Lock Cover
9
* and # Conrming Button
Page 4
65
Opening Your Safe for the First Time
SETTING THE USER CODE
1
With the door open, press the reset button once, start setting code when the
yellow light goes on.
2
Input new code (3-8 digits), and press “*“ or “#” button to conrm with 2
buzzer beeps, which indicates the acceptance and storage of the new code.
3
If the yellow light ashes with 3 buzzer beeps, the code changing is not
eective, and you need to try again.
SETTING MASTER CODE
1
Open the safe, input “0” twice and press reset button, start setting code
when the yellow light goes on.
2
Input the new master code (3-8 digits), then press “*“ or “#” button to
conrm, it will be conrmed by 2 beeps and the yellow light ashes two
times, then setting is done successfully..
3
If the yellow light ashes three times, it means the new code is
invalid and should be reset again.
NOTE: The user code is the code that will be used most often, the master code
can be used as a back up code. For example, if the user changes the user code,
the master code will allow the safe to be opened. Write down both codes and
keep in a safe place. You can change both master and user codes.
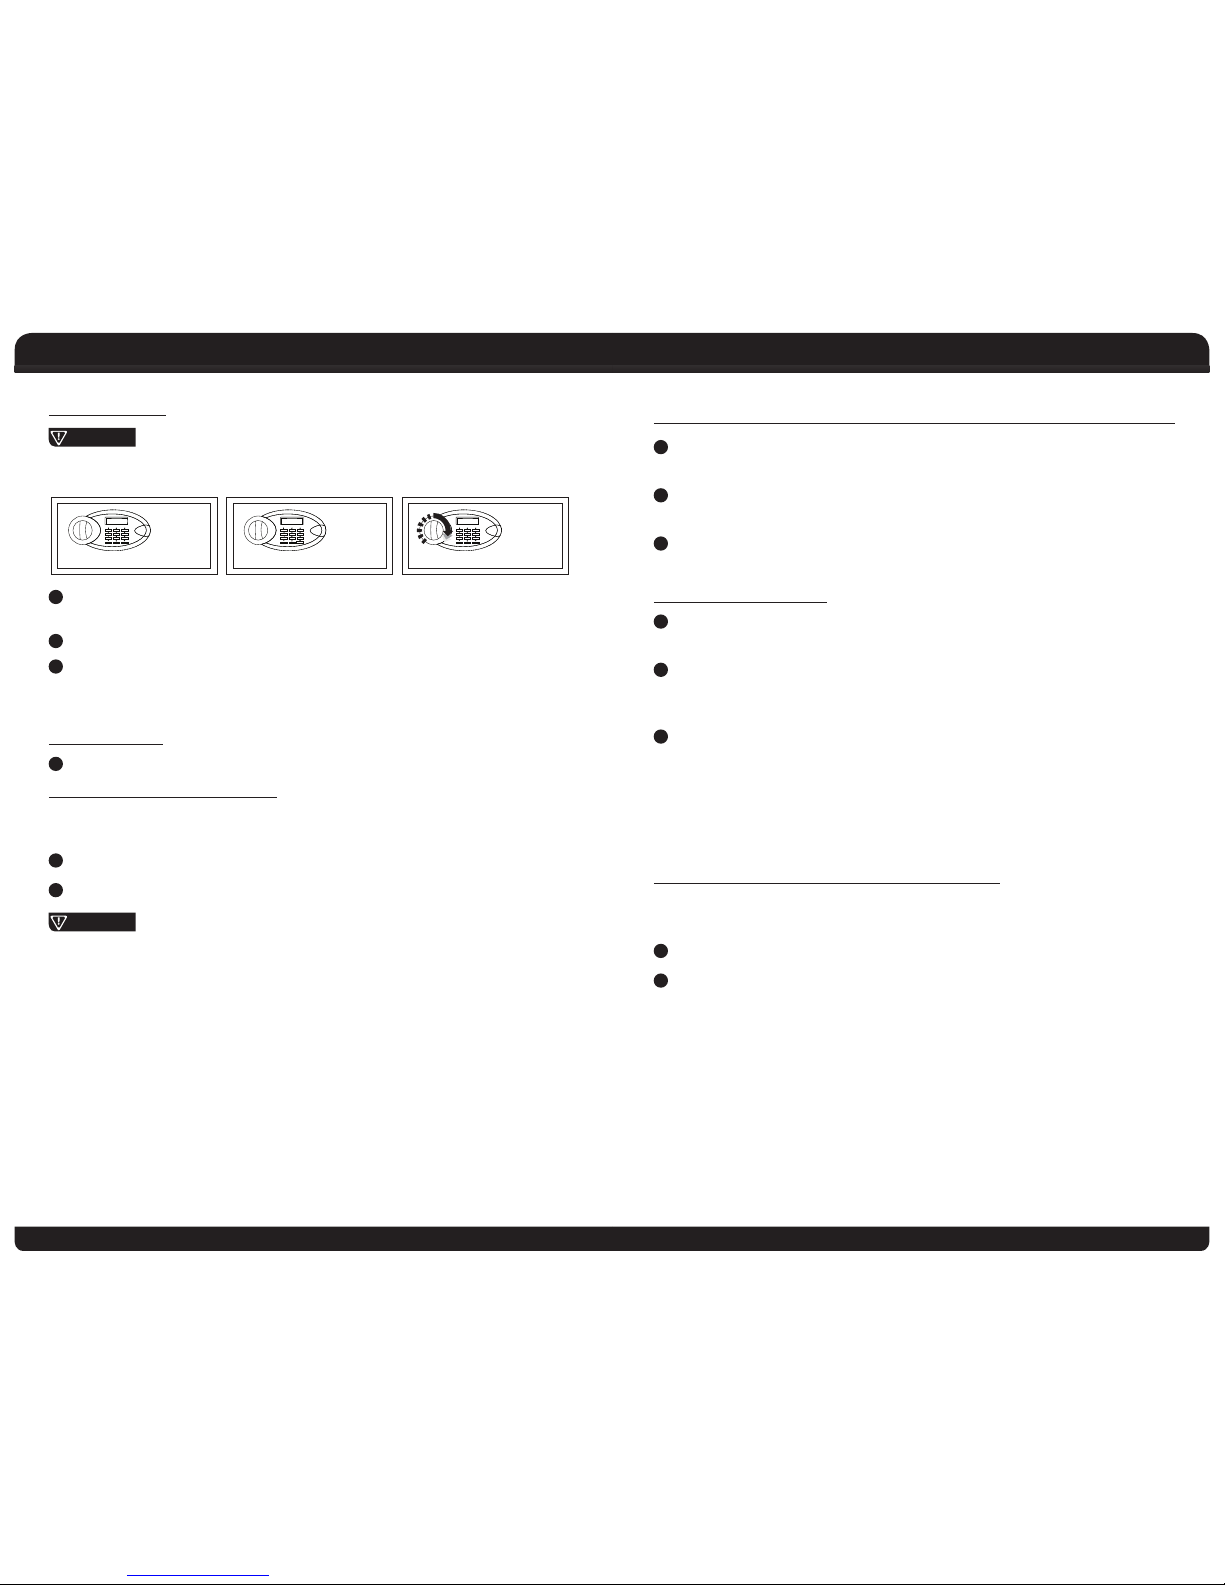
OPENING THE SAFE WITH THE EMERGENCY KEY
Upon rst receipt of the safe, if keypad is not functioning, the user code is
unknown, you can use the emergency key to open the safe.
1
Remove the cover of the emergency lock.
2
Insert the emergency key, turn it counter clockwise, then
turn the handle clockwise to open the door.
OPENING DOOR
CAUTION
The user preset code is “159” and then press pound #. Please input the user code
again if the yellow light ashes with three buzzer beeps.
1
Input your user’s code (3 to 8 digits), each press results in
one buzzer beep and yellow light ashes.
2
Press “*“ or “#” button, the green light will be on.
3
Rotate the knob clockwise and pull outwards within 5 seconds, the door is
opened.
NOTE: An interior LED turns on for 30 seconds after the door is opened.
CLOSING DOOR
1
Turn the knob counter clockwise to close the door.
AUTOMATIC LOCK OUT PERIOD
For added security, the safe will automatically lock out entry if the wrong
password is entered multiple times
1
3 continuously wrong entries will activate the warning beep for 20 seconds.
2
6 continuously wrong entries will activate the warning beep for 5 minutes.
CAUTION
The key pad would be disabled during the beeping. You can only stop the
beeps by opening the safe with emergency key and cut power by removing
the batteries.
Setting the User Code
Page 5
87
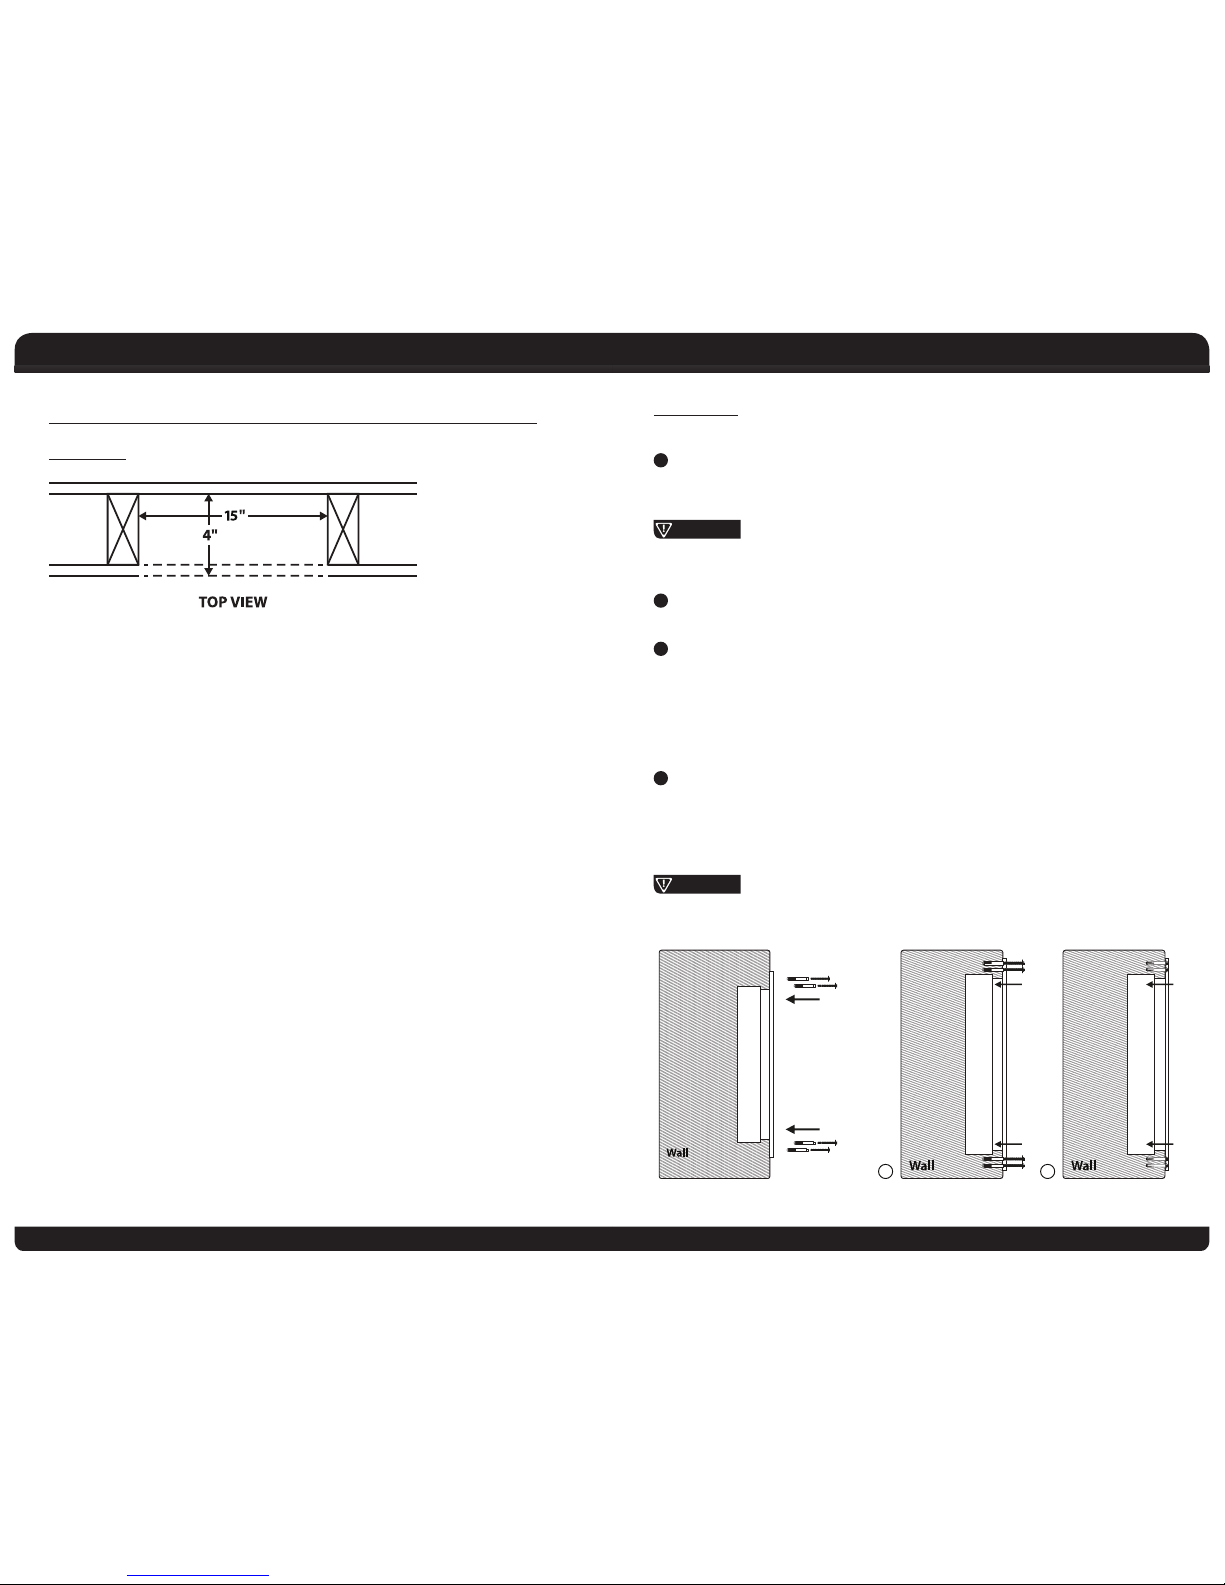
Mounting Method Mounting Method
MOUNTING
Fix the safe in the place so it is not easy to move.
1
Determine the approximate location of the stud for the right hand side of
your Wall Safe (hinge side). Drill or cut a large enough pilot hole to determine
where the inside edge of this stud is located.
CAUTION
With a ashlight, look through the pilot hole and make sure there are no
electrical wires or plumbing in the cutout area before you start cutting.
2
Drill holes for clamping screws in the right place. The external dimensions of
this safe are 22.04"H x 14.96"W x 3.94"-5.94"D.
3
Install your wall safe into the wall cutout so that the hinge side of the safe is
ush against the right hand stud and the front ange is at against the wall.
With the safe door open, extend the telescoping back by pushing it from the
inside until maximum possible depth is achieved.
NOTE: There may be a slight amount of space between the safe side wall and the
left hand stud, this is normal.
4
The right hand hinged side of your wall safe must be tightened ush to the
right hand stud. Once safe has been placed into position in the wall cutout,
secure into place by screwing 4 wood screws (included) through the four
recessed holes in the front ange of Safe and into studs. Tighten screws ush
with ange.
CAUTION
Clamping screws provided are best t for wooden wall surfaces.
A
B
MOUNTING METHOD
LO CATION
Your First Alert® Wall Safe should be mounted in an obscure location such as a
bedroom or hall closet and must be installed in a 2'x 4' or thicker framed wall.
Be sure that no plumbing pipes or electrical wires run through the wall cutout
area where your wall safe is to be located and that there is room to swing the
safe door open without obstruction. The Wall Safe is about 15 inches wide and
designed to t between standard 16 inch center-to-center wall framing.
NOTE: Most homes have wall framing construction of 2 x 4's and/or 2 x 6's that
are located on 16-inch centers. Instructions shown are for wood framed wall
installation. Installation for aluminum or steel stud walls may require pre-drilling
and/or alternative mounting screws.
Page 6

109
Safe Care and Maintenance / Consumer Aairs Safe Identication Record
SAFE CARE & MAINTENANCE
When properly maintained, your safe will continue to operate accurately for
many years. In order to ensure optimum performance of your safe, please follow
these simple precautions:
Battery Maintenance
1
Always purchase and use the batteries as specied by this User’s manual.
2
Always replace all batteries at the same time. It is recommended to replace
all batteries at least once a year or sooner depending on amount of use.
3
Always clean the battery contacts in the battery compartment and on the
batteries before installing new batteries.
4
Always make sure all batteries match the polarity (+ and -) signs in the open
battery compartment.
5
If your safe will not be used for an extended period of time, it is
recommended that you remove the batteries.
6
Always promptly remove and properly discard of all used batteries.
DO NOT MIX OLD AND NEW BATTERIES
DO NOT MIX ALKALINE, STANDARD, OR RECHARGEABLE BATTERIES
Clean Hands - Never attempt to operate the digital keypad if your hands have
excessive dirt, debris or liquids on them.
Clean Safe – To clean the surface of your safe, it is recommended that you use a
mild cleaner (e.g., window cleaner) to avoid scratching or discoloring the surface.
Always wipe dry and NEVER use abrasive cleansers on the safe or digital keypad.
CONSUMER AFFAIRS
YOUR SAFE’S UNIQUE IDENTIFICATION NUMBERS
When contacting Consumer Aairs, you should be prepared to supply some
important information that specically identies your safe. This information is
extremely important to assuring prompt and accurate assistance.
It is strongly recommended that you identify and record the following
information in the Safe Identication Record form located on page 8
MODEL NUMBER KEY NUMBER
MODEL NUMBER
The First Alert® Safes product line consists of many dierent models, each
identied by a specic Model number. Every model is manufactured with unique
capabilities and features that may require specic solutions to a variety of
diculties that occasionally occur.
KEY NUMBER
The Key Number is necessary to identify the specic conguration of the key and
lock cylinder components of your safe. If a key becomes damaged or misplaced,
the Key Number is required in order for you to receive a replacement key.
LOCATING KEY NUMBER
The Key Number is engraved on the keys and around the lock cylinder.
HOW TO OBTAIN WARRANTY SERVICE
If service is required, do not return the product to your retailer. In order to obtain
warranty service, contact Consumer Aairs at 1-800-323-9005. To assist us in
serving you, please have the model number and date of purchase
available when calling.
If you have any questions pertaining to proper use,
DO NOT RETURN safe to the store.
Please contact Consumer Aairs at 1-800-323-9005.
IMPORTANT: DO NOT RETURN SAFE TO STORE
SAFE IDENTIFICATION RECORD
Model Number
Key Number
Digital Passcode Record
Serial Number
!
LOW BAT TERY IN DICATOR
Every time the keypad is activated, the system automatically checks the power
level remaining in the batteries. If the power falls below a certain level, the
keypad will beep and ash yellow when a key is pressed.
Page 7

1211
Please return item(s) with Customer Reference number
marked on the outside of the box
to the address listed below:
First Alert, Inc.
ATTN: Warranty Safe Returns
1301 Joe Battle
El Paso, TX 79936
ORDERING REPLACEMENT ENTRY KEYS
If you lose the safe keys or would like additional keys, you can purchase them
from First Alert, Inc. Checks or money orders are required for orders received
by mail and should be made payable to First Alert. You must supply the
following information to assure accurate processing:
1
Name / Address / Telephone Number
2
Safe Model Number / Serial Number
3
Key Number (located on the key and on the Key lock)
4
Notarized Statement of Ownership can be printed at www.rstalert.com
5
Indicate number of keys requested
6
Method for how you would like to receive keys
Please send all the information via fax at 800-630-2878 or mail
First Alert, Inc., 3901 Liberty Street, Aurora, IL 60504-8122.
Mail To:
LIMITED WARRANTY
LIMITED WARRANTY
BRK Brands, Inc., (“BRK”) warrants that for a period of ve (5) years from the date
of purchase, this product will be free from defects in material and workmanship.
BRK, at its sole option, will repair or replace this product or any component of
the product found to be defective during the warranty period. Replacement or
repair will be made with a new or remanufactured product or component. If the
product is no longer available, replacement may be made with a similar product
of equal or greater value. This is your exclusive warranty.
This warranty is only valid for the original retail purchaser from the date of initial
retail purchase and is not transferable. You must keep the original sales receipt.
Proof of purchase is required to obtain warranty performance. BRK dealers,
service centers, or retail stores selling this product do not have the right to alter,
modify or in any way change the terms and conditions of this warranty.
This warranty does not apply to the nish on the product. This warranty does
not cover normal wear and tear of parts or damage resulting from any of the
following: negligent use or misuse of the product, use contrary to the operating
instructions, disassembly, repair or alteration by anyone other than BRK or an
authorized service center, improper installation, or exposure to extremes of heat
or humidity. Further, the warranty does not cover Acts of God, including
natural disasters.
BRK shall not be liable for any incidental or consequential damages caused by
the breach of any express or implied warranty. BRK is also not responsible for:
costs associated with removing or installing the product; damage or loss of the
contents of the product; nor for the unauthorized removal of the contents; or
damages incurred during shipment.
Except to the extent prohibited by applicable law, any implied warranty of
merchantability or tness for a particular purpose is limited in duration to the
duration of the above Warranty Period. Some states, provinces or jurisdictions
do not allow the exclusion or limitation of incidental or consequential damages
or limitations on how long an implied warranty lasts, so the above limitations
or exclusion may not apply to you. This warranty gives you specic legal rights,
and you may also have other rights that vary from state to state, or province to
province, or jurisdiction to jurisdiction.
If you have any questions that cannot be answered by reading this manual,
please call Consumer Aairs at 1-800-323-9005.
© 2017 BRK Brands, Inc. All rights reserved. Distributed by BRK Brands, Inc.
BRK Brands, Inc. is a subsidiary of Newell Brands (NYSE: NWL).
First Alert® is registered trademark of The First Alert Trust.
3901 Liberty Street, Aurora, IL 60504-8122
For more information and updates, please visit www.rstalert.com
Ordering Replacement Entry Keys Limited Warranty
First Alert, Inc.
ATTN: Consumer Aairs
3901 Liberty Street
Aurora, IL 60504-8122
PLEASE CALL US AT 1-800-323-9005 TO
ESTABLISH A WARRANTY RETURN SET-UP
Page 8

1413
Notes Notes
NOTES
NOTES
Page 9

www.FirstAlert.com
Guía De Instalación Y Operación
No guarde llaves de emergencia en su caja fuerte.
1037290
M08-156376-159193
M08-156376-159193
Caja Fuerte Electrónica Inteligente
Page 10

21
ÍNDICE
Uso Correcto De Su Caja Fuerte ...............................................................................2
Resumen de Producto .................................................................................................3
Abrir Su Caja Fuerte por Primera Vez ..............................................................4 - 5
Ajustar el Código de Usuario .....................................................................................6
Método de Montaje ................................................................................................7 - 8
Cuidado & Mantenimiento de la Caja Fuerte/Asuntos del Consumidor ....9
Registro de Identicación de la Caja Fuerte ..................................................... 10
Pedir Llaves de Entrada De Reemplazo ...............................................................11
Garantía Limitada .......................................................................................................12
Notas ...................................................................................................................... 13 - 14
¡Gracias!
¡Gracias por elegir nuestros productos! Usted ha tomado un paso importante
en la organización y protección de sus posesiones más valiosas. Cada serie de
nuestra caja fuerte está fabricada y diseñada profesionalmente para proporcionar
seguridad. Por favor tome tiempo para leer y familiarizarse con los procedimientos
operativos correctos de su nueva caja fuerte presentados en las siguientes páginas.
¡De nuevo, gracias por elegir nuestros productos!
CONTENIDO DEL PAQUETE
1 Caja Fuerte Inteligente
First Alert®
1 Guía de Operación e
Instalación
2 Llaves de
Emergencia
4 Baterías AA
4 Tornillos de Sujeción 2 Estantes Extensores de Estante
Índice/Uso Correcto De Su Caja Fuerte Uso Correcto de Su Caja Fuerte
USO CORRECTO DE SU CAJA FUERTE
Advertencia de Humedad
Le recomendamos colocar los artículos delicados tales como fotos
o joyería na en un recipiente hermético antes de guardarlo en su
caja fuerte. Evite colocar su caja fuerte en áreas de alta humedad.
Para un rendimiento óptimo, la caja fuerte debe abrirse y ventilada
por al menos 20 minutos cada dos 2 semanas.
Advertencia de Armas de Fuego
Este caja fuerte no está diseñada para almacenar medicamentos,
artículos con contenido combustible, armas de fuego u otras armas.
Para limpiar su caja fuerte, lave con un paño húmedo y seque. Nunca usar disolventes
o solventes químicos, ya que pueden dañar permanentemente el acabado.
PARA SU PROTECCIÓN
a Siempre guarde las llaves lejos de la caja fuerte, nunca adentro.
a Registre todos los números de identicación de la caja fuerte en el Registro
de Identicación de la Caja Fuerte en la página 8.
a Guarde este manual y NUNCA lo mantenga dentro de la caja fuerte.
NO LOS DESECHE!
Page 11

43
Resumen de Producto Abrir Su Caja Fuerte por Primera Vez
ABRIR SU CAJA FUERTE POR PRIMERA VEZ
En la primera apertura, los usuarios deberían abrir la caja fuerte con la llave de
emergencia.
1
Quitar la tapa de la cerradura de emergencia, introduzca la llave de
emergencia y gire a la izquierda.
2
Gire la perilla para abrir la puerta.
PRECAUCIÓN
Terminar la operación, saque la llave de emergencia y guárdela en un lugar seguro.
COLOCAR LAS BATERÍAS
1
Abra la puerta.
2
Inserte las 4 Batería AA alcalina no recargable en el compartimento de baterías.
3
Bajo condiciones normales, si ambas luces roja y verde están encendidas al
mismo tiempo, signica que el voltaje está bajo y debe inserte pilas nuevas.
PRECAUCIÓN
Coloque 4 baterías AA acalina no recargable frescas alineándolas de manera
como se indica en por los símbolos “+” y “-”. Si las baterías se descargan, se
pierden el código de usuario y el código maestro. Utilice las teclas y el código de
usuario pre-congurado para abrir la caja fuerte.
RESUMEN DE PRODUCTO
3
4
2
1
5
1
Pernos
2
Botón de Reconguración Rojo
3
Compartimiento de Baterías
4
Luz LED interior
5
Estanterías
7
6
9
8
6
Perilla
7
Imagen Indicador LED
– Aparece una Carita Feliz Amarilla cuando se ingresa el código
– Aparece un Ok Verde cuando se abre la caja fuerte
8
Cubierta de Cerradura de Emergencia
9
* y # Botones de Conrmación
Page 12

65
Abrir Su Caja Fuerte por Primera Vez Congurar el código de usuario
ABRIR LA PUERTA
PRECAUCIÓN
El código de usuario precongurado es “159” y pulse libra #. Por favor ingrese el
código de usuario otra vez, si parpadea la luz amarilla con tres tonos del timbre.
1
Introduzca su código del usuario (3 a 8 dígitos), cada pulso resultará en un
sonido del timbre y la luz amarillo parpadea.
2
Presione “*” o “#”, la luz verde será encenderá.
3
Gire la perilla hacia la derecha y tire hacia fuera dentro de 5 segundos, la
puerta está abierta.
NOTA: Un LED interno se enciende durante 30 segundos después de que se abre
la puerta.
CERRAR LA PUERTA
1
Gire la perilla a la izquierda para cerrar la puerta.
PERIODO DE BLOQUEO AUTOMÁTICO
Para mayor seguridad, la caja fuerte se bloqueará automáticamente si se ingresa
una contraseña incorrecta varias veces
1
3 códigos incorrectos activará el timbre de aviso durante 20 segundos.
2
6 códigos incorrectos activará el timbre de aviso durante 5 minutos.
PRECAUCIÓN
Quedaría deshabilitado el teclado mientras suena el timbre.Sólo puede detener
el timbre al abrir la caja fuerte con la llave de la emergencia y cortar la corriente
mediante la eliminación de las baterías.
CONFIGURAR EL CÓDIGO DE USUARIO
1
Con la puerta abierta, pulse el botón de reconguración una vez, empiece a
programar el código cuando se encienda la luz amarilla
2
Ingrese el nuevo código (3-8 dígitos) y presione el botón de “*” o “#”
para conrmar con 2 tonos de timbre, que indican la aceptación y el
almacenamiento del nuevo código.
3
3. Si la luz amarilla parpadea con 3 tonos de timbre, el cambio de código no
se llevó a cabo y debe intentar de nuevo.
CONFIGURAR EL CÓDIGO MAESTRO
1
Abra la caja fuerte, ingrese “0” dos veces y presione el botón de
reconguración una vez, empiece a programar el código cuando se
encienda la luz amarilla.
2
Ingrese el nuevo código (3-8 dígitos) y presione el botón “*” o “#” para
conrmar, se conrmará mediante 2 tonos del timbre y la luz amarilla
parpadeará dos veces, entonces la conguración del nuevo código se habrá
llevado a cabo exitosamente.
3
Si la luz amarilla parpadea con 3 veces signica que el nuevo código no es
válido y debe restablecerse de nuevo.
NOTA: El código de usuario es el código que se utilizará más a menudo, el código
maestro se puede utilizar como un código de respaldo. Por ejemplo, si el usuario
cambia el código de usuario, el código maestro permitirá que se abra la caja
fuerte. Anote ambos códigos y guárdelos en un lugar seguro. Puede cambiar
ambos códigos de maestro y de usuario.
ABRIR LA CAJA FUERTE CON LA LLAVE DE EMERGENCIA.
Al recibir la caja fuerte por primera vez, si el teclado no funciona, no conoce el
código de usuario, puede usar la llave de emergencia para abrir la caja fuerte.
1
Retire la cubierta de la cerradura de emergencia.
2
Introduzca la llave de emergencia luego gire la perilla a la izquierda, luego
gira laperilla a la derecha para abrir la puerta.
Page 13

87
Método de Montaje Método de Montaje
MO NTAJE
Fije la caja fuerte en un lugar donde no sea fácil de mover.
1
Determine la ubicación aproximada del paral del lado derecho de su Caja
Fuerte de Pared (el lado con las bisagras). Taladre o corte sucientes agujeros
piloto para determinar dónde está la orilla interior del paral.
PRECAUCIÓN
Con una linterna, mire a través del agujero piloto y asegúrese que no haya
cableado eléctrico o tubería en el área de recorte antes de empezar a cortar.
2
Perfore los oricios para los tornillos de jación en el lugar correcto.Las
dimensiones externas de esta caja fuerte son 22.04"A x 14.96"A x 3.94”-5.94"P.
3
Instale su caja fuerte de pared en el espacio vacío de la pared de modo que
el lado de la caja fuerte con las bisagras esté a ras contra el paral derecho
y que la pestaña frontal esté plana contra la pared. Con la puerta de la caja
fuerte abierta, extienda la parte trasera telescópica presionando el interior
hasta que se logre la profundidad máxima posible.
NOTA: Puede haber un pequeño espacio entre la pared del lado de la caja fuerte
y el paral izquierdo, esto es normal.
4
El lado derecho con bisagras de su caja fuerte de pared debe apretarse a
ras contra el paral derecho. 3 Una vez que la caja fuerte esté puesta en su
lugar en el espacio vacío de la pared, asegúrela colocando los 4 tornillos de
madera (incluidos) a través de los cuatro agujeros avellanados en la pestaña
frontal de la Caja Fuerte y en los parales. Apriete los tornillos a ras con la
pestaña.
PRECAUCIÓN
Los tornillos de sujeción suministrados son los más adecuados para supercies
de madera.
A
B
MÉTODO DE MONTAJE
UBICACIÓN
Su Caja Fuerte de Pared de First Alert® debe montarse en una ubicación oculta
como en una recámara o un clóset de pasillo y debe instalarse en una pared
de marco de 2' x 4' o más grueso. Asegúrese que no hayan tuberías o cableado
eléctrico en el área de recorte donde se ubicará su caja fuerte y de que haya
espacio para abrir la puerta sin obstrucción. La Caja Fuerte de Pared tiene
15 pulgadas de ancho y está diseñada para caber entre los marcos de pared
estándar de 16 pulgadas de centro-a-centro.
NOTA: La mayoría de hogares tienen marcos de construcción de 2 x 4' y/o 2 x
6' que están colocados sobre centros de 16 pulgadas. Las instrucciones que se
muestran son para instalaciones en paredes de marco de madera. La instalación
en parales de aluminio o acero pueden requerir la perforación de agujeros guía
y/o tornillos de montaje diferentes.
Page 14

109
Cuidado & Mantenimiento de la Caja Fuerte/Asuntos del Consumidor Registro de Identicación de la Caja Fuerte
CUIDADOS Y MANTENIMIENTO DE LA CAJA FUERTE
Cuando se le da mantenimiento correctamente, su caja fuerte seguirá
funcionando correctamente por muchos años. Con el n de asegurar un
rendimiento óptimo de su caja fuerte, por favor siga estas simples precauciones:
Mantenimiento de la Batería
1
Siempre compre y use las baterías según las especicaciones de este manual
de usuario.
2
Siempre reemplace todas las baterías al mismo tiempo. Es recomendado
reemplazar todas las baterías por lo menos una vez al año o antes
dependiendo de la cantidad de uso.
3
Siempre limpie los contactos de la batería en el compartimento de las
baterías y en las baterías antes de instalar baterías nuevas.
4
Siempre asegúrese de que todas las baterías coincidan con los indicadores de
polaridad (+ y -) en el compartimento abierto de las baterías.
5
Si no utilizará su caja fuerte por un largo período de tiempo, se recomienda
quitar las baterías.
6
Siempre retire y deseche inmediatamente todas las baterías usadas.
NO MEZCLE LAS BATERÍAS VIEJAS Y NUEVAS
NO MEZCLE LAS BATERÍAS ALCALINAS, ESTÁNDARES, O RECARGABLES
Manos Limpias - Nunca intente operar el teclado numérico digital si sus manos
tienen , suciedad, mugre, desechos o líquidos excesivos en ellas.
Limpiar la Caja Fuerte - Para limpiar la supercie de su caja fuerte, se
recomienda que usar un limpiador suave (por ejemplo, limpiador de la ventana)
para evitar rallar o descolorar la supercie. Siempre seque y NUNCA utilice
limpiadores abrasivos en la caja fuerte o el teclado numérico digital.
ASUNTOS DEL CONSUMIDOR
NÚMEROS DE IDENTIFICACIÓN ÚNICOS DE SU CAJA FUERTE
Al contactar Asuntos del Consumidor, usted debe de estar preparado para
proveer alguna información importante que especícamente identica su caja
fuerte. Esta información es extremadamente importante para asegurar una
asistencia rápida y precisa.
Se recomienda encarecidamente que usted identique y anote la siguiente
información en el Registro de Identicación de la Caja Fuerte en la página 8
NÚMERO DE MODELO
NÚMERO DE LLAVE
NÚMERO DE MODELO
La línea de producto de Cajas Fuertes First Alert® consiste en muchos diversos
modelos, cada uno identicado por un número de Modelo especíco. Cada
modelo se fabrica con capacidades únicas y características que pueden requerir
soluciones especícas a una variedad de dicultades que ocurren de vez
en cuando.
NÚMERO DE LLAVE
El número de llave es necesario para identicar la conguración especíca de la
llave y de los componentes del cilindro de la cerradura de la caja fuerte. Si una
llave se daña o es extraviada, el número de clave es necesario para recibir una
llave de reemplazo.
LOCALIZAR EL NÚMERO DE LLAVE
El Número de Llave está grabado en las llaves y en el cilindro de la cerradura.
CÓMO OBTENER EL SERVICIO DE GARANTÍA
Si se requiere servicio, no devuelva el producto a su distribuidor. Para obtener
servicio de garantía, comuníquese con Asuntos del Consumidor al 1-800-323-
9005. Para ayudarnos a servirle, por favor tenga el número de modelo y la fecha
de compra disponibles al llamar.
Si usted tiene preguntas relacionadas con el uso correcto,
NO DEVUELVA la caja fuerte a la tienda.
Por favor contacte Asuntos del Consumidor al 1-800-323-9005.
IMPORTANTE: NO DEVUELVA LA CAJA FUERTE A LA TIENDA
REGISTRO DE IDENTIFICACIÓN DE LA CAJA FUERTE
Número de Modelo
Número de Llave
Registro de Clave Digital
Número de Serie
!
INDICADOR DE BATERÍA BAJA
Cada vez que se activa el teclado, el sistema automáticamente revisa el nivel
de energía restante en las baterías. Si la energía cae por debajo de cierto nivel,
el teclado pitará u se iluminará en amarillo cuando se presiona una tecla.
Page 15

1211
Por favor devuelva artículo(s) con el número de Referencia del Cliente
marcado en el exterior de la caja
a la dirección que aparece a continuación:
First Alert, Inc.
ATTN: Warranty Safe Returns
1301 Joe Battle
El Paso, TX 79936
PEDIR LLAVES DE ENTRADA DE REEMPLAZO
Si usted pierde las llaves de la caja fuerte o desea llaves adicionales, usted puede
comprarlas de First Alert, Inc. Cheques o giros postales son necesarios para
los pedidos recibidos por correo y deben ser pagable a First Alert. Debe
suministrar la siguiente información para asegurar un procesamiento preciso:
1
Nombre/Dirección/Número de Teléfono
2
Número de Modelo de la Caja Fuerte/Número de Serie
3
El Número de Llave (ubicado en la llave y en la cerradura)
4
Una Declaración Notariada de Titularidad (un formulario de carta
notarial se puede imprimir desde www.rstalert.com)
5
Indicar el número de llaves solicitadas
6
Método de cómo le gustaría recibir las llaves
Por favor enviar toda la información vía fax al 800-630-2878 o por correo a
First Alert, Inc., 3901 Liberty Street, Aurora, IL 60504-8122.
Envíe a:
GARANTÍA LIMITADA
GARANTÍA LIMITADA
BRK Brands, Inc., (“BRK”) garantiza que por un período de cinco (5) años a partir
de la fecha de compra, este producto estará libre de defectos de material y
mano de obra. BRK, a su única opción, reparará o reemplazará este producto o
cualquier componente del producto que se encuentre defectuoso durante el
período de garantía. Reemplazo se hará con un equipo o componente nuevo
o remanufacturado. Si el producto ya no está disponible, el reemplazo puede
hacerse con un producto similar de igual o mayor valor. Esta es su garantía
exclusiva.
Esta garantía es válida para el comprador original desde la fecha de compra
inicial y no es transferible. Debe guardar el recibo original. Para obtener
cumplimiento de la garantía se requiere comprobante de compra. Los
distribuidores BRK, centros de servicio o tiendas que venden este producto no
tienen derecho de alterar, modicar o cambiar en modo alguno los términos y las
condiciones de esta garantía.
Esta garantía no se aplica en el acabado del producto. Esta garantía no cubre el
desgaste normal de partes o daños resultantes de cualquiera de los siguientes:
uso negligente o incorrecto del producto, uso contrario a las instrucciones de
operación, desmontaje, reparación o alteración por parte de alguien que no sea
BRK o un centro de servicio autorizado, instalación incorrecta o exposición a
condiciones extremas de calor o humedad. Además, la garantía no cubre actos
de Dios, incluyendo desastres naturales.
BRK no será responsable por daños incidentales o consecuentes causados por
el incumplimiento de cualquier garantía expresa o implícita. BRK tampoco
se responsabiliza por: los costos asociados con la remoción o instalación del
producto; daño o pérdida del contenido del producto; ni por la eliminación no
autorizada de los contenidos; o daños causados durante el envío.
Excepto en la medida en que lo prohíba la ley aplicable, cualquier garantía
implícita de comerciabilidad o idoneidad para un n determinado tiene
una duración limitada a la duración de la garantía anterior. Algunos estados,
provincias o jurisdicciones no permiten la exclusión o limitación de daños
incidentales o consecuentes o limitaciones sobre cuánto tiempo dura una
garantía implícita, por lo que las limitaciones o exclusiones anteriores pueden no
aplicarle a usted. Esta garantía le otorga derechos legales especícos y también
puede tener otros derechos que varían de un estado a estado o provincia a
provincia o jurisdicción a jurisdicción.
Si usted tiene alguna pregunta que no puede ser respondida mediante la lectura
de este manual, por favor llame a Asuntos del Consumidor al 1-800-323-9005.
© 2017 BRK Brands, Inc. Todos los derechos reservados. Distribuido por BRK
Brands, Inc. BRK Brands, Inc. es una subsidiaria de Newell Brands (NYSE: NWL).
First Alert® es marca registrada de The First Alert Trust.
3901 Liberty Street, Aurora, IL 60504-8122
Para más información y actualizaciones por favor visite www.rstalert.com
Pedir Llaves de Entrada De Reemplazo Garantía Limitada
First Alert, Inc.
ATTN: Consumer Aairs
3901 Liberty Street
Aurora, IL 60504-8122
POR FAVOR LLÁMENOS AL 1-800-3239005 PARA ESTABLECER UN RETORNO DE
DEVOLUCIÓN DE GARANTÍA
Page 16

1413
Notas Notas
NOTAS
NOTAS
 Loading...