

Page 1

Lap Harp
restringing guide
First Act
745 Boylston Street
Boston, MA 02116 USA
rstact.com
Customer Assistance
Phone: 888.551.1115
Email: info@firstact.com
First Act, th e Fir st Act logo, First
Act D iscov ery, and th e Fir st Act
Disco very logo are trademark s of
First Act Inc.
© 200 6-200 7 Fir st Act Inc.
All r ights res erved .
FG500 .M.03
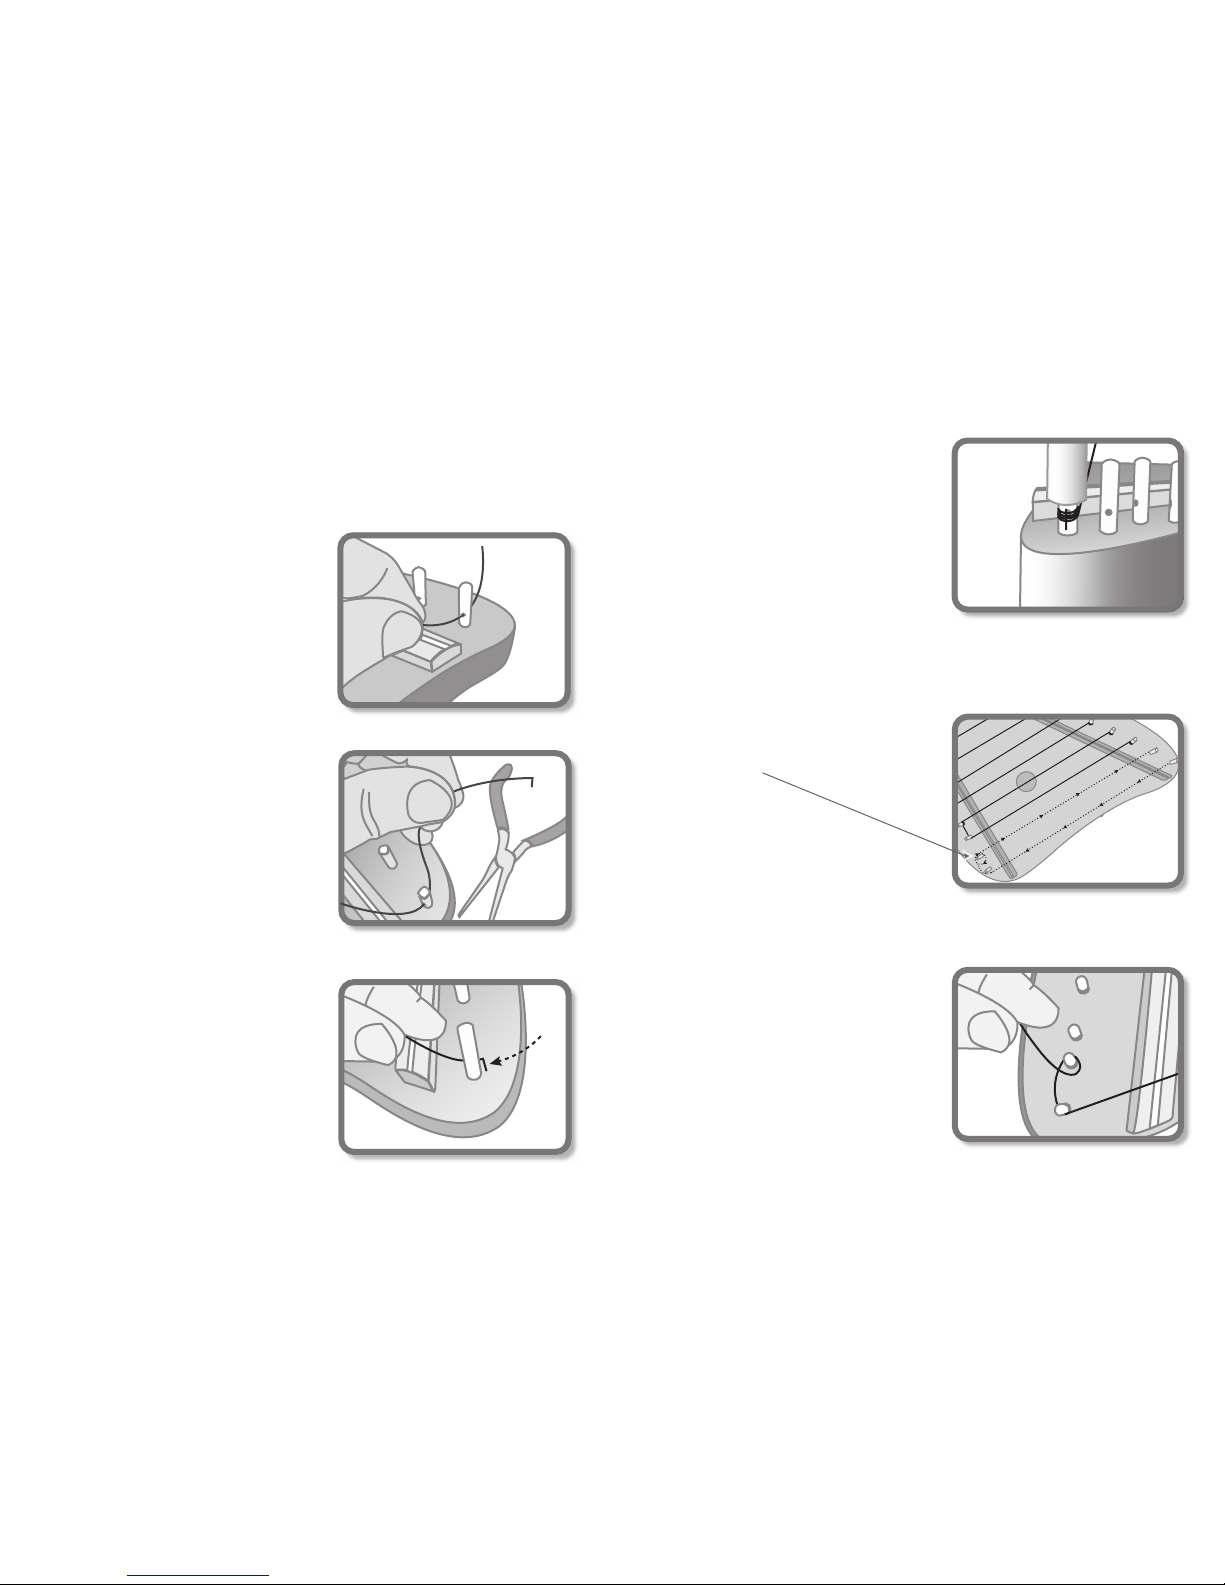
12. Bring the l oose end of the stri ng
back to the other side of the harp.
13. Run it thro ugh the eyelet of the
next avai lable tuning post.
14. Bend the en d with the pliers as
in ste p #3.
Please use cau tion while handling
and tu ning you r strings as string
ends a re sharp. Also, incr eated te nsion c an break strings and cause
injury, especial ly to your eyes.
15. Maintain te nsion and turn
the tu rning po st clockwise with
the tu ning key. As in step #8, you
should have a minimum of three
turns by the t ime the string is bei ng
stretched. Apply just enough ten sion
so the string stays in place w ithout
your h elp.
16. Refer to th e included tunin g
cards to add a dequate tension for
accura te tunin g.
Page 2
CHANGING ST RI NGS
Strings should be replaced when they become dirty, discolored, or
produce a dull sound. Strings shou ld always be changed by an
adult. You can change your strings in these easy steps:
1. Remove the o ld strings.
2. Take a new s tring out of the plas tic
pouch included wi th this guide.
Thread the end of the new string
throug h the ho le found on the tunin g
post.
3. Measuring 1/ 8” from t he end of the
string, bend it at a right angle with a
pair o f pliers.
4. Pull the str ing so that the bent section a t the en d is resting flat aga inst
the tu ning pos t.
5. Make sure th e bent end is pointin g
towa rds the ground.
6. Pull the tun ing key, located at the
back of the harp, out of it’s receptacle.
7. Use your lef t hand and pull light ly
on the string to create tension. At the
same t ime, use your right hand to
turn t he tunin g post with the tunin g
key in a clockwis e motion.
8. The first tur n can be above the bent
end. Three turns should go over the
bent e nd. This w ill prev ent the string
from s lipping out of the eyelet.
9. Note the str ing’s path in the illustra tion.
10. While mainta ining te nsion, run
the st ring aga inst the correspondin g
anchor post locateed a t the ot her side
of the harp wi thout making a loop.
11. Make one lo op around the next
anchor post while stil l mainta ining
tensio n.
 Loading...