

Page 1
Ukulele
Ukulele
QUICK START
GUIDE
Here’s your Quick Start Guide for the Ukulele. This guide will help you tune and
restring your uke, so you can get big sound out of a cool little instrument!
WHERE DID IT COME FROM?
Did you know that the ukulele was brought to Hawaii from Portugal more than a
hundred years ago? The Hawaiian people called it ukulele, which means “jumping
ea” and it became very popular in the islands. Then lots of other people started
playing it, like you! Today, the ukulele is heard in many styles of music, including
pop, reggae, and traditional Hawaiian music.
Happy playing!
Ukulele
quick start guide
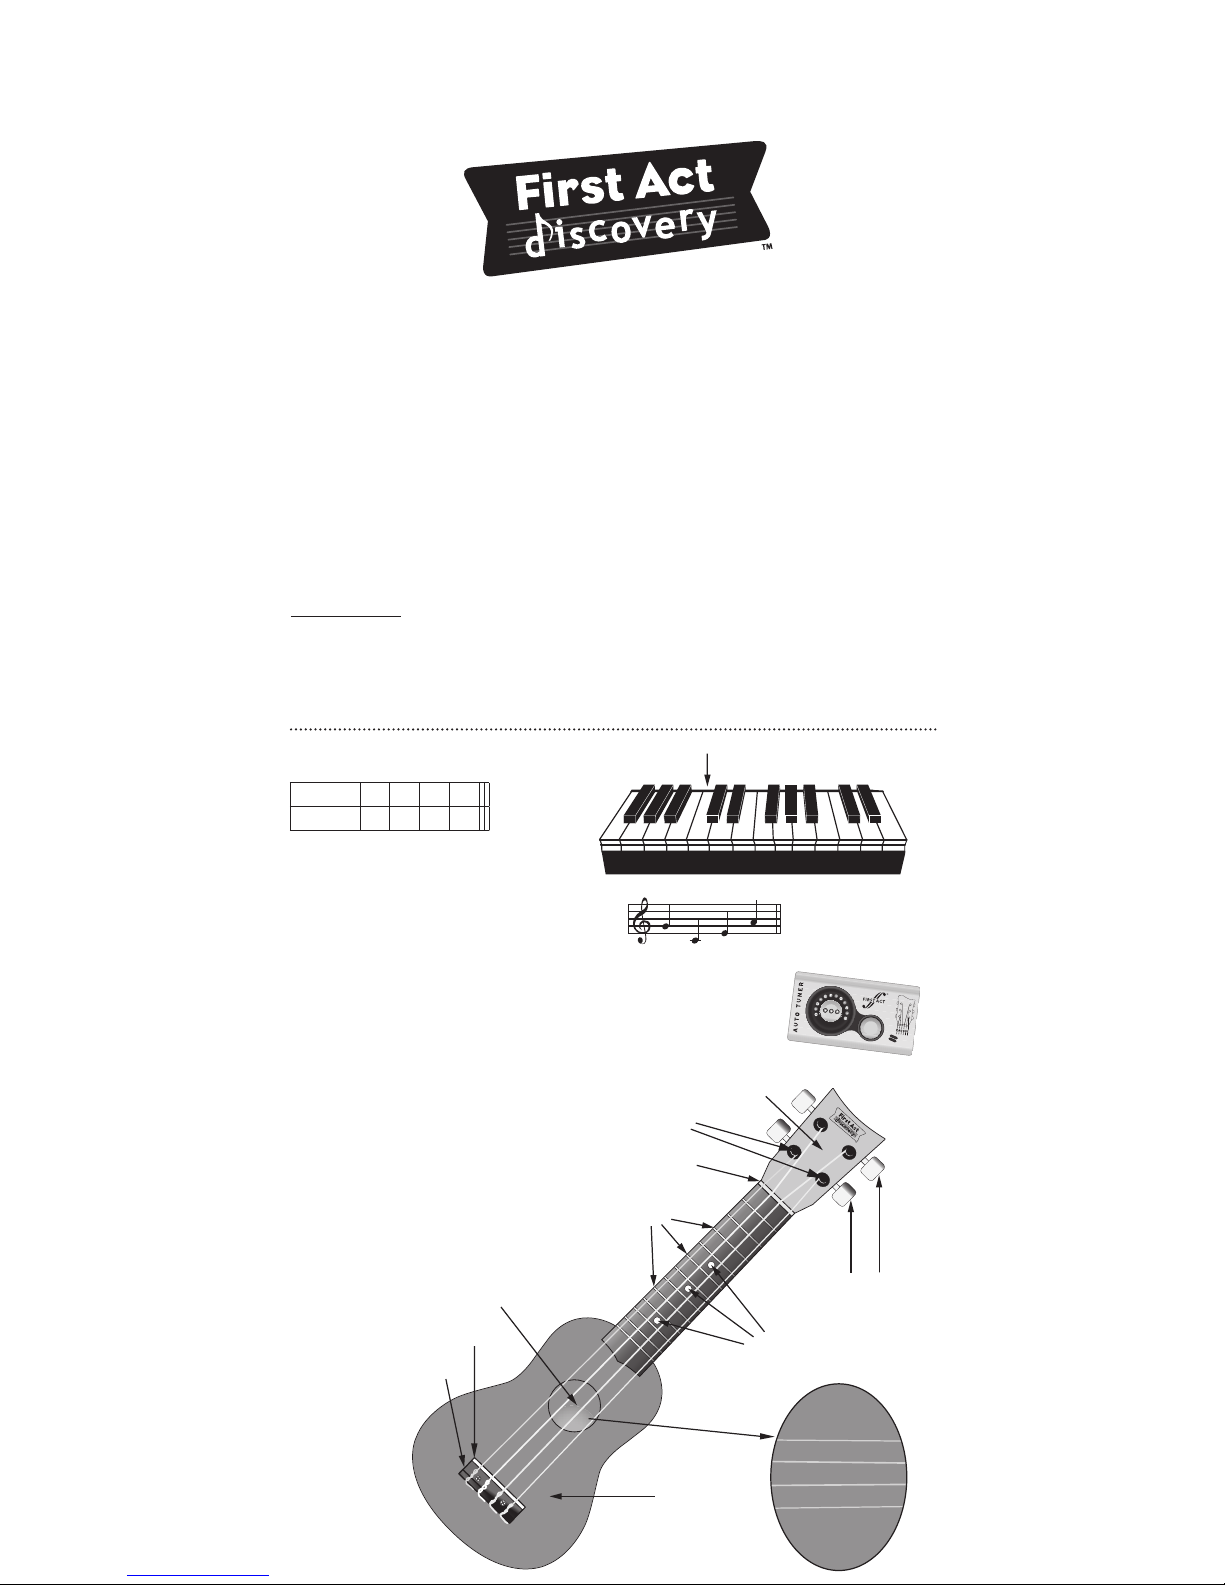
PRODUCT FEATURES
HEADSTOCK
TUNING POSTS
NUTS
FRETS
SOUND HOLE
SADDLE
BRIDGE
BODY
POSITION MARKERS
TUNING PEGS
Ukuleles have four strings
(usually tuned to G, C, E, and A).
Here are two ways to tune:
1. Tune to another instrument:
You can use a piano or keyboard to tune.
Play the piano keys one at a time, and
tune each guitar string to match the
sound of the note.
2. Use an electronic tuner
An electronic tuner tells you if the pitch
is too high or too low, which helps you
tune up.
Ukulele Standard Tuning:
NOTE G C E A
STRING 4 3 2 1
TUNING YOUR UKULELE
The t unin g can be easil y
memo rized by t his littl e
phrase “My Dog Has Fleas”
Middle C
Strings: 4 3
2
1
M
Y
F
L
E
A
S
H
A
S
D
O
G
G C
E
A
4th string- G
3rd string- C
2nd string- E
1st string- A
Page 2
First Act
745 Boylston Street
Boston, MA 02116 USA
rstact.com
Customer Assistance
Phone: 888.551.1115
Email: info@firstact.com
Specif ications de picted may v ary
slightly from product.
First Ac t, First Act D iscove ry and
the Fi rst Act Discovery l ogo are
trademarks of First Act Inc.
© 2008 First Act Inc.
All rights reserved.
FG404.M.02
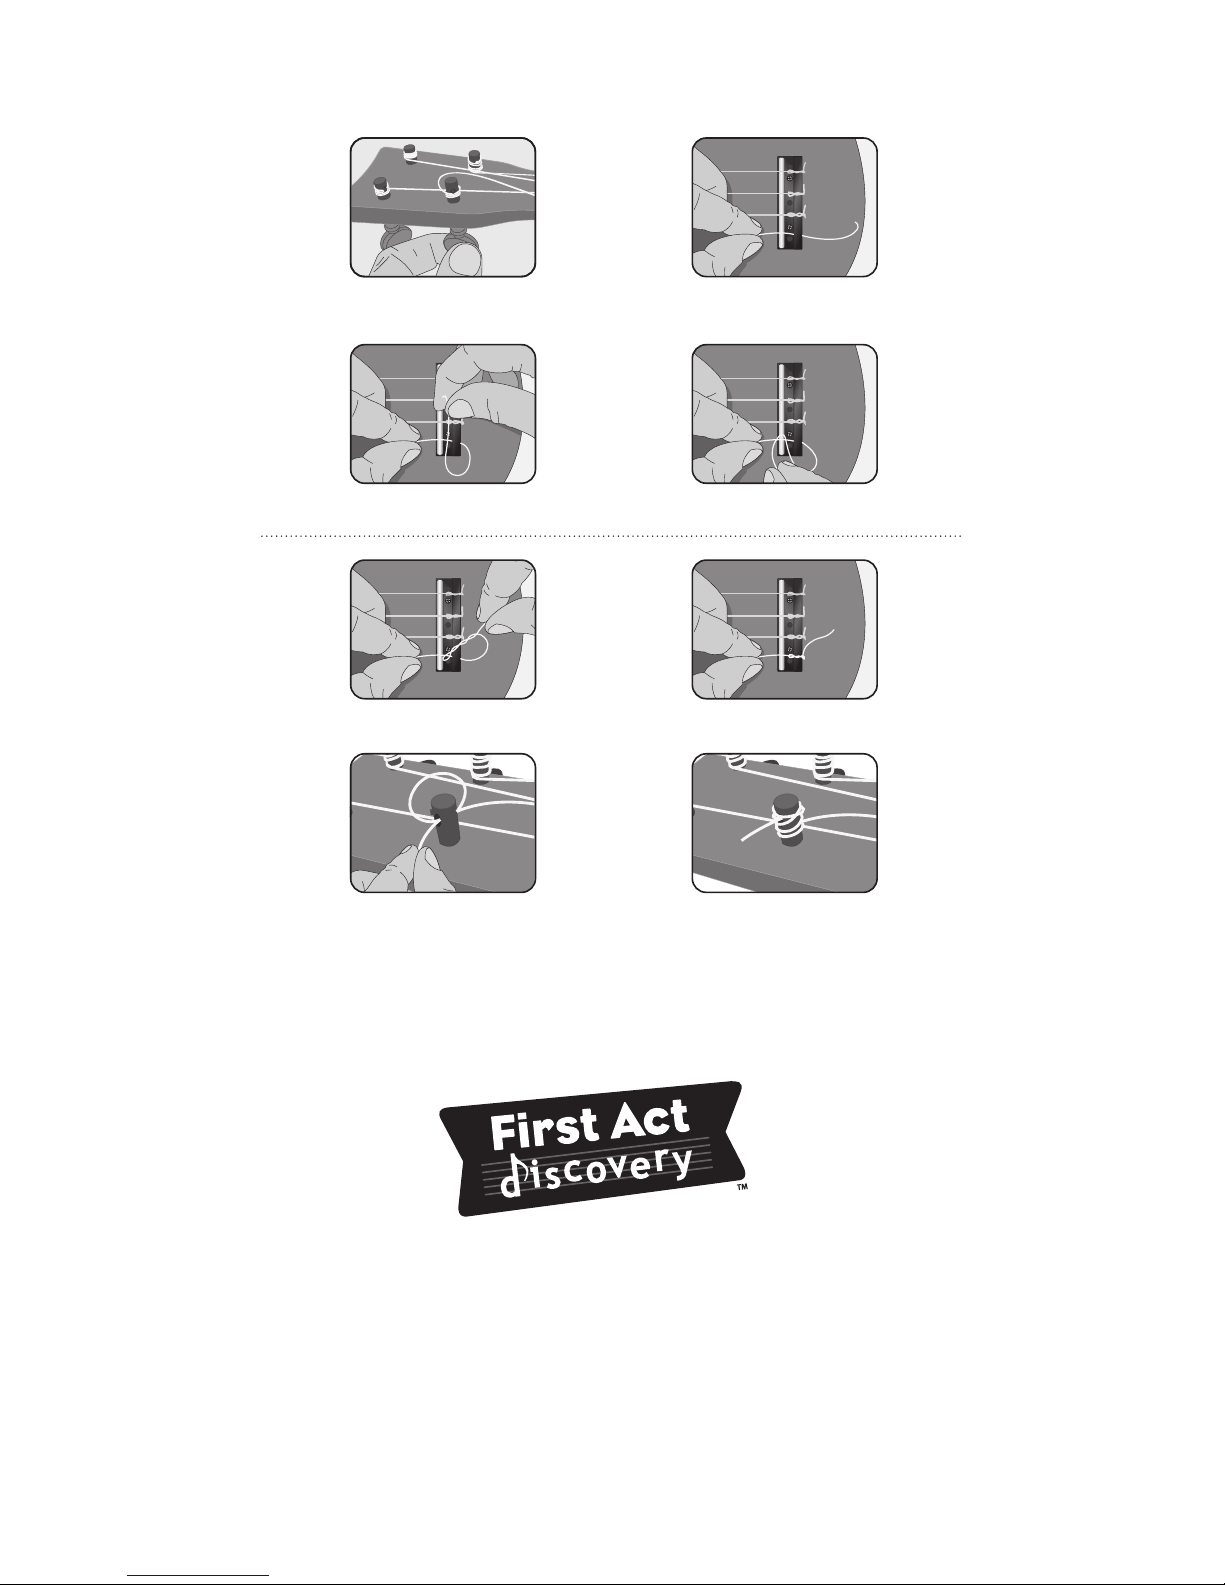
2. Poke a new string th rough the hol e
in the bridge, leaving 3 inches at the
end to tie the string to the bridge.
3. Run the end under the str ing to ma ke a
loop.
6. Pull the longer end of the string to
tighten further.
5. Thread the end through the loop 2-3 times,
then pull the end to tighten.
8. Turn the tunin g peg to wind the
string around the post. Wind the
strin g above and b elow itself o n the
post.
4. Pull the end b ack over the top o f the
string.
1. Loosen the tun ing peg o f the
strin g and remove the string
from the uke.
9. Turn the peg until the string makes a sound when you pluck it.
10. Repeat these steps for all strings. Tune the strings, and trim any excess at the ends.
Safety first! Always ask an adult to help you change strings.
Strings should be replaced when they become dirty or dull-sounding. Change one
string at a time, keeping the other strings in place. This is better for the uke’s neck.
Follow these steps to change strings:
CHANGING STRINGS
7. Pass the other end of the string through
the hole in the tuning post, so that 2
inches of string stick out. Make a loop and
run t he end of the string throu gh the ho le
again.
 Loading...