

Page 1
Firenado® Electric Fireplace Owner’s Manual
FN-50-BIF, FN-60-BIF, FN-72-BIF
50”/60”/72” - Built-In Electric Fireplace
AC 110-120V 60Hz 1400-1600W
ATTENTION
INSTALLER: PLEASE LEAVE THESE INSTRUCTIONS WITH THE CONSUMER.
CONSUMER: PLEASE READ & RETAIN THESE INSTRUCTIONS FOR FUTURE REFERENCE AND BEFORE
INSTALLING OR OPERATING.
WARNING
• If the informa�on in this manual is not followed exactly, a fire or explosion may result and cause
property damage, personal injury, or loss of life.
WARNING
•
Read the installa�on, opera�on, and maintenance instruc�ons thoroughly
before installing, opera�ng, or servicing this equipment to reduce risk of fire,
burn hazard, or other injury.
This manual should be retained for your informa�on.
•
• Do not operate this electric fireplace without having read this manual.
•
All electrical installa�ons, service, and repairs must be performed by a
qualified technician or authorized service agent.
• NOTE: This fireplace is not intended for commercial use.
CALIFORNIA PROPOSITION 65 WARNING
WARNING: This product can expose you to
which are known to the State of California to cause cancer and birth defects
or other reproduc�ve harm. For more informa�on, go to: www.P65Warnings.ca.gov
chemicals including lead and lead compounds,
This appliance has a
remote that requires
button batteries that
are hazardous to
young children.
1
Page 2

Table of Contents
Warnings/Safety Information
Rating Plate Information
Locating the Appliance
Grounding the Appliance
Specications and Dimensions
Parts and Hardware
Installation and Assembly
Hardwiring Installation
Operation - Remote Control and Touch Panel
3-4
5
6
6
7
7
8-12
13
14-16
Temperature Limiting Control
Care and Maintenance
Troubleshooting
Warranty Information
Product Registration
16
17
18-19
20
21
2
Page 3

WARNING
• THIS APPLIANCE IS HOT WHEN OPERATING AND CAN CAUSE SEVERE BURNS.
• Do not install damaged, incomplete, or substitute components.
• Young children should be carefully supervised when they are in the same room as the appliance. Toddlers, young children, and others
may be susceptible to accidental burns. A physical barrier should be used if there are any at-risk individuals in the home. To restrict
access to the appliance, an adjustable safety gate is recommended to keep toddlers, young children, and other at-risk individuals out of
the room or away from hot surfaces.
• Clothing and other ammable material should not be placed on or near the replace.
• DO NOT run power cord under carpeting. DO NOT cover power cord with throw rugs, runners, or similar coverings.
• DO NOT route power cord under furniture or appliances. Arrange power cord away from high-trac areas, and where it will not be
tripped over.
• Connect to properly grounded outlets ONLY. Have a certied service provider ensure the outlet is properly installed.
• DO NOT insert or allow foreign objects to enter any ventilation or exhaust opening, as this may cause electric shock or re, or damage
the replace.
• To prevent a possible re, DO NOT block air intakes or exhaust in any manner. Doing so could cause a re. DO NOT use on soft surfaces,
like a bed, where openings may become blocked.
• A replace has hot and arcing or sparking parts inside. DO NOT use it in areas where gasoline, paint, or ammable liquids are used or
stored.
• Use this replace only as described in this manual. Any other use not recommended by the manufacturer may cause re, electric shock,
or injury to persons.
• AVOID FIRE! Regularly inspect all air vents to make sure they are free from dust, lint, or other blockages. Unplug the unit and clean with
a vacuum ONLY. DO NOT rinse or get wet.
• NEVER hang this unit on a wall directly below an electrical outlet.
• DO NOT set on the oor, or other surfaces, to use.
• NEVER use a wall mount bracket from another manufacturer.
• For residential use only! NOT for commercial use! Any commercial or public use of this replace voids all warranties and could cause
injury.
• This product is not intended to be a primary heat source. It is for supplemental heat only.
• INDOOR use only!
• Risk of electric shock! DO NOT OPEN! No user-serviceable parts inside!
• NEVER modify this replace. Doing so could result in personal injury or property damage. Modication of this replace completely
voids all warranties.
• ALWAYS turn this replace o before unplugging it from the outlet.
• Never locate replace where it may fall into a bathtub or other water container.
• Keep the packaging material out of reach of children and safely dispose of the material. As with all plastic bags, these are not toys and
should be kept away from children and infants.
• ALWAYS disconnect this unit from the power supply before performing any assembly or cleaning, or before relocating the electric
replace.
• ONLY use this replace on a 120V AC 15-Amp grounded circuit. NEVER overload the circuit. If this replace trips the circuit breaker,
unplug all other appliances on the same circuit before the next use. Avoid plugging other appliances into the same circuit as this
replace.
• NEVER plug this replace into an outlet that is old, cracked, or has any loose wires or connections. Plugging this replace into a faulty
outlet could result in electric arcing within the outlet that could cause the outlet to overheat or catch re.
• To prevent a possible re, do not block the air intakes or exhaust in any manner. Do not use on soft surfaces, like a carpet, where
openings may be blocked.
• Ensure clearances to combustibles are maintained when building a mantel or shelves above the replace. Elevated
temperatures on the wall or in the air above the replace can cause melting, discoloration, or damage to the decorations,
TV, or other electronic components.
• Arrange cord away from high-trac areas where it will not be tripped over.
• SAVE THESE INSTRUCTIONS.
3
Page 4
SAFETY INFORMATION
WARNING
• Due to high temperatures, the replace should be located out of trac and away from furniture and
draperies.
• Ensure that you have incorporated adequate safety measures to protect infants/toddlers from touching
hot surfaces.
• It is imperative that that the control compartments, circulating blower, and its passageway in the replace
are kept clean.
• SAVE THESE INSTRUCTIONS!
Preparation
Remove all parts and hardware from the carton and place them on a clean, soft, dry surface.
Check the parts list to make sure nothing is missing. Dispose of packaging materials properly. Please recycle
whenever possible.
You will need the following tools (not included): Phillips screwdriver; stud nder; level; tape measure; electric
drill; 1/4” wood drill bit; hammer.
SAFETY INFORMATION
WARNING
THIS PRODUCT INCLUDES A GLASS PANEL! Always use
extreme caution when handling glass. Failure to do so could
result in personal injury or property damage.
4
Page 5
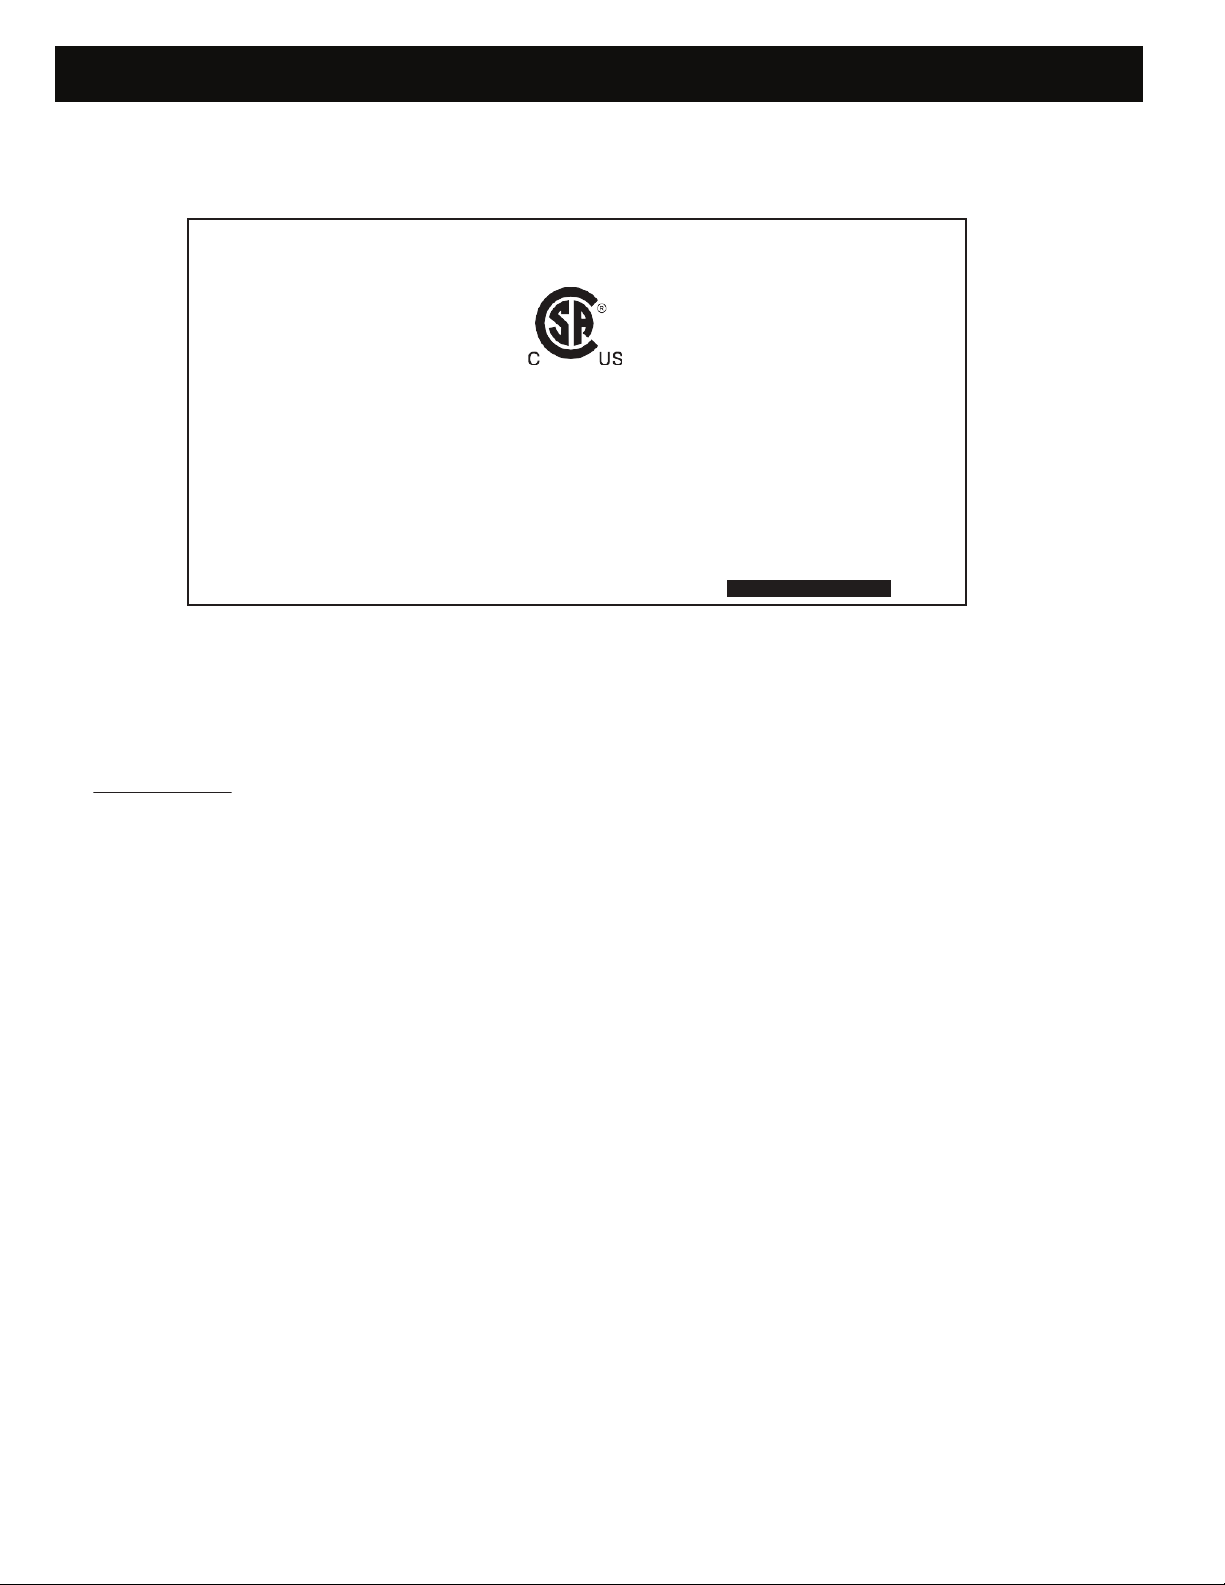
SERIAL NUMBER:
C
FN-50-BIF (BEF-50BIF)
MODEL
Rating Plate Information
ERTIFIED UNDER CANADIAN AND AMERICAN NATIONAL STANDARD: CSA 22.2 NO. 46 AND UL 2021
ELECTRIC FIREPLACE. SUITABLE FOR BEDROOM
AND BED-SITTING ROOM INSTALLATION. SUITABLE
FOR MOBILE HOME INSTALLATION.
MASTER CONTRACT:
DATE CODE:
DESIGNED IN NORTH AMERICA
By Firenado
MADE IN CHINA
VOLTAGE: 120VAC
FREQUENCY: 60Hz
POWER: 1450W
*This is an EXAMPLE of what your rating plate could look like. It may look
dierent than the example given above.
INSTALLER: It is your responsibility to check o the appropriate box on the rating plate
according to the model of the appliance.
This illustration is for reference only. Refer to the rating plate on the appliance for accurate
information.
NOTE: The rating plate must remain with the appliance at all times. It must not be removed.
5
Page 6
Locating the Appliance
NOT ALLOWED IN CANADA
(B)
ADAPTER
(C)
GROUNDING
MEANS
!
WARNING
DUE TO HIGH TEMPERATURES, THIS ELECTRIC APPLIANCE SHOULD BE LOCATED OUT OF TRAFFIC. KEEP
COMBUSTIBLE MATERIALS SUCH AS FURNITURE, PILLOWS, BEDDING, PAPERS, CLOTHES, AND CURTAINS
AT LEAST 36” FROM THE FRONT OF THE APPLIANCE.
NEVER LOCATE THIS ELECTRIC APPLIANCE WHERE IT MAY FALL INTO A BATHTUB OR OTHER WATER CONTAINER.
WEAR SAFETY GLASSES FOR PROTECTION DURING INSTALLATION AND MAINTENANCE.
DO NOT EXPOSE THE ELECTRIC APPLIANCE TO THE ELEMENTS (SUCH AS RAIN, ETC.)
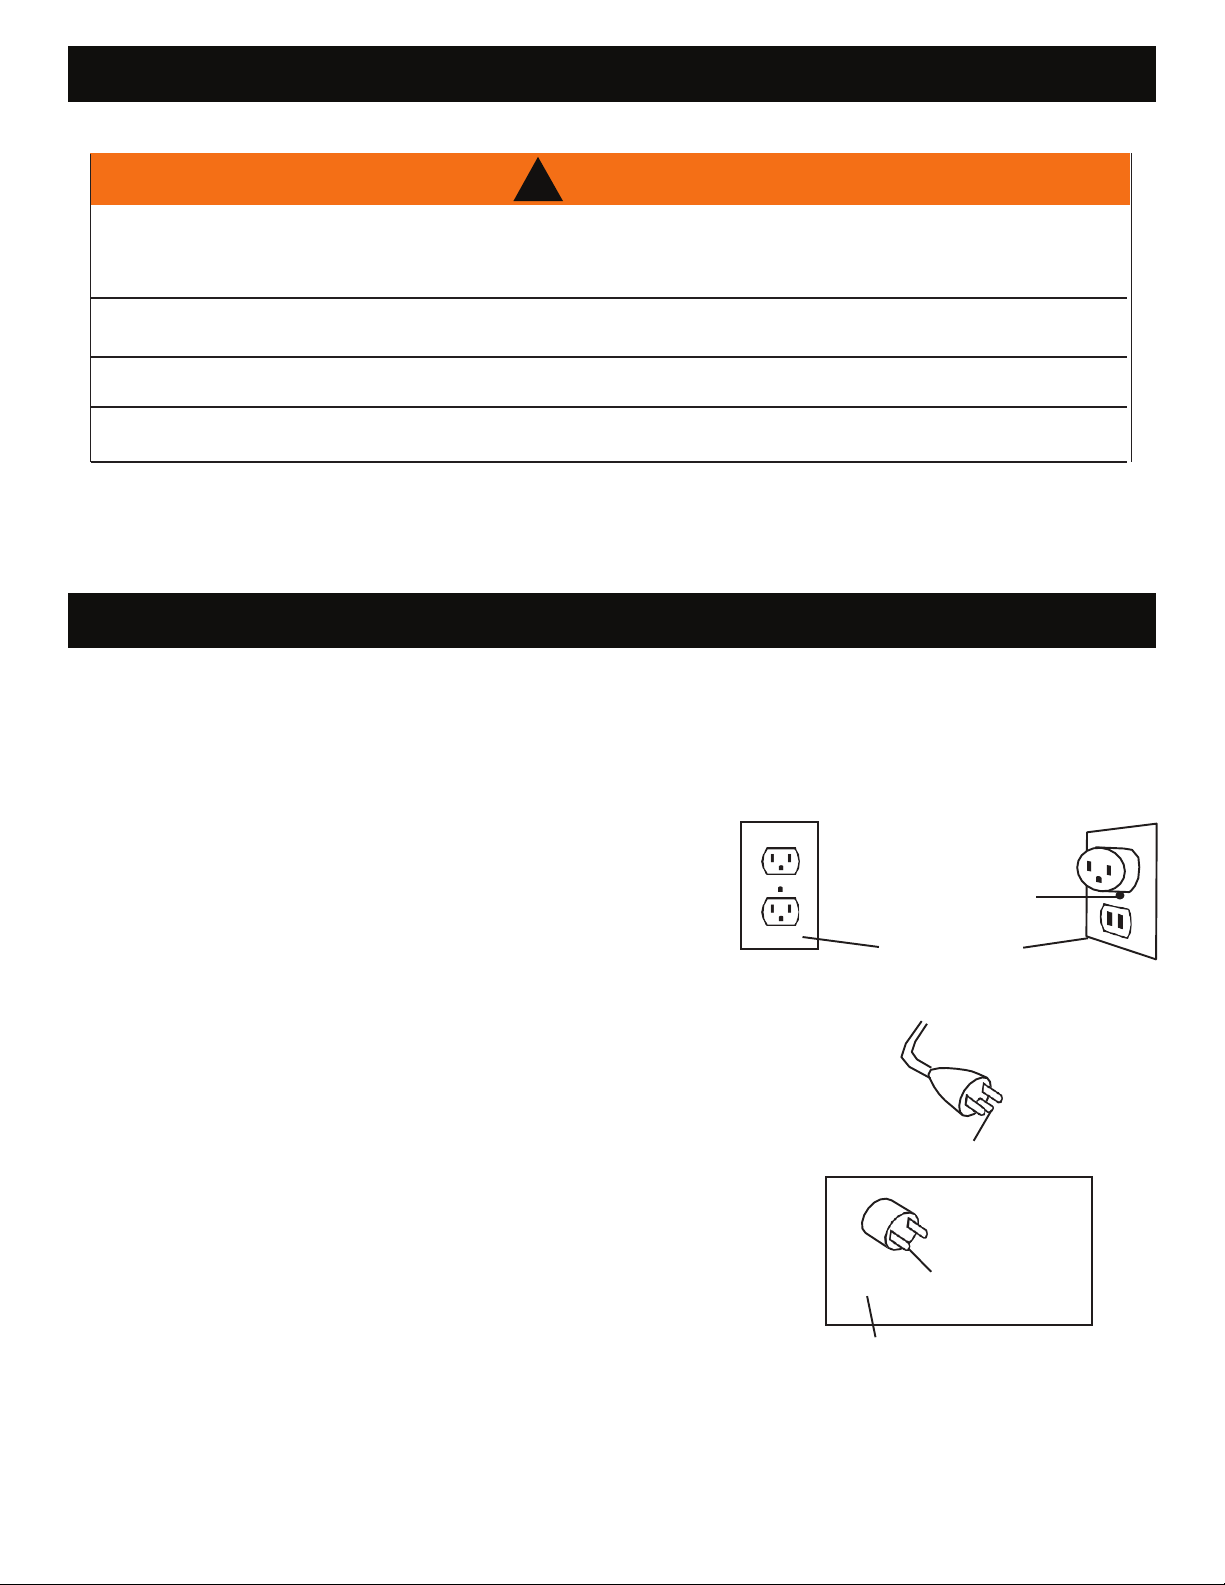
Grounding the Appliance
This appliance is for use with 120 volts. The cord has a plug as
shown in gure (A). An adapter as shown in gure (C) is available for connecting three-blade grounding type plugs to
two-slot receptacles. The green grounding lug extending from
the adapter must be connected to a permanent ground such
as a properly grounded outlet box. The adapter should not be
used if a three-slot grounded receptacle is available.
To disconnect appliance, turn controls to o, then remove plug
from outlet.
GROUNDING METHODS
METAL SCREW
(A)
COVER OF
GROUNDED
OUTLET BOX
GROUNDING PIN
6
Page 7
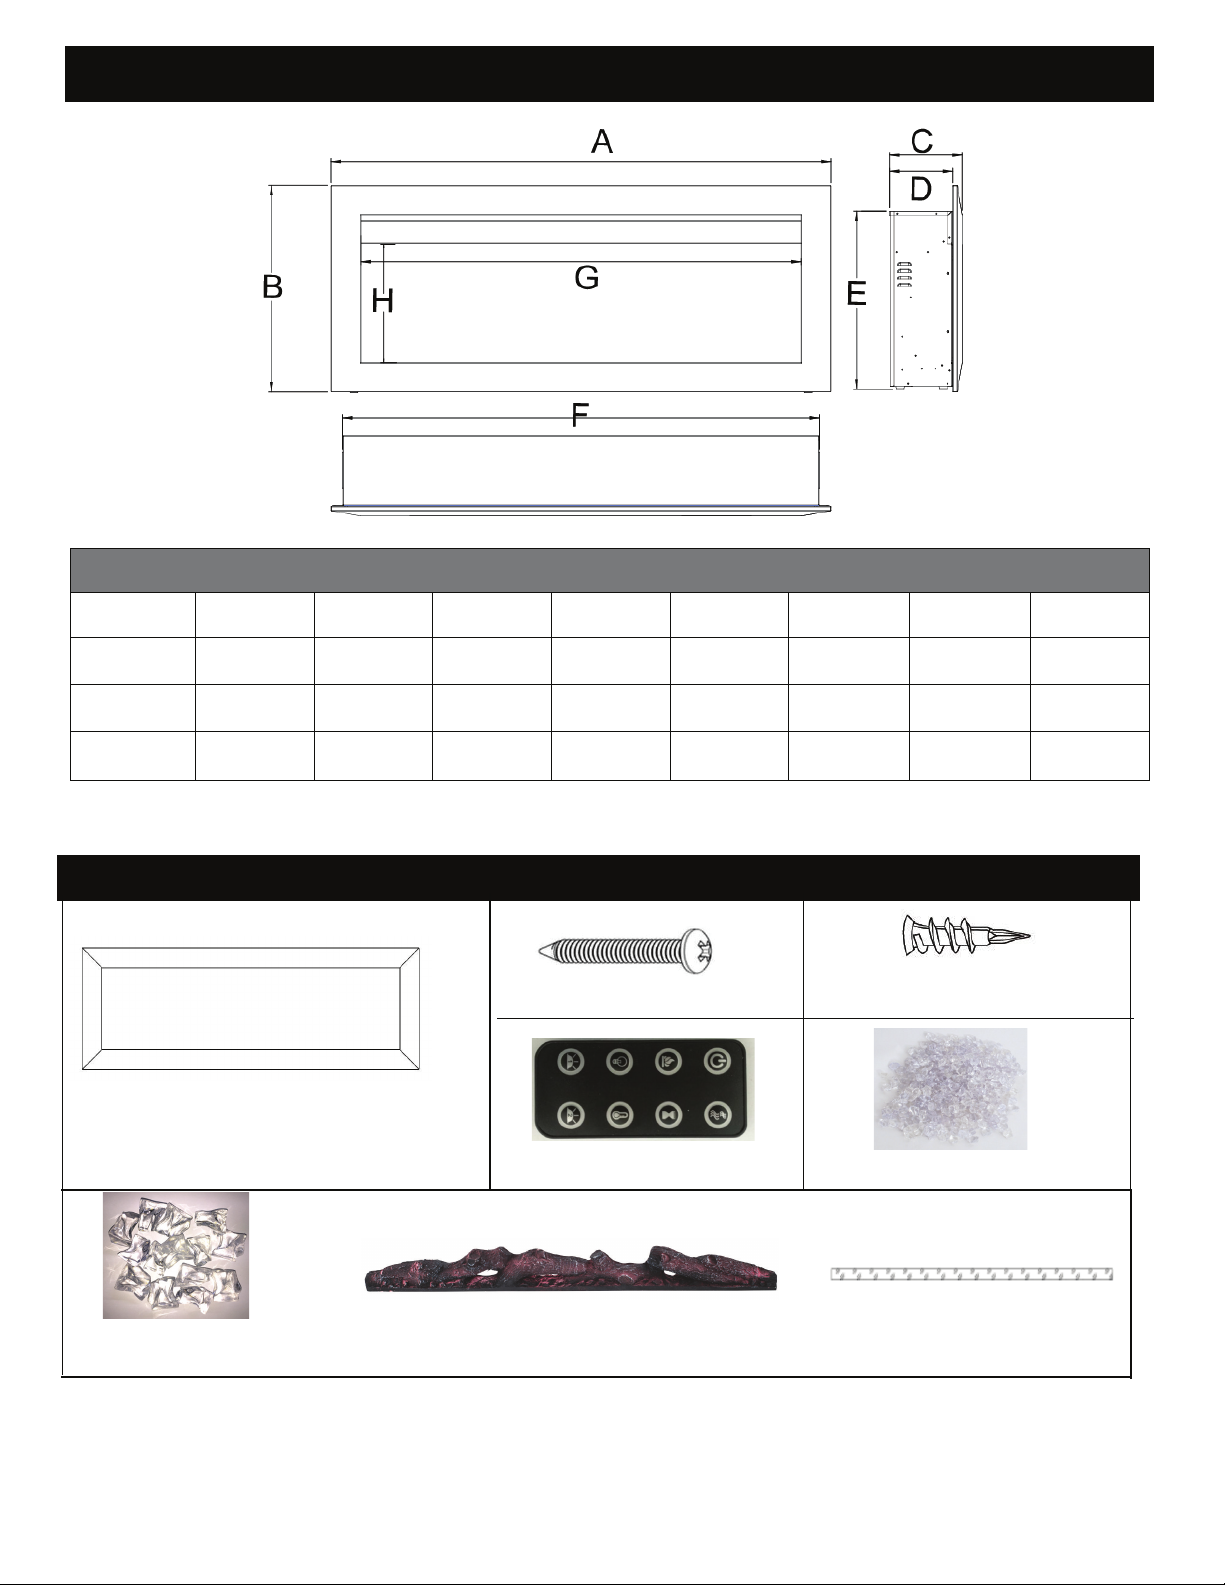
Specifications and Dimensions
50"
[1270mm]
18"
[456mm]
44"
[1120mm]
12"
[304mm]
60"
[1524mm]
18"
[456mm]
54"
[1374mm]
12"
[304mm]
72"
[1830mm]
18"
[456mm]
66"
[1679mm]
12"
[304mm]
PRODUCT DIMENSIONS
Model No
FN-50-BIF
FN-60-BIF
FN-72-BIF
A B C D E F G H
20-7/8”
[529mm]
20-7/8”
[529mm]
20-7/8”
[529mm]
Parts and Hardware
A – Fireplace
7-1/4”
[529mm]
7-1/4”
[529mm]
7-1/4”
[529mm]
6-1/4”
[529mm]
6-1/4”
[529mm]
6-1/4”
[529mm]
B – Wood Screws C – Drywall anchors
RC – Remote Control
47-3/4”
[529mm]
57-3/4”
[529mm]
69-3/4”
[529mm]
D- Crystals (Small)
- Crystals (Large) F
E - Log Set
G - Ember Bed
7
Page 8

Installation
and
Assembly
Your appliance is a recessed and/or mantel installed appliance. Select a suitable location that is
not susceptible to moisture and is away from drapes, furniture, and high-traffic areas.
NOTE: Follow all national and local electrical codes.
MINIMUM CLEARANCE TO COMBUSTIBLES
Measurements are taken from the glass front.
0"Bottom Top
Sides 0" Top
Back
0"
11.8" (300mm) to mantel
11.8" (300mm) to ceiling
MINIMUM MANTEL CLEARANCES
SAFETY INFORMATION
WARNING
WHEN USING PAINT OR LACQUER TO FINISH THE
MANTEL, THE PAINT OR LACQUER MUST BE
HEAT-RESISTANT TO PREVENT DISCOLORATION.
Note: For best flame performance, do not install directly under a light.
!
WARNING
RISK OF FIRE! THE POWER CORD MUST NOT BE PINCHED AGAINST A SHARP EDGE. SECURE CORD TO AVOID
TRIPPING OR SNAGGING. TO REDUCE THE RISK OF FIRE, ELECTRIC SHOCK, OR PERSONAL INJURY, DO NOT RUN
CORD UNDER CARPETING. DO NOT COVER CORD WITH THROW RUGS, RUNNERS, OR THE LIKE. ARRANGE CORD
AWAY FROM TRAFFIC AREAS AND WHERE IT WILL NOT BE TRIPPED OVER.
RISK OF FIRE! TO PREVENT A POSSIBLE FIRE, DO NOT BLOCK AIR INTAKE OR EXHAUST IN ANY MANNER. DO NOT
USE ON SOFT SURFACES WHERE OPENINGS MAY BECOME BLOCKED.
RISK OF FIRE! DO NOT BLOW OR PLACE INSULATION AGAINST THE APPLIANCE.
THIS ELECTRIC APPLIANCE IS TESTED AND LISTED FOR USE ONLY WITH THE APPROVED OPTIONAL ACCESSORIES.
USE OF OPTIONAL ACCESSORIES NOT SPECIFICALLY TESTED FOR THIS ELECTRIC APPLIANCE COULD VOID THE
WARRANTY AND/OR RESULT IN A SAFETY HAZARD.
IF THE INFORMATION IN THESE INSTRUCTIONS IS NOT FOLLOWED EXACTLY, A FIRE OR EXPLOSION MAY RESULT,
CAUSING PROPERTY DAMAGE, PERSONAL INJURY, OR DEATH. DO NOT STORE OR USE GASOLINE OR OTHER
FLAMMABLE VAPORS IN THE VICINITY OF THIS OR ANY OTHER APPLIANCE.
THIS APPLIANCE IS HEAVY. IT IS HIGHLY RECOMMENDED THAT TWO PEOPLE INSTALL THIS APPLIANCE.
HEATER VENTS ON THE ELECTRIC APPLIANCE CANNOT, IN ANY WAY, BE COVERED AS IT MAY CREATE A FIRE
HAZARD.
DO NOT RUN THE POWER CORD HORIZONTALLY, DIRECTLY BELOW THE APPLIANCE.
8
Page 9

Framing Size
Model Number
Installation
and
Assembly
A B C
FN-50-BIF
FN-60-BIF
FN-72-BIF
STEP 1. Select a dry wall to cut a hole for the replace box. Please refer to the framing sizes in above
chart.
48-1/4” [1225mm]
58-1/4” [1480mm]
70-1/4” [1784mm]
18-1/2”(467mm)
18-1/2”(467mm) 6-1/2”(165mm)
18 -1/2”(467mm)
6-1/2”(165mm)
6-1/2”(165mm)
Figure A
9
Page 10

Figure B
STEP 2. Place the replace on a clean surface. Using the screw driver, take o the TWO
screws in both sides. See Figure B
Figure C
STEP 3. Have two people pull the trim up, then take them out of the
replace box. See Figure C
10
Page 11

STEP 4. Using the screw driver, take o the 8 screws as shwon below in Figure
D. Have two people take out the glass panel as shown in Figure E and move it
to a clean, soft place to avoid scratching.
Figure D
Figure E
11
Page 12

STEP 5.
Have two people lift the replace box and place it into the opened hole. Attach
the replace to the wall using the four wall screws on each side of the replace
box. See Figure F
Figure F
STEP 6.
Place the decorative crystals or log set on the designated slot and even with the front. See
Figure G
Figure G
STEP 7. After placing the decorative crystals or log set on the designated slot evenly from
side to side, and then move and screw back the glass panel and metal trim.
(Repeat as Fig B, C, D, E)
12
Page 13

HARDWIRING INSTALLATION
!
TURN OFF THE APPLIANCE COMPLETELY AND LET COOL BEFORE SERVICING. ONLY A QUALIFIED SERVICE
PERSON SHOULD SERVICE AND REPAIR THIS ELECTRIC APPLIANCE.
WARNING
HARDWIRING CONNECTION
If it is necessary to hardwire this appliance, a qualified electrician must remove the cord connection and wire
the appliance directly to the house hardwiring.
This appliance must be electrically connected and grounded in accordance with local codes, if hardwired. In
the absence of local codes, use the current CSA C22.1 CANADIAN ELEC
current ANSI/NFPA 70 NATIONAL ELECTRICAL CODE in the United States.
TRICAL CODE in Canada or the
Remove the cover plate from the bottom left side
A.
three screws, as shown above.
1.
Take the new cover plate, supplied in the hardware bag. Punch out the 7/8" (22.2mm) hole and install
a box connector through, into the junction box. Snap the box connector clamp onto the supply wires.
2.
Using the wire connectors, connect the ground green wires (G), the common white wires (N)
together, then the hot black wires (L) and then the refer to Figure 3.
3.
Reinstall the cover plate using the three screws, as shown in Figure1.
B. Remove the wire connectors from the
cord. The power cord may be discarded.of the appliance by removing the
13
Page 14

Operation
Read and understand this entire owner’s manual, including all safety information, before
plugging in or using this product. Failure to do so could result in electric shock, fire,
serious injury, or death.
Power
Plug the power cord into a 110~120 Volt 15-Amp grounded outlet (see IMPORTANT
SAFETY INFORMATION on Pages 3 and 4). Make sure the outlet is in good condition
and that the plug is not loose. NEVER exceed the maximum amperage for the circuit.
DO NOT plug other appliances into the same circuit.
Methods of Operation
This electric fireplace can be operated by the touch panel, located on the right
side pane
The operation and functions of the two methods are the same.
Before operating, please review the IMPORTANT SAFETY INFORMATION on Pages
3 and 4 and heed all warnings.
l of the fireplace (see figure below), or by the battery-powered remote control.
Touch Panel
14
Page 15

Remote Control &Touch Panel Operation
BUTTON FUNCTION ACTION & INDICATION
1.
Press once. Indicator light turns on.
Power turns on. All functions
enabled.
2.
Press again. Flame effect turns off.
Unit goes to standby. All functions
turn off.
POWER
ON: Enables control panel functions
and remote control. Turns on flame
effect.
OFF: Disables control panel functions
and remote control. Turns off flame
effect.
TIMER button: Controls timer settings
to turn off fireplace at selected time.
Settings range from 30 minutes to 8 hours.
TIMER
FLAME button: Makes flame
FLAME
effect dimmer and brighter.
NOTE: Flame effect stays on until
power button is turned off. Flame effect
must be on for the heater to turn on.
COLOR button: Makes the color of
the flames change.
NOTE: Color effect stays on until
power button is turned off. Color
COLOR
flame effect must be on for heater to
turn on.
NOTE: This fireplace includes
memory function for flames.
Press once. Indicator light turns
1.
on. Timer is set to 30 minutes.
2.
Press again until desired setting
is reached. Indicator lights show
setting.
1.
Press once. Flame brightness
effect changes.
2.
Press again
until desired setting
is reached.
Press once. Flame color effect
1.
changes.
2.
Press again until desired setting
is reached.
Press once. Indicator lights up.
HEATER button: Turns heater on and off.
NOTE: The heater only works when the
flame effect is on. If the flame effect is
off, the heater will not turn on.
HEATER
NOTE: To prevent overheating, the
heater fan will blow cool air for 8-10
seconds before the heater turns on, and
after the heater turns off.
1.
Fan blows cool air for 10 seconds.
750W heater turns on and b
lows warm
air.
Press again. Indicator lights up.
2.
1500W heater turns on and blows hot
air.
3.
Press again. Heaters turn off.
The fan blows cool air for 10 seconds
to allow heater to cool down, then
turns off.
15
Page 16

4.
recycling.
TEMPERATURE button: Turns heater
on and off.
NOTE: Press the button for 5 seconds,
the temperature setting will switch from
°C to °F. Doing this will also switch from °F
to °C.
Press once: Touch panel
indicator becomes active.
5.
Press again until desired setting
is
reached. Digital display shows
setting circles as below:
LED Ember light button (1): Makes
the color on bottom change.
NOTE: Ember color effect stays on
until power button is turned off.
LED Bottom light button (2):
Makes the color on the bottom change/ash
automatically.
NOTE: Ember color effect stays on
until power button is turned off.
Press once. Ember color eect changes
1.
automatically.
2.
Press again until desired
is reached, in total 10 colors
1.
Press once. Ember color effect
gets changes automatically.
Press again Ember color effect
2.
flashes automatically.
setting
When the fireplace is first turned on, a slight odor may be present. This is normal and
NOTICE
NOTICE
should not occur again unless the fireplace is not used for a long period of time.
To improve operation, aim the remote control at the front of the fireplace. DO NOT
press the buttons too quickly. Give the unit time to respond to each command.
Temperature Limiting Control
This heater is equipped with a Temperature Limiting Control. Should the heater reach an
unsafe temperature, the heater will automatically turn OFF. To reset:
Remote Control Battery Information
• Unplug the power cord from the outlet.
• Turn the ON/OFF switch on the CONTROL PANEL to OFF. Wait 5 minutes.
• Inspect the fireplace to make sure no vents are blocked, or clogged with dust or
lint. If they ar
e, use a vacuum to clean the vent areas.
• With the POWER switch in the OFF position, plug the power cord back into the
outlet.
• If the problem continues, have your outlet and wiring inspected by a professional.
• This remote control uses CR2025 battery (included).
NEVER dispose of batteries in fire. Failure to observe this precaution may result in an
explosion. Dispose of batteries at your local hazardous material processing center.
16
Page 17

the surface.
Care and Maintenance
Cleaning
ALWAYS turn the fireplace OFF and unplug the power cord from the outlet before
cleaning, performing maintenance, or moving this fireplace. Failure to do so could result in
electric shock, fire, or personal injury.
NEVER immerse in water or spray with water. Doing so could result in electric shock,
fire, or personal injury.
Metal:
• Buff using a soft cloth, slightly dampened with a citrus oil-based product.
• DO NOT use brass polish or household cleaners, as these products will damage
the metal trim.
Glass:
• Use a good quality glass cleaner sprayed onto the cloth or towel. Dry thoroughly
with a paper towel or lint-free cloth.
• NEVER use abrasive cleansers, liquid sprays, or any cleaner that could scratch
the surfac
Vents:
• Use a vacuum or duster to remove dust and dirt from the fireplace and vent areas.
e.
Plastic:
• Wipe gently with a slightly damp cloth and a mild solution of dish soap and warm
water.
• NEVER use abrasive cleansers, liquid sprays, or any cleaner that could scratch
Maintenance
Risk of electric shock! DO NOT OPEN any panels! No user serviceable parts inside!
ALWAYS turn the fireplace OFF and unplug the power cord from the outlet before
cleaning, performing maintenance, or moving this fireplace. Failure to do so could result in
electric shock, fire, or personal injury.
Electrical and Moving Parts:
• The fan motors are lubricated at the factory and will not require lubrication.
• Electrical components are integrated in the replace and are not serviceable by the
consumer.
Storage:
• Store replace in a clean dry place when not in use.
WARNING! NO SERVICING of the internal or electrical parts should be performed by the
consumer. Do not service the unit yourself.
17
Page 18

Troubleshooting
SAFETY INFORMATION
WARNING
DISCONNECT THE APPLIANCE
COMPLETELY AND LET COOL
PRIOR TO ANY SERVICE.
ONLY A QUALIFIED SERVICE PERSON
SHOULD SERVICE AND REPAIR THIS
ELECTRIC APPLIANCE.
Problem
1.
Fireplace turns o 1. Fireplace has overheated
and will not turn on.
2.
Flame is not moving. 1. Loose wiring.
Possible Cause Solution
and safety device has caused
thermal switch to disconnect
or home circuit breaker has
opened.
• Flame motor defective.
• Flame rod out is of place.
1. Reset switch by turning main
power switch o and waiting 10
minutes then turning it back on
or reset circuit breaker.
1. Inspect wiring for loose connections.
2. Call a qualied service technician to
replace ame motor.
3. "Flame Rod" out of place due to rough
transit/handling of the product. This issue
can be corrected by simply removing the
glass, ipping the replace upside down,
removing a set of screws that are holding
the bottom frame plate, and placing the
ame rod back into place.
3.
Flame is not visible. 1. Wiring is loose.
4.
Log set and/or
crystals are not
glowing
.
1.Wiring is loose.
2. Ember is in o mode.
1. Disconnect from power source
and inspect wiring for loose
connections and repair or
replace if necessary.
2. Push the ame button to high.
1. Disconnect from power source
and inspect wiring for loose
connections and repair or replace if
necessary.
2. Push the ember button to high.
18
Page 19

5.
Remote control
does not work.
6.
Fireplace will not
come on when
switch is ipped to
ON.
1.
Low batteries.
2.
Not aiming control correctly.
3.
Defective remote control
and/or sensor.
1.
Fireplace is not plugged in to
an electrical outlet.
2.
Control failure.
3.
Breaker tripped.
1.
Replace batteries in
remote control.
2.
Aim control at sensor located
directly behind glass screen in
center of unit just above logs.
3.
Replace remote control and/or
sensor.
1.
Check plug.
2.
Call a qualied service
technician
3.
Reset breaker.
Heater does not
7.
provide heat when
turned on.
8.
Touch panel /
Remote Control do
not work.
1.
Thermal switch has been
tripped.
2.
Wiring is loose.
3.
Heater is defective.
The front glass is moved or
not secured properly
.
1. Turn unit o and unplug unit
for 10 minutes. Plug back in and
turn unit on. If plug cannot be
reached, follow directions for
tripped circuit breaker
2. Disconnect from power source
and inspect wiring for loose
connections and repair or
replace if necessary.
3. Replace heater.
Unplug the appliance,
recessed to the wall, shut o house circuit
breaker. Ensure the front glass is in the
correct location and is sitting at to the
appliance touch panel. after 15 seconds,
plug or turn on the appliance to reset it.
.
if the appliance is
9.
There is a gap
between the glass
and the logs/light
is visible
The logs have not been
seated properly.
Turn unit o, re-open and re-seat
logs into channel. If logs are properly
seated, light will no longer be visible/
there will be no gap between the glass
and the logs.
CAUTION: To remove the glass, you will notice two screws on front both sides (right and left) of the
replace. Once the screws are removed, slide the glass up and away from the replace. Once the
bottom frame plate is removed, you will notice one ame motor on right side where the rod should
in place with the rubber plugs.
Please remember to always have the unit disconnected prior to any work. Always lay the glass, as well
as the unit onatowel to not damage the parts/frame.
This entire process should not take longer than 20-30 minutes.
be
19
Page 20

LIMITED WARRANTY
Firenado® Electric Fireplaces are warrantied against manufacturing defects under normal use
and service for a period of 1 year.
Installation, repair, and maintenance work should be performed by an authorized service
technician. Work by unqualied persons could be dangerous and will void the warranty.
All electric appliances must have a qualied installer complete the installation for the warranty
to be in eect. The incorrect installation of the Firenado® electric appliance will void the warranty.
Firenado® shall not be liable under this or any implied warranty for incidental or consequential
damages and Firenado® liability is limited to the purchase price of the appliance only. This
warranty gives you specic legal rights, and you may also have other rights, which may vary
from state to state. This warranty is applicable in the United States and Canada only. No one else
is authorized to perform any obligations under this warranty.
Improper maintenance, excessive humidity, chlorine, fertilizers, lawn pesticides, chemicals, and
salt can aect the steel components and for these reasons, the warranties DO NOT COVER
DISCOLORATION, SURFACE RUST, OR RUST, unless there is a loss of structural
integrity/rust through of the appliance components. This warranty covers defects in material
and workmanship.
Consumers are responsible for all labor and shipping cost associated with warranty parts. All
warranty claims are subject to manufacturer review. Please make sure to have your sales receipt
information and product serial number located on the outside left side panel of the appliance.
All replacement parts can be purchased through your local stocking dealer.
20
Page 21

Firenado® Product Registration
Please take a minute to let us know what you bought. This makes sure we keep you up to date and
have your info ready if you ever need warranty help! You may register your product electronically on
the Firenado® website therenado.com.
Name
First ______________________________ Last________________________________
Email_____________________________________________________________
Phone__________________________________
Street Address ______________________________________________________________
Street Address Line 2_________________________________________________________
City__________________ State/Province/Region____________________
Zip/Postal Code______________________ Country________________________________
What is the model number of the Firenado product purchased?
__________________________________________________________________________________
What size Firenado product did you purchase?
___________________________________________________________________________________
Where did you buy your Firenado product?
___________________________________________________________________________________
21
 Loading...