

Page 1
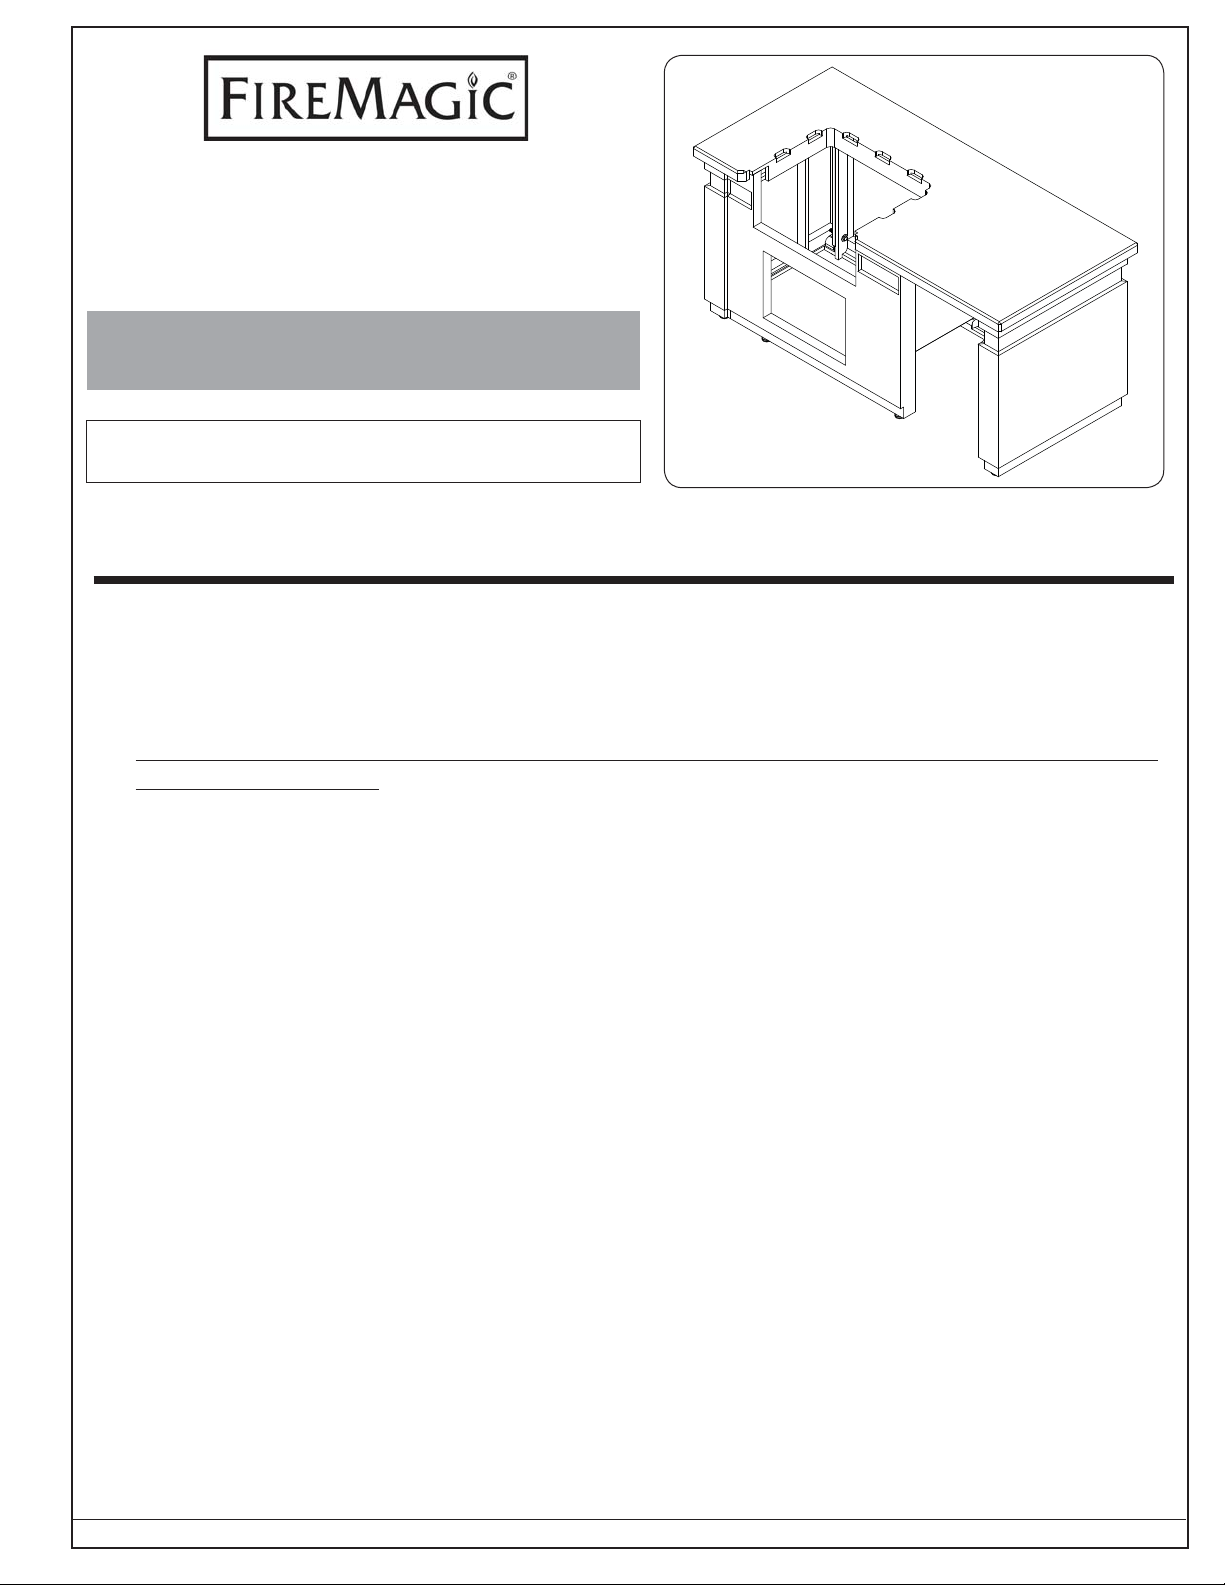
PRE-FAB GRILL ISLAND
Model #s: DC430-XXR-75SM
DC790-XXR-108SM
ASSEMBLY INSTRUCTIONS
AND OWNER’S MANUAL
INSTALLER: Leave these instructions with consumer.
CONSUMER: Retain for future reference.
IMPORTANT: READ THESE INSTRUCTIONS CAREFULLY BEFORE STARTING INSTALLATION OR USE.
• Only Fire Magic / A.O.G. grills and accessories can be used with this grill island.
• Fire Magic / A.O.G. grill and accessories are not included. Contact your dealer for ordering
information.
• When installing an L.P. cylinder within this island, it must be installed with a Fire Magic Door w/
Tank Tray and Louvers:
Model #s (2,3,4,5)3820-TS(L,R), 23920-1T-S
• Follow all instructions included with the grill and accessories to be installed into this island.
• This grill island design provides all necessary ventilation.
• Adapter kits are available to accommodate A.O.G. grill/accessories. Contact your dealer for ordering
information.
DC430 model
shown
REV 6 - 1409101305
Robert H. Peterson Co. • 14724 East Proctor Avenue • City of Industry, CA 91746
1
L-C2-306
Page 2
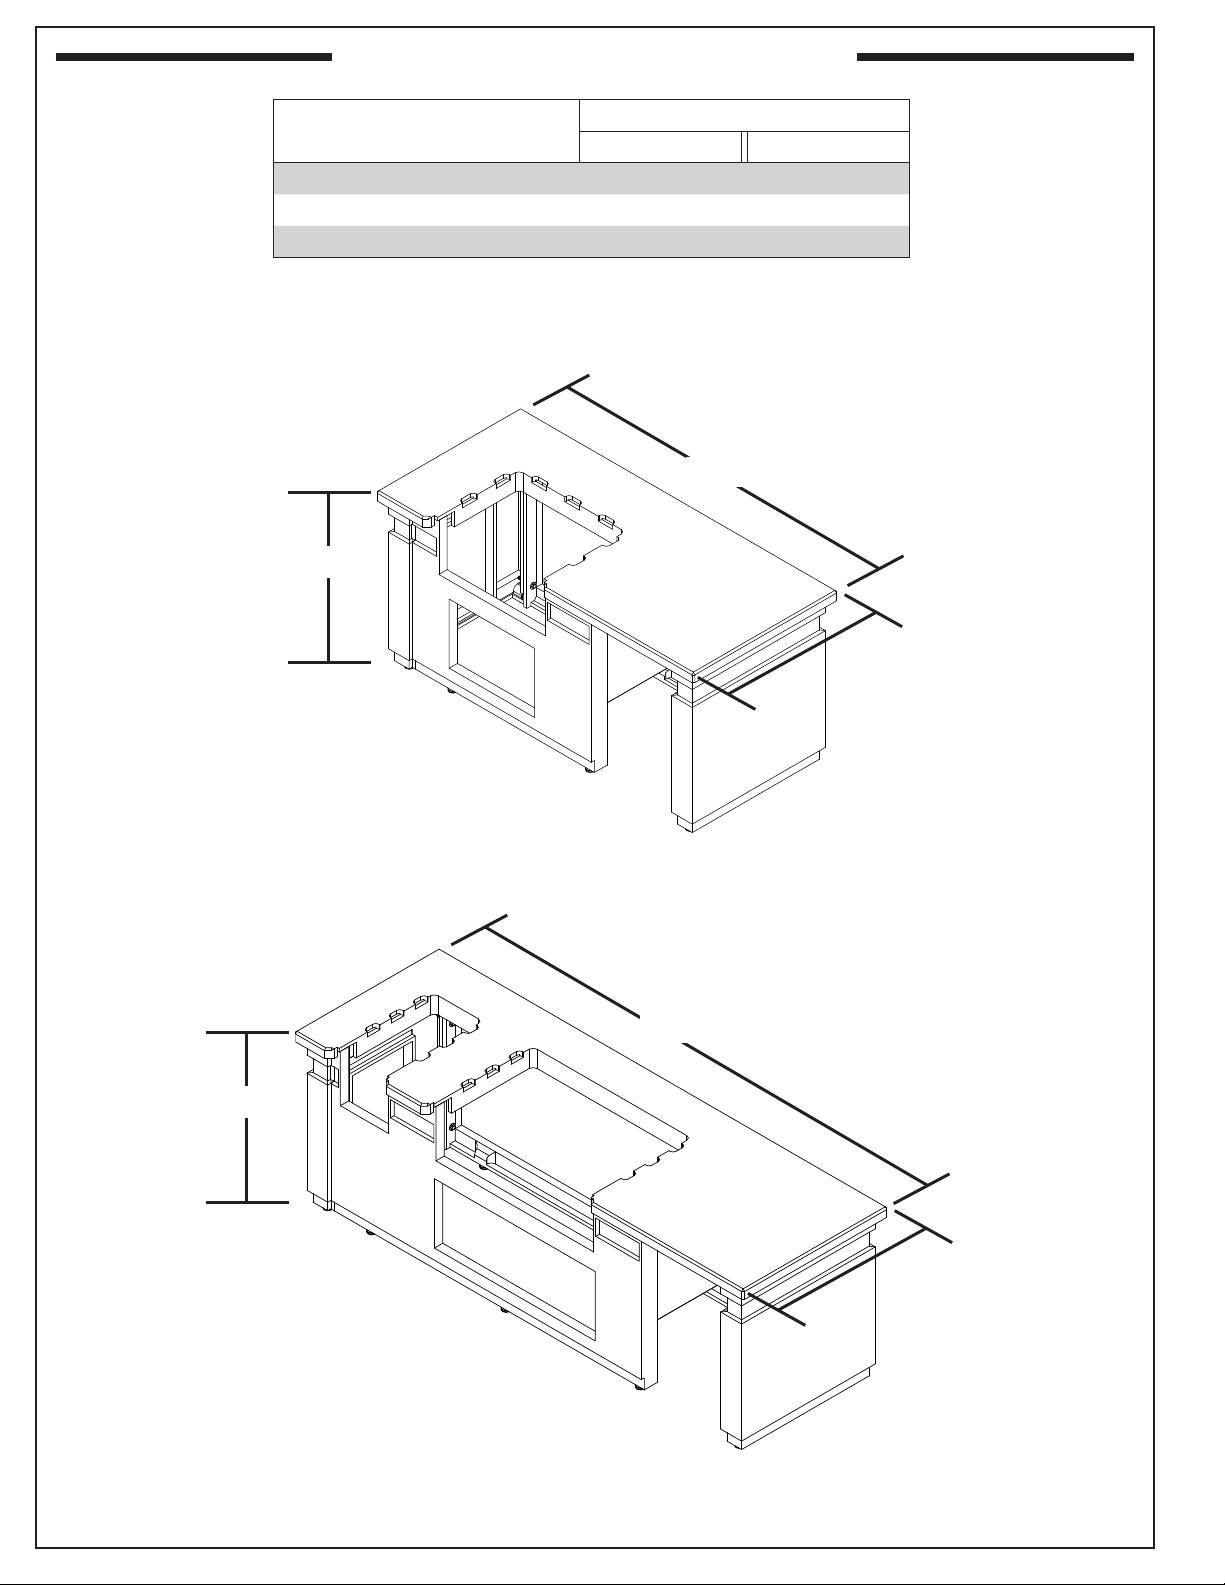
SPECIFICATIONS AND DIMENSIONS
Height
Description
Height 36" 36"
Width 76
Depth 34 3/4" 34 3/4"
DC430 DC790
Dimension
1
/4" 107 1/2"
Table 1 - Overall Island Dimensions
Width
Depth
Height
DC430 model
Width
Depth
REV 6 - 1409101305
DC790 model
2
L-C2-306
Page 3
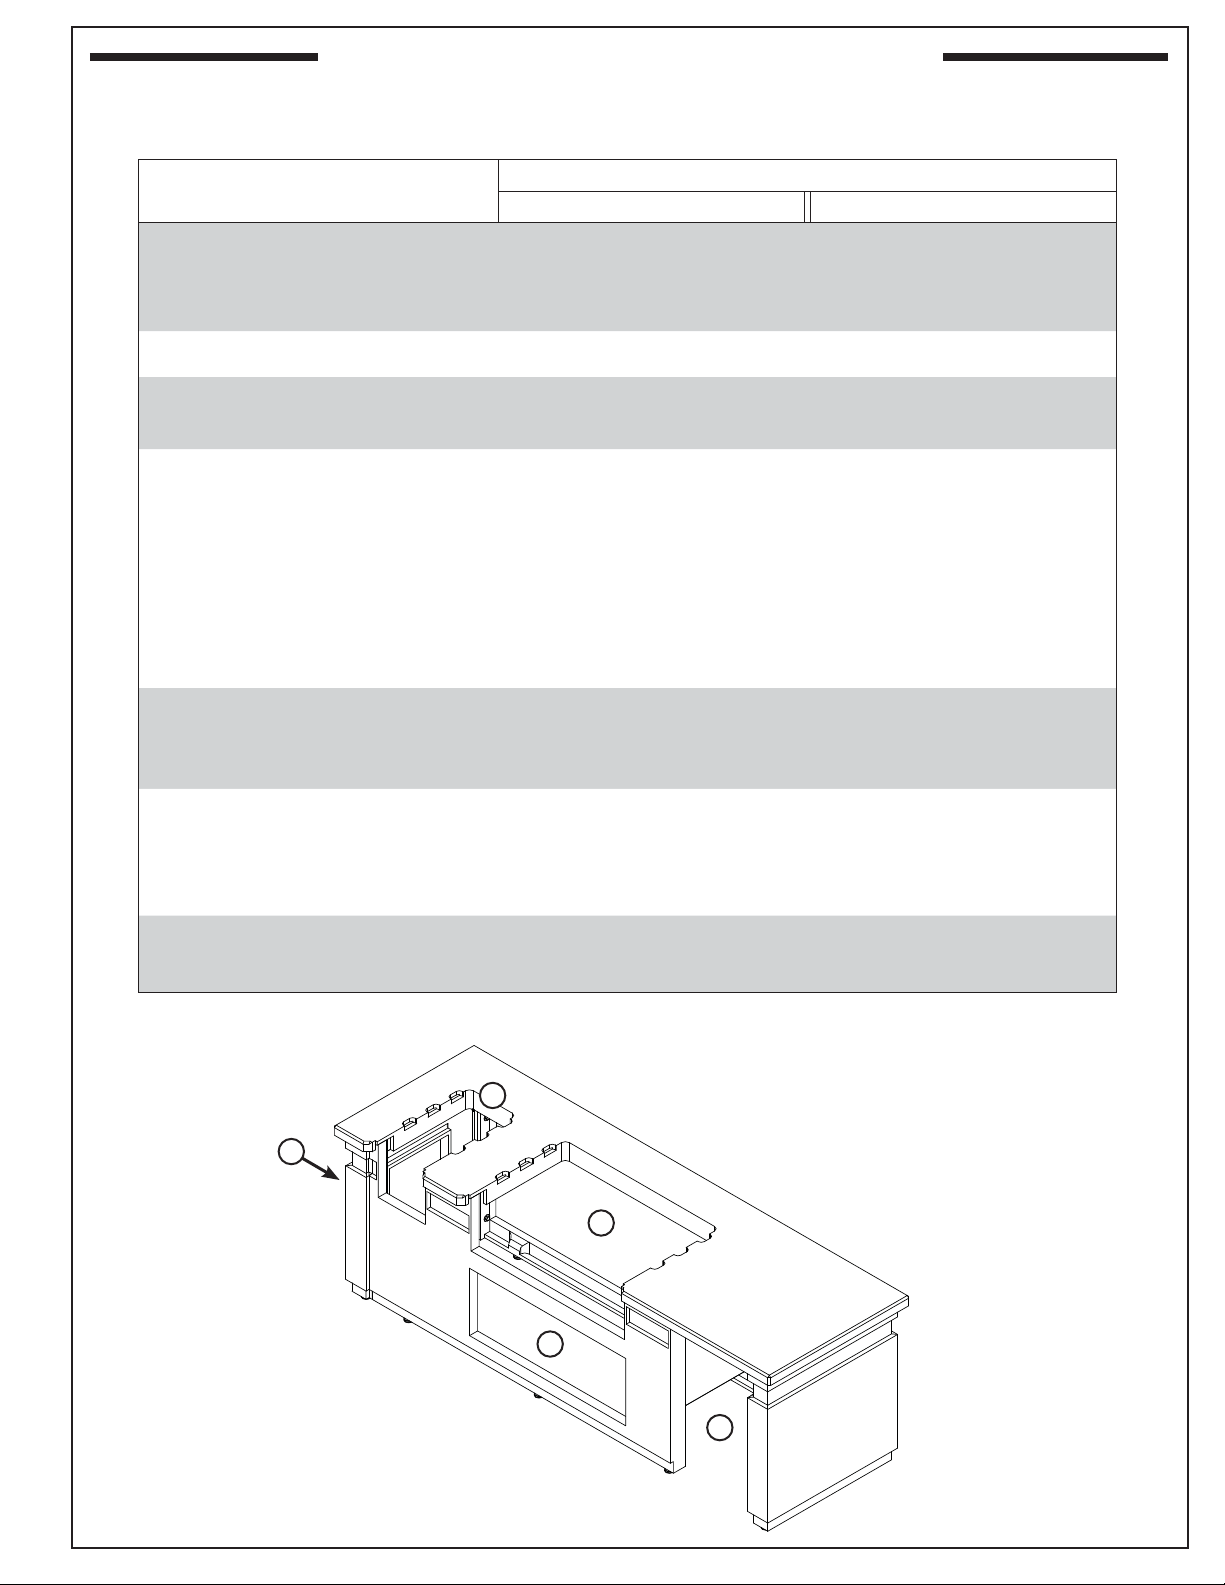
SPECIFICATIONS AND DIMENSIONS (Cont.)
Only Fire Magic / A.O.G. grills and accessories can be used with this grill island. Below is a list of the options
available for each island model. Contact your local dealer for ordering information.
Item
Grill (A)
Double Side Burner (B) n/a 32814, 3281, 3282
Refrigerator (C)
End Panel Door (D)
Under Grill Access Door (E)
24(N,P)B (w/adapter kit)
3590A, 3590-D(L,R),
23920-1-S, 23920-1T-S,
(3,4,5)3820-TS(L,R),
DC430 DC790
A430i, C430i,
REF-20
23820-S, 23920-S,
(3,4,5)3820-S(L,R),
(3,4,5)3920-S(L,R),
33920-1-S(L,R),
23920, 23920-1T,
23920-1
23914-S,
(3,4,5)3914-S(L,R)
23914
Option(s)
(A,E)790i,
(A,E)660i (w/adapter kit),
36(N,P)B (w/adapter kit)
3590A, 3590-D(L,R),
REF-20
23820-S, 23920-S,
23920-1-S, 23920-1T-S,
(3,4,5)3820-S(L,R),
(3,4,5)3820-TS(L,R),
(3,4,5)3920-S(L,R),
33920-1-S(L,R),
23920, 23920-1T,
23920-1
(3,4,5)3938S
Grill Adapter Kit
Side Burner Adapter Kit n/a
AD-24C
[for 24(N,P)B grill]
Table 2 - Island Options
B
D
A
E
AD-36C
[for 36(N,P)B grill],
DC-AD-660
[for (A,E)660i grill]
3282-AD
(for 3282 side burner)
REV 6 - 1409101305
DC790 model
shown
C
3
L-C2-306
Page 4
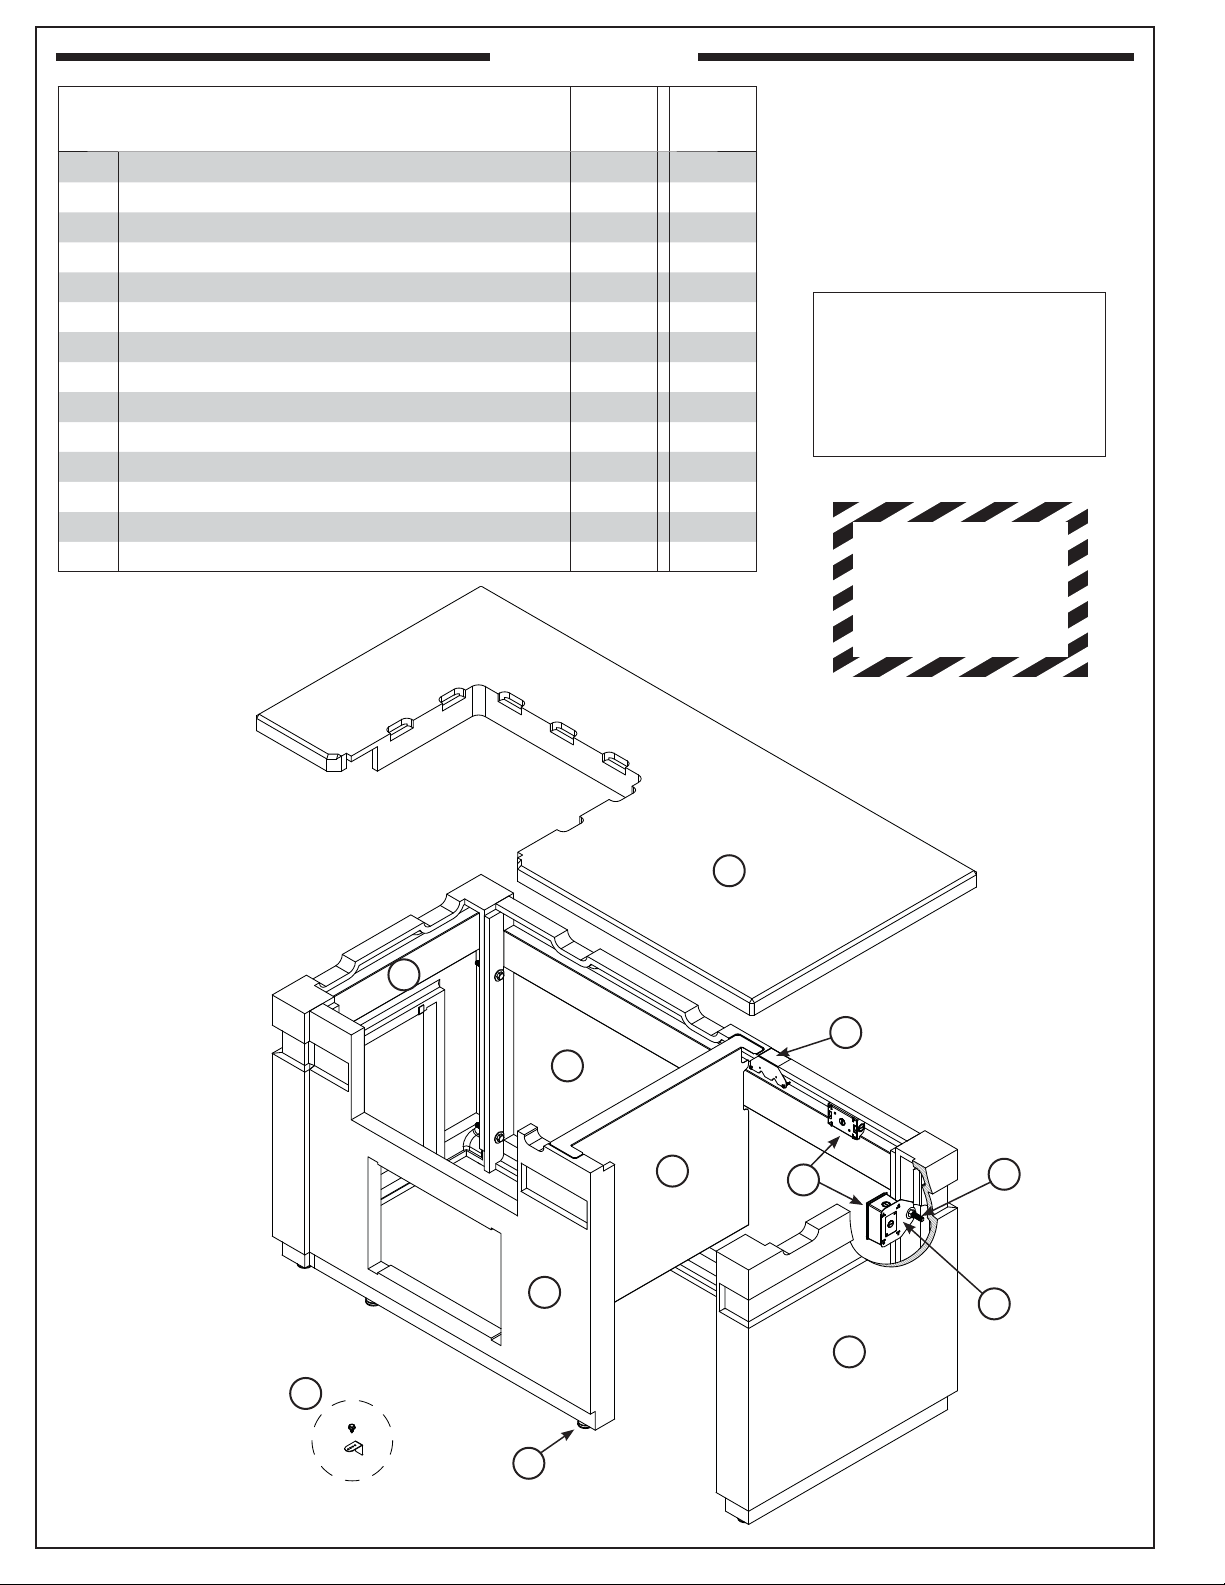
PARTS LIST
DC430 DC790
Item Description Qty. Qty.
1. Rear wall 1 1
2. Left wall 1 1
3. Right wall 1 1
4. Front wall 1 1
5. Duplex outlet box assy. 2 2
6. Heat shield 1 1
7. Countertop 2 2
8. Power supply box bracket (w/ Phillips screws) 1 1
9. Outlet bracket 1 1
10. Door bracket (w/ hex screw) 8 12
11. Leveler bolts 8 9
1
12. Hex bolt,
13. Nut * 6 6
14. Washer * 12 12
Not shown
*
/2"-13 x 3" 6 6
• Your grill island is packaged
onto 1 pallet.
• Select model is illustrated
(your model may vary)
IMPORTANT
Remove all packing
material (including any
protective coatings) and
discard prior to use.
COMPONENTS
ARE HEAVY
HANDLE WITH CARE
DC430 model
shown
10
7
2
8
1
6
5
4
12
9
3
11
REV 6 - 1409101305
4
L-C2-306
Page 5

ASSEMBLY AND INSTALLATION
WARNING: Failure to position the parts in accordance with these diagrams or failure to use only parts specifi cally
approved with this unit may result in property damage or personal injury.
TOOLS REQUIRED
• 3/4" open end wrench, or equivalent (2)
5
• Power drill with
• Level
LOCATION
While following all requirements and safety information in the grill owner's manual, determine and prepare the
location of the island (a hard and level surface).
Note: A combustible surface is permitted.
Important: For models with underneath gas installs, the gas supply must be routed to the location the
grill island will rest over at this stage.
/16" hex driver and #2 Phillips driver
ASSEMBLY AND INSTALLATION REQUIRES TWO OR MORE PEOPLE.
EXERCISE EXTREME CARE DURING ASSEMBLY AND INSTALLATION.
REV 6 - 1409101305
5
L-C2-306
Page 6

ASSEMBLY AND INSTALLATION (Cont.)
ASSEMBLY AND INSTALLATION - OVERVIEW
CAUTION: Island components are heavy. CAREFULLY handle all components during assembly.
• Fig. 6-1 provides an overall orientation and bolt assembly detail for the island.
(DC430 model shown. Assembly may slightly vary depending on island selected.)
• The DC790 assembles in the same manner.
• The DC790 has the addition of a double sideburner, which is addressed in the following step-by-step section.
• This section is just an overview, refer to the following step-by-step section for complete assembly (and grill/
accessory installation) details.
12
11
7
1
(Attach all)
DC430 model
shown
2
9
ONLY HAND TIGHTEN
BOLTS DURING
STEPS 2 - 4!
FULLY TIGHTEN
DURING STEP 5.
2
4
8
3
7
10
Fig. 6-1
Overall Orientation
3
1. Attach levelers
2. Assemble rear & left wall
3. Assemble right wall &
install outlet box
4. Assemble front wall
REV 6 - 1409101305
ASSEMBLY / INSTALL OVERVIEW
5. Adjust levelers to level top
surfaces of unit evenly, ensure
unit is square, then fully tighten
all bolts (not shown)
6. Install electrical (not shown)
7. Install drawer and/or door(s)
8. Place heat shield
6
9. Install power supply box
(only bracket shown)
10. Install refrigerator
11. Place countertop
12. Install grill
13. Install double sideburner
(if applicable, not shown)
L-C2-306
Page 7

ASSEMBLY AND INSTALLATION (Cont.)
ASSEMBLY AND INSTALLATION - STEP BY STEP
CAUTION: Island components are heavy. CAREFULLY
handle all components during assembly.
Note: A DC430 grill island is depicted here. Your assembly
may slightly vary depending on model selected.
Island Base
Important: DO NOT fully tighten bolts until the island
base is leveled and squared. Hand tighten
until instructed to fully tighten.
1. Locate the island pieces in an appropriate location (refer
back to the LOCATION section if needed).
2. Carefully lay the front wall down and attach the levelers.
Repeat for the rear wall and two side walls. See Fig. 7-1.
Important: The levelers are required for ventilation and
leveling purposes.
3. Orient the rear wall and left wall as shown. Carefully
align the pilot holes, and insert the hardware in the order
shown. Hand tighten only. See Fig. 7-2.
Attach levelers to bottom of all 4 walls
Fig. 7-1 Attach levelers
Hardware:
Bolts x 2
(hand tighten)
Nuts x 2
Washers x 4
Note: DO NOT fully tighten any bolts until all 4 walls are
set and the top surface is even.
4. Orient the right wall and repeat the hardware installation
process for the bottom hardware fi rst. Ensure the top
pilot holes are aligned.
An outlet box assembly is provided and requires
installation. Assemble the box as shown, then use the
hardware to secure both the top of the right wall and the
outlet box in place. See Fig. 7-3 and 7-4.
Note: Covers are provided for any outlets that will not be
used (if applicable).
Fig. 7-2 Assemble rear and left wall
Hardware:
Bolts x 2
Nuts x 2
[covers are
provided for any
outlets that will
not be used]
Washers x 4
B
A
(hand tighten)
Fig. 7-3 Assemble right wall and outlet box
[covers are
provided for any
outlets that will
not be used]
DC430
shown
REV 6 - 1409101305
Fig. 7-4 Right wall and outlet box installed
7
L-C2-306
Page 8

ASSEMBLY AND INSTALLATION (Cont.)
5. Orient the front wall and repeat the hardware installation
process (on left side only). See Fig. 8-1.
6. Use the level to ensure the top surfaces of the assembly
are level. The levelers at the bottom of the island may
be adjusted as needed. See Fig. 8-2.
7. Check for squareness of the island.
a. Measure the X outer dimension, see Fig. 8-3. It should
be approximately:
3
• DC430 models: 79
• DC790 models: 108 3/4"
/4"
Hardware:
Bolts x 2
Nuts x 2
Washers x 4
(hand tighten)
b. Measure the Y outer dimension, see Fig. 8-3.
Carefully adjust the side walls as needed to ensure
the X & Y dimensions are equal. (The fi nal dimension
may slightly vary from that mentioned in step a.)
c. Measure the Z outer dimension, see Fig. 8-3. It should
1
be approximately 30
8. Once the assembly is level and square, use the two
/2".
3
/4"
open end wrenches (or equivalent) to fully tighten all
hardware. DO NOT OVERTIGHTEN.
Note: Tightening of the hardware may slightly alter the
setup. Check once more to ensure the island is level
and square, and adjust if needed.
Install Electrical
Have a licensed electrician route the electrical setup for
your island. Two outlet boxes are available. The primary box
is located on the interior of the right wall. An additional box
exists at the top of the rear wall. See Fig. 8-4.
Your installation may vary. Observe all local codes.
Fig. 8-1 Assemble front wall
Adjust all levelers
as needed
Fig. 8-2 Level assembly
X
Ensure all top
surfaces are level
(outer dimensions)
Y
Z
REV 6 - 1409101305
Fig. 8-3 Square unit (then tighten bolts)
Fig. 8-4 Install electrical (as needed)
8
L-C2-306
Page 9

ASSEMBLY AND INSTALLATION (Cont.)
Install Drawer and/or Door(s)
The drawers/doors for your island are purchased
Review the instructions provided with your accessories.
separately.
See
Fig. 9-1 for install locations.
Brackets are provided for ease of installation in this island.
Follow the steps below.
1. Insert your door/drawer completely into the appropriate
opening. Ensure it is fl ush against the exterior wall (see
Fig. 9-1 and Fig. 9-2, A).
2. The door will have 2-4 oblong cutouts (or round holes)
on both the top and bottom of its frame. Insert a bracket
where a cutout exists, below the frame. See Fig. 9-2, B.
3. While squeezing the rear of the bracket and the front of
the door frame fi rmly against the concrete wall, insert
a hex screw and tighten with the power drill and 5/16"
hex driver (see Fig. 9-2, C). DO NOT OVERTIGHTEN
Note: Certain models may require a second person to hold
the bracket against the concrete wall from within the
island enclosure.
4. Repeat this process for the remaining brackets and the
second door/drawer in the island.
Use provided brackets
to install, see Fig. 9-2
for details.
Fig. 9-1 Door / drawer install locations
Under grill door: 4-8 brackets
End door: 4 brackets
Note: Only the cutouts in the top and bottom of the frames
require brackets.
Alternatively, the doors/drawers may be installed by fastening them into the island using #8 x 1" concrete screws (not
provided). DO NOT OVERTIGHTEN.
1
Use a power drill and a
/8" bit to drill all pilot holes needed
(through the frame pilot holes). Then install the screws as
shown in Fig. 9-3.
Insert screw & fasten
C
Insert bracket
below frame
A
Insert door (frame)
Fig. 9-2 Door / drawer install detail
Alternate method
(insert door, drill pilot holes, install screws)
(First drill 1/8"
pilot holes)
B
REV 6 - 1409101305
Fig. 9-3 Alternate door/drawer install method
9
L-C2-306
Page 10

Place Heat Shield
ASSEMBLY AND INSTALLATION (Cont.)
Place the heat shield as shown in Fig. 10-1. It will need to
be inserted at an angle to clear the island (A). Then turn it
(within the island slots) until it is perpendicular with the front
and rear walls (B). Locate the heat shield in place by using
the grooves found on the top of the front and rear walls (C).
Install Power Supply Box
A power supply box is included with your grill and requires
installation.
CAUTION: Refer to the grill owner's manual for all safety
information regarding the power supply box.
A bracket is provided for installation in this island. Follow the
steps below.
1. First place the power supply box bracket over the rear
wall, in the groove just to the right of the heat shield
(see Fig. 10-2).
2. Align the pilot holes on the power supply box with the
holes on the bracket, then insert the two Phillips screws
and tighten with the power drill and #2 Phillips driver
(see Fig. 10-2). DO NOT OVERTIGHTEN.
Note: Power supply box design may vary.
A
B
C
Grooves on front
and rear walls
Fig. 10-1 Place heat shield
A. Place bracket
over rear wall
B. Align box
C. Install screws
Groove
3. Once the box is installed, route the box wire along the heat
shield and into the grill area (for future grill installation).
See Fig 10-3.
(heat shield)
(rear wall)
Fig. 10-2 Install power supply box
(Rear view
of island)
Route power
supply box wire
(power supply
box bracket)
Fig. 10-3 Route power supply box wire
REV 6 - 1409101305
10
L-C2-306
Page 11

ASSEMBLY AND INSTALLATION (Cont.)
Install Refrigerator
The refrigerator for your island is purchesed separately. Review
the instructions provided with your accessory.
In addition to all information found in the owner's manual,
simply slide the refrigerator and plug it into the island electrical
outlet (see Fig. 11-1).
Place Countertop
Apply silicone along the top of island. Then place the
countertop onto the island as shown in Fig. 11-2. Be sure
to align the cutout(s) in the countertop with the opening(s)
in the front wall.
Install Grill and Double Sideburner (as applicable)
The grill and double sideburner for your island are purchased
separately. Follow all instructions provided with your grill (and
double side burner if applicable) for installation. See Fig. 11-3
for install locations.
B
A
Fig. 11-1 Install refrigerator
Apply
silicone
along
top
Fig. 11-2 Place countertop
Double sideburner
location (if applicable)
Grill location
DC790
shown
Fig. 11-3 Install grill (and sideburner if applicable)
REV 6 - 1409101305
11
L-C2-306
Page 12

CARE AND CLEANING
• Keep the vent openings and surrounding area of the of the unit clean and free of obstructions at
all times.
• For grill and accessory care and cleaning, refer to the owner's manuals provided with the units.
• Concrete components
As with any surface, concrete components require regular maintenance and care. Certain guidelines must
be followed to preserve the concrete's appearance and structural integrity.
• Use trivets to protect your countertop from high-heat.
• Scratches may occur due to usage. To minimize, avoid striking or dragging heavy, rough, or sharp objects
across the countertop. Use a cutting board when using knives.
• Spotting and hairline cracks may occur due to the nature of the product and are not considered a
manufacturing defect.
• Concrete products are porous and susceptible to discoloration from liquids (especially oils and acidic
substances). During use, clean up any spills immediately to prevent any possible staining or damage
to the fi nish. Avoid allowing water (or any liquid / substance) to stand on the surface. Using coasters for
drinks is highly recommended.
• After each use, clean up any food particles or debris.
• To clean the concrete, fi rst wash with a mild soap and water solution. For stubborn stains, a vinyl
brush may be used. Allow to dry. Annually, follow up with a masonry sealer in order to preserve
the fi nish.
• It should be noted that, like natural stone, concrete products will develop a patina when left outside. No
two concrete products are identically the same and the fi nish will vary.
REV 6 - 1409101305
12
L-C2-306
 Loading...